Fuel Tank Removal
Please read the entire removal and reinstallaton procedure before beginning. Do not attempt to remove and install the fuel tank if you’re not comfortable with this procedure. Please see your dealer.
A special fuel tank fitting plug tool is required for this procedure. Please see your dealer to obtain this tool (PV-50567).
Before beginning, be prepared to place the fuel tank in a secure location to avoid scratching the finish and to catch any fuel that may leak or drip from disconnected hoses or fittings.
-
Remove the seat. See the Removing the Seats section for details.
-
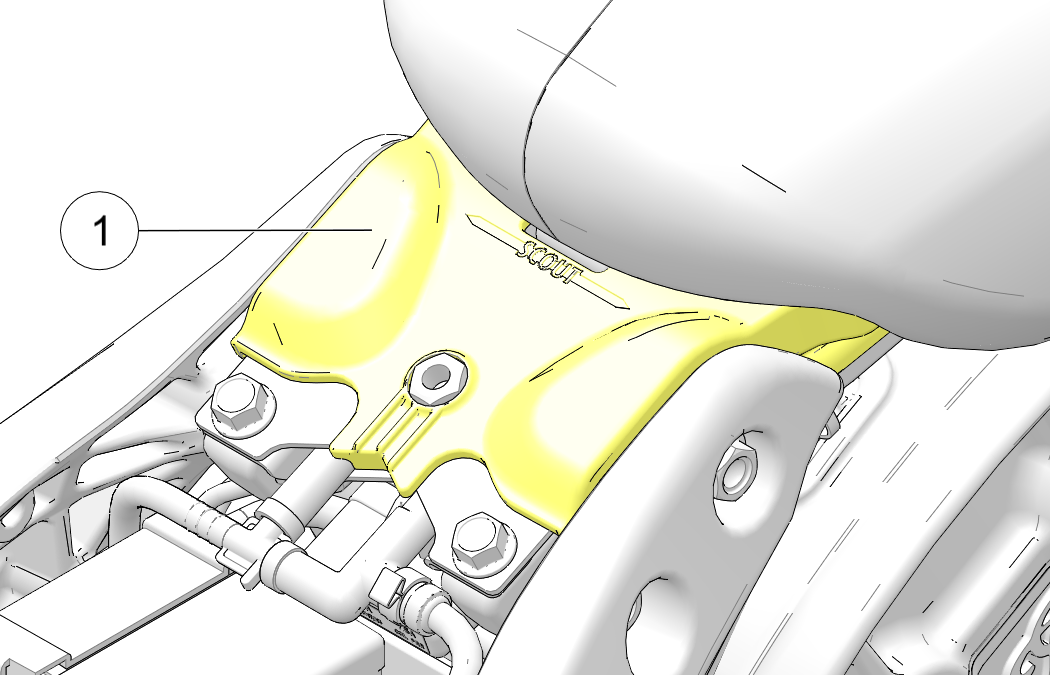
Lift the rear of the fuel tank filler pad 1 to access the fuel tank bolts.
-
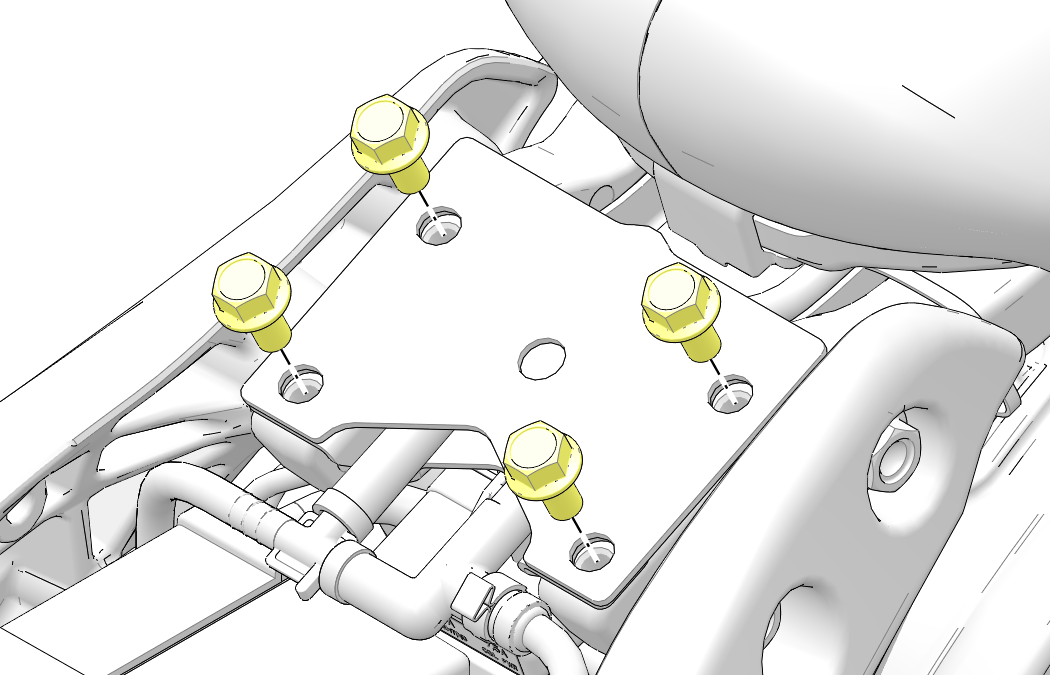
Remove the four (4) rear fuel tank bolts 2. Set hardware aside for reassembly.
-
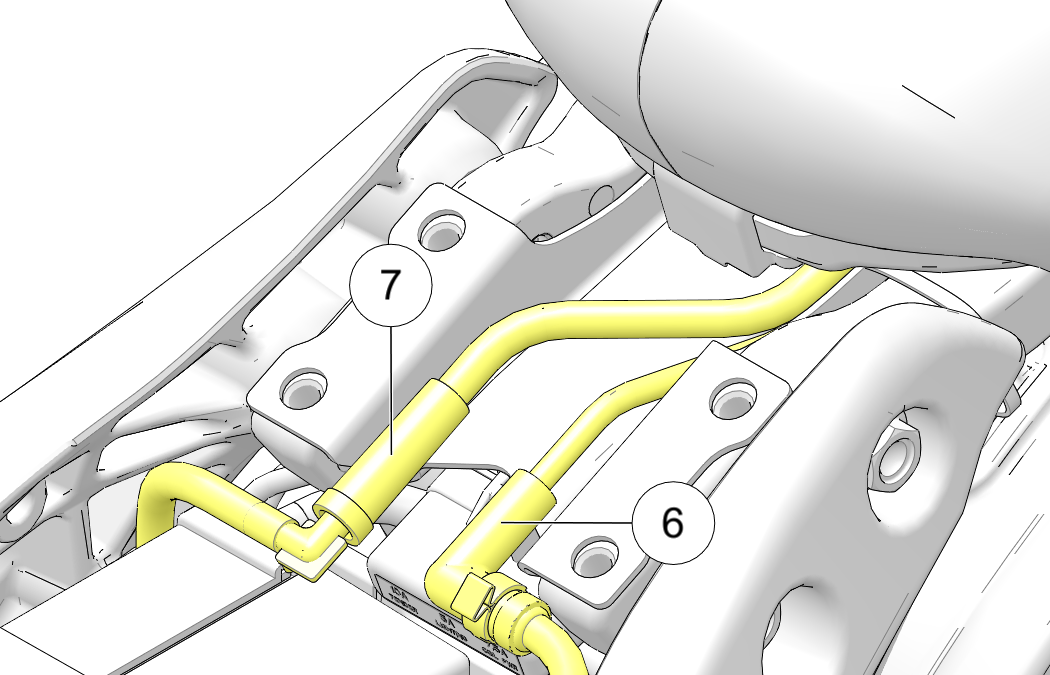
Locate the rubber elbow and the straight rubber coupler exiting the rear of the tank mounting bracket.
-
Gently pull the elbow free of the tube to disconnect the fuel tank vent line 4 (California and International models 6).

-
Gently pull the straight rubber coupler free of the tube to disconnect the fuel cap recess drain line 5 (California and International models 7).
-
Place the handlebars in the straight ahead position. Cover the front of the fuel tank with a protective cloth to prevent contact with the instrument cluster, which could cause damage.
-
Lift and support the rear of the tank approximately 2 in (5 cm).
-
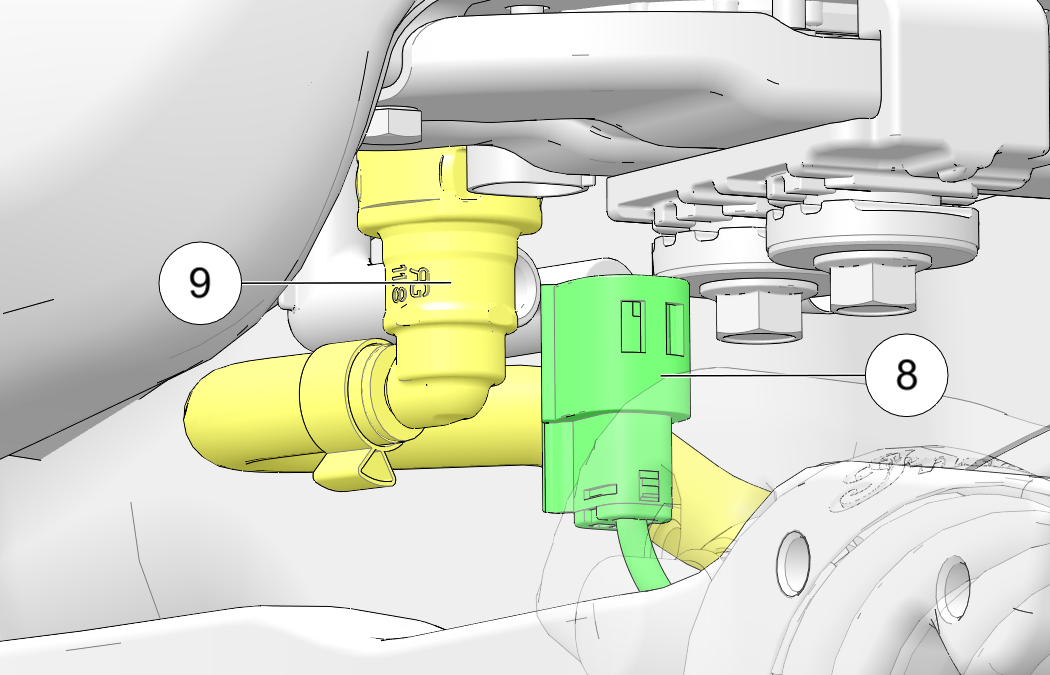
Disconnect the fuel pump electrical connector 9 by depressing the release tab on the connector body.
-
Wrap a shop towel around the fuel fitting.
-
Disconnect the fuel supply line connector 8 from the fuel pump by squeezing the release tabs on both sides of the fitting.
-
Install the fuel tank fitting plug tool onto the fuel pump fitting to protect the fitting and prevent fuel from seeping out of the tank.
-
Lift the rear of the fuel tank and carefully slide it rearward to release it from the front isolators.
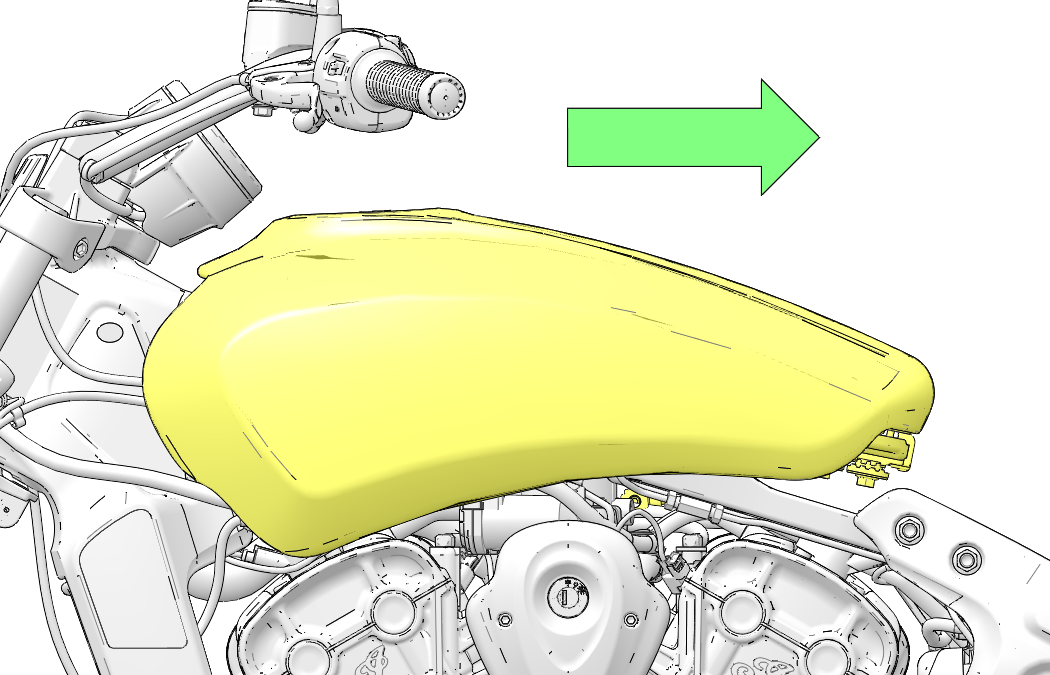
-
Lift the tank up and away from the frame. Reinstall the front isolators if they become dislodged.
-
Place the fuel tank on a flat surface in a secure location.