Belt Removal
If a belt fails, always clean any debris from the clutch air duct and from the clutch and engine compartments when replacing the belt.
Inspect the entire clutch outlet duct (including the outlet duct screen) when replacing a drive belt. Remove any debris found in the outlet duct or outlet duct screen.
To remove the belt, do the following:
-
Remove the nine fasteners 1 that retain the outer clutch cover.

 NOTICE
Removal of left rear wheel or left rear shock is NOT necessary for belt replacement.
-
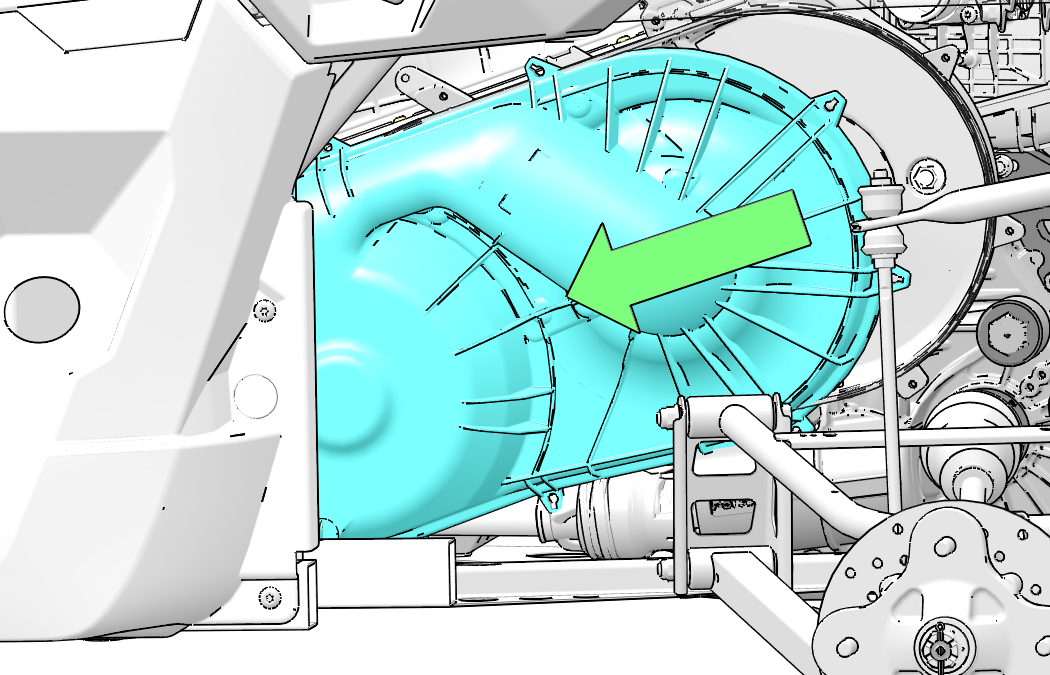
Pull the clutch cover forward and slide towards the front of the vehicle as shown above.
-
Rotate the clutch cover back and lift up and over the control arm mounting 2.
NOTICEUse care when lifting clutch cover upwards. Do not damage cover, intake boot, or electrical harness.
-
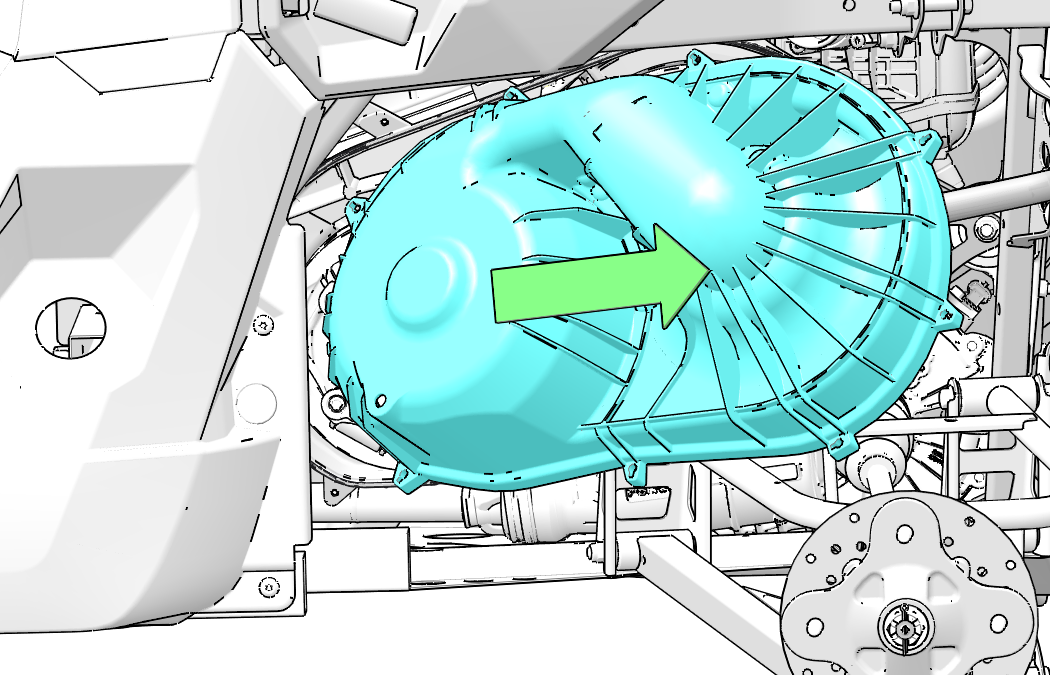
Pull clutch cover out towards the rear of the vehicle as shown above.
-
Mark the drive belt direction of rotation so that it can be installed in the same direction.
-
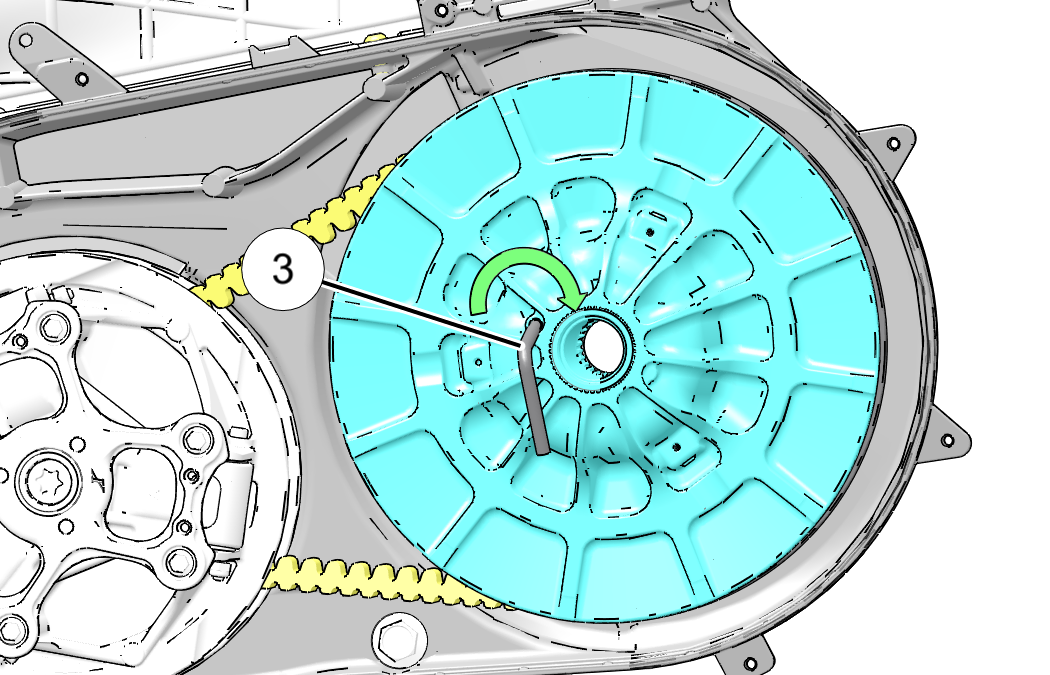
Insert clutch spreader tool 3 into threaded hole on driven clutch as shown and turn clockwise to spread clutch.
NOTICEClutch spreader tool part number 2875911 is found in vehicle tool kit.
-
Walk the belt out of the driven clutch and drive clutch. Remove the belt from the vehicle.