Drive Belt Removal
-
Position the vehicle on a level surface and place the transmission in PARK.
-
Elevate and safely support the rear of the vehicle.
-
Remove the left rear wheel from the vehicle.
-
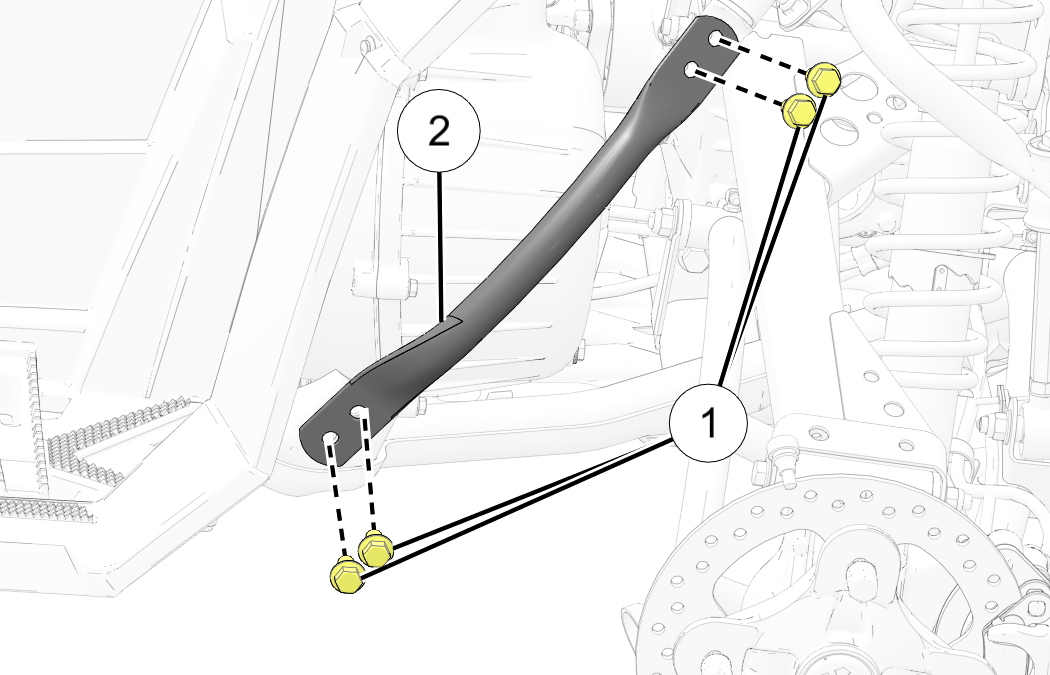
Remove the (4) bolts 1 retaining the lower LH frame support 2 and remove from the frame.
-
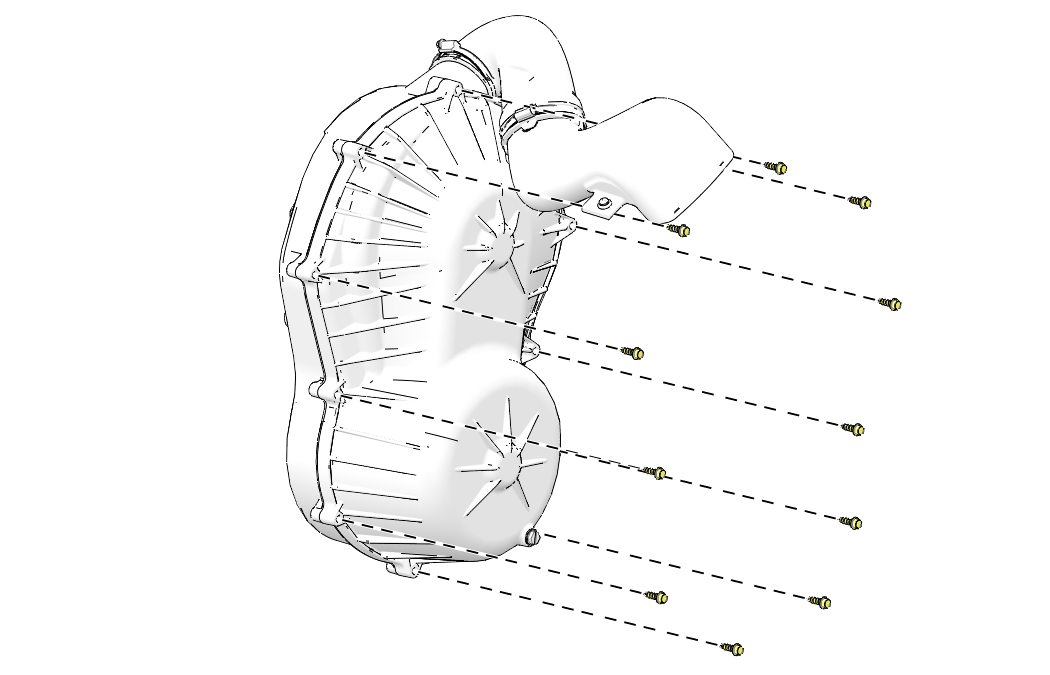
Remove the (11) fasteners securing the outer PVT cover to the inner PVT cover.
-
Using care, pull the outer PVT cover out the left rear wheel well.
NOTICEFlexing the PVT outlet duct aids PVT cover removal.
-
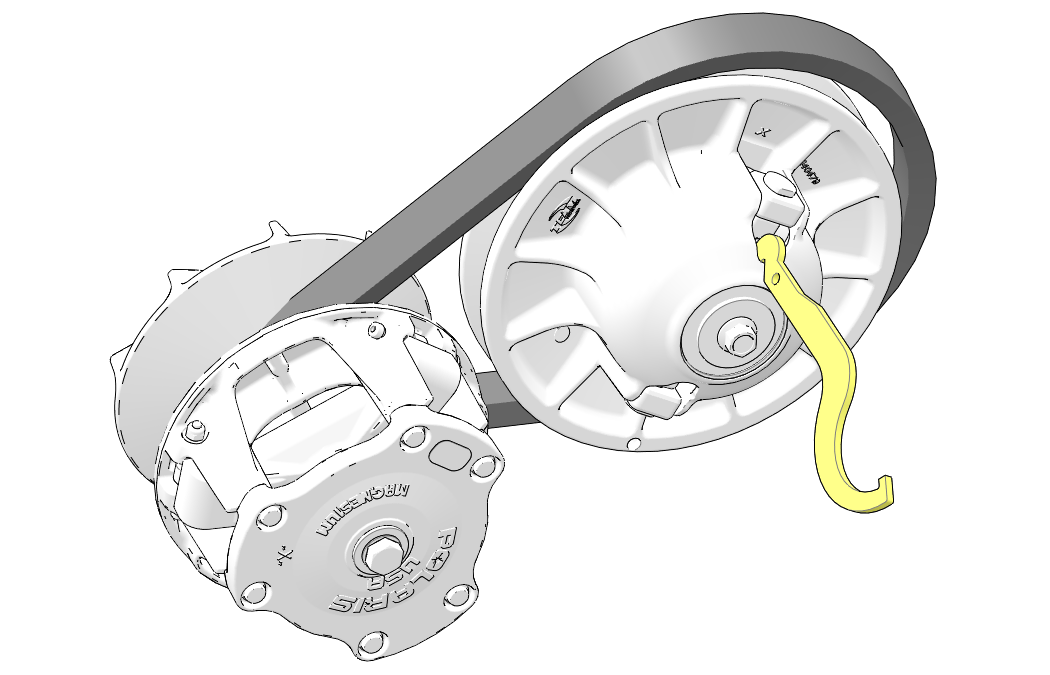
Note the orientation of the drive belt so that it can be installed in the same direction.
-
Insert the provided clutch tool between the slides and rotate the tool to spread the sheaves.
Spanner Wrench / Spreader:
PN 2877408
NOTICEMake sure the tool is square with the moveable sheave surface of the driven clutch.
-
Once the sheaves have been spread, walk the drive belt out of the driven clutch and drive clutch, and remove it from the vehicle.