i 2026 Sportsman 570 2-Up Owner’s Manual

|
| 2026
Owner’s Manual Sportsman 570 2-Up Tractor |
The Owner's Manual for this vehicle contains warnings, instructions and other information you must read and fully understand before safely riding or performing maintenance on this vehicle. Always follow the warnings and instructions in Owner's Manual.
Click the link above for the Table Of Contents, or download a full PDF of the Owner Manual in the Owner Support area of Polaris.com.
|
|
| 2026
Owner’s Manual Sportsman 570 2-Up Tractor |
Android® and Google Play® are registered trademarks of Google LLC. Apple® and App Store® are registered trademarks of Apple Inc. BatteryMINDer® is a registered trademark of VDC Electronics, Inc. Bluetooth® is a registered trademark of Bluetooth Sig, Inc. iOS® is a registered trademark of Cisco Technology, Inc. MacPherson Ride® is a registered trademark of Aftermarket Auto Parts Alliance, Inc. NGK® is a registered trademark of NGK Spark Plug Co., Ltd. Tread LightlySM is a service mark of the United States Department of Agriculture.
Unless noted, trademarks are the property of Polaris Industries Inc.
Copyright 2025 Polaris Industries Inc. All information contained within this publication is based on the latest product information at the time of publication. Due to constant improvements in the design and quality of production components, some minor discrepancies may result between the actual vehicle and the information presented in this publication. Depictions and/or procedures in this publication are intended for reference use only. No liability can be accepted for omissions or inaccuracies. Any reprinting or reuse of the depictions and/or procedures contained within, whether whole or in part, is expressly prohibited.
The original instructions for this vehicle are in English. Other languages are provided as translations of the original instructions.
Printed in Hungary
Thank you for purchasing a Polaris vehicle, and welcome to our world-wide family of Polaris enthusiasts. Be sure to visit us online at polaris.com for the latest news, new product introductions, upcoming events, career opportunities and more.
Here at Polaris we proudly produce an exciting line of utility and recreational products. We believe Polaris sets a standard of excellence for all utility and recreational vehicles manufactured in the world today. Many years of experience have gone into the engineering, design, and development of your Polaris vehicle.
For safe and enjoyable operation of your vehicle, be sure to follow the instructions and recommendations in this owner’s manual. Your manual contains instructions for minor maintenance, but information about major repairs is outlined in the Polaris Service Manual and can be performed by a Polaris dealer.
Your Polaris dealer knows your vehicle best and is interested in your total satisfaction. Your Polaris dealership can perform all of your service needs during and after the warranty period.
For the most up-to-date owner’s manual, visit
polaris.com/en-us/owners-manuals
.
The following signal words and symbols appear throughout this manual and on your vehicle. Your safety is involved when these words and symbols are used. Become familiar with their meanings before reading the manual.
DANGER indicates a hazardous situation which, if not avoided, WILL result in death or serious injury.
WARNING indicates a hazardous situation which, if not avoided, COULD result in death or serious injury.
CAUTION indicates a hazardous situation which, if not avoided, COULD result in minor to moderate injury.
NOTICE provides key information by clarifying instructions.
IMPORTANT provides key reminders during disassembly, assembly, and inspection of components.
The Prohibition Safety Sign indicates an action NOT to take in order to avoid a hazard.

The Mandatory Action Sign indicates an action that NEEDS to be taken to avoid a hazard.

Failure to heed the warnings and safety precautions contained in this manual can result in severe injury or death. A Polaris ATV is not a toy and can be hazardous to operate. This vehicle handles differently than other vehicles, such as motorcycles and cars. A collision or rollover can occur quickly, even during routine maneuvers like turning, or driving on hills or over obstacles, if you fail to take proper precautions.
Read this owner’s manual. Understand all safety warnings, precautions and operating procedures before operating a Polaris ATV. Keep this manual with the ATV.
Never operate an ATV without proper instruction. Take a certified ATV safety training course. In the United States, certified training can be found at atvsafety.org .
This vehicle is an ADULT VEHICLE ONLY. Operation is prohibited for anyone under 16 years of age.
Never permit a guest to operate the ATV unless the guest has read this manual and all product labels and has completed a certified safety training course. In the United States, certified training can be found at atvsafety.org .
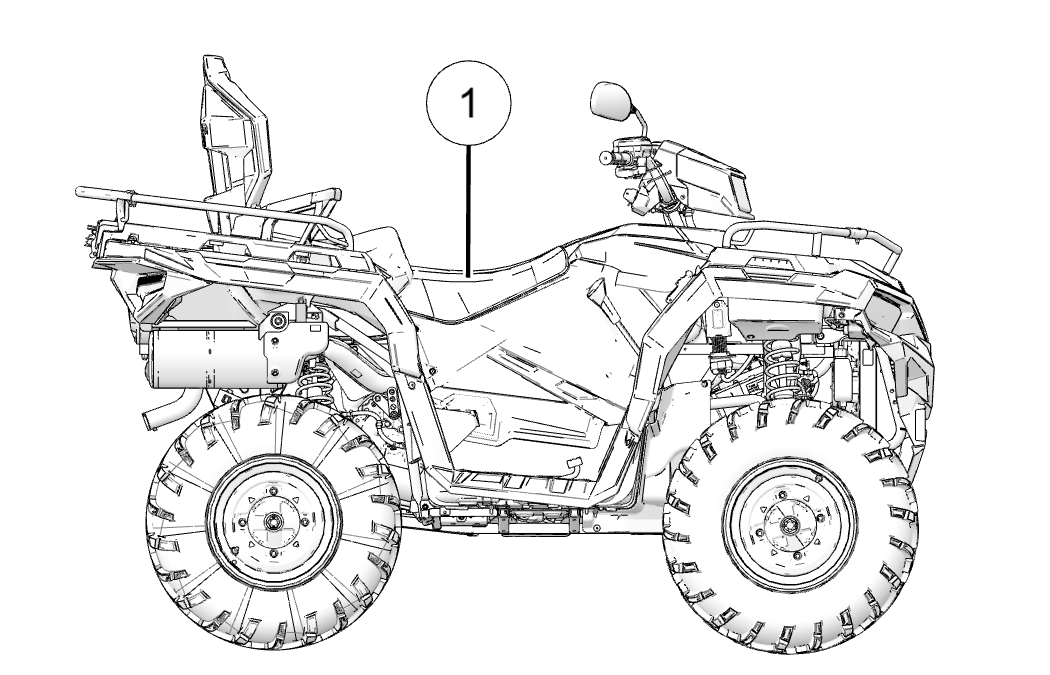
The vehicle identification number (VIN) is stamped on the frame under the seat.
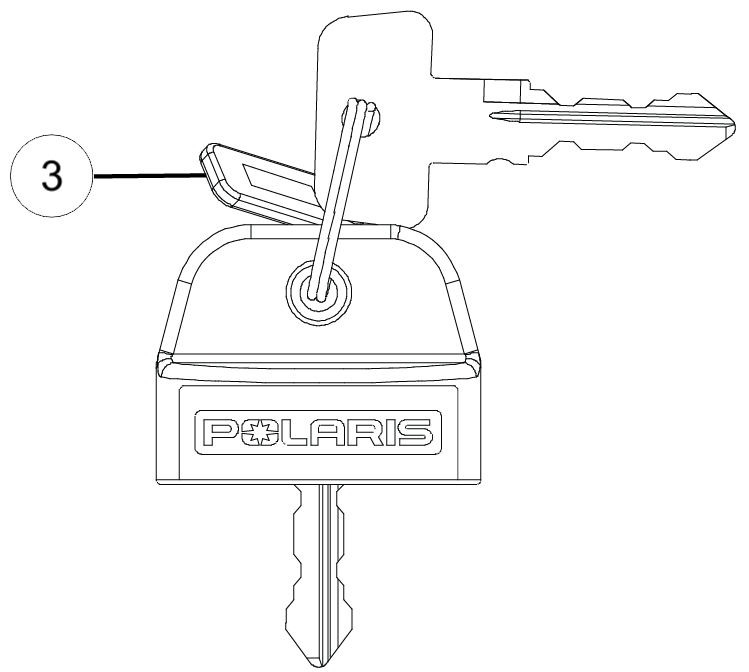
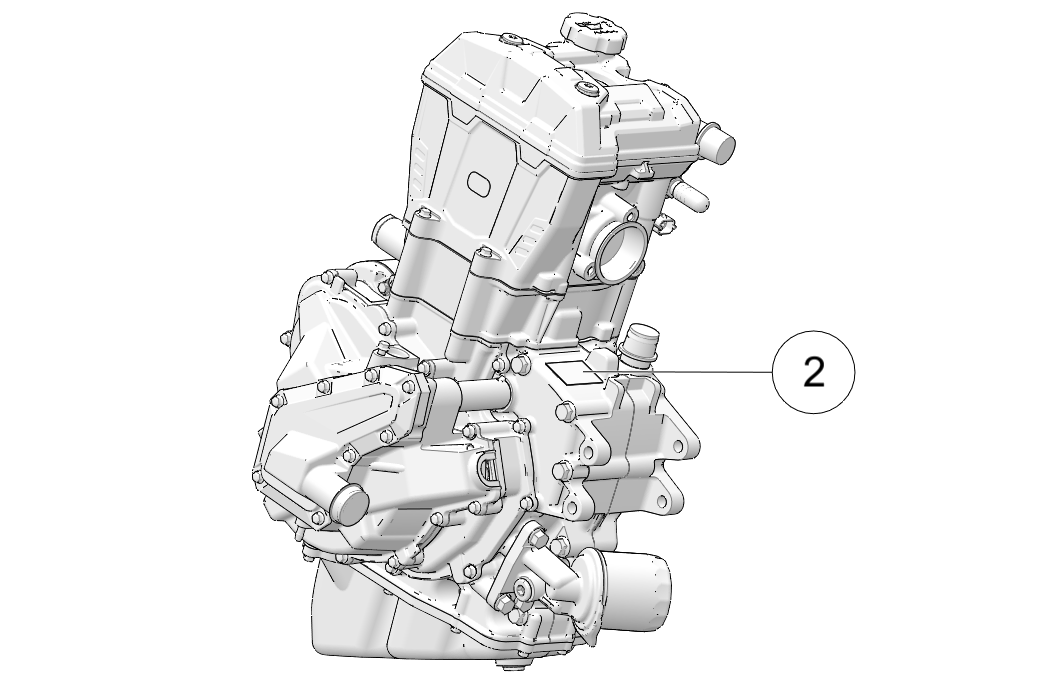
Record your vehicle’s identification numbers and key number in the spaces provided. Remove the spare key and store it in a safe place. An ignition key can be duplicated only by ordering a Polaris key blank (using your key number) and mating it with one of your existing keys. The ignition switch must be replaced if all keys are lost. Contact your Polaris dealer for additional key replacement information.
Images are for reference only. Your model might differ slightly.
|
|
|
|
Vehicle Identification Number (VIN) 1: |
|
|
Vehicle Model Number: |
|
|
Engine Serial Number 2: |
|
|
Key Number 3: |
January 14, 2025
Rolle, Switzerland
Polaris Sales Europe Sàrl, declares that the vehicle(s) covered by this Owner Manual conform to the applicable security requirements in Schedule 2 of UK PSTI Regulation 2023 No. 1007.
The products will be supported with security updates until December 31, 2029.

This statement of compliance was prepared by Polaris Sales Europe Sàrl.
This vehicle may contain the following radio equipment or components that contain radio equipment:
|
COMPONENT |
B1 Gauge Bluetooth® LE |
|
COMPONENT ID |
CYBLE-222014-01 |
|
MANUFACTURER |
Cypress Semiconductor |
|
TRANSMITTING FREQUENCY* |
2402 - 2480 MHz |
|
MAX RF TRANSMITTING PWR |
0.78 mW |
|
* Other transmitting radio frequencies may exist outside of EU markets. |
|
Hereby, Polaris Sales Europe Sàrl declares that the above radio equipment is in compliance with EU Directive 2014/53/EU.
The full text of the EU declaration of conformity is available at the following internet address:
Safety training is a top priority for Polaris. Polaris strongly encourages you and any family members who will be riding this vehicle to take a training course.
For more information about safety, contact an authorized Polaris dealer or visit the Polaris website at polaris.com .
Your Polaris vehicle is considered an off-road vehicle. Familiarize yourself with all laws and regulations concerning the operation of this vehicle in your area.
We strongly advise you to strictly follow the recommended maintenance program outlined in your owner’s manual. This preventive maintenance program is designed to ensure that all critical components on your vehicle are thoroughly inspected at specific intervals.
Always wear helmet, eye protection, gloves, long-sleeve shirt, long pants, and over-the-ankle boots at all times. Protective gear reduces the chance of injury.
1 Helmet
2 Eye Protection
3 Long Sleeves
4 Gloves
5 Long Pants
6 Over-the-Ankle Boots
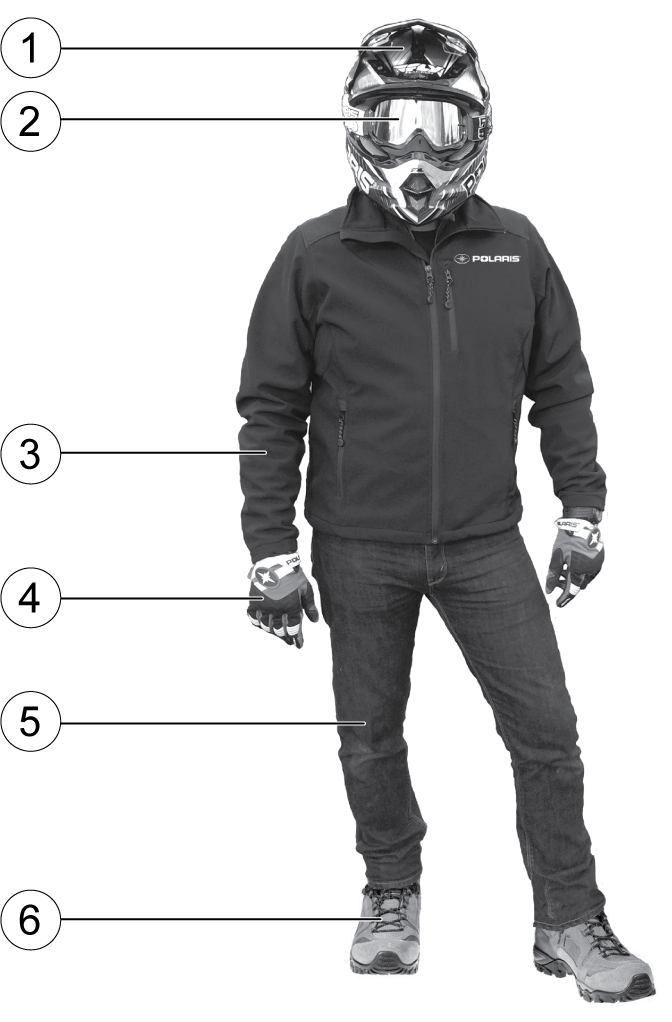
Wearing a helmet can prevent a severe head injury. Whenever riding this Polaris vehicle, always wear a helmet that meets or exceeds established safety standards. Clasp the buckle and pull each strap tight to ensure the helmet is properly secured to the head.
Approved helmets in the USA and Canada bear a U.S. Department of Transportation (DOT) label.

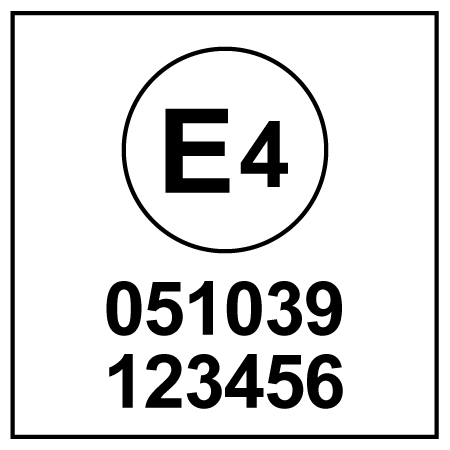
Approved helmets in Europe, Asia and Oceania bear the ECE 22.05 (or newer) label. The ECE mark consists of a circle surrounding the letter E, followed by the distinguishing number of the country which has granted approval. The approval number and serial number will also be displayed on the label.
Do not depend on eyeglasses or sunglasses for eye protection. Whenever riding this Polaris vehicle, always wear shatterproof goggles or use a shatterproof helmet face shield. Polaris recommends wearing approved Personal Protective Equipment (PPE) bearing markings such as VESC 8, V-8, Z87.1, or CE. Make sure protective eyewear is kept clean.
Wear gloves for comfort and for protection from sun, cold weather and other elements.
Wear sturdy over-the-ankle boots for support and protection. Never ride a Polaris vehicle with bare feet or sandals.
Wear long sleeves and long pants to protect arms and legs.
Gear that may be appropriate for your riding conditions.
Ear Protection: Long-term exposure to wind and engine noise can cause permanent hearing loss. Properly worn hearing protective devices such as earplugs can help prevent hearing loss. Check local laws or the rules of the riding area you are in before wearing hearing protection to make sure its use is permitted.
Failure to operate this vehicle properly can result in a collision, loss of control, accident or rollover, which may result in serious injury or death. Heed all safety warnings outlined in this section of the owner’s manual. See the Operation chapter of this owner’s manual for proper operating procedures.
Operating this ATV without proper
instruction increases the risk of an accident. The operator must understand
how to operate the ATV properly in different situations and on different
types of terrain.
Beginning and inexperienced
operators should complete the recommended safety training before operating
this vehicle.
Never permit a guest
to operate the ATV unless the guest has read this manual and all product
labels and has completed a certified safety training course.

This vehicle is an ADULT VEHICLE
ONLY. Operation is prohibited for anyone under 16 years of age.
Never allow anyone under 12 years of age to ride
as a passenger on a 2-up ATV.
Even
though a child may be within the recommended age group for operating
some ATVs, they may not have the skills, abilities, or judgment needed
to operate or ride on this ATV safely and could be susceptible to
accident or injury.
If you are operating
a 2-up ATV, do not carry passengers whose feet do not reach the footrests.

Never consume alcohol or drugs before
or while operating this vehicle.
Operating
this vehicle after consuming alcohol or drugs could adversely affect
operator judgment, reaction time, balance and perception.

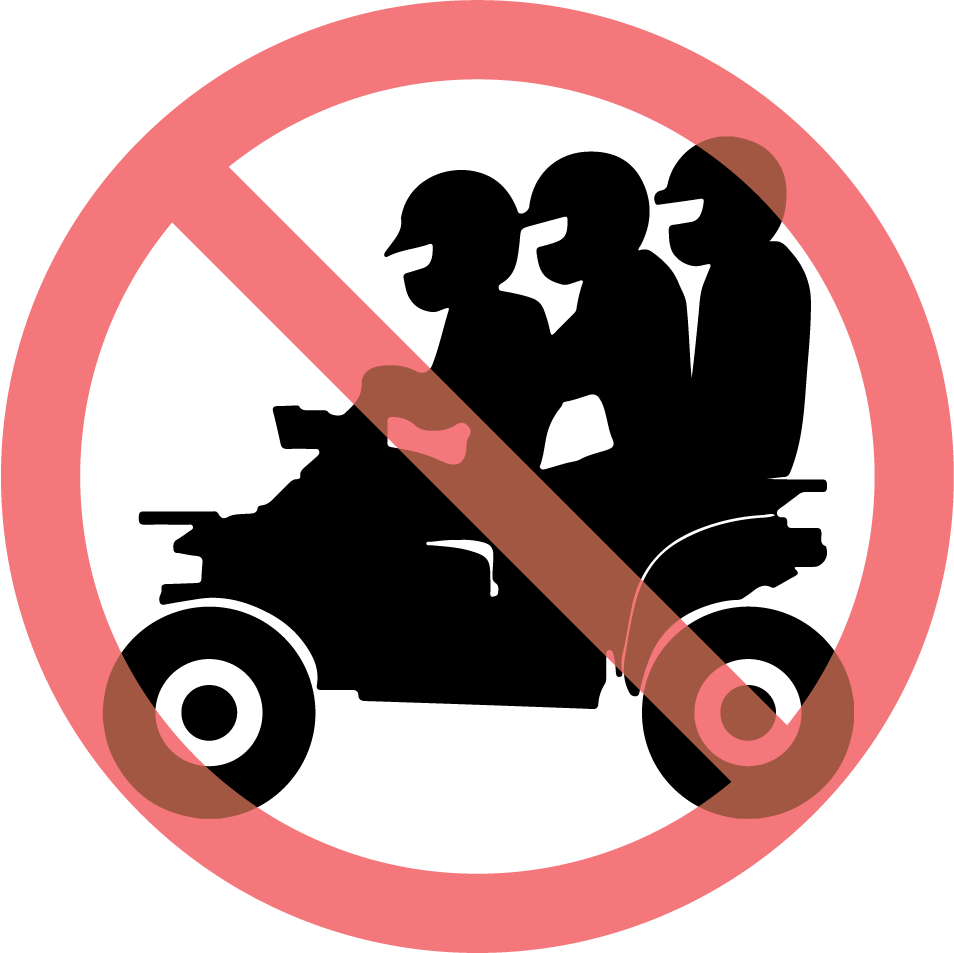
Carrying more than one passenger on a 2-up ATV greatly reduces the operator's ability to balance and control the ATV, which may result in an accident or rollover. Never carry more than one passenger on a 2-up ATV.
Failure to inspect and verify that the vehicle is in safe operating condition before operating increases the risk of an accident.
Always perform the pre-ride inspection before each use of your vehicle to make sure it's in safe operating condition.
Always follow the inspection and maintenance procedures and schedules described in this owner’s manual.
Gasoline is highly flammable and explosive under certain conditions.
Always exercise extreme caution whenever handling gasoline.
Always refuel with the engine stopped, and outdoors or in a well ventilated area.
Never carry fuel or other flammable liquids on this vehicle. Failure to follow this instruction could lead to serious burn injuries or death.
Do not smoke or allow open flames or sparks in or near the area where refueling is performed or where gasoline is stored.
Do not overfill the tank. Do not fill the tank neck.
If gasoline spills on your skin or clothing, immediately wash it off with soap and water and change clothing.
Engine exhaust fumes are poisonous and can cause loss of consciousness or death in a short time. Never start the engine or let it run in an enclosed area. Operate this vehicle only outdoors or in well-ventilated areas.
This vehicle does not have a Falling Objects Protective Structure (FOPS). Do not use the vehicle in forestry application situations where the risk of falling objects may be present.
This vehicle is not equipped for protection against hazardous substances. It does not offer any protection against substances which are harmful to health. Always wear proper personal protective equipment if this vehicle is used for crop spraying or other applications requiring the use of hazardous substances.
This vehicle is approved for on-road use.
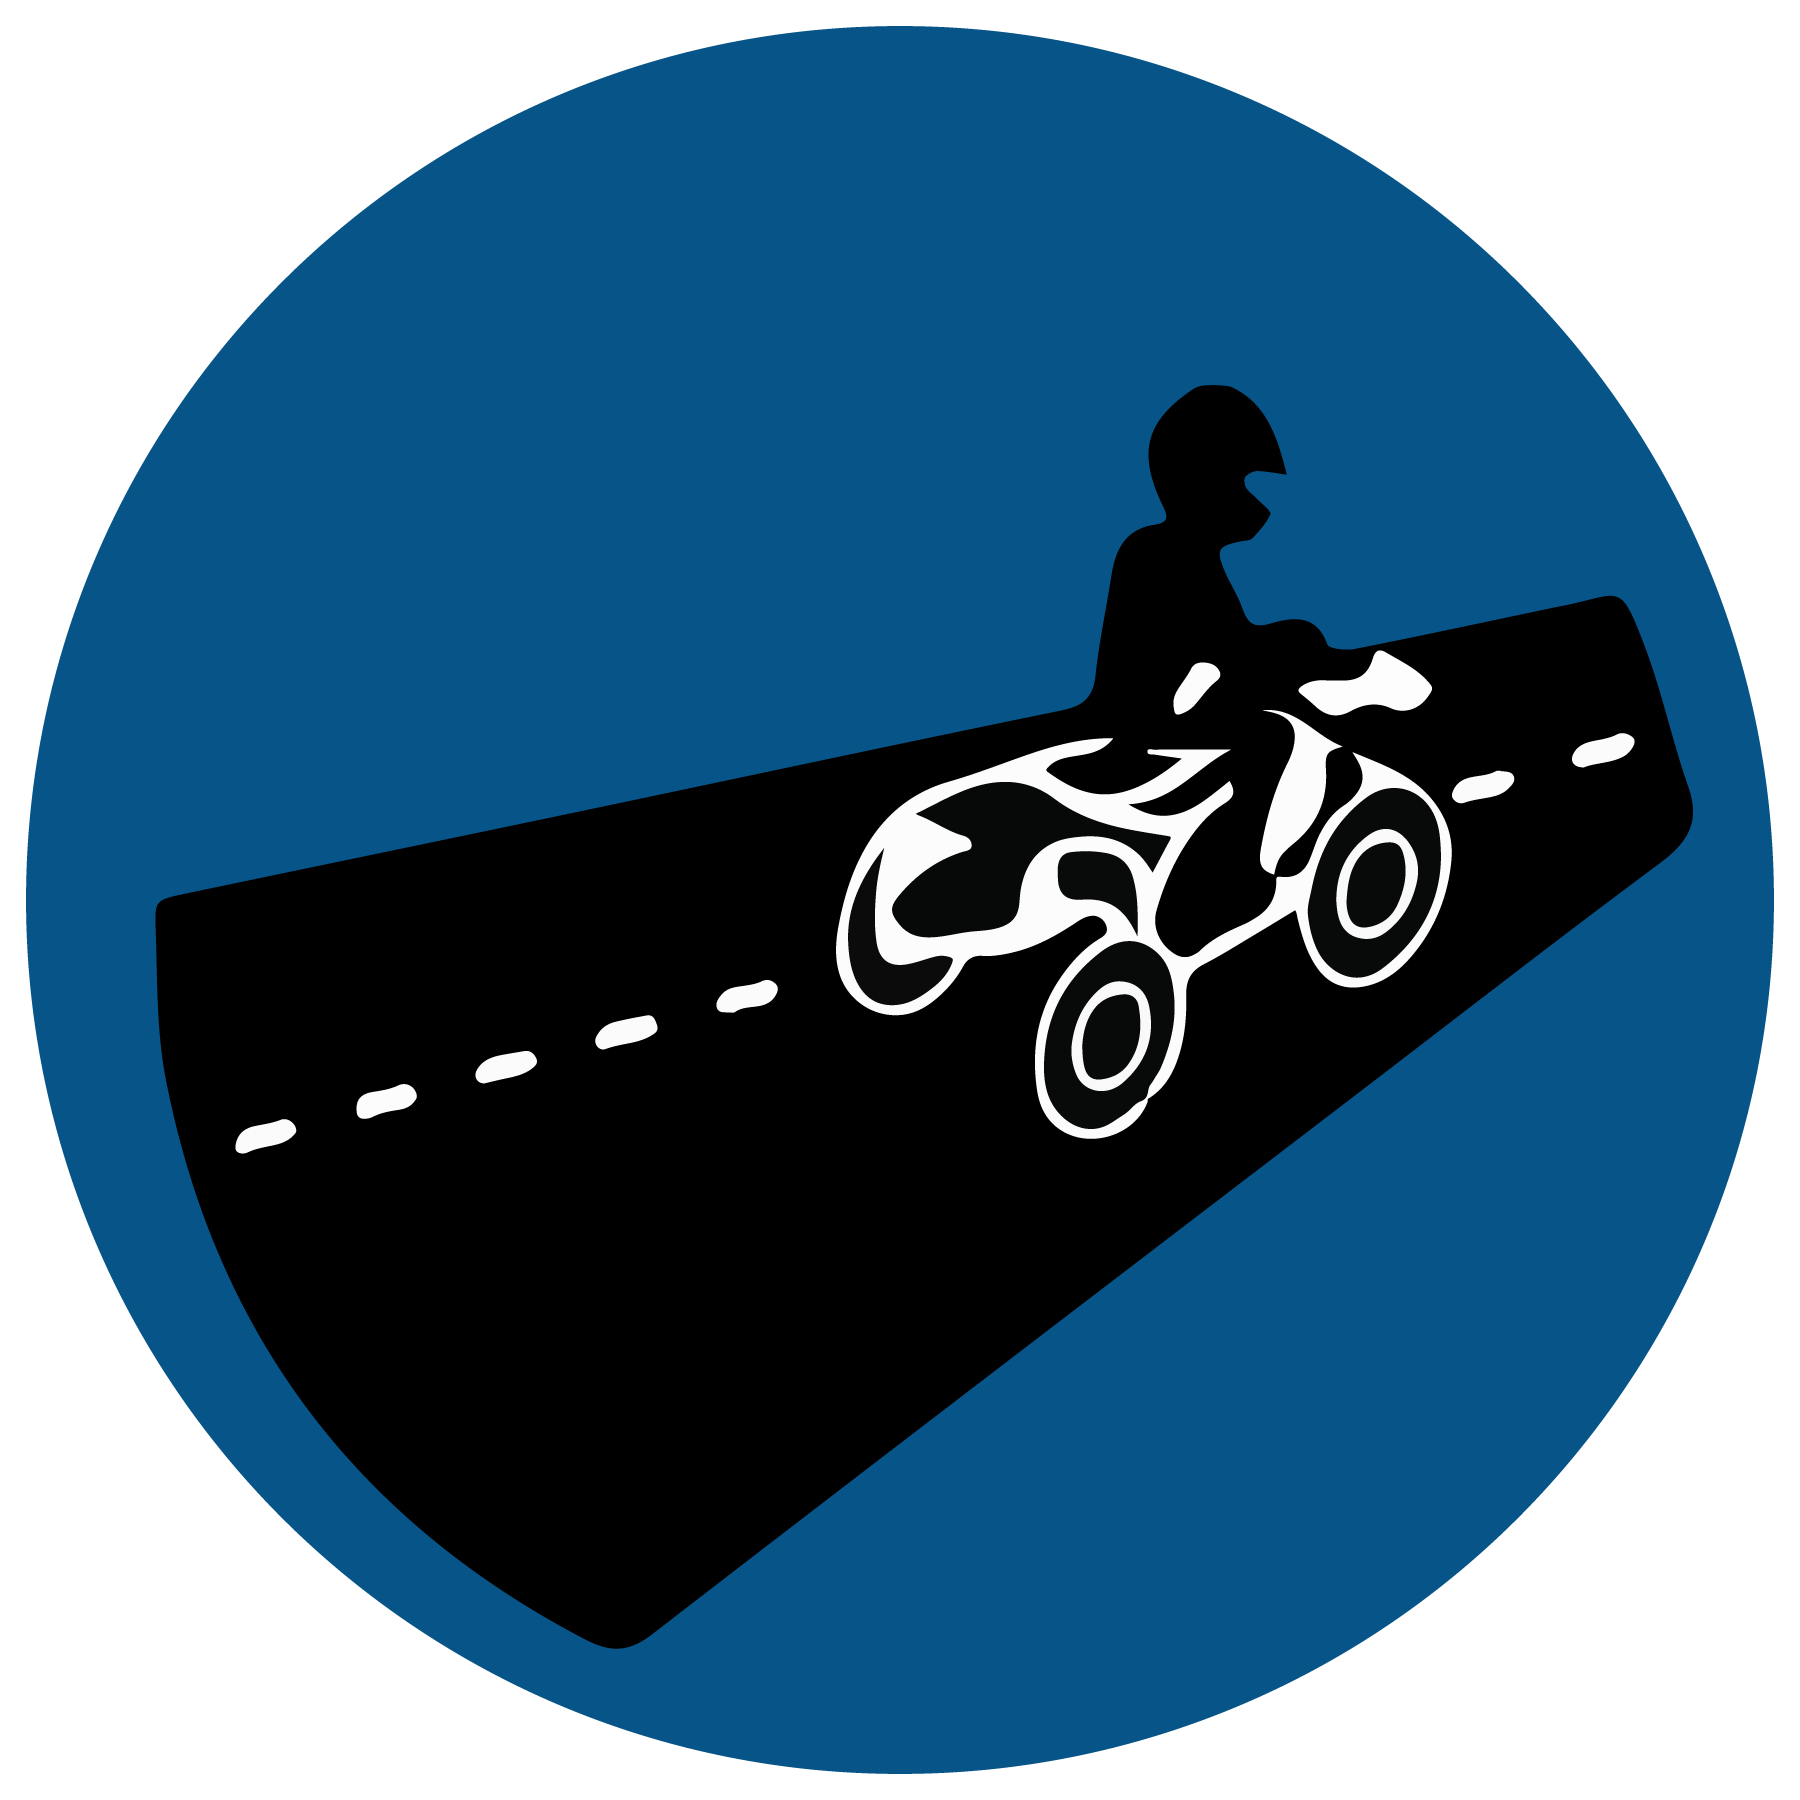
This vehicle’s tires are primarily designed for off-road use. Operating this vehicle on paved surfaces (including sidewalks, paths, parking lots and driveways) may adversely affect the handling of the vehicle and may increase the risk of loss of control and accident or rollover. Avoid operating the vehicle on pavement. If it’s unavoidable, travel slowly, travel short distances and avoid sudden turns or stops.
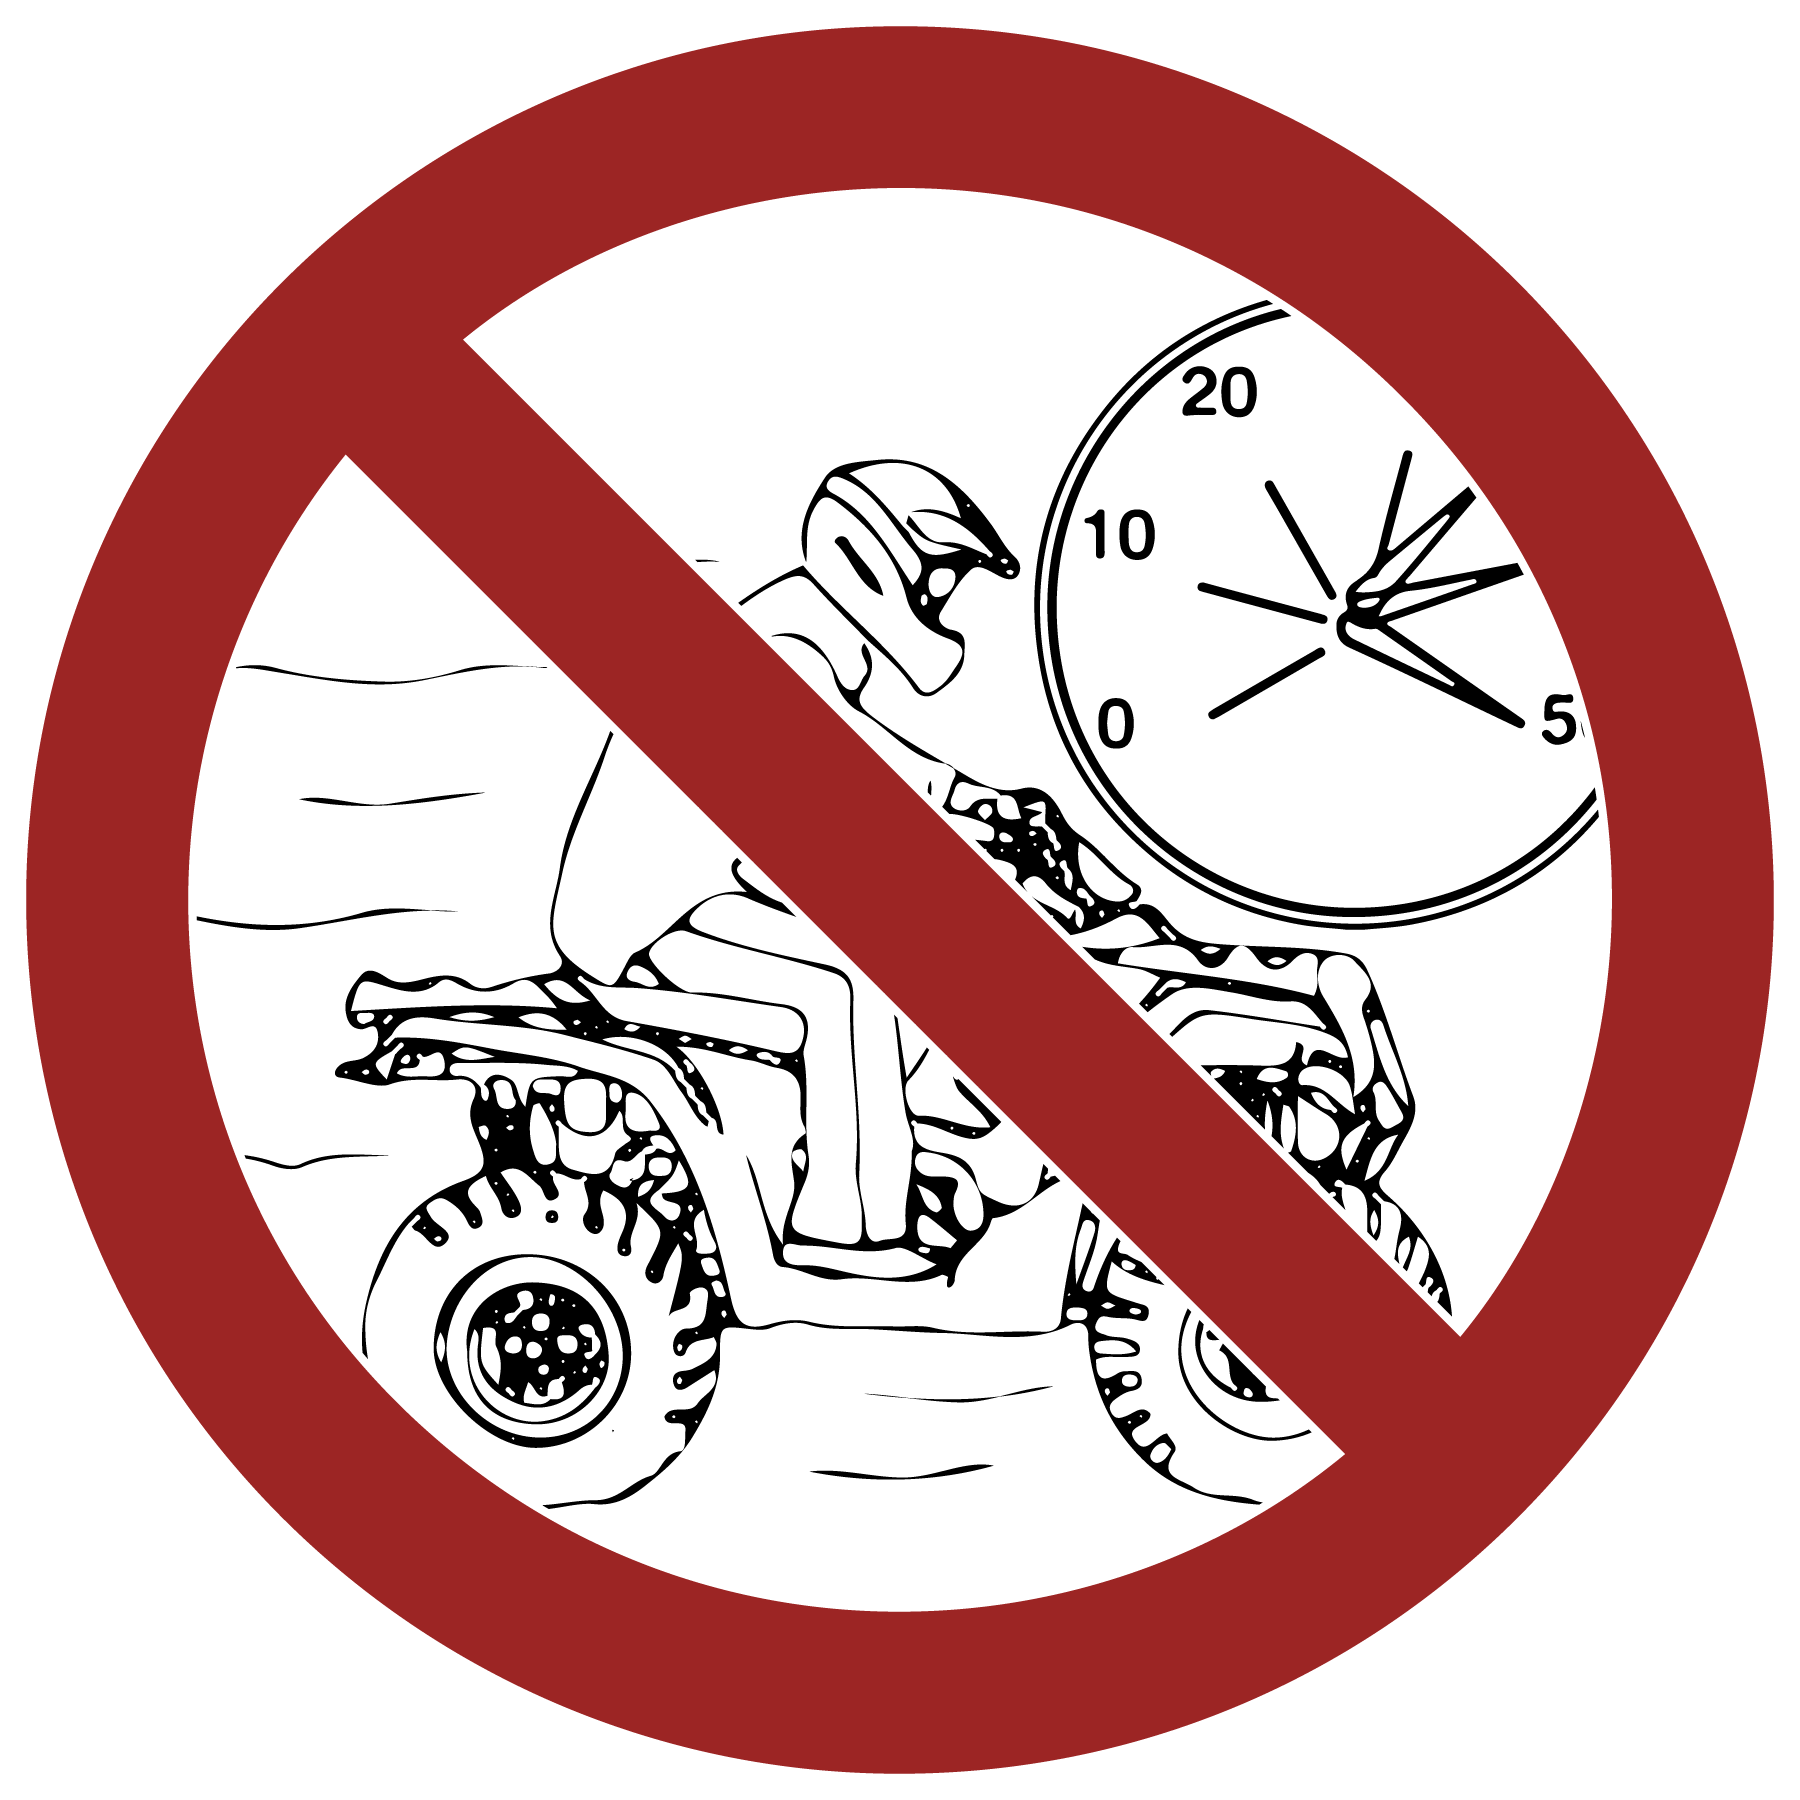
Operating this vehicle at excessive speeds increases the operator’s risk of losing control. Always operate at a speed that’s appropriate for the terrain, the visibility and operating conditions and your skills and experience.
Removing even one hand or foot can reduce ability to control the vehicle or could cause loss of balance and ejection from the ATV.
If a person's feet are not firmly planted on the footrests, they could come into contact with the wheels or other moving parts and lead to accident or injury.
Always keep both hands on the handlebars and both feet on the footrests of the ATV during operation.
Turning improperly could cause loss of traction, loss of control, accident or rollover. Always follow proper procedures for turning as described in this owner’s manual.
Avoid sharp turns. Never turn while applying heavy throttle. Never make abrupt steering maneuvers. Practice turning at slow speeds before attempting to turn at faster speeds.
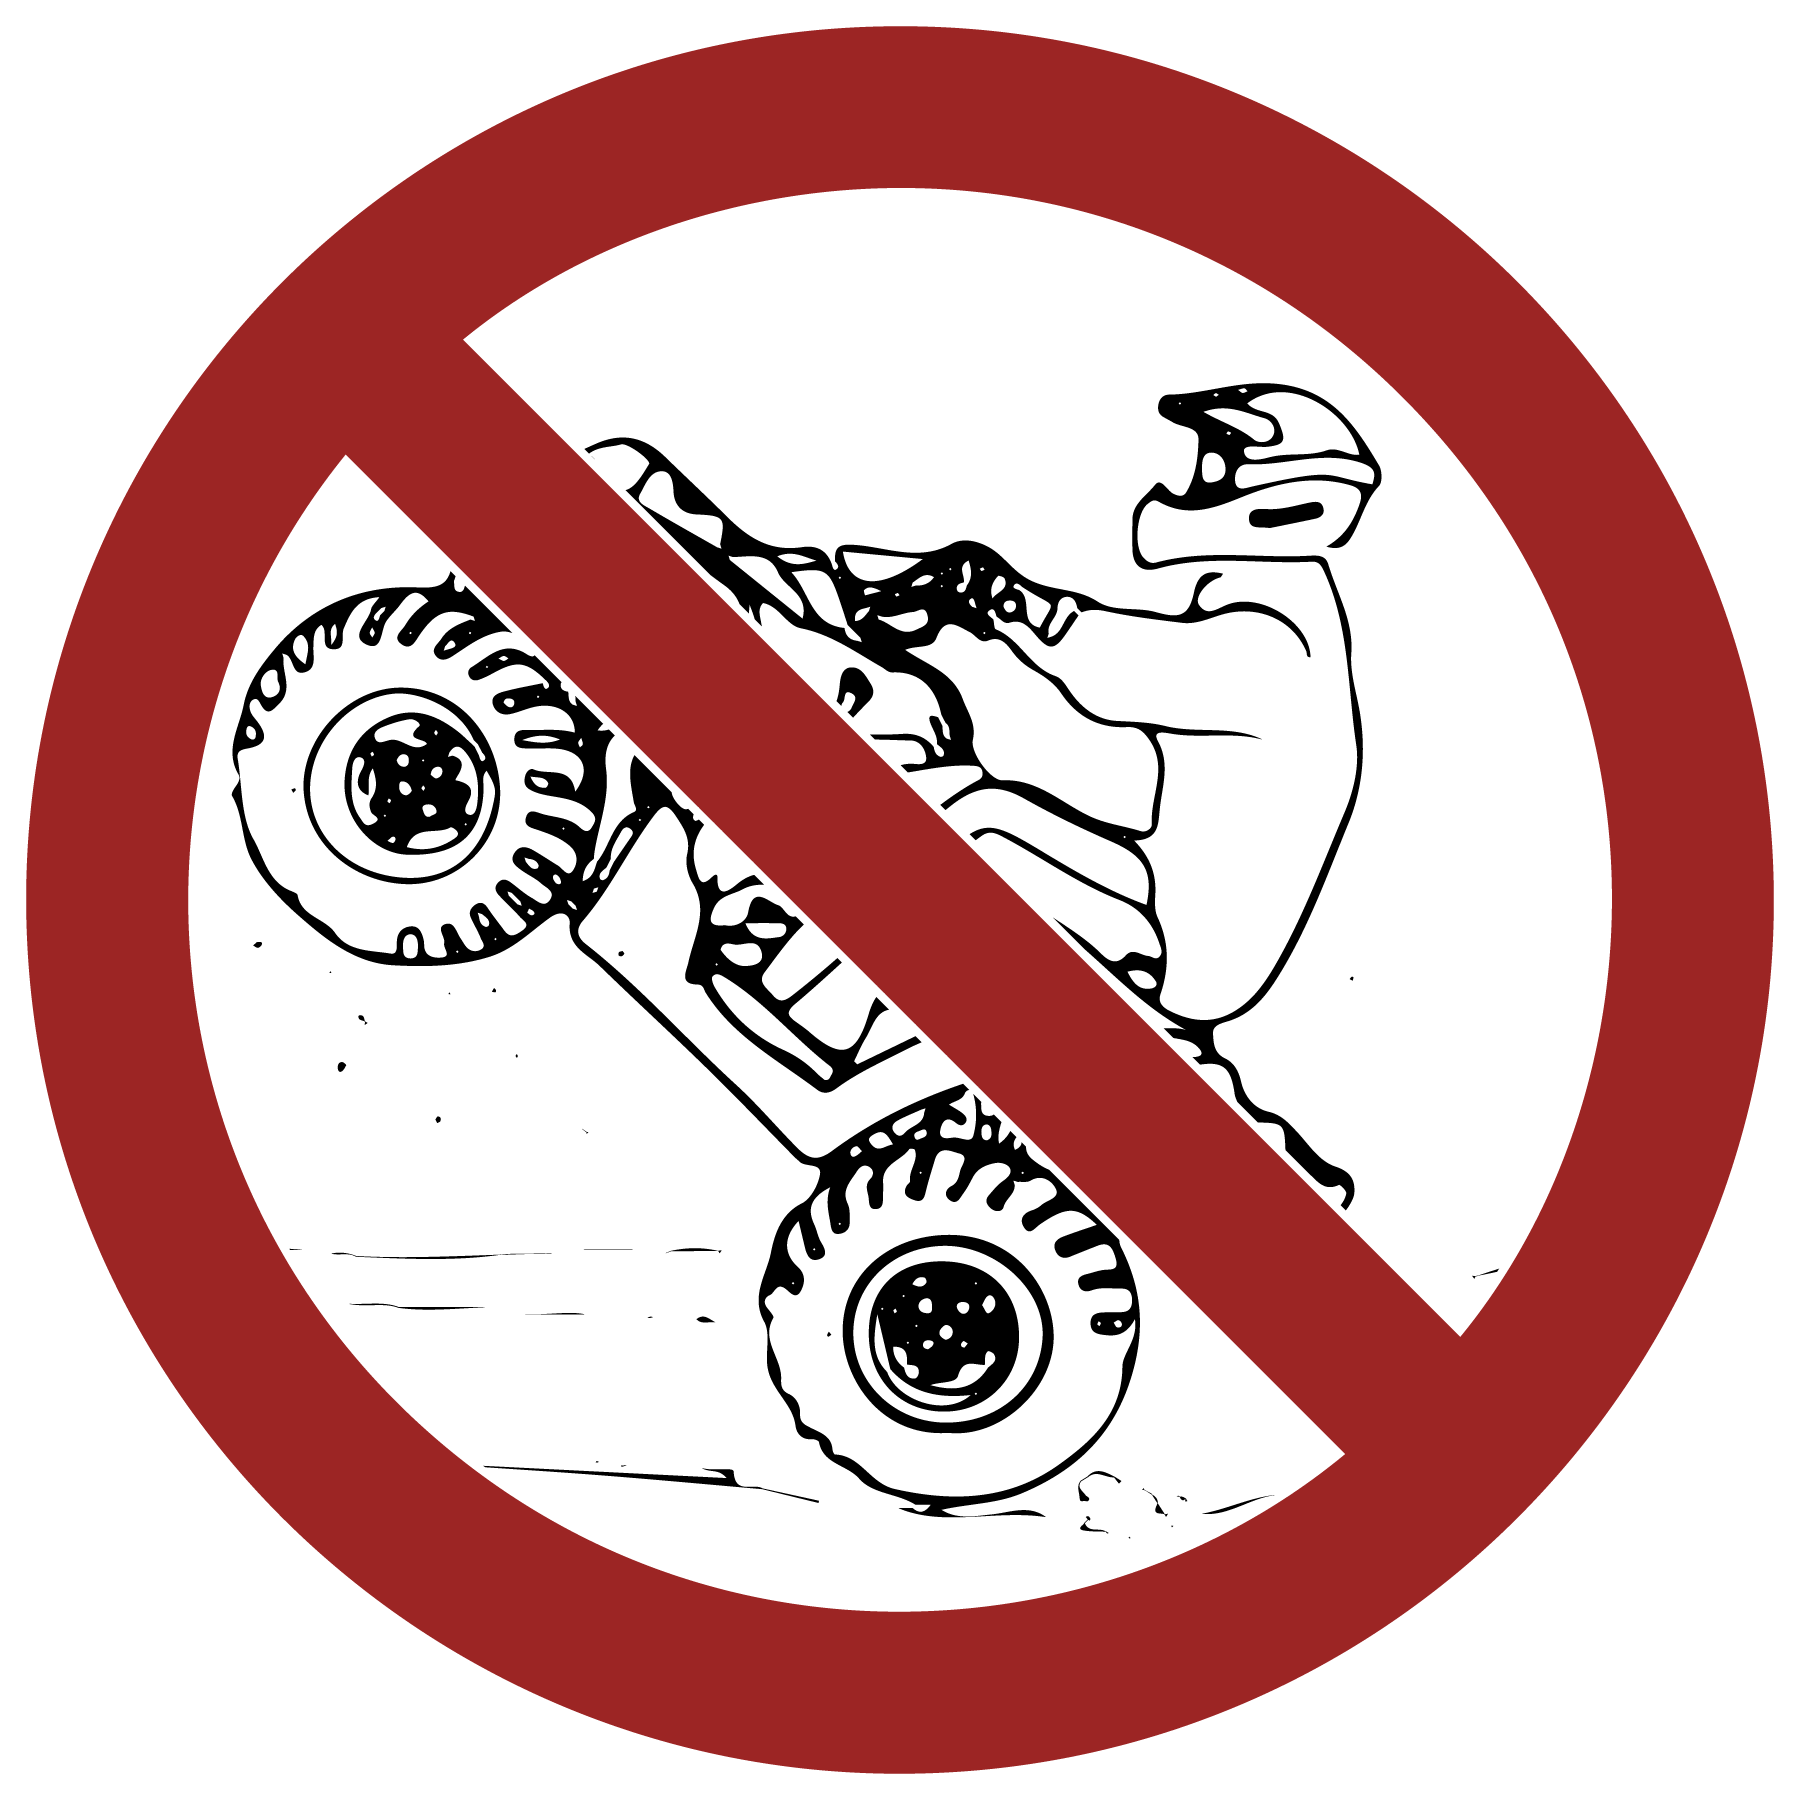
Exhibition driving increases the risk of an accident or rollover. DO NOT do power slides, “donuts”, jumps or other driving stunts. Avoid exhibition driving.
Improper hill climbing could cause loss of control or rollover. Use extreme caution when operating on hills. Always follow proper procedures for hill climbing as described in this owner's manual. See the New Operator Driving Procedures section for details.
Improperly descending a hill could cause loss of control or rollover. Always follow proper procedures for traveling down hills as described in this owner’s manual. See the New Operator Driving Procedures section for details.
Driving on a sidehill is not recommended. Improper procedure could cause loss of control or rollover. Avoid crossing the side of any hill unless absolutely necessary.
If crossing a hillside is unavoidable, always follow proper procedures as described in this owner's manual. See the New Operator Driving Procedures section for details.
Stalling, rolling backwards or improperly dismounting while climbing a hill could cause a rollover.
Always maintain a steady speed when climbing a hill.
Always engage ADC mode (if equipped) before ascending or descending a hill. If ADC mode is not equipped, apply AWD mode before ascending or descending a hill.
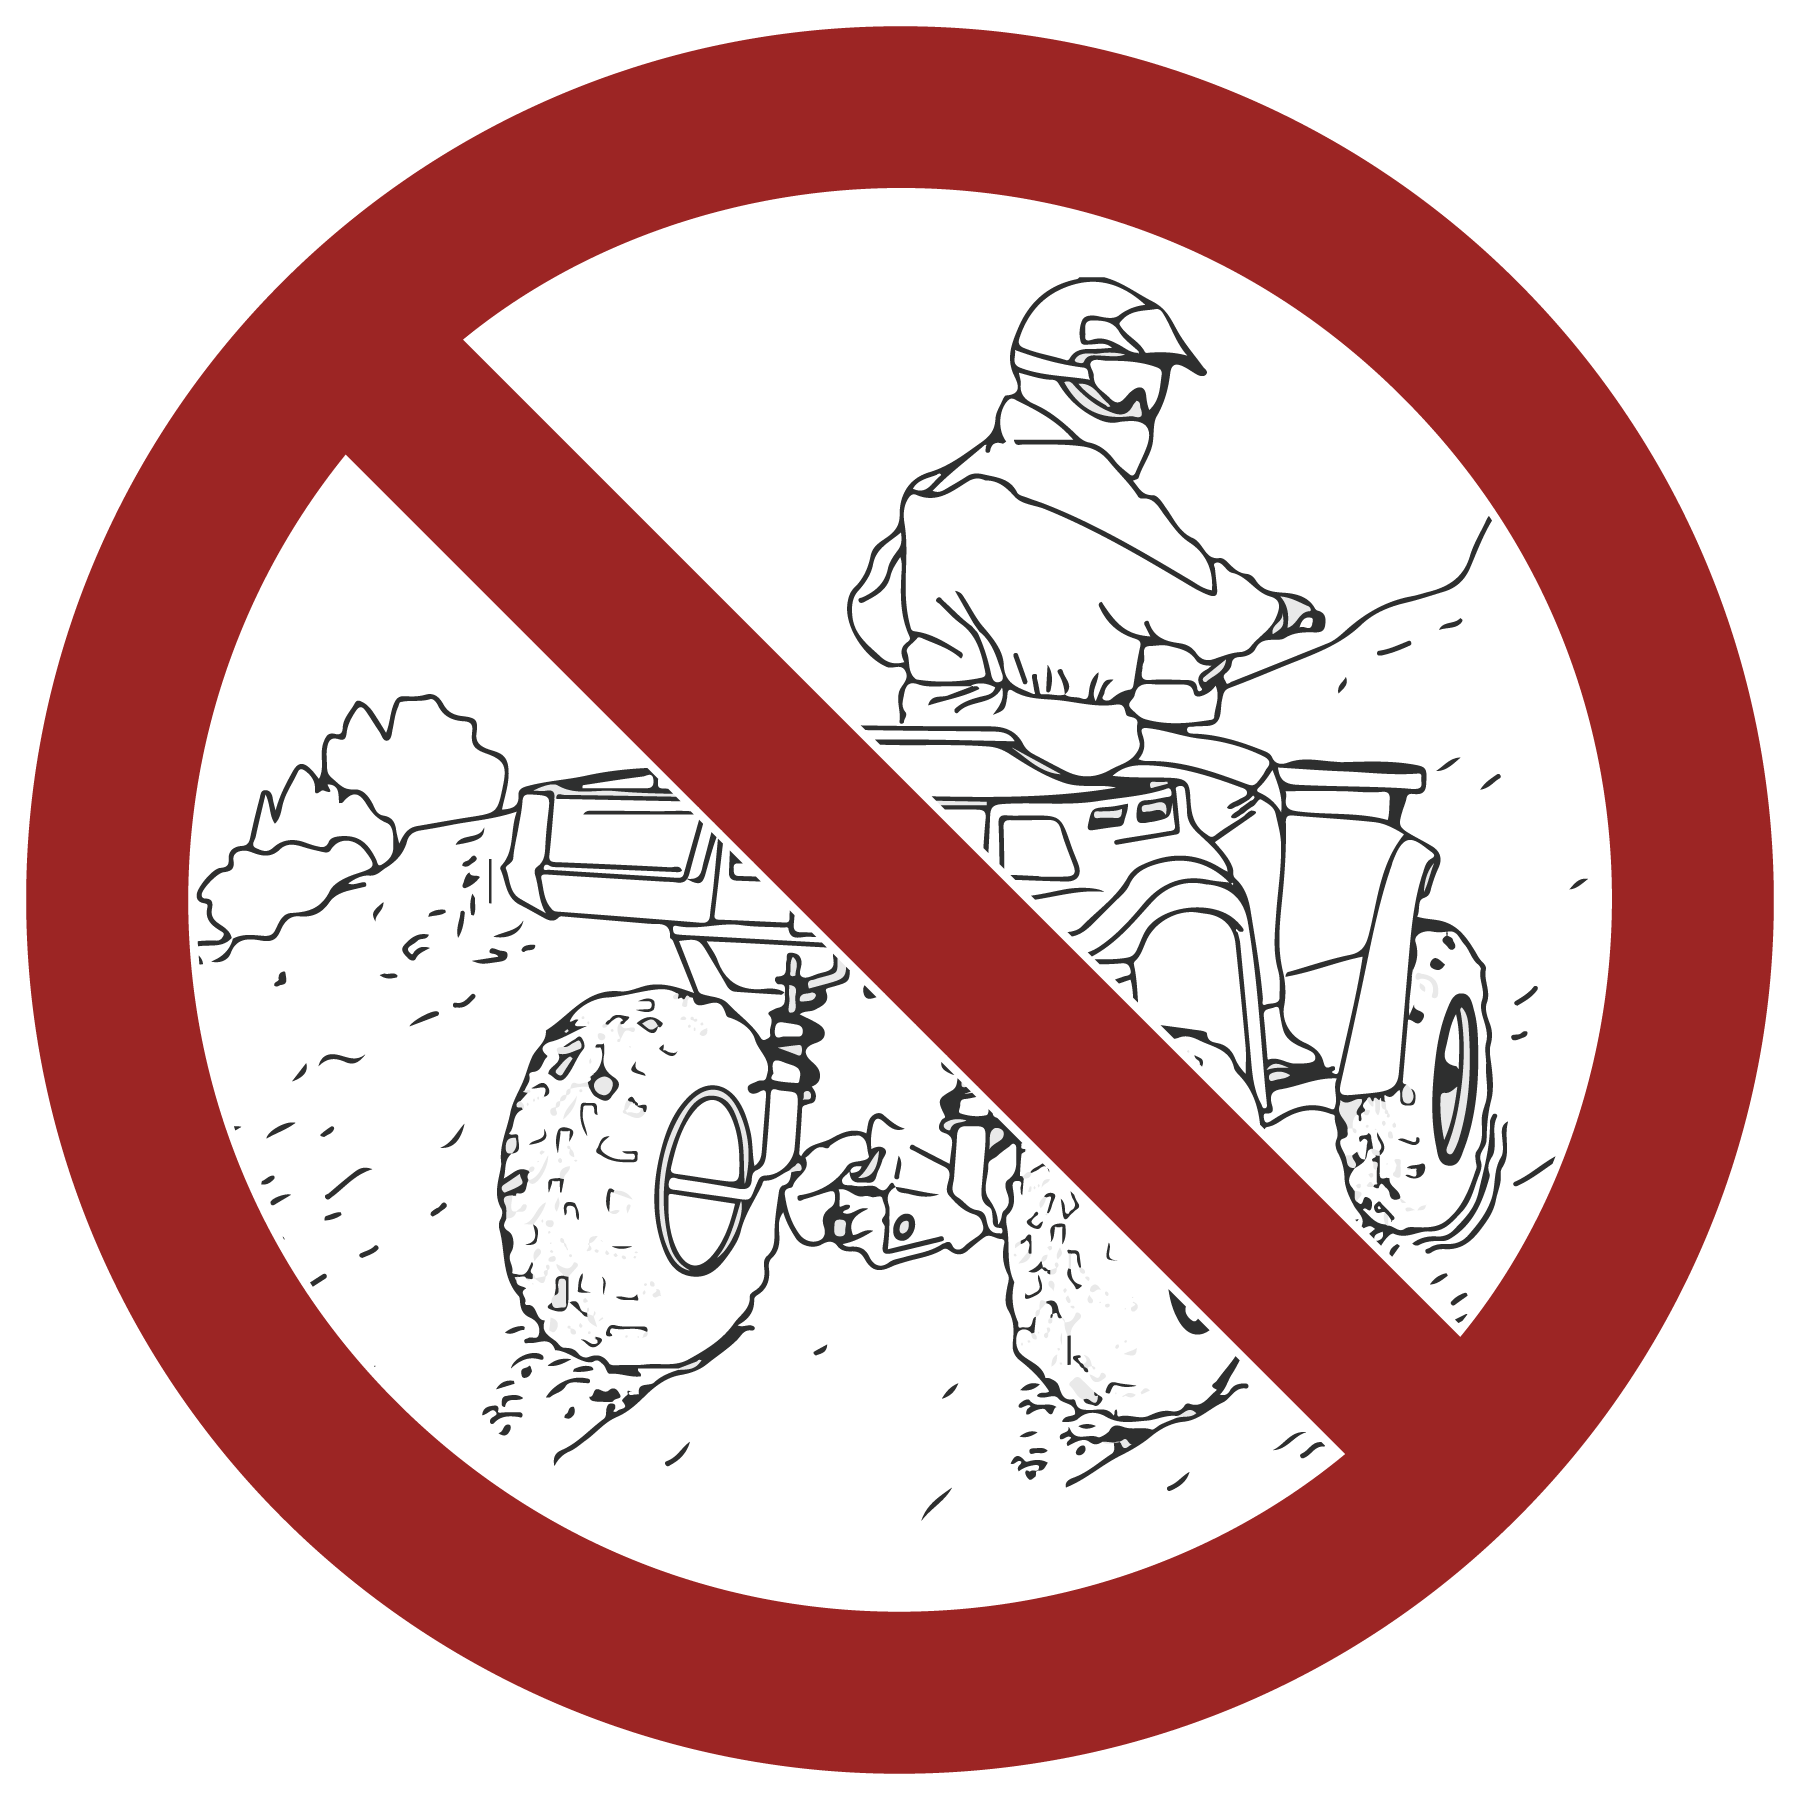
If all forward speed is lost:
Lean forward to keep body weight uphill. A passenger should also lean uphill.
Apply the brakes.
Lock the temporary brake lock when fully stopped.
Dismount on the uphill side of the vehicle, or on the left if the vehicle is pointing straight uphill. Have a passenger dismount first, then the operator may dismount.
Turn the ATV around and remount, following the procedure described in the owner's manual.
If the ATV begins rolling downhill:
Keep operator and passenger body weight uphill.
Never apply engine power.
Apply the brake lever gradually.
When fully stopped, apply the auxiliary brake as well, and then lock the temporary brake lock.
Dismount on the uphill side of the vehicle, or on the left if the vehicle is pointing straight uphill. Have a passenger dismount first, then the operator may dismount.
Turn the ATV around and remount, following the procedure described in the owner's manual.
Operating on excessively steep hills
could cause an overturn.
Never operate
on hills too steep for the ATV or for your abilities.
Never operate this ATV on hills steeper than 15
degrees.
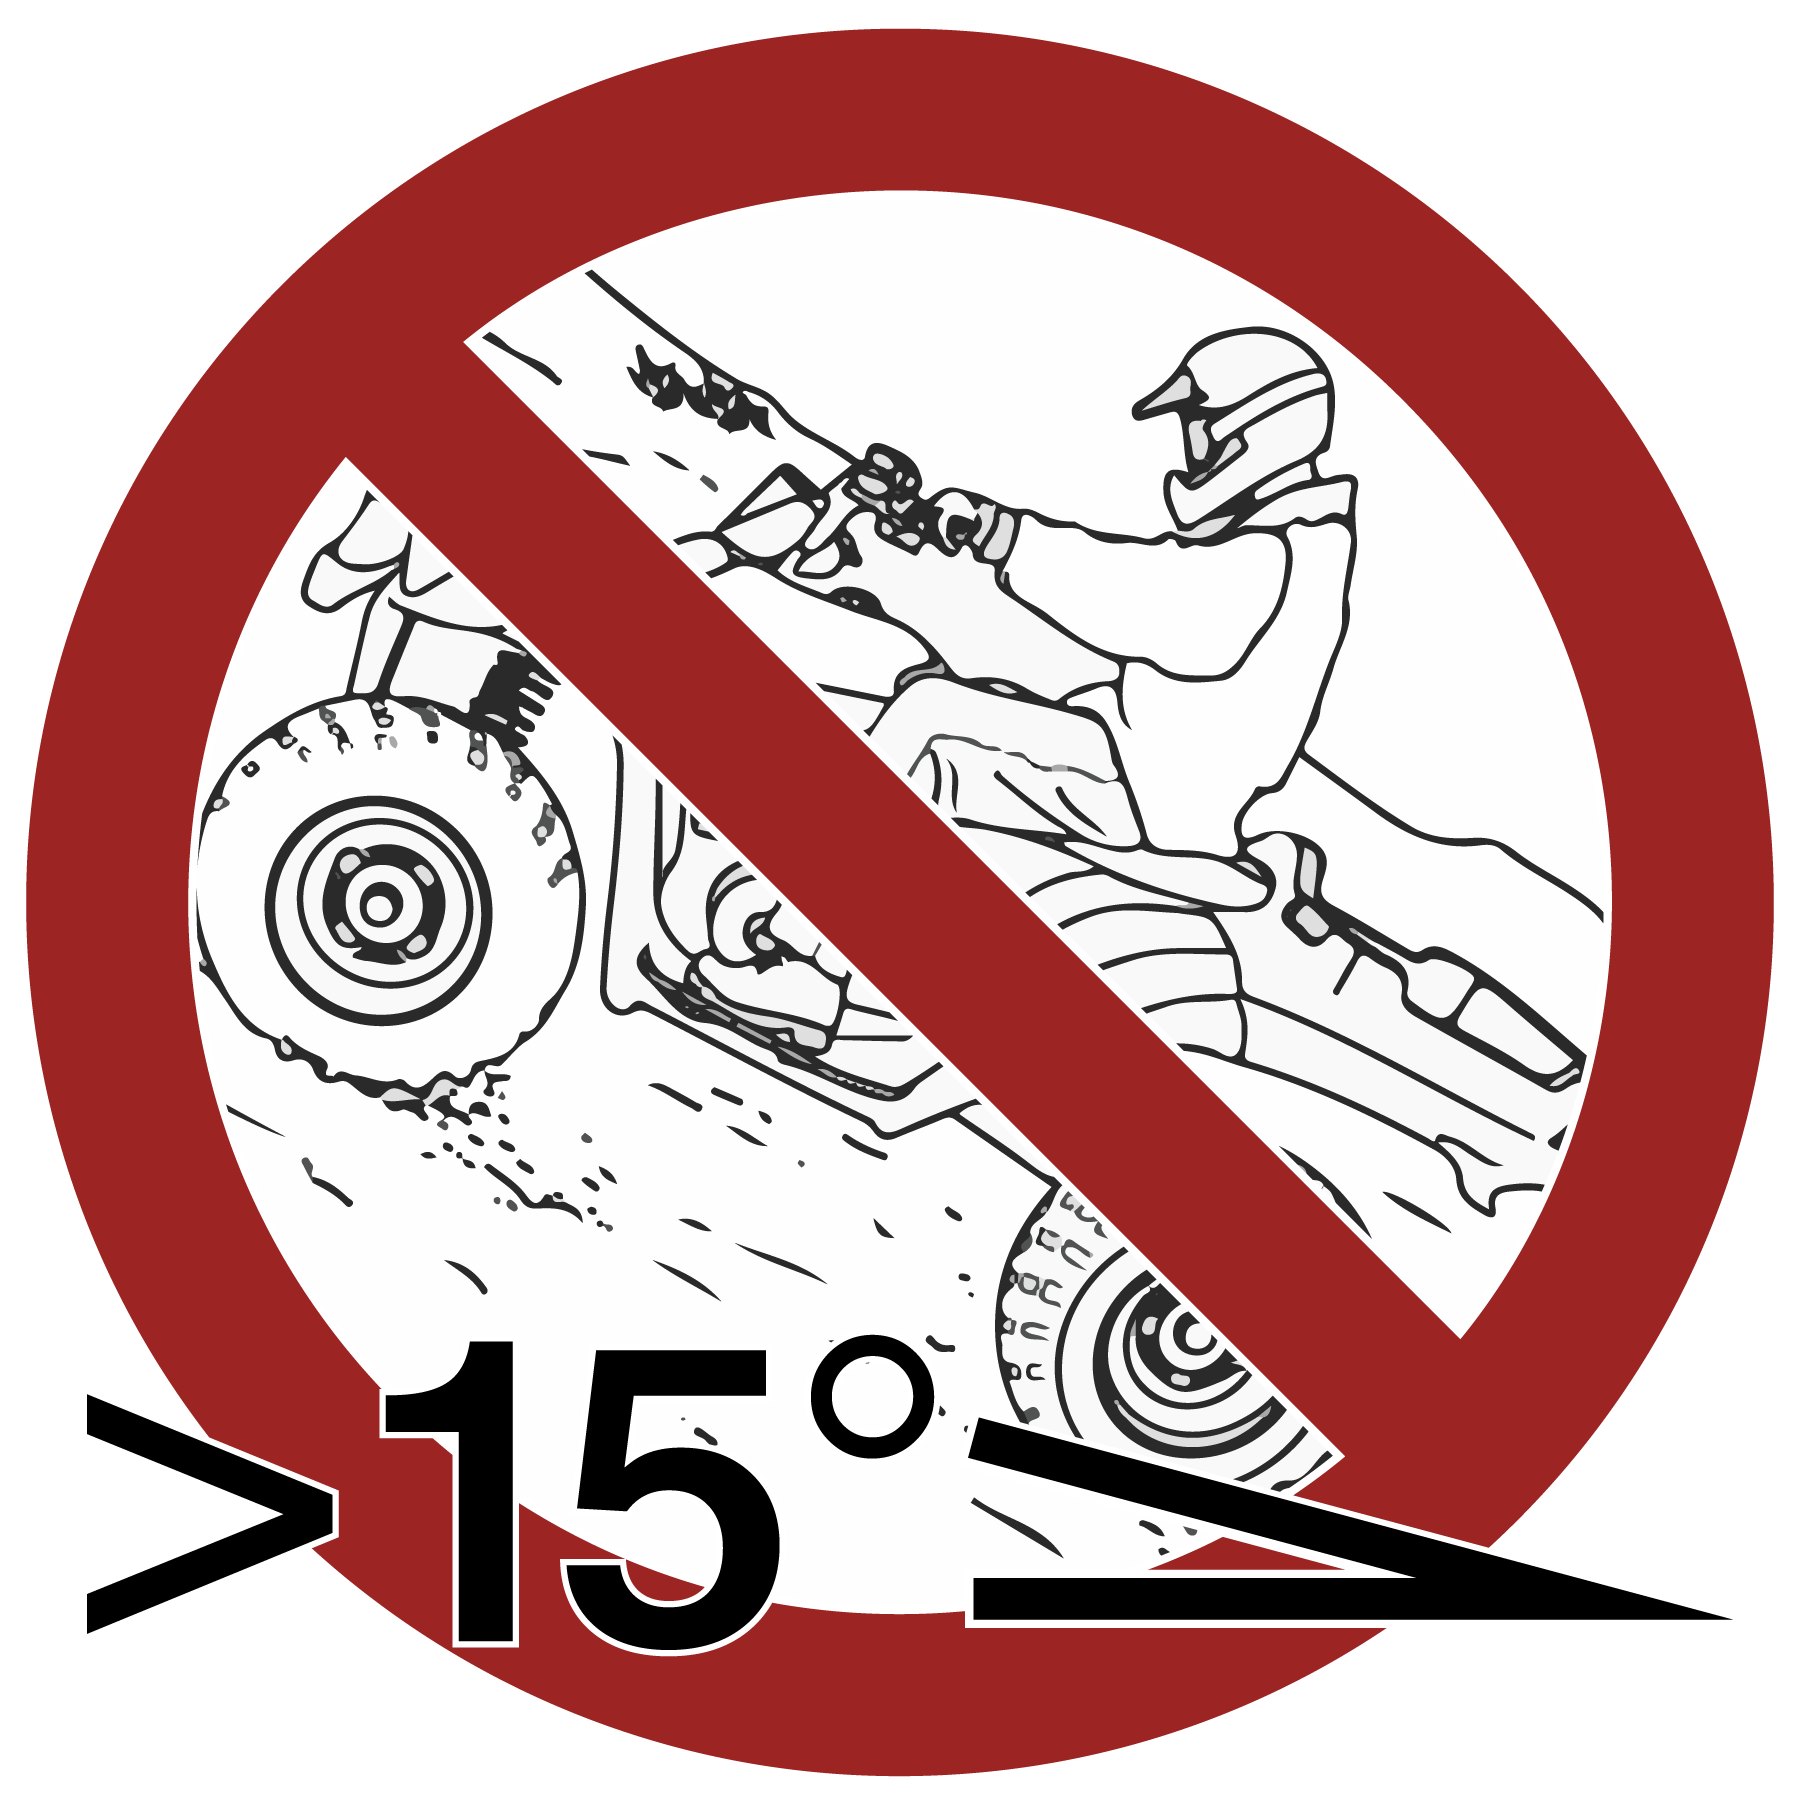
Failure to use extra caution when
operating on excessively rough, slippery or loose terrain could cause
loss of traction, loss of control, accident or overturn.
Do not operate on excessively rough, slippery or loose terrain until you’ve learned and practiced the skills necessary to control the vehicle on such terrain.
Always use extra caution on rough, slippery or loose terrain.
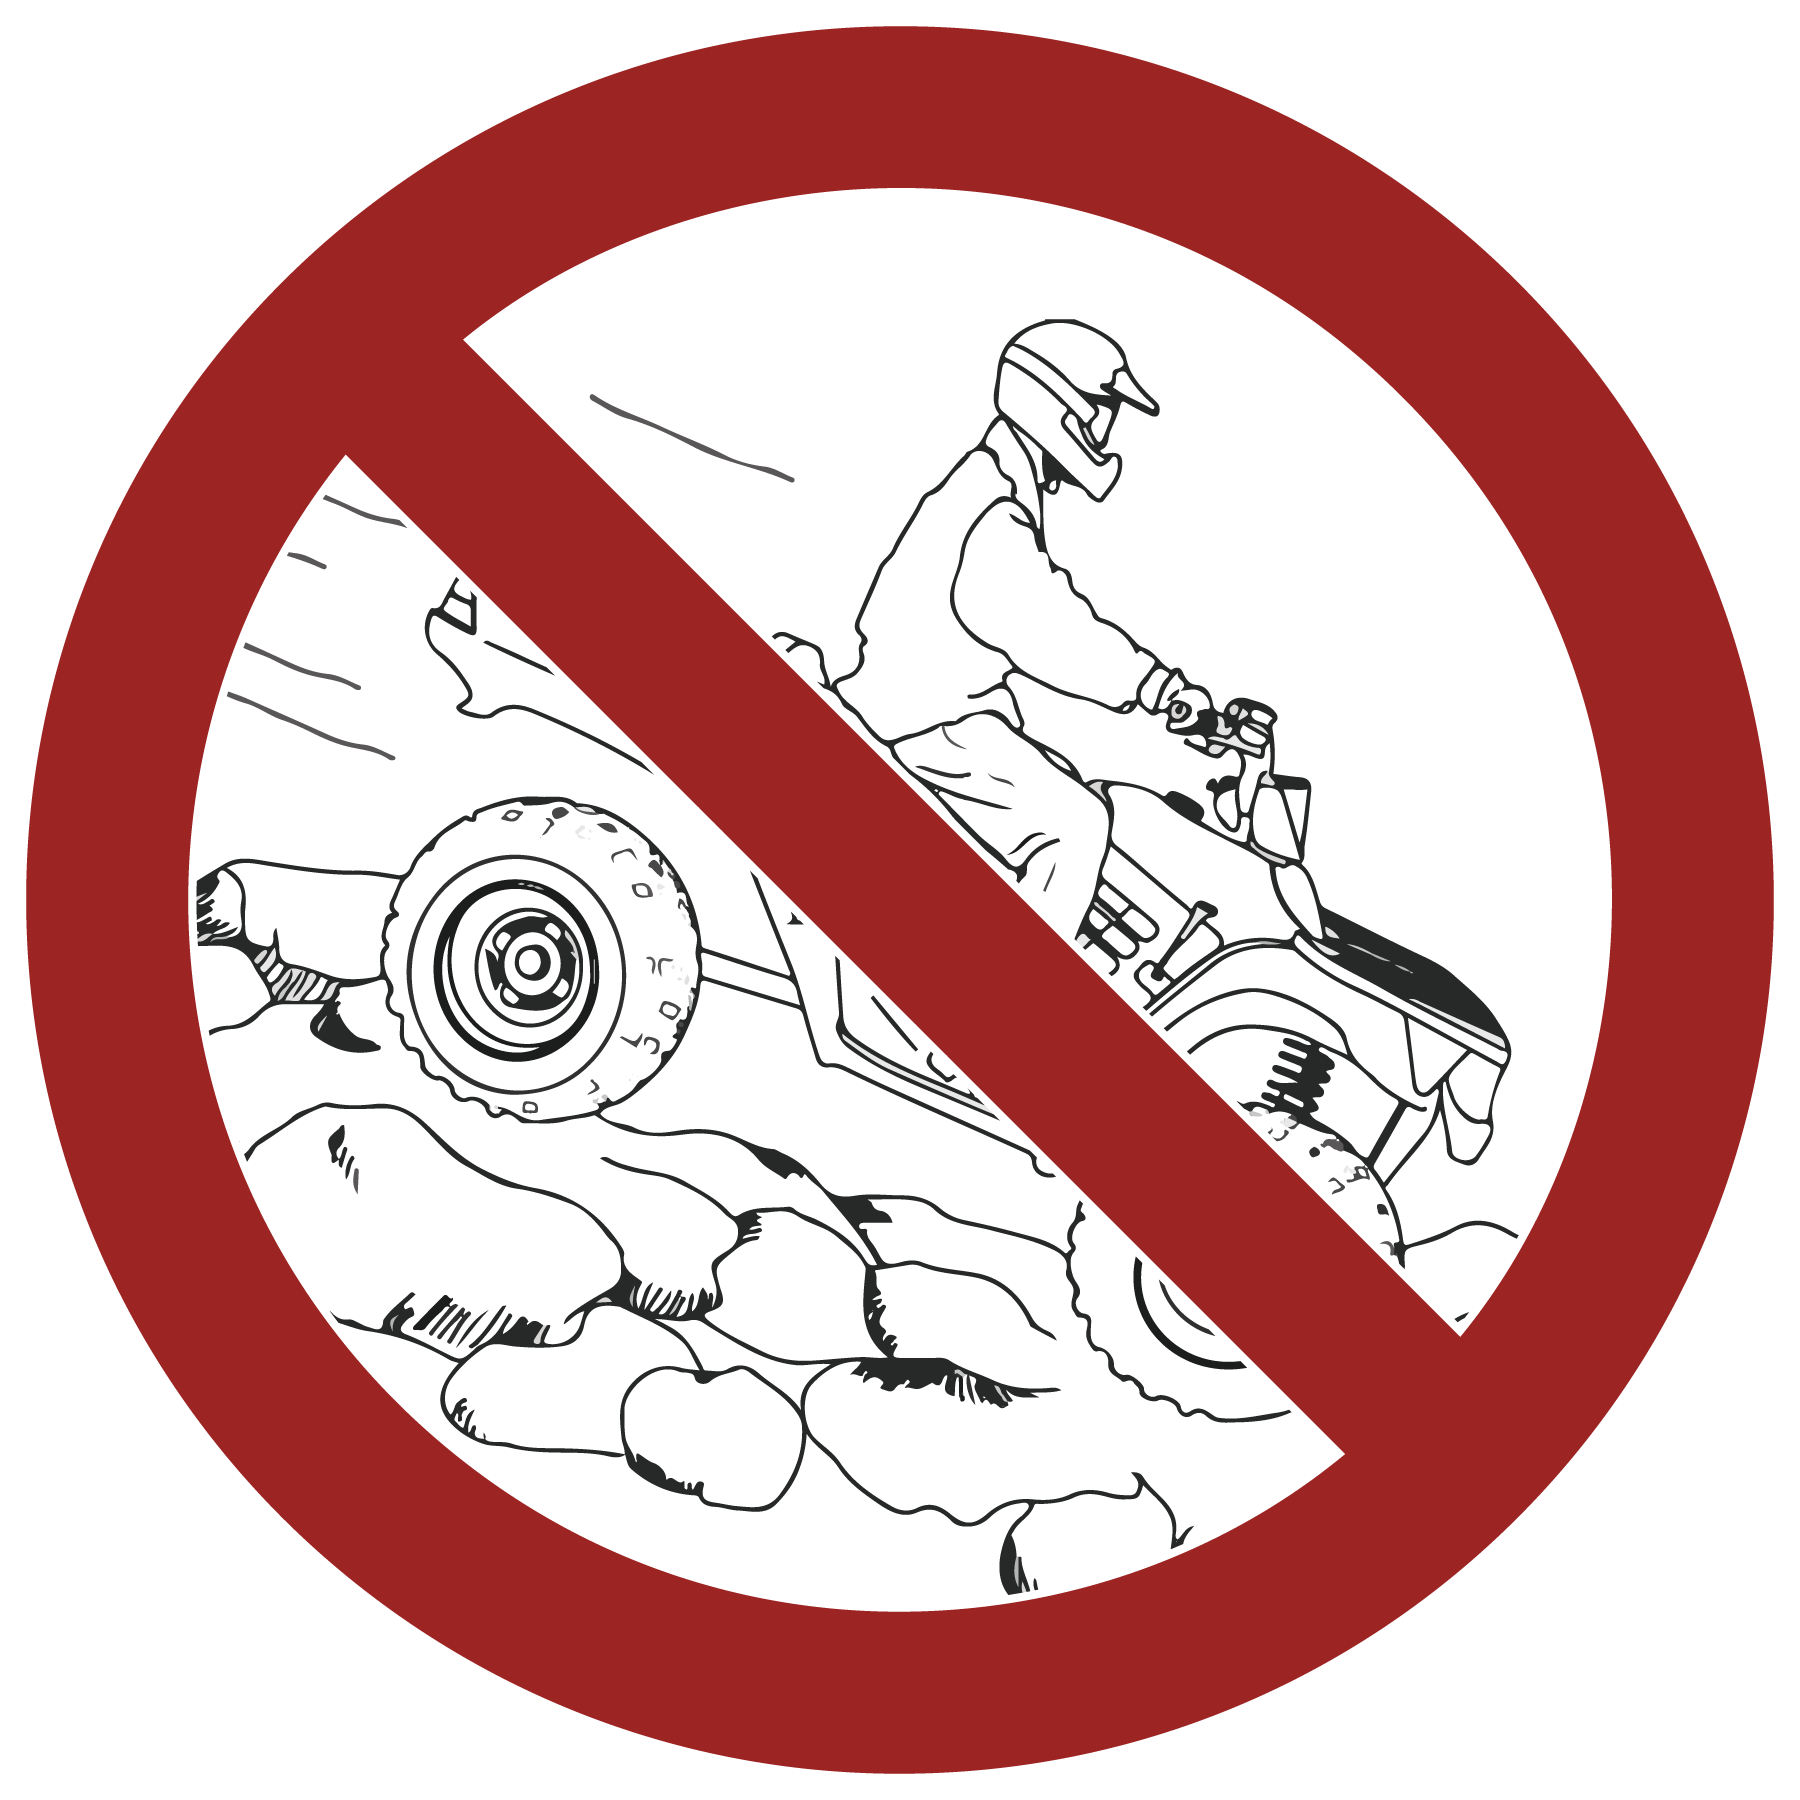
Failure to use extra caution when operating on unfamiliar terrain could result in an accident or rollover.
Unfamiliar terrain may contain hidden rocks, bumps, or holes that could cause loss of control or rollover.
Travel slowly and use extra caution when operating on unfamiliar terrain. Always be alert to changing terrain conditions.
Operating this vehicle with improper tires or with improper or uneven tire pressure could cause loss of control or accident.
Always use the size and type of tires specified for your vehicle.
Always maintain proper tire pressure as described in the owner's manual and on safety labels.
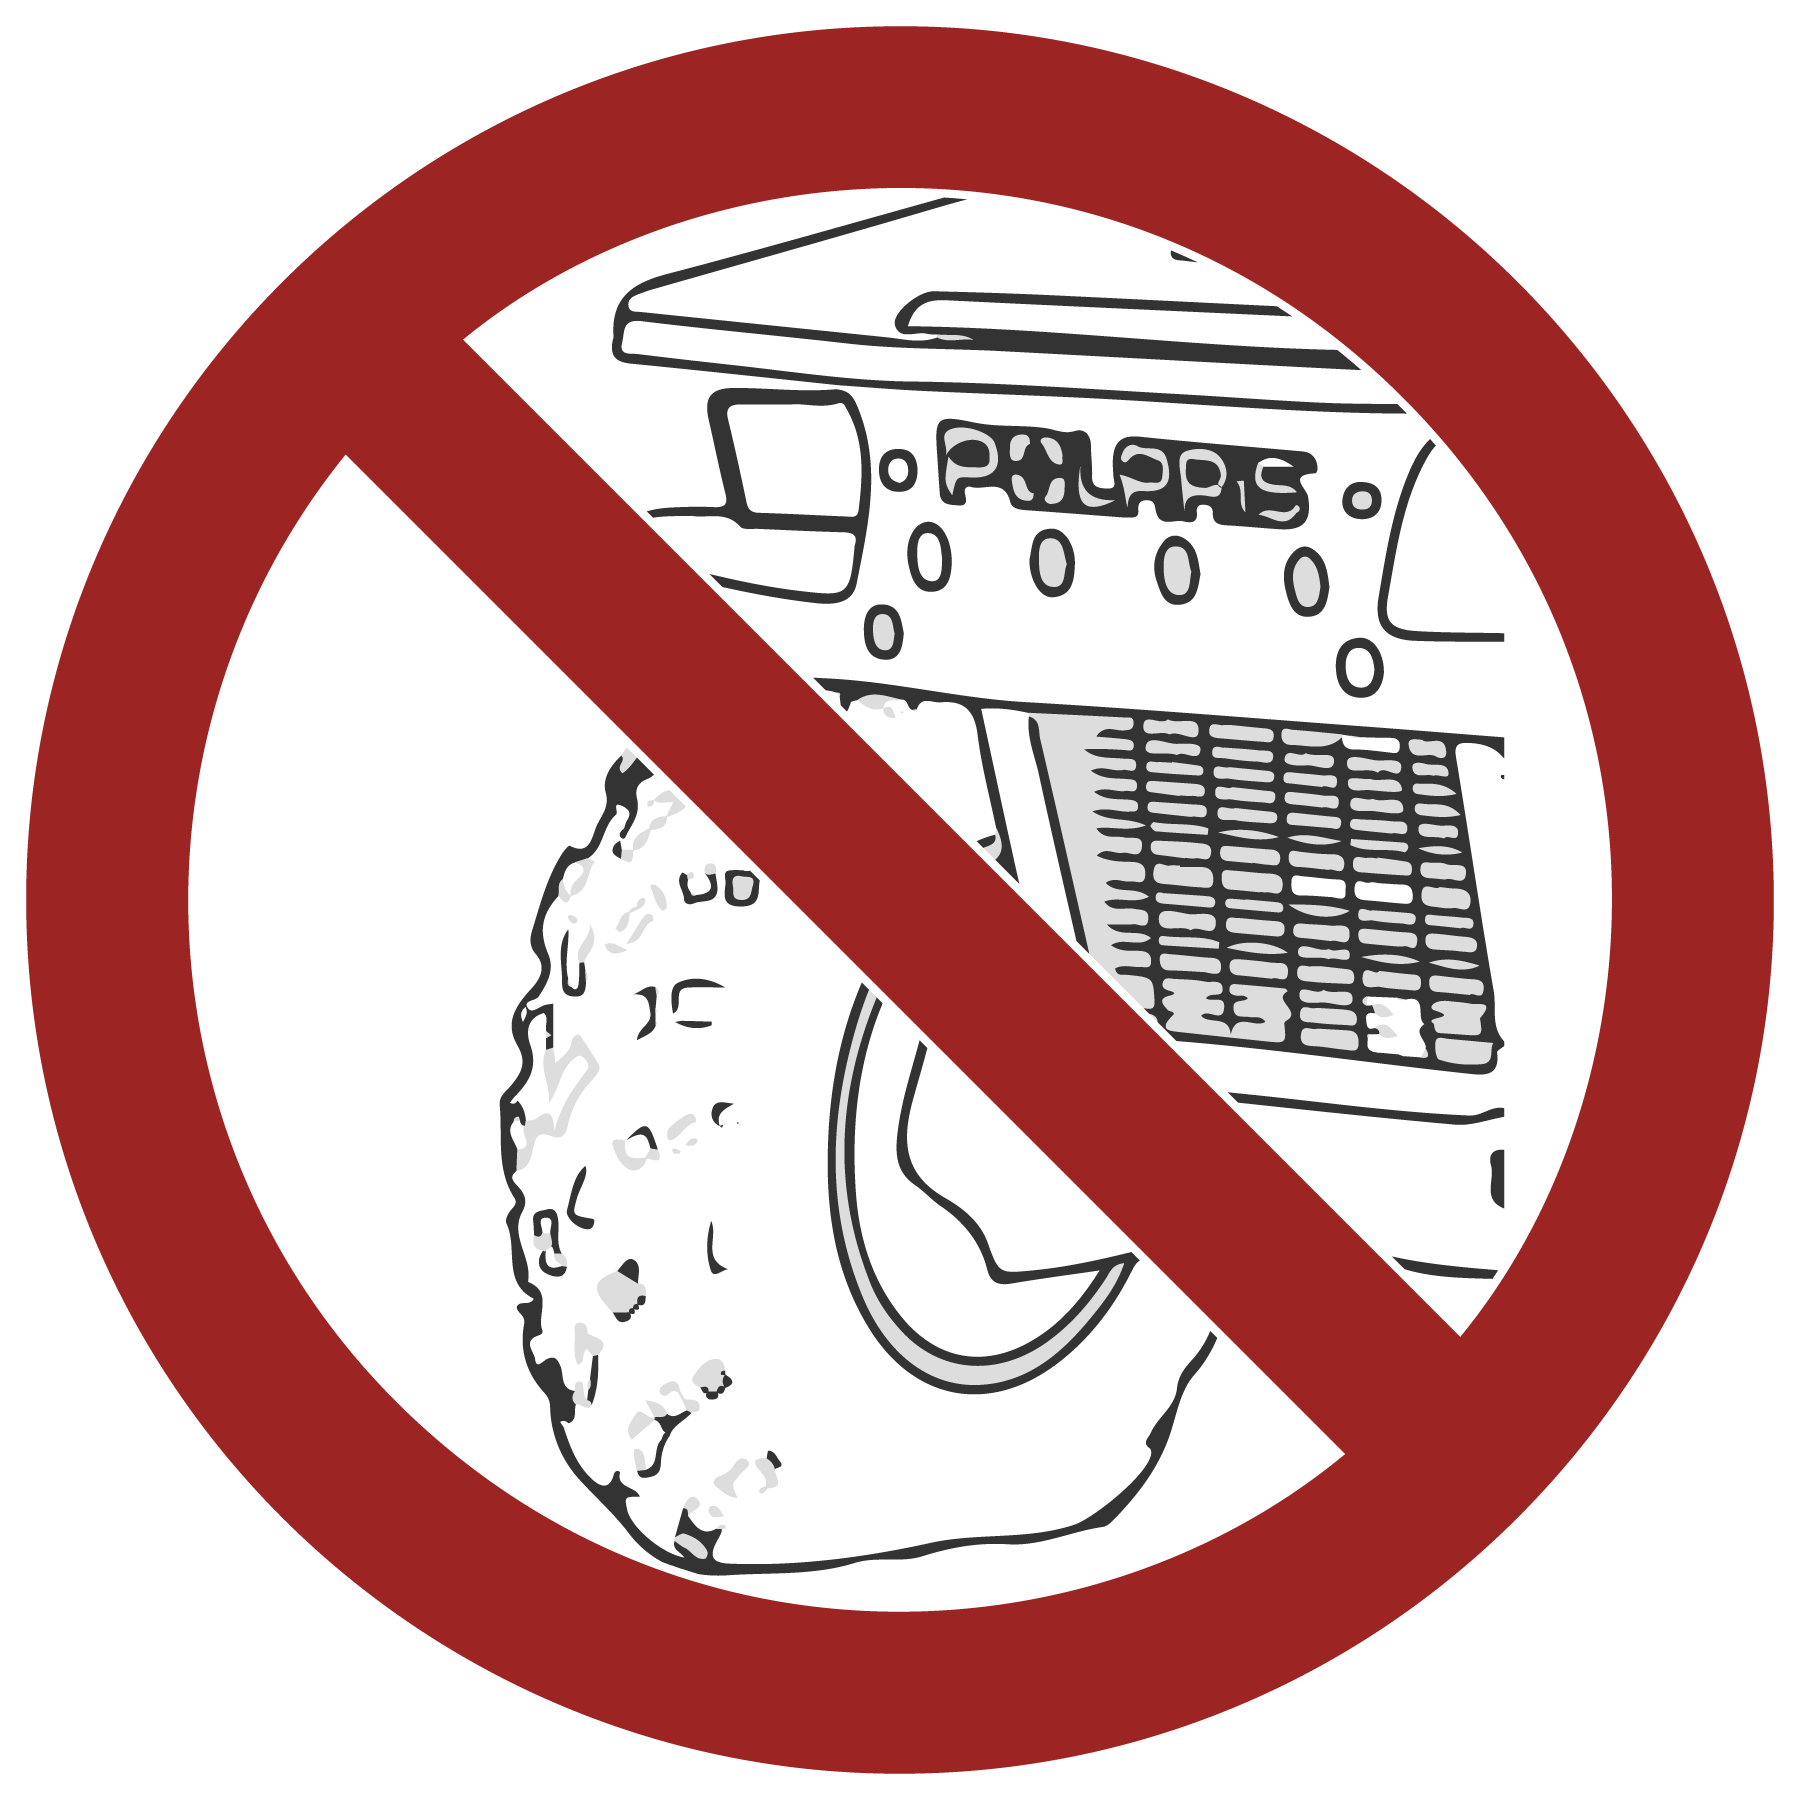
Improperly operating in reverse could result in a collision with an obstacle or person. Always follow proper operating procedures as outlined in this manual. See the New Operator Driving Procedures section for details.
Before shifting into reverse gear, always check for obstacles or people behind the vehicle. When it’s safe to proceed, back slowly.
Improperly operating over obstacles
could cause loss of control or rollover.
Before operating in a new area, check for obstacles. Avoid operating
over large obstacles such as large rocks and fallen trees. Always
follow the proper procedures outlined in this manual when operating
over obstacles. See the New Operator Driving Procedures section for
details.
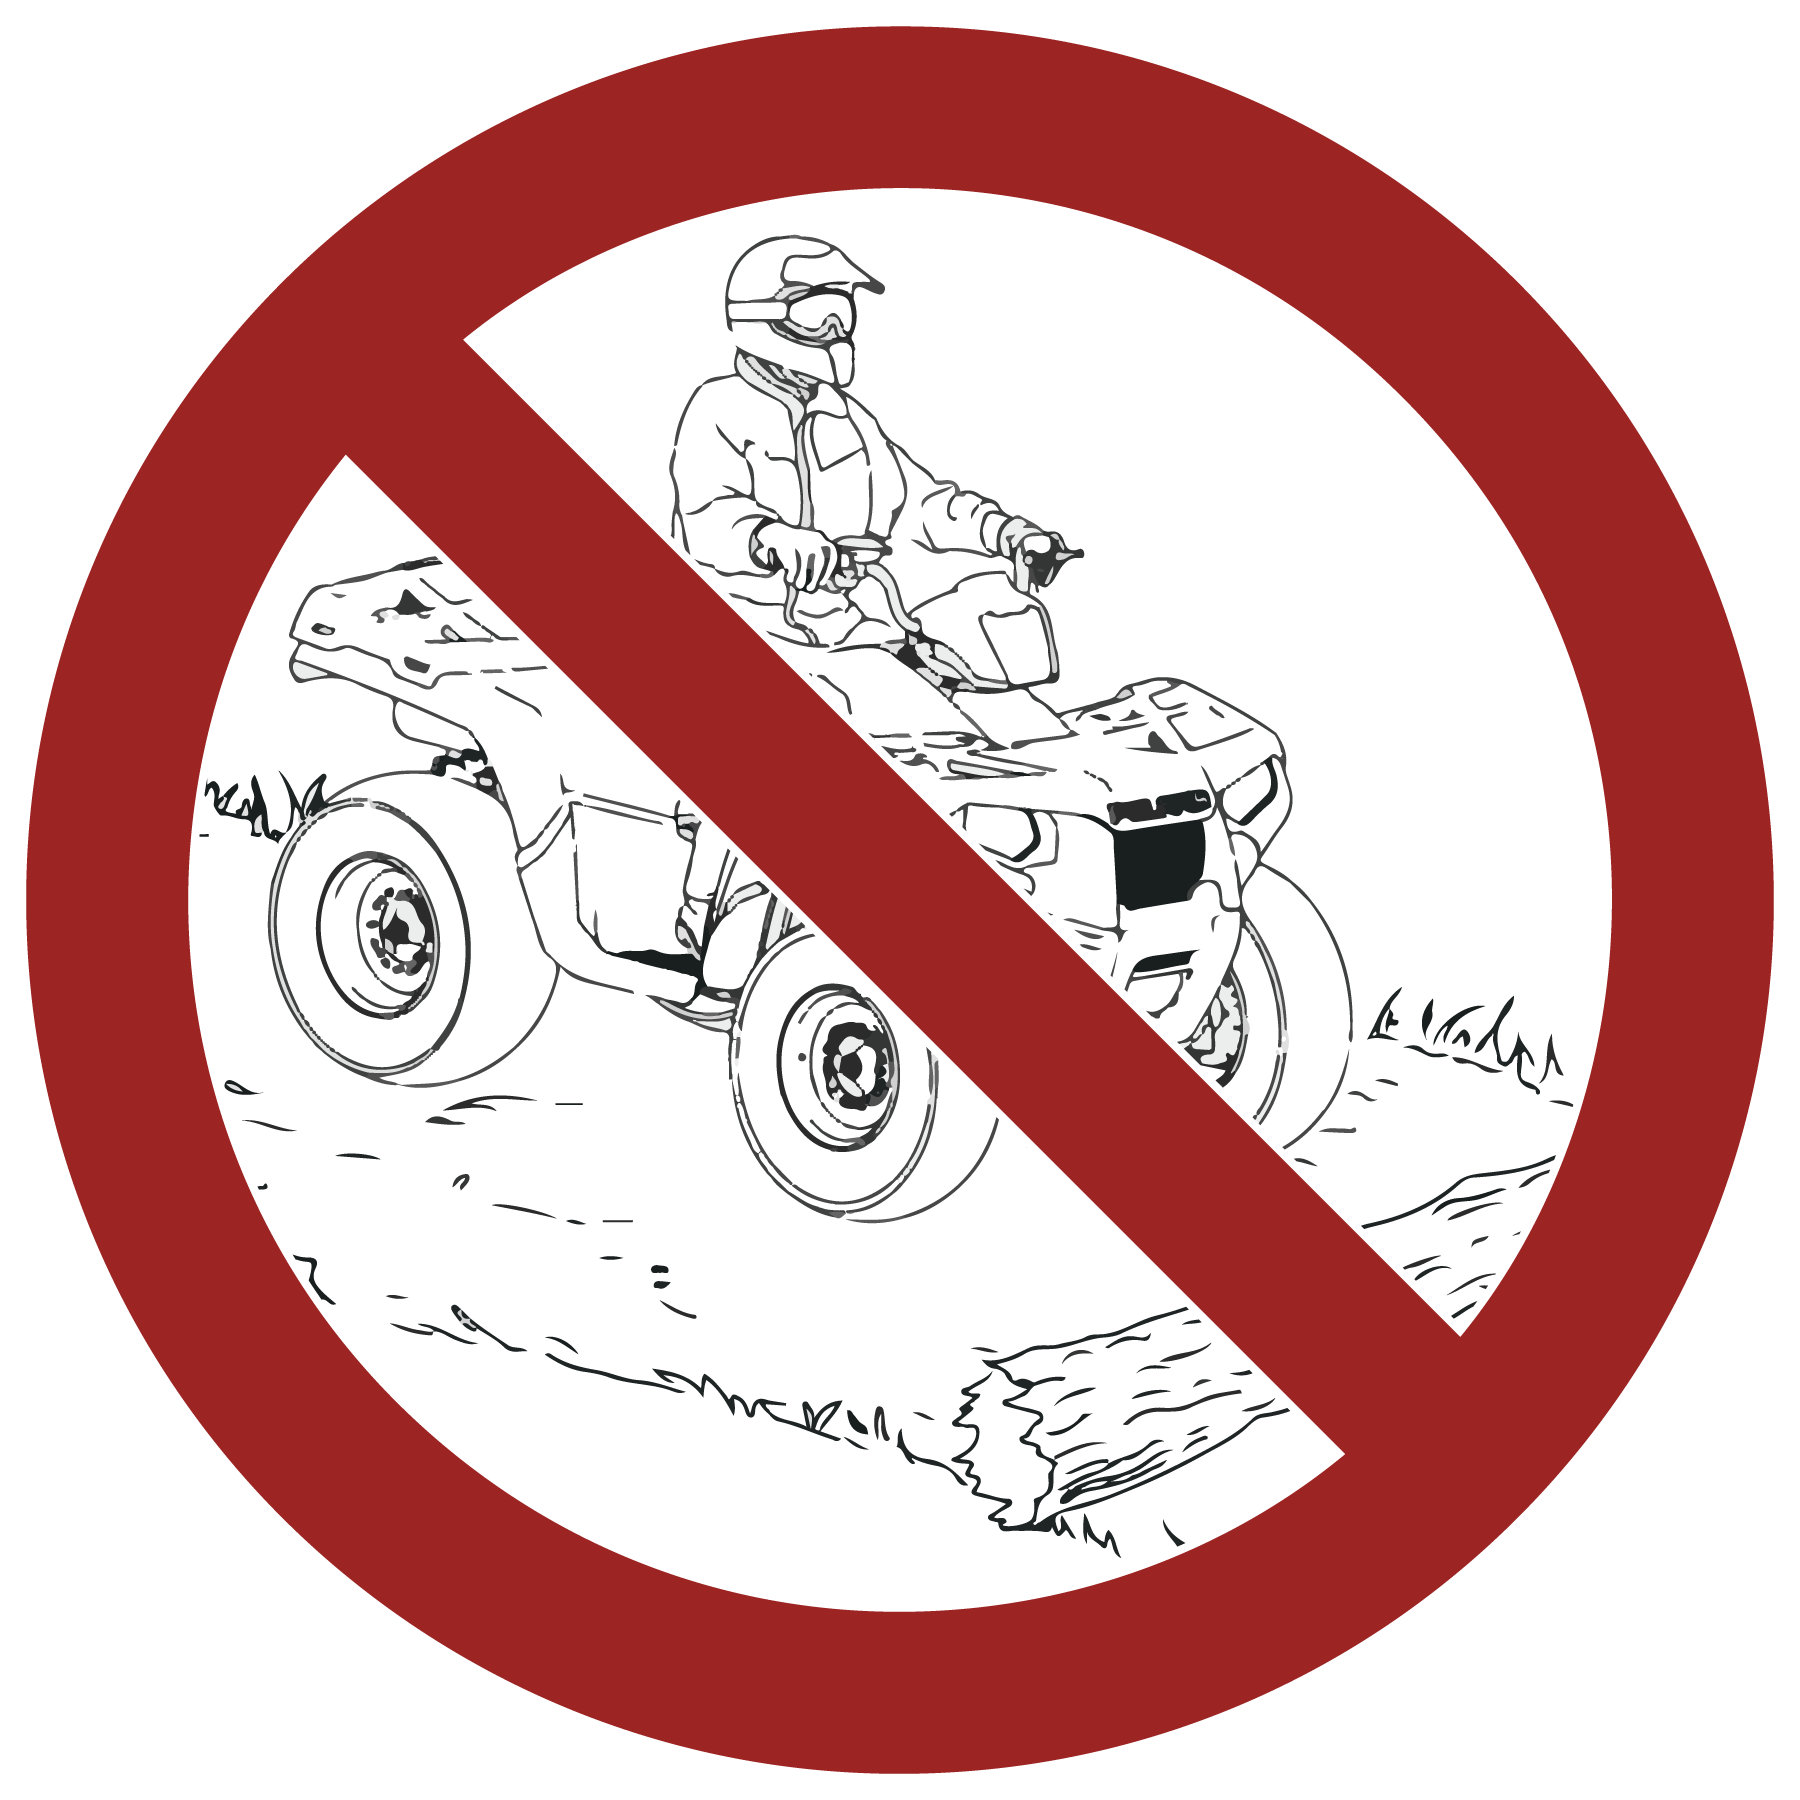
Failure to use extra caution when
operating on excessively rough, slippery or loose terrain could cause
loss of traction, loss of control, accident or rollover. Do not operate
on excessively slippery surfaces. Always slow down and use additional
caution when operating on slippery surfaces.
Skidding or sliding due to loss of traction can cause loss of control
or rollover (if tires regain traction unexpectedly). Always follow
proper procedures for operating on slippery surfaces as described
in this owner's manual. See the New Operator Driving Procedures section
for details.
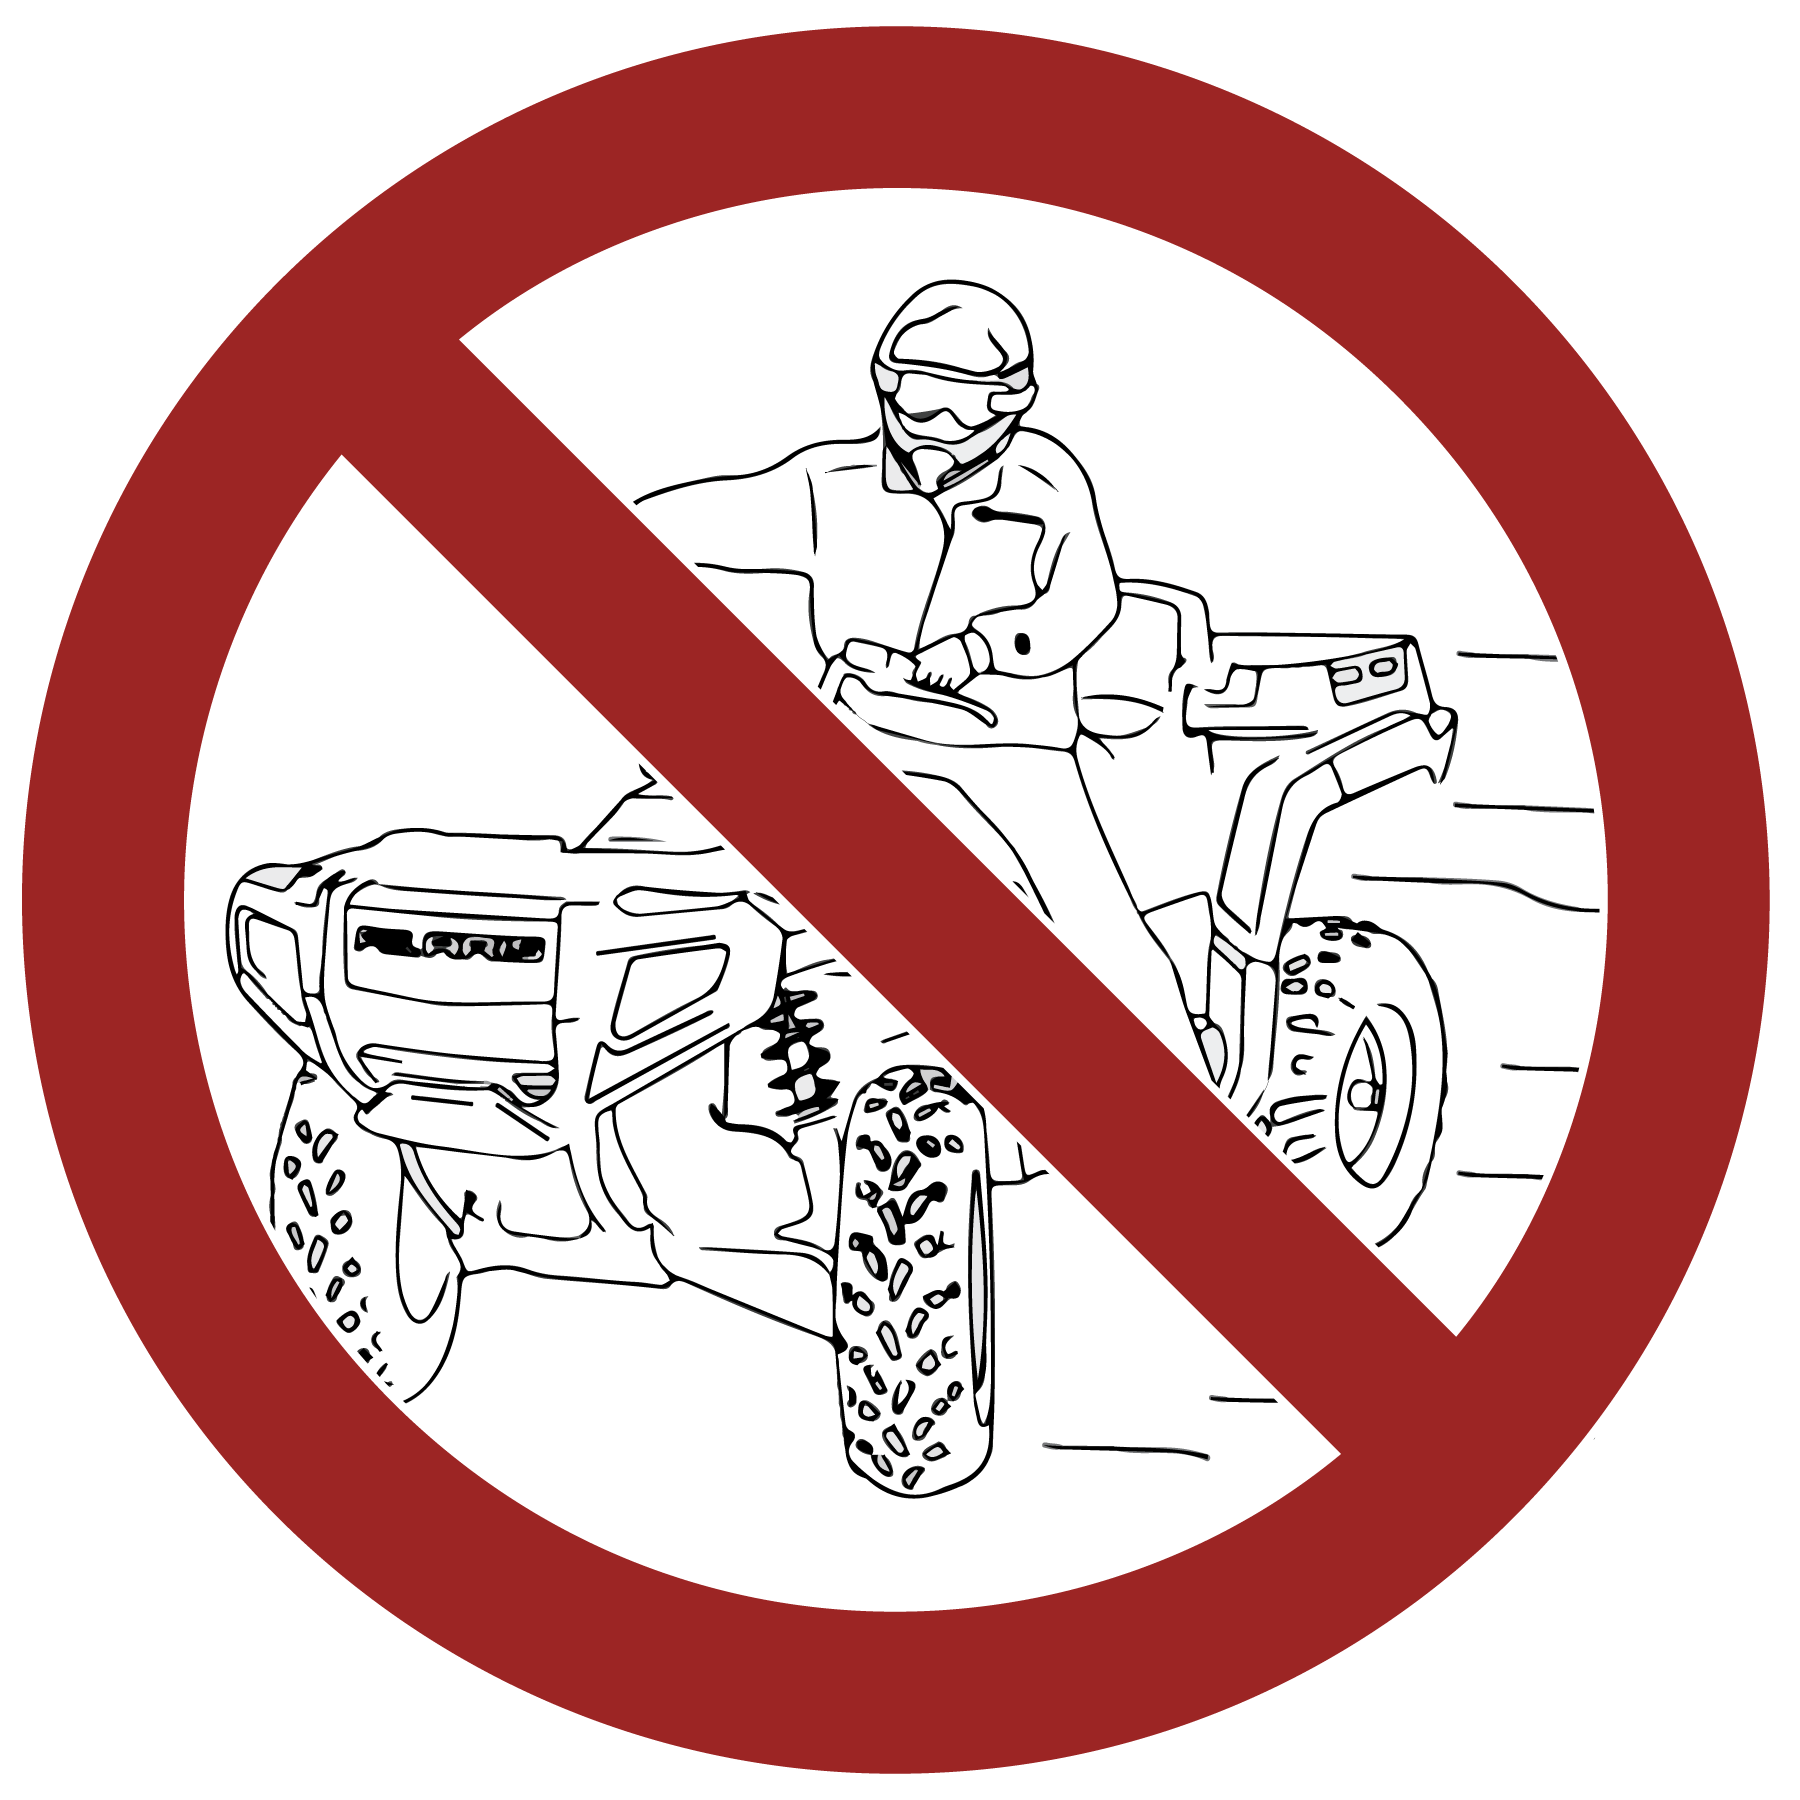
Operating a damaged vehicle can result in an accident. After any rollover or other accident, have a qualified service dealer inspect the entire machine for possible damage, including (but not limited to) brakes, throttle, and steering systems.
Operating through deep or fast-flowing water can cause loss of traction, loss of control, rollover or accident. Never operate in fast-flowing water or in water that exceeds the floor level of the vehicle.
Always follow proper procedures for operating in water as described in this owner’s manual.
Wet brakes may have reduced stopping ability. After leaving water, test the brakes. Apply them lightly several times while driving slowly. The friction will help dry out the pads.
Avoid operating this vehicle when lightning could occur unless the vehicle is equipped with a fully enclosed cab. Rubber tires, rubber handgrips and a foam seat will not protect a rider from lightning strikes. Always seek safe shelter when lightning is imminent.
Overloading the vehicle or carrying cargo improperly may cause changes in stability and handling, which could cause loss of control or an accident.
Always follow the instructions in this owner’s manual for carrying cargo.
Never exceed the stated load capacity for this vehicle.
Cargo should be properly distributed and securely attached.
Reduce speed when carrying cargo or pulling a trailer. Allow a greater distance for braking.
Severe injury or death can result if the vehicle and/or the operator fall through the ice. Never operate the vehicle on a frozen body of water unless you have first verified that the ice is sufficiently thick to support the weight and moving force of the vehicle, you and your cargo, together with any other vehicles in your party.
Always check with local authorities and residents to confirm ice conditions and thickness over your entire route. Vehicle operators assume all risk associated with ice conditions on frozen bodies of water.
Operating this vehicle in darkness or inclement weather could result in a collision or accident, especially if operating on a road or street. Use caution and drive at reduced speeds in conditions of reduced visibility such as fog, rain and darkness. Clean headlights and taillights frequently and replace burned out headlamps and taillamps promptly.
Safe operation of this rider-active vehicle requires good judgment and physical skills. Persons with cognitive or physical disabilities who operate this vehicle have an increased risk of overturn and loss of control.
Exhaust system components are very hot during and after use of the vehicle. Hot components can cause burns and fire. Do not touch hot exhaust system components. Always keep combustible materials away from the exhaust system.
Use caution when traveling through tall grass, especially dry grass and when traveling through muddy conditions. Always inspect the underside of the vehicle and areas near the exhaust system after driving through tall grass, weeds, brush, other tall ground cover, and muddy conditions. Promptly remove any grass, debris or foreign matter clinging to the vehicle and pay particular attention to the exhaust system area.
If using a hitch, make sure the receiver hitch does not exceed a 2 in (5 cm) drop or raise.
When trailering with your ATV, be aware that the exhaust is located above the hitch ball receiver and the trailer hitch. During operation of the ATV, the exhaust will produce hot exhaust gas that should not be inhaled and that may elevate the surface temperature of surrounding surfaces, including trailer surfaces (e.g., trailer hitch, trailer tongue, trailer walls, etc.). To reduce the risk of inhaling exhaust gases and to avoid risk of burn or injury, shut off your engine and allow time for the exhaust gases to dissipate and for the surfaces surrounding the exhaust to cool, including the trailer surfaces, before connecting or disconnecting a trailer. To reduce the potential for the trailer hitch or trailer tongue from getting too hot, do not use a receiver hitch with a rise of more than 2 in (5 cm).
Leaving the keys in the ignition can lead to unauthorized use of the vehicle by someone under the age of 16, without a drivers license, or without proper training. This could result in an accident or rollover. Always remove the ignition key when the vehicle is not in use.
Your Polaris vehicle is designed to provide safe operation when used as directed. Modifications to your vehicle may negatively impact vehicle stability. Failure of critical machine components may result from operation with any modifications, especially those that increase speed or power. This vehicle may become less stable at speeds higher than those for which it is designed. Loss of control may occur at higher speeds.
Do not install any non-Polaris-approved accessory or modify the vehicle for the purpose of increasing speed or power. Any modifications or installation of non-Polaris-approved accessories could create a substantial safety hazard and increase the risk of bodily injury.
The Polaris limited warranty on your Polaris vehicle will be terminated if any non-Polaris approved equipment and/or modifications have been added to the vehicle that increase speed or power.
The addition of certain accessories, including (but not limited to) mowers, blades, tires, sprayers, or large racks, may change the handling characteristics of the vehicle. Use only Polaris-approved accessories, and familiarize yourself with their function and effect on the vehicle.
For more information about ATV safety, see the Safety Training section.
Warning labels have been placed on the vehicle for your protection. Read and follow the instructions on each label carefully. If any of the labels shown in this manual differ from the labels on your vehicle, always read and follow the instructions of the labels on the vehicle.
If an informational or graphic label becomes illegible or comes off, contact your Polaris dealer to purchase a replacement. Replacement safety labels are provided by Polaris at no charge. The part number is printed on the label.
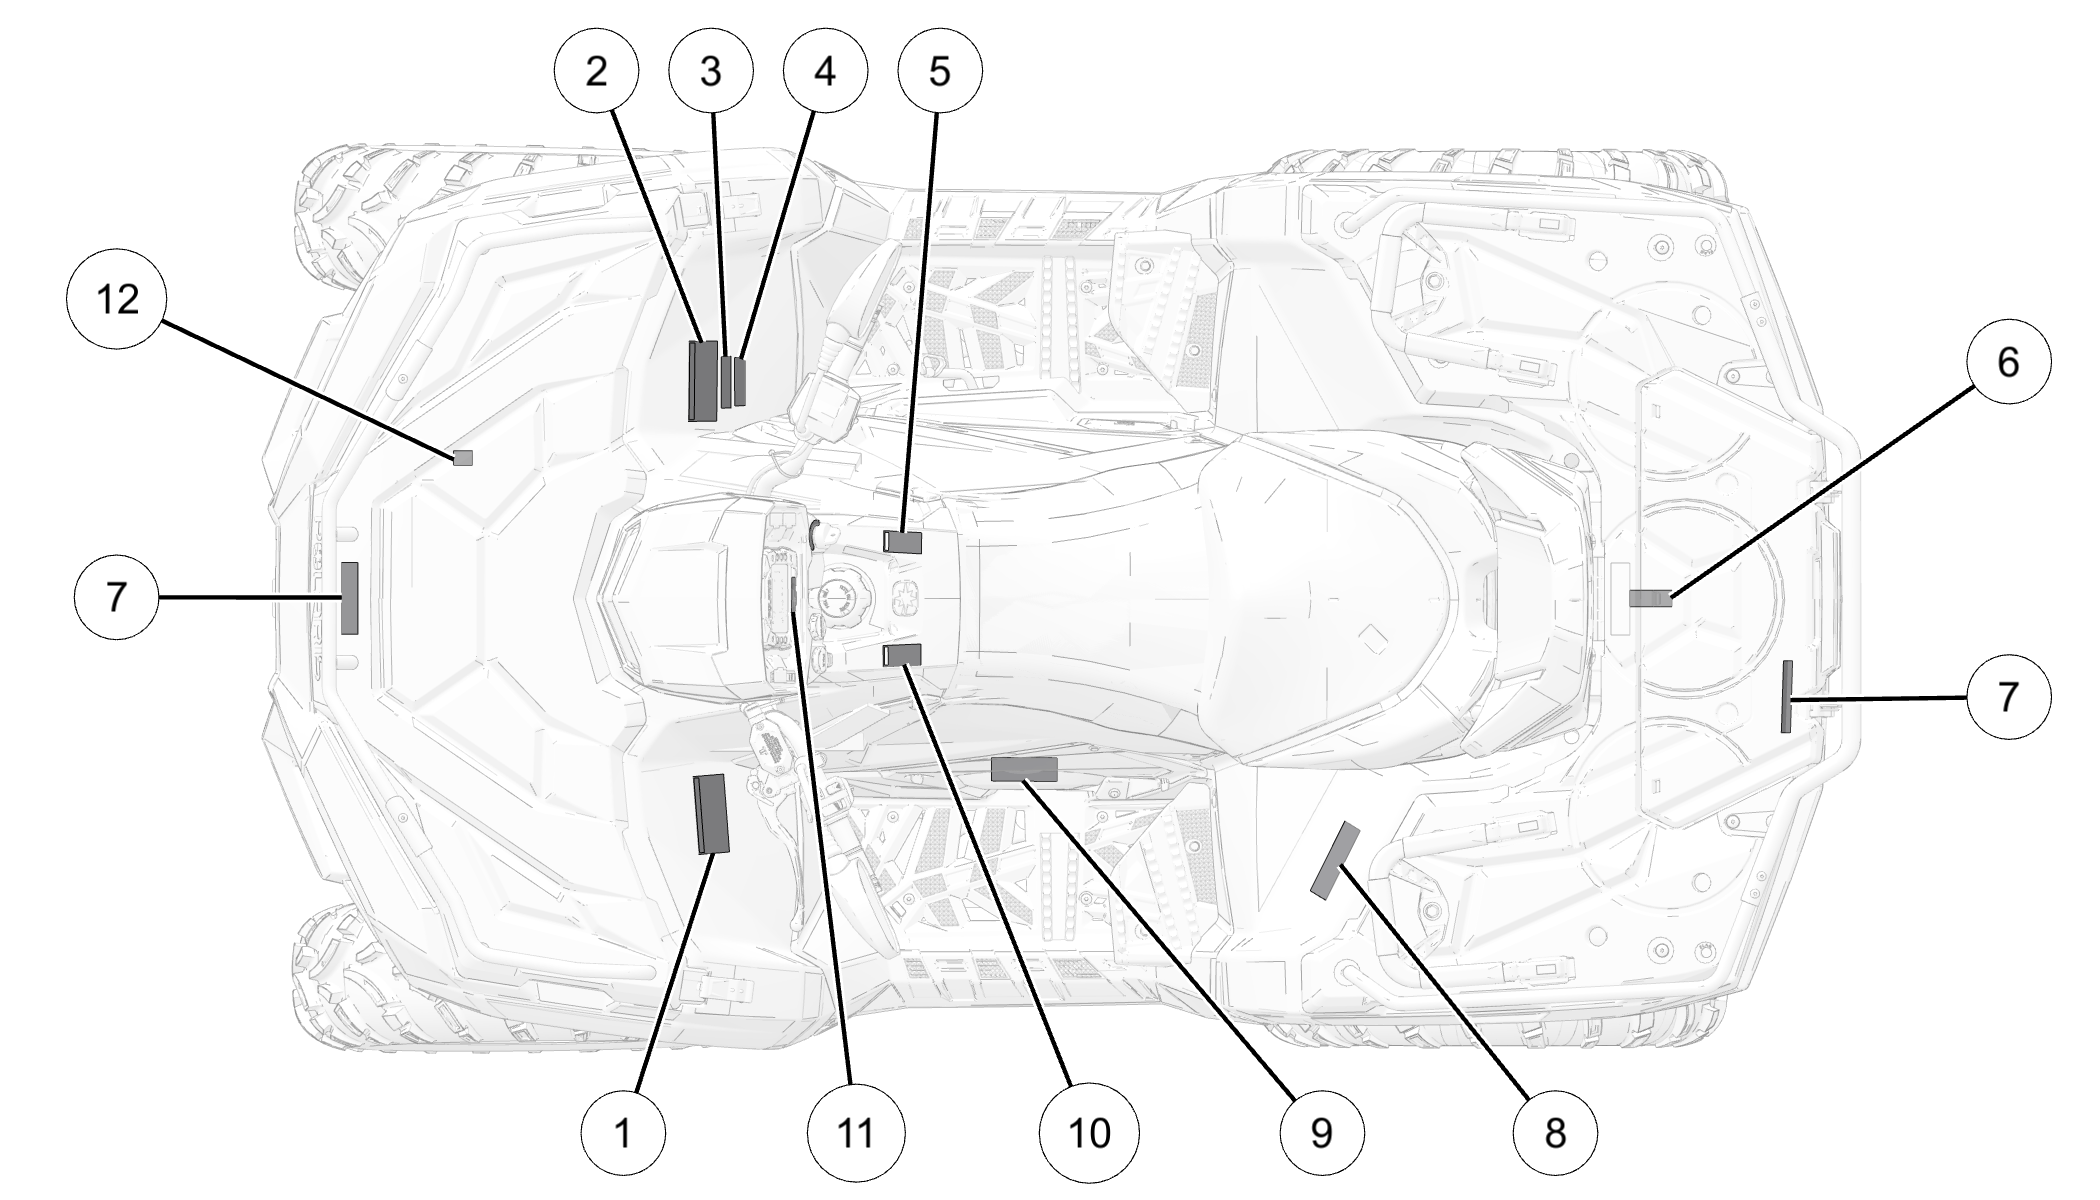
1 General Alert
2 Discretionary Alert
3 Greasing Point Alert (if equipped)
4 Jacking Points Alert (if equipped)
5 4x4 (AWD) Alert
6 Hitch Capacity Alert (if equipped)
7 Rack Alerts
8 Tire Pressure Alert
9 Clutch Cover Alert
10 Reverse Override Alert
11 Fuel Alert (if equipped)
12 Radiator Cap Alert (if equipped)
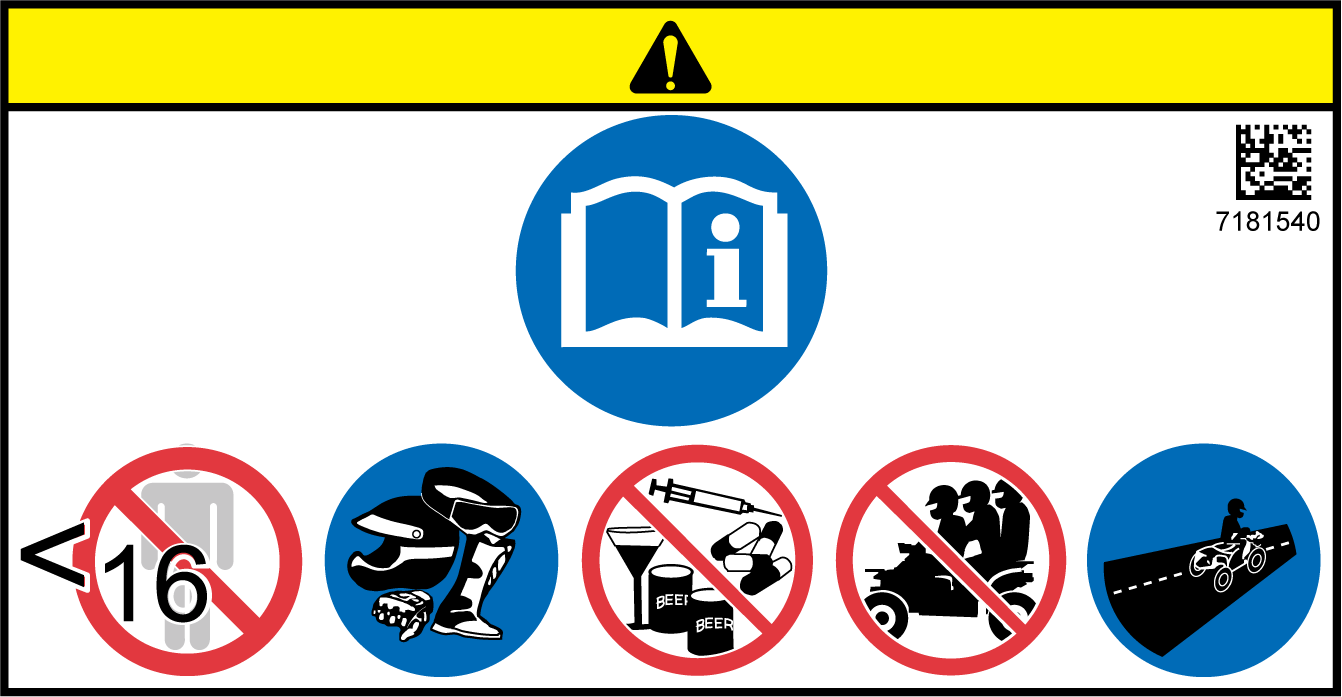
WARNING
Before you operate this vehicle, read the owner’s
manual. Never allow anyone under 16 years of age to operate this vehicle.
Always wear an approved helmet, goggles, and protective clothing.
Never use alcohol or drugs before or while operating. Never carry
more than one passenger. This vehicle is approved for on-road use.
Part Number: 7181540
WARNING
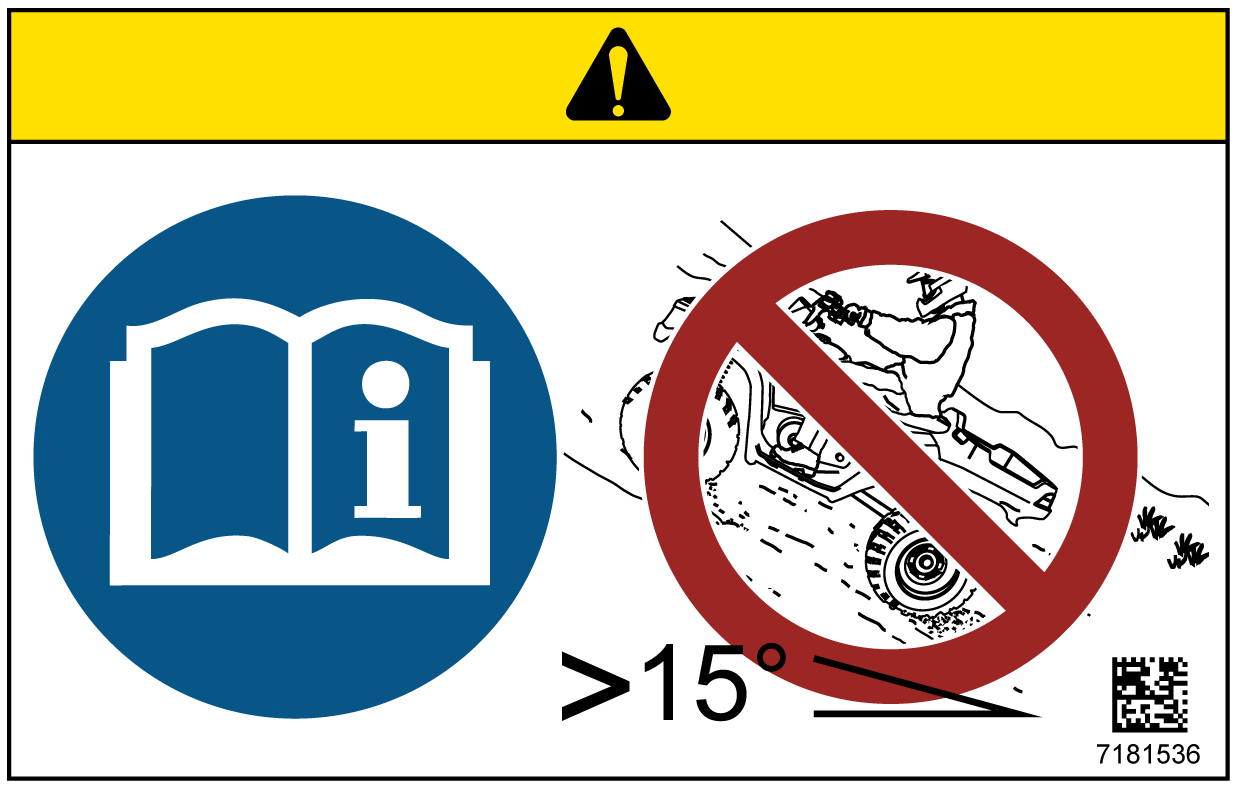
Read and understand your owner’s manual. Never
operate this vehicle on hills steeper than 15°.
Part Number: 7181536
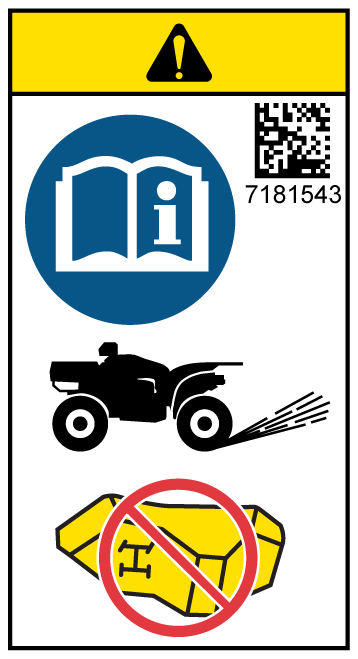
WARNING
Do not push switch to engage 4X4 (AWD) if the rear
wheels are spinning. This may cause severe drive shaft and clutch
damage.
Part Number: 7181543
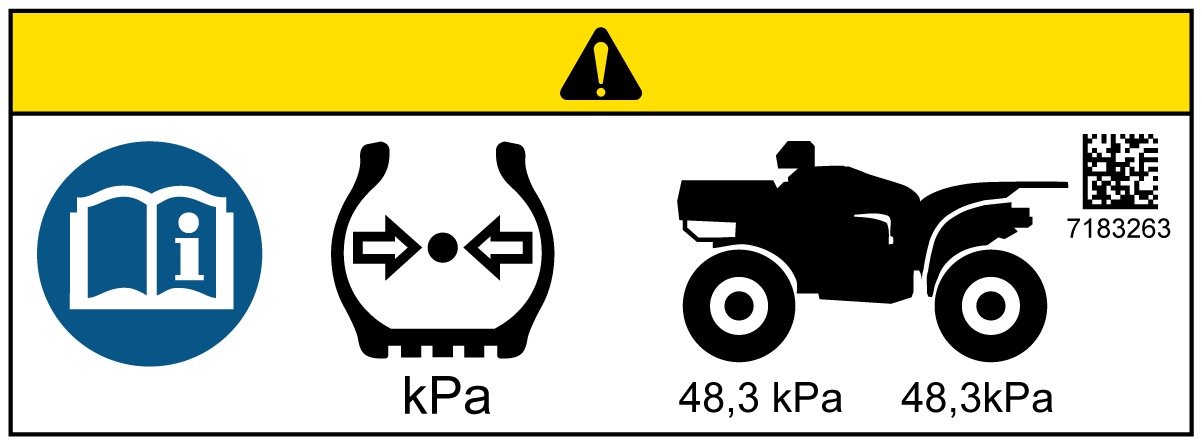
WARNING
TIRE PRESSURE IN kPa:
FRONT –
48,3 kPa
REAR – 48,3 kPa
Part
Number: 7183263
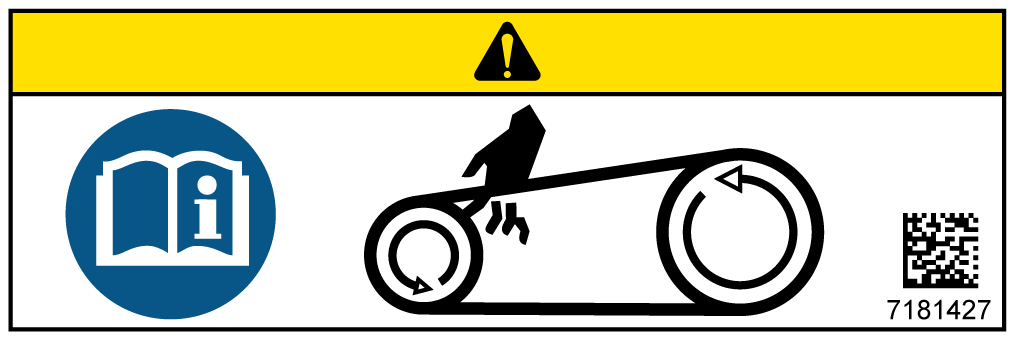
WARNING
Keep body parts away from belt.
Part
Number: 7181427
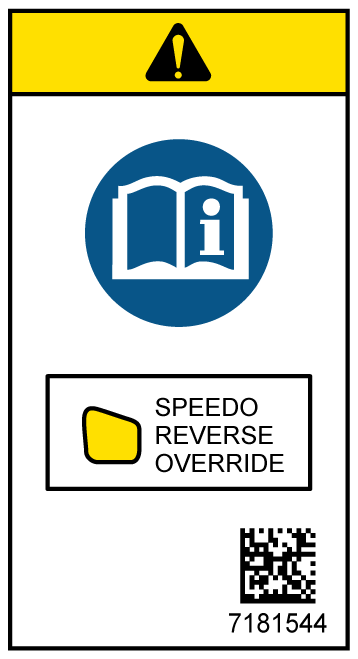
WARNING
Improper use of the reverse override button can lead
to loss of control resulting in severe injury or death. Do not activate
override while throttle is engaged. Always apply throttle gradually
while in reverse.
Part Number: 7181544
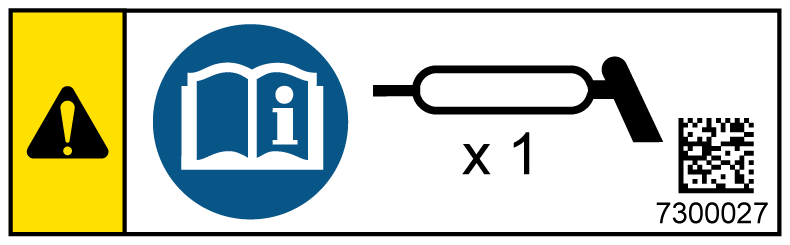
WARNING
Always read and understand your owner’s manual.
Lubricate as recommended.
Part Number: 7300027
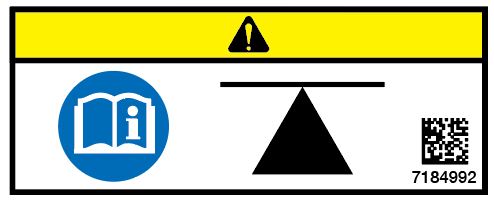
Compatible Fuel Types:
E5
E10

WARNING
See Elevating the Vehicle for Service for details.
Part Number: 7184992
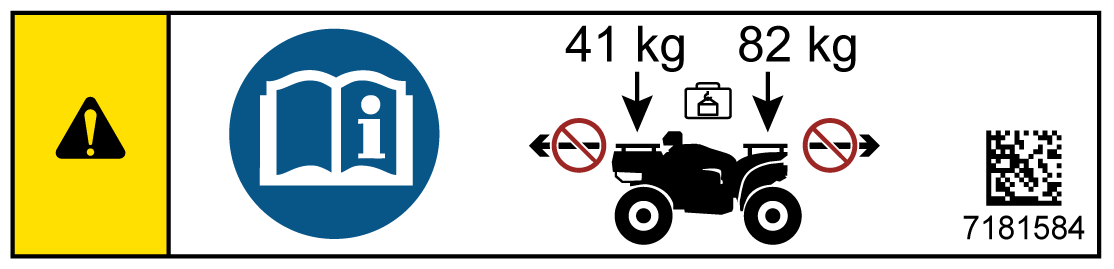
WARNING
DO NOT TOW FROM RACK OR BUMPER. Vehicle damage or
tipover may result causing severe injury or death. Tow only from tow
hooks or hitch.
Maximum Rack Loads:
Front 41 kg. Rear 82 kg.
Part Number: 7181584
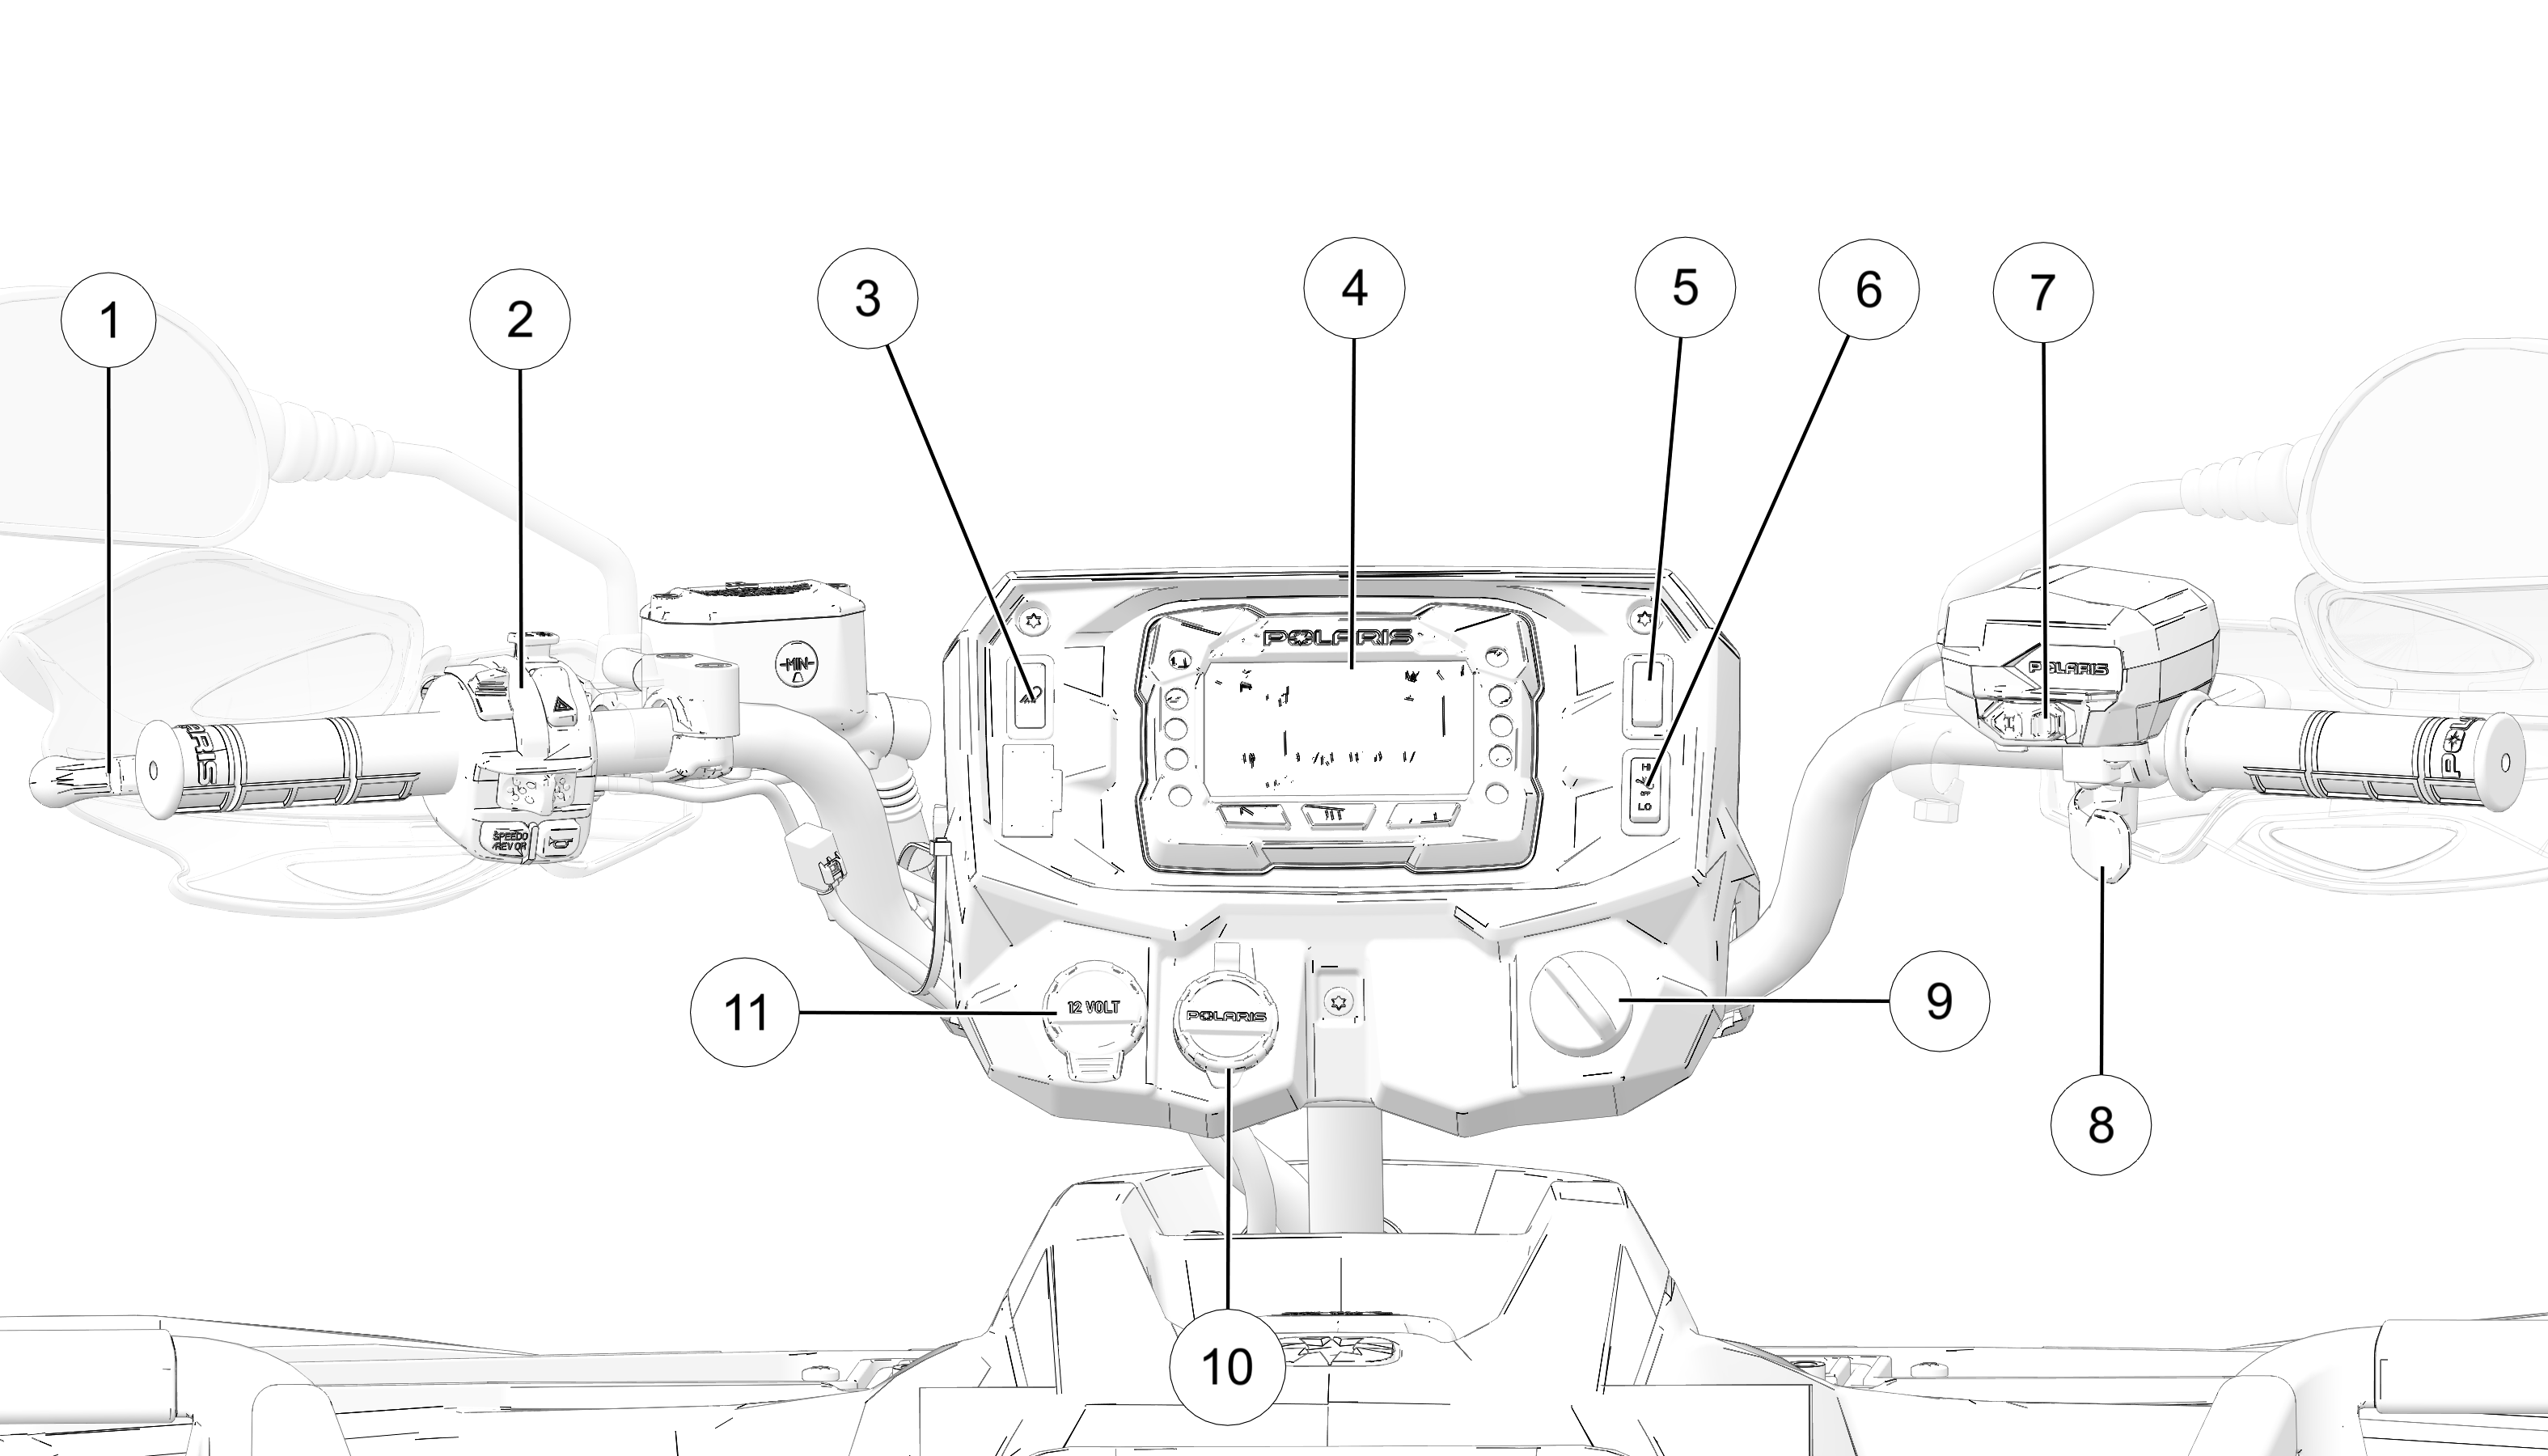
1 Brake Lever
2 Left-Hand Controls
3 Work Light Switch (if equipped)
4 Digital Display
5 Hand Warmer Switch (if equipped)
6 Thumb Warmer Switch (if equipped)
7 AWD Momentary Switch
8 Throttle Lever
9 Ignition Switch
10 Battery Charge Port
11 Auxiliary Outlet
| Switch Position | Function |
|---|---|

|
End all electrical power to the vehicle |

|
The LIGHTS ON position turns the headlights on. The engine stop switch must be in the RUN position. |

|
Start the engine. The headlights are not on in this position. |
|
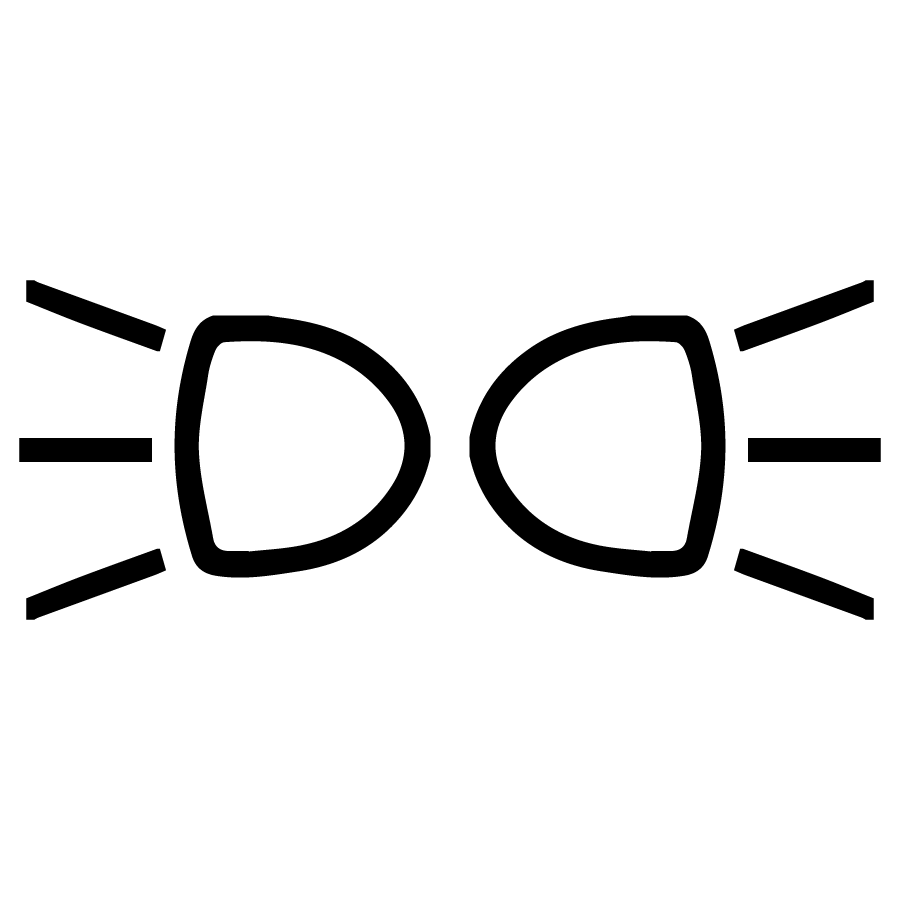
After starting the engine, release the key switch to the PARKING LIGHTS ON position. The parking lights and taillights are on in this position. |
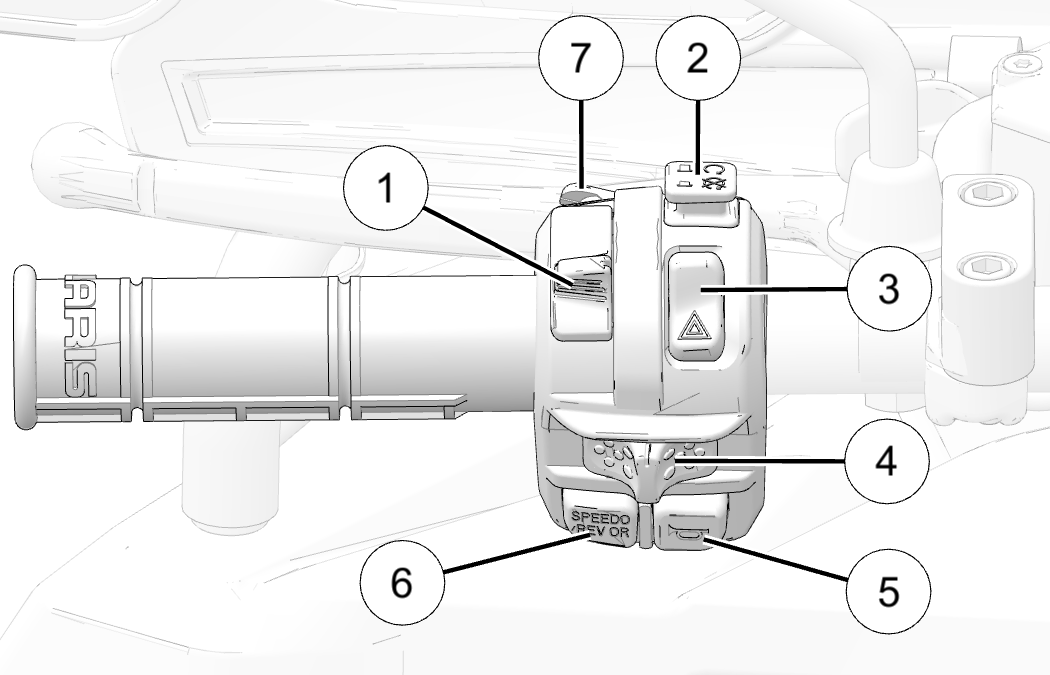
1 Light Switch
2 Engine Stop Switch
3 Hazard Warning Switch
4 Turn Signal Switch
5 Horn Switch
6 Mode / Reverse Override Switch
7 High Beam (Flash) Momentary Switch
The engine will not start or run when the switch is in the OFF position.
Push the stop switch down to stop the engine quickly. Pull the stop switch up to the RUN position before attempting to start the engine.
Both the ignition switch and the engine stop switch will shut off all electrical power to the vehicle, including lights.
|
Switch Position |
Function |
|---|---|

|
OFF |
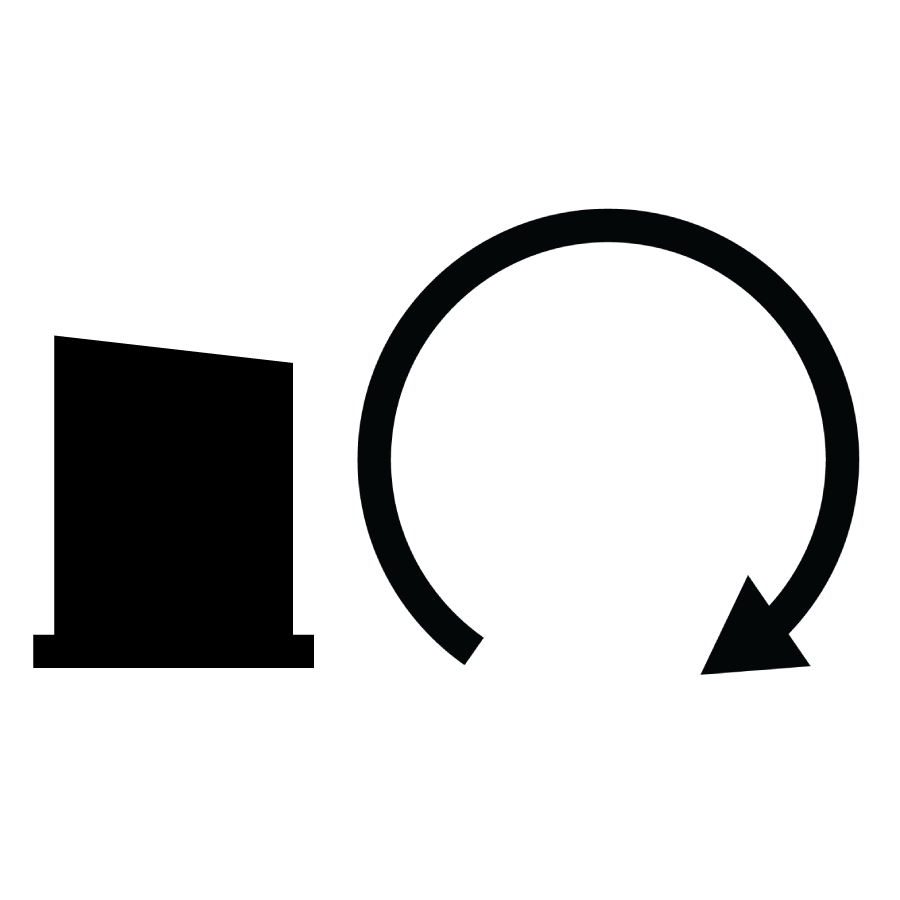
|
RUN |
Push the hazard warning switch to cause all turn signal lights to flash simultaneously. Use this feature to alert others of an emergency or other situation requiring caution.
Press the horn switch to sound the horn.
This vehicle is equipped with a reverse speed limiter system. To gain additional wheel speed while backing, release the throttle and press the override button.
The reverse override button also acts as a MODE button for the digital display when held down for approximately one half second. The override button will not function as a MODE button if the transmission is in reverse.
Push the toggle switch either left or right to activate the corresponding turn signal light. The indicator in the gauge will also flash. Return the toggle to the center position and push it inward to end the signal.
The lights do not operate unless the main key switch is on and the engine stop switch is in the RUN position.
| Switch Position | Function |
|---|---|

|
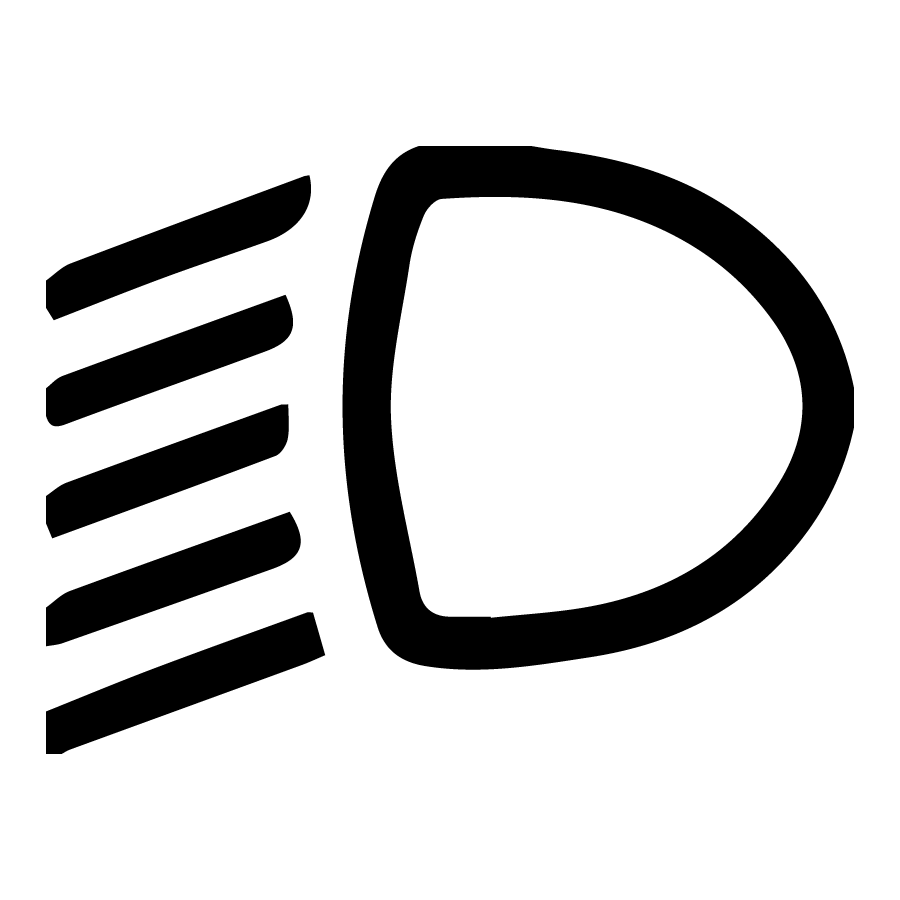
High Beam |
|
Low Beam |
Press this switch with your left forefinger to activate the headlight high beam. The lights will return to low beam when the switch is released.
Failure to check or maintain proper operation of the throttle system can result in an accident if the throttle lever sticks during operation. Always check the lever for free movement and return before starting the engine. Also check occasionally during operation.
Modifications to the electronic throttle control could result in failure to perform as designed, which could result in an accident. Do not attempt to modify the throttle control system or replace it with any aftermarket throttle mechanisms.
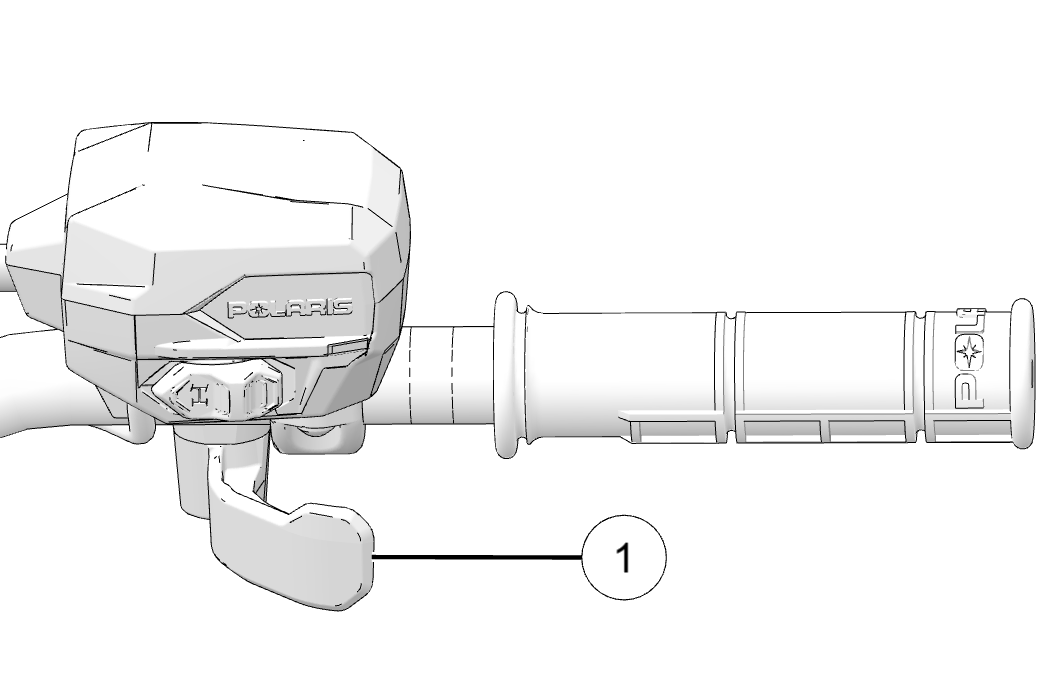
Engine speed and vehicle movement are controlled by pressing the throttle lever 1. The throttle lever is spring loaded. Engine speed returns to idle when the lever is released.
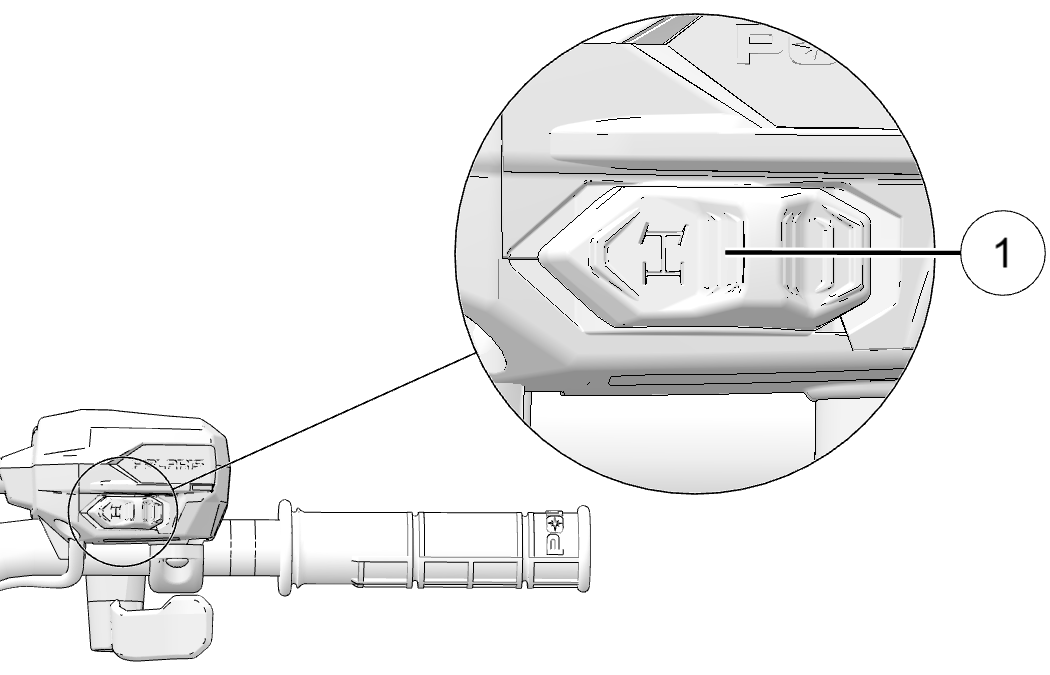
The All Wheel Drive (AWD) system is controlled by the AWD Momentary Switch 1. Use this switch to engage 2x4, AWD, or ADC (if equipped). The vehicle automatically engages AWD when operating in forward or reverse if the switch is set to AWD. For more information, see All Wheel Drive System.
The All Wheel Drive (AWD) system
is controlled by the AWD Momentary Switch 1.
Engage AWD before getting into conditions where
AWD may be needed. If the rear wheels are spinning, release the throttle
before switching to AWD mode.
To engage 2x4 mode, push the momentary switch to the left.
To engage AWD mode, push the momentary switch to the right.
To engage ADC mode (if equipped), push the momentary switch to the right twice.
To engage 2x4 mode, push the momentary switch to the left. AWD will disengage when engine speed slows to below 3100 RPM. The gauge will display “2X4.”
To engage AWD mode, push the momentary switch to the right. AWD will engage when engine speed slows to below 3100 RPM. The gauge will display “AWD.” There is no limit to the length of time the vehicle may remain in AWD. The vehicle automatically engages AWD when operating in forward or reverse if the momentary switch is set to the AWD mode. Once enabled, AWD remains enabled until the AWD mode is turned off. If the AWD mode is turned off while the demand drive unit is moving, it will not disengage until the rear wheels regain traction. When in AWD, the demand drive unit will automatically engage any time the rear wheels lose traction. When the rear wheels regain traction, the demand drive unit will automatically disengage.
To engage ADC mode, push the momentary switch to the right twice. When the switch is on ADC, the ADC system allows engine braking to all four wheels when the vehicle descends a hill or incline. Always engage ADC mode before ascending or descending a hill.
Squeeze the brake lever 1 toward the handlebar to apply the front and rear brakes. These brakes are hydraulically activated disc type brakes that are activated by only one lever. Always test brake lever travel and master cylinder fluid level before riding. When squeezed, the lever should feel firm.
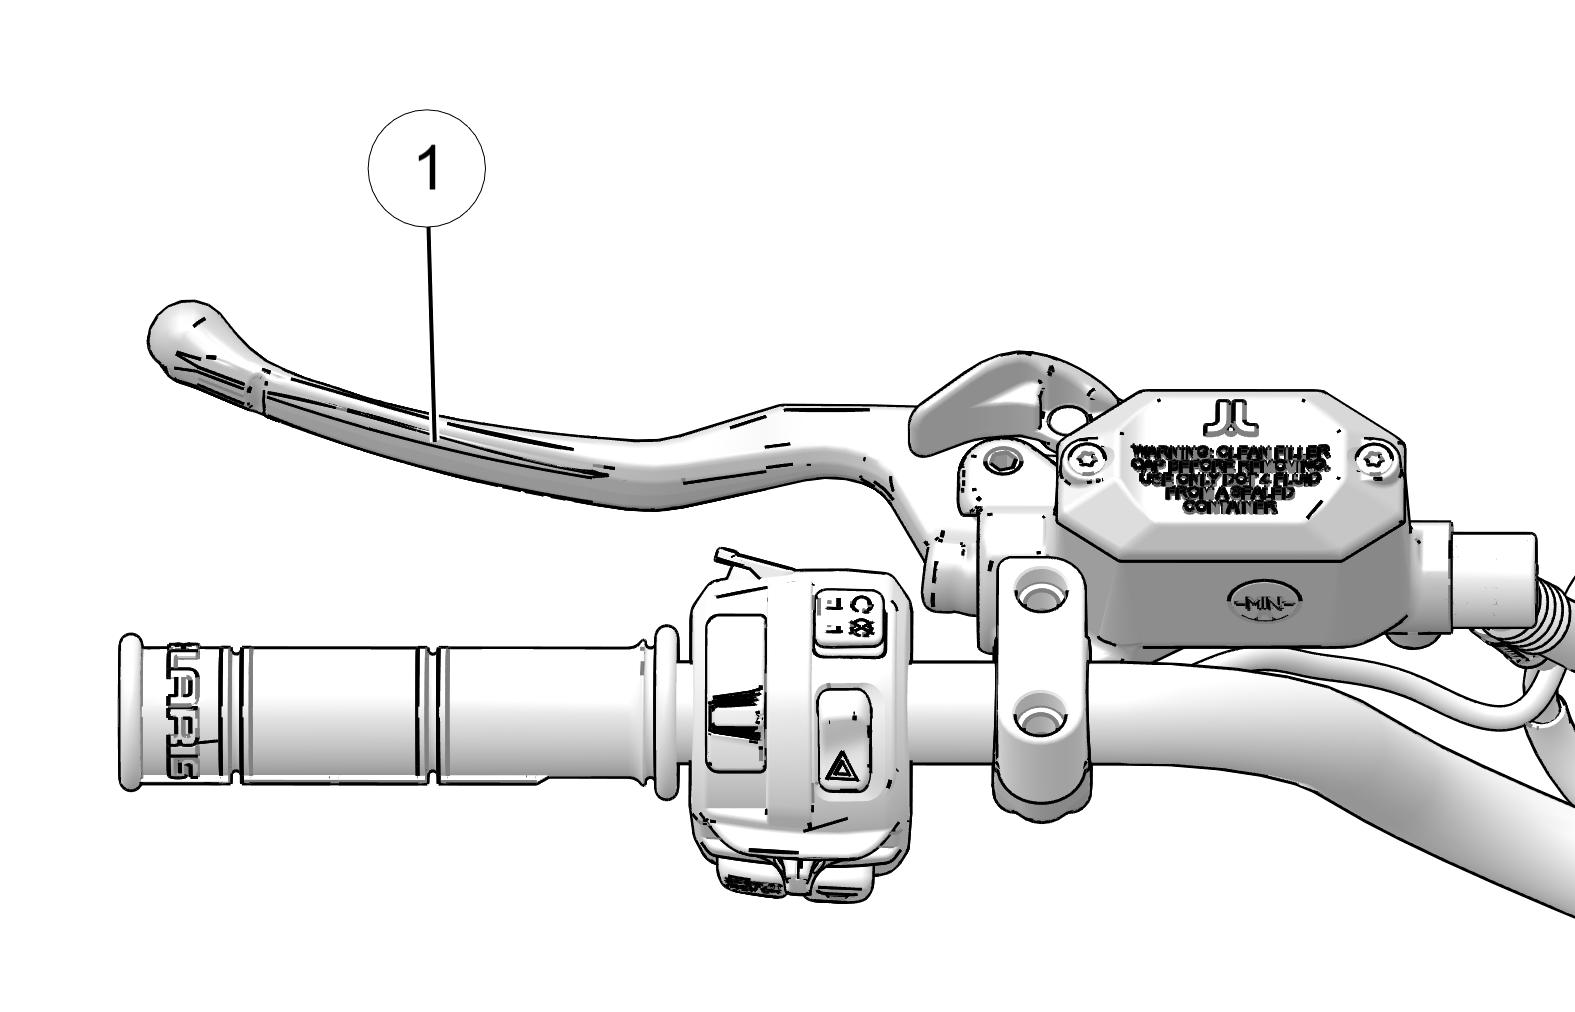
Any sponginess would indicate a possible fluid leak or low master cylinder fluid level, which must be corrected before riding. Contact your Polaris dealer or other qualified service facility for proper diagnosis and repairs.
Never store or use a partial bottle of brake fluid. Brake fluid is hygroscopic, meaning it rapidly absorbs moisture from the air. The moisture causes the boiling temperature of the brake fluid to drop, which can lead to early brake fade and the possibility of brake failure, which could result in an accident. After opening a bottle of brake fluid, always discard any unused portion.
Check the brake fluid in the master cylinder before each ride.
Position the ATV on a level surface.
Position the handlebars so the master cylinder 2 is level.
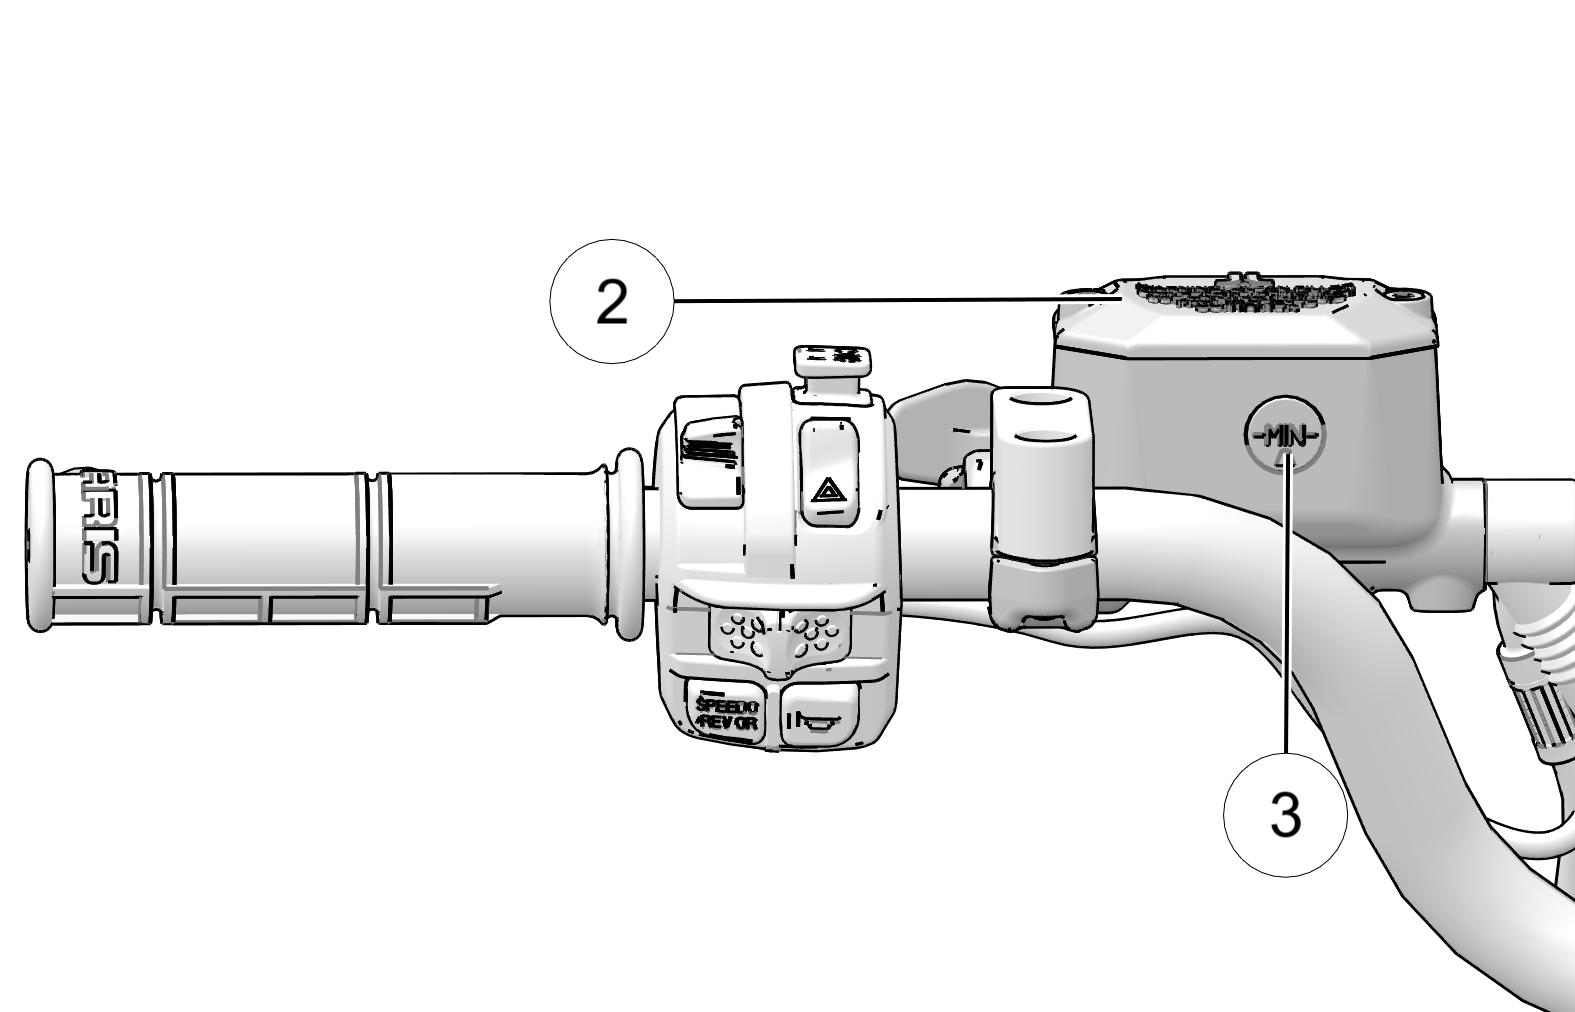
View the brake fluid level through the indicator window 3 on the side of the master cylinder. The window will appear dark when the fluid level is at MAX. When fluid level is at the MIN mark, only the lower half of the indicator will be dark. If the entire indicator window is clear, the master cylinder is empty of fluid.
If fluid level is below the MIN mark, remove the cover screws and add fluid to the fill line. Do not overfill. Use DOT 4 brake fluid only.
Reinstall the cover. Torque screws to specification.
Brake Fluid Cover Screws:
17.7 in-lbs (2 N·m)
To engage the temporary brake lock, do the following:
Place the transmission in PARK (P).
Squeeze and release the brake lever two or three times, then squeeze and hold.
Push the temporary brake lock 4 forward to engage the lock.
Release the brake lever.
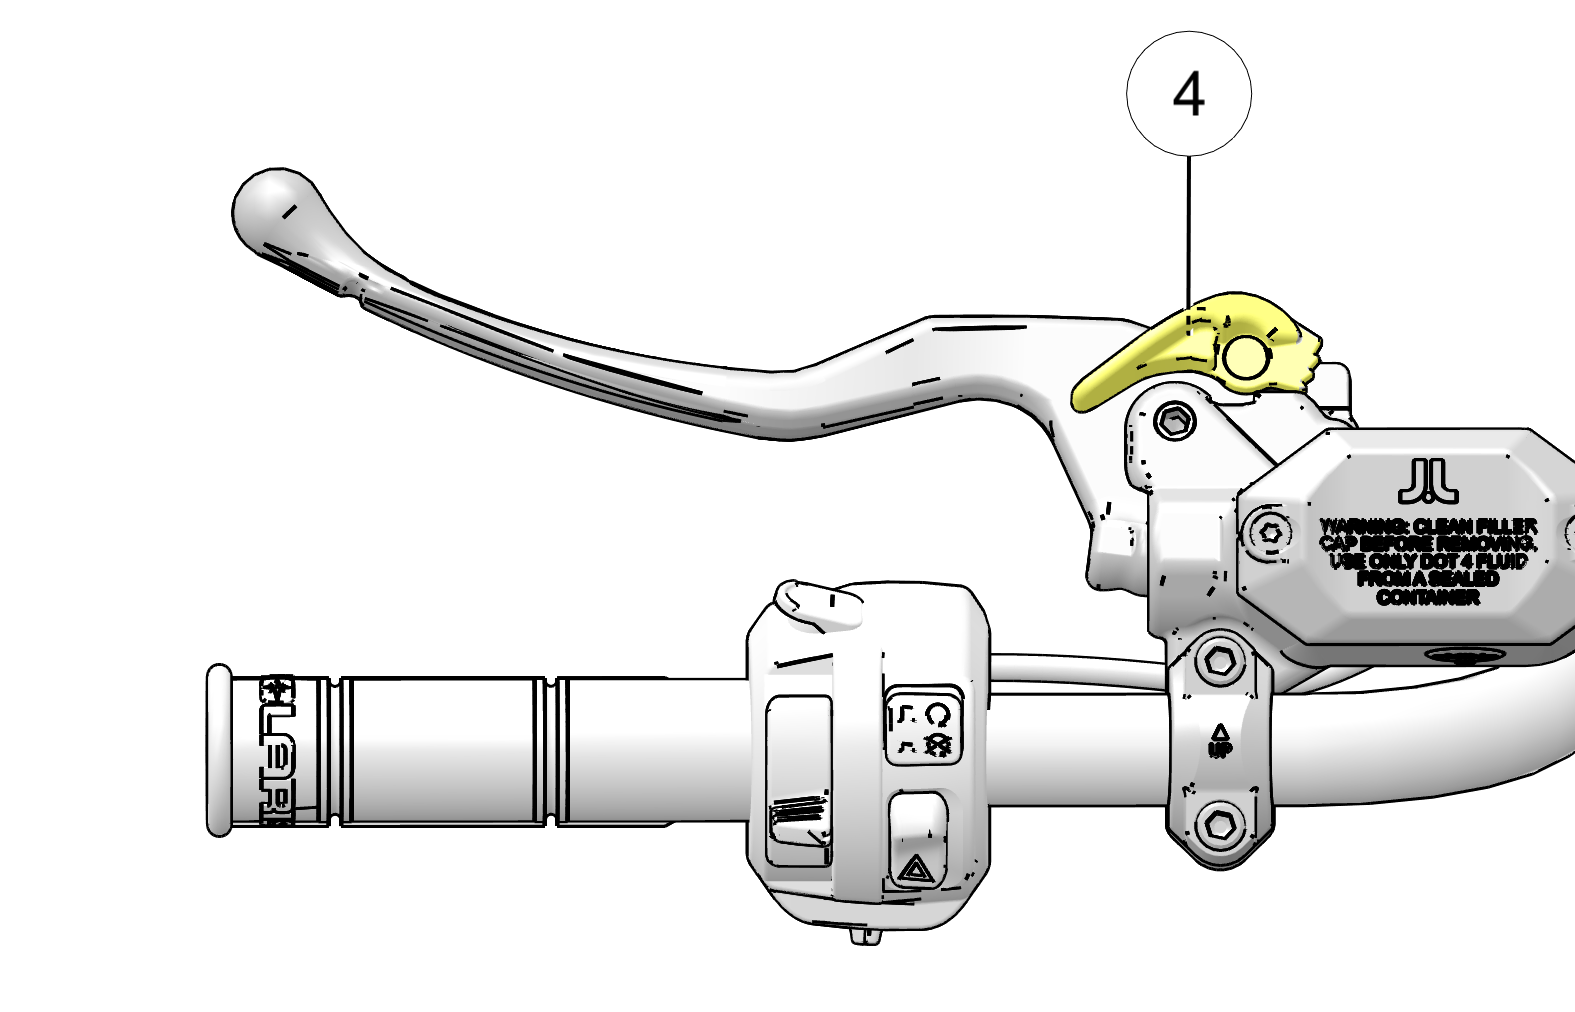
To release the temporary brake lock, squeeze and release the brake lever. It will return to its unlocked position.
The temporary brake lock may relax if left on for a long period of time. Always block the wheels to prevent rolling. Always block the wheels on the downhill side of the ATV if leaving it parked on a hill. Another option is to park the ATV in a sidehill position. Never depend on the temporary brake lock alone if the ATV is parked on a hill.
Use caution when applying the auxiliary brake. Do not aggressively apply the auxiliary brake when going forward. The rear wheels may skid and slide sideways, causing loss of control and serious injury or death.
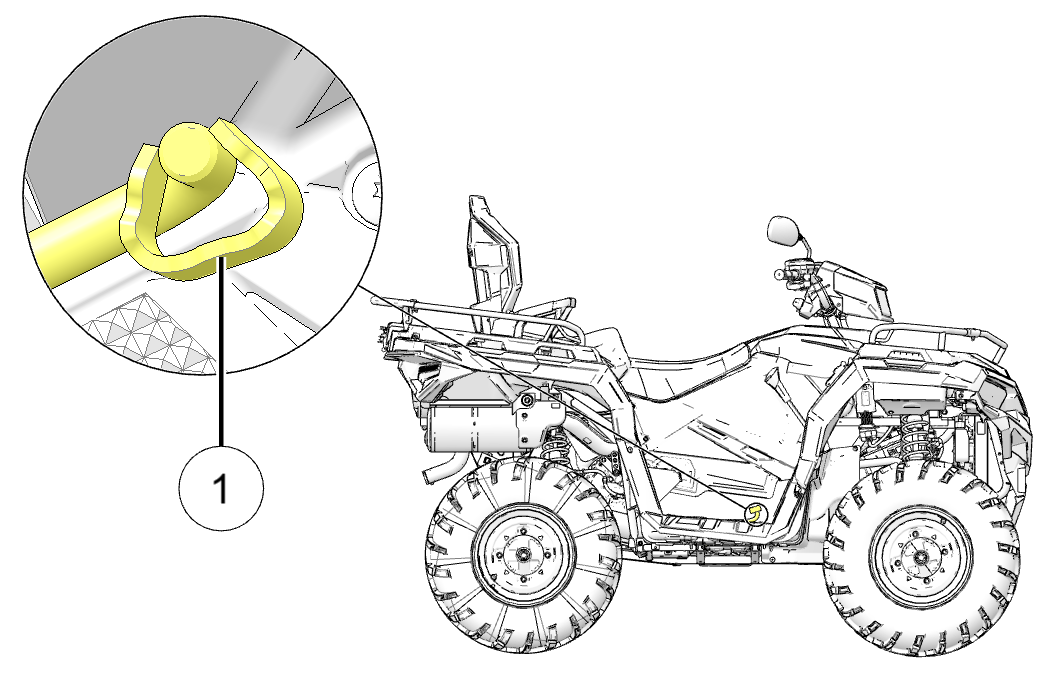
The auxiliary brake system is intended to be used as a backup for the main brake system. Should the main system fail, use the auxiliary foot brake 1.
The auxiliary foot brake is located on the inside of the right footrest. Operate this brake with your right foot. If the rear wheels slide while using the auxiliary brake, reduce brake pedal pressure to brake the rear wheels without skidding.
Check the brake fluid level frequently
for the auxiliary brake system. The reservoir is located under the
seat.
Maintain the fluid level between
the maximum and minimum marks. Use DOT 4 brake fluid only.

This ATV is designed to prevent riders from driving through their brakes or overheating the brake system in the event of a stuck brake. If the brakes are engaged and the system detects pressure on the throttle, power will be limited to the vehicle and a scrolling message will appear on the gauge: “RELEASE BRAKES”.
In the event of this message, do the following:
Bring vehicle to a full stop.
Check the brakes to make sure the brake lever is not stuck and the temporary brake lock is unlocked.
Once brakes are disengaged, the message will clear and the fault will be saved in the historic code.
The transmission gear selector is located on the right side of the vehicle. To shift gears, brake to a complete stop. When the engine is idling, move the lever to the desired gear.
H: High Gear
L: Low Gear
N: Neutral
R: Reverse
P: Park
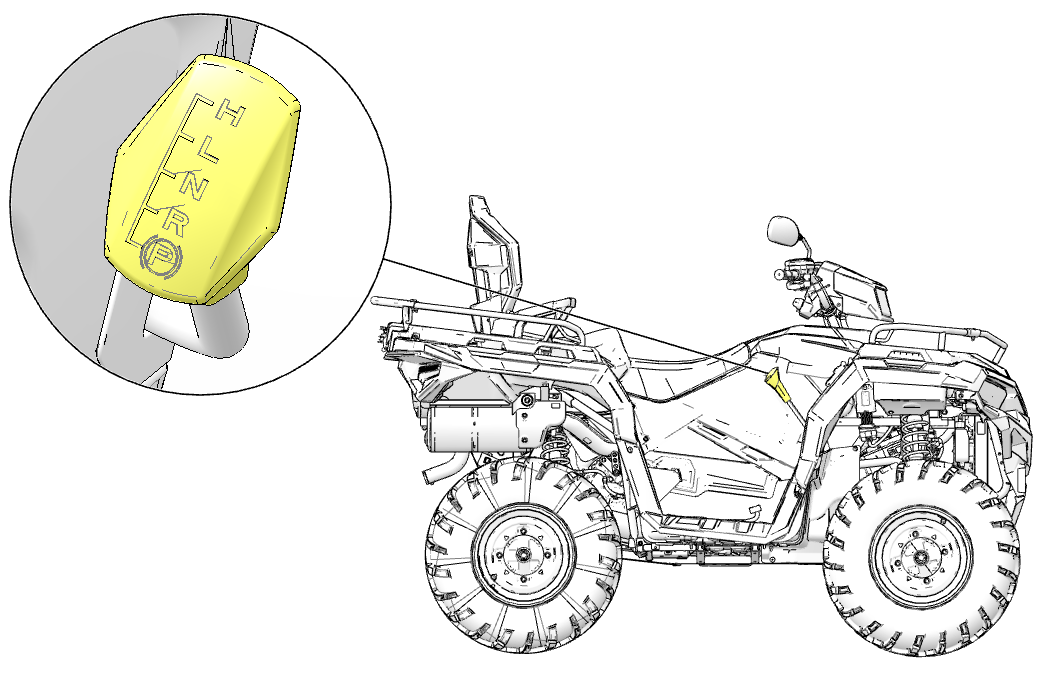
Whenever the ATV is left unattended, always place the transmission in PARK (P) and lock the temporary brake lock.
To extend belt life, use low forward gear when pulling a heavy load at less than 7 mph (11 kph) for extended periods and when operating uphill at a slow speed.
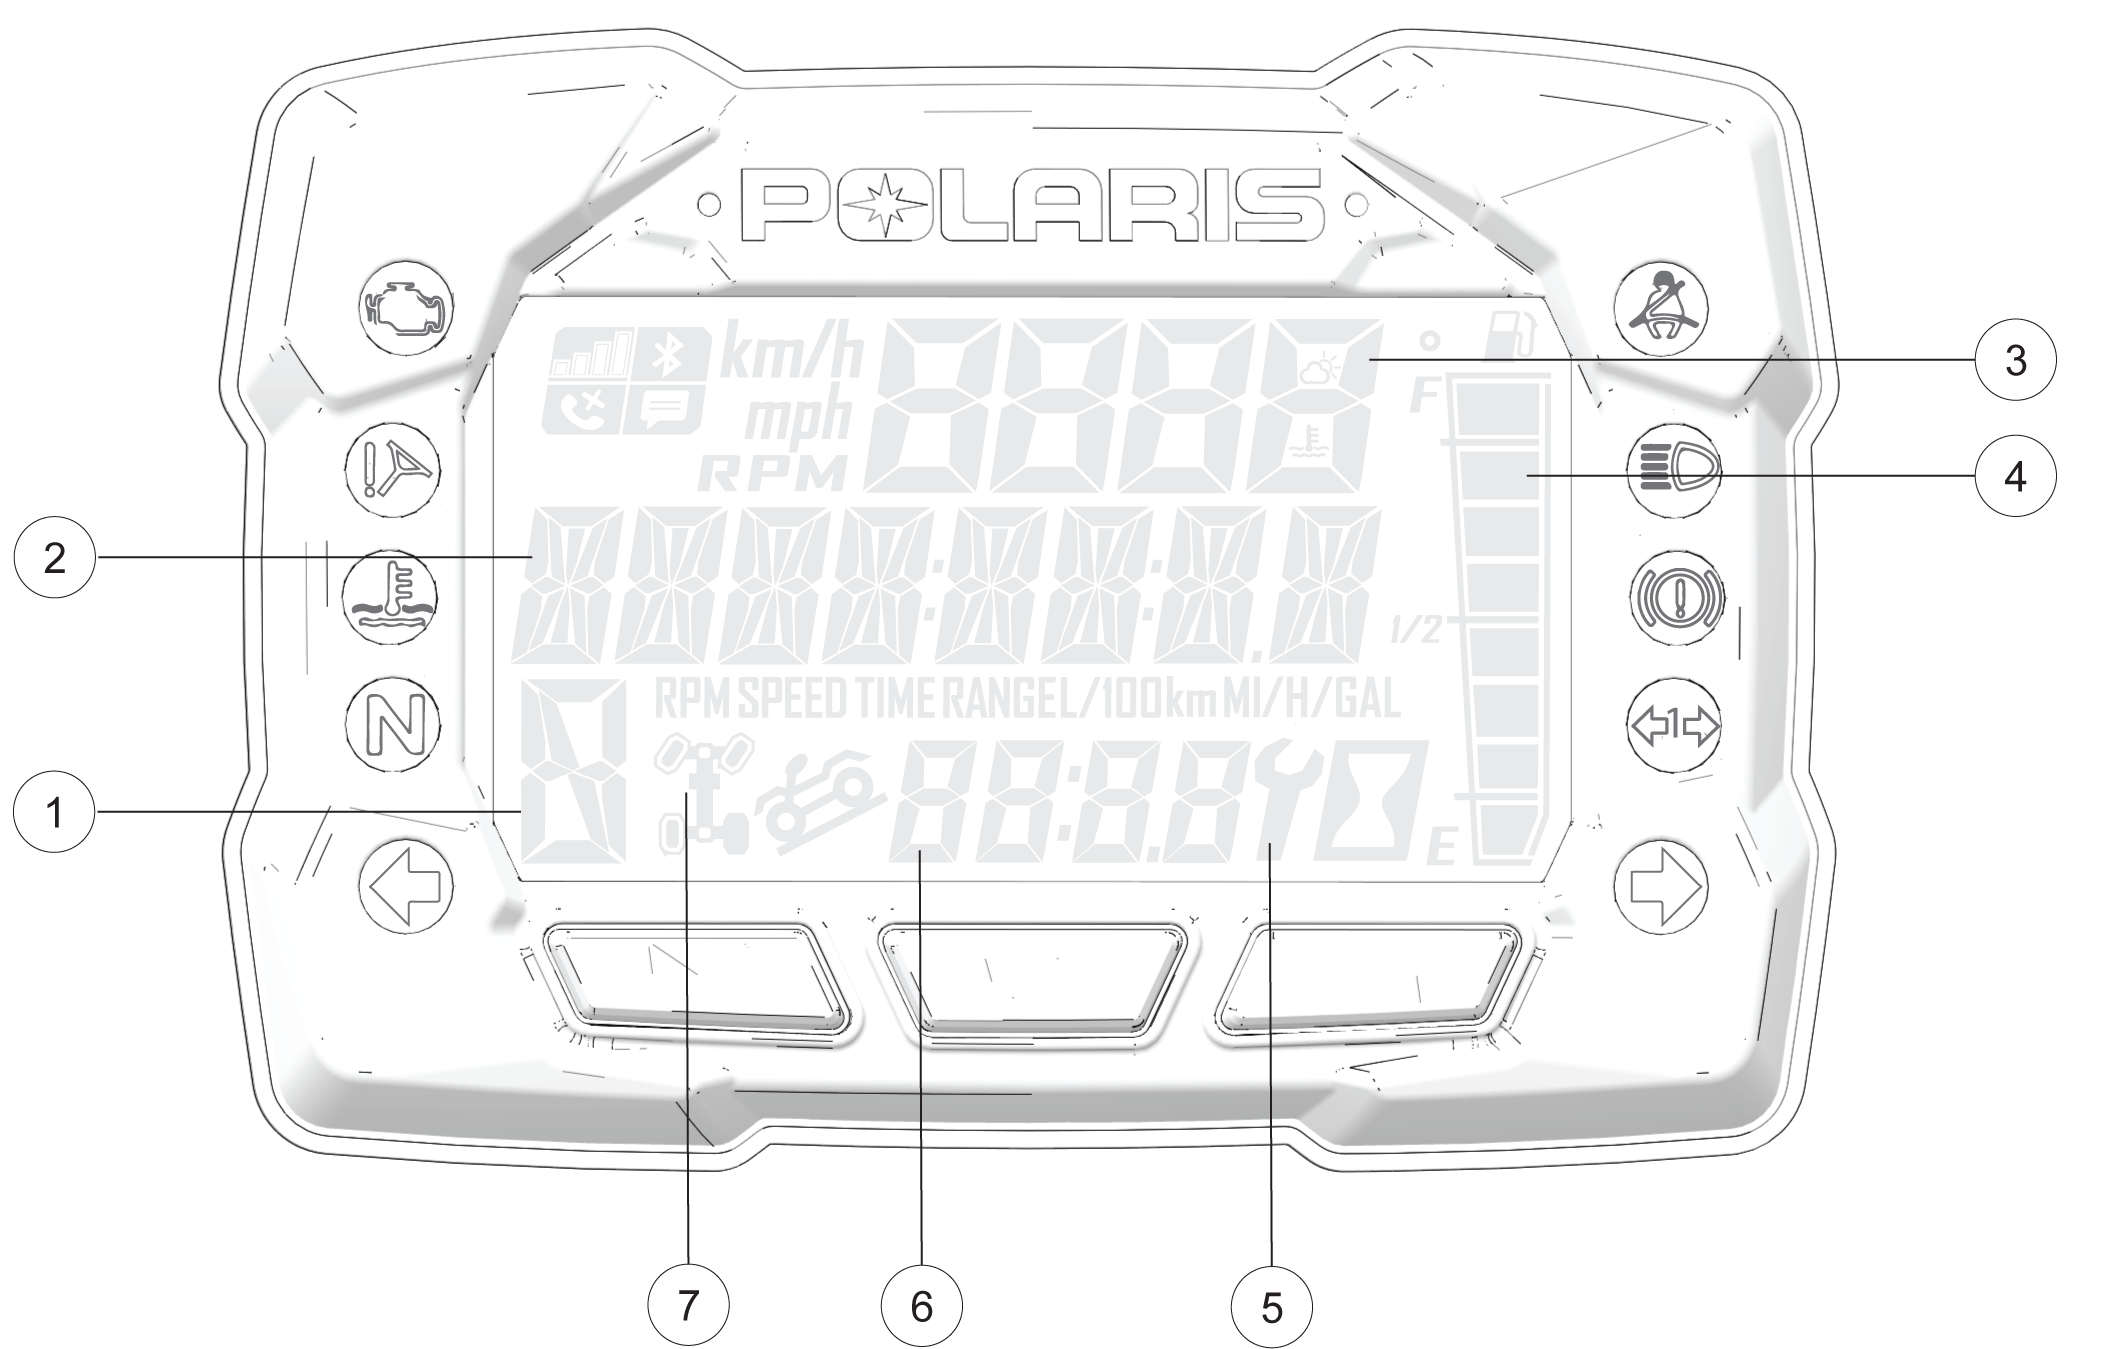
| Display Area | Function |
|---|---|
|
1 Gear Indicator |
H = High Gear L = Low Gear N = Neutral R = Reverse Gear P = Park -- = Gear Signal Error (or shifter between gears) |
|
2 Display Area 2 |
This area displays odometer, trip meter, trip meter 2, voltage, engine temperature, engine hour meter, programmable service hour interval, ground speed, or engine RPM. |
|
3 Display Area 1 |
This area displays engine RPM, ground speed, or coolant temperature. |
|
4 Fuel Gauge |
The segments of the fuel gauge show the level of fuel in the fuel tank. When the last segment clears, a low fuel warning is activated. All segments including the fuel icon will flash. Refuel immediately. |
|
5 Service Indicator |
A flashing wrench symbol alerts the operator that the preset service interval has been reached. Your Polaris dealer can provide scheduled maintenance. See Service Hours for more information. |
|
6 Clock |
The clock displays time in a 12-hour or 24-hour format. |
|
7 Driveline Mode Indicator |
Segments of the indicator illuminate based on driveline mode engaged. |
| Indicator | Icon | Function |
|---|---|---|
|
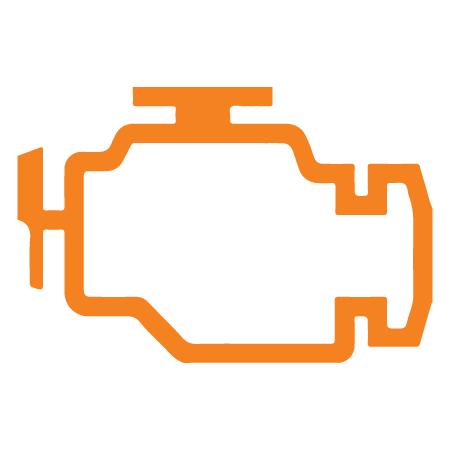
Check Engine |
|
This indicator appears if a fault occurs. Do not operate the vehicle if this warning appears. Serious engine damage could result. Your authorized Polaris dealer can assist. |
|
EPS Warning (if equipped) |

|
This indicator illuminates when a fault has occurred in the EPS system. Your authorized Polaris dealer can assist. |
|
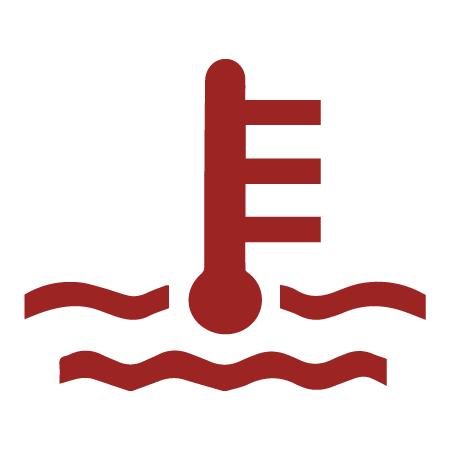
Engine Hot |
|
This lamp illuminates to indicate an overheated engine of at least (111 c). If the indicator flashes, a severe overheating condition exists. Engine shut down will occur at (119 c). |
|
Neutral |

|
This lamp illuminates when the transmission is in neutral and the ignition key is in the ON position. |
|
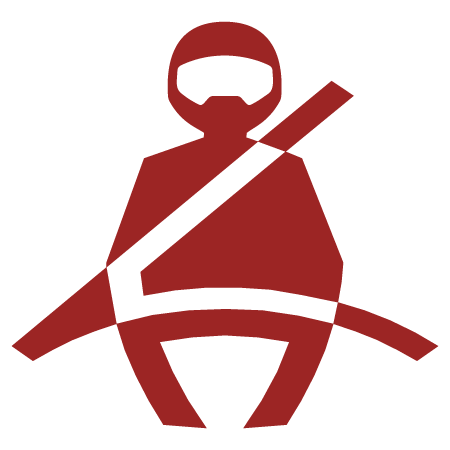
Helmet/Seat Belt |
|
This lamp flashes for several seconds when the key is turned to the ON position. The lamp is a reminder to wear helmet and seat belt (if equipped) before operating. |
|
High Beam |

|
This lamp illuminates when the headlamp switch is set to high beam. |
|
Brake Failure |

|
This lamp illuminates when the Brake System detects a stuck brake while the throttle lever is engaged. This lamp also illuminates when the brake fluid level in the rear brake circuit is too low. Stop the vehicle, check the brake functionality, and verify the brake fluid in the reservoirs. |
|
Trailer Indicator |

|
This indicator illuminates when the trailer turn signals are active. |
Pressing the MODE button will change the information displayed in Area 1 1.
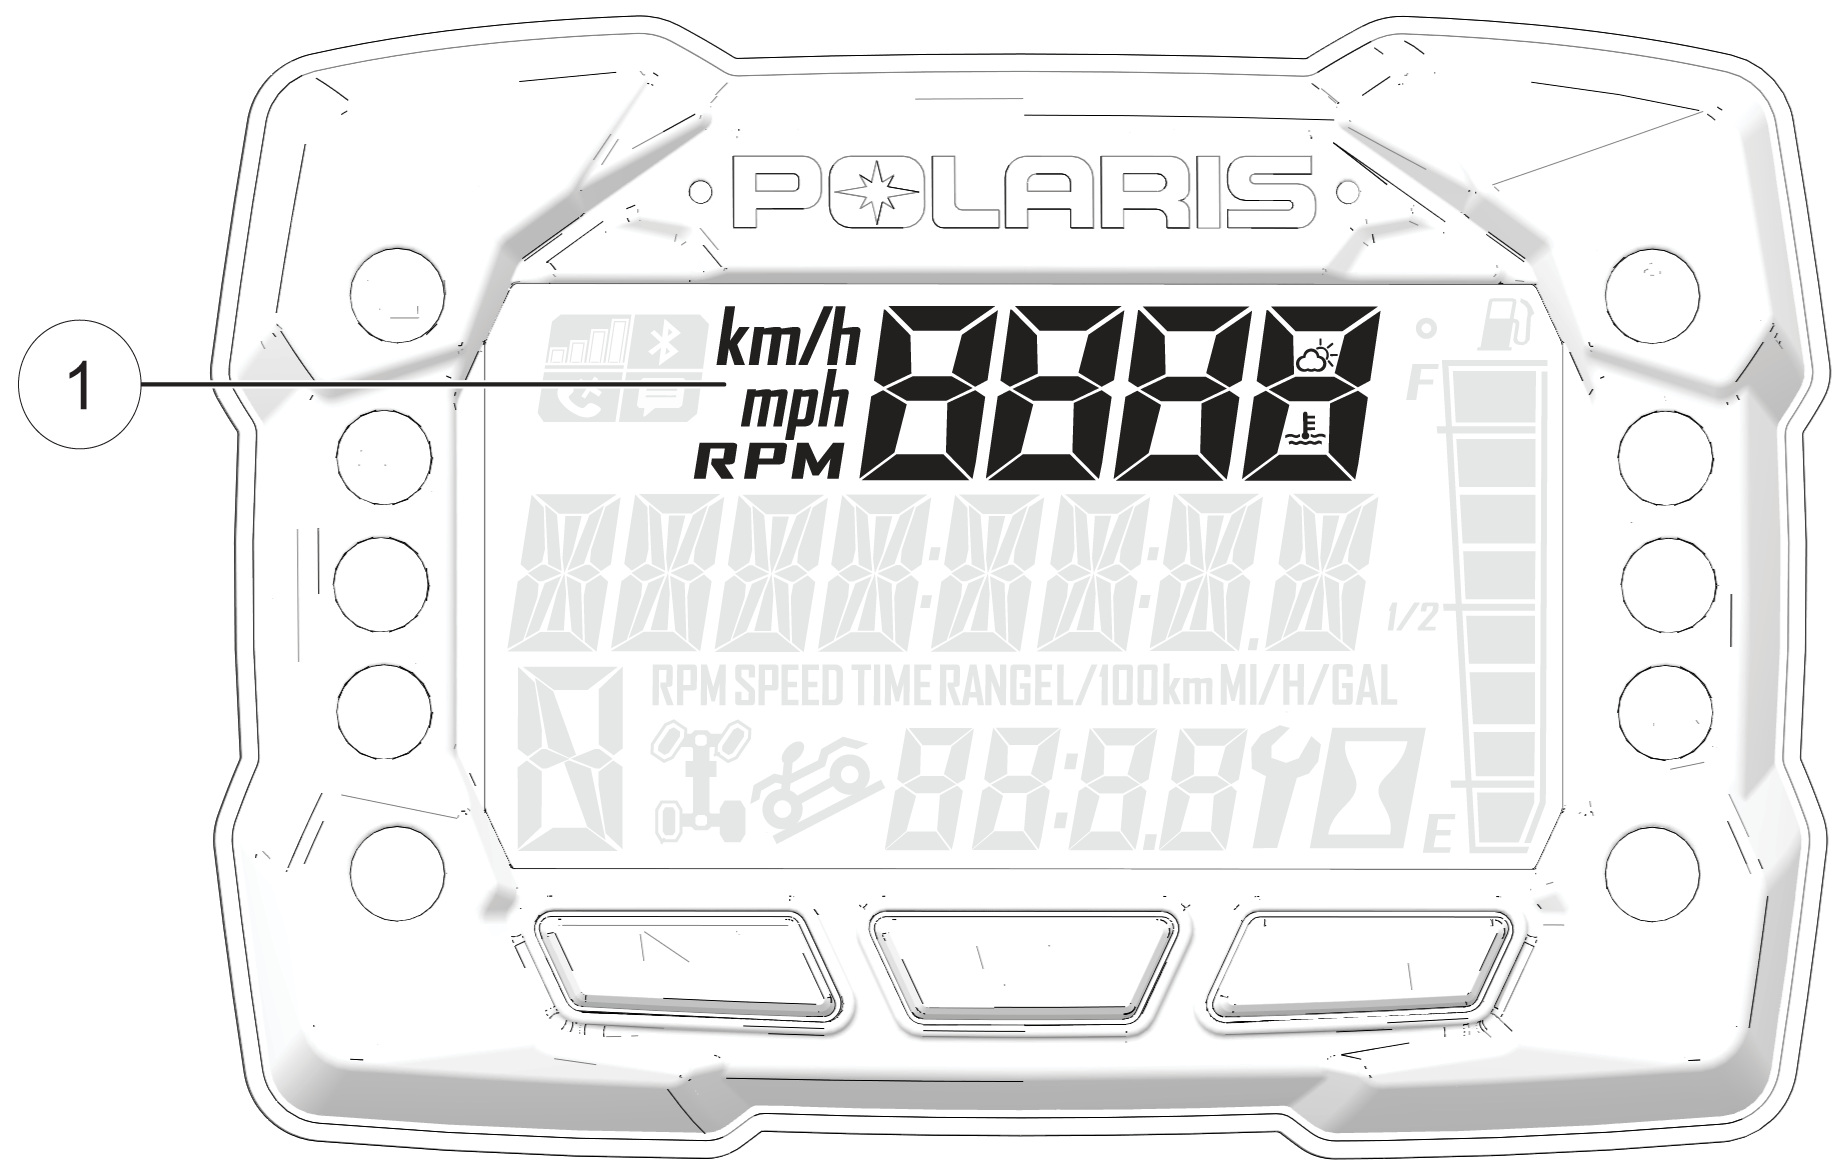
| Display Area 1 | Function |
|---|---|
|
Speed |
The vehicle’s speed will be displayed in mph or km/h. |
|
Engine Temperature |
The vehicle’s current engine temperature will be displayed. |
|
RPM |
The vehicle’s RPM will be displayed. |
Toggle the Up/Down buttons to change the information displayed in Area 2 2.
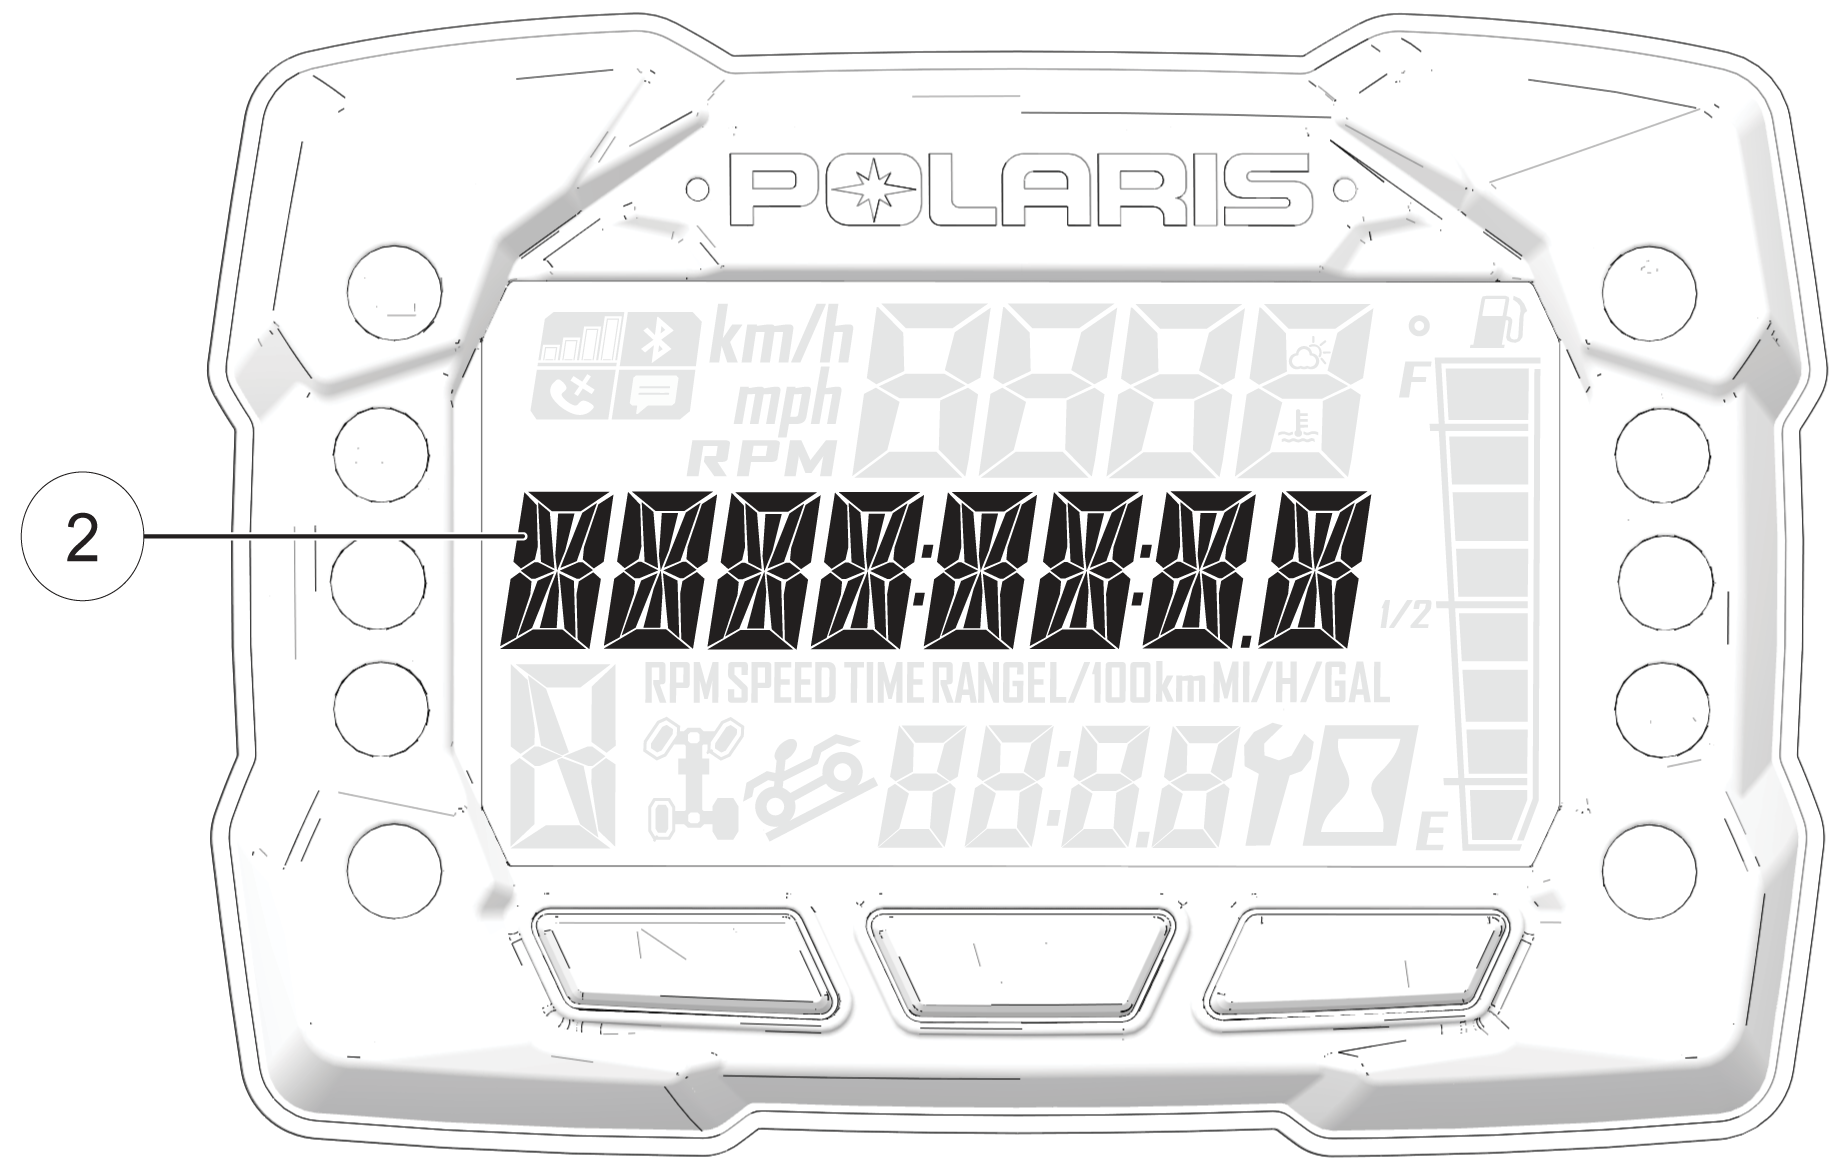
| Display Area 2 | Function |
|---|---|
| Odometer | The vehicle’s odometer reading will be displayed. |
| Engine Temperature | The vehicle Engine Temperature will be displayed. |
| Trip 1 | The vehicle Trip 1 mileage will be displayed. |
| Trip 2 | The vehicle Trip 2 mileage will be displayed. |
| RPM | The vehicle RPM will be displayed. |
| Voltage | The vehicle’s current battery voltage will be displayed. |
| Speed | The vehicle’s current speed will be displayed. |
| Engine Hours | The vehicle’s engine hours will be displayed. |
| Service Hours | The vehicle’s service hours will be displayed. |
From the Options Menu, you can view
diagnostic codes, access the Advanced Menu (if equipped), set the
clock (if equipped), and much more. For a full list of available options,
see below.
To enter the Options Menu,
press and hold the MODE button.
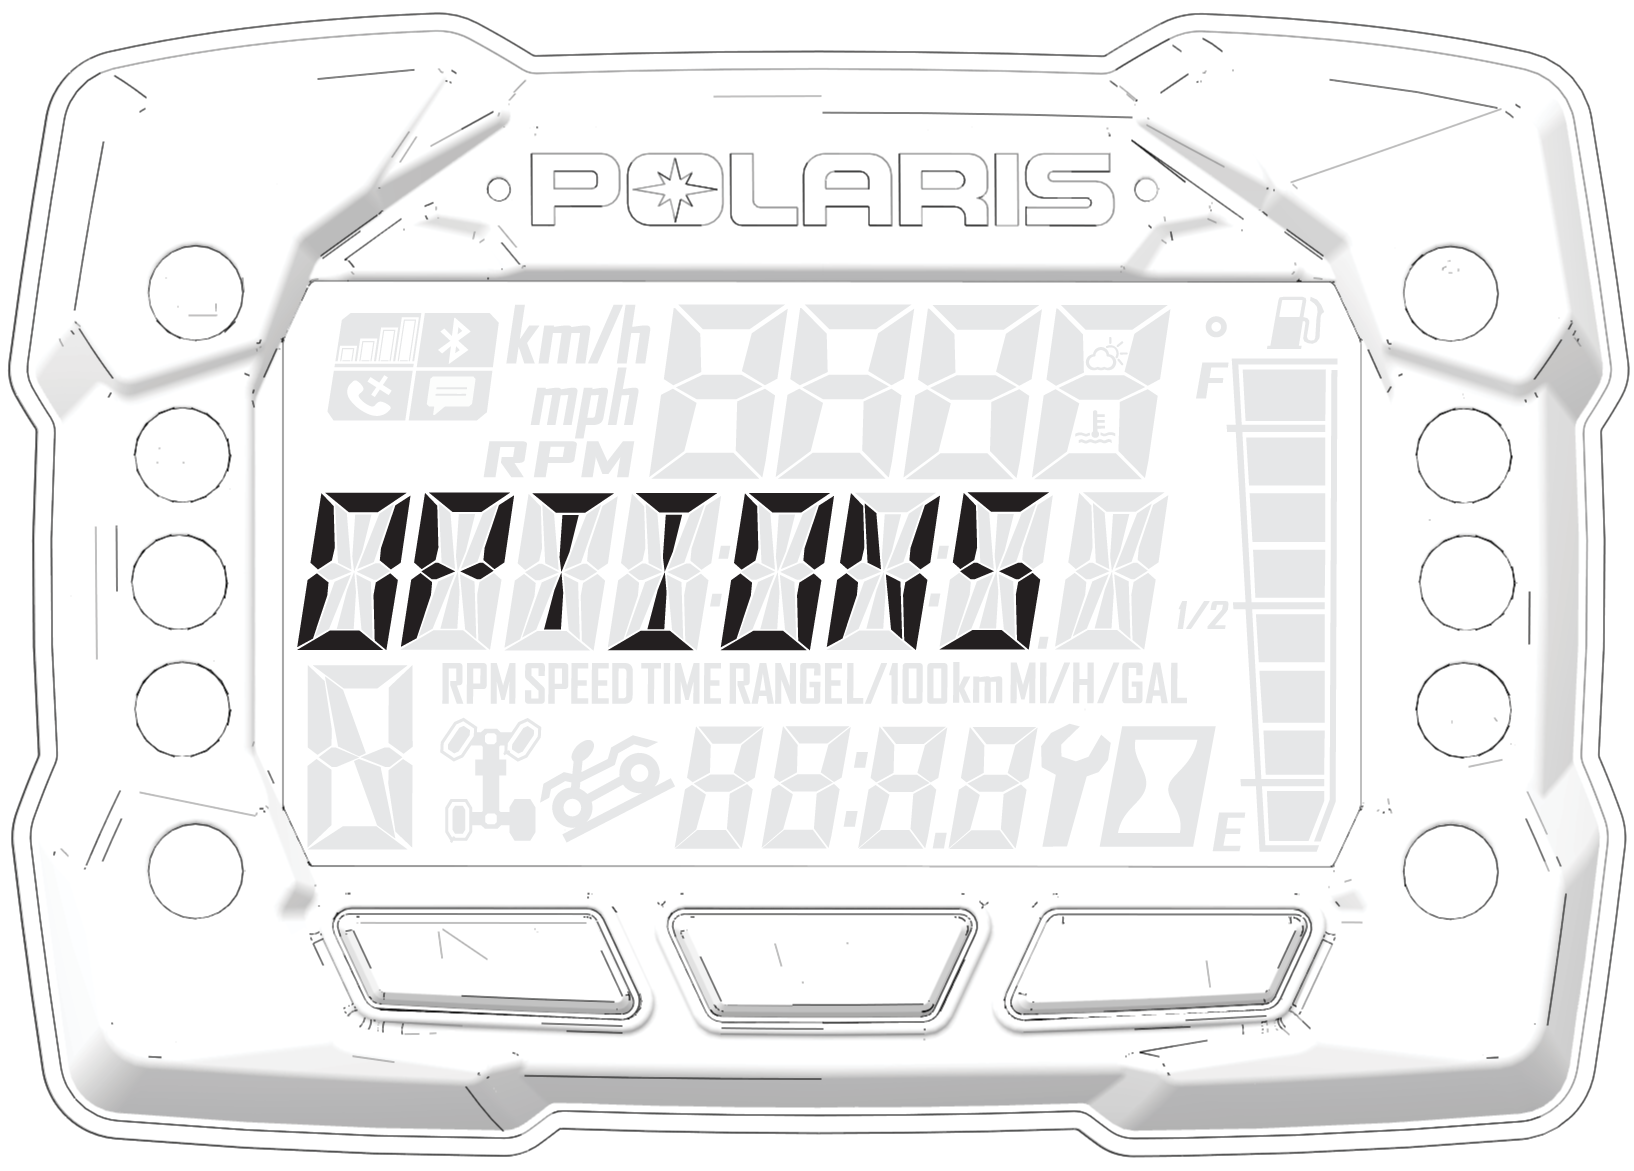
| Options Menu | Notes |
|---|---|
|
Diagnostic Codes |
Only displays if fault codes are present or stored. |
|
Advanced Menu (if equipped) |
Set maximum speed and geofencing settings. |
|
Units - Distance |
Select MPH or KPH. |
|
Units - Temp |
Select between °F and °C. |
|
Clock (if equipped) |
Select between 12H or 24H and set time. |
|
Backlight Color |
Select between Blue or Red. |
|
Backlight Level |
Set backlight brightness level. |
|
Service Hours |
View / set service hours. |
|
Bluetooth® Pairing (if equipped) |
Pair Bluetooth® device. |
|
Electronic Power Steering (EPS) |
Toggles between high, medium, and low EPS assist modes. |
|
Exit Menu |
Exit. |
The Diagnostic Code screen will show an available Malfunction Indicator Lamp (MIL) that has come on during the ignition cycle. To access the Diagnostic Code Screen, do the following:
Press and hold the MODE button to enter the Options Menu. “OPTIONS” will display on the screen for 3 seconds before showing first menu item.
Select “Diagnostic Codes” from the Options Menu by pressing the MODE button.
Toggle the Up/Down Buttons to cycle through code(s).
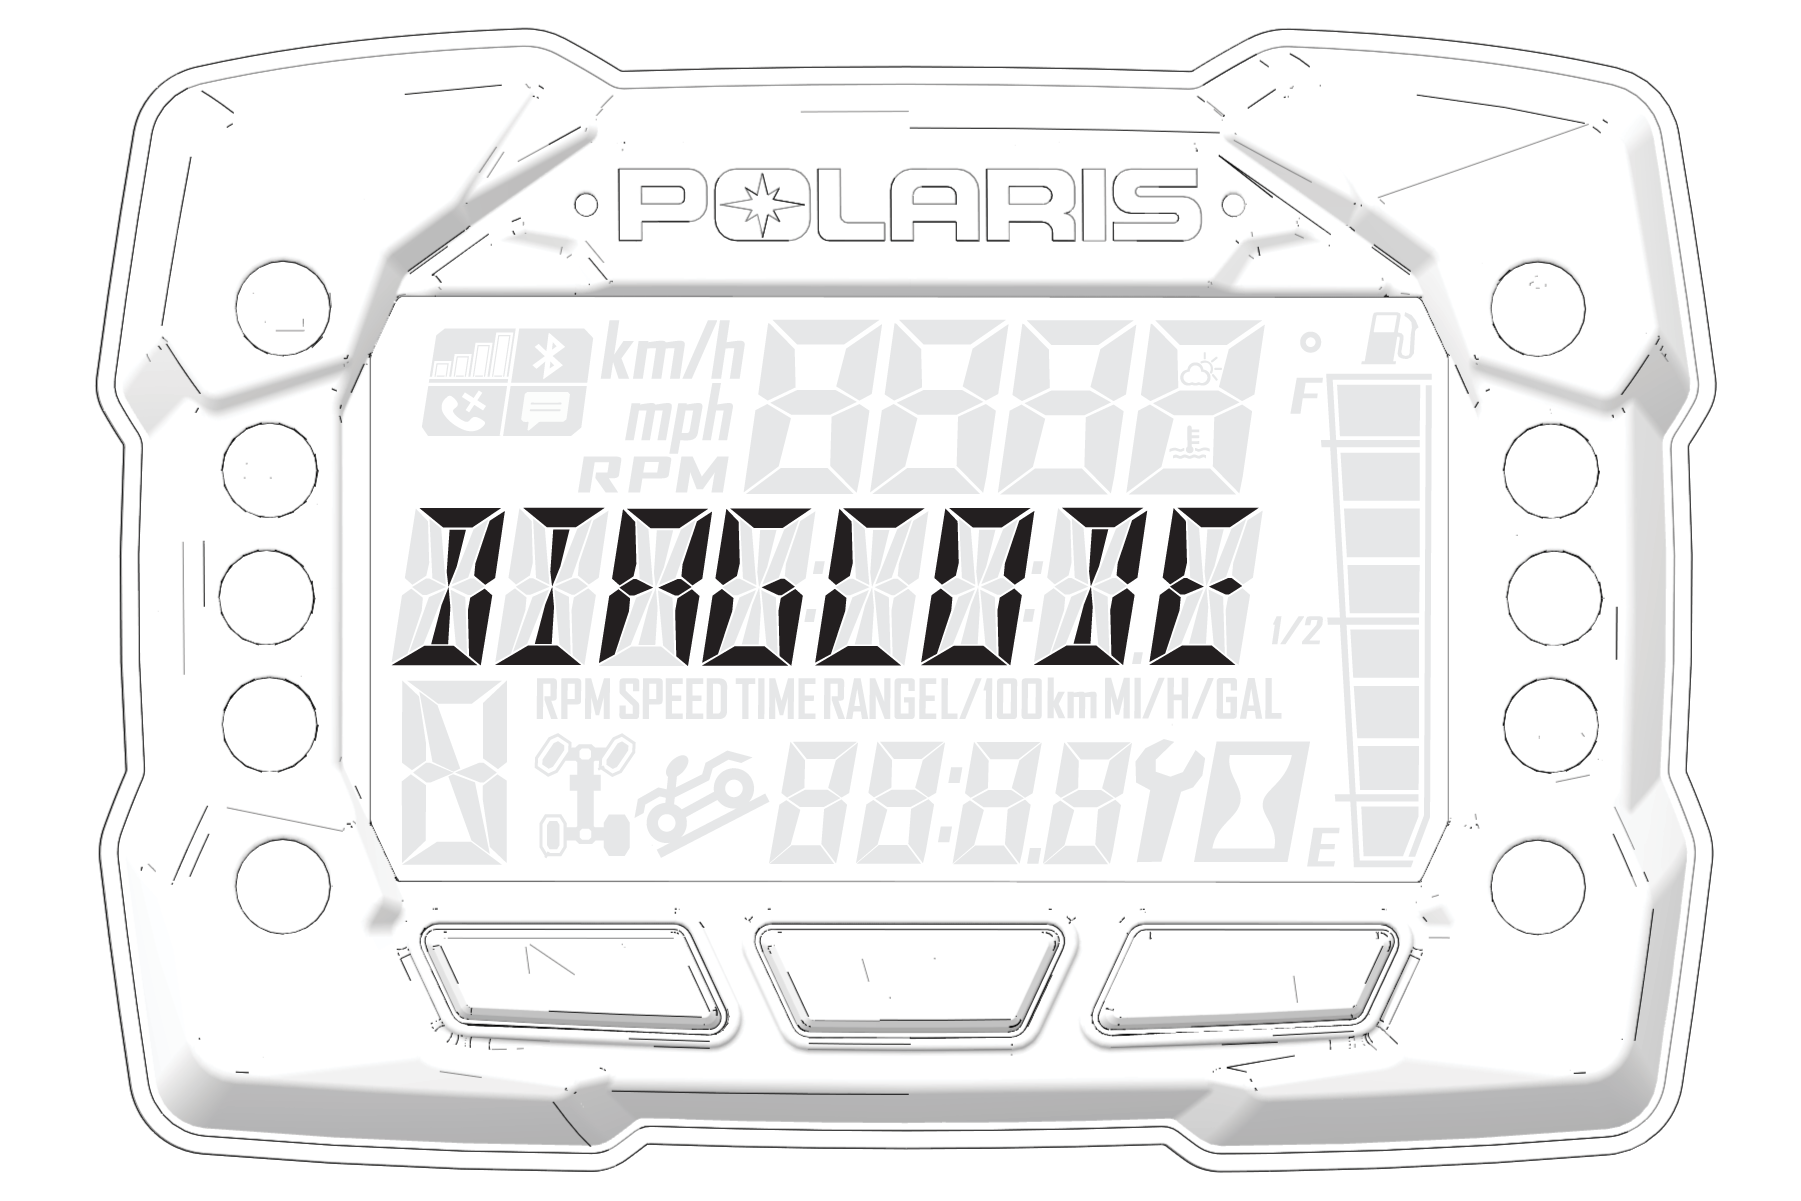
This option will only be available if a fault code was set or is active during the current ignition key ‘on’ cycle. Turning off the ignition will clear any save fault codes from the gauge.
1 Display area 1 will show FMI
2 Display area 2 will show SPN
3 Clock area will show Count
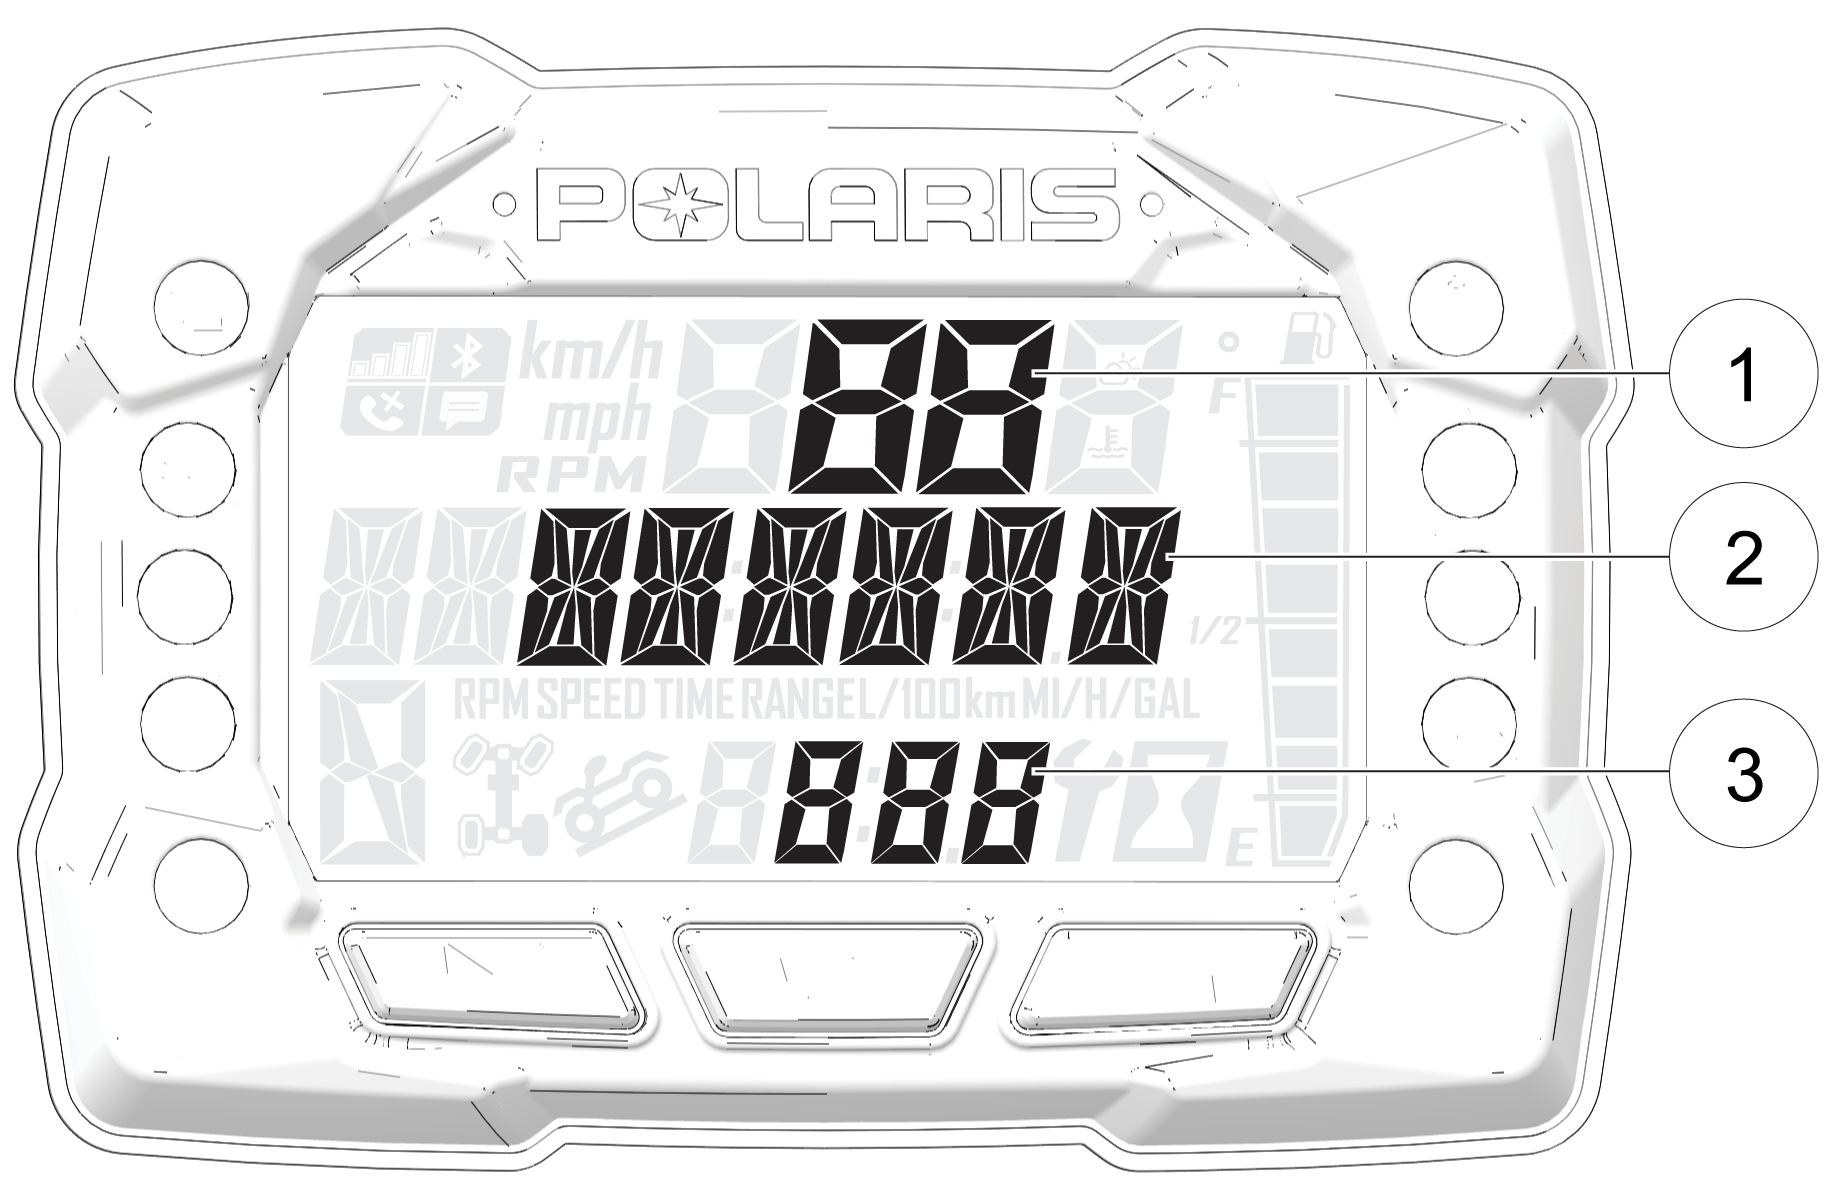
To exit the Options Menu the user can select Exit Menu function from Options Menu, can hold Mode Button and exit out of Options Menu, or not press any button for 10 seconds, which will exit out of the Options Menu.
From the Advanced Menu (if equipped), you can set the maximum speed, enable and disable a geofence, and more. For a full list of available options, see below.
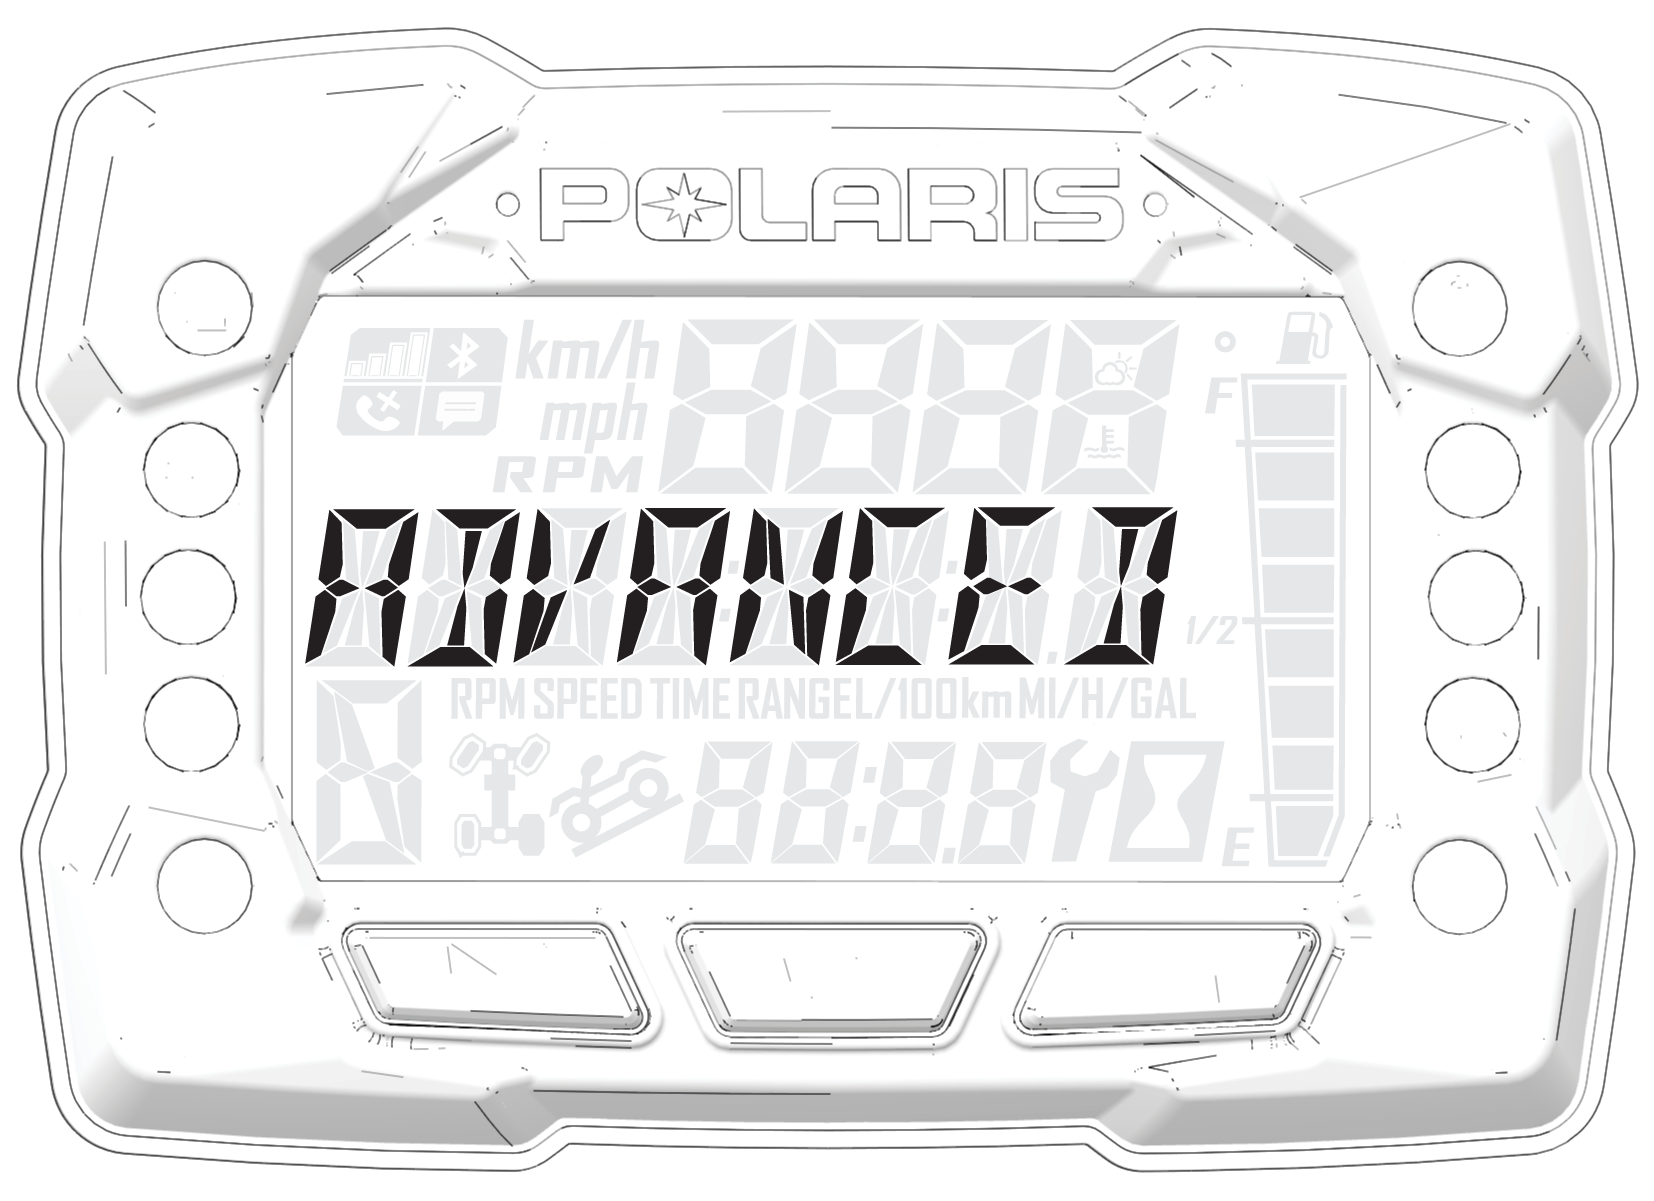
| Advanced Menu | Notes |
|---|---|
|
Maximum Speed (if equipped) |
Set maximum speed. |
|
Geofence (if equipped) |
Enable / disable geofence. |
|
Inside Geofence Speed (if equipped) |
Set inside geofence maximum vehicle speed. |
|
Outside Geofence Speed (if equipped) |
Set outside geofence maximum vehicle speed. |
|
Enter PIN (if equipped) |
Enter PIN. |
|
Require PIN to Start (if equipped) |
Require a PIN to start. |
|
Start PIN Delay (if equipped) |
Start a PIN delay. |
|
Change PIN (if equipped) |
Change PIN. |
|
Exit Menu |
Exit. |
Press and hold the MODE button to enter the Options Menu.
“OPTIONS” will display on the screen for 3 seconds before showing first menu item.
Select “ADVANCED MENU” by pressing the MODE Button.
Enter PIN.
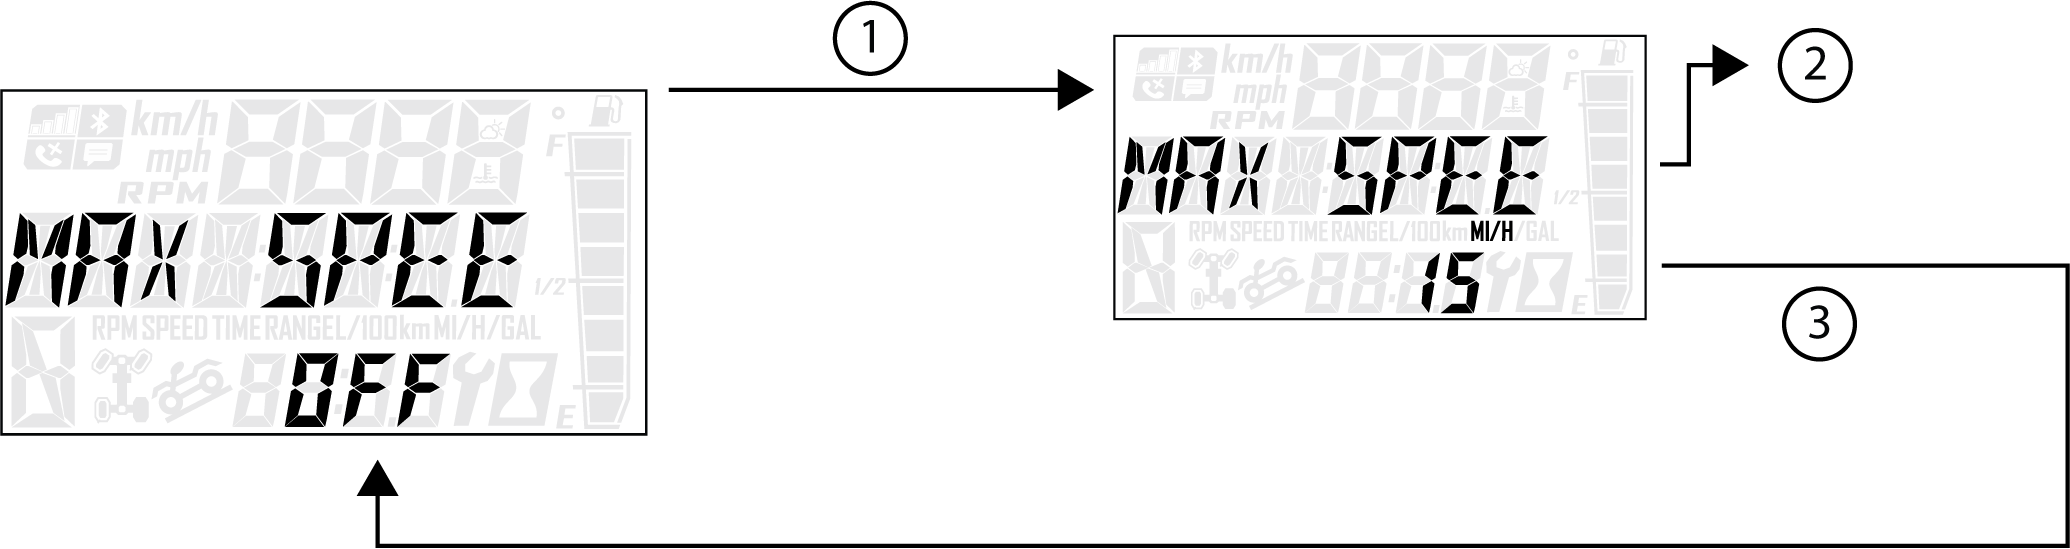
Select “MAX SPEED” from the Advanced Menu by pressing the MODE button.
Reference the image shown above:
1 Press the MODE button.
2 Toggle the Up/Down Buttons to increase/decrease Max Speed.
3 With the desired Max Speed displayed, press the MODE button which will set the Max Speed and return to the Advanced Menu.
To exit the Advanced Menu the user can select Exit Menu function from Advanced Menu, can hold MODE Button and exit out of Advanced Menu, or not press any button for 10 seconds, which will exit out of the Options Menu.
Before you can use the geofencing features, you must first download the Polaris Ride Command app from the Apple App Store® or Google Play® and create an account. Enabling and disabling a geofence, as well as changing the minimum and maximum speeds, can be done using the vehicle display after a geofence boundary has been created through the Ride Command app.
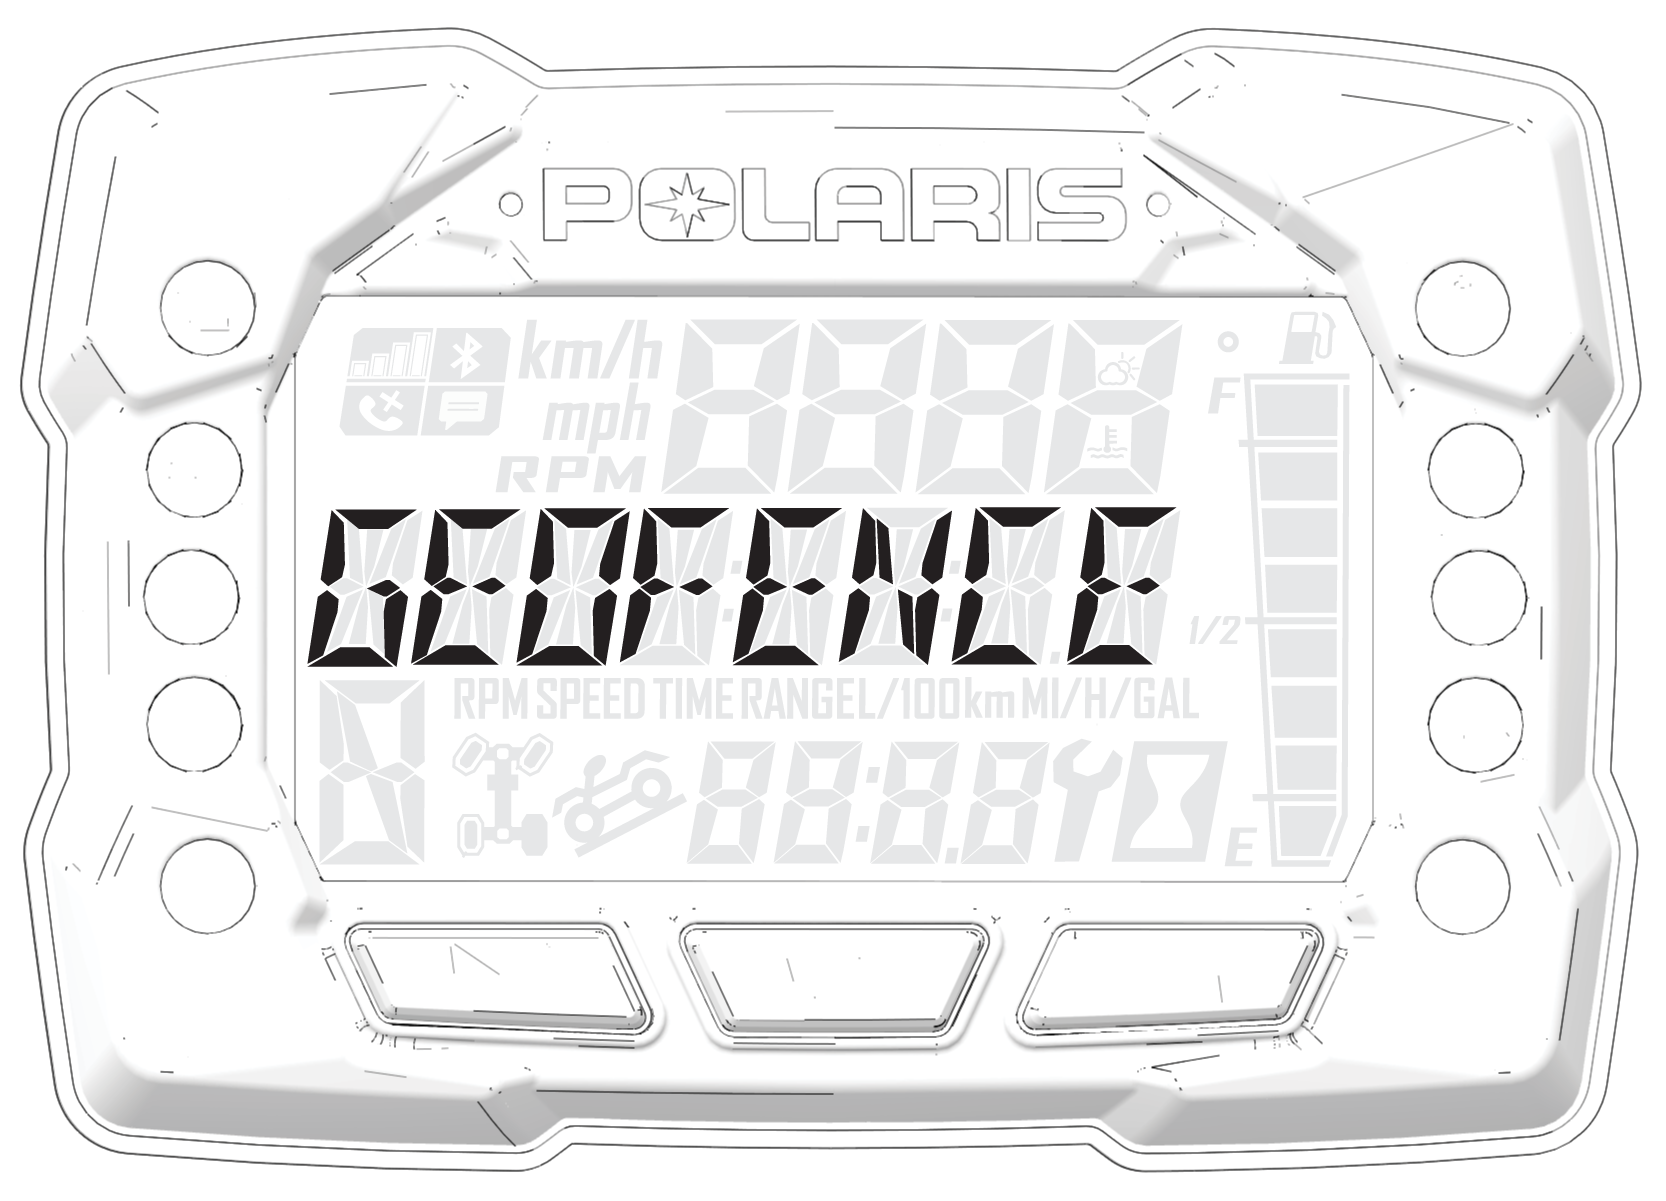
To access the geofencing features, do the following:
Press and hold the MODE button to enter the Options Menu.
“OPTIONS” will display on the screen for 3 seconds before showing first menu item.
Select “ADVANCED MENU” by pressing the MODE button.
Enter PIN.
Select “GEOFENCE” from the Advanced Menu by pressing the MODE button.
Toggle the Up/Down buttons to cycle through options (On/Off).
With the desired option displayed, press the MODE button which will set function and return to the Advanced Menu.
To exit the Advanced Menu, select Exit Menu. You can also hold the Mode Button, or not press any button for 10 seconds, to exit the Advanced Menu.
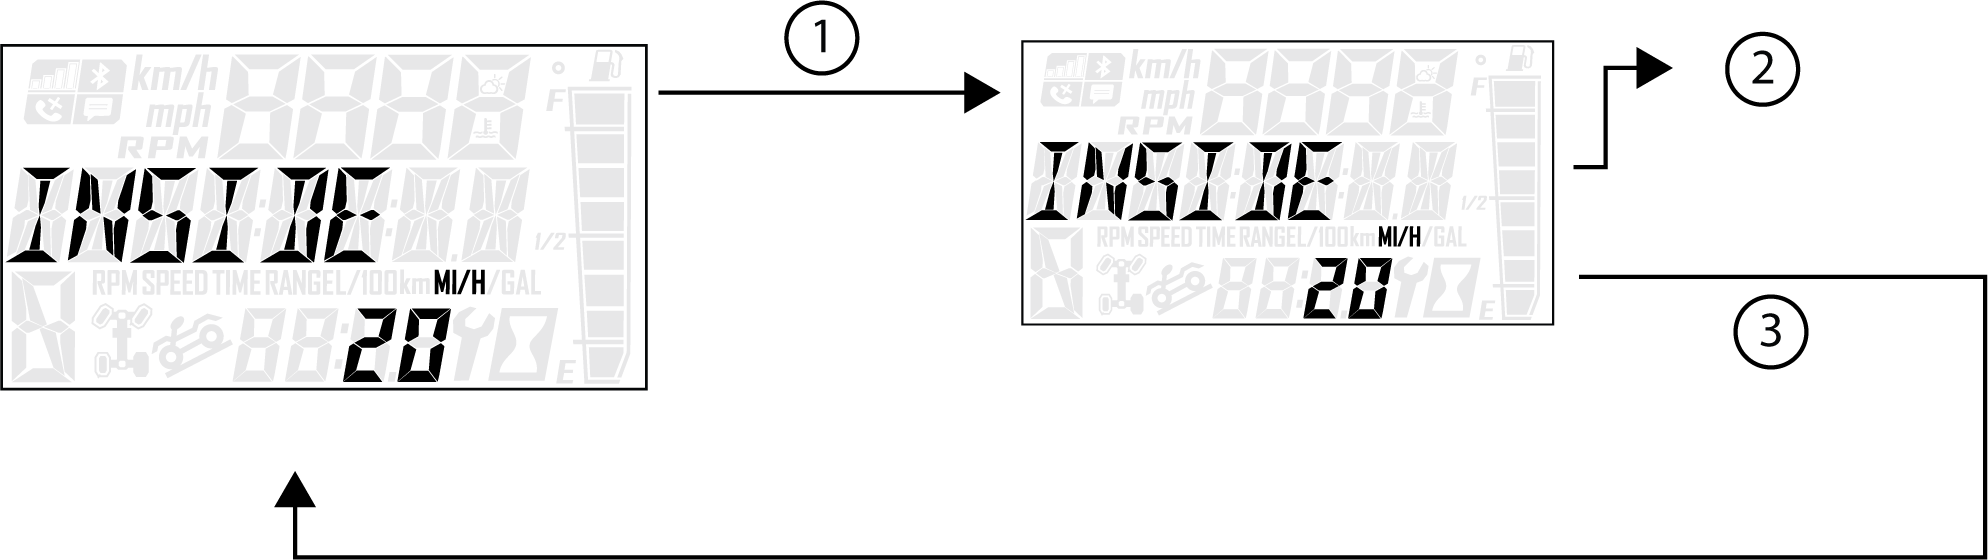
Press and hold the MODE button to enter the Options Menu.
“OPTIONS” will display on the screen for 3 seconds before showing first menu item.
Select “ADVANCED MENU” by pressing the MODE button.
Enter PIN.
Select “INSIDE GEOFENCE SPEED” from the Advanced Menu by pressing the MODE button.
Reference the image shown above:
1 Press the MODE button.
2 Toggle the Up/Down buttons to increase/decrease Inside Geofence Maximum Speed.
3 With the desired speed displayed, press the MODE button which will set the Inside Geofence Speed and return to the Advanced Menu.
To exit the Advanced Menu the user can select Exit Menu function from Advanced Menu, can hold MODE button and exit out of Advanced Menu, or not press any button for 10 seconds, which will exit out of the Options Menu.
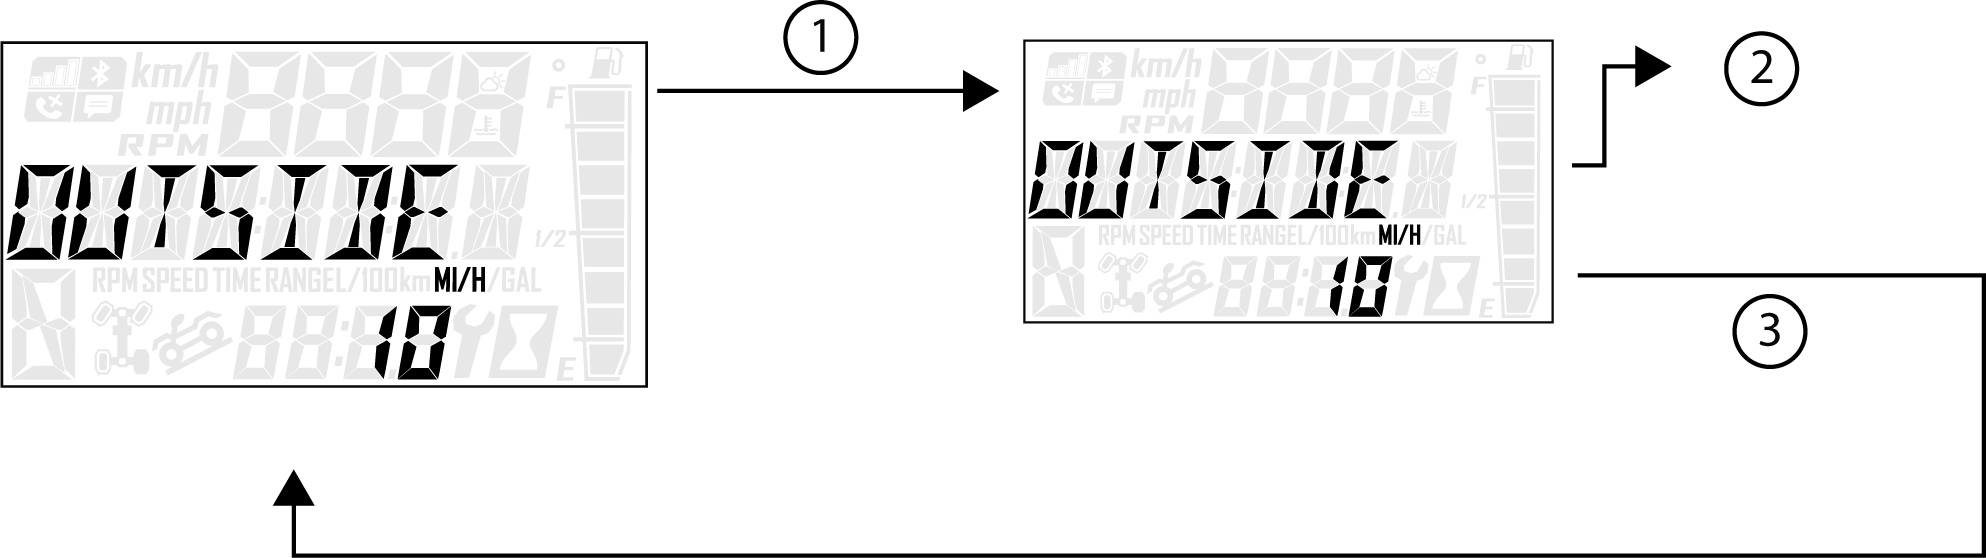
Press and hold the MODE button to enter the Options Menu.
“OPTIONS” will display on the screen for 3 seconds before showing first menu item.
Select “ADVANCED MENU” by pressing the MODE button.
Enter PIN.
Select “OUTSIDE GEOFENCE SPEED” from the Advanced Menu by pressing the MODE button.
Reference the image shown above:
1 Press the MODE button.
2 Toggle the Up/Down Buttons to increase/decrease Outside Geofence Maximum Speed.
3 With the desired speed displayed, press the mode button which will set the Outside Geofence Speed and return to the Advanced Menu.
To exit the Advanced Menu the user can select Exit Menu function from the Advanced Menu, can hold Mode button and exit out of Advanced Menu, or not press any button for 10 seconds, which will exit out of the Options Menu.
Press and hold the MODE button to enter the Options Menu.
“OPTIONS” will display on the screen for 3 seconds before showing first menu item.
Select “ADVANCED MENU” by pressing the MODE button.
Enter PIN.
To exit the Advanced Menu the user can select Exit Menu function from Advanced Menu, can hold MODE button and exit out of Advanced Menu, or not press any button for 10 seconds, which will exit out of the Options Menu.
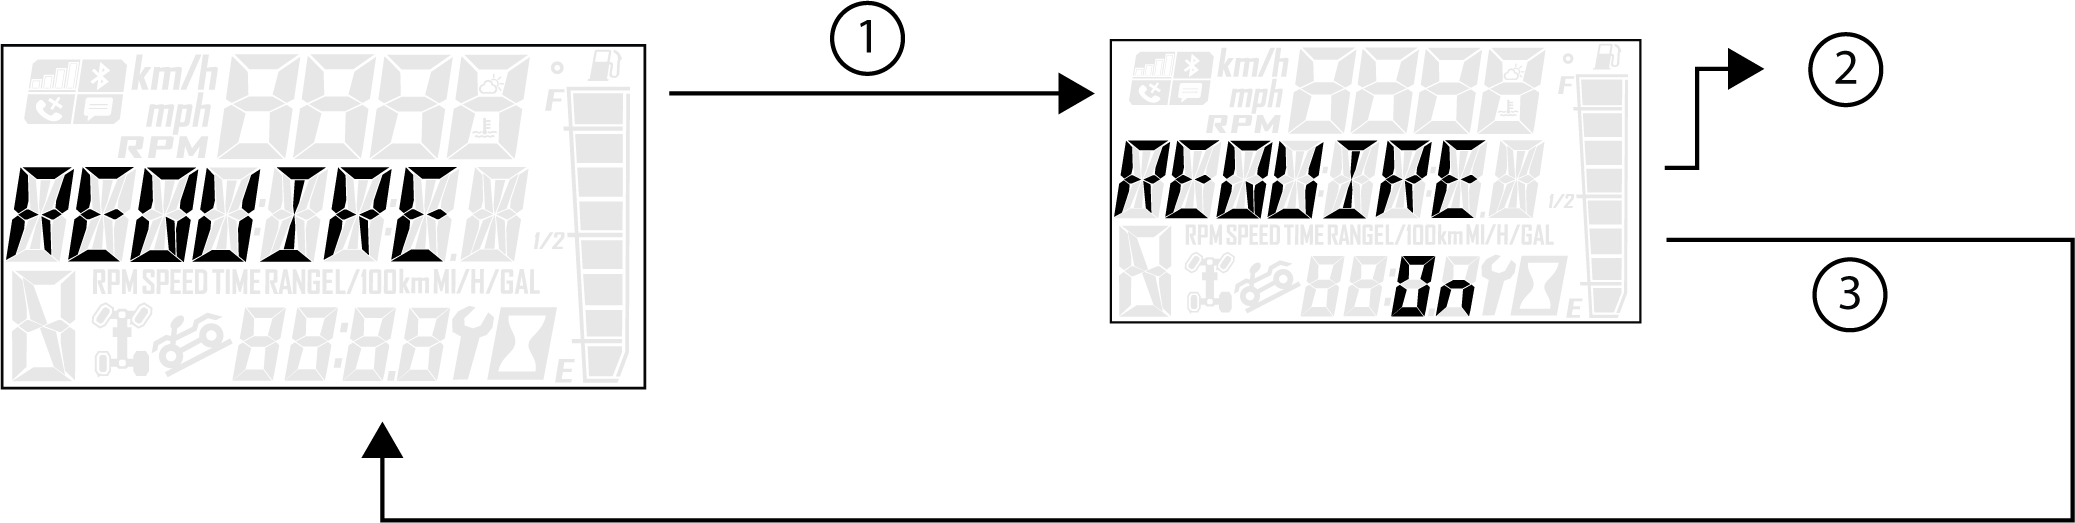
Press and hold the MODE button to enter the Options Menu.
“OPTIONS” will display on the screen for 3 seconds before showing first menu item.
Select “ADVANCED MENU” by pressing the MODE button.
Enter PIN.
Select “REQUIRE PIN TO START” from the Advanced Menu by pressing the MODE button.
Reference the image shown above:
1 Press the MODE button.
2 Toggle the Up/Down buttons to enable/disable requiring PIN to start vehicle.
3 With the desired option displayed, press the MODE button which will set the function and return to the Advanced Menu.
To exit the Advanced Menu the user can select Exit Menu function from Advanced Menu, can hold MODE button and exit out of Advanced Menu, or not press any button for 10 seconds, which will exit out of the Options Menu.
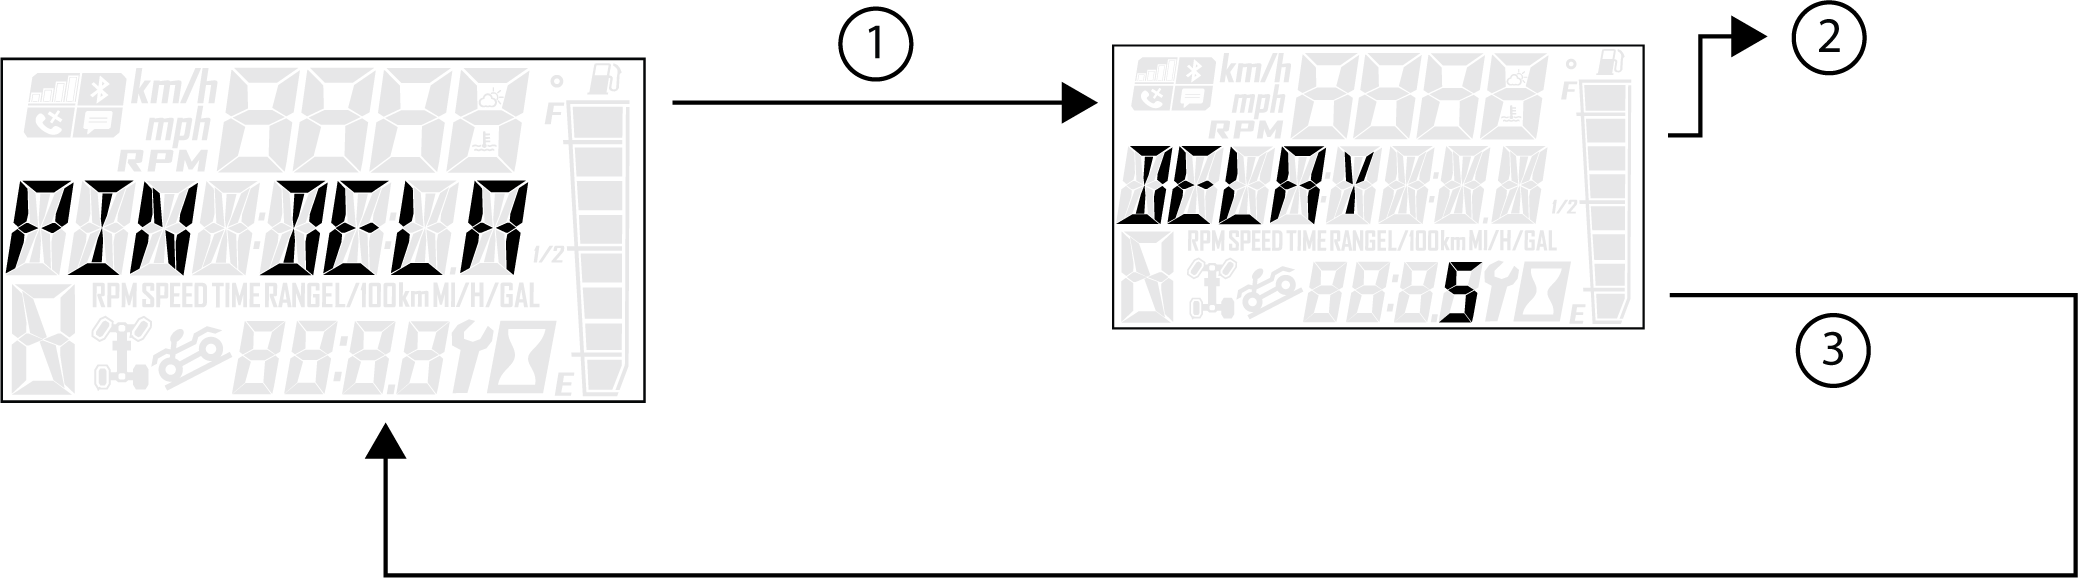
Press and hold the MODE button to enter the Options Menu.
“OPTIONS” will display on the screen for 3 seconds before showing first menu item.
Select “ADVANCED MENU” by pressing the MODE button.
Enter PIN.
Select “PIN DELAY” from the Advanced Menu by pressing the MODE button.
Reference the image shown above:
| 1 | Press the MODE button. |
| 2 | Toggle the Up/Down buttons to enable/disable PIN Delay. |
| 3 | With the desired option displayed, press the MODE button which will set the function and return to the Advanced Menu. |
To exit the Advanced Menu the user can select Exit Menu function from Advanced Menu, can hold Mode Button and exit out of Advanced Menu, or not press any button for 10 seconds, which will exit out of the Options Menu.
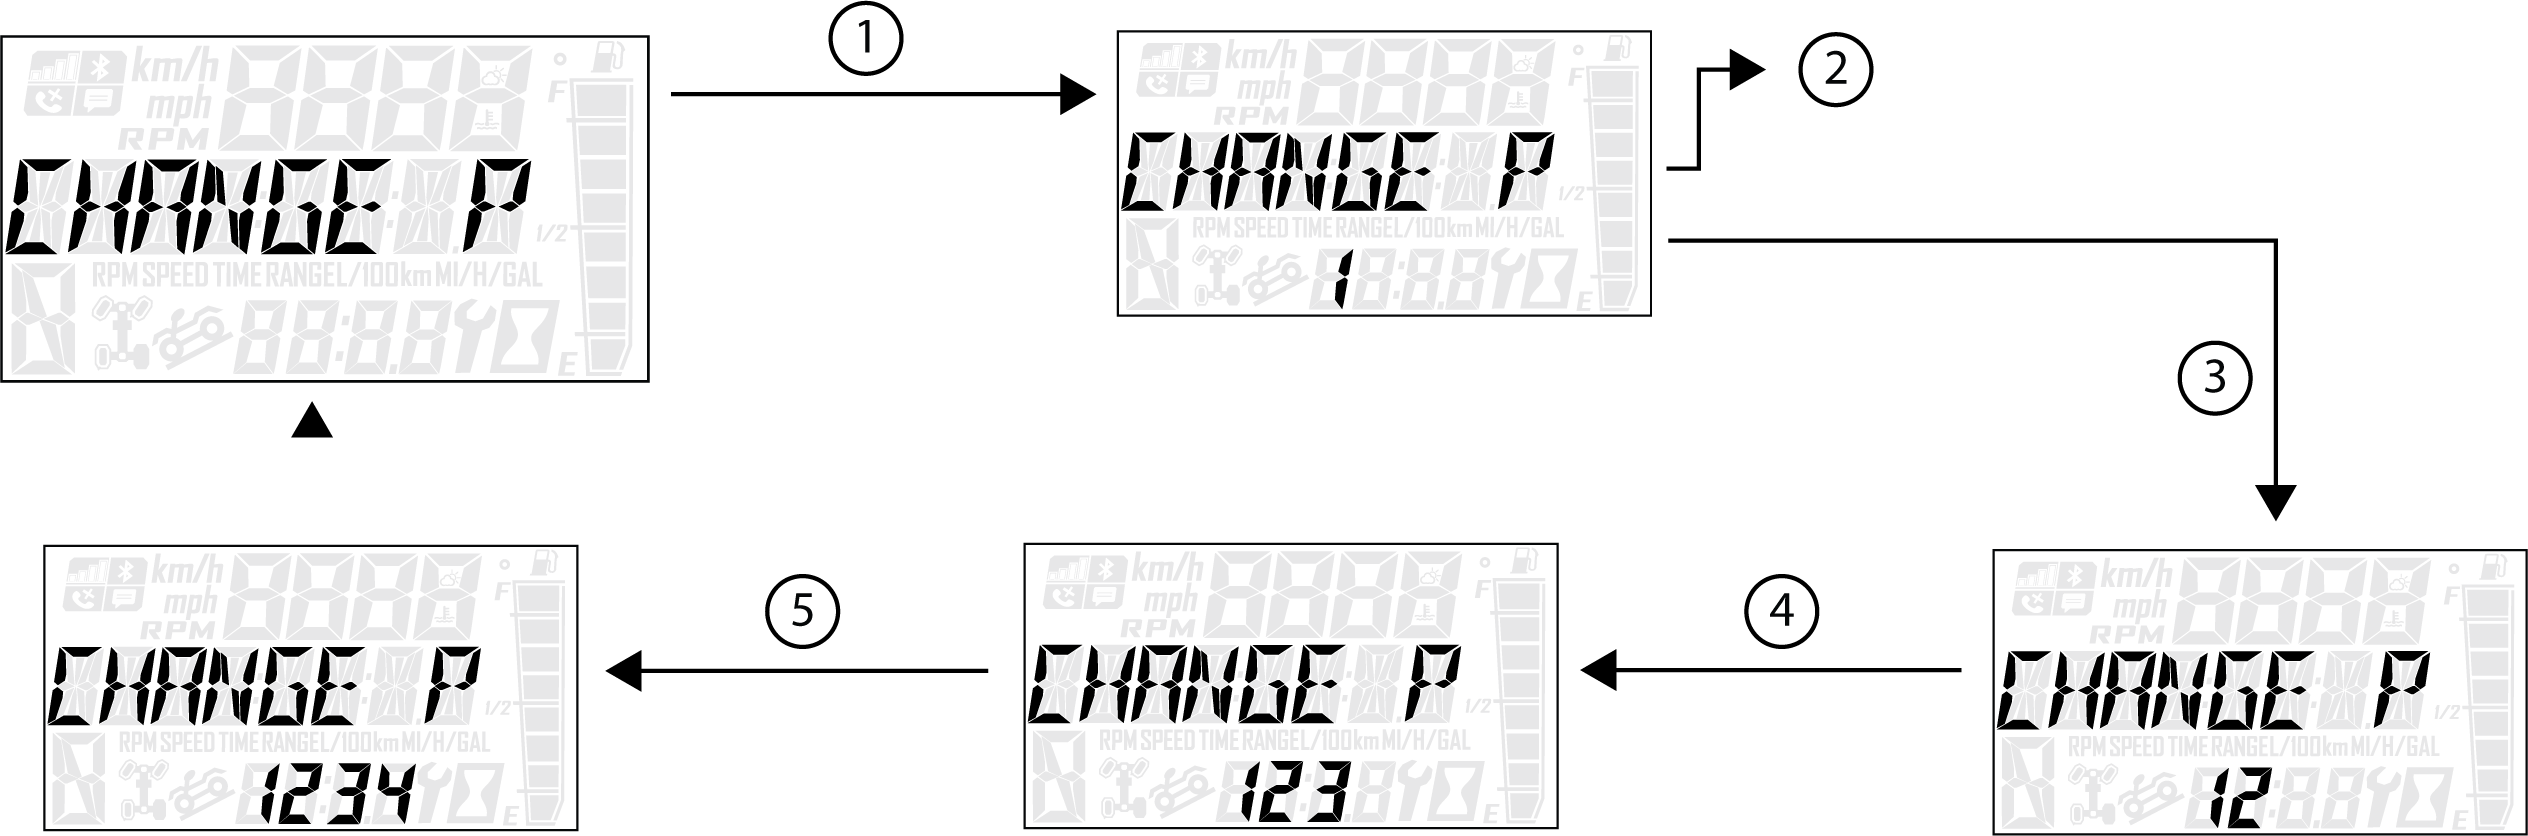
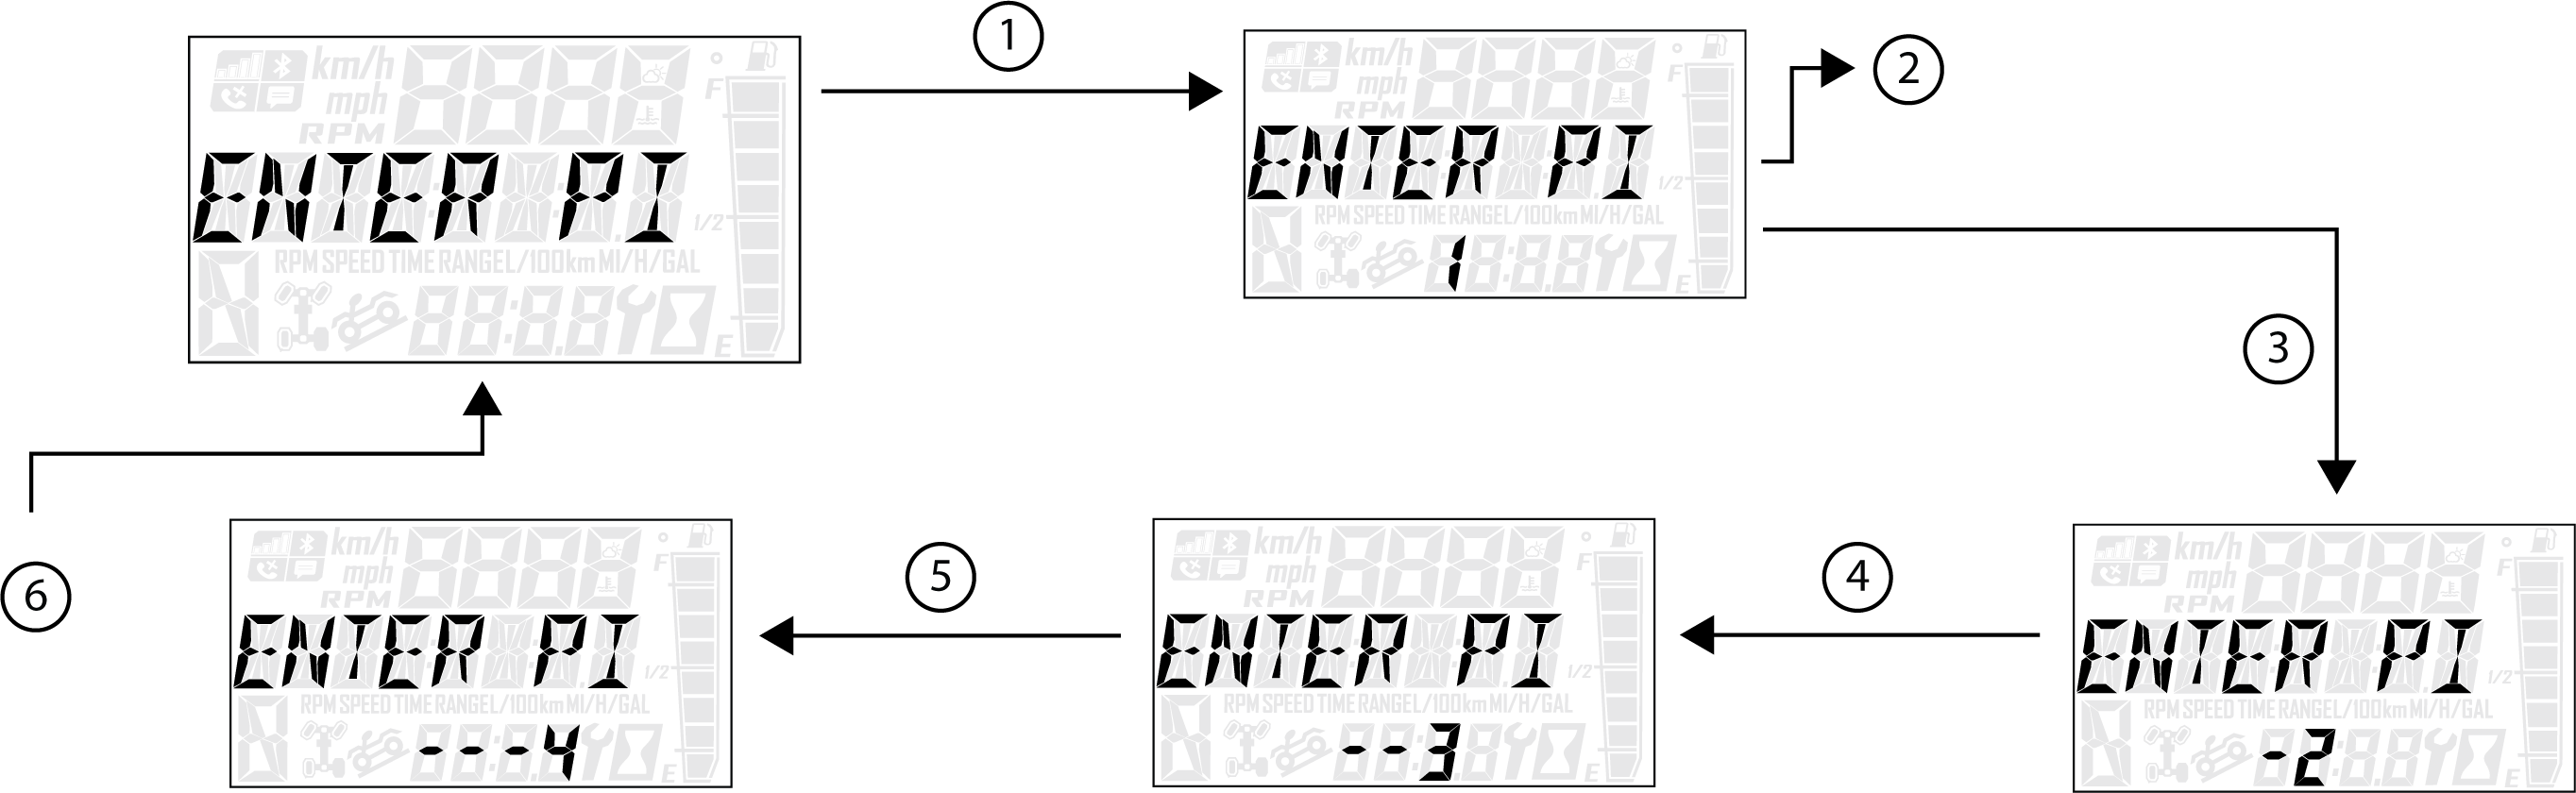
Press and hold the MODE button to enter the Options Menu.
“OPTIONS” will display on the screen for 3 seconds before showing first menu item.
Select “ADVANCED MENU” by pressing the MODE button.
Enter PIN.
Select “CHANGE PIN” from the Advanced Menu by pressing the MODE button.
Reference the image shown above:
1 Press the MODE button.
2 Toggle the Up/Down buttons to increase/decrease the first digit of the new PIN.
3 With the desired first digit of the new PIN displayed, Press the MODE button which will set the digit and move to the 2nd digit.
4 Toggle the Up/Down Buttons to increase/decrease the 2nd digit of the new PIN. Press MODE button to set 2nd digit and move on to the 3rd digit.
5 Toggle the Up/Down Buttons to increase/decrease the 3rd digit of the new PIN. Press MODE button to set 3rd digit and move on to the 4th digit.
Press the MODE button to set the 4th digit and exit.
To exit the Advanced Menu the user can select Exit Menu function from Advanced Menu, can hold Mode button and exit out of Advanced Menu, or not press any button for 10 seconds, which will exit out of the Options Menu.
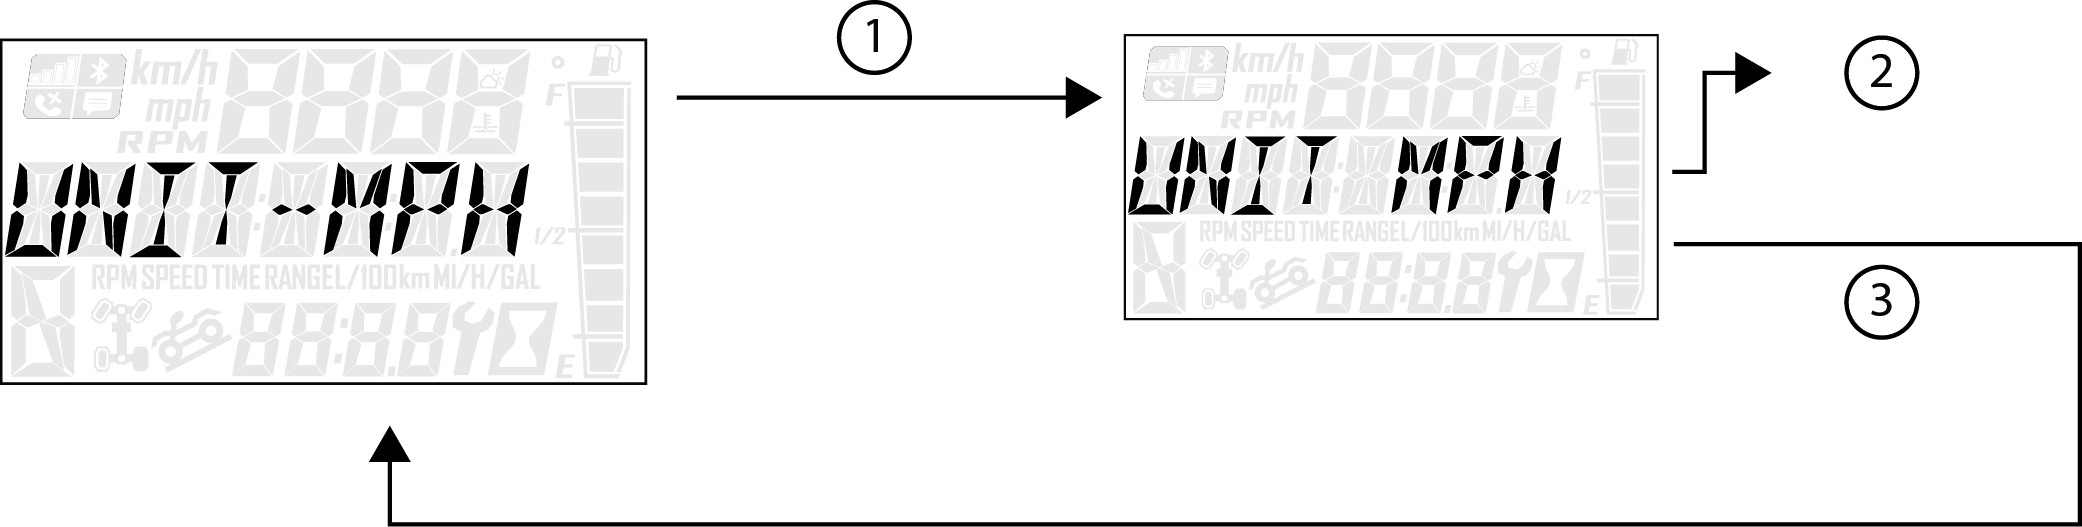
Press and hold the MODE button to enter the Options Menu.
“OPTIONS” will display on the screen for 3 seconds before showing first menu item.
Select “Units-Distance” from the Options Menu by pressing the MODE button.
Reference the image shown above:
1 Press the MODE button.
2 Toggle the Up/Down Buttons to change the units (MPH or KPH)
3 With the correct unit displayed, Press the mode button which will set the unit and return to the Options Menu.
To exit the Options Menu the user can select Exit Menu function from Options Menu, can hold Mode Button and exit out of Options Menu, or not press any button for 10 seconds, which will exit out of the Options Menu.
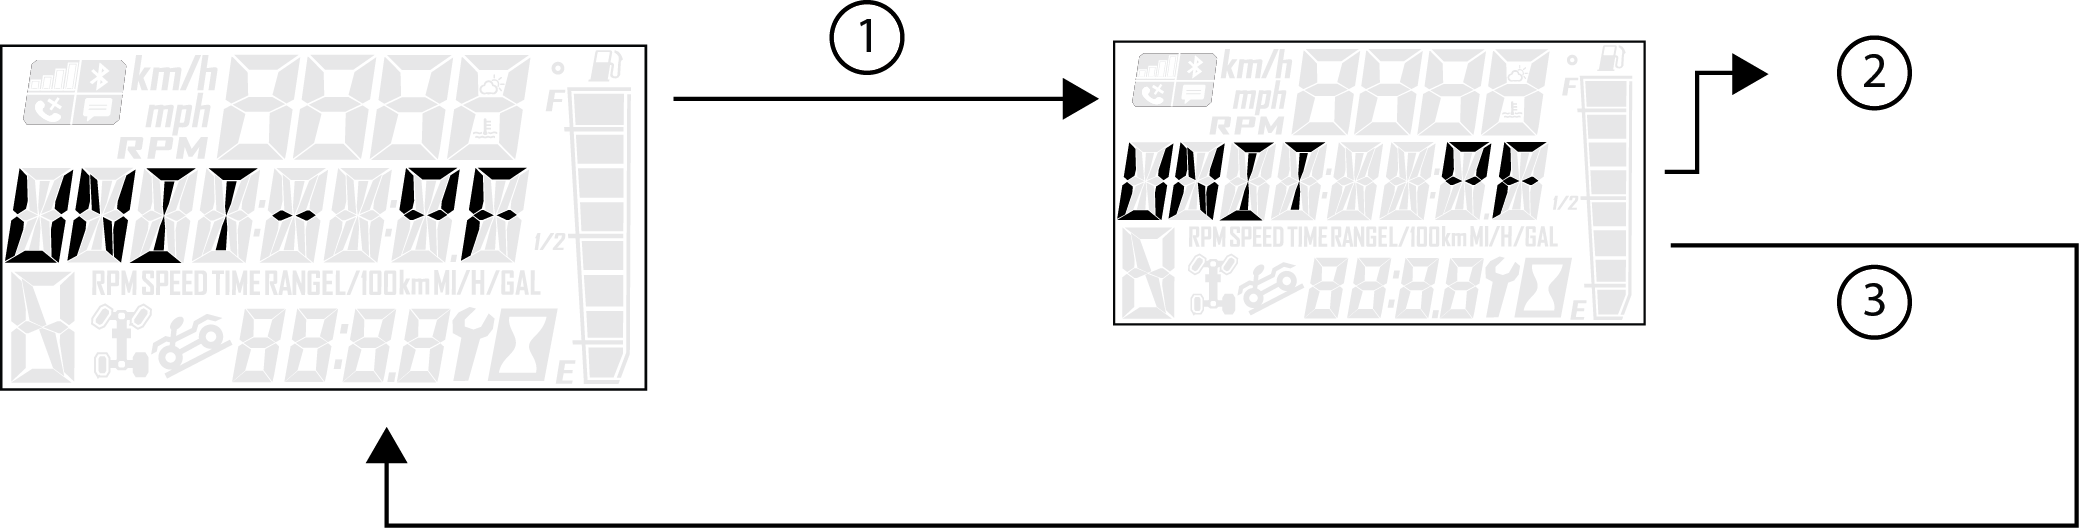
Press and hold the MODE button to enter the Options Menu.
“OPTIONS” will display on the screen for 3 seconds before showing first menu item.
Select “Units - Temp” from the Options Menu by pressing the MODE button.
Reference the image shown above:
1 Press the MODE button.
2 Toggle the Up/Down Buttons to change the units (°F or °C)
3 With the correct unit displayed, Press the mode button which will set the unit and return to the Options Menu.
To exit the Options Menu the user can select Exit Menu function from Options Menu, can hold Mode Button and exit out of Options Menu, or not press any button for 10 seconds, which will exit out of the Options Menu.
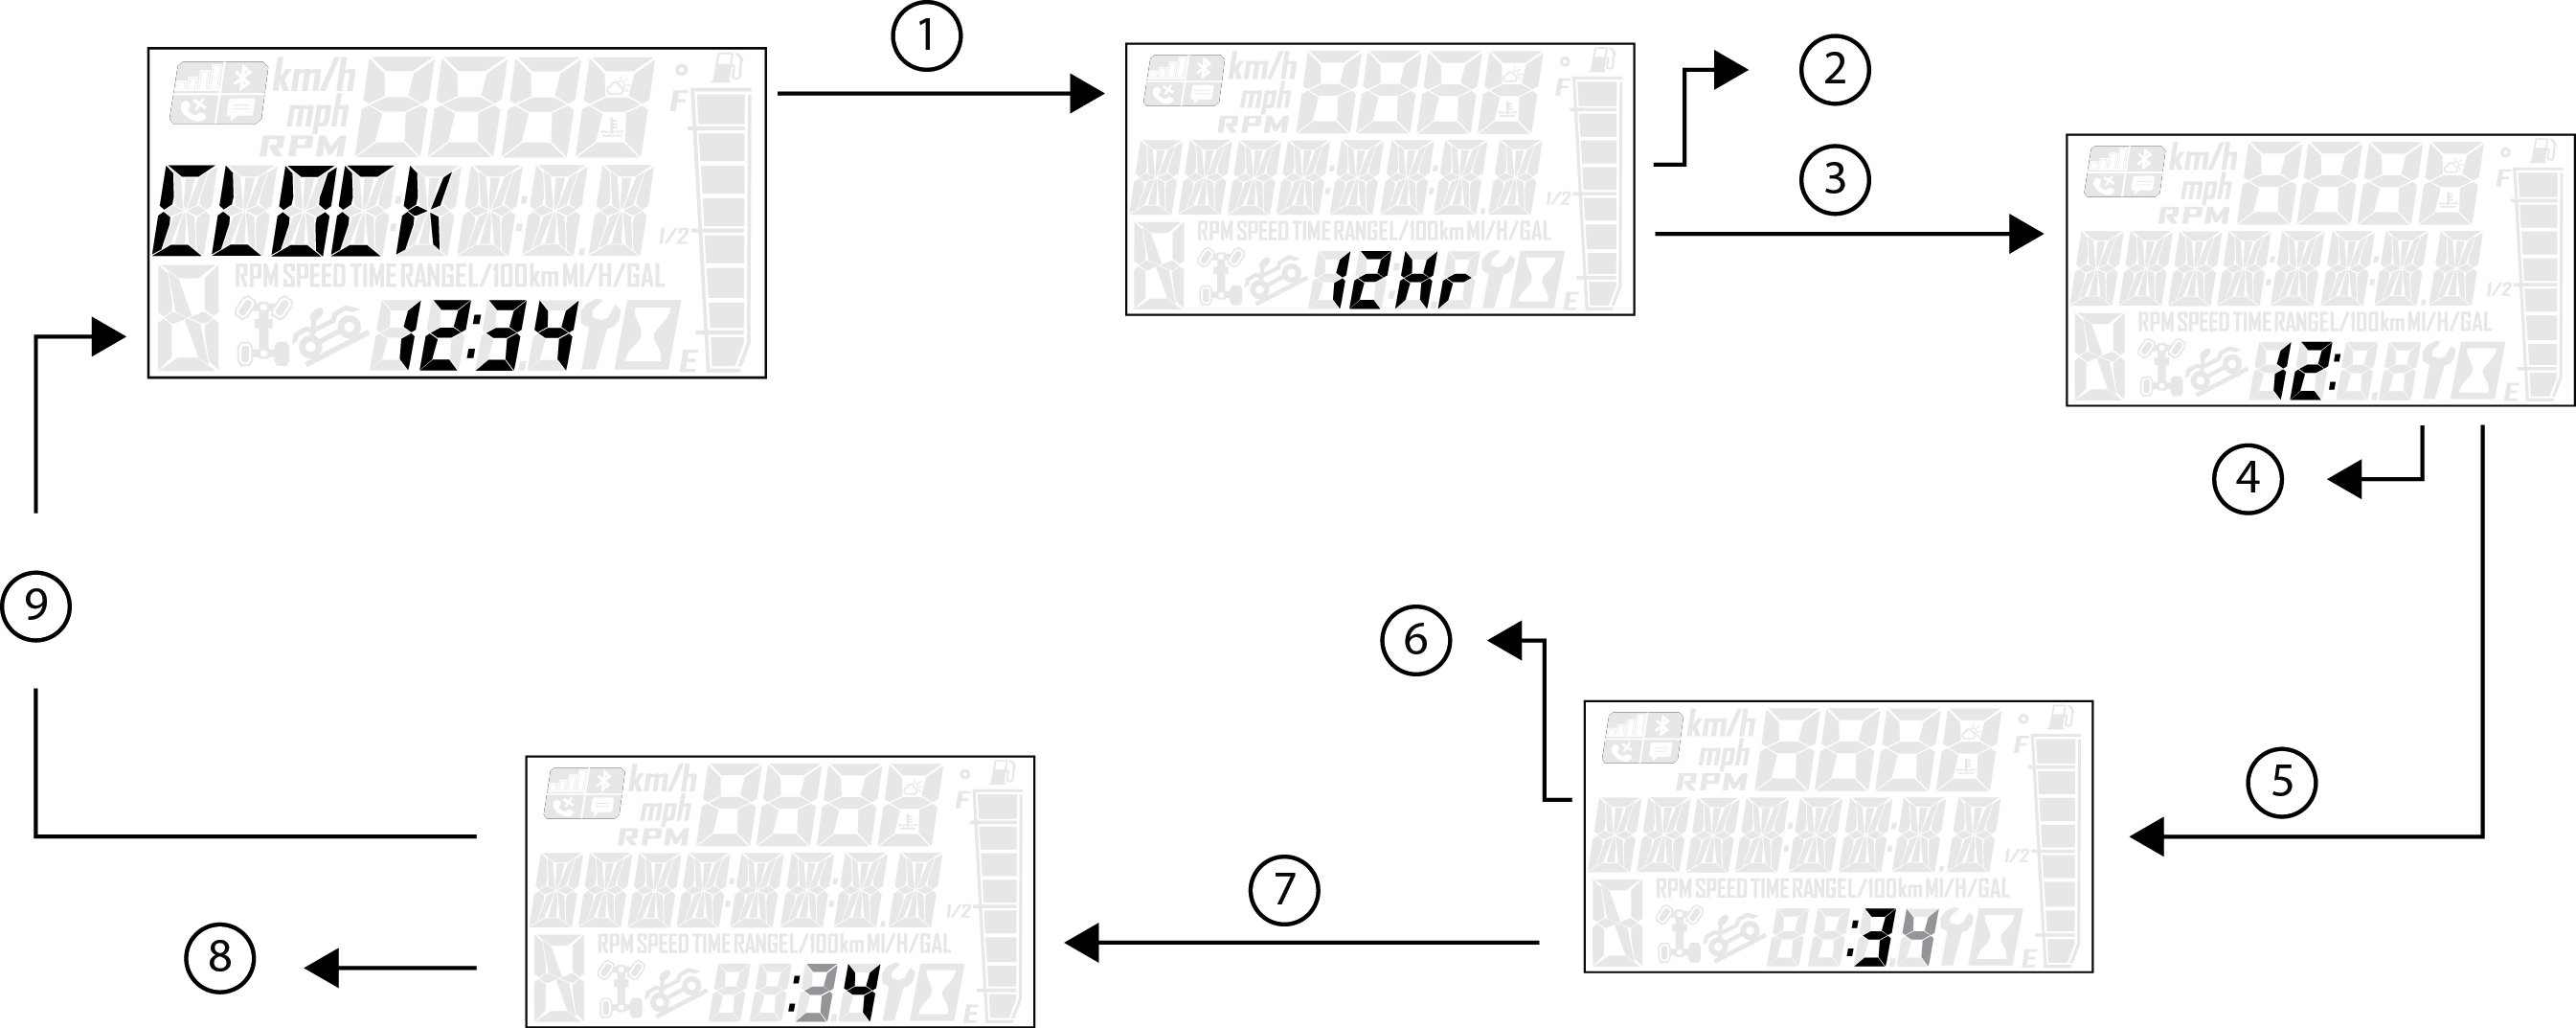
Press and hold the MODE button to enter the Options Menu.
“OPTIONS” will display on the screen for 3 seconds before showing first menu item.
Select “Clock” from the Options Menu by pressing the MODE button.
Reference the image shown above:
1 Press the MODE button.
2 Toggle the Up/Down Buttons to change the units (12H or 24H)
3 With the correct unit displayed, Press the mode button which will set the unit.
4 Toggle the Up/Down Buttons to change the units (Cycles Hours)
5 With the correct unit displayed, Press the mode button which will set the unit.
6 Toggle the Up/Down Buttons to change the units (Cycles 10s of Minutes)
7 With the correct unit displayed, Press the mode button which will set the unit.
8 Toggle the Up/Down Buttons to change the units (Cycles 1s of Minutes)
9 With the correct unit displayed. Press the mode button which will set the unit and return to the Options Menu.
To exit the Options Menu the user can select Exit Menu function from Options Menu, can hold Mode Button and exit out of Options Menu, or not press any button for 10 seconds, which will exit out of the Options Menu.
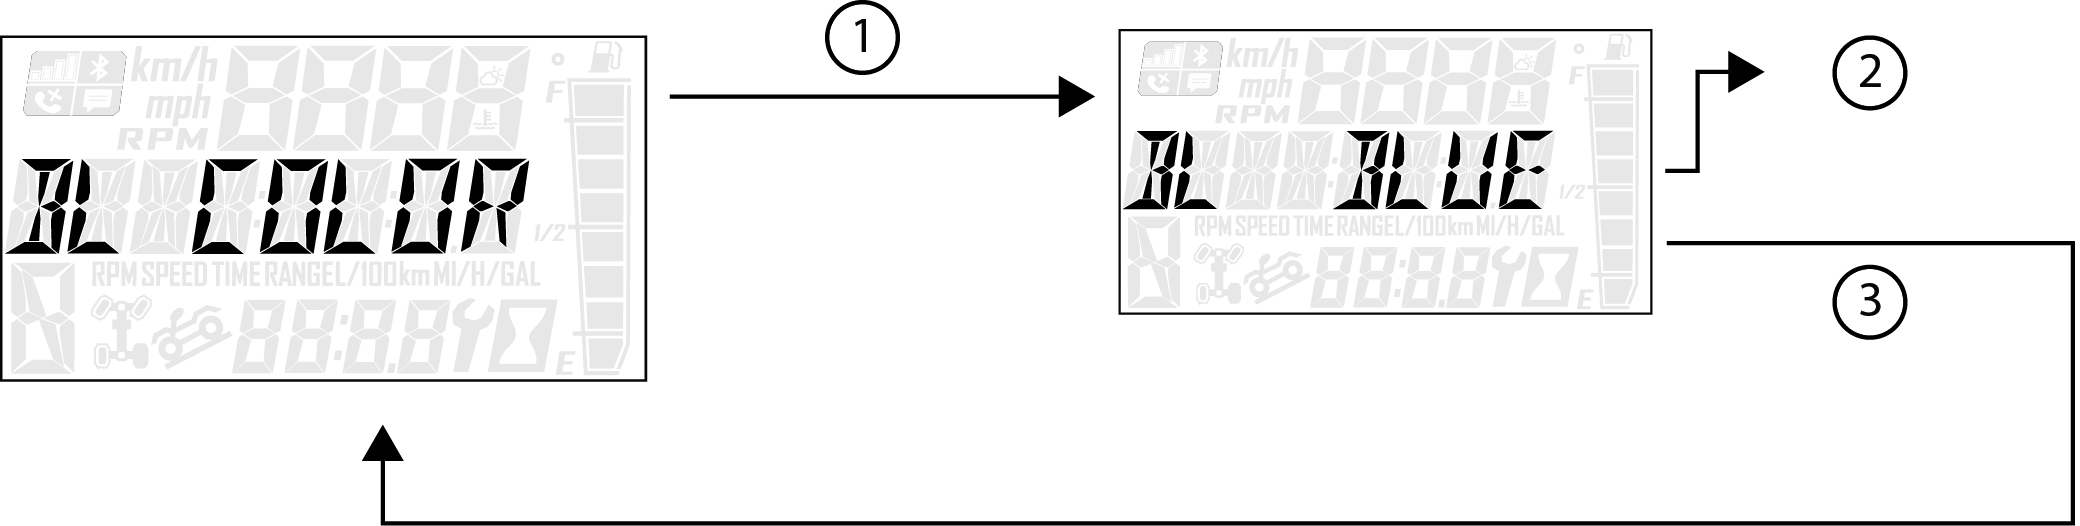
Press and hold the MODE button to enter the Options Menu.
“OPTIONS” will display on the screen for 3 seconds before showing first menu item.
Select “Backlight Color” from the Options Menu by pressing the MODE button.
Reference the image shown above:
1 Press the MODE button.
2 Toggle the Up/Down Buttons to change the units (Blue or Red)
3 With the correct unit displayed, Press the MODE button which will set the unit and return to the Options Menu.
To exit the Options Menu the user can select Exit Menu function from Options Menu, can hold MODE Button and exit out of Options Menu, or not press any button for 10 seconds, which will exit out of the Options Menu.
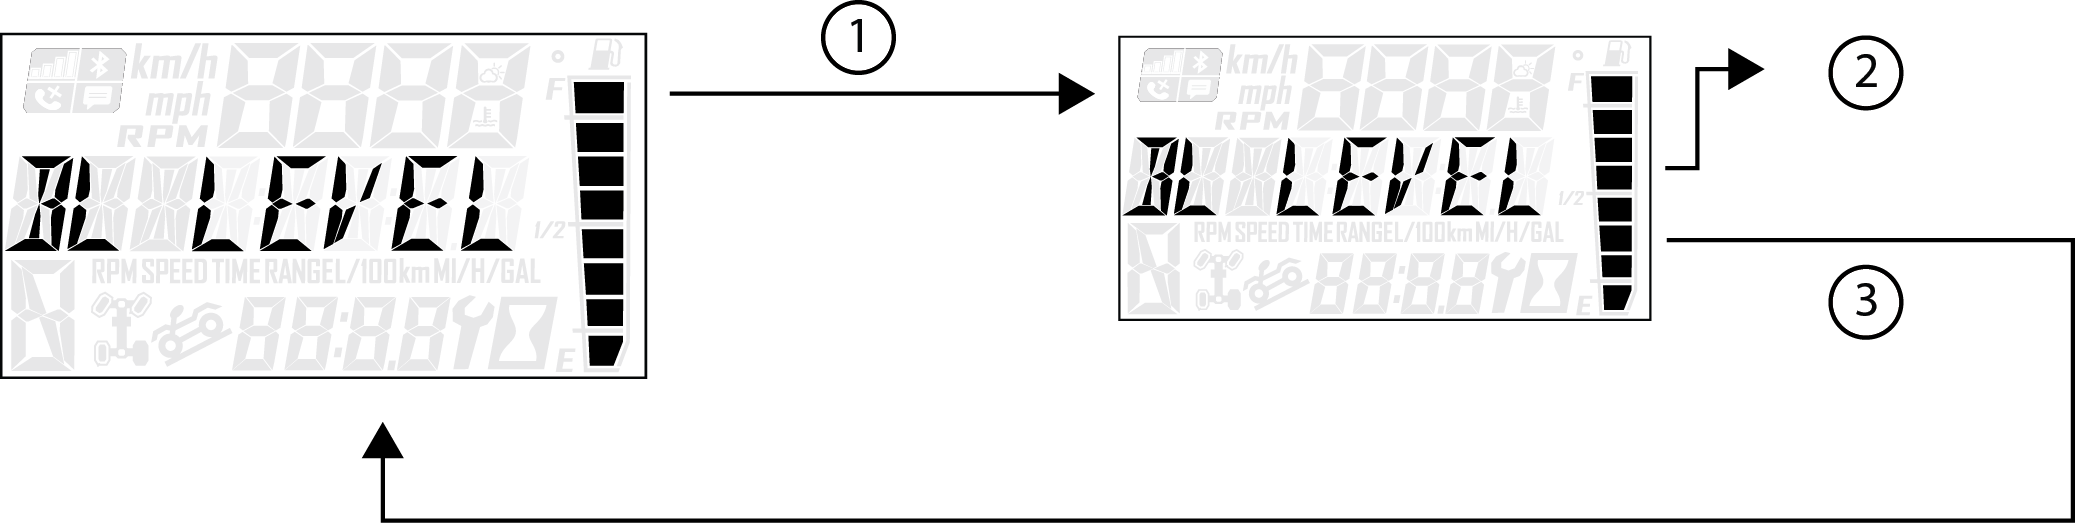
Press and hold the MODE button to enter the Options Menu.
“OPTIONS” will display on the screen for 3 seconds before showing first menu item.
Select “Backlight Level” from the Options Menu by pressing the MODE button.
Reference the image shown above:
1 Press the MODE button.
2 Toggle the Up/Down Buttons to change the units (Increase or Decrease Level)
3 With the correct unit displayed, Press the MODE button which will set the unit and return to the Options Menu.
To exit the Options Menu the user can select Exit Menu function from Options Menu, can hold MODE Button and exit out of Options Menu, or not press any button for 10 seconds, which will exit out of the Options Menu.
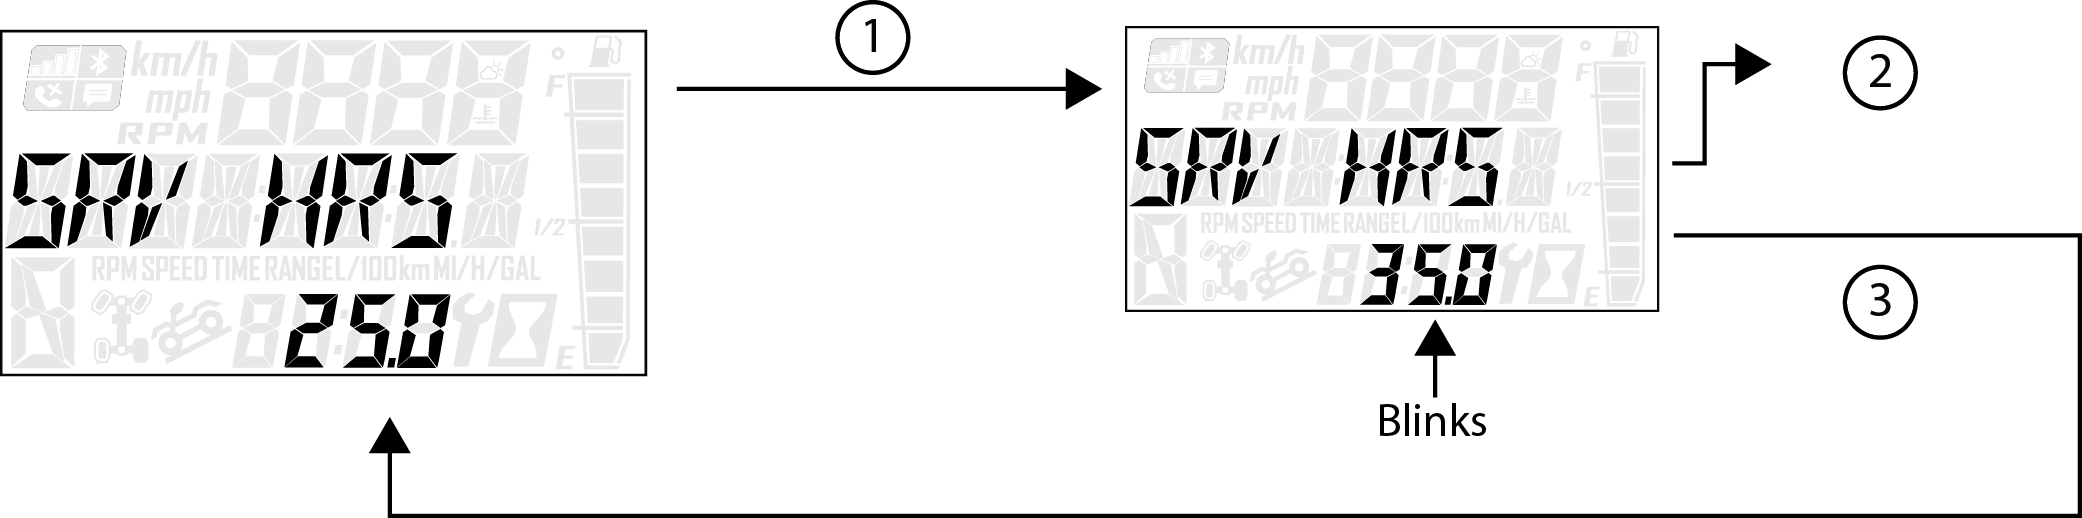
Press and hold the MODE button to enter the Options Menu.
“OPTIONS” will display on the screen for 3 seconds before showing first menu item.
Select “Service Hours” from the Options Menu by pressing the MODE button.
Reference the image shown above:
1 Press the MODE button.
2 Toggle the Up/Down Buttons to change the units (0, 5, 10 - 95, 100)
3 With the correct unit displayed, press the MODE button, which will set the unit and return you to the Options Menu.
To reset service hours after they have counted down to "0.0", reselect the existing setpoint or select a new service hour value.
To exit the Options Menu the user can select Exit Menu function from Options Menu, can hold MODE Button and exit out of Options Menu, or not press any button for 10 seconds, which will exit out of the Options Menu.
Electronic Power Steering (EPS) engages when the ignition key is turned to the ON position. EPS remains engaged whether the vehicle is moving or idle. See the Instrument Cluster section for EPS Warning Indicator information.
EPS has three modes: high, medium, low. To set the EPS mode, do the following:
Stop the engine and put the transmission in PARK (P).
Press and hold the MODE button to enter the Options Menu. “OPTIONS” will display on the screen for 3 seconds before showing the first menu item.
Select “EPS” from the Options Menu by pressing the MODE button.
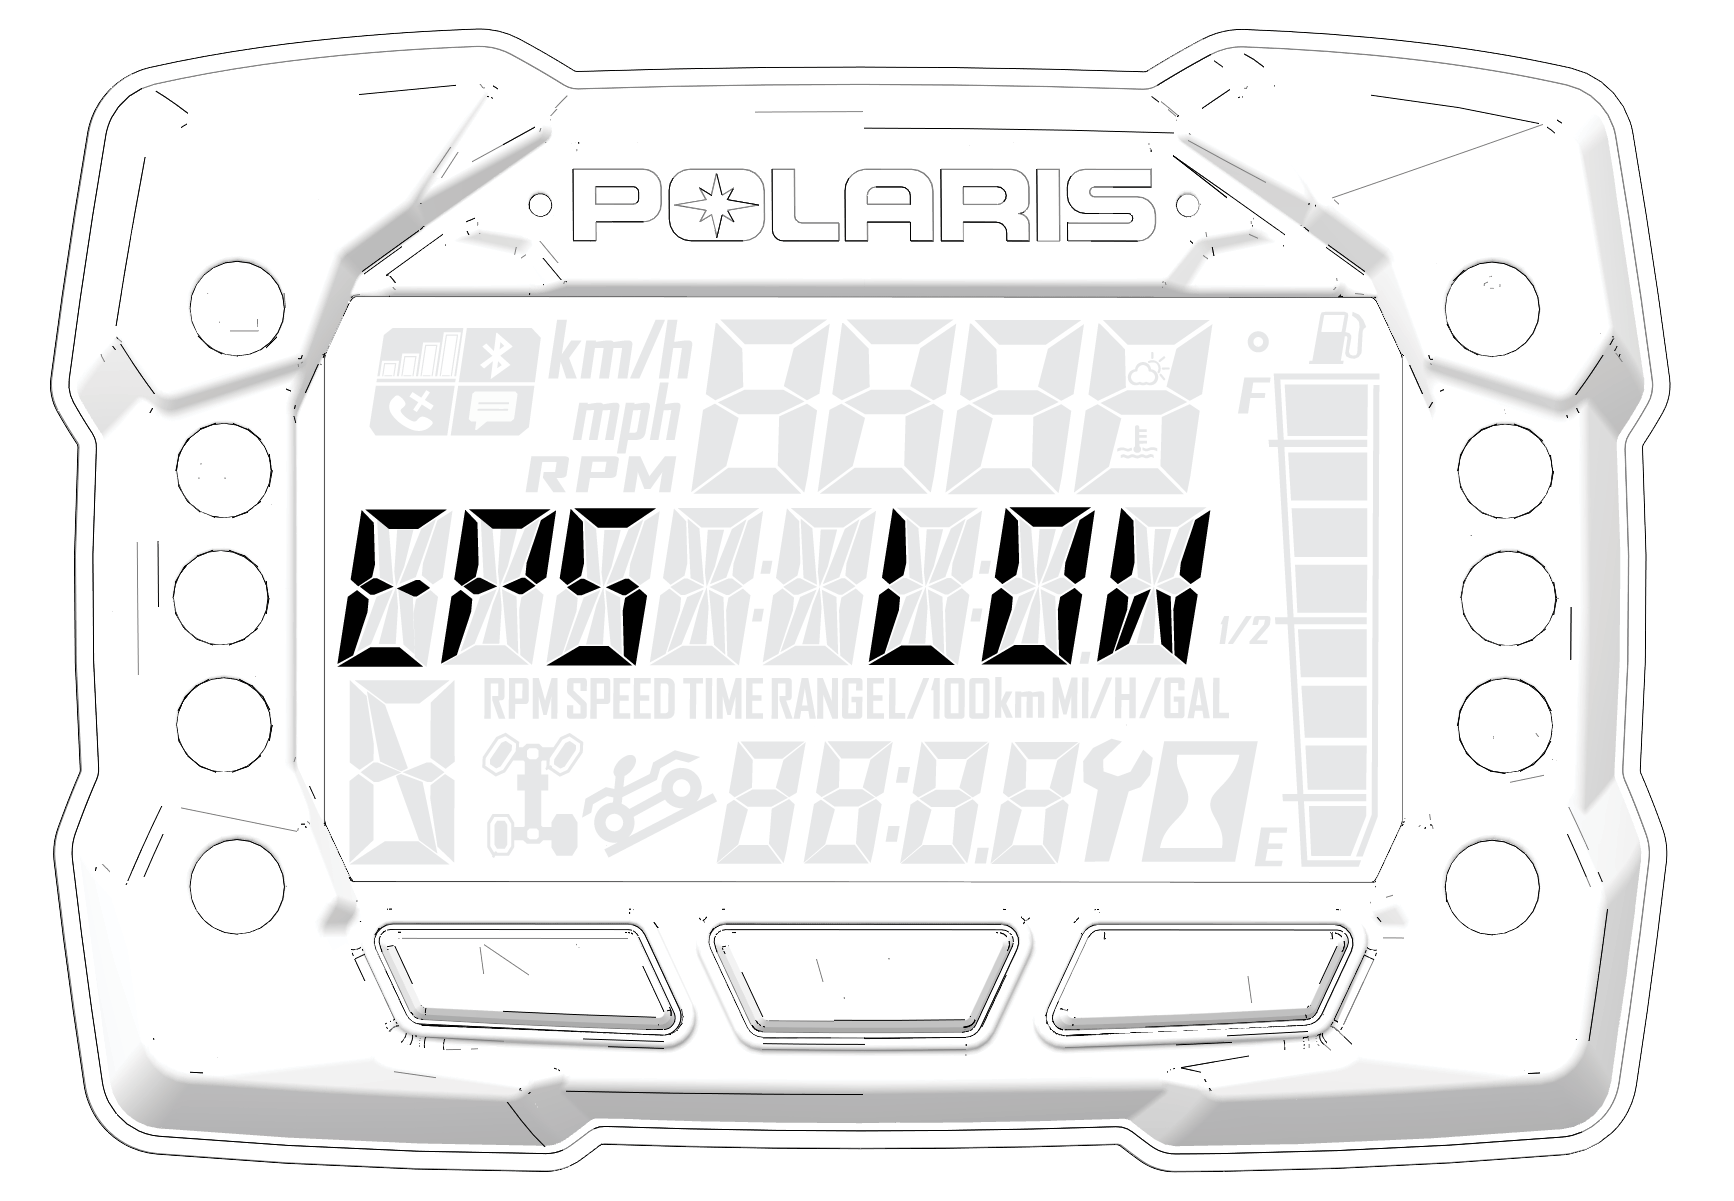
Toggle the Up/Down Buttons to choose between the high, medium, and low modes.
Press the MODE button to lock in the EPS setting.
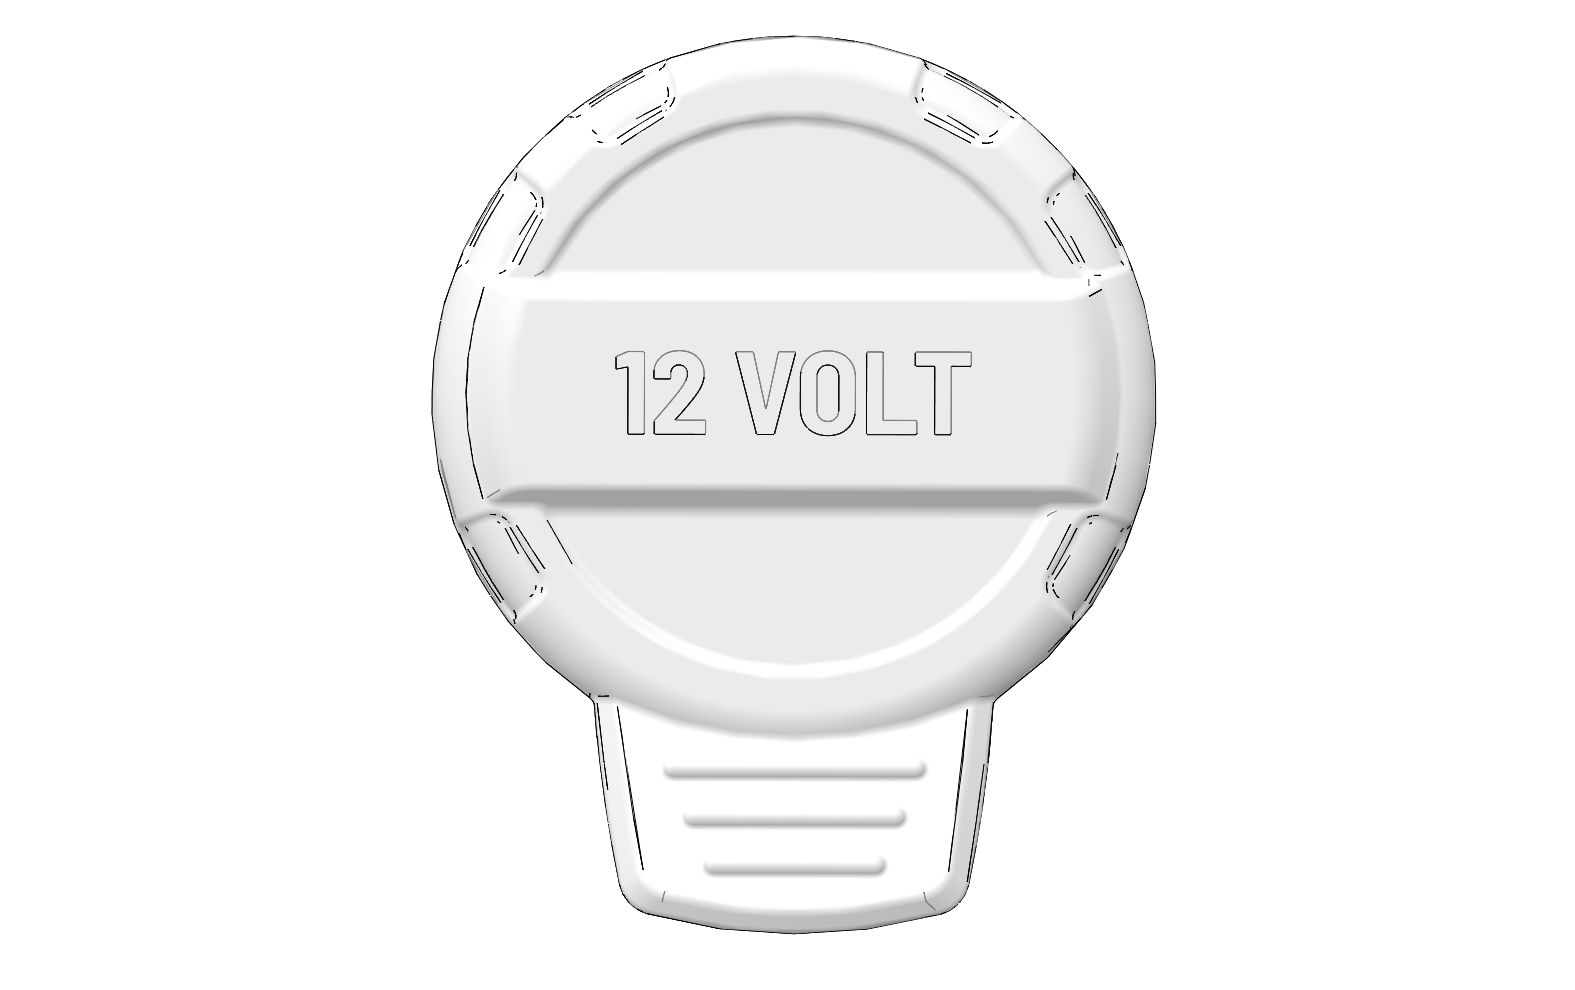
A 12-volt accessory outlet is located on the pod. Use the outlet to power an auxiliary light or other optional accessories or lights.
This vehicle is equipped with a digital
fuel gauge that will indicate a low fuel condition. Refuel when the
gauge indicates a low fuel condition.
Always refuel with the engine stopped, and outdoors or in a well
ventilated area. Refuel on a level surface.
Remove the fuel tank cap to add fuel to the fuel tank. Use unleaded
gasoline with a minimum 87 octane rating (R+M)/2 or 91 RON minimum.
Do not use fuel with ethanol content greater than 10 percent, such
as E-85 fuel.
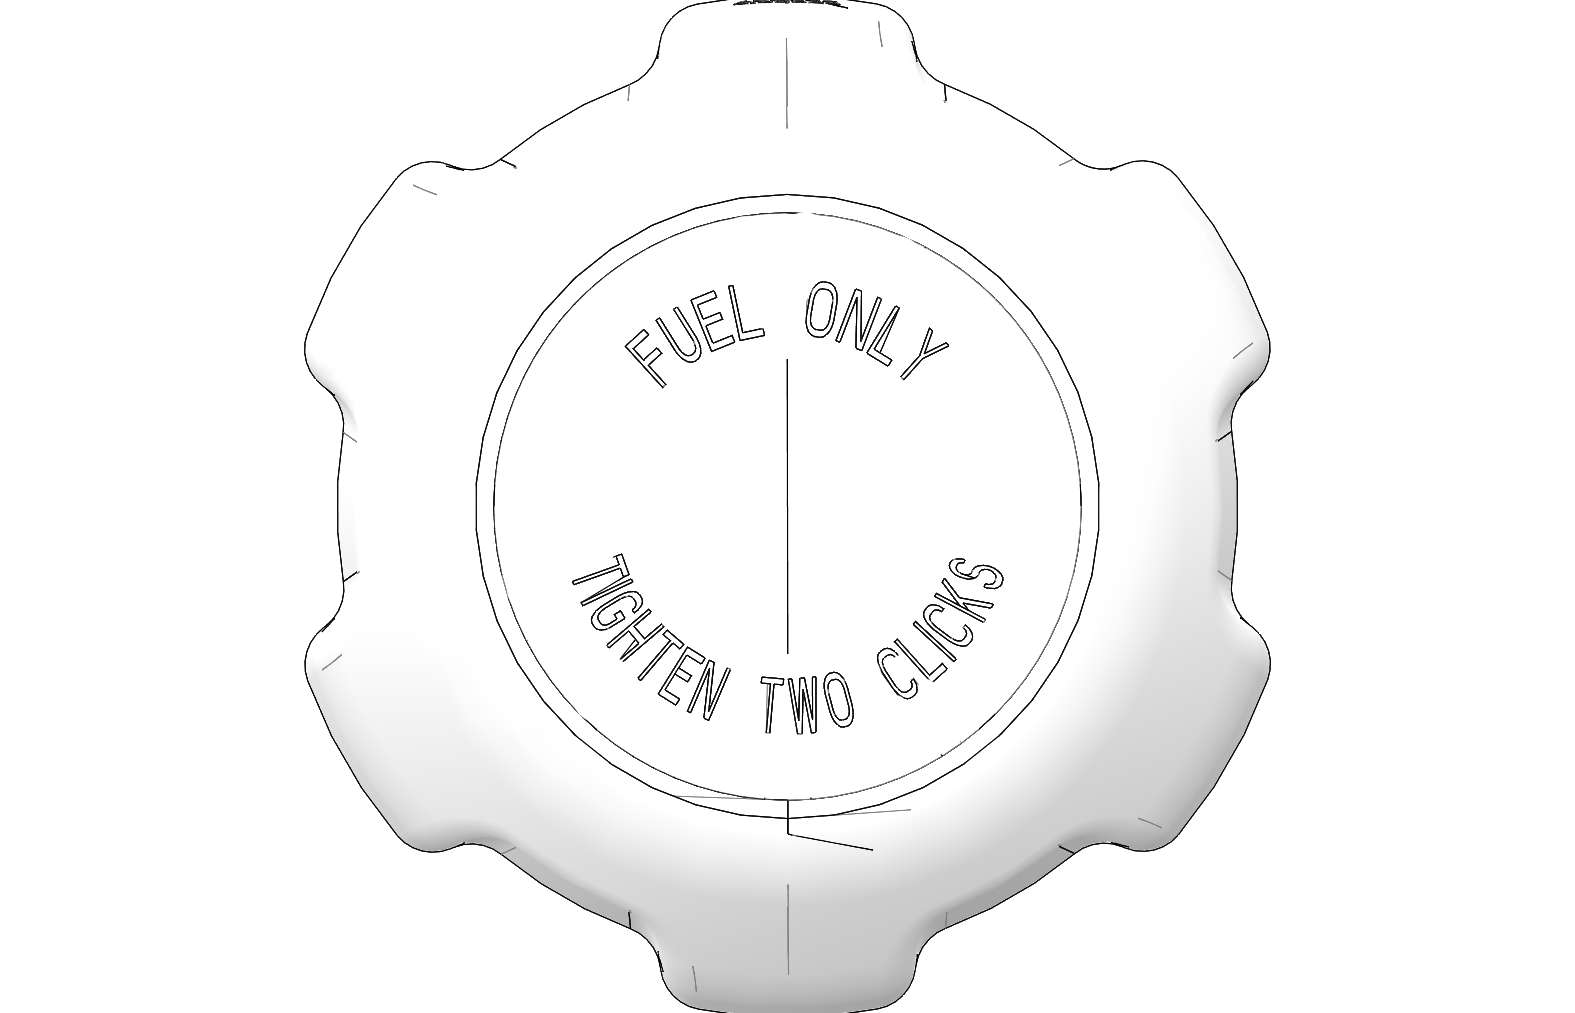
Always ensure that
the fuel tank filler cap is fully tightened and secure before operating
or transporting the vehicle. To close, tighten the fuel cap until
it clicks twice.
Compatible fuel types:
E5, E10

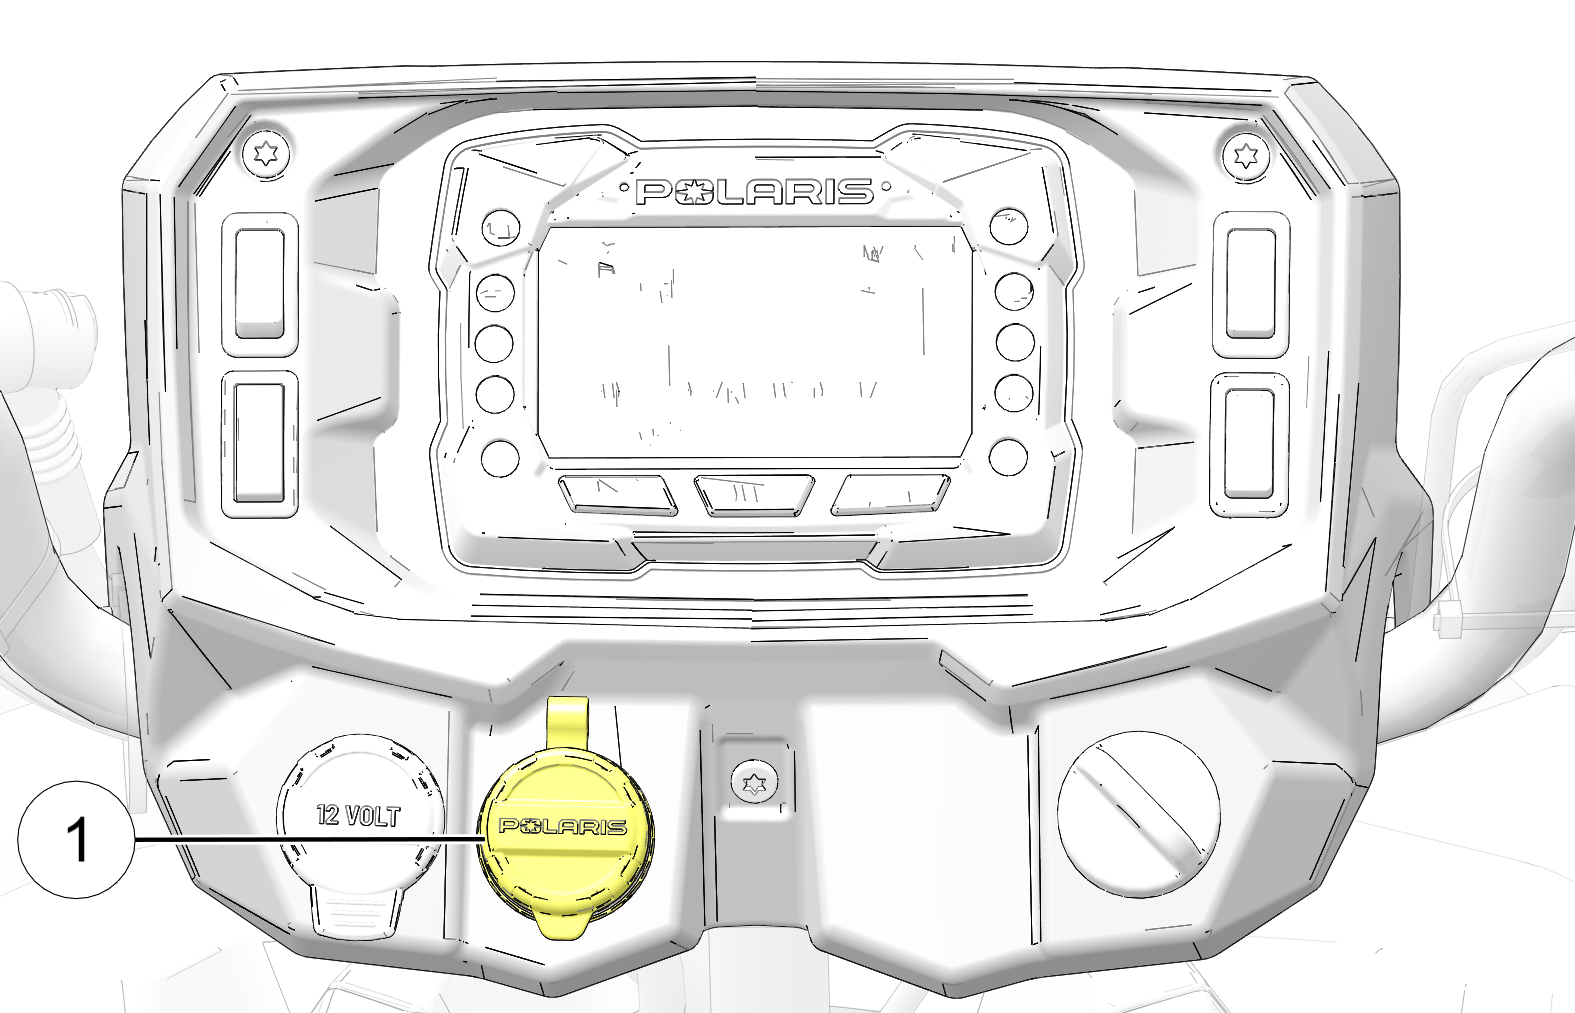
Your vehicle is equipped with a battery charge port 1. The battery charge port allows you to quickly and easily connect a battery charger or maintainer to your vehicle’s battery. For more information see Battery Charging.
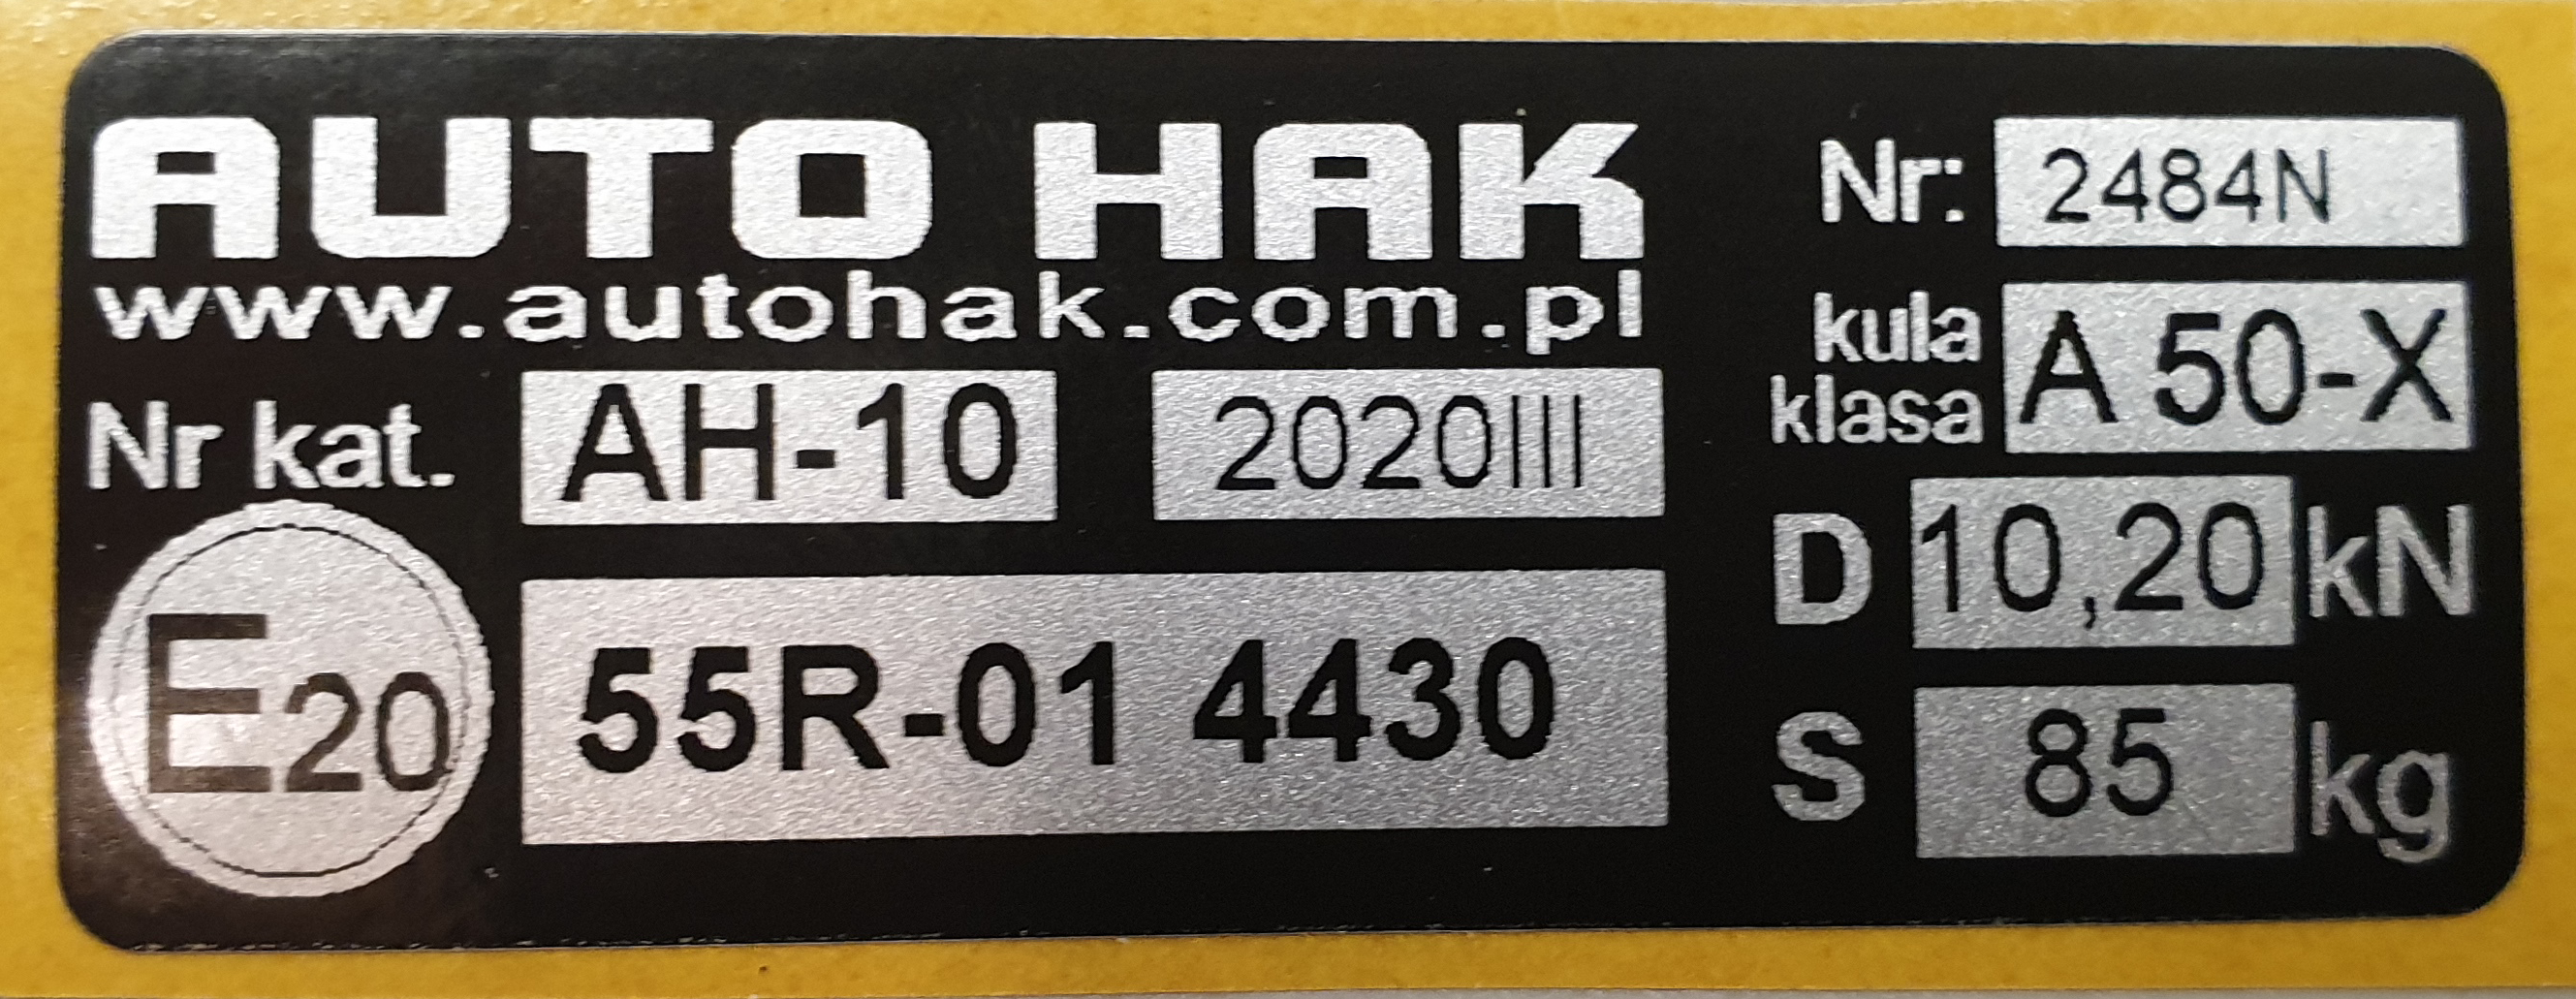
See the Specifications section for hitch weight capacities.
Use the rear hitch for towing a trailer. See the Hauling Cargo section for procedures.
|
Rear Hitch Specifications per Component Certificate |
|
|---|---|
|
Maximum Vertical Load |
85 kg applied on coupling point |
|
Maximum Towable Mass |
2000 kg |
|
Approval # |
E20 55R-01 4430 |
|
Maximum Dynamic Force (D) |
10,2 kN |
The hitch certification label is located near the hitch on models equipped with a factory-installed rear hitch.
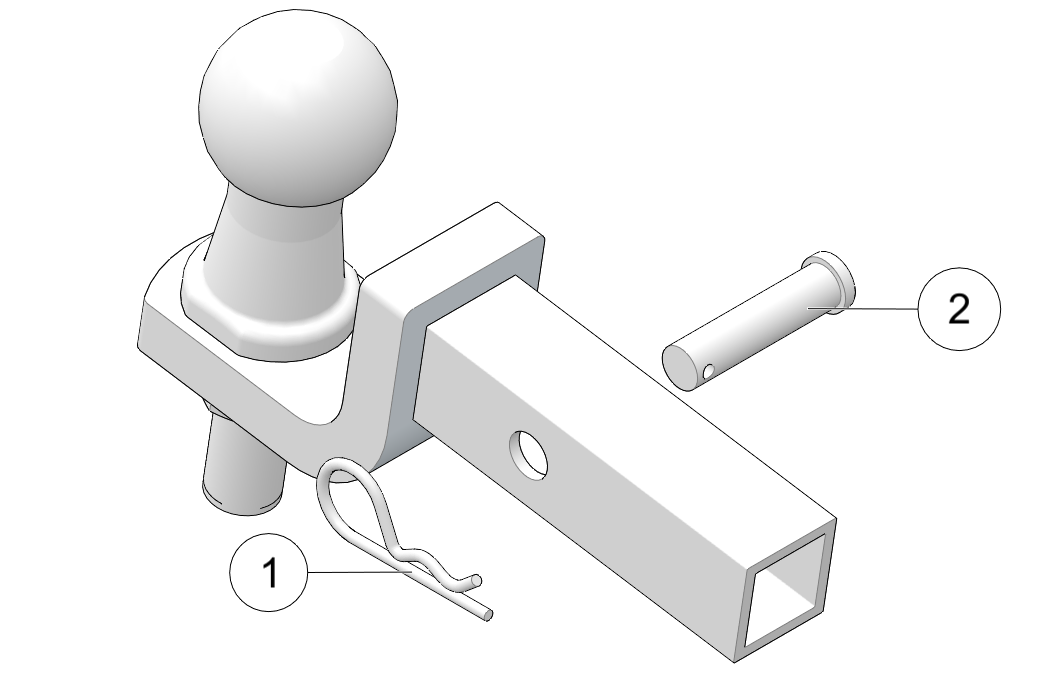
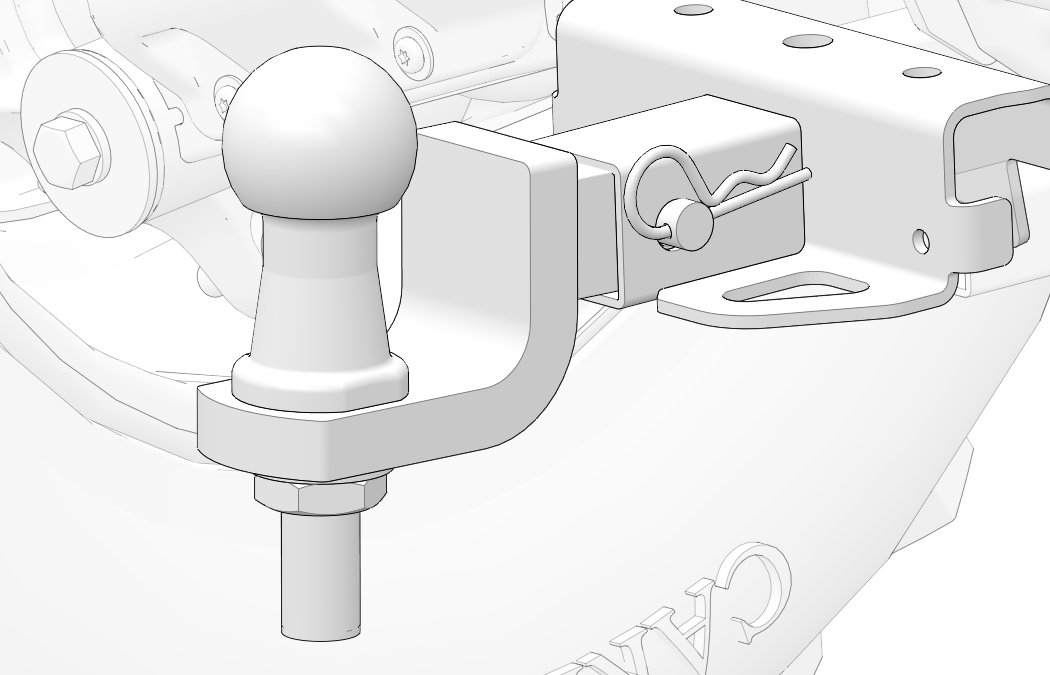
To remove the hitch, remove the cotter pin 1 and hitch pin 2. Remove the hitch, then reinstall the hitch pin 2 and secure the cotter pin 1.
To install the hitch, remove the cotter pin 1 from the hitch pin and remove the hitch pin 2.
Install the hitch to the receiver.
Reinstall the hitch pin (from the left side of the hitch) through the bore of both the receiver and the hitch.
Reinstall the cotter pin. Make sure the hitch assembly is secure at that the cotter pin is properly engaged over the hitch pin.
Complete the recommended safety training before operating this vehicle. Visit atvsafety.org for safety courses and riding tips. See Safety Training for details.
Do not allow anyone under 16 years of age to operate this vehicle. Do not allow anyone with cognitive or physical disabilities to operate this vehicle.
Never carry a passenger on a 1-up ATV. Never carry more than one passenger on a 2-up ATV.
Engine exhaust fumes are poisonous. Never start the engine or let it run in an enclosed area.
Before operating, learn how to use the auxiliary brake for emergency situations (if hand brake becomes inoperable).
Use caution and drive at reduced speeds in conditions of reduced visibility such as fog, rain and darkness. Clean headlights and taillights frequently and replace burned out headlamps and taillamps promptly.
Drive in a manner appropriate for your skills, your passenger’s skills (if you are operating a 2-up ATV), and operating conditions. Never operate at excessive speeds. Never attempt wheelies, jumps, or other stunts. Never remove your hands from the handlebars while operating, and always keep both feet on the footrests.
Never consume alcohol or drugs before or while operating an ATV.
Always use the size and type of tires specified for your vehicle. Always maintain proper tire pressure.
Never operate a damaged ATV. After any overturn or accident, have a qualified service dealer inspect the entire machine for possible damage.
Never operate the ATV on a frozen body of water unless you have independently verified that the ice is sufficiently thick to support the weight and moving force of the ATV, you and your cargo, together with any other vehicles in your party.
Do not touch hot exhaust system components. Always keep combustible materials away from the exhaust system.
Always remove the ignition key when the vehicle is not in use to prevent unauthorized use.
Always practice good etiquette when riding. Allow a safe distance between your vehicle and other vehicles operating in the same area. Communicate to oncoming operators by signaling the number of vehicles in your group. When stopping, move your vehicle to the edge of the trail as far as possible to allow others to pass safely.
Familiarize yourself with all laws and regulations concerning the operation of this vehicle in your area. Respect the environment in which you ride your vehicle. Find out where the designated riding areas are by contacting your Polaris dealer, a local riding club, or local officials.
Help keep our trails open for recreational vehicle use. As an off-road enthusiast, you represent the sport and can set a good example (or a poor example) for others to follow. Tread LightlySM. Operate with respect for the terrain, avoid littering, and always stay on the designated trails.
The break-in period for your new Polaris vehicle is the first 25 hours of operation, or the time it takes to use the first two tanks full of gasoline. No single action on your part is as important as a proper break-in period. Careful treatment of a new engine and drive components will result in more efficient performance and longer life for these components. Perform the following procedures carefully.
Excessive heat build-up during the first three hours of operation will damage close-fitted engine parts and drive components. Do not operate at full throttle or high speeds during the first three hours of use.
Use of any improper oils may cause serious engine damage. Polaris PS-4 5W-50 4-Cycle Engine Oil and Polaris PS-4 Extreme 0W-50 4-Cycle Engine Oil is specifically formulated for your 4-cycle engine.
Fill the fuel tank with gasoline. Always exercise extreme caution whenever handling gasoline.
Check the oil level. See the Oil Level Check section for reference. Add the recommended oil as needed to maintain the oil level in the safe operating range.
Drive slowly at first. Select an open area that allows room to familiarize yourself with vehicle operation and handling.
Avoid aggressive use of the brakes.
Vary throttle positions. Do not operate at sustained idle.
Pull only light loads.
Perform regular checks on fluid levels, controls, and areas outlined in the pre-ride inspection checklist.
During the break-in period, change both the engine oil and filter at 25 hours or 500 mi (800 km) (whichever comes first).
During the break-in period, change the transmission and front gearcase fluids at 25 hours or 500 mi (800 km) (whichever comes first).
Apply only moderate braking force for the first 50 stops. Aggressive or overly forceful braking when the brake system is new could damage brake pads and rotors.
Perform the following steps on a new vehicle or anytime brake pads are replaced on the vehicle:
In an appropriate riding area, safely slow the vehicle with moderate (70%) braking from 30 mph (50 kph) down to 5 mph (8 kph). Do not stop completely in order to keep air flowing through the brakes.
Repeat for 10-20 cycles and let the brakes cool between each cycle by riding your vehicle approximately 0.25 mi (400 m).
After you have completed all 20 cycles, ride the ATV for awhile to cool the braking system to avoid overheating the brakes.
Stop the vehicle and put the transmission in PARK (P). DO NOT apply the temporary brake lock until the brake system has fully cooled.
Always break in the clutches and drive belt of a new vehicle. Additionally, break in the clutches and drive belt after a belt replacement.
A proper break-in of the clutches and drive belt will ensure a longer life and better performance. Break in the clutches and belt by operating at slower speeds during the break-in period as recommended. Pull only light loads. Avoid aggressive acceleration and high speed operation during the break-in period.
If a belt fails and you need to replace it, always clean all debris from the PVT intake and outlet duct, the clutch, and the engine components.
Failure to inspect and verify that the ATV is in safe operating condition before operating increases the risk of an accident. Always inspect the ATV before each use to make sure it’s in safe operating condition.
|
Item |
Remarks |
Page |
|---|---|---|
|
Brake System / Lever Travel |
Ensure proper operation. Inspect for adequate brake pad life. |
Brake Lever
Brakes |
|
Brake Fluid |
Ensure proper level. |
Master Cylinder / Brake Fluid
Brake Fluid Level |
|
Auxiliary Brake |
Ensure proper operation. |
Auxiliary Foot Brake |
|
Front Suspension |
Inspect. |
- |
|
Rear Suspension |
Inspect. |
- |
|
Steering |
Ensure free operation. |
- |
|
Tires |
Inspect condition and pressure. |
Tires |
|
Wheels / Fasteners |
Inspect, ensure fastener tightness. |
Wheel Nut Torque Specifications |
|
Fuel and Oil |
Ensure proper levels. |
Oil Level Check |
|
Coolant Level |
Ensure proper level. |
Cooling System |
|
Coolant Hoses |
Inspect for leaks. |
- |
|
Throttle |
Ensure proper operation. |
Throttle Lever |
|
Indicator Lights / Switches |
Ensure operation. |
Indicator Lamps |
|
Engine Stop Switch |
Ensure proper operation. |
Engine Stop Switch |
|
Air Filter |
Inspect, clean or replace. |
Air Filter Inspection and Replacement |
|
Headlamp |
Check operation. |
High Beam (Flash) Momentary Switch |
|
Brake Light / Taillight |
Check operation. |
- |
|
Riding Gear |
Wear approved helmet, goggles, and protective clothing. |
Safe Riding Gear |
|
Winch (if equipped) |
Inspect cable and switch. |
Winch Safety |
|
Grass and Leaves |
Remove grass, leaves, foreign matter, and other flammable material or debris, especially near the exhaust system. |
- |
Complete a certified safety training course. See the Safety Training section.
Wear protective riding gear. See the Safe Riding Gear section.
Perform the pre-ride inspection.
Place the transmission in PARK (P).
Lock the temporary brake lock.
Mount the vehicle from the left side.
Sit upright with both feet on the footrests and both hands on the handlebars.
Start the engine and allow it to warm up.
Shift the transmission into gear.
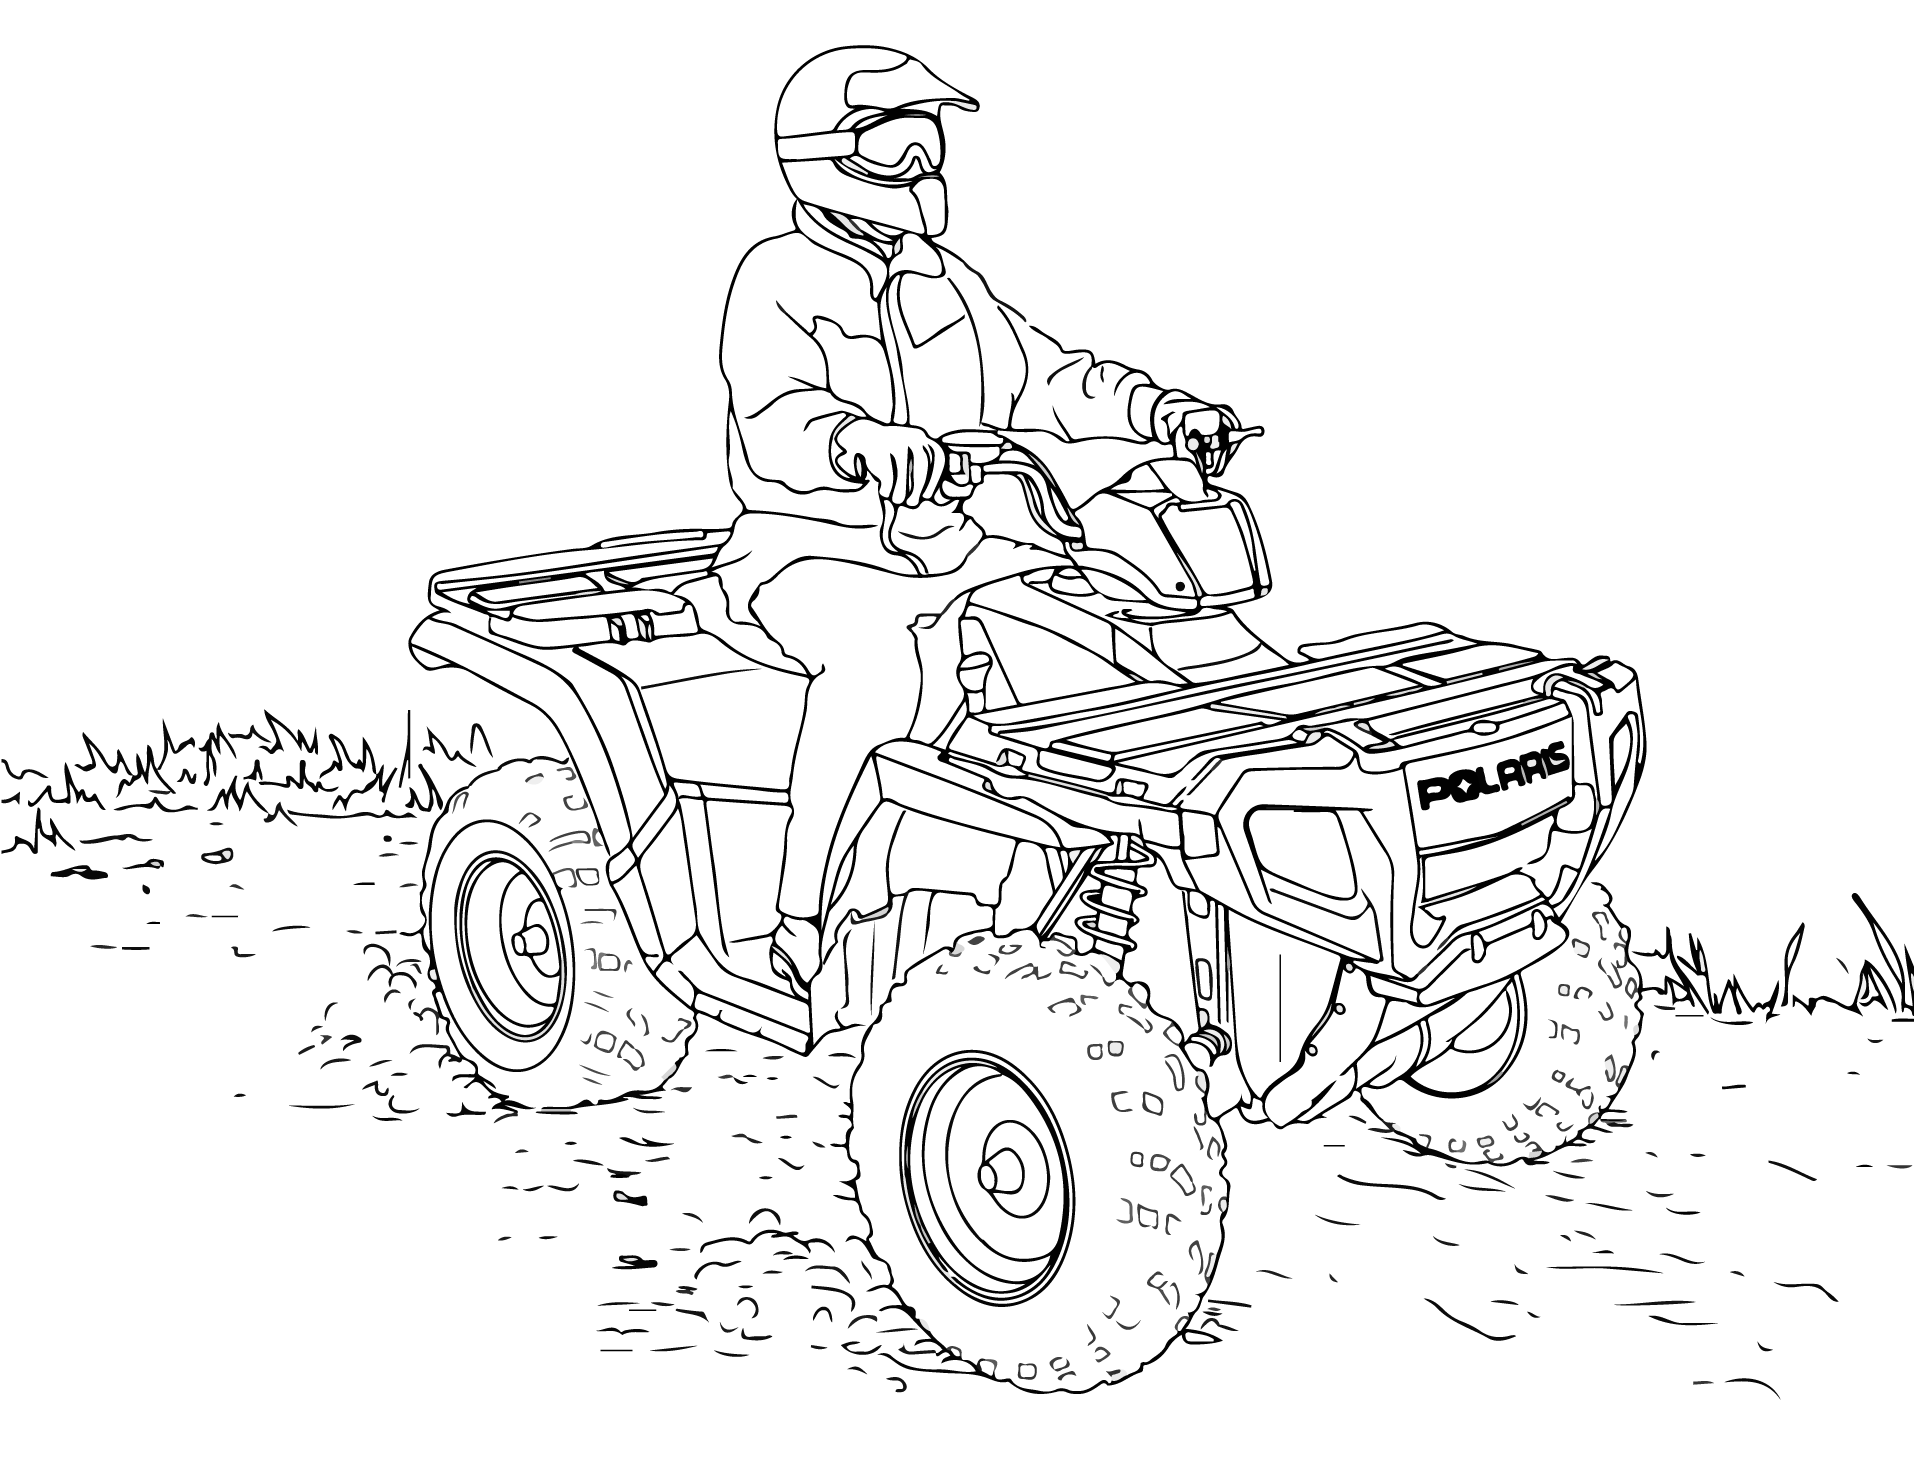
Check your surroundings and determine your path of travel.
Release the temporary brake lock.
Slowly depress the throttle with your right thumb and begin driving.
Drive slowly. Practice maneuvering and using the throttle and brakes on level surfaces.
Both rear wheels drive equally at all times. This means that the outside wheel must travel a greater distance than the inside wheel when turning, and the inside tire must slip traction slightly.
Slow down.
Never turn quickly when carrying cargo.
Steer in the direction of the turn.
Keep both feet on the footrests.
Lean your upper body to the inside of the turn while supporting your weight on the outer footrest. This technique alters the balance of traction between the rear wheels, allowing the turn to be made smoothly. The same leaning technique should be used for turning in reverse.
When driving on slippery surfaces such as wet trails or loose gravel, or during freezing weather, follow these precautions:
Do not operate on excessively rough, slippery or loose terrain.
Slow down when entering slippery areas.
Engage AWD before the wheels begin to lose traction.
Maintain a high level of alertness, reading the trail and avoiding quick, sharp turns, which can cause skids.
Never apply the brakes during a skid. Correct a skid by turning the handlebars in the direction of the skid and shifting your body weight forward.
Braking and handling are greatly affected when operating in hilly terrain. Improper procedure could cause loss of control or overturn. When driving uphill, follow these precautions:
Always engage AWD or ADC mode (if equipped) before ascending or descending a hill.
Drive straight uphill.
Avoid steep hills. Maximum incline is: 15°
Always check the terrain carefully before ascending any hill.
Never climb hills with excessively slippery or loose surfaces.
Keep both feet on the footrests.
Shift body weight uphill.
Proceed at a steady rate of speed and throttle opening. Opening the throttle suddenly could cause the ATV to flip over backwards.
Never go over the top of any hill at high speed. An obstacle, a sharp drop, or another vehicle or person could be on the other side of the hill.
Remain alert and be prepared to take emergency action. This may include quick dismounting of the vehicle.
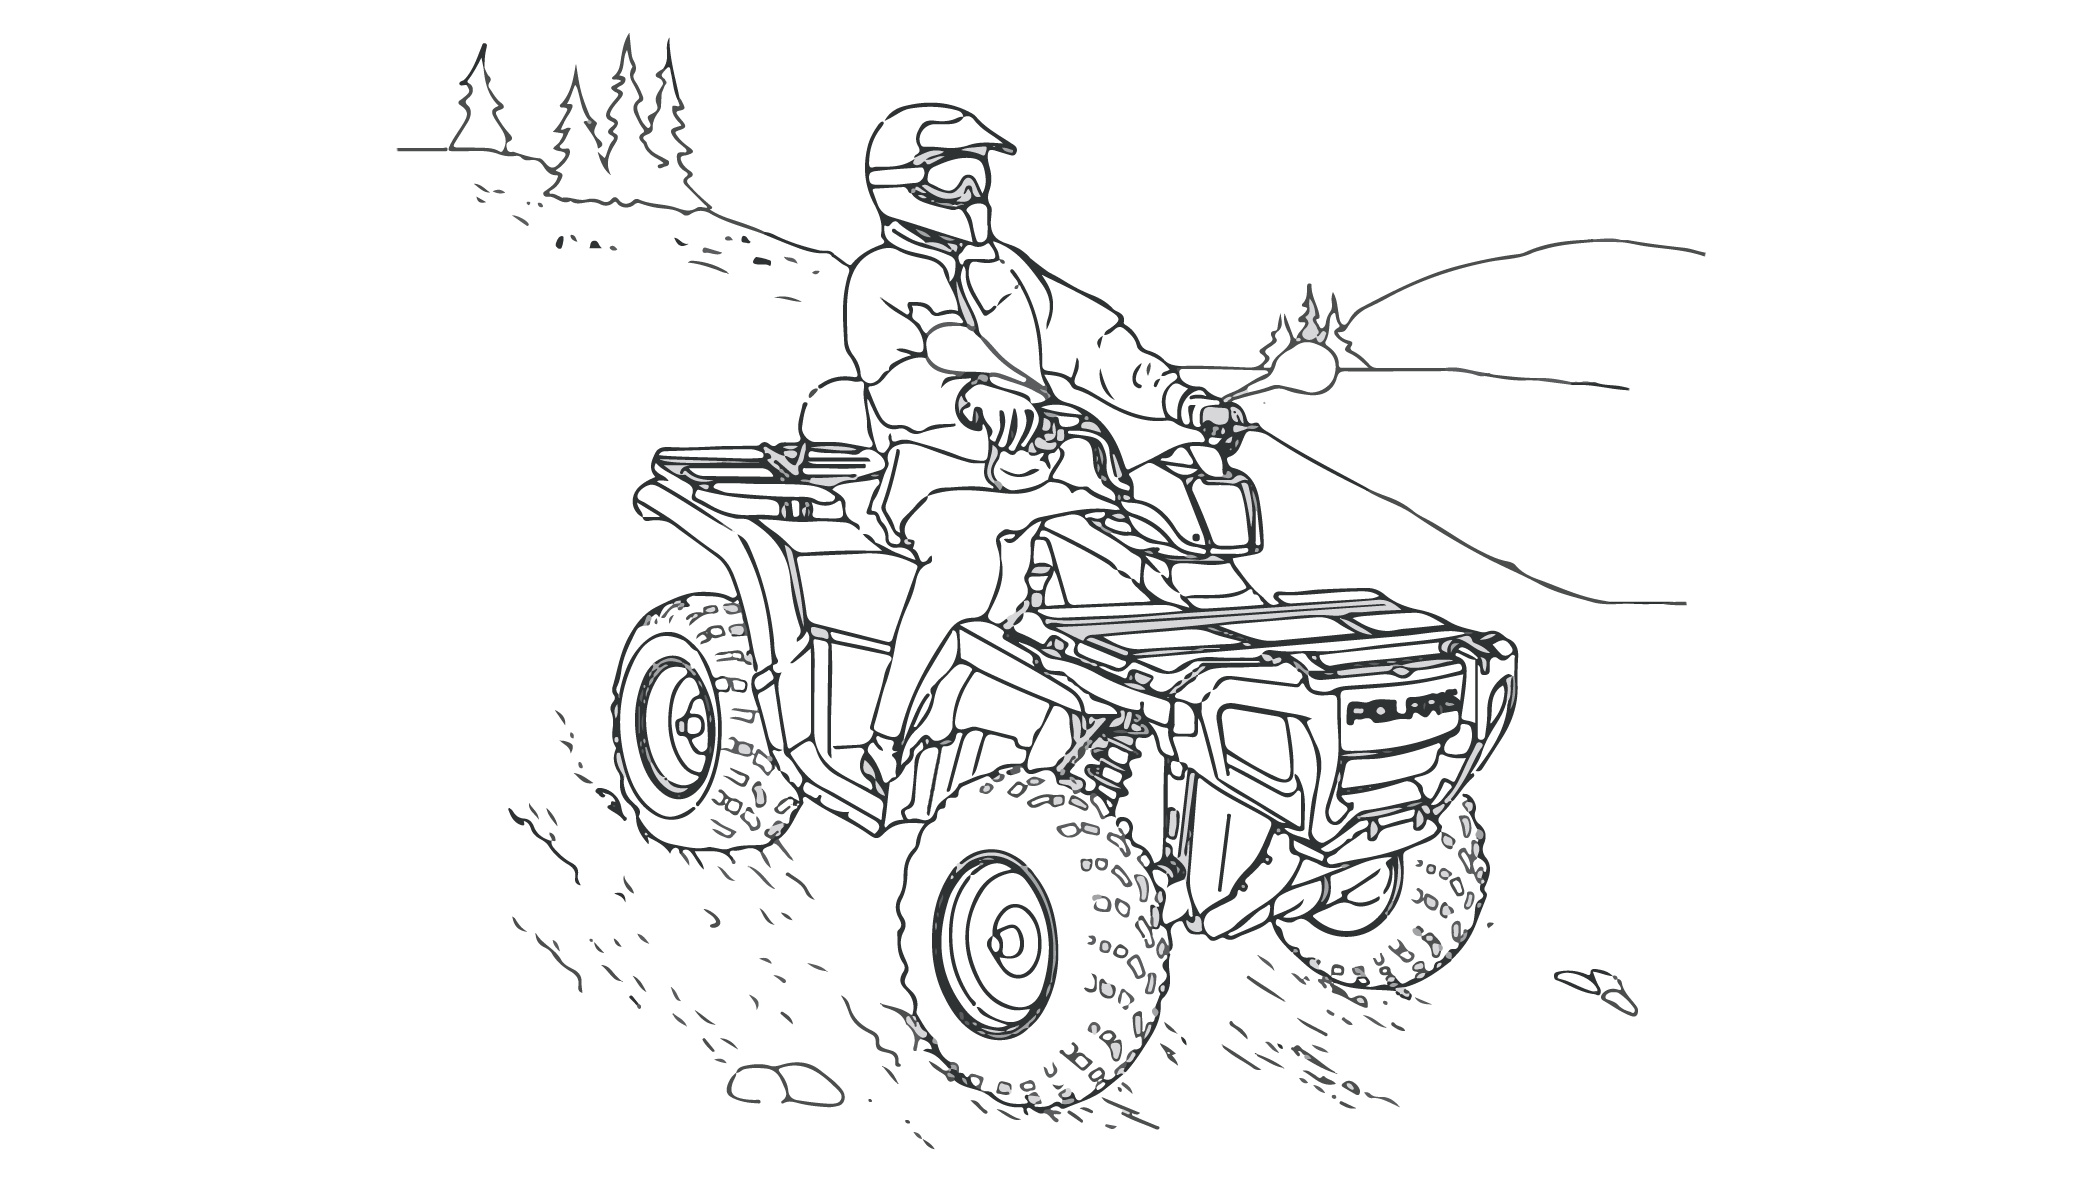
When driving downhill, follow these precautions:
Always check the terrain carefully before descending a hill.
Always engage AWD or ADC mode (if equipped) before ascending or descending a hill.
Avoid steep hills. Maximum incline is 15°
Always descend a hill with the transmission in forward gear. Do not descend a hill with the transmission in neutral.
Slow down. Never travel down a hill at high speed.
Drive straight downhill. Avoid traveling down a hill at an angle, which would cause the vehicle to lean sharply to one side.
Shift body weight uphill.
Apply the brakes slightly to aid in slowing. Applying the brakes too firmly may cause the rear wheels to lock, which could result in loss of control.
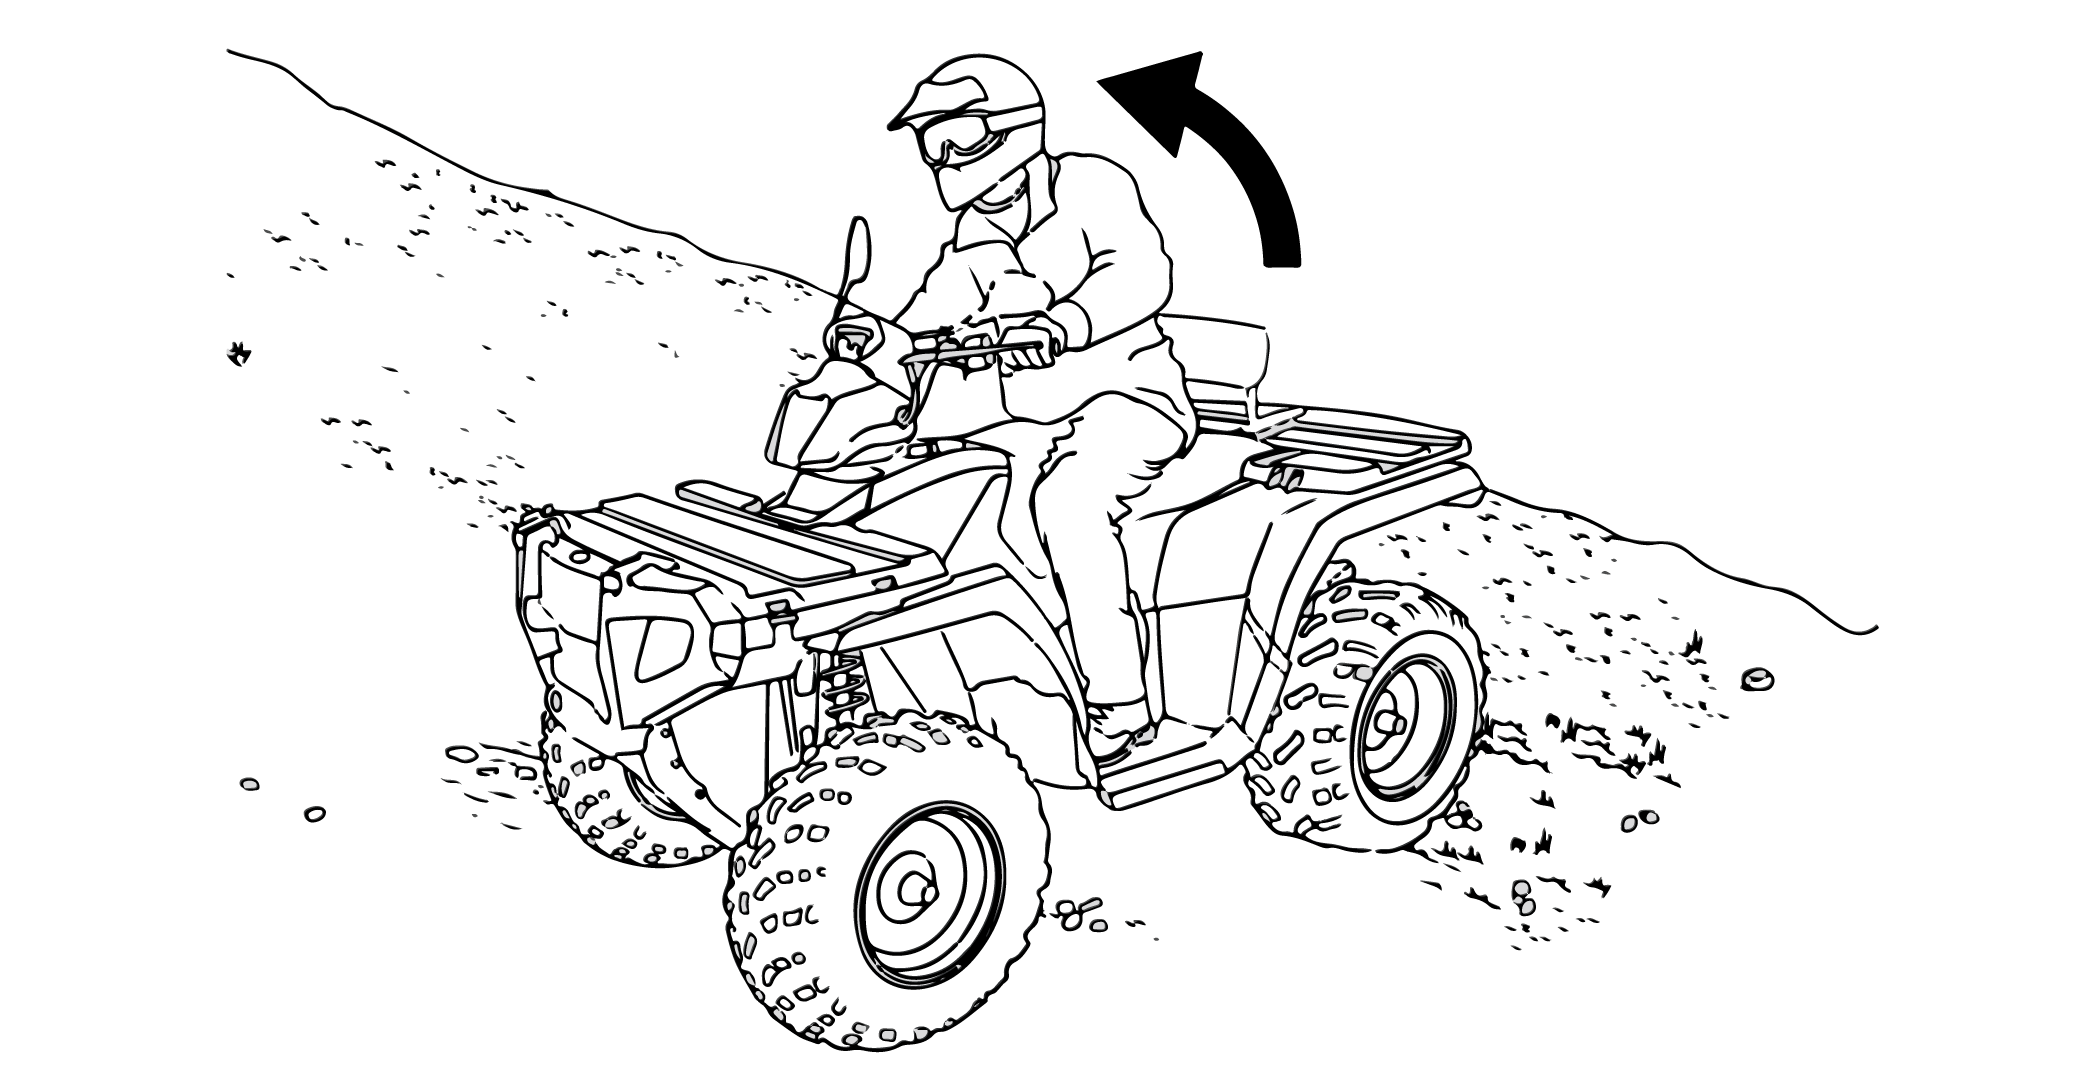
Driving on a sidehill is not recommended. Improper procedure could cause loss of control or overturn. Avoid crossing the side of any hill unless absolutely necessary.
If crossing a sidehill is unavoidable, follow these precautions:
Slow down.
Avoid crossing the side of a steep hill.
Lean into the hill, transferring your upper body weight toward the hill while keeping your feet on the footrests.
If the vehicle begins to tip, quickly turn the front wheel downhill, if possible, or dismount on the uphill side immediately!
If the vehicle stalls while climbing a hill, never back it down the hill! Use the K-turn to turn around.
Stop and lock the temporary brake lock while keeping body weight uphill.
Always engage AWD or ADC mode (if equipped) before ascending or descending a hill.
Leave the transmission in forward and shut off the engine.
Dismount on the uphill side of the vehicle, or on the left if the vehicle is pointing straight uphill.
Staying uphill of the vehicle, turn the handlebars full left.
While holding the brake lever, release the temporary brake lock and slowly allow the vehicle to roll around to your right until it's pointing across the hill or slightly downward.
Lock the temporary brake lock. Remount the vehicle from the uphill side, keeping body weight uphill. Start the engine with the transmission still in forward.
Release the temporary brake lock and proceed slowly, controlling speed with the brake lever, until the vehicle is on more level ground.
If the vehicle tips or overturns in water, or if the engine stops during or after operating in water, service is required before starting the engine. Your Polaris dealer can provide this service. If it’s impossible to bring the vehicle in before starting the engine, perform the service outlined in the Vehicle Immersion section of this manual, and take the vehicle in for service at the first opportunity.
Your ATV can operate through water with a maximum recommended depth equal to the bottom of the footrests.
Follow these precautions when operating through water:
Determine water depths and current before entering water.
Choose a crossing where both banks have gradual inclines.
Avoid operating through deep or fast-flowing water.
After leaving the water, test the brakes. Apply them lightly several times while driving slowly. The friction will help dry out the pads.
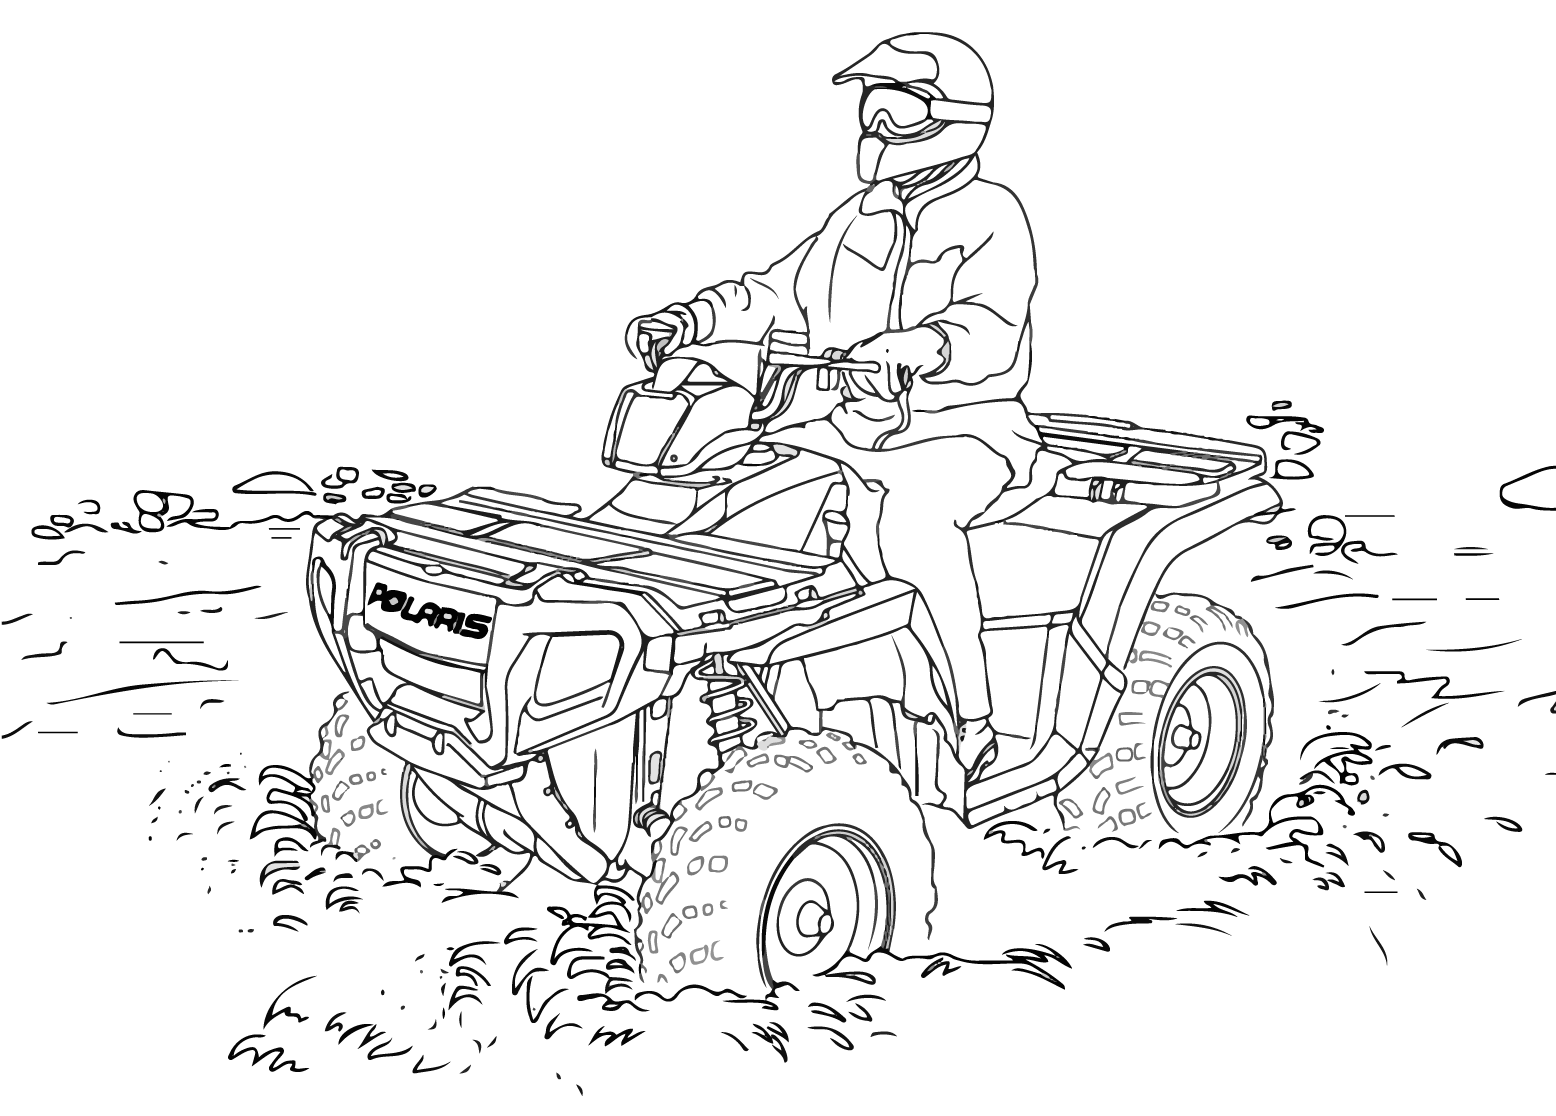
If it’s unavoidable to enter water deeper than the footrest level, follow these precautions:
Proceed slowly. Avoid rocks and obstacles.
Balance your weight carefully. Avoid sudden movements.
Maintain a steady rate of speed. Do not make sudden turns or stops. Do not make sudden throttle changes.
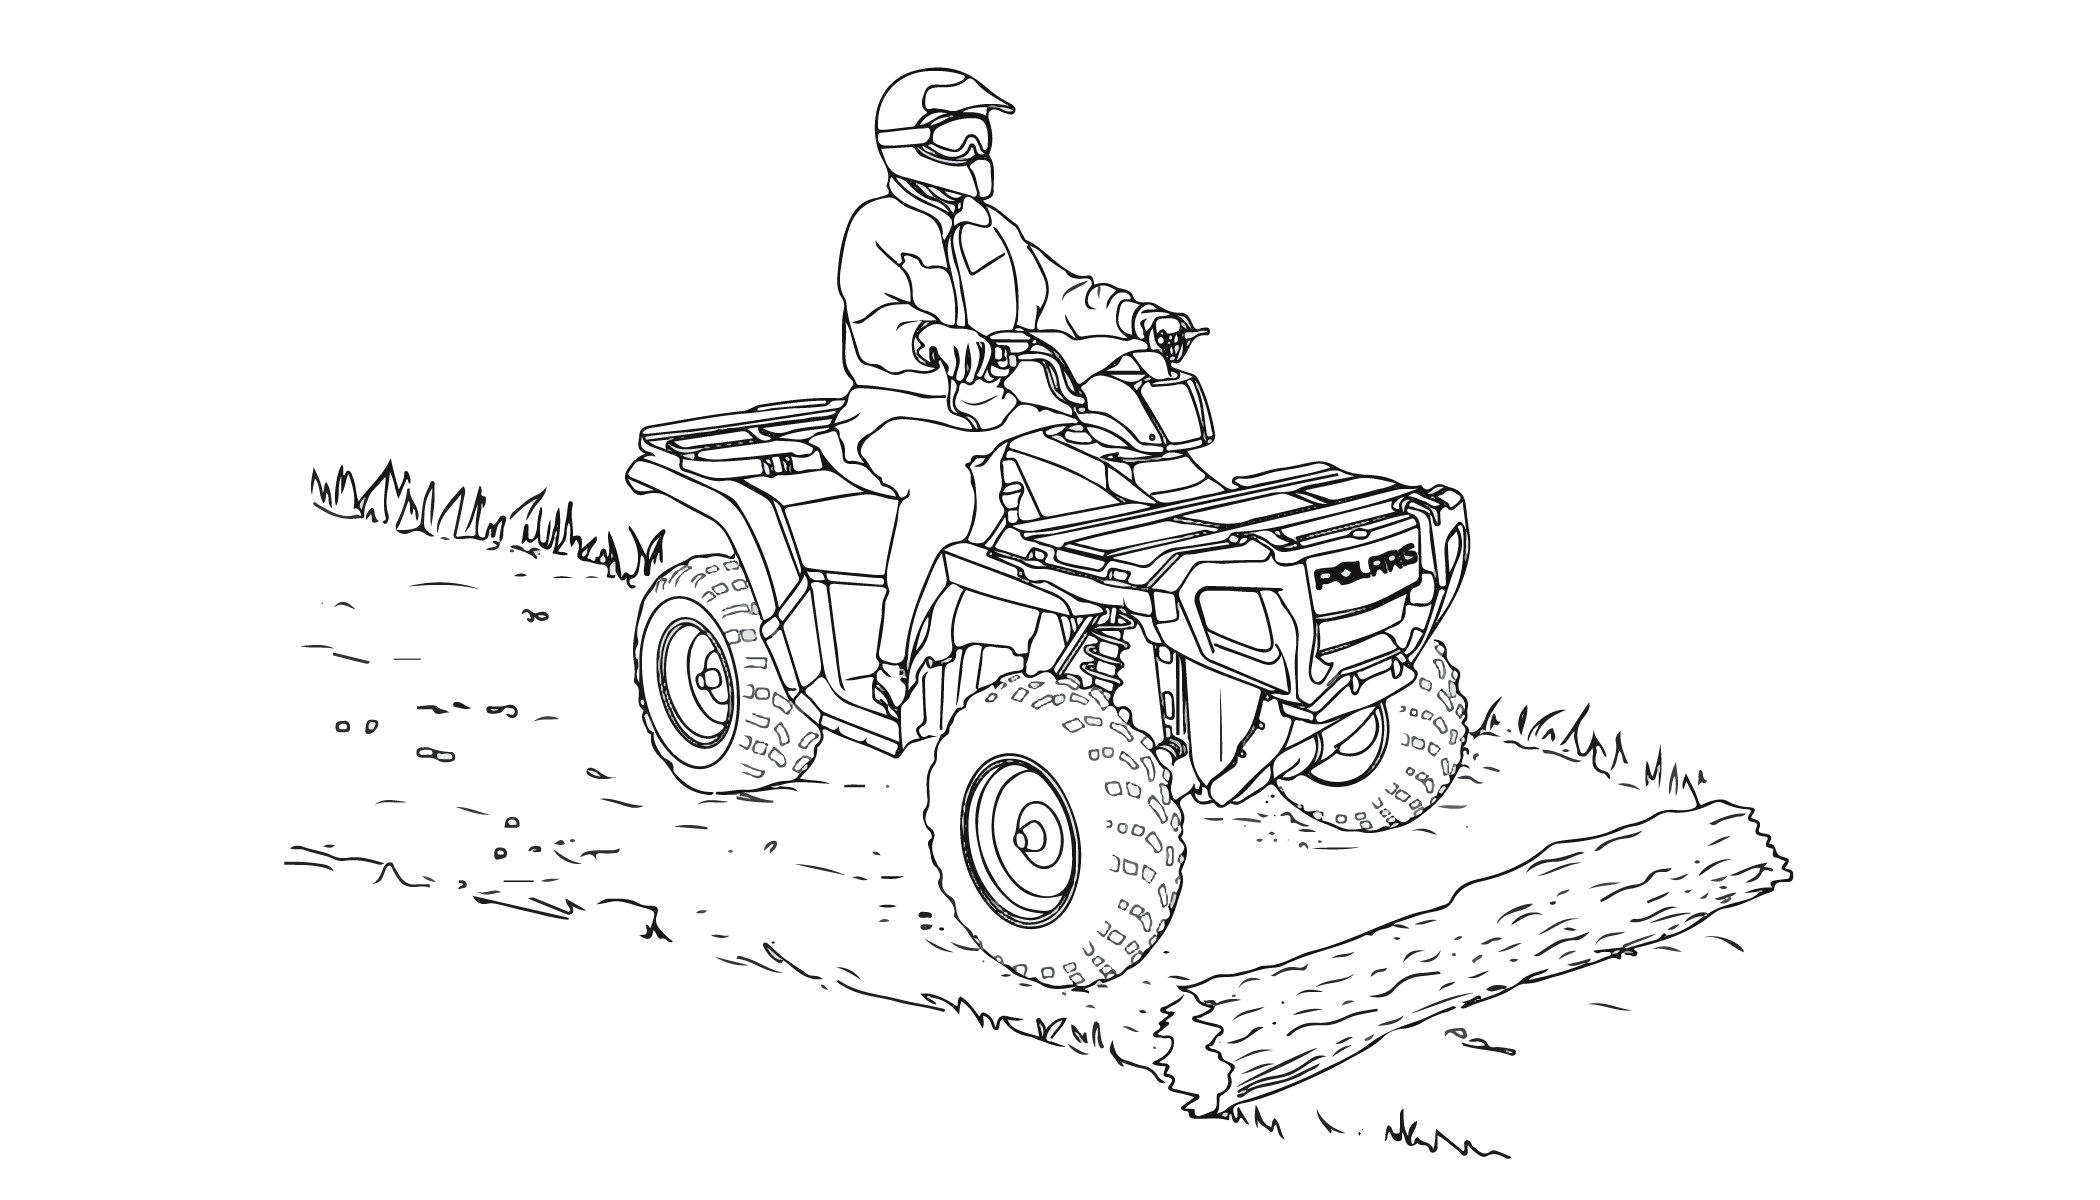
Follow these precautions when operating over obstacles:
Always check for obstacles before operating in a new area.
Look ahead and learn to read the terrain. Be constantly alert for hazards such as logs, rocks and low hanging branches.
Travel slowly and use extra caution when operating on unfamiliar terrain. Not all obstacles are immediately visible.
Never attempt to operate over large obstacles, such as rocks or fallen trees.
If you are operating a 2-up ATV, always have the passenger dismount before you operate over an obstacle that could cause a fall from the vehicle or vehicle tipover.
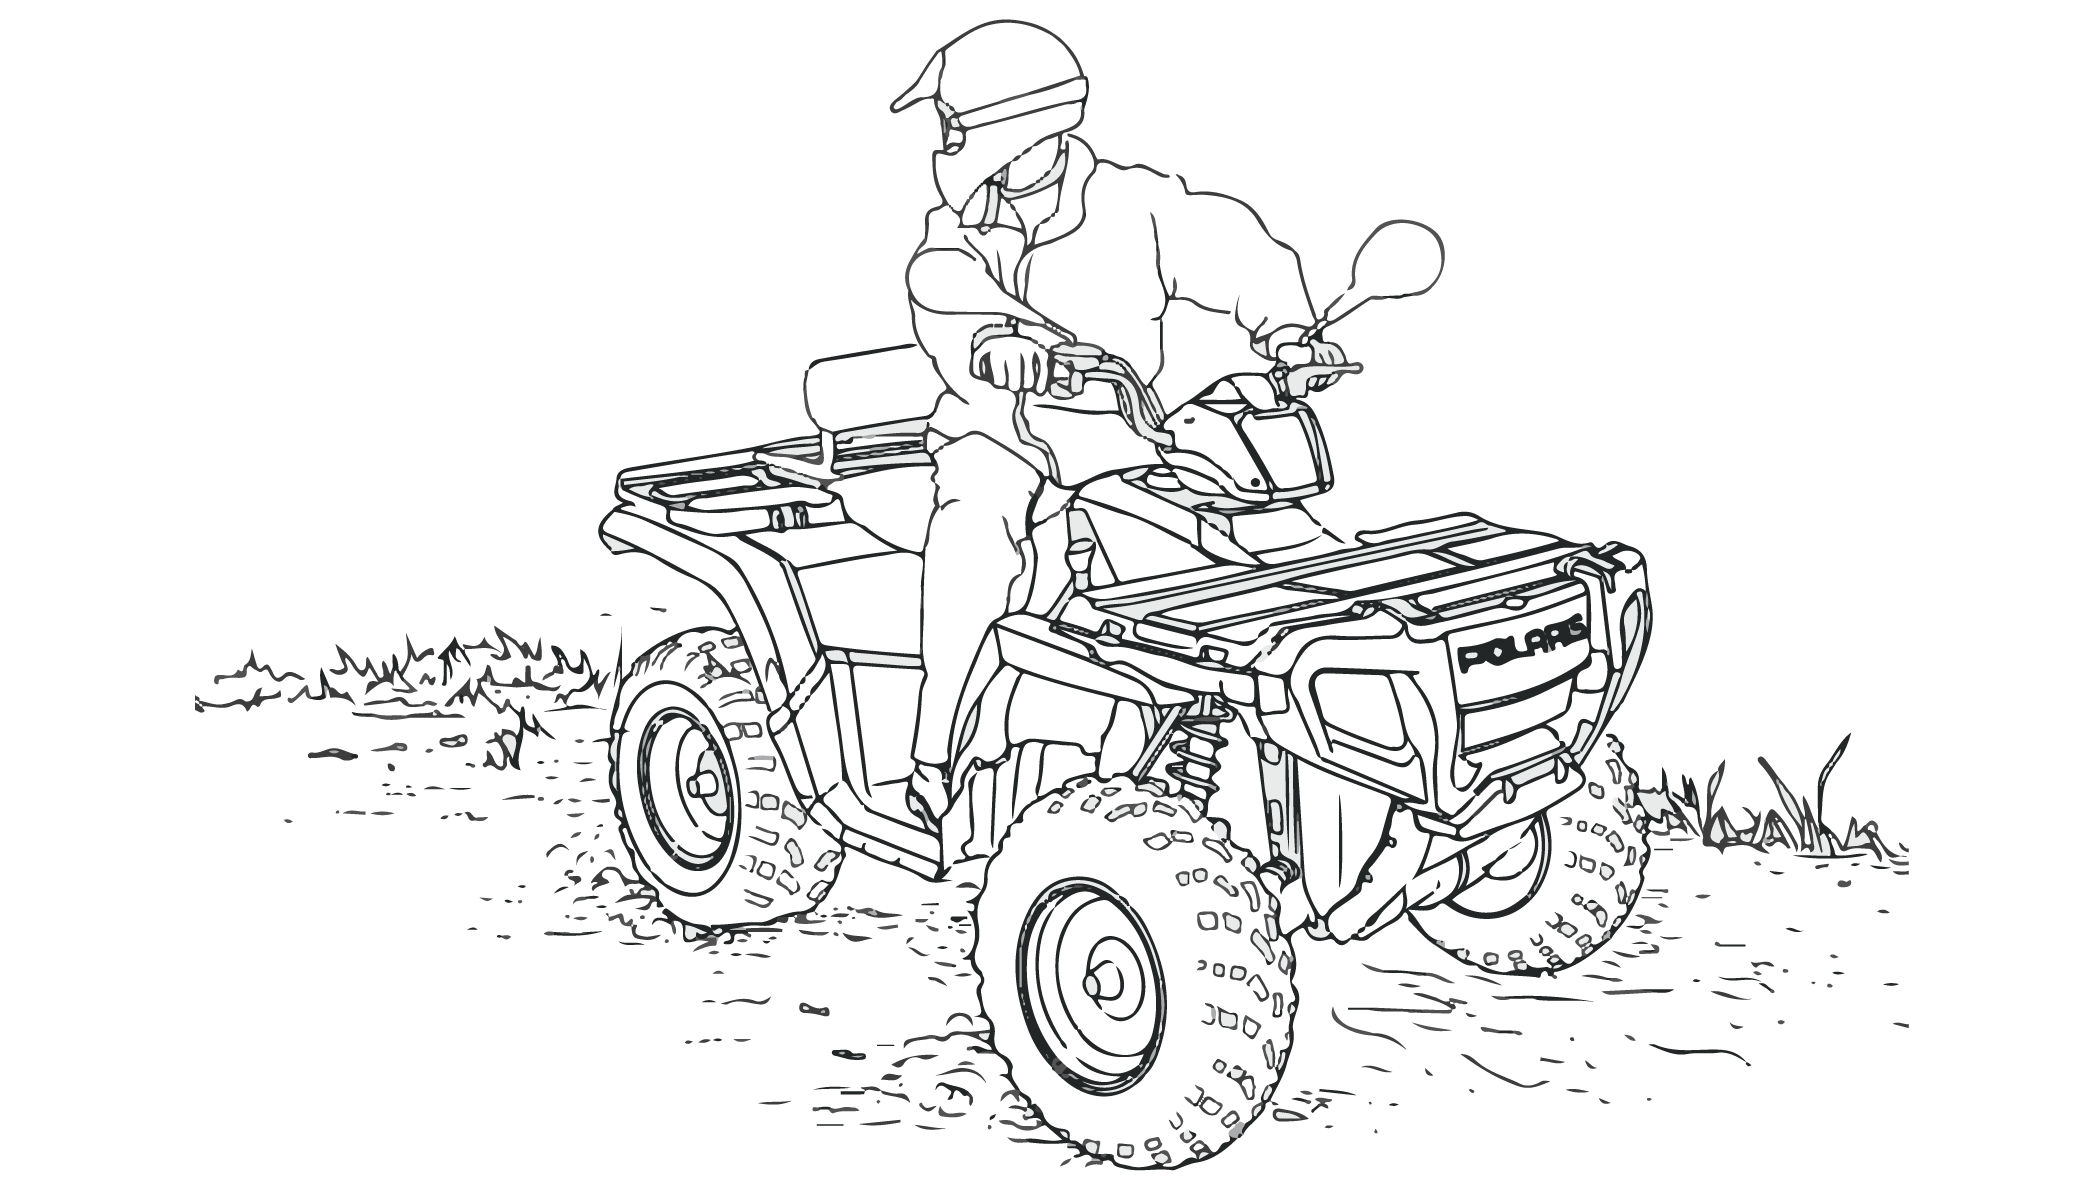
Follow these precautions when operating in reverse:
Always check for obstacles or people behind the vehicle.
Always avoid backing downhill.
Back slowly.
Apply the brakes lightly for stopping.
Avoid turning at sharp angles.
Never open the throttle suddenly.
Do not use the override switch unless additional wheel speed is required for vehicle movement. Use the override with caution as rearward vehicle speed is greatly increased. Do not operate at wide open throttle. Operate the throttle just enough to maintain a desired speed.
If boarding from the left side of the vehicle, grasp the left handlebar grip with your left hand. Step onto the footrest and place your right foot and leg across the seat. Sit astride the vehicle.
If boarding from the right side of the vehicle, grasp the right handlebar grip with your right hand. Step onto the footrest and place your left foot and leg across the seat. Sit astride the vehicle.
Position the vehicle on a level surface.
Place the transmission in PARK (or neutral).
Stand on the footrests and dismount the vehicle, holding onto the handlebar for support.
Position the vehicle on a level surface outdoors or in a well-ventilated area.
Place the transmission in PARK (P).
Lock the temporary brake lock.
Sit on the vehicle and move the engine stop switch to RUN.
Turn the ignition key past the ON position to engage the starter. Activate the starter for a maximum of five seconds, releasing the key when the engine starts.
If the engine does not start, return the key to the OFF position and wait five seconds before attempting to start again. Activate the starter for another five seconds if necessary. Repeat this procedure until the engine starts.
If the vehicle is used year-round, check the oil level frequently. A rising oil level could indicate the accumulation of contaminates such as water or excess fuel in the bottom of the crankcase. Water in the bottom of the crankcase can lead to engine damage and must be drained. Water accumulation increases as outside temperature decreases.
Release the throttle completely and brake to a complete stop.
Place the transmission in PARK (P).
Stop the engine.
Lock the temporary brake lock.
Stop the vehicle on a level surface. When parking inside a garage or other structure, be sure that the structure is well ventilated and that the vehicle is not close to any source of flame or sparks, including any appliance with pilot lights.
Place the transmission in PARK (P).
Stop the engine.
Lock the temporary brake lock.
Remove the ignition key to prevent unauthorized use.
Avoid parking on an incline if possible. If it’s unavoidable, follow these precautions:
Place the transmission in PARK (P).
Stop the engine.
Lock the temporary brake lock.
Always block the rear wheels on the downhill side.
Overloading the vehicle or carrying or towing cargo improperly can alter vehicle handling and may cause loss of control or brake instability, which can result in serious injury or death. Always follow these precautions when hauling cargo:
REDUCE SPEED AND ALLOW GREATER DISTANCES FOR BRAKING WHEN HAULING CARGO.
NEVER EXCEED THE MAXIMUM WEIGHT CAPACITY of the vehicle. When determining the weight you are adding to the vehicle, include the weight of the operator, passenger (if you are operating a 2-up ATV), accessories, loads in the rack or box and the load on the trailer tongue. The combined weight of these items must not exceed the maximum weight capacity.
CARGO WEIGHT DISTRIBUTION should be 1/3 on the front rack and 2/3 on the rear rack. When operating over rough or hilly terrain, reduce speed and cargo to maintain stable driving conditions. Carrying loads on only one rack increases the possibility of vehicle overturn.
CARRY LOADS AS LOW ON THE RACKS AS POSSIBLE. Carrying loads high on the racks raises the center of gravity of the vehicle and creates a less stable operating condition.
SECURE ALL LOADS BEFORE OPERATING. Unsecured loads can create unstable operating conditions, which could result in loss of control of the vehicle.
OPERATE ONLY WITH STABLE AND SAFELY ARRANGED LOADS. When handling off-centered loads that cannot be centered, securely fasten the load and operate with extra caution. Always attach the tow load to the hitch point designated for your vehicle.
HEAVY LOADS CAN CAUSE BRAKING AND CONTROL PROBLEMS. Use extreme caution when applying brakes with a loaded vehicle. Avoid terrain or situations that may require backing downhill. Adjust suspension springs preload accordingly to the vehicle load. See details of adjustment procedure in "Maintenance" section.
USE EXTREME CAUTION when operating with loads that extend over the rack sides. Stability and maneuverability may be adversely affected, causing the vehicle to overturn.
DO NOT BLOCK THE FRONT HEADLIGHT BEAM when carrying loads on the front rack.
DO NOT TRAVEL FASTER THAN THE RECOMMENDED SPEEDS.
The vehicle should never exceed 10 mph (16 kph) while towing a load on a level surface. Vehicle speed should never exceed 5 mph (8 kph) when towing loads in rough terrain, while cornering, or while ascending or descending a hill.
Never exceed the weight capacities specified for your ATV on warning labels and in the specifications section of this manual
Cargo weight should be evenly distributed (1/3 on the front rack and 2/3 on the rear rack) and mounted as low as possible.
When operating over rough or hilly terrain, reduce speed and cargo weight to maintain stable driving conditions.
NEVER exceed 50 mph (80 kph) when rear cargo loads are above 75 lbs (34 kg) and/or front cargo loads are above 37 lbs (17 kg).
Do not obstruct the headlight beam with cargo.
Slow down.
Use low forward gear when hauling or towing heavy cargo to extend belt life.
Always operate the vehicle with extreme caution whenever hauling or towing loads. Balance, handling and control may be affected.
Always attach a towed load to the hitch point. Remove the hitch from the ATV when not towing a trailer. If towing a load, reduce rear rack cargo weight by the amount of tongue weight. Strictly follow the instructions outlined in the operator’s manual of the mounted or trailed machinery or trailer. Never operate the combination tractor — machine or tractor — trailer unless all instructions have been followed.
The combination of rear rack cargo weight and tongue weight must not exceed the rear rack capacity.
The total load (operator, accessories, cargo and weight on hitch) must not exceed the maximum weight capacity of the vehicle.
Whatever the vehicle is towing, always stay clear of the area between the vehicle and the towed object.
If towing the vehicle is necessary, shift the transmission into neutral for better mobility and to prevent damage to the belt. Always attach the tow cable to the front tow loop of the disabled vehicle. A rider must be on board to steer the disabled vehicle while towing.
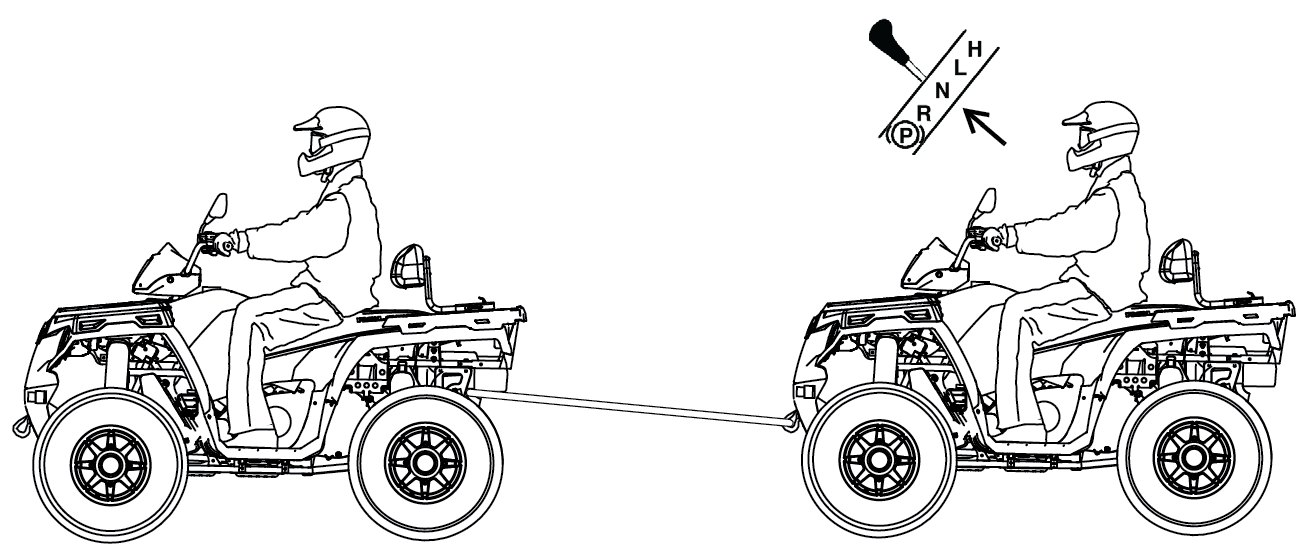
These safety warnings and instructions apply if your vehicle came equipped with a winch or if you choose to add an accessory winch to your vehicle.
Your winch may have a cable made of either wire rope or specially designed synthetic rope. The term “winch cable” will be used for either unless noted otherwise.
Read all sections of this manual.
Never use alcohol or drugs before or while operating the winch.
Never allow children under 16 years of age to operate the winch.
Always wear eye protection and heavy gloves when operating the winch.
Always keep body, hair, clothing and jewelry clear of the winch cable, fairlead and hook when operating winch.
Never attempt to “jerk” a load attached to the winch with a moving vehicle. See the Shock Loading section on Shock Loading.
Always keep the area around the vehicle, winch, winch cable, and load clear of people (especially children) and distractions while operating the winch.
Always turn the vehicle ignition power OFF when it and the winch are not being used.
Always be sure that at least five (5) full turns of winch cable are wrapped around the winch drum at all times. The friction provided by this wrapped cable allows the drum to pull on the winch cable and move the load.
Always apply your vehicle’s park brake and/or park mechanism to hold the vehicle in place during winching. Use wheel chocks if needed.
Always align the vehicle and winch with the load directly in front of the vehicle as much as possible. Avoid winching with the winch cable at an angle to the winching vehicle’s centerline whenever possible.
If winching at an angle is unavoidable, follow these precautions:
Look at the winch drum occasionally. Never let the winch cable “stack” or accumulate at one end of the winch drum. Too much winch cable at one end of the winch drum can damage the winch and the winch cable.
If stacking occurs, stop winching. Follow step 15 of Winch Operation to feed and rewind the cable evenly before continuing the winch operation.
Never winch up or down at sharp angles. This can destabilize the winching vehicle and possibly cause it to move without warning.
Never attempt to winch loads that weigh more than the winch’s rated capacity.
The winch motor may become hot during winch use. If you winch for more than 45 seconds, or if the winch stalls during operation, stop winching and permit the winch to cool down for 10 minutes before using it again.
Never touch, push, pull or straddle the winch cable while winching a load.
Never let the winch cable run through your hands, even if wearing heavy gloves.
Never release the clutch on the winch when the winch cable is under load.
Never use the winch for lifting or transporting people.
Never use the winch to hoist or suspend a vertical load.
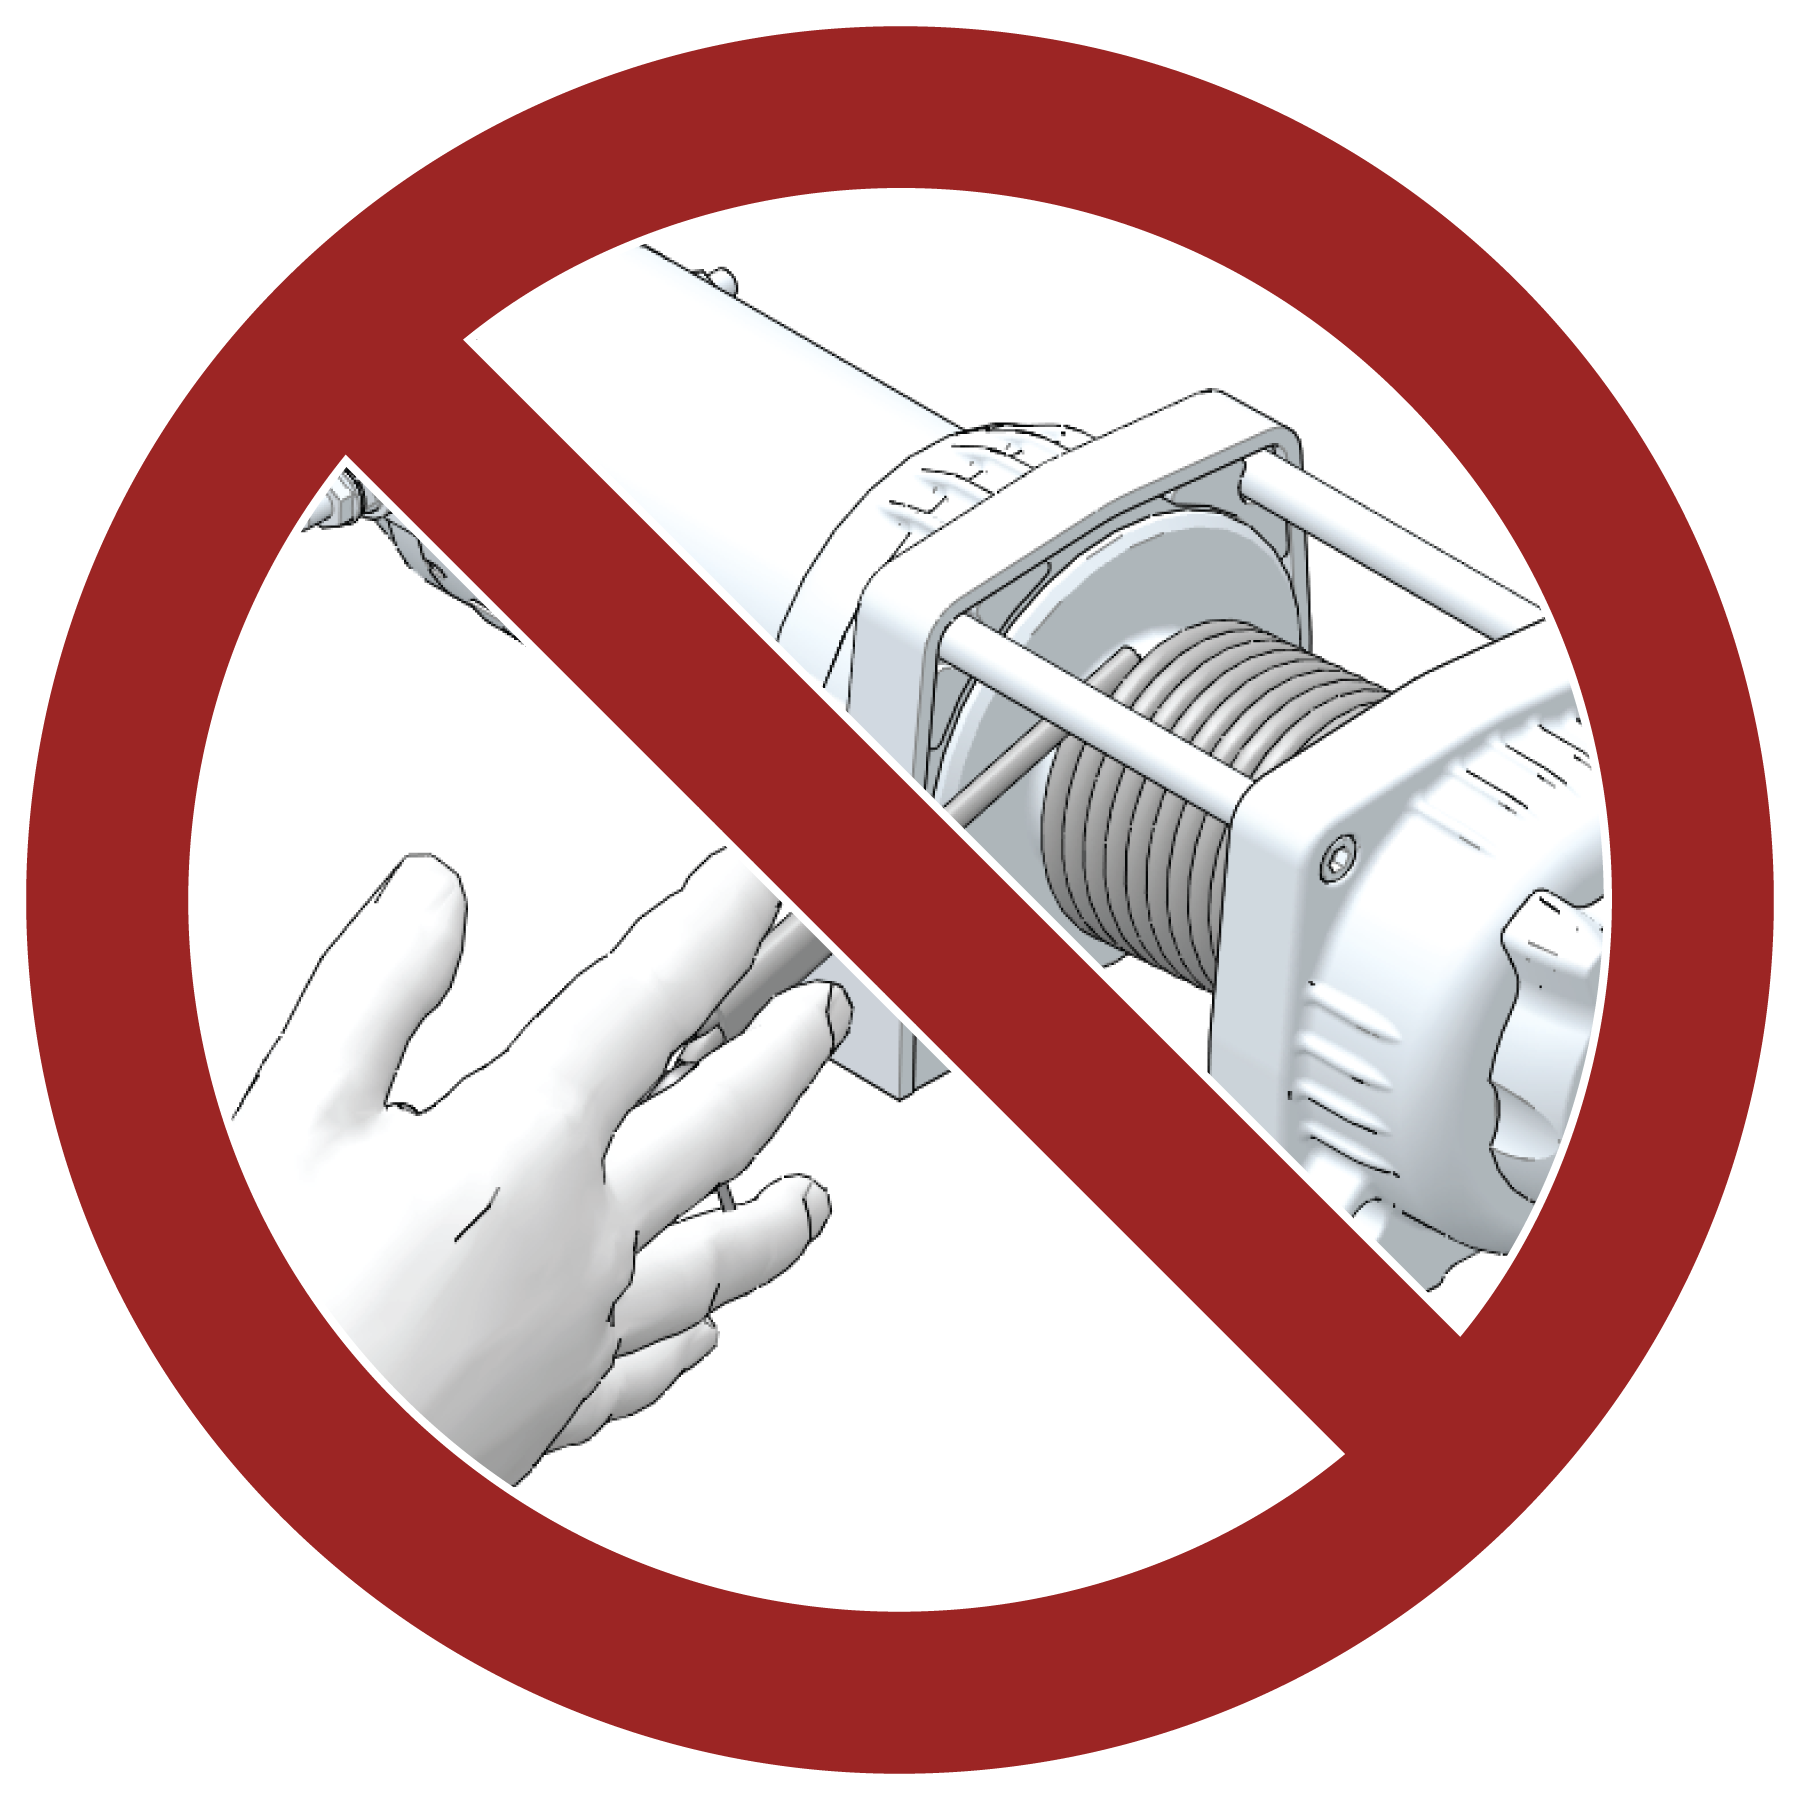
Always inspect your winch and winch cable before each use.
Never winch the hook fully into the winch. This can cause damage to winch components.
Unplug the remote control from the vehicle when the winch is not in use to prevent inadvertent activation and use by unauthorized persons.
Never grease or oil the winch cable. This will cause the winch cable to collect debris that will shorten the life of the cable.
Read the Winch Safety Precautions in the preceding pages before using your winch.
Consider practicing the operation and use of your winch before you actually need to use it in the field.
Improper winch use can result in SEVERE INJURY or DEATH. Always follow all winch instructions and warnings in this manual.
Each winching situation is unique.
Take your time to think through the winching you are about to do.
Proceed slowly and deliberately.
Never hurry or rush during winching.
Always pay attention to your surroundings.
You may need to change your winching strategy if it is not working.
Always remember that your winch is very powerful.
There are simply some situations that you and your winch will not be able to deal with. Do not be afraid to ask others to help when this happens.
Always inspect the vehicle, winch, winch cable and winch controls for any signs of damage or parts in need of repair or replacement before each use. Pay particular attention to the first 3 feet (1 meter) of winch cable if the winch is being used (or has been used) for lifting an accessory plow assembly. Promptly replace any worn or damaged cable.
Never operate a winch or a vehicle in need of repair or service.
Always apply your vehicle’s park brake and/ or park mechanism to hold the vehicle in place during winching. Use wheel chocks if needed.
Always use the hook strap when handling the hook.
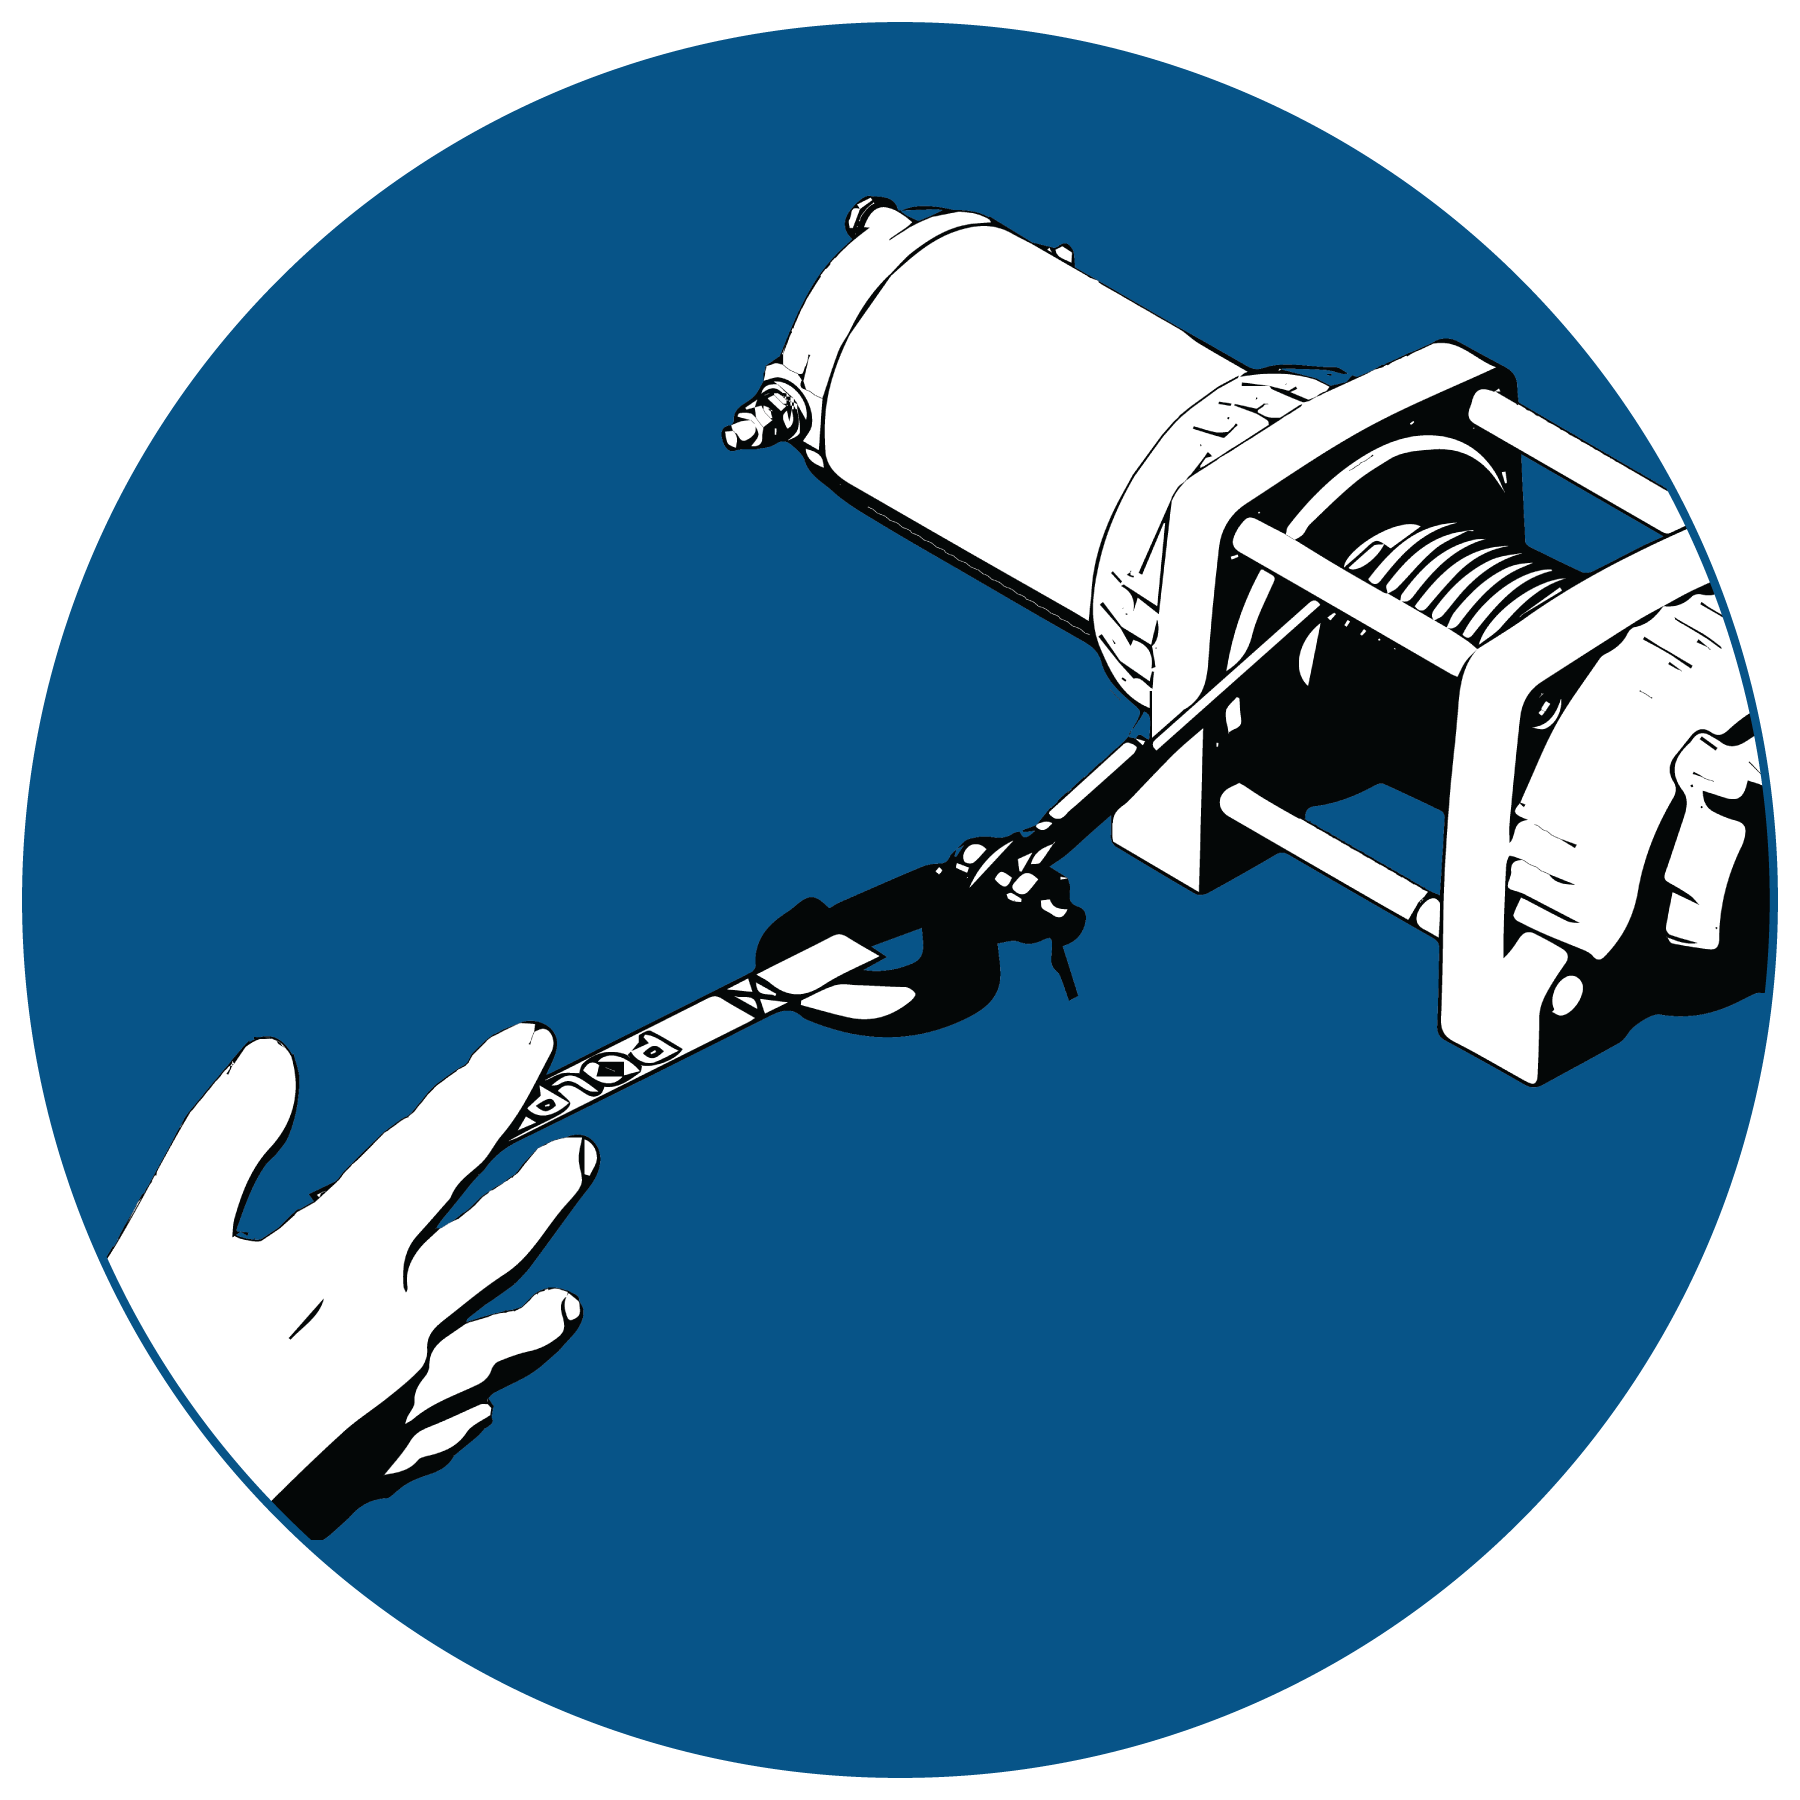
Never put your fingers into the hook. This could lead to SEVERE INJURY.
Attach the hook itself onto the load or use a tow strap or chain to secure the load to the winch cable.

A “tow strap” is NOT intended to stretch. A “recovery strap” is designed to stretch.
Never hook the winch cable back onto itself. This will damage the winch cable and may result in winch cable failure.
If possible, keep the winch cable aligned with the centerline of the winching vehicle. This will help the spooling of the winch cable and reduce the load on the fairlead.
If freeing a stuck vehicle by attaching to a tree, use an item such as a tow strap to avoid damaging the tree during winch operation. Sharp cables and chains can damage and even kill trees. Please remember to Tread Lightly℠ (treadlightly.org).
Before operating the winch, be sure that the safety latch on the winch cable hook is fully seated when the load is attached.
Never operate your winch with a damaged hook or latch. Always replace damaged parts before using the winch.
Never remove the hook strap from the hook.
Release the winch clutch and pull out the winch cable.
Pulling out as much cable as possible maximizes the winch’s pulling capacity. Always be sure that at least five (5) full turns of winch cable are wrapped around the winch drum at all times. The friction provided by this wrapped cable allows the drum to pull on the winch cable and move the load.
Read and adhere to the following information for winch damping to ensure safe winch use.
In order to absorb energy that could be released by a winch cable failure, always place a “damper” on the winch cable. A damper can be heavy jacket, tarp, or other soft, dense object. A damper can absorb much of the energy released if a winch cable breaks when winching. Even a tree limb can help as a damper if no other items are available to you.
Lay the damper on top of the mid-point of the winch cable length that is spooled out.
On a long pull, it may be necessary to stop winching so that the damper can be repositioned to the new mid-point of the winch cable. Always release the tension on the winch cable before repositioning the damper.
Avoid being directly in line with the winch cable whenever possible. Also, never permit others to stand near or in line with the winch cable during winch operation.
Never hook the winch cable back onto itself. This will damage the winch cable and may result in winch cable failure.
Never use straps, chains or other rigging items that are damaged or worn.
The ONLY time a winch-equipped vehicle should be moving when using the winch is when that vehicle itself is stuck. The winch equipped vehicle should NEVER be in motion to “shock” load the winch cable in an attempt to move a second stuck vehicle. See the Shock Loading section on Shock Loading. For your safety, always follow these guidelines when winching a vehicle free:
Release the winch clutch and spool out the necessary length of winch cable.
Align the winch cable as close as possible to the winching vehicle’s centerline.
Attach the winch cable hook to the anchor point or the stuck vehicle’s frame following instructions in this manual.
Re-engage the clutch on the winch.
Slowly winch in the slack in the winch cable.
Select the proper vehicle gear to propel the stuck vehicle in the direction of winching.
Shift to the lowest gear available on the stuck vehicle.
Slowly and carefully apply vehicle throttle and winch together to free the vehicle.
Stop winching as soon as the stuck vehicle is able to propel itself without the help of the winch.
Detach the winch cable hook.
Rewind the winch cable evenly back onto the winch drum following the instructions in this manual.
Never attempt to winch another stuck vehicle by attaching the winch cable to a suspension component, brush guard, bumper or cargo rack. Vehicle damage may result. Instead, attach the winch to a strong portion of the vehicle frame or hitch.
Extensive winching will run down the battery on the winching vehicle. Let the winching vehicle’s engine run while operating the winch to prevent the battery from running low if winching for long periods.
The winch motor may become hot during winch use. If you winch for more than 45 seconds, or if the winch stalls during operation, stop winching and permit the winch to cool down for 10 minutes before using it again.
After winching is complete, especially if winching at an angle, it may be necessary to re-distribute the winch cable across the winch drum. You will need an assistant to perform this task.
Release the clutch on the winch.
Feed out the winch cable that is unevenly bunched up in one area.
Re-engage the winch clutch.
Have an assistant pull the winch cable tightly with about 100 lbs. (45 kg) of tension using the hook strap.
Slowly winch the cable in while your assistant moves the end of the winch cable back and forth horizontally to evenly distribute the winch cable on the drum.
Doing this reduces the chances of the winch cable “wedging” itself between lower layers of winch cable.
Use of worn or damaged cable could lead to sudden failure and SEVERE INJURY.
For your safety, always replace POLARIS winch parts (including the cable) with genuine POLARIS replacement parts available at your authorized POLARIS dealer, or other qualified person.
Always inspect your winch before each use. Inspect for worn or loose parts including mounting hardware. Never use the winch if any part needs repair or replacement.
Always inspect your winch cable before each use. Inspect for worn or kinked winch cable.
A kinked winch cable made of wire rope is shown at right. Even after being “straightened out,” this cable has already been permanently and severely damaged. Promptly discontinue use of a winch cable in this condition.
A kinked winch cable made of wire rope that has been “straightened out” is shown at right. Even though it may look usable, the cable has been permanently and severely damaged. It can no longer transmit the load that it could prior to kinking. Promptly discontinue use of a winch cable in this condition.
A winch cable made of synthetic rope should be inspected for signs of fraying. Replace the cable if fraying is observed (shown below). Promptly discontinue use of a winch cable in this condition. Also replace the winch cable if there are fused or melted fibers. Such an area of the synthetic rope will be stiff and appear smooth or glazed. Promptly discontinue use of a winch cable in this condition.
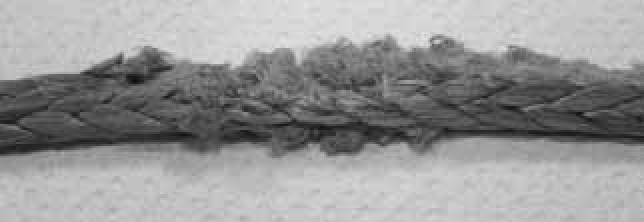
Your winch cable is very strong but it is NOT designed for dynamic, or “shock” loading. Shock loading may tension a winch cable beyond its strength and cause the cable to break. The end of a broken winch cable under such high loading can cause SEVERE INJURY or DEATH to you and other bystanders.
Winch cables are designed to NOT absorb energy. This is true of both wire-rope and synthetic-rope winch cables.
Never attempt to “jerk” a load with the winch. For example, never take up slack in the winch cable by moving the winching vehicle in an attempt to move an object. This is a dangerous practice. It generates high winch cable loads that may exceed the strength of the cable. Even a slowly moving vehicle can create large shock loads in a winch cable.
SEVERE INJURY or DEATH can result from a broken winch cable.
Never quickly turn the winch ON and OFF repeatedly (“jogging”). This puts extra load on the winch, winch cable, and generates excessive heat from the motor. This is a form of shock loading.
Never tow a vehicle or other object with your winch. Towing an object with a winch produces shock loading of the cable even when towing at slow speeds. Towing from a winch also positions the towing force high on the vehicle. This can cause instability of the vehicle and possibly lead to an accident.
Never use recovery straps with your winch. Recovery straps are designed to stretch and can store energy. This stored energy in the recovery strap is released if a winch cable fails making the event even more hazardous. Similarly, never use elastic “bungie” cords for winching.
Never use the winch to tie down a vehicle to a trailer or other transportation vehicle. This type of use also causes shock loading that can cause damage to the winch, winch cable, or vehicles used.
Your winch cable is designed and tested to withstand the loads produced by the winch motor when operated from a stationary vehicle. Always remember that the winch and winch cable are NOT designed for shock loading.
Always inspect your winch before each use. Inspect for worn or kinked winch cable. Also inspect for worn or loose parts including mounting hardware.
Permit your winch motor to cool down prior to servicing your winch.
Never work on your winch without first disconnecting the battery connections to prevent accidental activation of the winch.
For your safety, always replace POLARIS winch parts (including the cable) with genuine POLARIS replacement parts available at your authorized POLARIS dealer, or other qualified person.
Some winch models use wire rope as the winch cable. Other winches use a specially designed synthetic rope as the winch cable.
Never replace a synthetic-rope winch cable with a consumer-grade polymer rope such as can be purchased in a hardware store. Although they may look similar, they are NOT alike. A polymer rope not designed for winch use will stretch and store excessive energy when winching.
Do not modify the engine, intake or exhaust components, as doing so may affect compliance with governmental noise level requirements.
This engine is equipped with a closed crankcase system. Blow-by gases are forced back to the combustion chamber by the intake system. All exhaust gases exit through the exhaust system.
Exhaust emissions are controlled by engine design. An electronic fuel injection (EFI) system controls fuel delivery. The engine and EFI components are set at the factory for optimal performance and are not adjustable.
This vehicle complies with the EMC requirements of European directive 2014/30/EU.
Non-ionizing Radiation: This vehicle emits some electromagnetic energy. People with active or non-active implantable medical devices (such as heart monitoring or controlling devices) should review the limitations of their device and the applicable electromagnetic standards and directives that apply to this vehicle.
Carbon dioxide (CO2) emission: 1035 g/kWh
This CO2 measurement results from testing over a fixed test cycle under laboratory conditions a(n) (parent) engine representative of the engine type (engine family) and shall not imply or express any guarantee of the performance of a particular engine representative of the engine type (engine family) and shall not imply or express any guarantee of the performance of a particular engine.
Any qualified repair shop or person may maintain, replace or repair the emission control devices or systems on your vehicle. An authorized Polaris dealer can perform any service that may be necessary for your vehicle. Polaris also recommends Polaris parts for emissions-related service, however equivalent parts can be used.
It is a potential violation of the EU law if a part supplied by an aftermarket parts manufacturer reduces the effectiveness of the vehicle’s emission controls. Tampering with emission controls is prohibited by law.
Owners are responsible for performing the scheduled maintenance identified in this owner’s manual. Careful periodic maintenance will help keep your vehicle in safe, reliable condition. Inspect, clean, lubricate, adjust and replace parts as necessary. When inspection reveals the need for replacement parts, genuine Polaris parts are available from your Polaris dealer. Equivalent parts may be used for emissions-related service.
Record maintenance and service in the Maintenance Log beginning on Maintenance Log. Service and adjustments are important for proper vehicle operation. If you're not familiar with safe service and adjustment procedures, a qualified dealer can perform these operations. Maintenance intervals in the following chart are based upon average riding conditions and an average vehicle speed of approximately 10 mph (16 kph). Vehicles subjected to severe use must be inspected and serviced more frequently.
Severe use is defined as:
Frequent immersion in mud, water, or sand
Frequent or prolonged operation in dusty environments
Short trip cold weather operation
Racing or racing-style high RPM use
Prolonged low speed, heavy load operation
Extended idle
The intervals shown are based on vehicles operated under normal conditions.
Each interval is given in hours and miles (kilometers). Items should be serviced at whichever interval comes first.
Continue to reference the following maintenance schedules at the given intervals as hours and miles (kilometers) increase on the vehicle.
Vehicles subjected to severe use must be serviced at 50% of the stated interval. Examples of Severe Use: Frequent immersion in mud, water, or sand, constant high RPM use, prolonged low-speed heavy load operation, extended idle, and short trip cold weather operation.
| Initial Break-In
Service First 25 Hours / 500 Miles (800 km) |
|
|---|---|
| Brake System | Initial fluid level inspection; inspect for fluid leaks; add recommended brake fluid from a sealed container if needed. Inspect brake pad wear. |
| Engine Oil and Filter | Change the engine oil and filter. |
| Front Gearcase Fluid | Change fluid. |
| Transmission Fluid | Change fluid. |
| The break-in period consists of the first 25 hours of operation. Careful treatment of a new engine and drive components will result in more efficient performance and longer life for these components. The items outlined in this service interval only need to be performed at the first 25 hours of operation. They do not need to be performed every 25 hours. | |
Vehicles subjected to severe use must be serviced at 50% of the stated interval. Examples of Severe Use: Frequent immersion in mud, water, or sand, constant high RPM use, prolonged low-speed heavy load operation, extended idle, and short trip cold weather operation.
| Every 100 Hours / 1000 Miles (1600 km) or Yearly | |
|---|---|
| Air Filter | Replace air filter. Ensure proper installation of filter and airbox cover. Inspect ducts and screens; clean as necessary. |
| Battery | Check terminals; terminals should be tight and free of corrosion. Clean, test, and replace as necessary. |
| Body to Frame Fasteners | Inspect; tighten as needed. |
| Brake Pad Wear | Inspect; replace as needed. |
| Clutches (Non-EBS)* | Inspect bushings, rollers, wearable parts; clean; replace worn parts. |
| Cooling System | Fluid level inspection; inspect for fluid leaks; add coolant if needed. Inspect coolant strength seasonally; pressure test system yearly. |
| Drive Belt | Inspect; replace as needed. |
| Engine Breather | Inspect; clean; replace if necessary. |
| Exhaust Silencer / Pipe | Inspect for leaks or damage. |
| Front Gearcase Fluid | Check fluid. |
| Fuel System* | Cycle key to pressurize fuel pump; check for leaks at fuel system connections, check for leaks at fill cap. |
| General Lubrication | Locate all applicable fittings and grease. |
| Spark Arrestor | Clean out. |
| Suspension Components* | Inspect tie rods, wheel bearings, suspension bushings, and ball joints for loose or worn components; replace as needed. Inspect shock absorbers for leaks or damage. |
| Temporary Brake Lock | Inspect and adjust brake fluid level as needed. |
| Throttle Cable (if applicable)* | Inspect; adjust; replace if necessary. |
| Transmission Fluid | Check fluid. |
| Wiring | Inspect for wear, routing, and retention. |
| * Have an authorized Polaris dealer or other qualified person perform these services. | |
Vehicles subjected to severe use must be serviced at 50% of the stated interval. Examples of Severe Use: Frequent immersion in mud, water, or sand, constant high RPM use, prolonged low-speed heavy load operation, extended idle, and short trip cold weather operation.
| Additional Maintenance Intervals | ||
|---|---|---|
|
Every 200 hours / 2000 miles (3200 km) |
Clutches (EBS)* | Inspect bushings, rollers, wearable parts; clean; replace worn parts. |
| Engine Oil and Filter | Change the engine oil and filter. | |
| Front Gearcase Fluid | Change fluid. | |
| Shock Absorbers* | Inspect; replace or rebuild (if applicable) as needed. | |
| Spark Plugs | Inspect; replace as needed. | |
| Transmission Fluid | Change fluid. | |
|
Every 500 hours / 5000 miles (8000 km) |
Valve Clearance* | Inspect; adjust as needed. |
|
Every 24 months / 2 years |
Brake Fluid | Change fluid. |
|
Every 60 months / 5 years |
Coolant | Change fluid. |
| * Have an authorized Polaris dealer or other qualified person perform these services. | ||
Some service procedures require elevation of the vehicle. Always position the vehicle on a firm, level surface before elevating. Do not position a jack or jack stand under any components other than the frame.
Use an appropriate lift or floor jack. Place the floor jack at the front (or rear) of the vehicle, directly under the center of the unit. Make sure the floor jack makes contact only with the frame of the vehicle while lifting 1, 2, 3, and 4.
Do not allow the vehicle to remain elevated on a floor jack. After elevating, place jack stands under the frame on each side of the floor jack, then lower the floor jack.
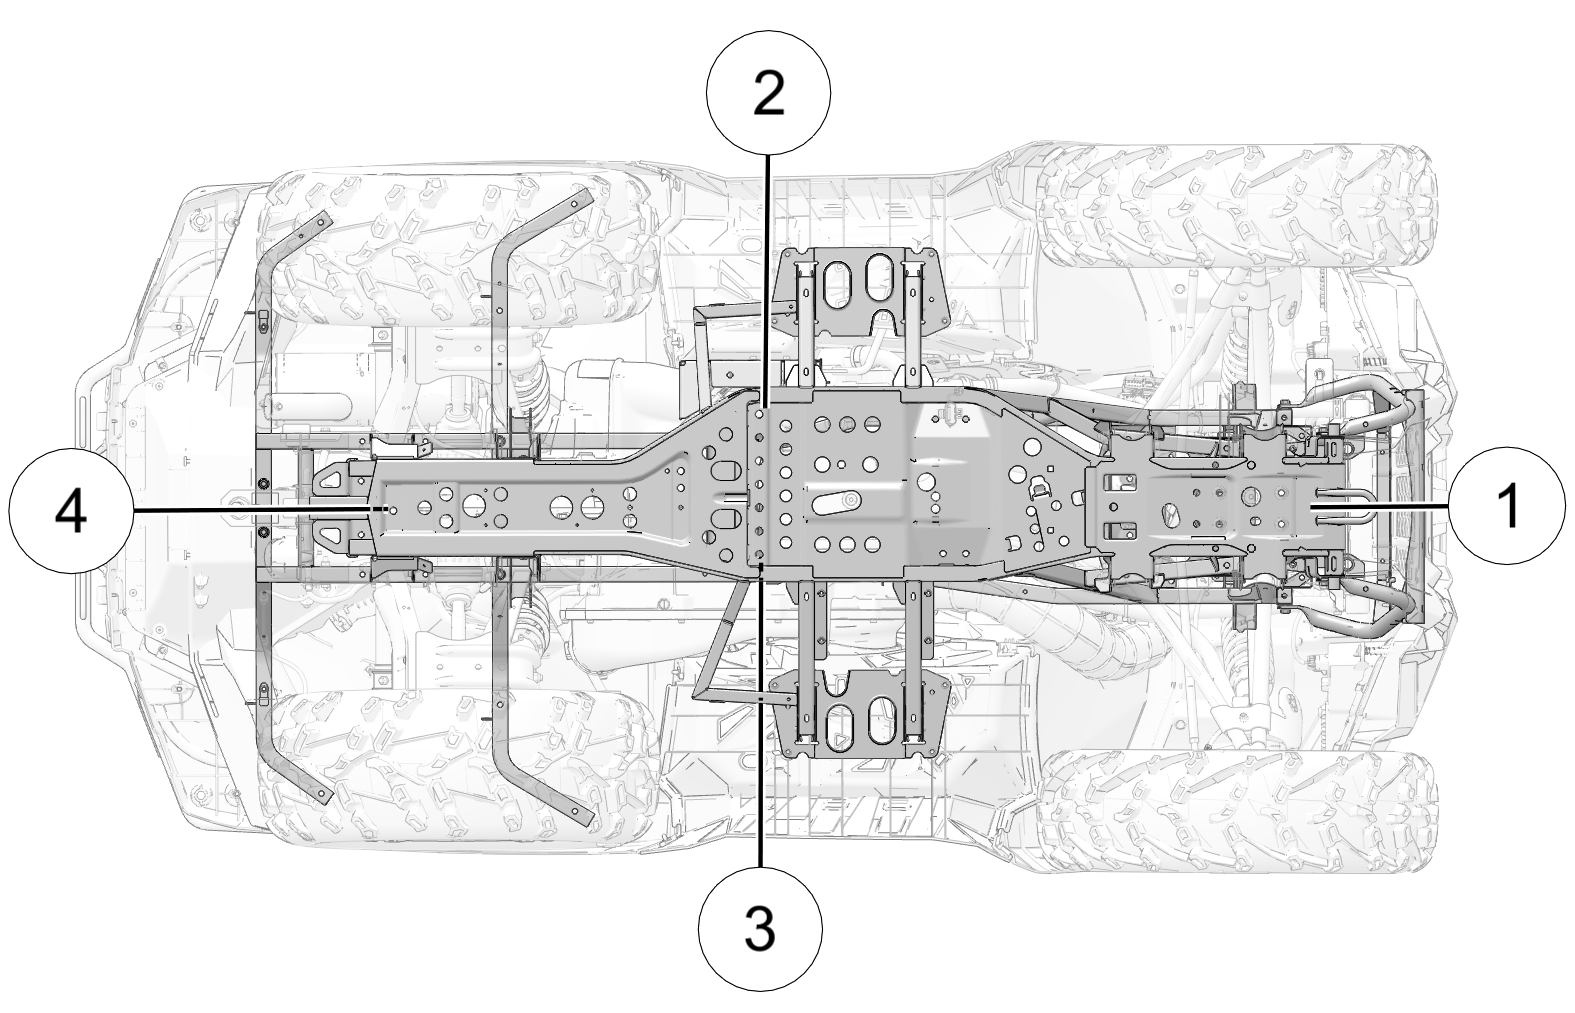
Check and lubricate all components at the intervals outlined in the Polaris Maintenance Schedule. Items not listed in the chart should be lubricated at the General Lubrication interval.
The a-arms and lower control arms are lubricated at the factory, and no additional lubrication will be needed. However, if these components are subjected to severe use, grease zerks have been provided for additional lubrication at the user’s discretion.
| Item | Recommended Lubricant | Capacity at Fluid Change | Fill Plug Torque | Drain Plug Torque | See Page |
|---|---|---|---|---|---|
|
Engine Oil |
Polaris PS-4 5W-50 4-Cycle Engine Oil |
2 qt (1.9 l) |
— |
12 ft-lbs (16 N·m) |
|
|
Transmission Fluid |
Polaris AGL Gearcase Lubricant & Transmission Fluid |
32 oz (948 ml) |
12 ft-lbs (16 N·m) |
12 ft-lbs (16 N·m) |
|
|
Front Gearcase Fluid |
Polaris Demand Drive Fluid |
9 oz (265 ml) |
19 ft-lbs (26 N·m) |
19 ft-lbs (26 N·m) |
|
|
Brake Fluid |
Polaris DOT 4 Brake Fluid |
— | — | — | |
|
Front Prop Shaft |
Polaris U-Joint Grease |
Grease fittings (3 pumps maximum) every 50 hours, or 500 miles (800 km) (whichever comes first), before long periods of storage, or after pressure washing or submerging. | |||
Vehicle operation with insufficient, deteriorated, or contaminated engine oil will cause accelerated wear and may result in engine seizure, accident and injury.
Always check and change the engine oil at the intervals outlined in the Polaris Maintenance Schedule. Always use the recommended engine oil.
Pay special attention to the oil level. A rise in oil level during cold weather can indicate contaminants collecting in the oil sump or crankcase. Change oil immediately if the oil level begins to rise. Monitor the oil level, and if it continues to rise, discontinue use and determine the cause. Your authorized dealer can assist.
Polaris recommends the use of Polaris PS-4 5W-50 4-Cycle Engine Oil, Polaris PS-4 Extreme 0W-50 4-Cycle Engine Oil, or a similar oil for this engine. Oil may need to be changed more frequently if Polaris oil is not used. Always use 5W-50 or 0W-50 oil. Follow the manufacturer’s recommendations for ambient temperature operation.
See the Lubrication Guide section for fluid recommendations, capacities, and plug torques.
Check the oil level when the engine is cold. Never check the oil with the engine running or damage to the dipstick and / or engine could occur.
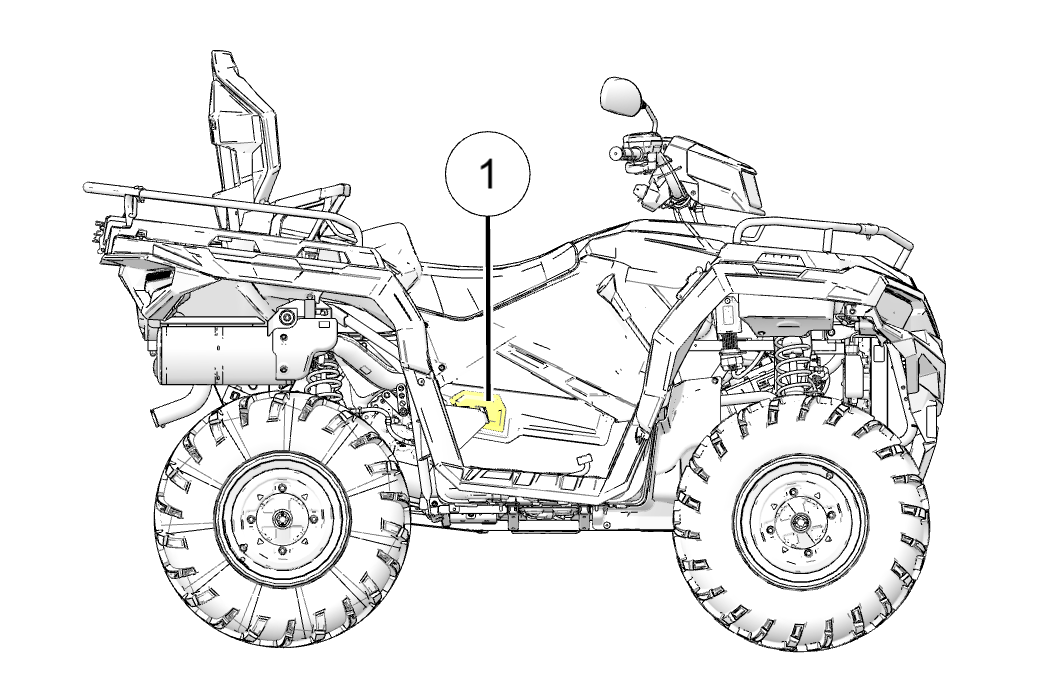
Position the vehicle on a level surface and put the transmission in PARK (P). Stop the engine and lock the temporary brake lock.
Remove the engine access panel 1 on the right side of the vehicle.
Clean the area around the dipstick.
Remove the dipstick by twisting it counter-clockwise until it can be pulled out. Wipe it dry with a clean cloth.
Install the dipstick and tighten it all of the way to ensure an accurate measurement.
Remove the dipstick and check the oil level.
The oil level should be within the safe range (between the FULL and ADD marks) on the dipstick.
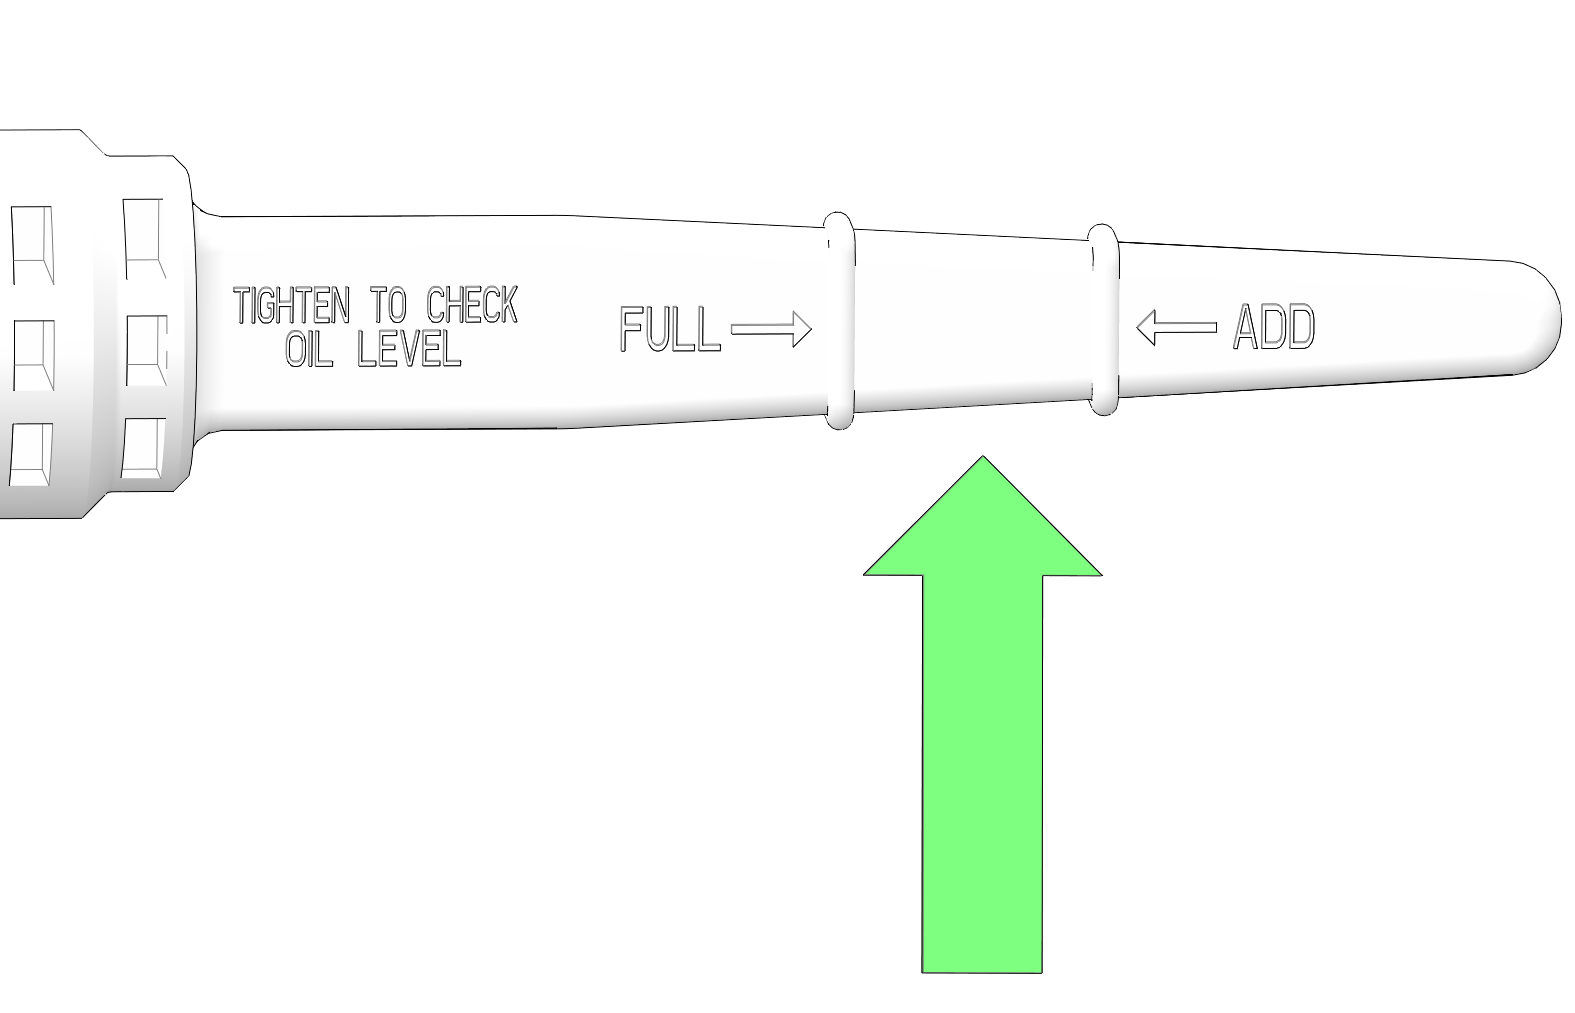
Add the recommended oil as needed. Do not overfill.
Reinstall the dipstick and the engine access panel.
A rising oil level between checks in cool weather driving may indicate contaminants, such as gas or moisture, collecting in the engine crankcase. If the oil level is over the FULL mark, change the oil immediately.
The engine oil and oil filter should be changed in accordance with the Polaris Maintenance Schedule. See the Lubrication Guide section for fluid recommendations, capacities, and plug torques.
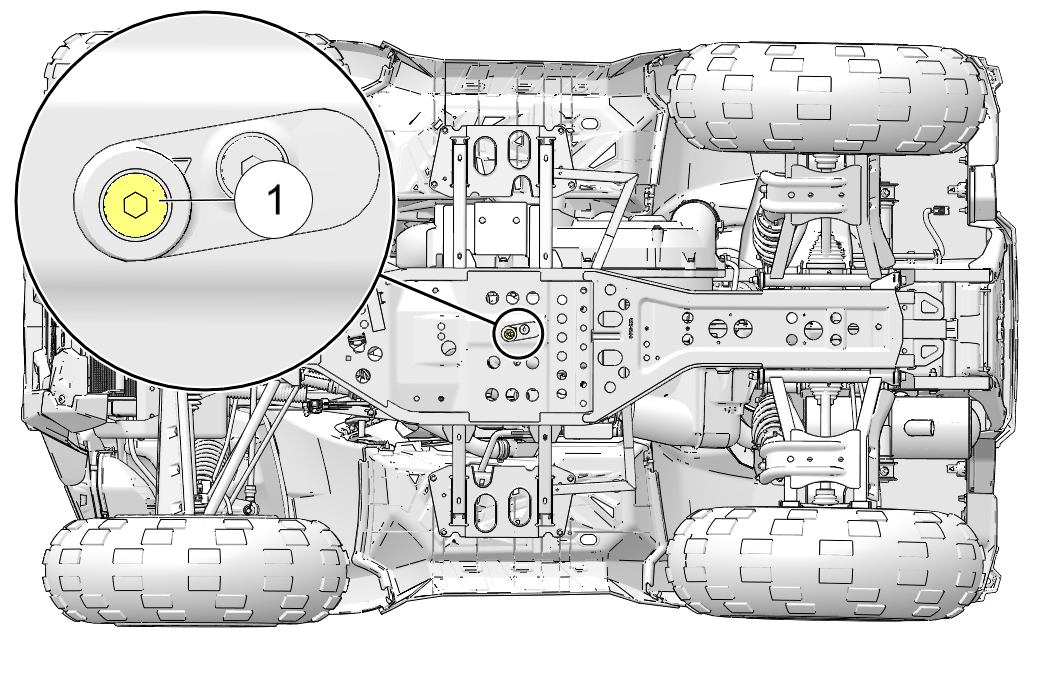
Position the vehicle on a level surface and put the transmission in PARK (P). Stop the engine and lock the temporary brake lock.
Place an oil drain pan under the drain plug 1.
Clean the area around the drain plug 1.
Remove the drain plug 1 and washer. Allow the oil to drain completely.
Clean any dirt or debris from the drain plug. Install a new sealing washer on the drain plug.
Install the drain plug and torque to specification.
Oil Drain Plug:
12 ft-lbs (16 N·m)
Place an oil drain pan and shop towels under the oil filter.
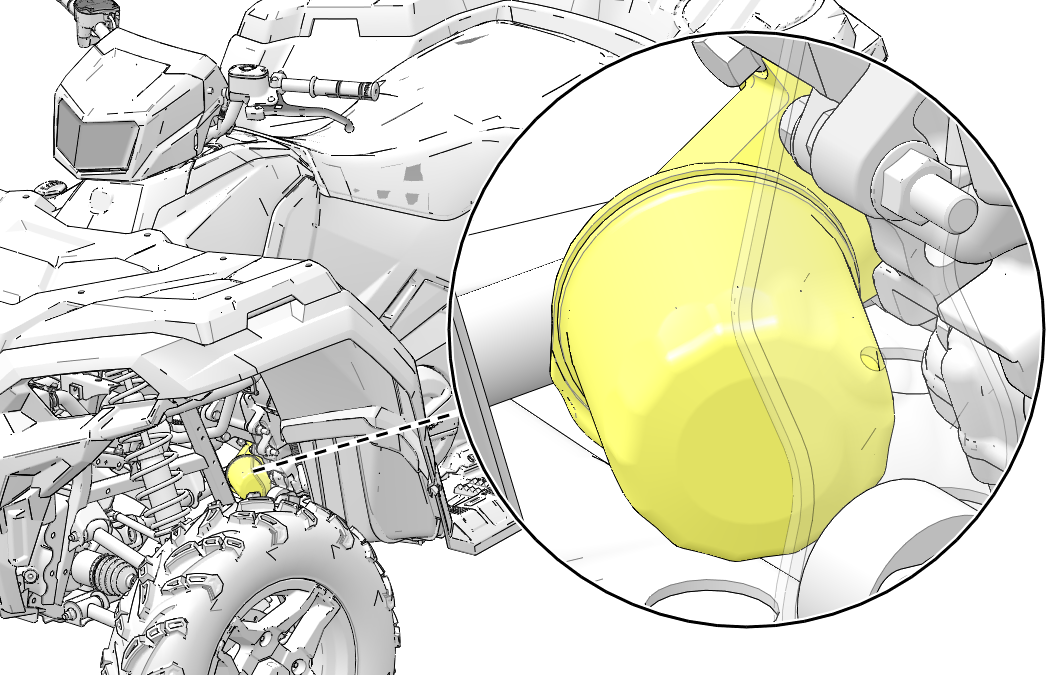
Using an oil filter wrench (available from your Polaris dealer), turn the oil filter counter-clockwise to remove it.
Oil Filter Wrench:
PN 2830550
Using a clean dry cloth, clean the oil filter sealing surface on the crankcase.
Lubricate the o-ring on the new oil filter with a film of fresh engine oil. Check to make sure the o-ring is in good condition.
Install the new oil filter and rotate it clockwise by hand until the filter gasket contacts the sealing surface, then turn it an additional 3/4 turn.
Remove the engine access panel on the right side of the vehicle.
Clean the area around the dipstick.
Remove the dipstick. Add the recommended oil as necessary to bring the oil level within the safe range on the dipstick. Do not overfill.
Recommended Oil:
Polaris PS-4 5W-50 4-Cycle Engine Oil
Polaris PS-4 Extreme 0W-50 4-Cycle Engine Oil
Capacity:
2 qt (1.9 l)
Install the dipstick.
Start the engine. Allow it to idle for one to two minutes.
Stop the engine and inspect for leaks.
Check the oil level. Add oil as needed. See Oil Level Check.
Discard the used oil and oil filter properly.
Always check and change the transmission fluid at the intervals outlined in the Polaris Maintenance Schedule. See the Lubrication Guide section for fluid recommendations, capacities, and plug torques. Maintain the fluid level at the bottom of the fill plug hole. The fill plug is located on the left side of the ATV behind the footwell. The drain plug is located on the right side of the vehicle.
Position the vehicle on a level surface. Put the transmission in PARK (P) and lock the temporary brake lock.
Remove the fill plug 1. Check the fluid level. Fluid should reach the bottom of the fill hole threads.
Slowly add the recommended fluid as needed to bring the level to the bottom of the fill hole threads.
Reinstall the fill plug. Torque to specification.
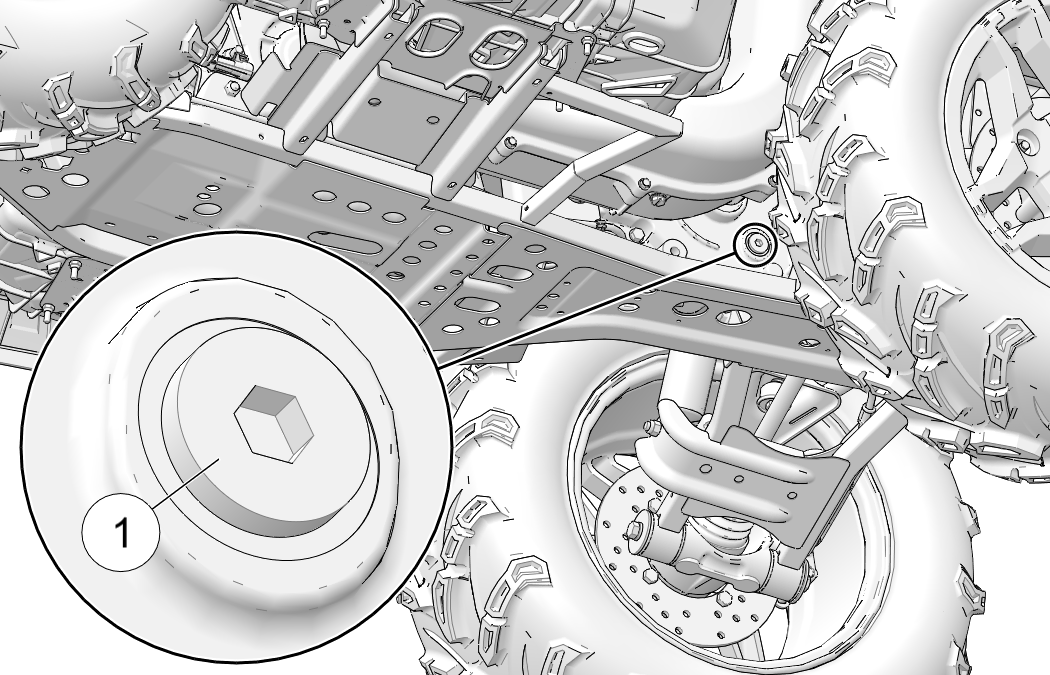
Fill Plug:
12 ft-lbs (16 N·m)
Position the vehicle on a level surface. Put the transmission in PARK (P) and lock the temporary brake lock.
Place a drain pan under the gearcase. Remove the drain plug 2. Allow the fluid to drain completely.
Clean and reinstall the drain plug. Torque to specification.
Remove the fill plug. Slowly add the proper amount of the recommended fluid. Fluid should reach the bottom of the fill hole threads.
Reinstall the fill plug. Torque to specification.
Check for leaks.
Dispose of used fluid properly.
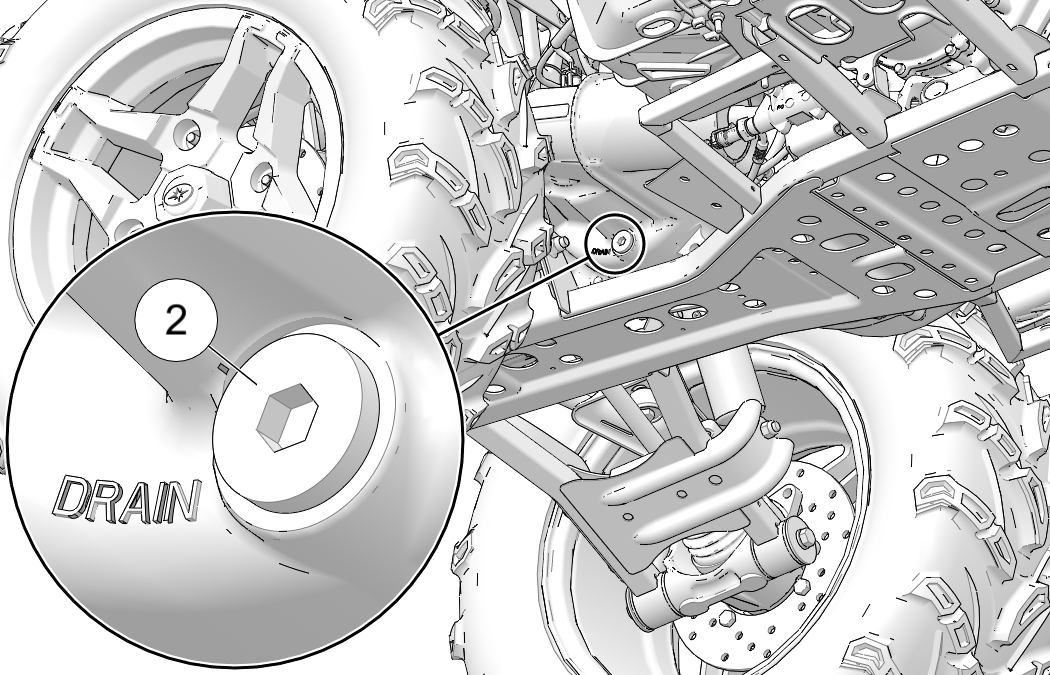
Drain Plug:
12 ft-lbs (16 N·m)
Always check and change the front gearcase fluid at the intervals outlined in the Polaris Maintenance Schedule.
Change the front gearcase fluid every 25 hours if the ADC unit is exposed to extreme use. Extreme use includes any of the following:
operation in ADC mode for prolonged periods
constant ADC operation on hilly or mountainous terrain
ADC is the primary mode of all-wheel-drive operation
Use the recommended fluid. Use of other fluids may result in improper operation of components. Maintain the fluid level at the bottom of the fill hole threads. The fill plug is located on the right side of the demand drive unit. The drain plug is located on the bottom right side of the unit.
Position the vehicle on a level surface. Put the transmission in PARK (P) and lock the temporary brake lock.
Remove the fill plug 1. Check the fluid level, verifying the level reaches the bottom of the fill hole threads.
Slowly add the recommended fluid as needed to bring the level to the bottom of the fill hole threads.
Recommended Lubricant:
Polaris Demand Drive Fluid
Capacity:
9 oz (265 ml)
Reinstall the fill plug. Torque to specification.
Fill Plug:
19 ft-lbs (26 N·m)
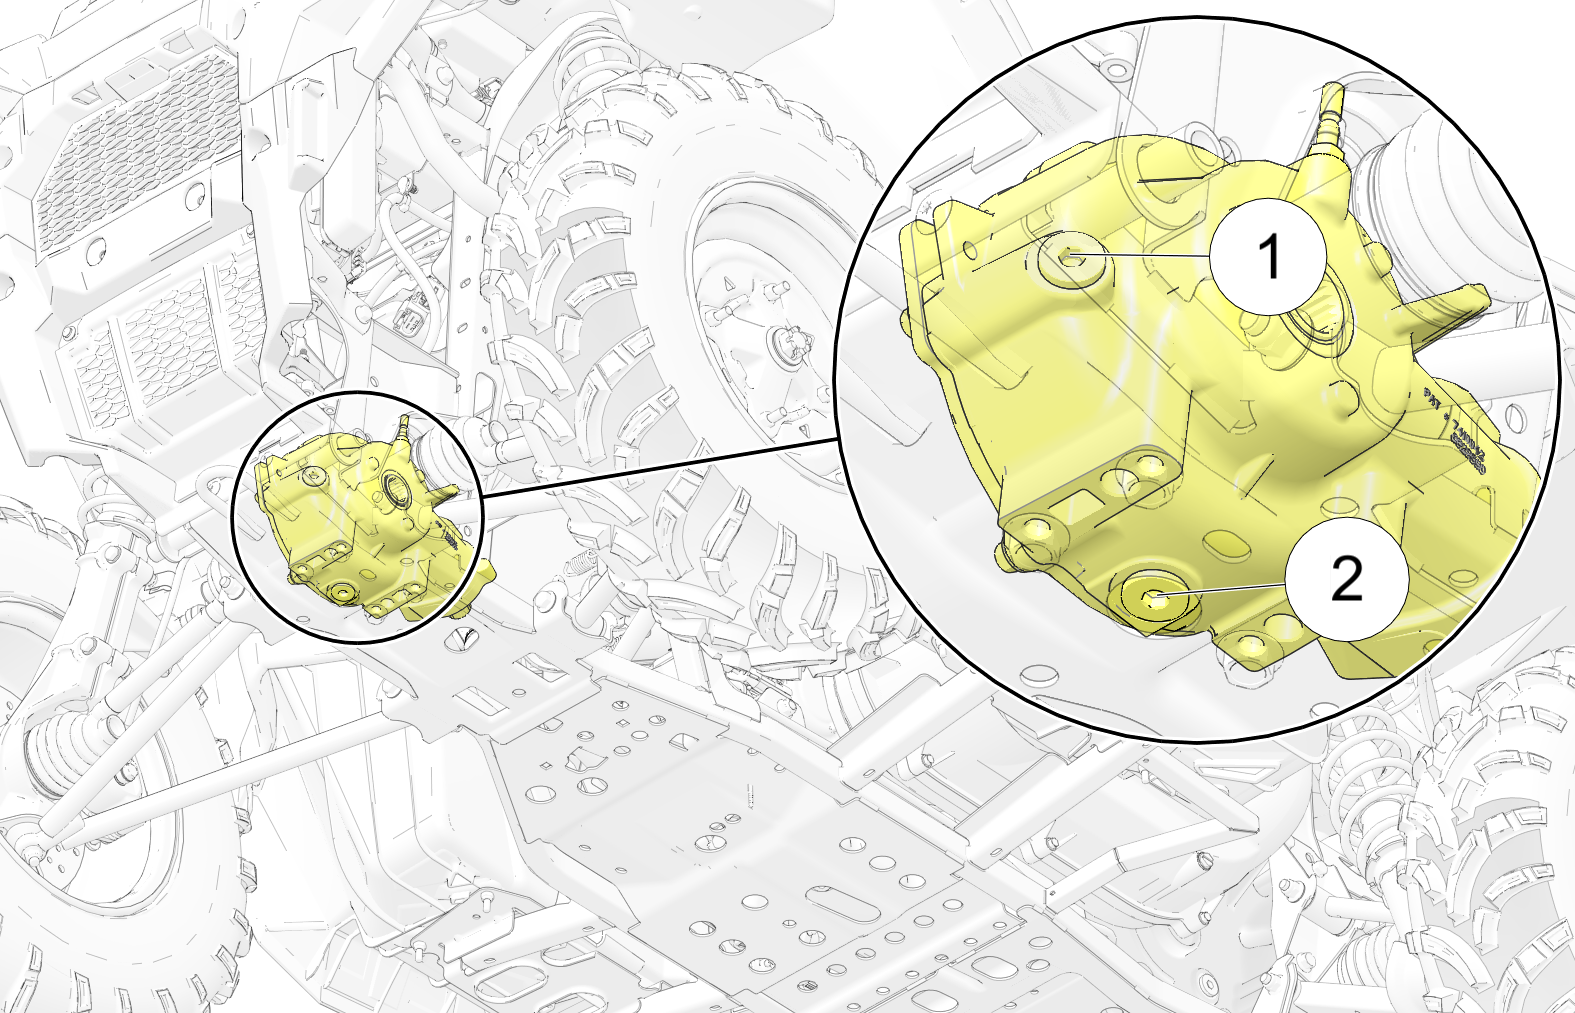
Position the vehicle on a level surface. Put the transmission in PARK (P) and lock the temporary brake lock.
Remove the fill plug.
Place a drain pan under the demand drive unit. Remove the drain plug 2. Allow the fluid to drain completely.
Clean and reinstall the drain plug. Torque to specification.
Add the proper amount of the recommended fluid. Ensure the oil reaches the bottom of the fill hole threads.
Reinstall the fill plug. Torque to specification.
Check for leaks.
Dispose of used fluid properly.
Drain Plug:
19 ft-lbs (26 N·m)
If your model is equipped with power steering, frequently clean the areas around and on the power steering unit to allow proper cooling. Clean these areas thoroughly.
The steering assembly of the ATV should be checked periodically for loose nuts and bolts. If loose nuts and bolts are found, see your authorized dealer or other qualified service facility before operating the vehicle.
The engine coolant level is controlled, or maintained, by the recovery system. The recovery system components are the recovery bottle, the radiator filler neck, the radiator pressure cap and the connecting hose.
As coolant operating temperature increases, the expanding (heated) excess coolant is forced out of the engine, past the pressure cap, and into the recovery bottle. As engine coolant temperature decreases the contracting (cooled) coolant is drawn back up from the bottle, past the pressure cap, and into the radiator.
Some coolant level drop on new vehicles is normal as the system is purging itself of trapped air. Check the coolant level and maintain as recommended by adding coolant to the recovery bottle.
Polaris recommends the use of Polaris Antifreeze 50/50 Pre-Mix. This antifreeze is already premixed and ready to use. Do not dilute with water. See the Polaris Products chapter for the part number.
The recovery bottle fluid level can be viewed from inside the front right wheel well. Access the recovery bottle cap under the front rack.
View the fluid level in the bottle.
If the level is low, remove the bottle cap and add coolant as needed. Maintain the coolant level between the minimum and maximum marks on the bottle (when the fluid is cool).
Reinstall the cap.
Close and secure the front rack.
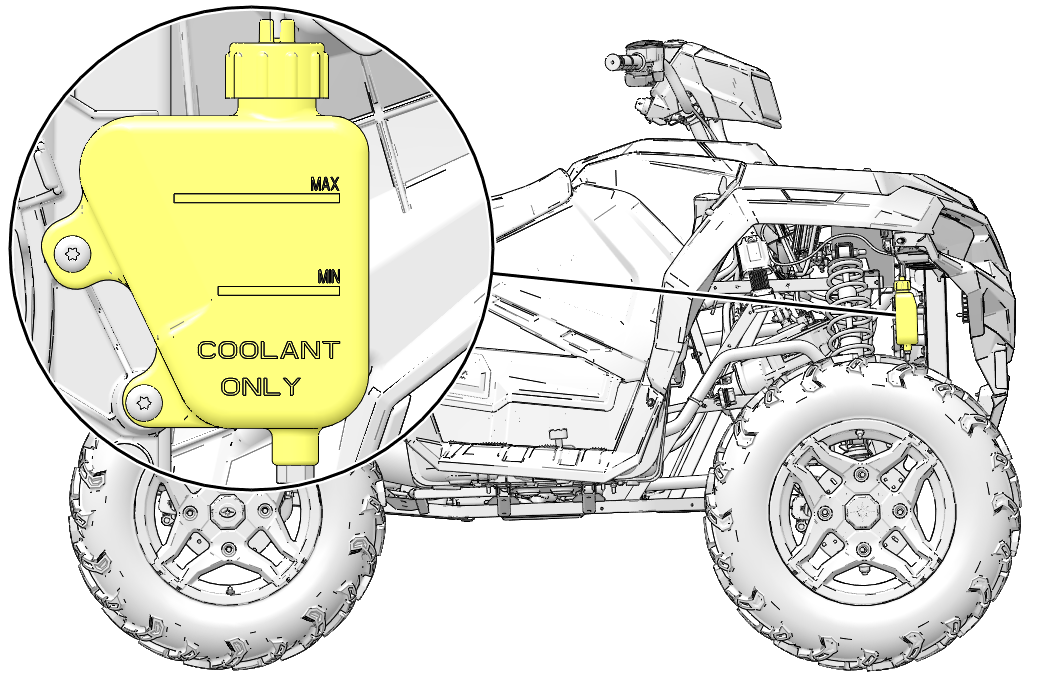
To ensure that the coolant maintains its ability to protect the engine, we recommend that the system be completely drained every five years and fresh Polaris Antifreeze 50/50 Pre-Mix added.
Any time the cooling system has been drained for maintenance or repair, replace the coolant with fresh Antifreeze 50/50 Pre-Mix. If the recovery bottle has run dry, check the level in the radiator. Add coolant as needed.
Unlock the front rack latches and open the front rack.
Remove the pressure cap.
Using a funnel, slowly add coolant through the radiator filler neck.
Reinstall the pressure cap. Use of a non-standard pressure cap will not allow the recovery system to function properly. Your Polaris dealer can provide the correct replacement part.
Close and secure the front rack.
The front and rear brakes are hydraulic disc brakes, activated by moving the single brake lever toward the handlebar. These brakes are self-adjusting.
Under normal operation, the diaphragm extends into the reservoir as fluid level drops. If the fluid level is low and the diaphragm is not extended, a leak is likely and the diaphragm should be replaced. To ensure proper diaphragm operation, always fill the reservoir as needed whenever the cover is loosened or removed. Do not overfill.
The following checks are recommended to keep the brake system in good operating condition. Check more often if brakes are used heavily under normal operation.
Always keep brake fluid at an adequate level. See the Master Cylinder / Brake Fluid section for details.
Check the brake system for fluid leaks.
Check the brakes for excessive travel or spongy feel.
Check the friction pads for wear, damage and looseness. Replace brake pads when they are worn to .030 in (0.762 mm).
Check the security and surface condition of the disc. Clean any grease using a recommended brake cleaner or alcohol. Do not use spray lubricants or other petroleum-based products. If you discover any damage (cracks, excessive corrosion, warping) see your dealer for service before operating.
The hydraulic auxiliary brake system requires no adjustment. Check the brake fluid level frequently for the auxiliary brake system.
Pull up on the passenger seat latch lever 1.
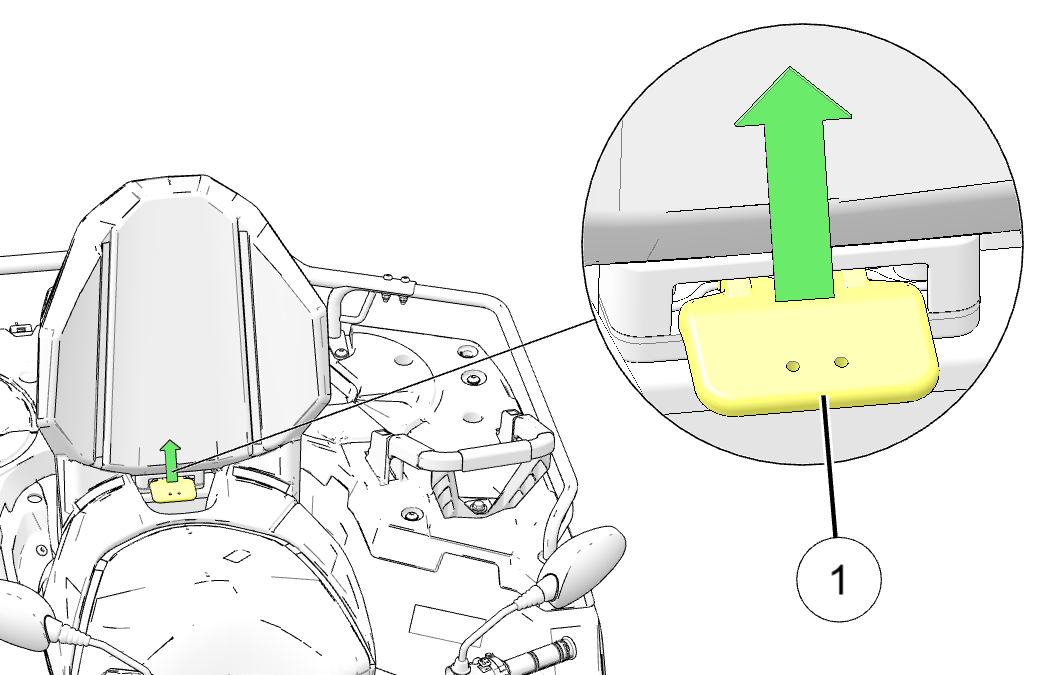
Tilt the passenger seat forward and then lift up to remove the seat from the vehicle.
Lift the rear of the driver seat and slide the seat towards the back of the vehicle to remove it.
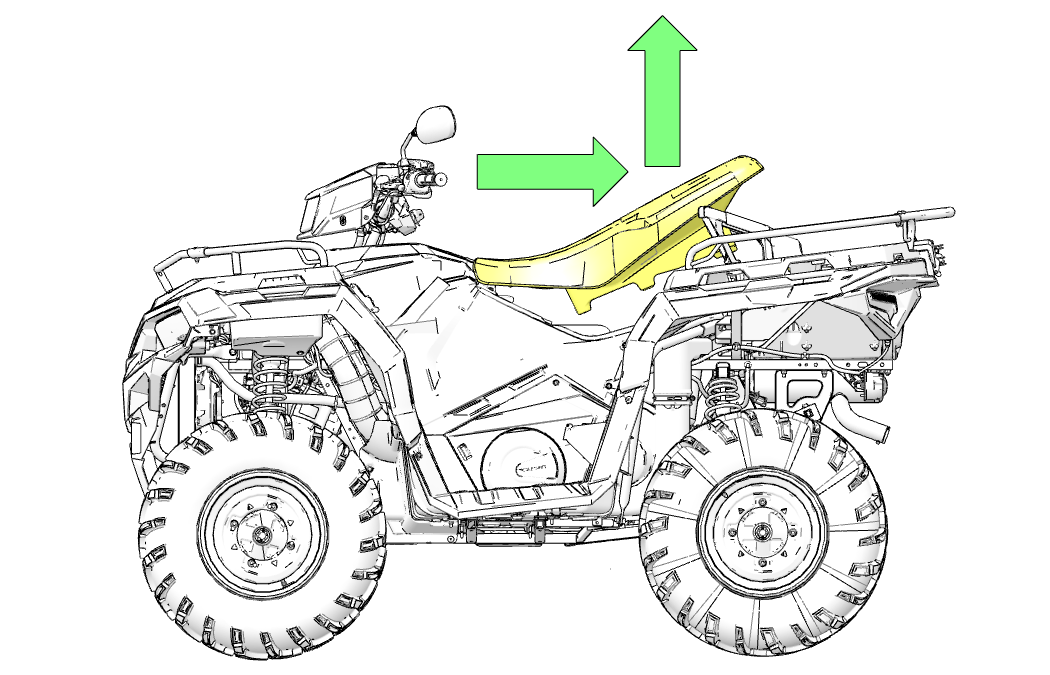
Align the two openings in the bottom of the driver seat with the two seat base brackets 1.
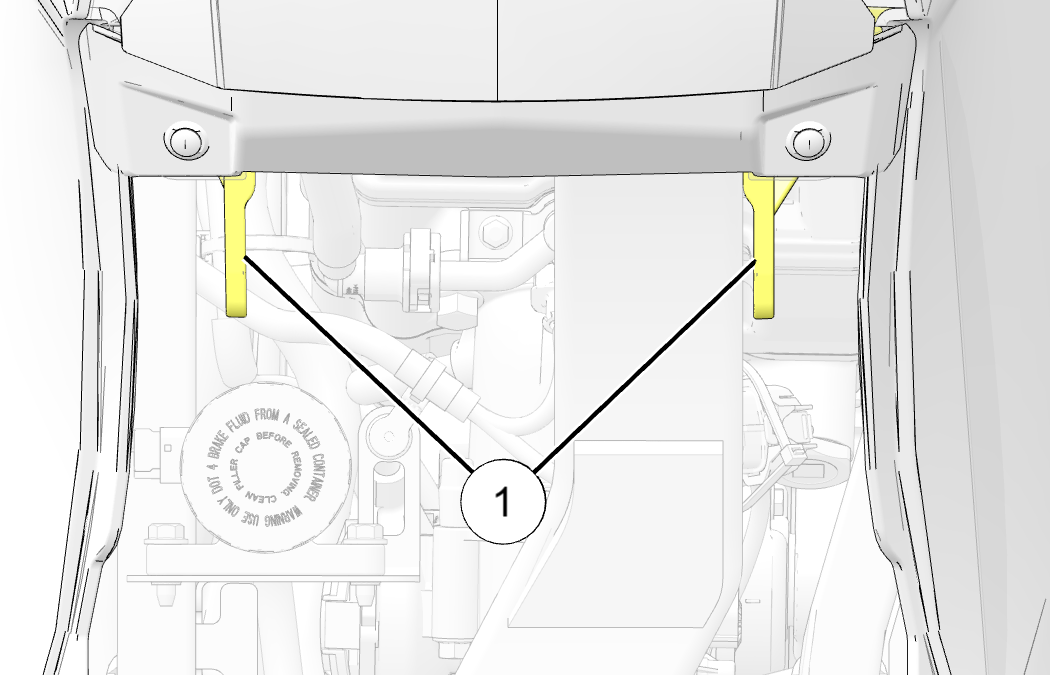
Slide the driver seat forward and lower the rear.
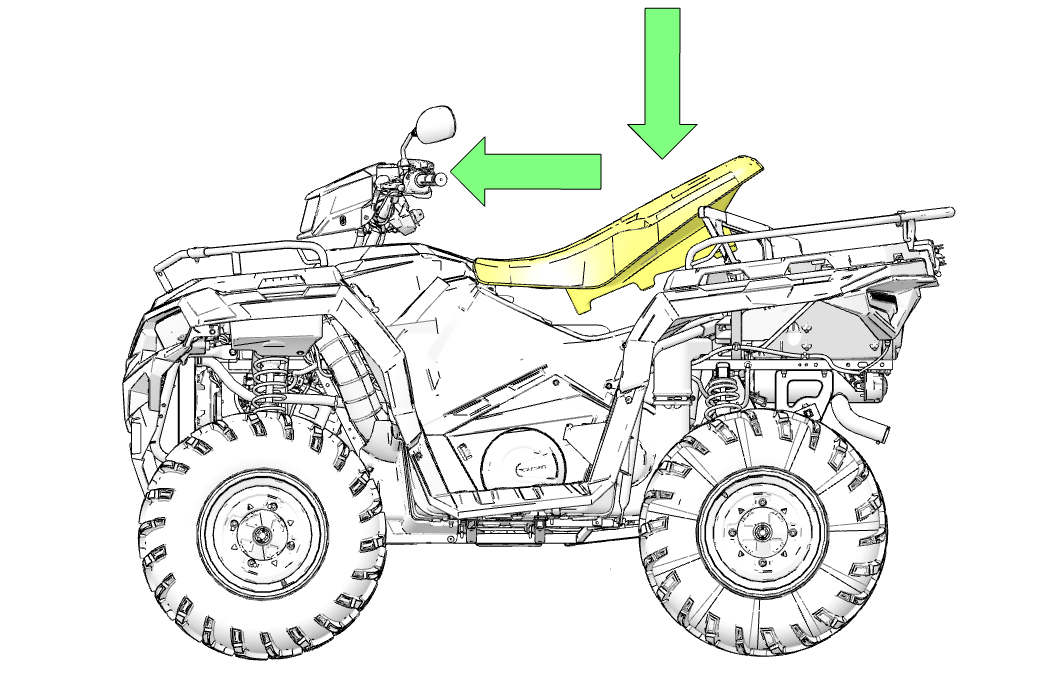
Press the rear of the driver seat down firmly to seat the two pins into the grommets 2.
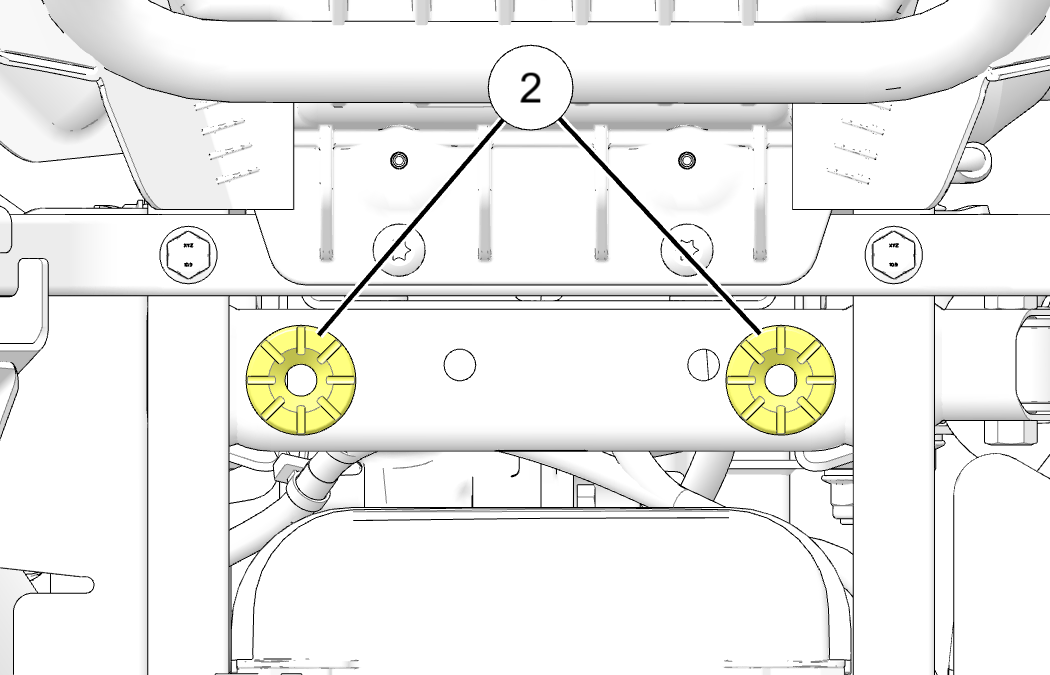
Install the passenger seat onto the vehicle by pushing back on the backrest and down on the passenger seat latch lever 3 until you feel and hear a click.
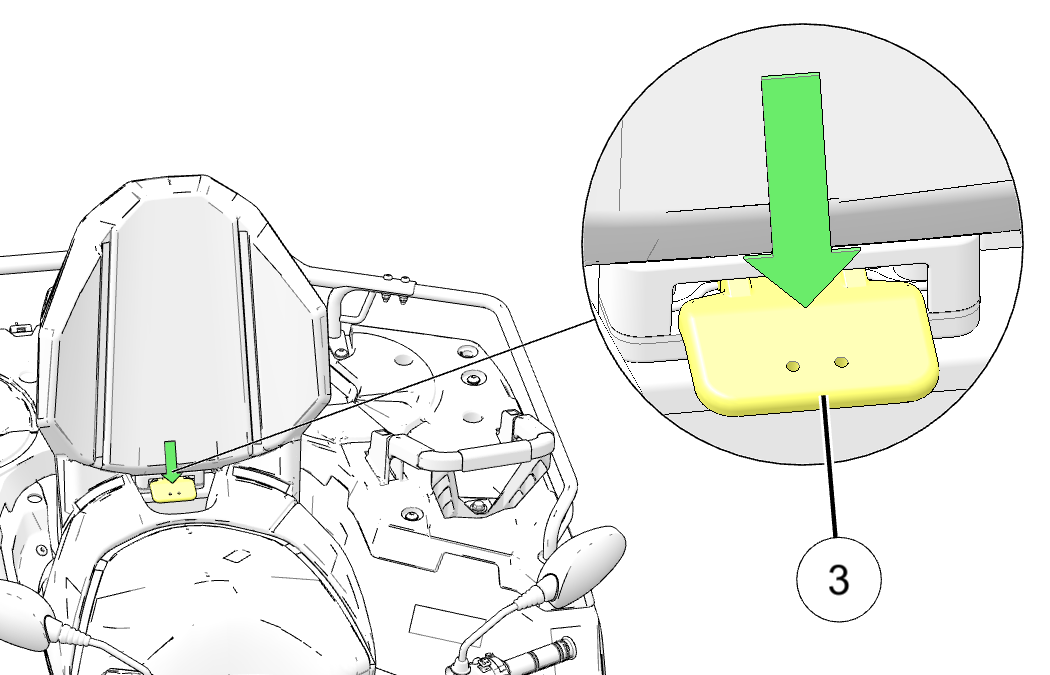
Pull up and forward on the passenger seat to make sure the seat does not release from the vehicle.
Remove the seats. See Seat Removal.
Use the multi-function pliers (included in your vehicle’s toolkit) to remove the four push rivets from the side panel and close off panel.
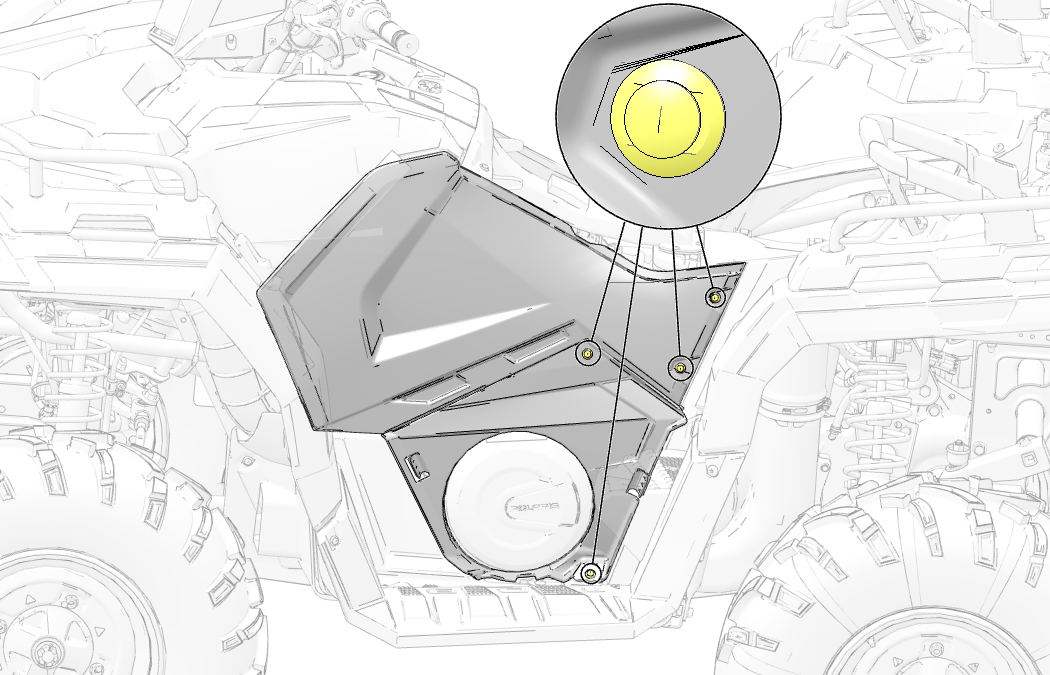
Grasp the rear of the side panel. With a firm motion, pull the side panel outward to disengage it from the vehicle.
Remove the close off panel.
Remove the two fasteners and two push rivets securing the footwell to the front cab and rear cab.
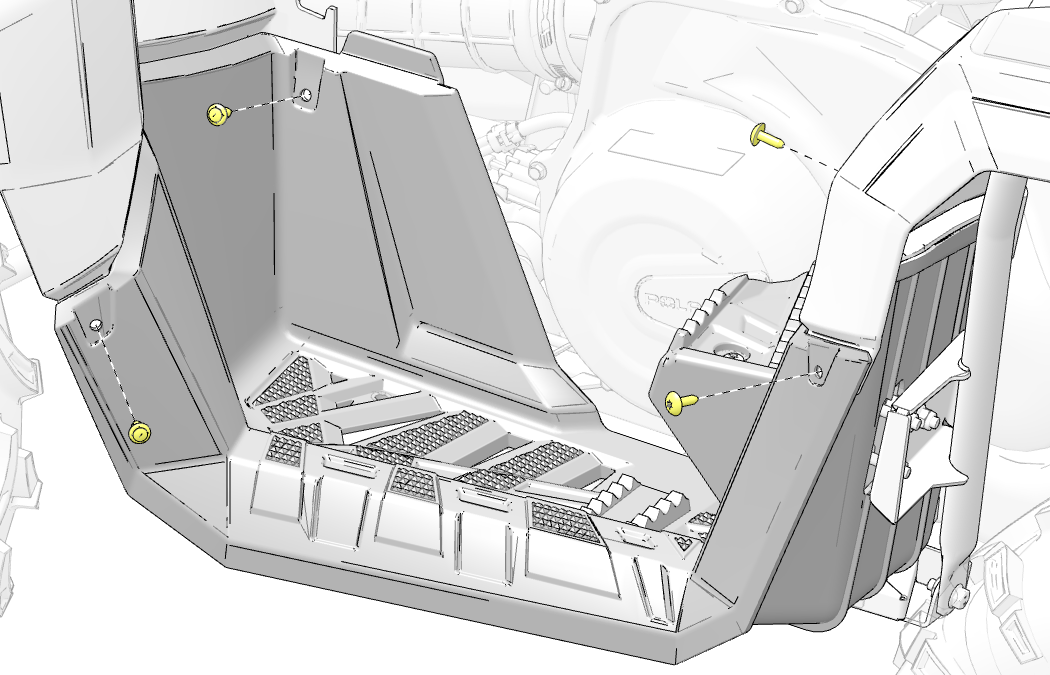
Remove the three fasteners and three nuts from the passenger footrest bracket.
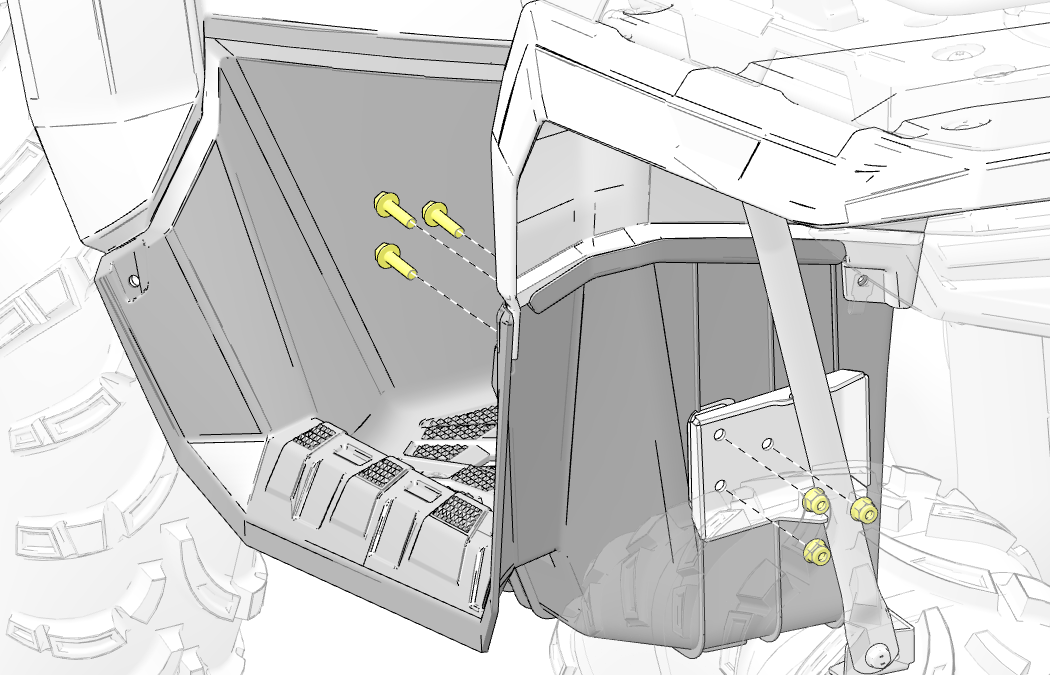
For drive belt removal, remove the fastener from the bottom of the passenger footrest bracket tube.
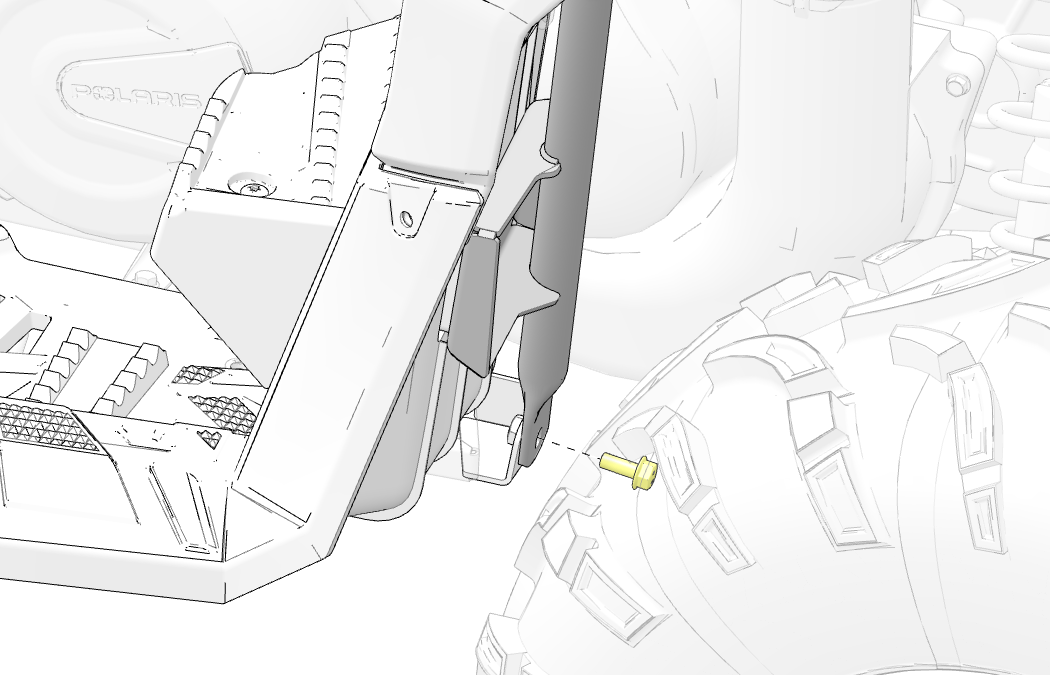
Remove the two fasteners and two nuts from the passenger footrest.
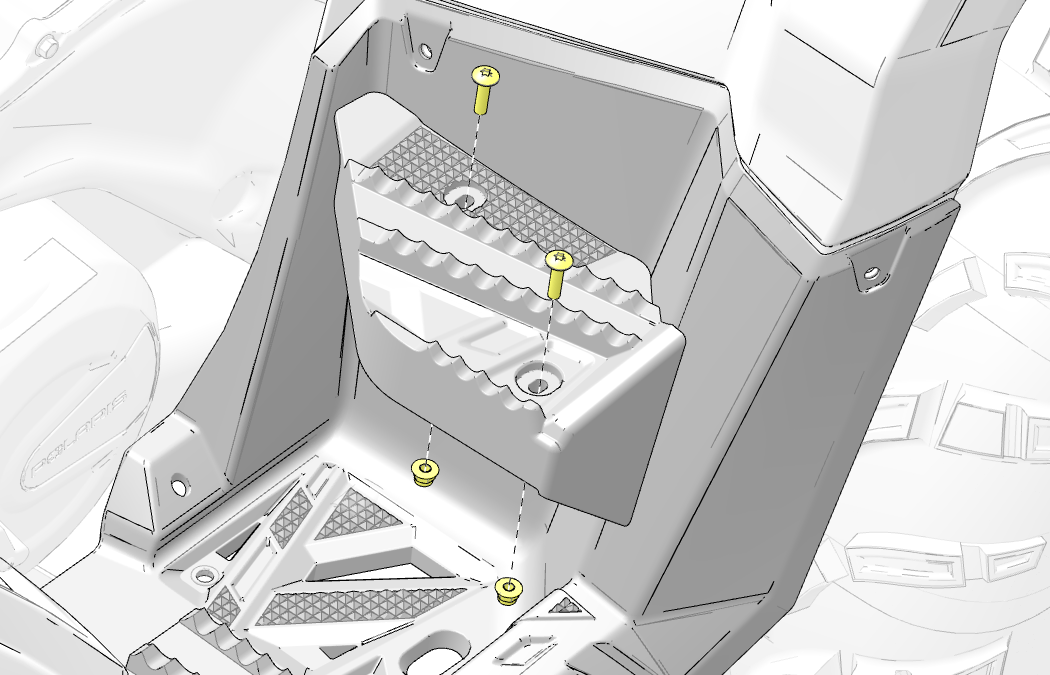
Remove the four fasteners and four nuts from the bottom of the footwell. Pull the footwell downward and outward to remove it.
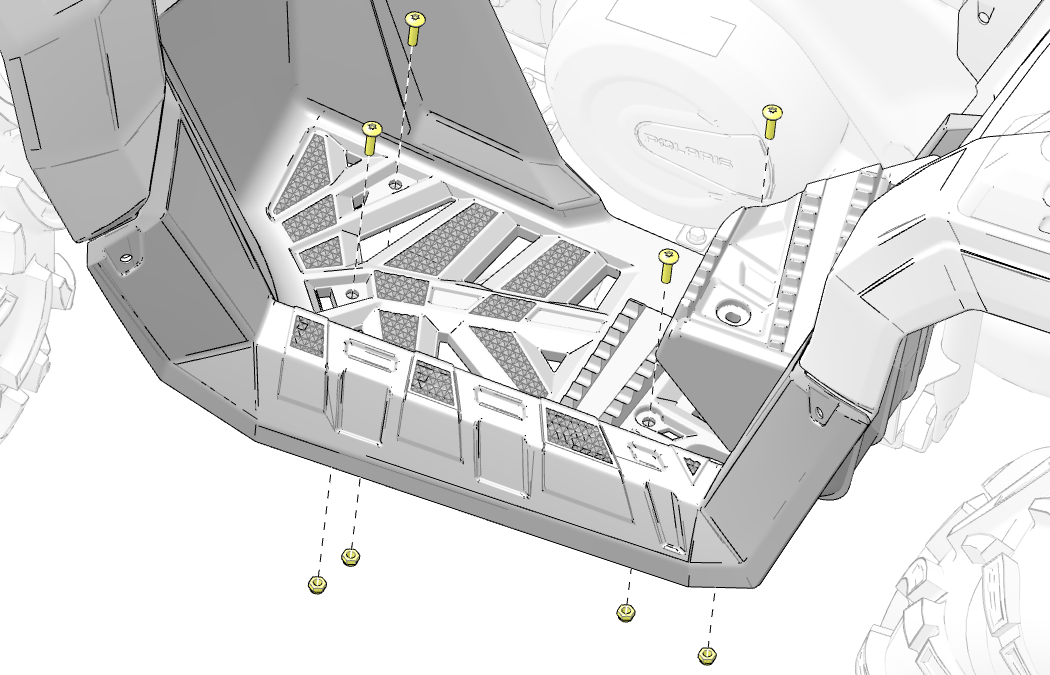
Remove the seats. See Seat Removal.
Use the multi-function pliers (included in your vehicle’s toolkit) to remove the two push rivets from the side panel.
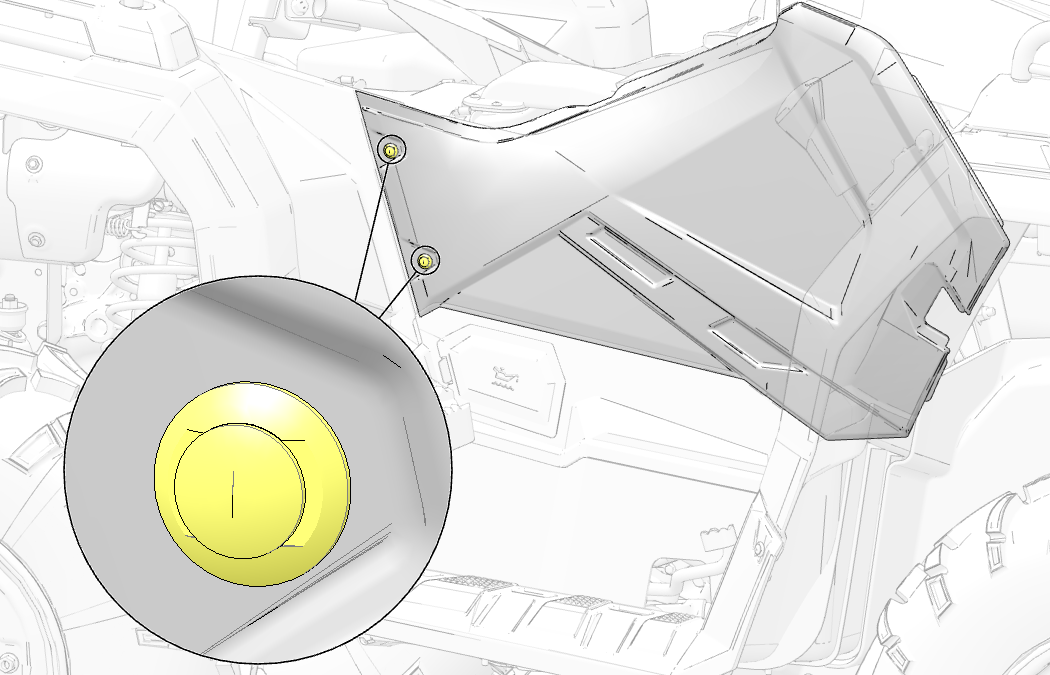
Grasp the rear of the side panel. With a firm motion, pull the side panel outward to disengage it from the vehicle.
Lift the close off shield out of the vehicle.
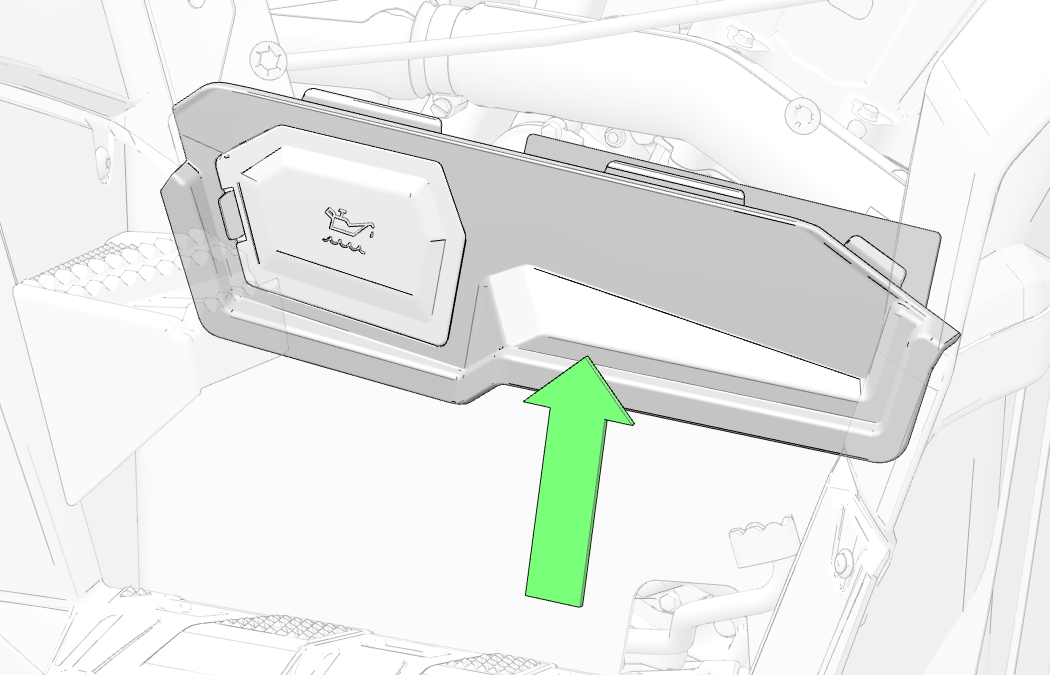
Remove the two fasteners and two push rivets securing the footwell to the front cab and rear cab.
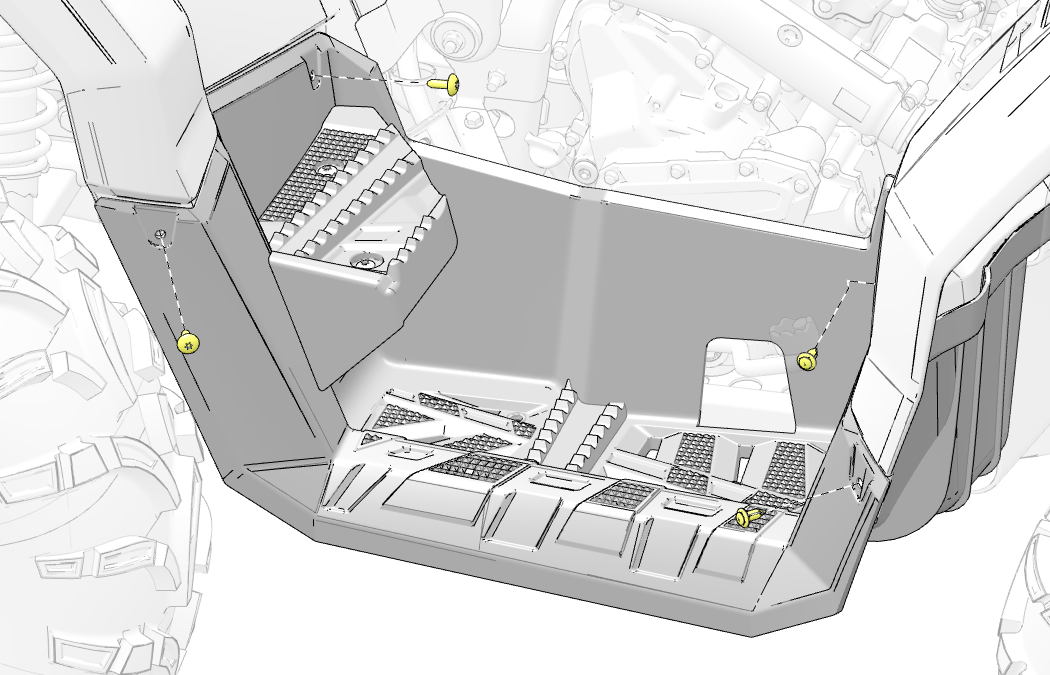
Remove the three fasteners and three nuts from the passenger footrest bracket.
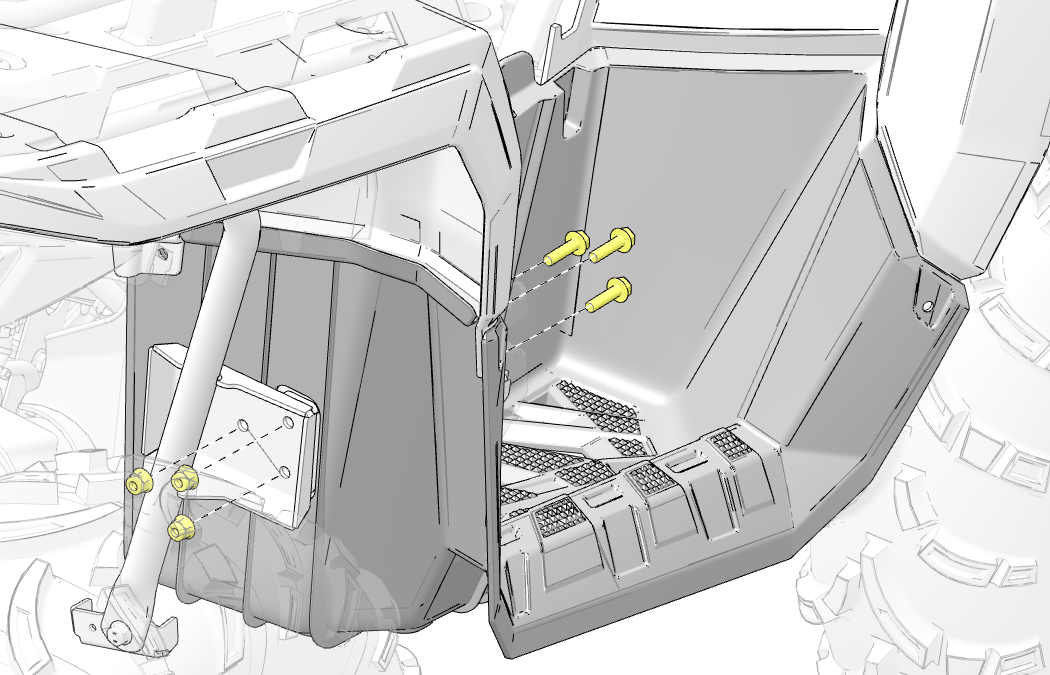
Remove the two fasteners and two nuts from the passenger footrest.
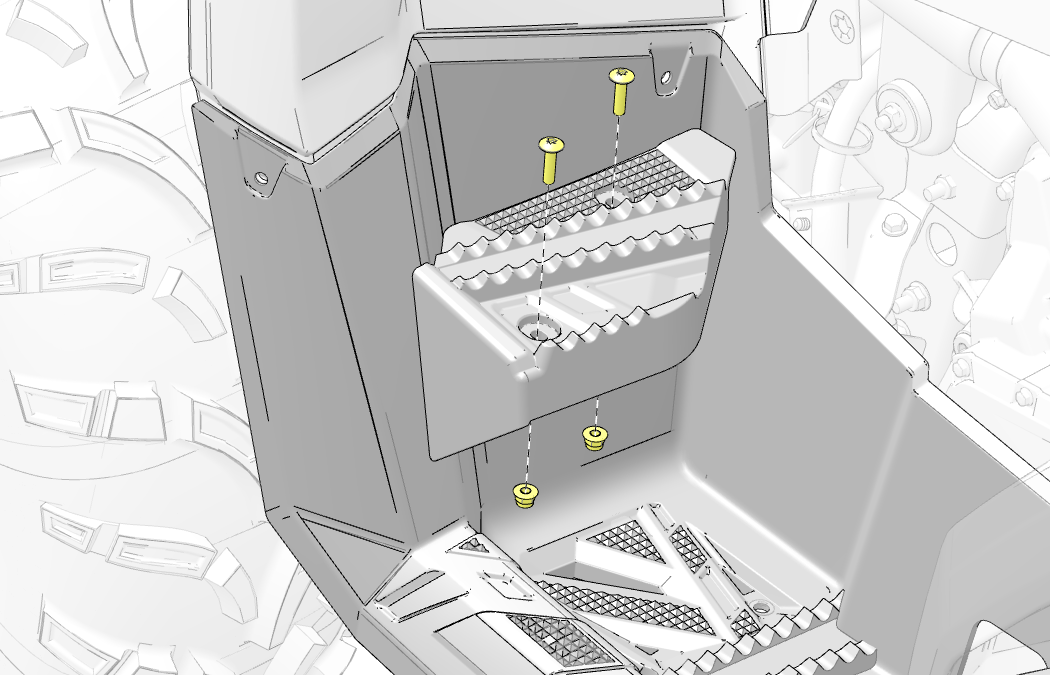
Remove the four fasteners and four nuts from the bottom of the footwell. Pull the footwell downward and outward to remove it.
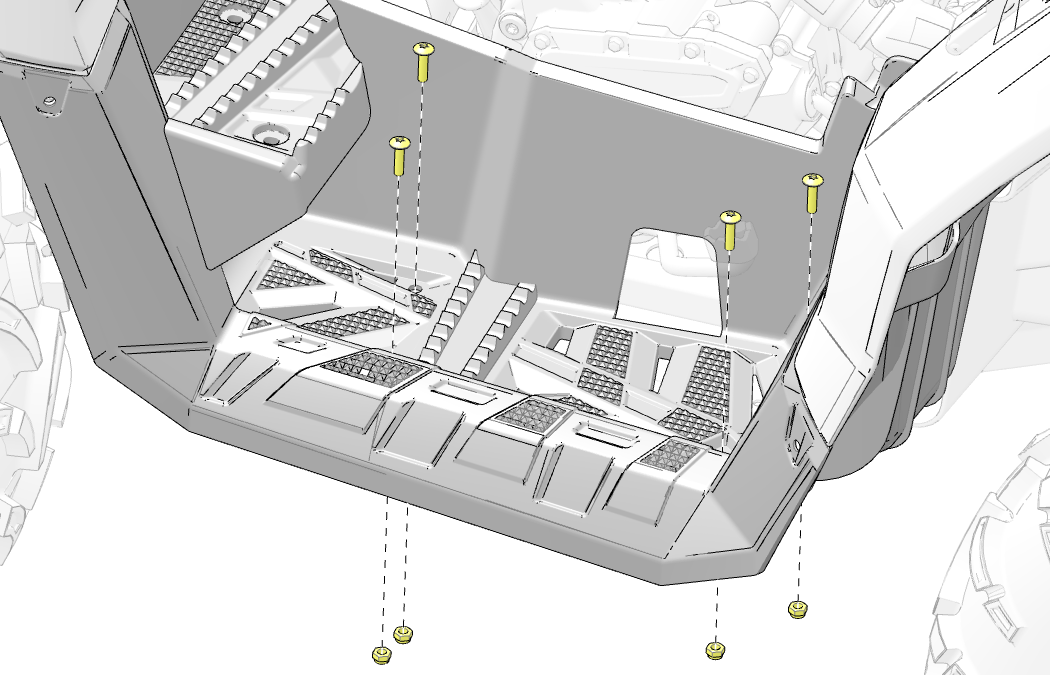
Install the footwell onto the vehicle. Loosely install the four fasteners and four nuts into the bottom of the footwell.
Loosely install the two fasteners and two nuts into the passenger footrest.
Loosely install the fastener into the bottom of the passenger footrest bracket tube.
Loosely install the three fasteners and three nuts into the passenger footrest bracket.
Loosely install the two fasteners securing the footwell to the rear cab.
Install the two push rivets securing the footwell to the front cab.
Install the side panel and close off panel onto the vehicle and install the four push rivets.
Torque all fasteners to specification.
Footwell / Passenger Footrest to Chassis Fasteners:
35 in-lbs (4 N·m)
Passenger Footrest Bracket Tube Fastener:
13 ft-lbs (18 N·m)
Passenger Footrest Bracket Nuts:
15 ft-lbs (20 N·m)
Footwell to Rear Cab Fasteners:
35 in-lbs (4 N·m)
Install the seats. See Seat Installation.
Install the footwell onto the vehicle. Loosely install the four fasteners and four nuts into the bottom of the footwell.
Loosely install the two fasteners and two nuts into the passenger footrest.
Loosely install the three fasteners and three nuts into the passenger footrest bracket.
Loosely install the two fasteners securing the footwell to the rear cab.
Install the two push rivets securing the footwell to the front cab.
Install the close off shield onto the vehicle.
Install the side panel onto the vehicle and install the two push rivets.
Torque all fasteners to specification.
Footwell / Passenger Footrest to Chassis Fasteners:
35 in-lbs (4 N·m)
Passenger Footrest Bracket Nuts:
15 ft-lbs (20 N·m)
Footwell to Rear Cab Fasteners:
35 in-lbs (4 N·m)
Install the seats. See Seat Installation.
Refer to the Specifications chapter for recommended tire type, size, and pressure.
Tires age, even if they are unused or only used occasionally. Evidence of aging could appear as cracks in the treads or sidewall rubber, sometimes accompanied by carcass deformation. Old tires should be checked by tire specialists to determine their suitability for further use.
Always replace tires when tread depth is worn to 1/8 in (3 mm) or less.
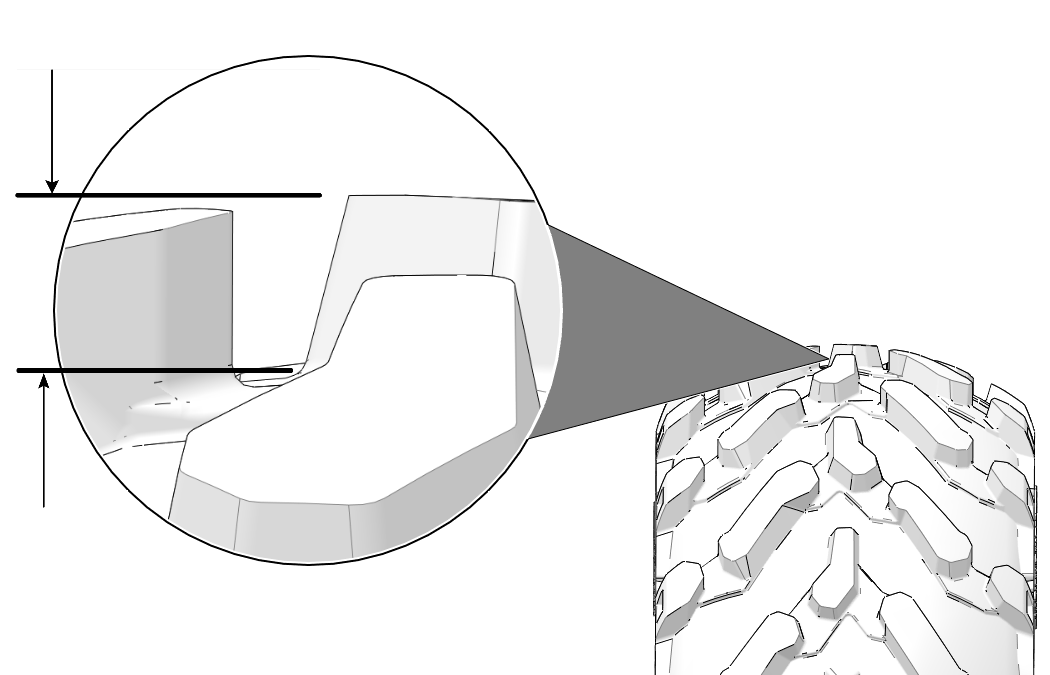
Stop the engine.
Place the transmission in PARK (P).
Lock the temporary brake lock.
Loosen the wheel nuts 1 approximately 1/2 of a turn.
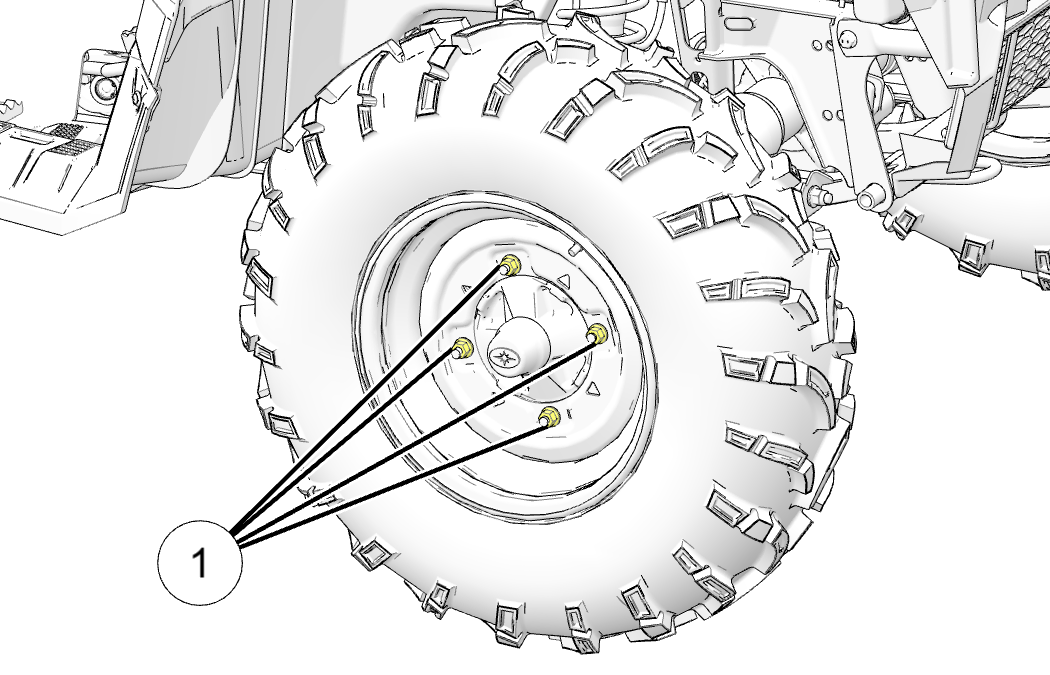
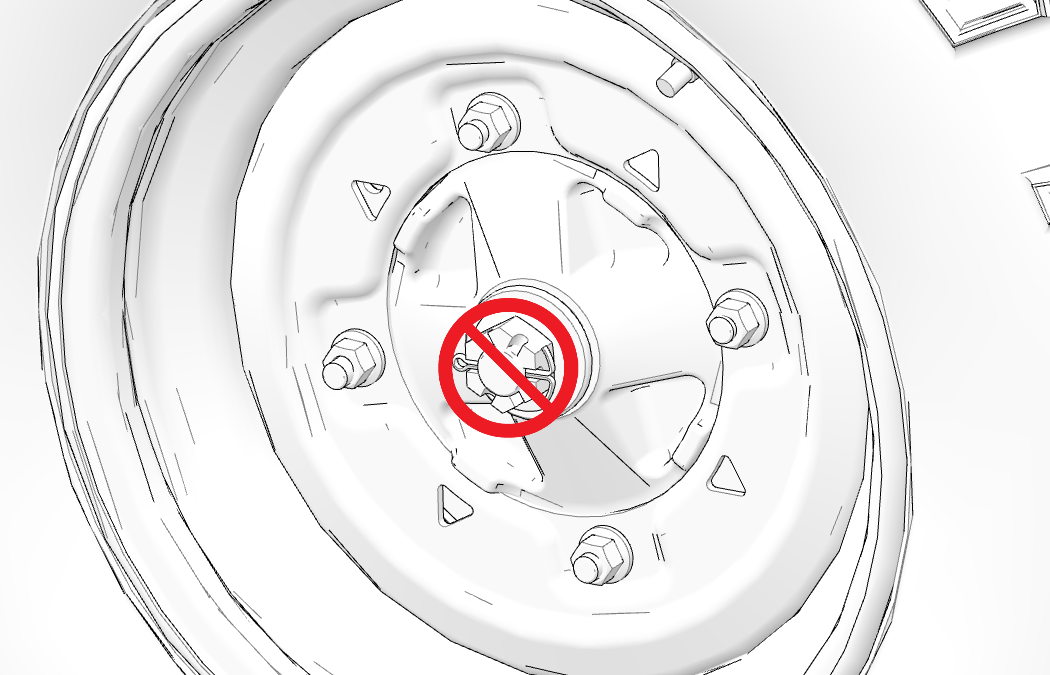
Elevate the side of the vehicle by using a floor jack, and secure the vehicle by placing a suitable jack stand under the foot rest frame.
Remove the wheel nuts.
Remove the wheel.
Place the transmission in PARK (P).
Lock the temporary brake lock.
Place the wheel on the hub with the valve stem toward the outside and rotation arrows on the tire pointing toward forward rotation (if equipped).
Install the wheel nuts and finger-tighten them.
Lower the vehicle to the ground.
Torque the wheel nuts to specification.
Check the wheel nut torques occasionally and when they’ve been loosened for maintenance service.
|
Lug Nut |
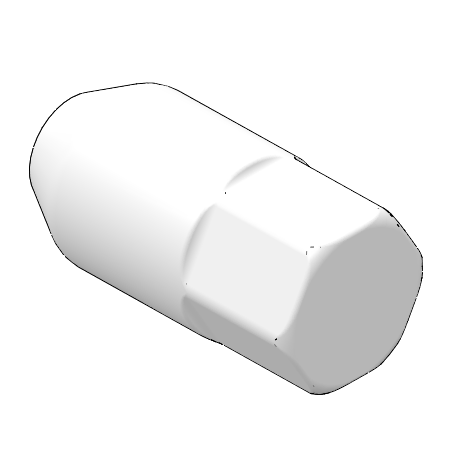
|
Front and Rear |
30 ft-lbs (40 N·m) PLUS 1/4 TURN |
|
2-Piece Flange Nut |
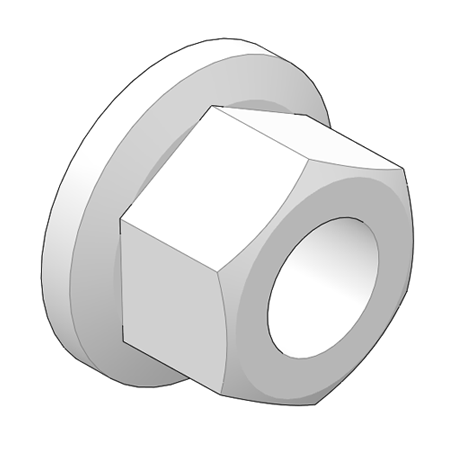
|
Front and Rear |
27 ft-lbs (37 N·m) |
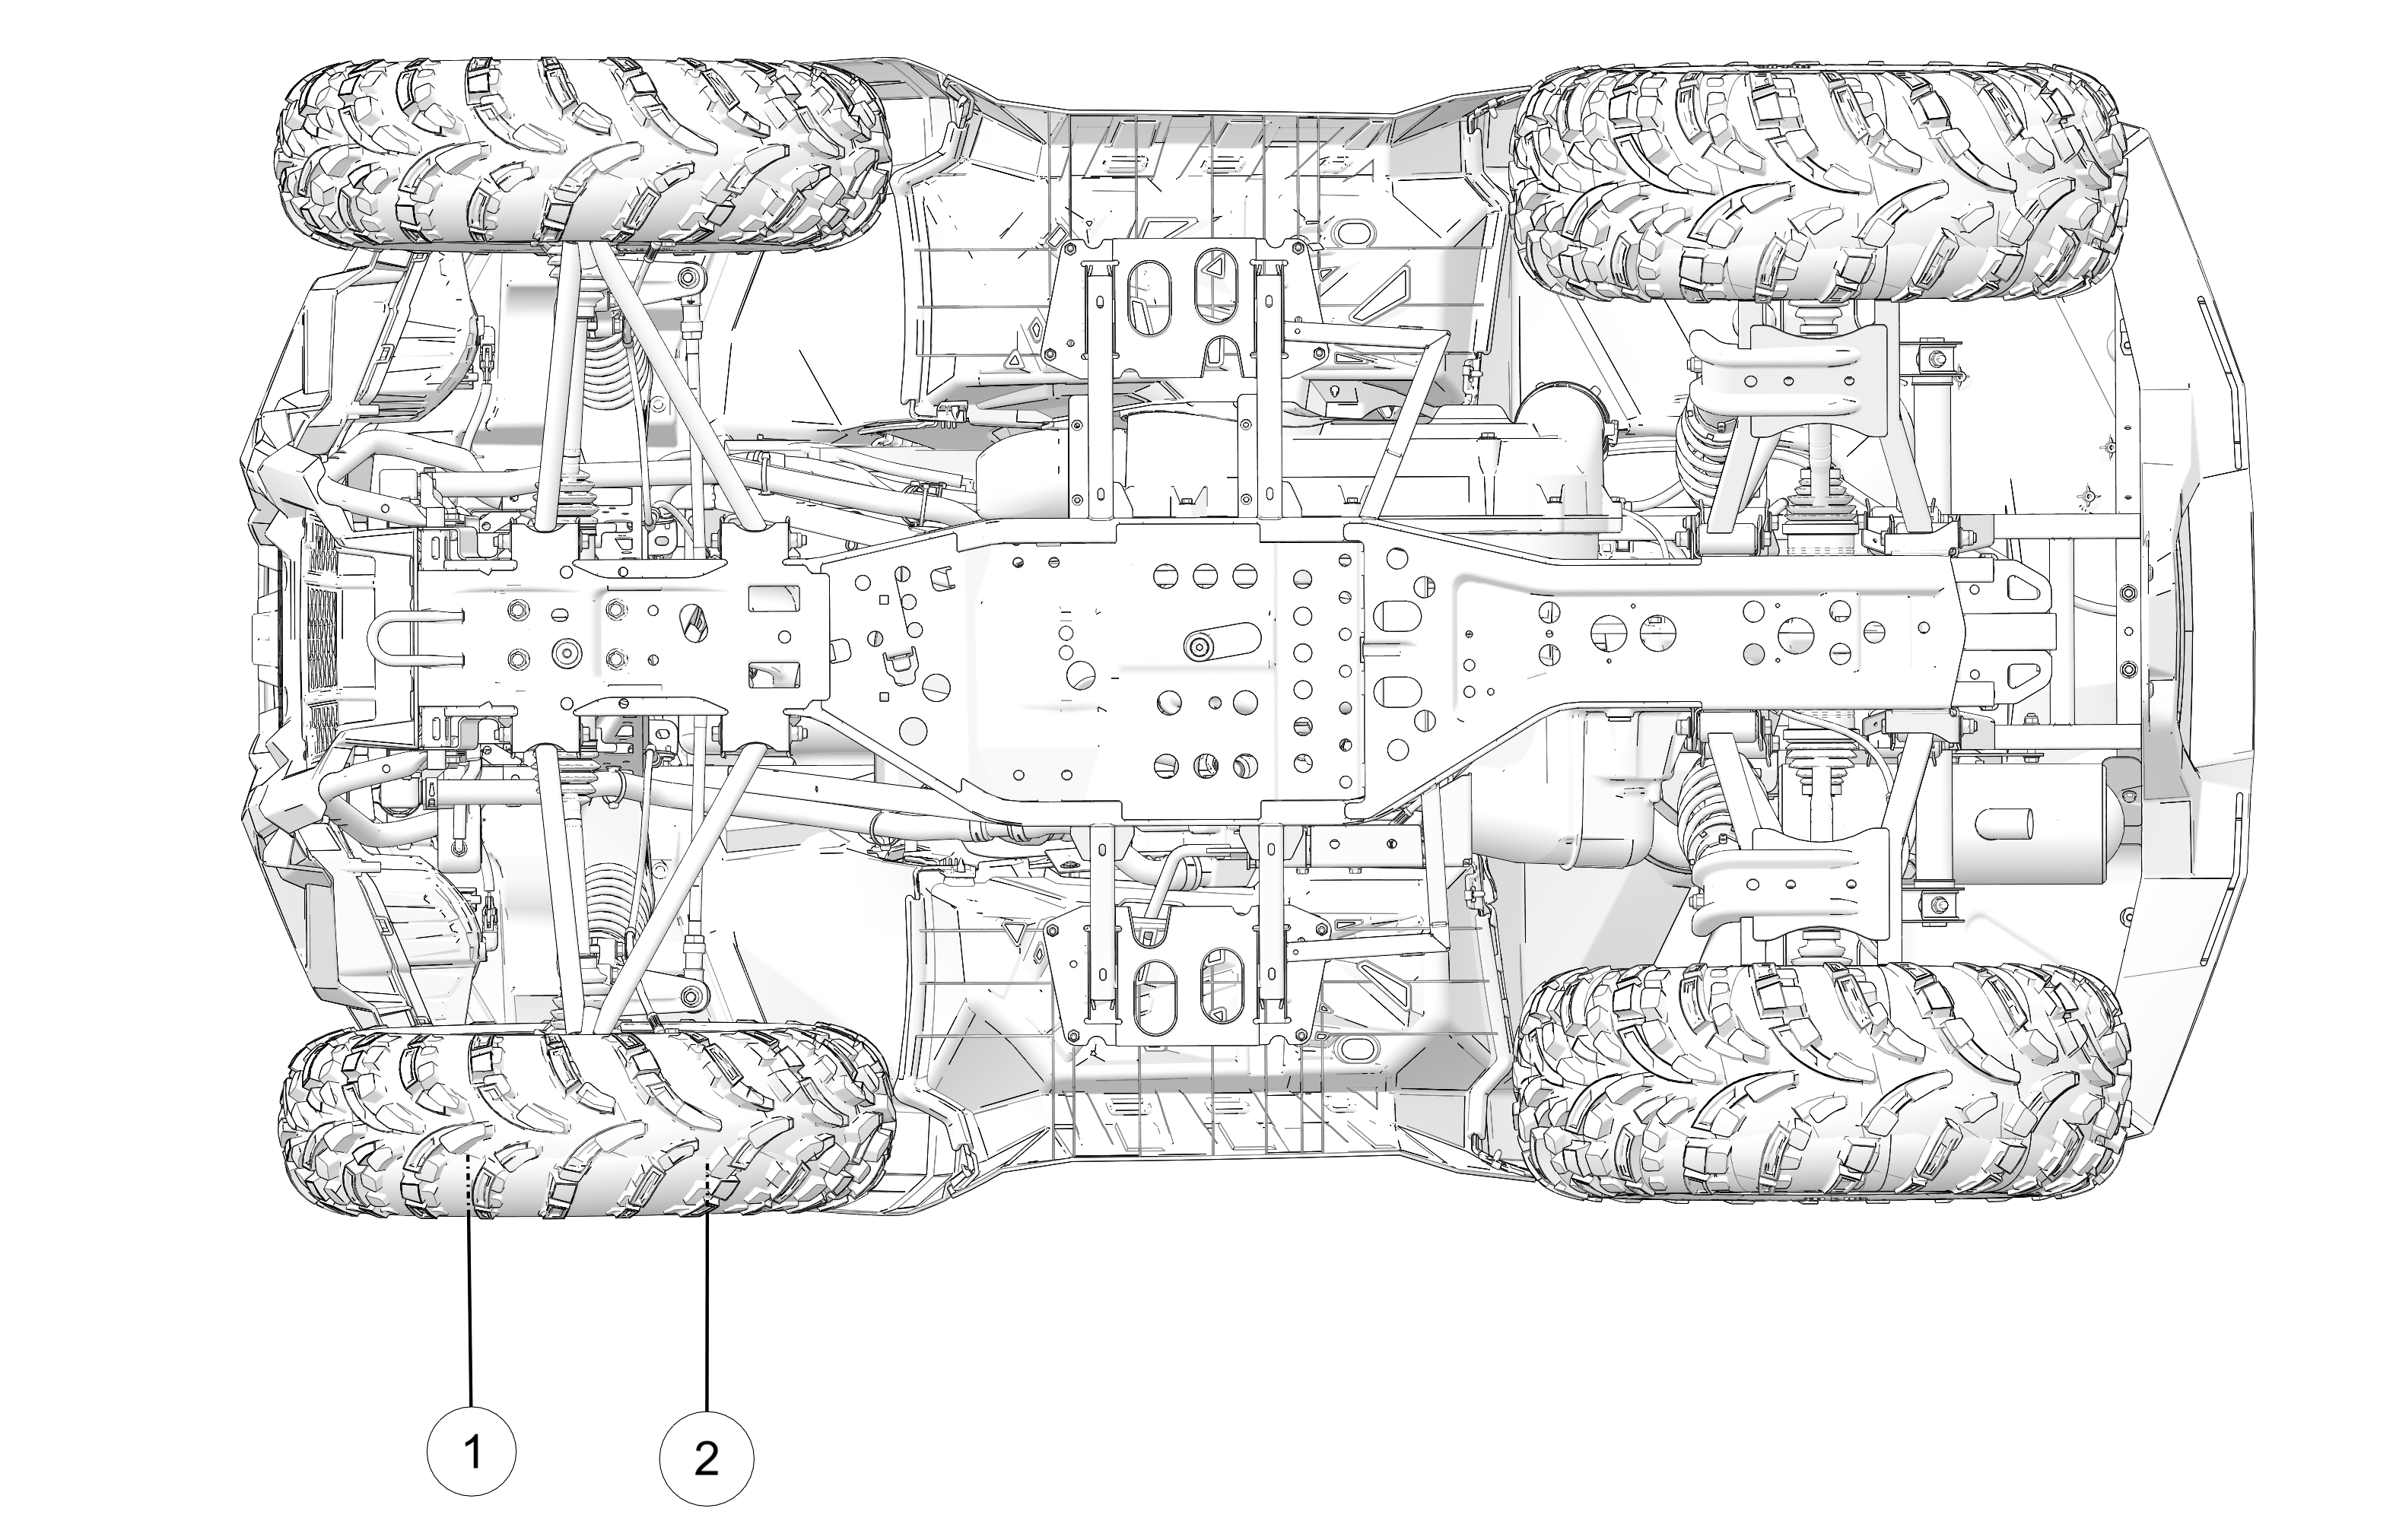
Use the following procedure to check the toe alignment of the vehicle.
The recommended toe alignment is 1/4-1/2 inch (6-12 mm).
Position the vehicle on a level surface.
Place the handlebars in a straight-ahead position.
Tie a length of string between two stands. Position the stands so that the string is flush with the side of the rear tire. If available, you may use a long straight-edge instead of string.
Measure the distance from the string to the rim at the front 1 and rear 2 of the front rim. The rear measurement should be 1/8-1/4 inch (3-6 mm) more than the front measurement on each side of the vehicle to obtain the recommended 1/4-1/2 inch (6-12 mm) toe out alignment.
Repeat the measurement procedure on the other side of the vehicle.
If you discover improper alignment, see your Polaris dealer for service.
The camber and caster are non-adjustable.
It is recommended that the air filter is replaced annually. When riding in extremely dusty conditions, replacement is required more often.
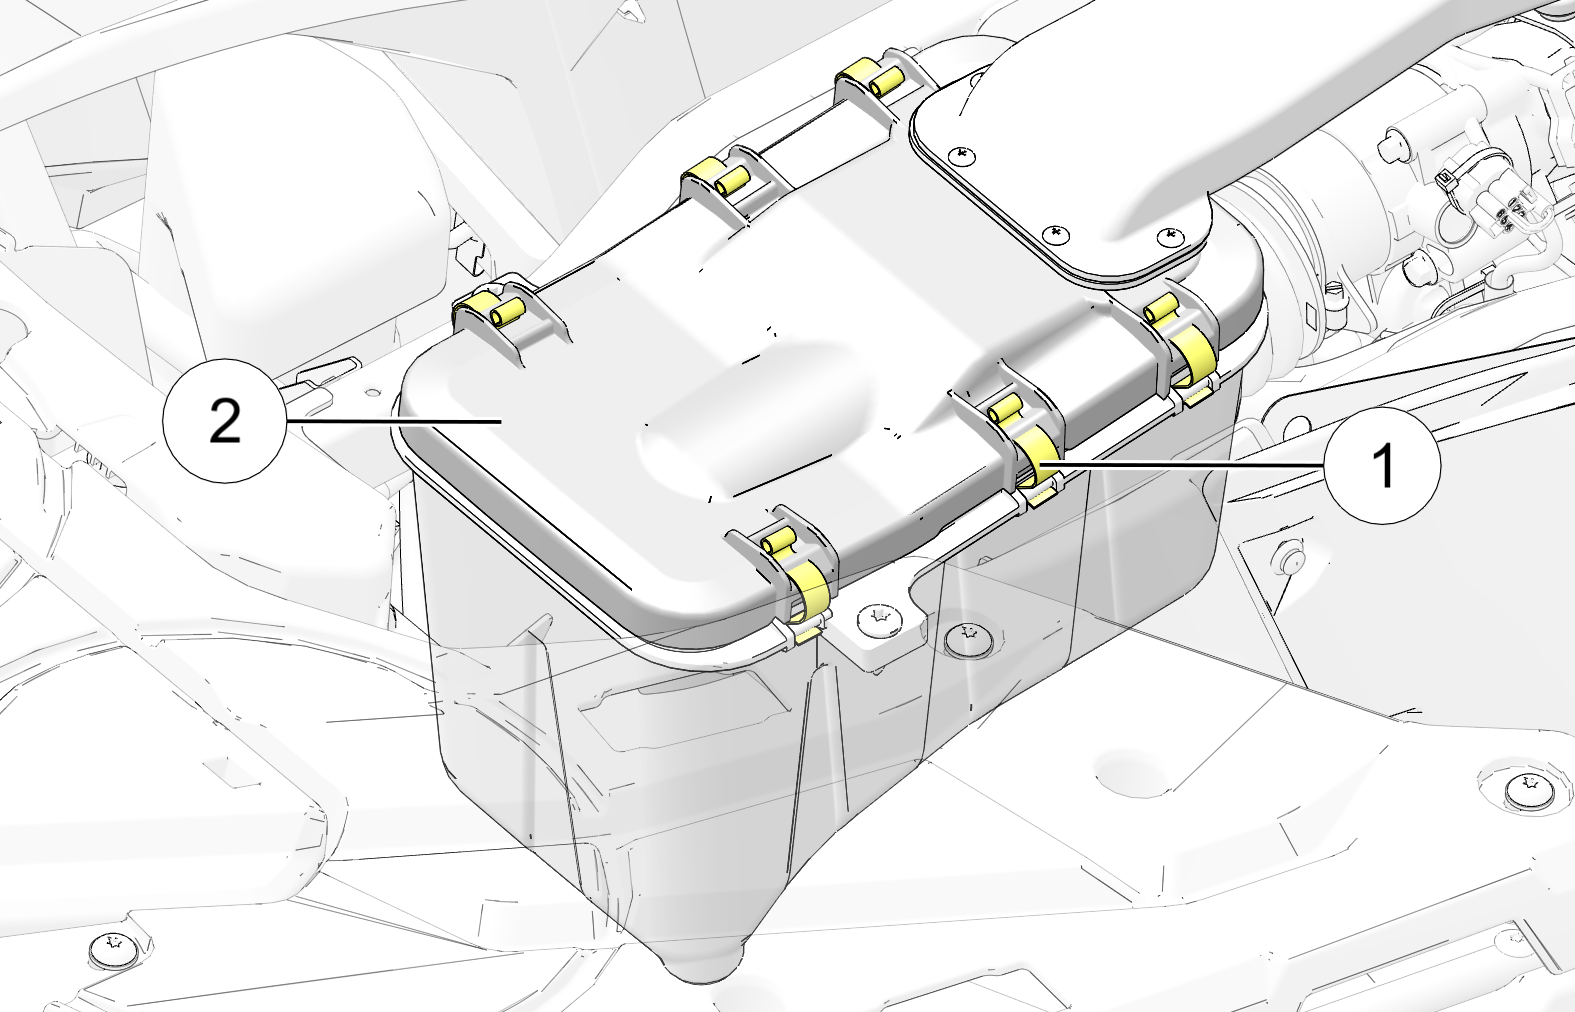
Lift up on the rear of the seat.
Pull the seat back and free of the tabs.
When reinstalling seat, make sure the slots in the seat engage the tabs in the fuel tank.
Remove the six clips 1 from the air box cover and remove the cover 2.
Inspect the gasket 3. It should adhere tightly to the cover and seal all the way around.
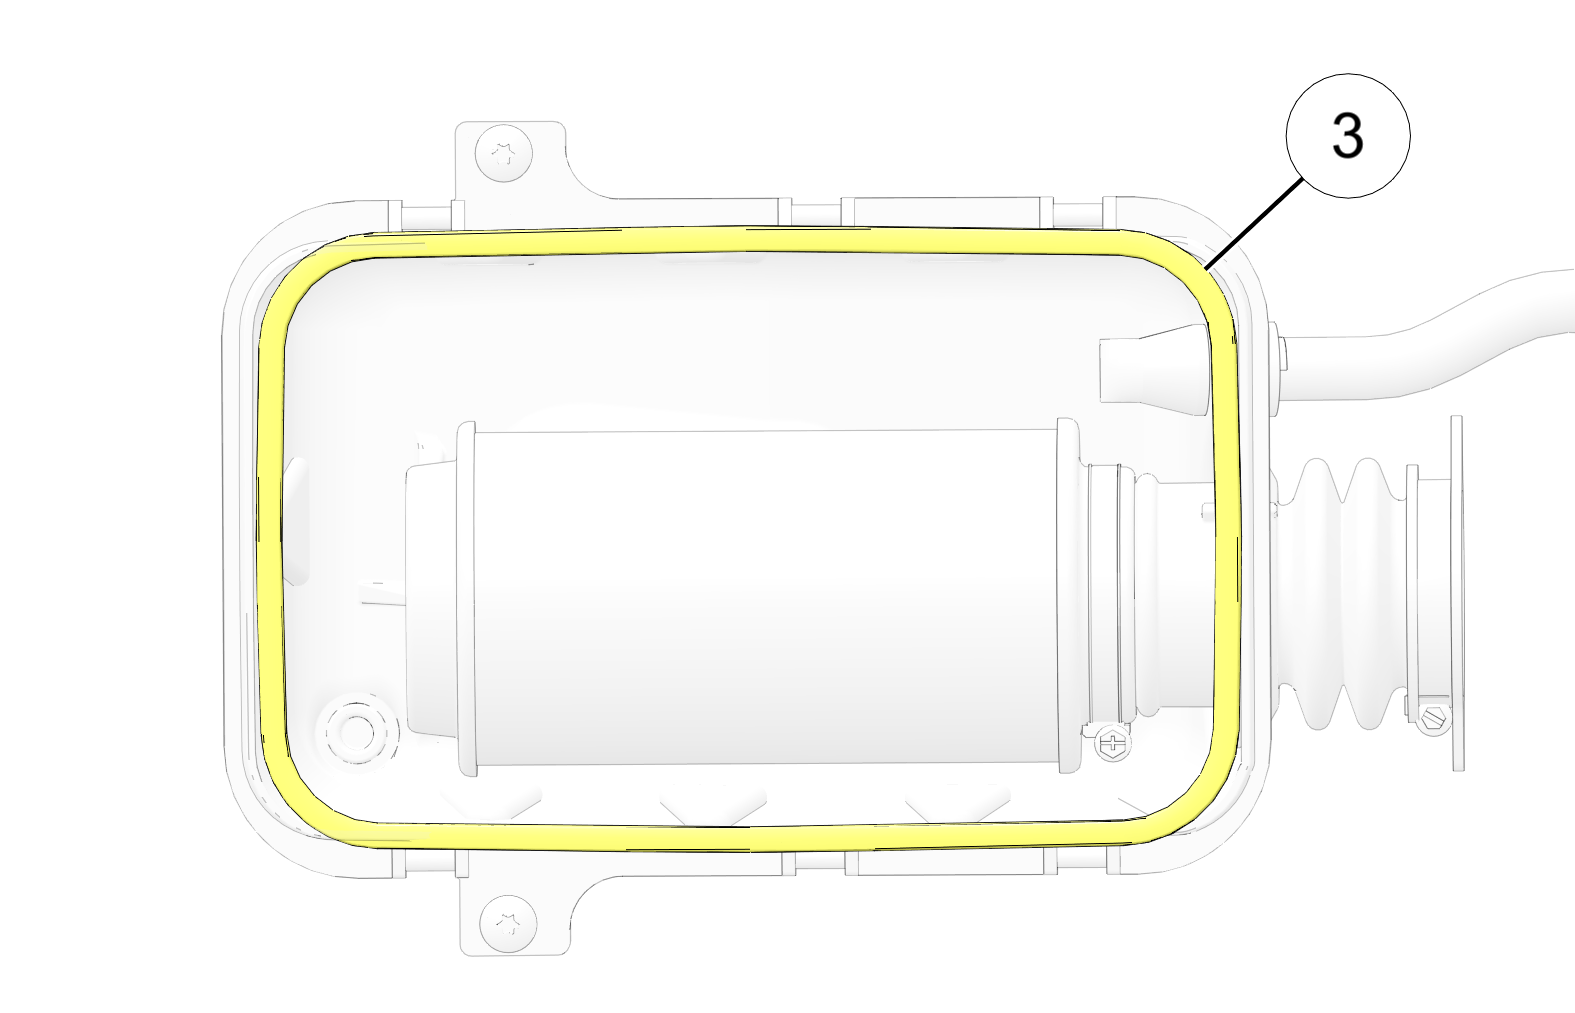
Loosen the air filter hose clamp 4 and remove air filter assembly.
Inspect the air filter and replace if necessary. If the filter has been soaked with fuel or oil, it must be replaced.
Reinstall the air filter on the main filter mount. Place hose clamp over the assembly and torque to specification.
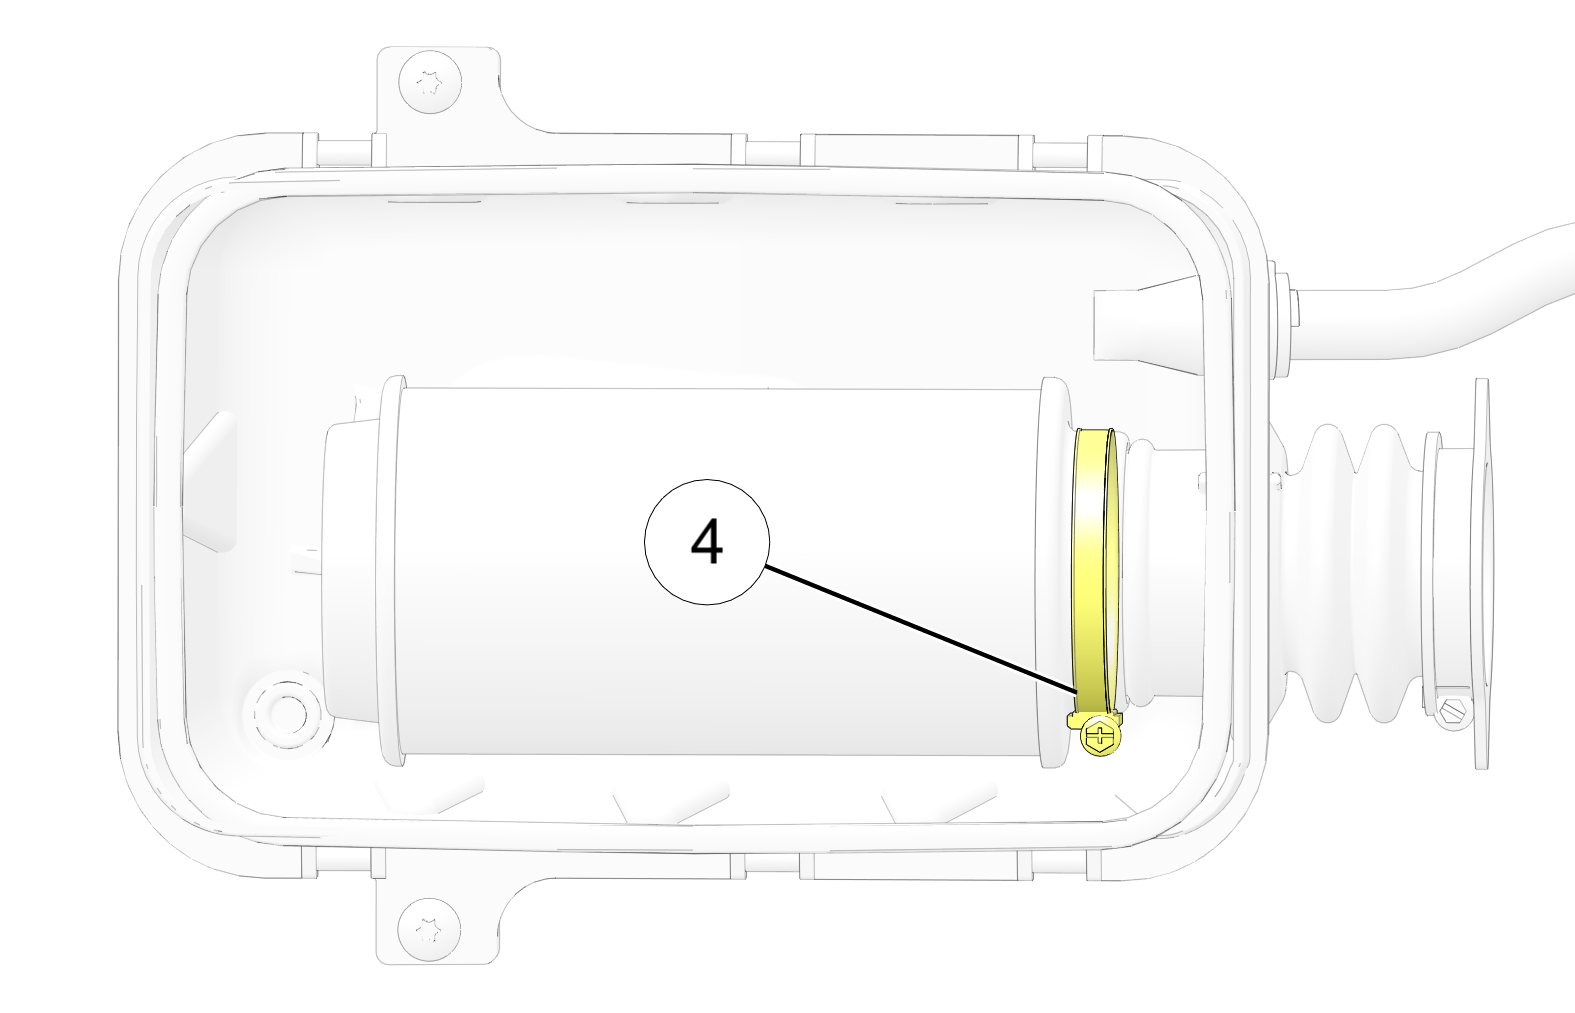
Apply a small amount of general purpose grease to the sealing edges of the filter before reinstalling.
Air Filter Hose Clamp:
20 in-lbs (2 N·m)
The air filter should rest on the filter supports. Proper placement of the air filter is important to prevent rattles and air leaks.
Install the air box cover and secure with the clips.
If the engine stops or will not start, or if you experience other electrical failures, a fuse may need replacement. Locate and correct any short circuits that may have caused the blown fuse, then replace the fuse. Spare fuses are provided in the fuse box.
To replace a fuse, do the following:
Unlock the front rack latches and open the front rack.
Remove the front cover (under the work light pod).
Remove the fuse box cover.
Remove the suspect fuse from the fuse panel. If the fuse is blown, install a new fuse with the same amperage.
Secure the fuse box cover and front cover.
Close and secure the front rack.
Poor lighting can result in reduced visibility when driving. Headlight and taillight lenses become dirty during normal operation. Clean headlights and taillights frequently and replace burned out headlamps and taillamps promptly.
Always make sure lights are adjusted properly for best visibility.
Your vehicle is equipped with an integrated LED pod work light. In the event of a failure, the entire assembly must be replaced. Contact your authorized Polaris dealer for assistance if needed.
The work light beam can be adjusted slightly upward or downward. Use the following procedure to make the adjustment.
Image is for reference only. Your model might differ slightly.
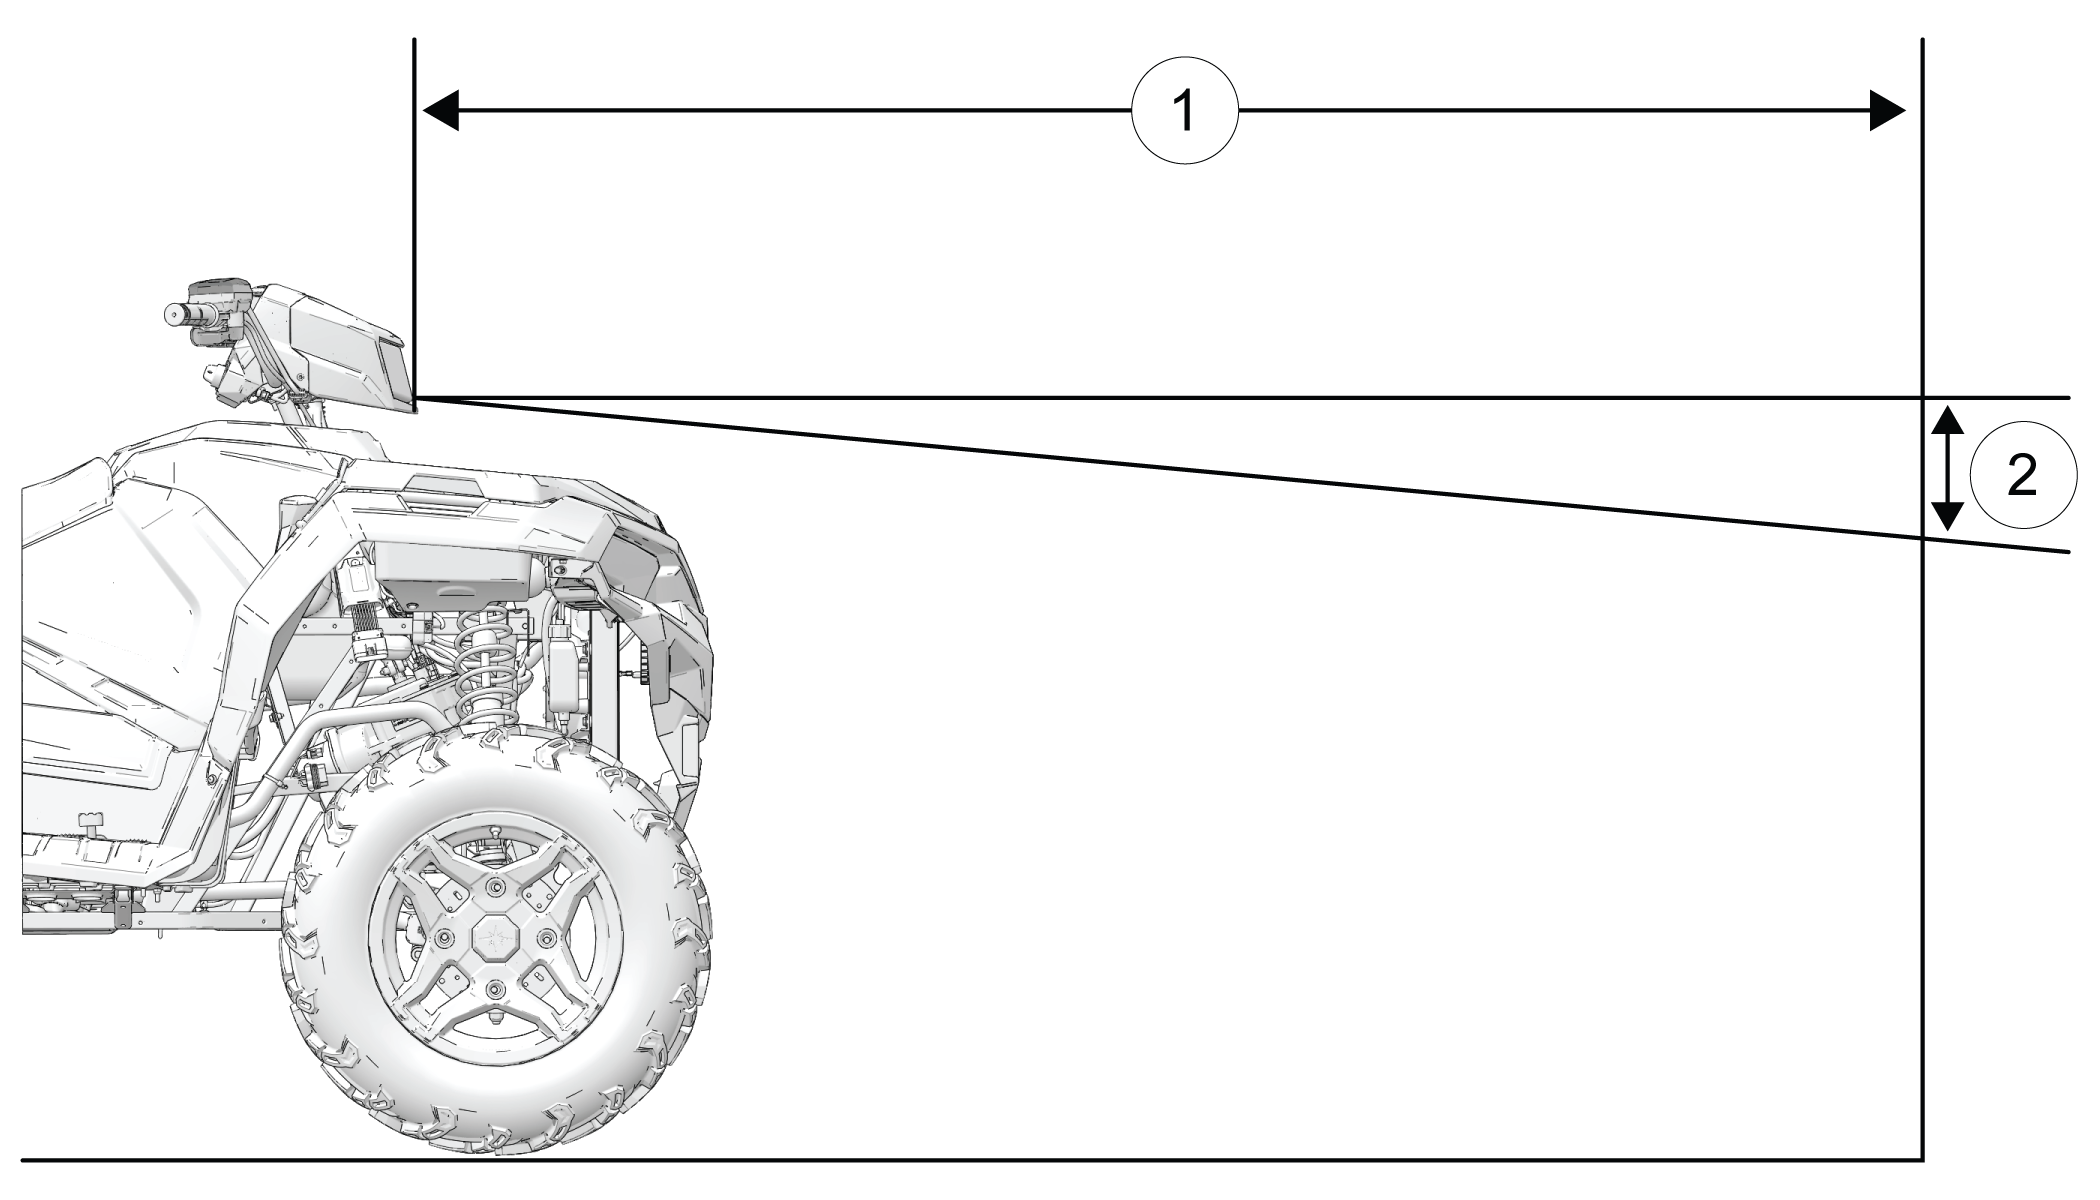
Position the vehicle on a level surface with the work light approximately 25 ft (7.6 m) from a wall 1. Place the transmission in PARK (P).
Measure the distance from the floor to the center of the work light and make a mark on the wall at the same height.
Start the engine. Turn on the work light.
Observe the work light aim on the wall. The most intense part of the work light beam should be 2 in (5 cm) below the mark on the wall 2. Include rider weight on the seat when measuring.
The adjustment screw is located on the right side of the work light pod. To adjust the beam, loosen the screw. Adjust the headlamp to the desired position, then tighten the screw.
Your vehicle is equipped with integrated LED front bumper headlights. In the event of a failure, the entire assembly must be replaced. Contact your authorized Polaris dealer for assistance if needed.
The LED front bumper lights can be adjusted slightly upward or downward or to the left or right.
Place the vehicle on a level surface with the front bumper lights approximately 23 ft (7 m) from a wall 1.
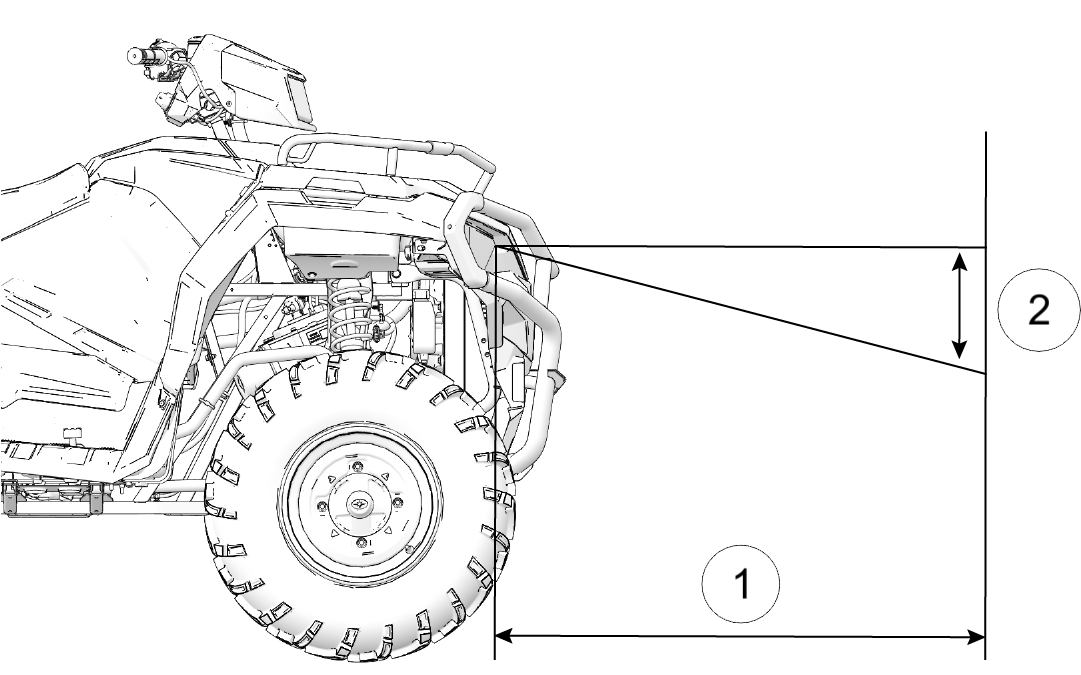
Put the transmission in PARK (P).
Load the vehicle with the equivalent weight of a rider.
Measure the distance from the floor to the center of each front bumper light and make a mark on the wall at the same height.
Turn the ignition ON and turn the front bumper lights to low beam.
Observe the headlight aim on the wall 2. The horizontal line, separating the lit-zone from the unlit-zone should be aimed 8 in (20 cm) below the mark placed on the wall in step 4.
Unlock the front rack latches 1 and open the front rack.
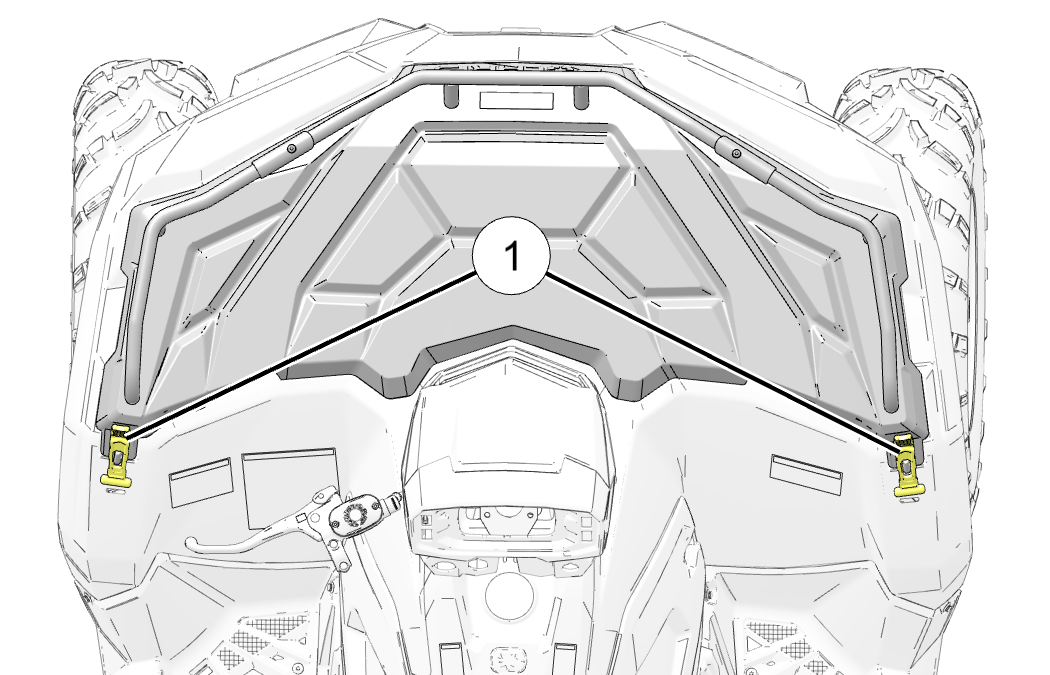
Remove the compartment plug 2 from the front cab.
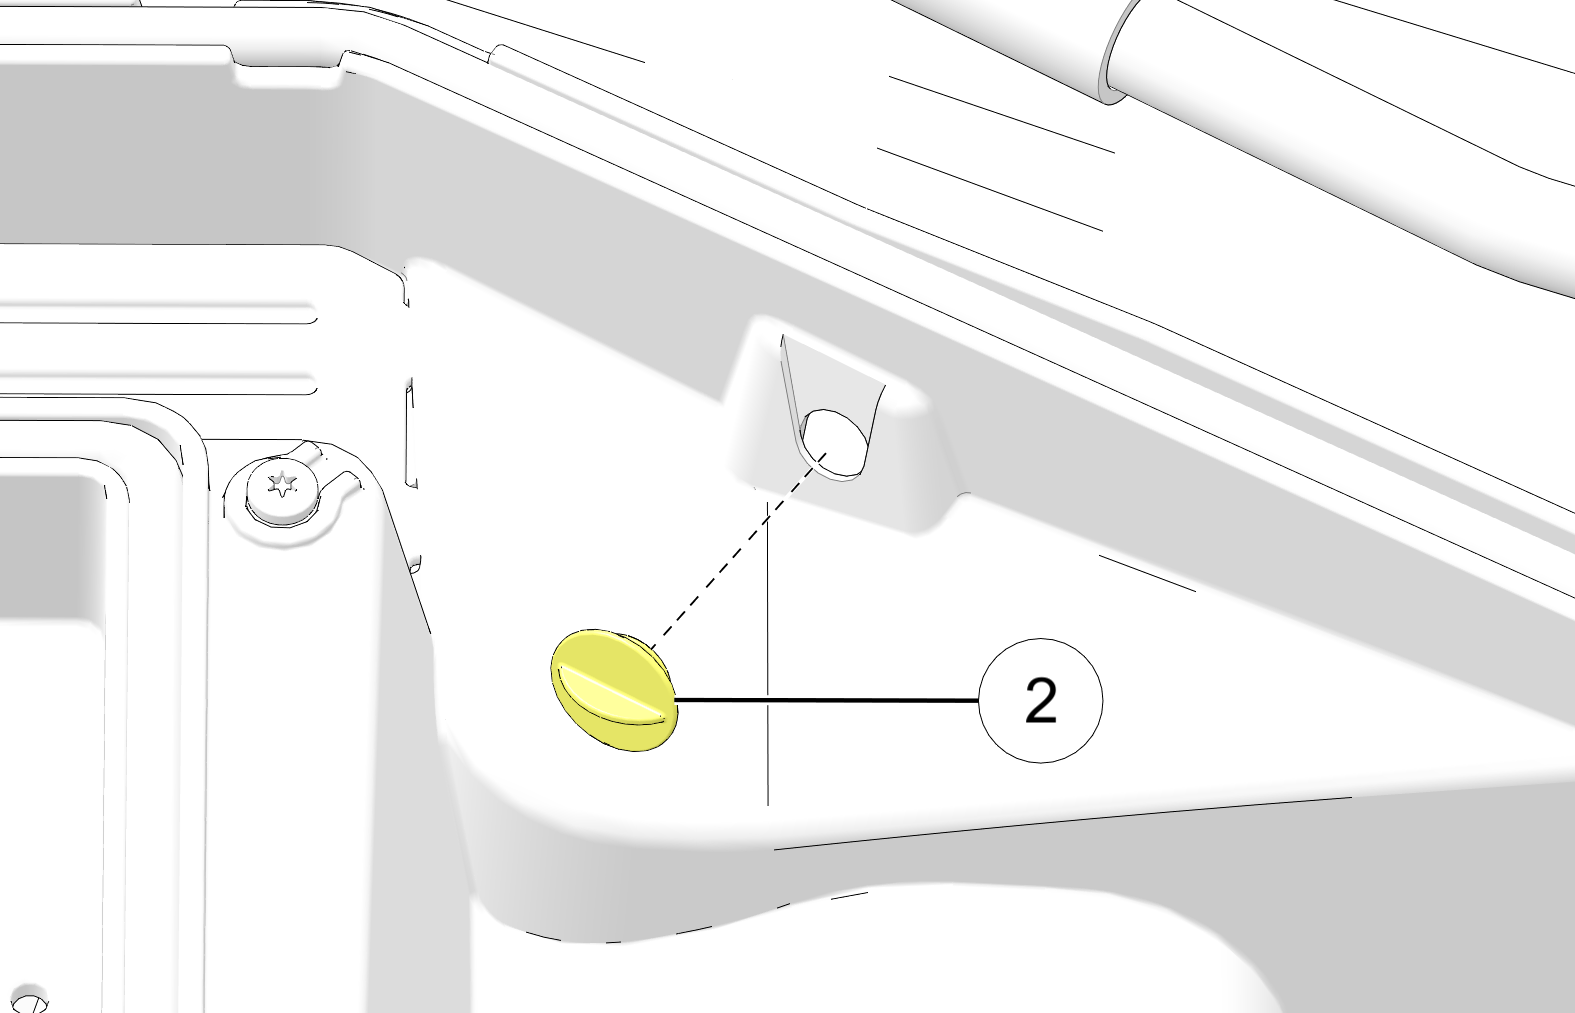
Insert the Torx® wrench tool 3 (included in your vehicle’s tool kit) through the compartment plug hole to access the top center screw 4 on the back of the front bumper light. Loosen the screw.
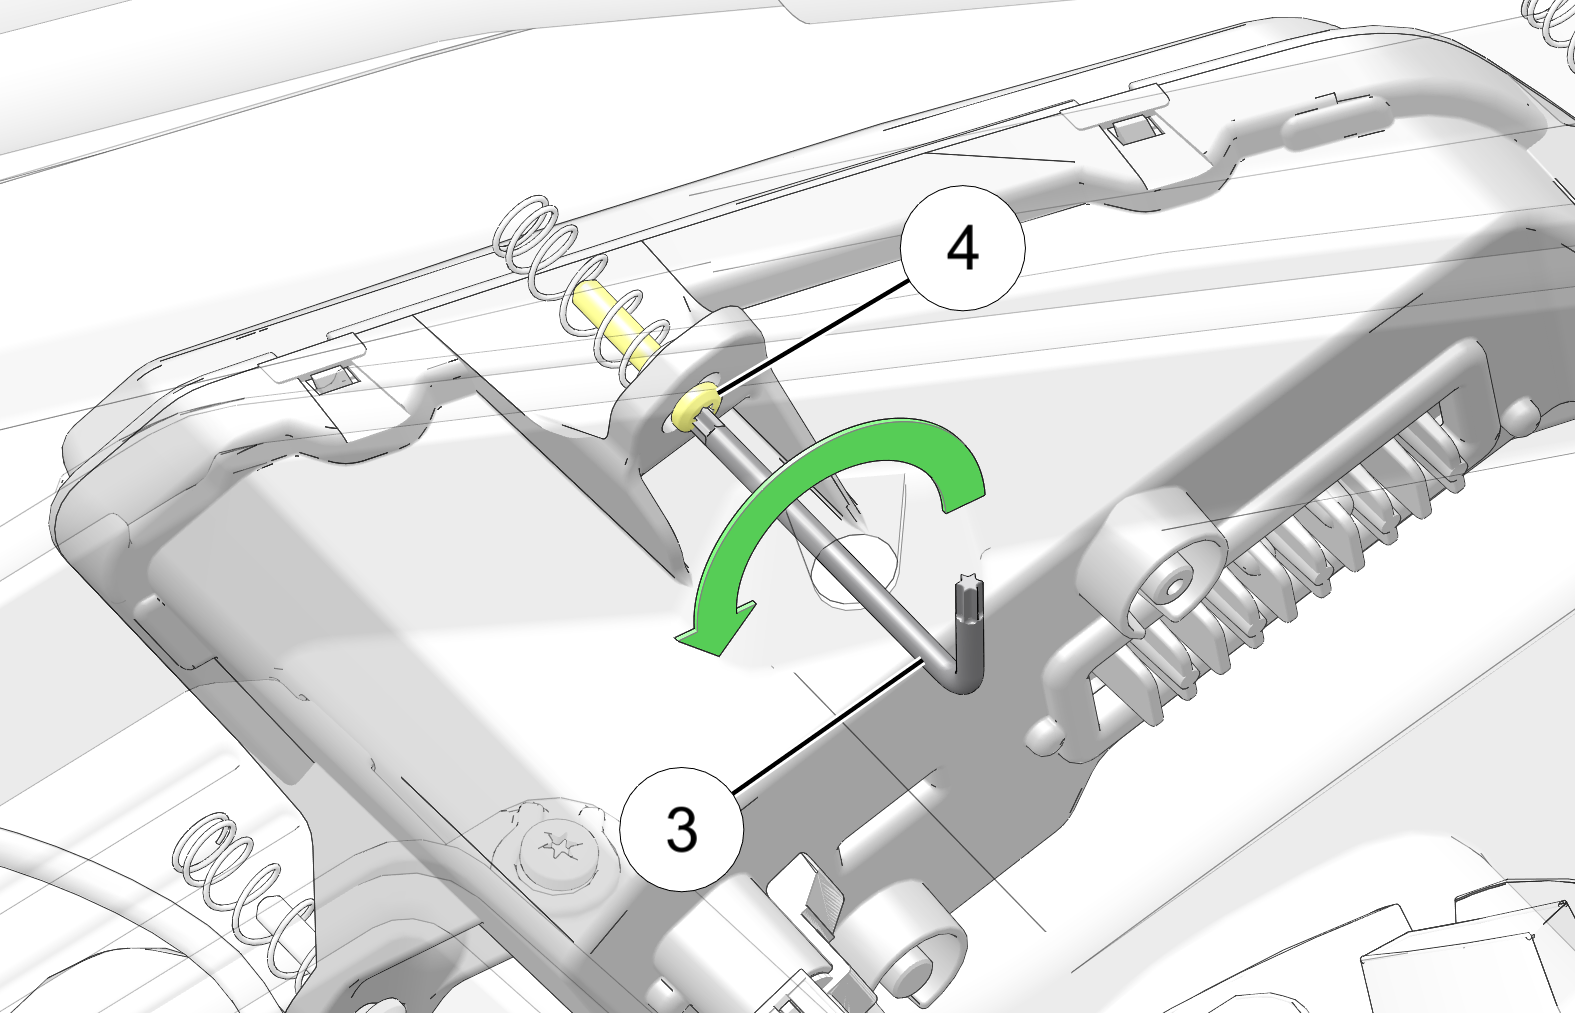
Loosen the other two screws (5 and 6) on the back of the front bumper light.
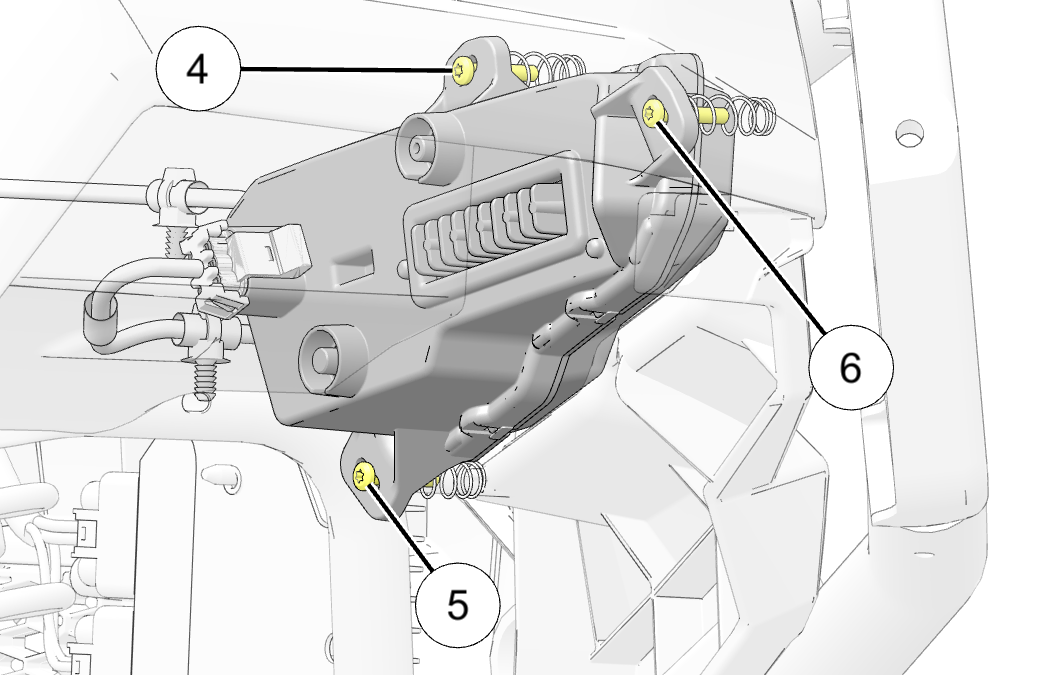
Adjust the screws on the back of the front bumper light as follows:
The screws labeled 4 and 5 adjust the light upwards and downwards.
The screw labeled 6 adjusts the light to the left and right.
Tighten the screws.
Repeat steps for the other front bumper light.
Your vehicle is equipped with an integrated LED brake light / taillight. In the event of a failure, the entire assembly must be replaced. Contact your authorized Polaris dealer for assistance if needed.
Refer to the Specifications chapter for the recommended spark plug type and gap for your vehicle. Torque spark plugs to specification.
Spark Plug:
9 ft-lbs (12 N·m)
Spark plug condition is indicative of engine operation. Check the spark plug for the correct color.
Allow engine to cool completely.
Rotate the spark plug cap 1/4 turn and pull it off the spark plug.
Rotate the spark plug counter-clockwise to remove it.
Reverse this procedure to reinstall the spark plug. Torque to specification.
The normal insulator tip is gray, tan or light brown. There will be few combustion deposits. The electrodes are not burned or eroded. This indicates the proper type and heat range for the engine and the service.
The tip should not be white. A white insulator tip indicates overheating, caused by use of an improper spark plug or incorrect throttle body adjustments.
The wet fouled insulator tip is black. A damp oil film covers the firing end. There may be a carbon layer over the entire nose. Generally, the electrodes are not worn. General causes of fouling are excessive oil consumption, use of non-recommended oil, or poor fuel quality.
If your vehicle becomes immersed, major engine damage can result if the machine is not thoroughly inspected. Take the vehicle in for service before starting the engine. Your Polaris dealer can provide this service.
If it’s impossible to take your ATV to a dealer before starting it, follow the steps outlined below.
Move the ATV to dry land or at the very least, to water below the footrests.
Check the air box. If water is present, dry the air box and replace the filter with a new filter. If equipped, remove the air box drain plug to drain water. Reinstall the drain plug.
Remove the spark plugs.
Turn the engine over several times using the electric start.
Dry the spark plugs. Reinstall the plugs or install new plugs.
Attempt to start the engine. If necessary, repeat the drying procedure.
Take the vehicle in for service as soon as possible, whether you succeed in starting it or not. Your authorized dealer can provide the required service.
If water has been ingested into the PVT, follow the procedure in the PVT System section for drying out the PVT.
Do not perform clean out immediately after the engine has been run, as the exhaust system becomes very hot. Serious burns could result from contact with exhaust components.
To reduce fire hazard, make sure that there are no combustible materials in the area when purging the spark arrestor.
Wear eye protection.
Do not stand behind or in front of the vehicle while purging the carbon from the spark arrestor.
Never run the engine in an enclosed area. Exhaust contains poisonous carbon monoxide gas.
Do not go under the machine while it is inclined. Put the transmission in PARK (P), lock the temporary brake lock, and block the wheels to prevent roll back.
Failure to heed these warnings could result in serious personal injury or death.
The spark arrestor should be periodically cleaned to remove accumulated carbon. A plugged spark arrestor will affect engine performance. Replace a cracked or damaged spark arrestor before running the vehicle.
Remove the spark arrestor screen fasteners 1.
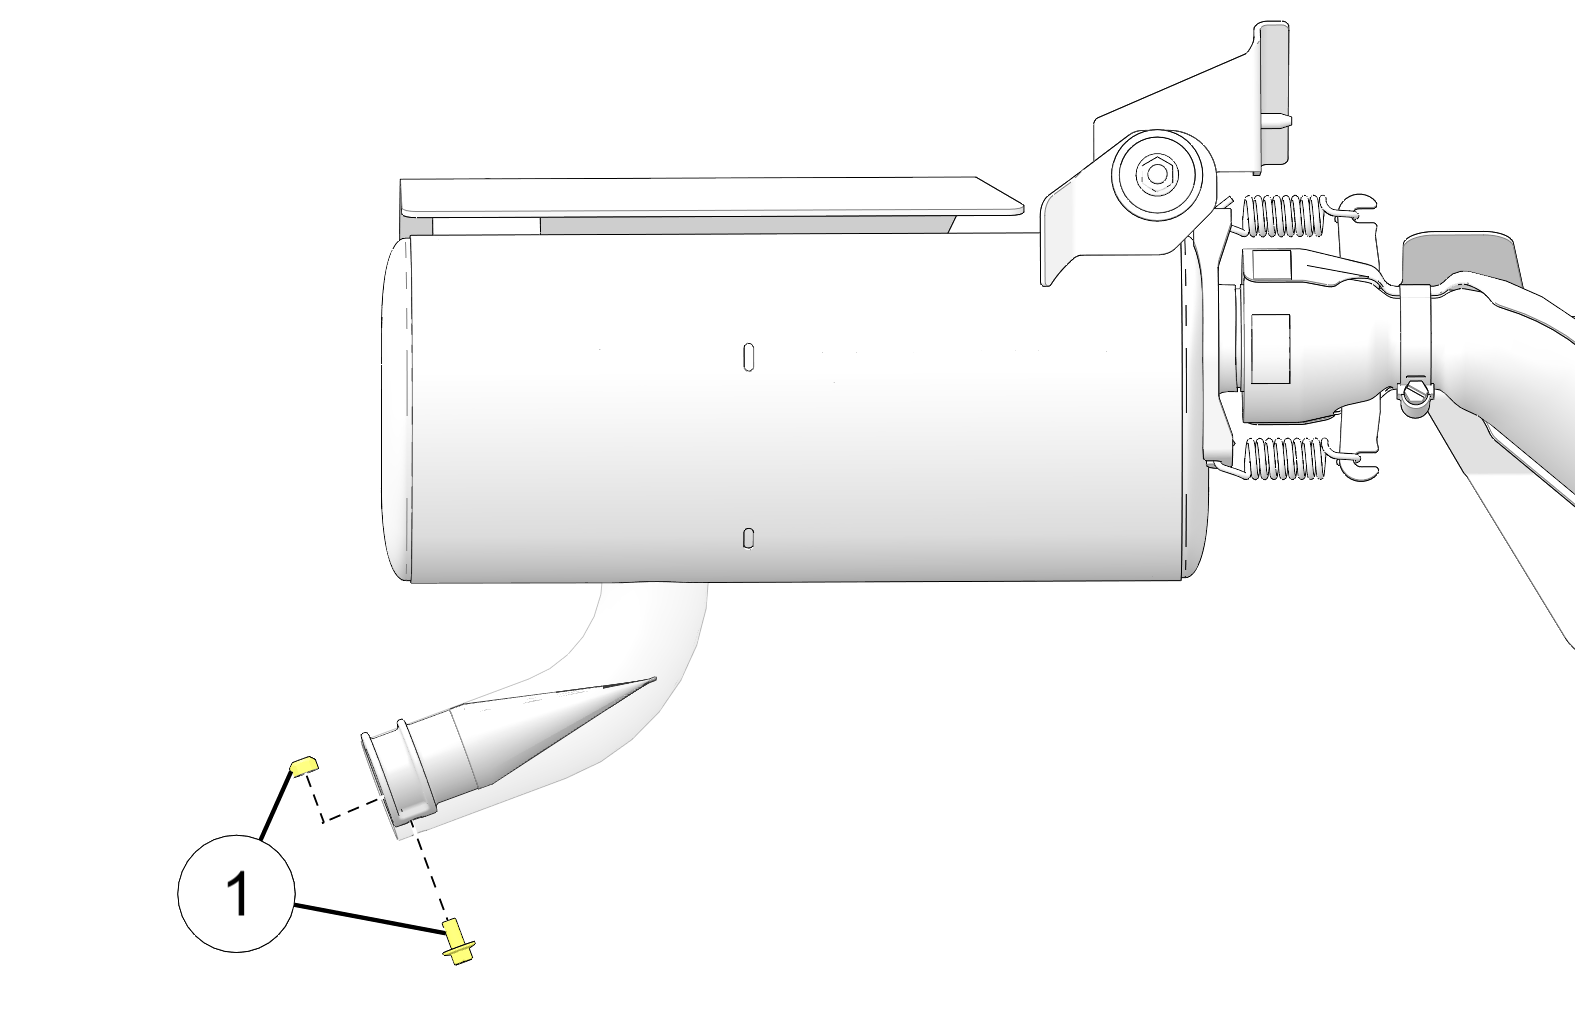
Remove the spark arrestor 2 from the end of the muffler.
Use a non-synthetic brush to clean the screen 3 on the spark arrestor. If necessary, blow debris from the screen with compressed air.
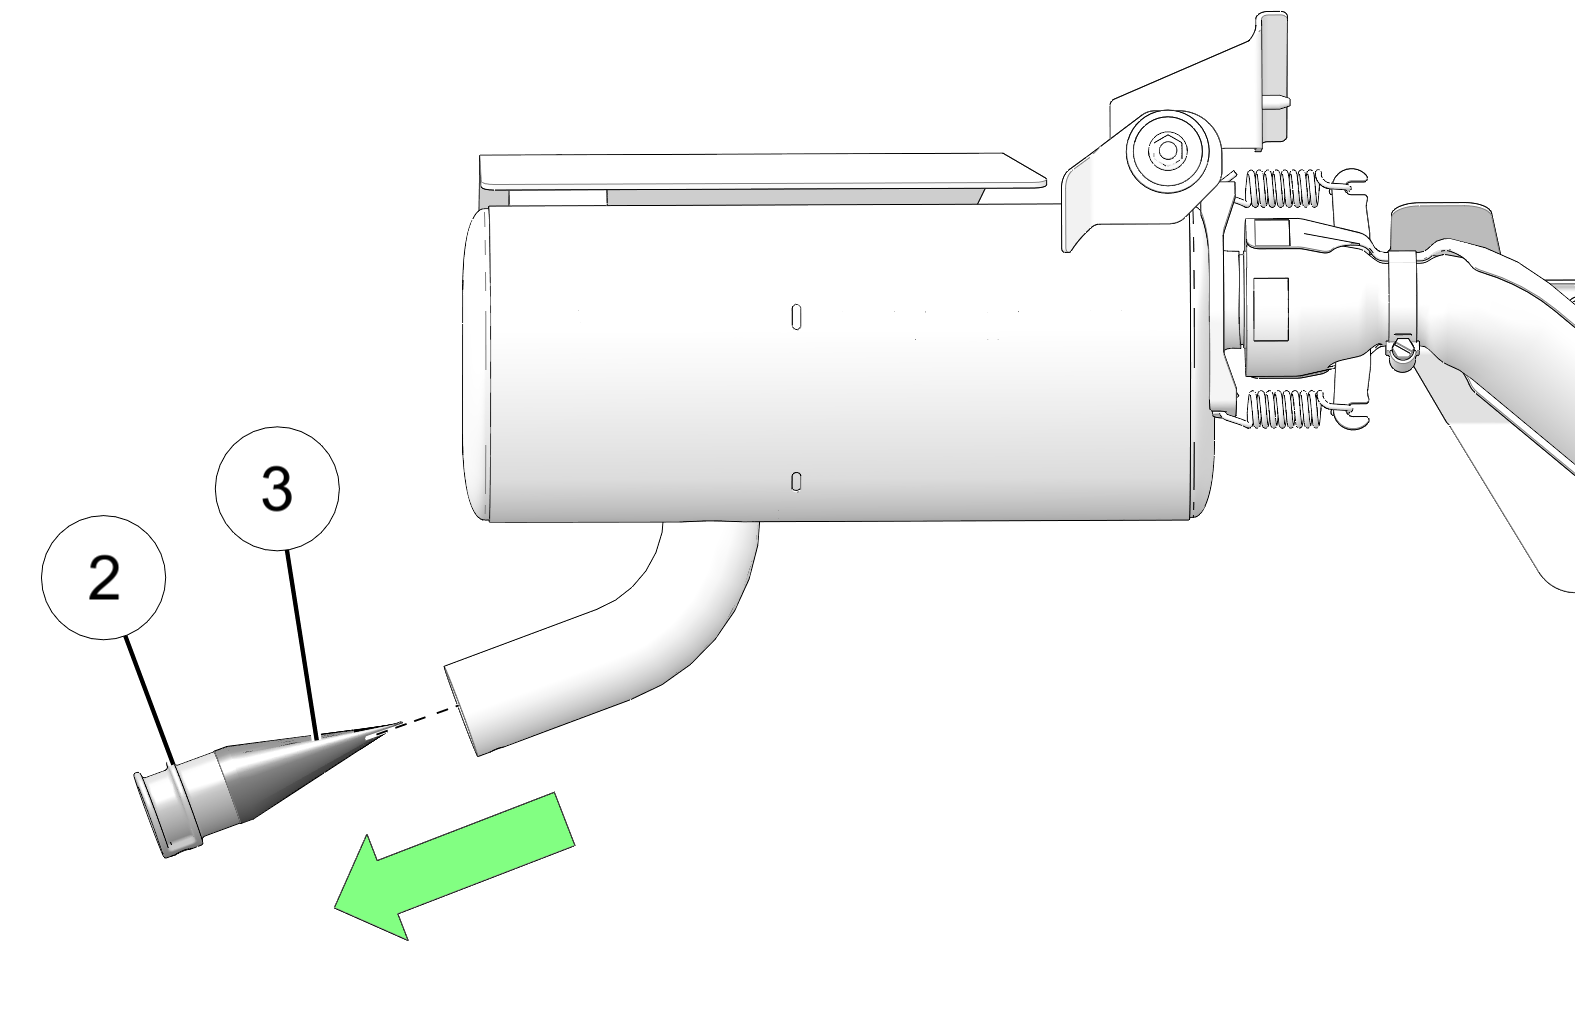
Inspect the screen for wear and damage. Replace if damaged.
Install the spark arrestor. Torque fasteners to specification.
Spark Arrestor Screen Fasteners:
8 ft-lbs (11 N·m)
Do not modify any component of the PVT system. Doing so may reduce its strength so that a failure may occur at a high speed. The PVT system has been precision balanced. Any modification will cause the system to be out of balance, creating vibration and additional loads on components.
The PVT system rotates at high speeds, creating large amounts of force on clutch components. Extensive engineering and testing has been conducted to ensure the safety of this product. However, as the owner, you have the following responsibilities to make sure this system remains safe:
Always follow all recommended maintenance procedures. Always look for and remove debris inside and around the clutch and vent system when replacing the belt.
See your Polaris dealer, or other qualified person, for service and repair assistance.
This PVT system is intended for use on Polaris products only. Do not install it in any other product.
Always make sure the PVT housing is securely in place during operation.
The basic operation of the Polaris PVT system is dependent on engine speed and vehicle torque requirements. As engine speed increases, the force exerted on the movable drive sheave by the flyweights also increases. This, in turn, increases the amount of pinch applied to the drive belt. Similarly, if the engine speed decreases, the amount of centrifugal force decreases, reducing the amount of belt pinch.
On Polaris ATVs, the approximate gear ratio difference between high and low range is 1:2.25. This difference in gearing affects the operation of the PVT, especially at speeds less than 7 MPH (11 km/h), due to the system's dependence on engine speed.
For example, when operating at a ground speed of 3 mph (5 kph) in low range, the engine speed would be around 3000 RPM. This is well above the engagement speed of 1600 - 1800 RPM. However, in high range at 3 mph (5 kph), the engine would be running at only 1500 RPM. Whenever operating this close to the engagement speed, the engine may be running at a speed too low to provide the pinch needed to prevent belt slip. Belt slip is responsible for creating the excessive heat that destroys belts, wears clutch components and causes outer clutch covers to fail.
The air temperature in the clutch cover is substantially reduced by using low range while operating at low ground speeds. Reducing the temperature inside the clutch cover greatly extends the life of the PVT components (belt, cover, etc.).
|
Condition |
Range to Use |
|---|---|
|
Operating at speeds less than 7 mph (11 kph) |
Low |
|
Towing heavy loads |
Low |
|
Operating in rough terrain (swamps, mountains, etc.) |
Low |
|
Operating at speeds greater than 7 mph (11 kph) |
High |
There may be some instances when water is accidently ingested into the PVT system. Use the following instructions to dry it out before operating.
Position the vehicle on a level surface.
Remove the drain plug. Allow the water to drain completely. Reinstall the drain plug.
Start the engine. Place the transmission in PARK (P).
Apply varying throttle for 10-15 seconds to expel the moisture and air-dry the belt and clutches. Do not hold the throttle wide open for more than 5 seconds.
Allow the engine RPM to settle to idle speed, then shift the transmission to low range.
Test for belt slippage. If the belt slips, repeat the process. Your vehicle requires service as soon as possible, which your authorized dealer can provide.
Position the vehicle on a level surface. Put the transmission in PARK (P) and lock the temporary brake lock.
Elevate and safely support the rear of the vehicle.
Remove the left side panel / footwell. See Side Panel / Footwell Removal.
Loosen the PVT outlet duct clamp.
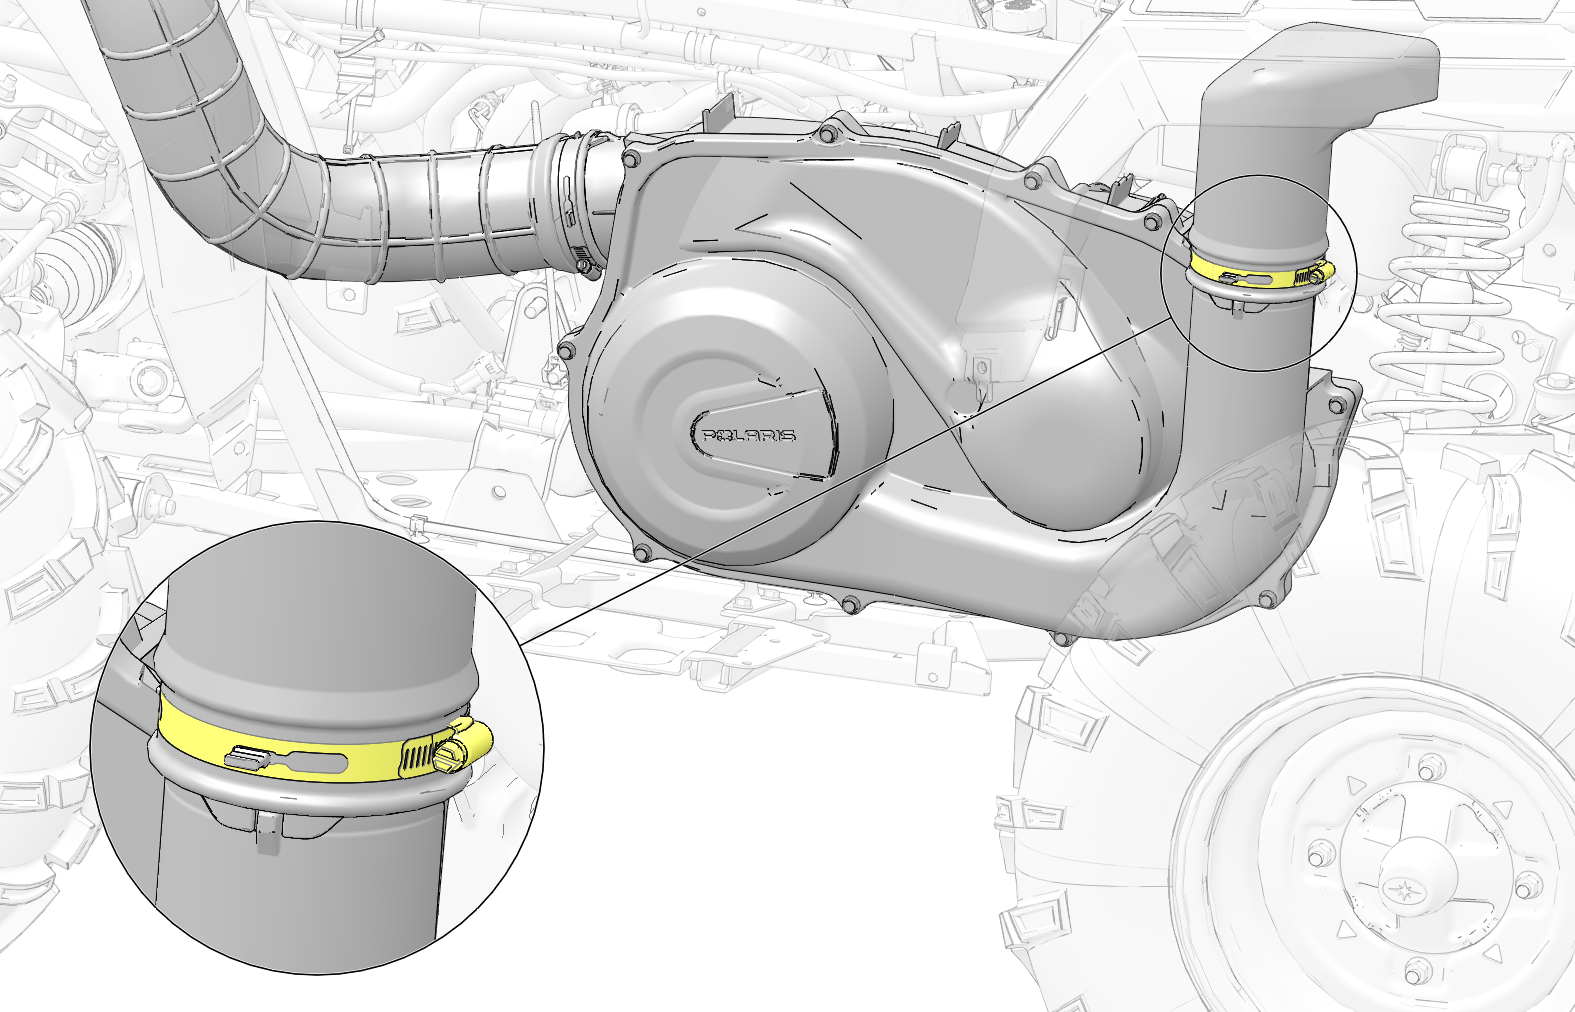
Remove the 10 fasteners securing the outer PVT cover to the inner PVT cover.
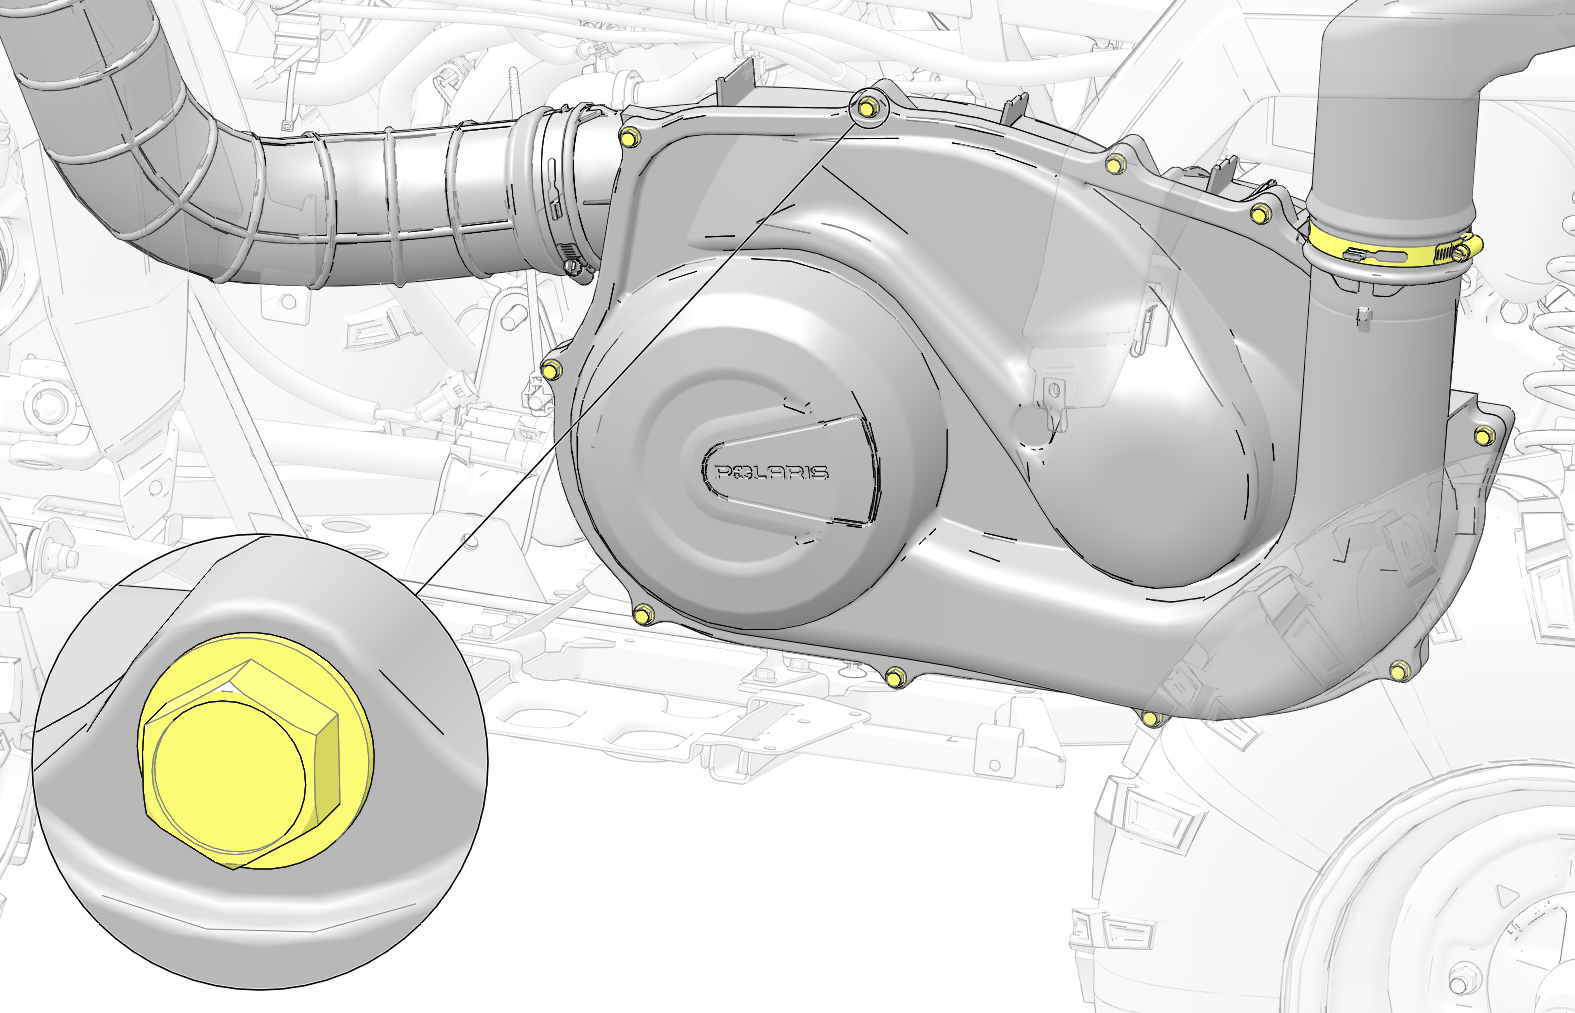
Using care, pull the outer PVT cover out the side of the vehicle.
Note the orientation of the drive belt so that it can be installed in the same direction.
Insert the Belt Removal Tool 1 (included in your vehicle’s toolkit) into the threaded hole on the driven clutch as shown and turn clockwise to spread the clutch.
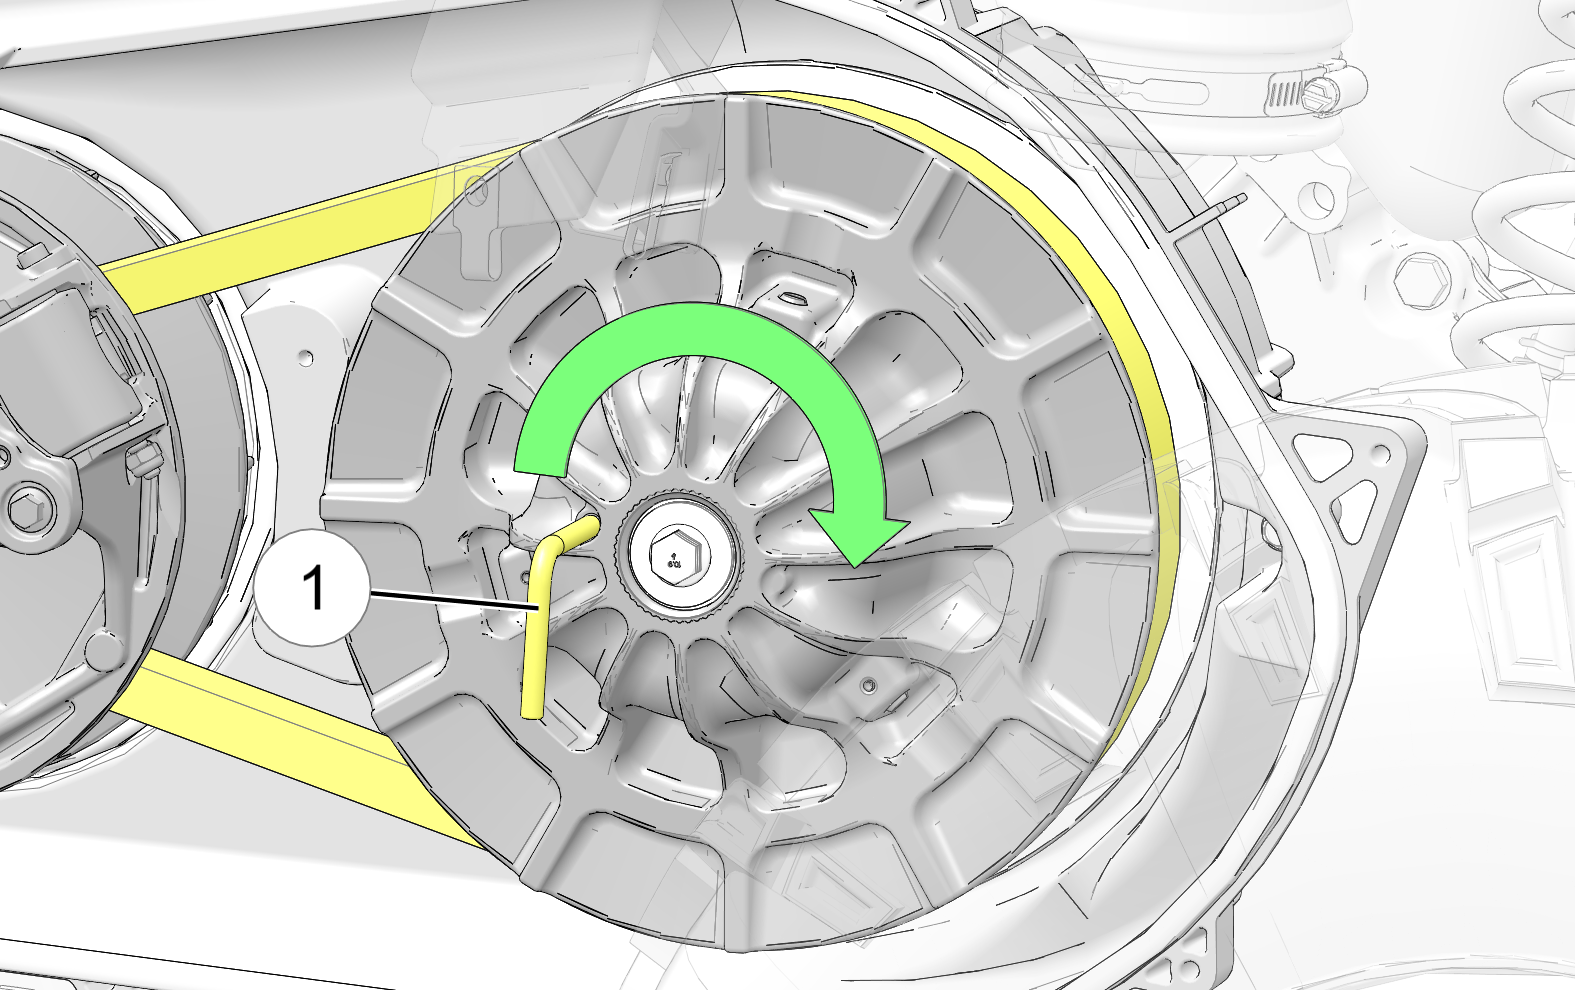
Carefully walk the belt off the driven clutch and remove from the drive clutch.
Inspect belt for hour glassing (extreme circular wear in at least one spot and on both sides of the belt). Hour glassing occurs when the drive train does not move and the drive clutch engages the belt.
Inspect belt for loose cords, missing cogs, cracks, abrasions, thin spots, or excessive wear. Compare belt measurements with a new drive belt. Replace if necessary.
Belts with thin spots, burn marks, etc., should be replaced to eliminate noise, vibration, or erratic PVT operation. See General Diagnostic information for possible causes.
Clean the inside of the PVT covers thoroughly. Inspect the PVT outlet duct and remove all debris.
Orient the belt as it was removed or orient the new belt so that you can read the text.
With the Belt Removal Tool 1 installed, loop the belt over the drive clutch and over the driven clutch.
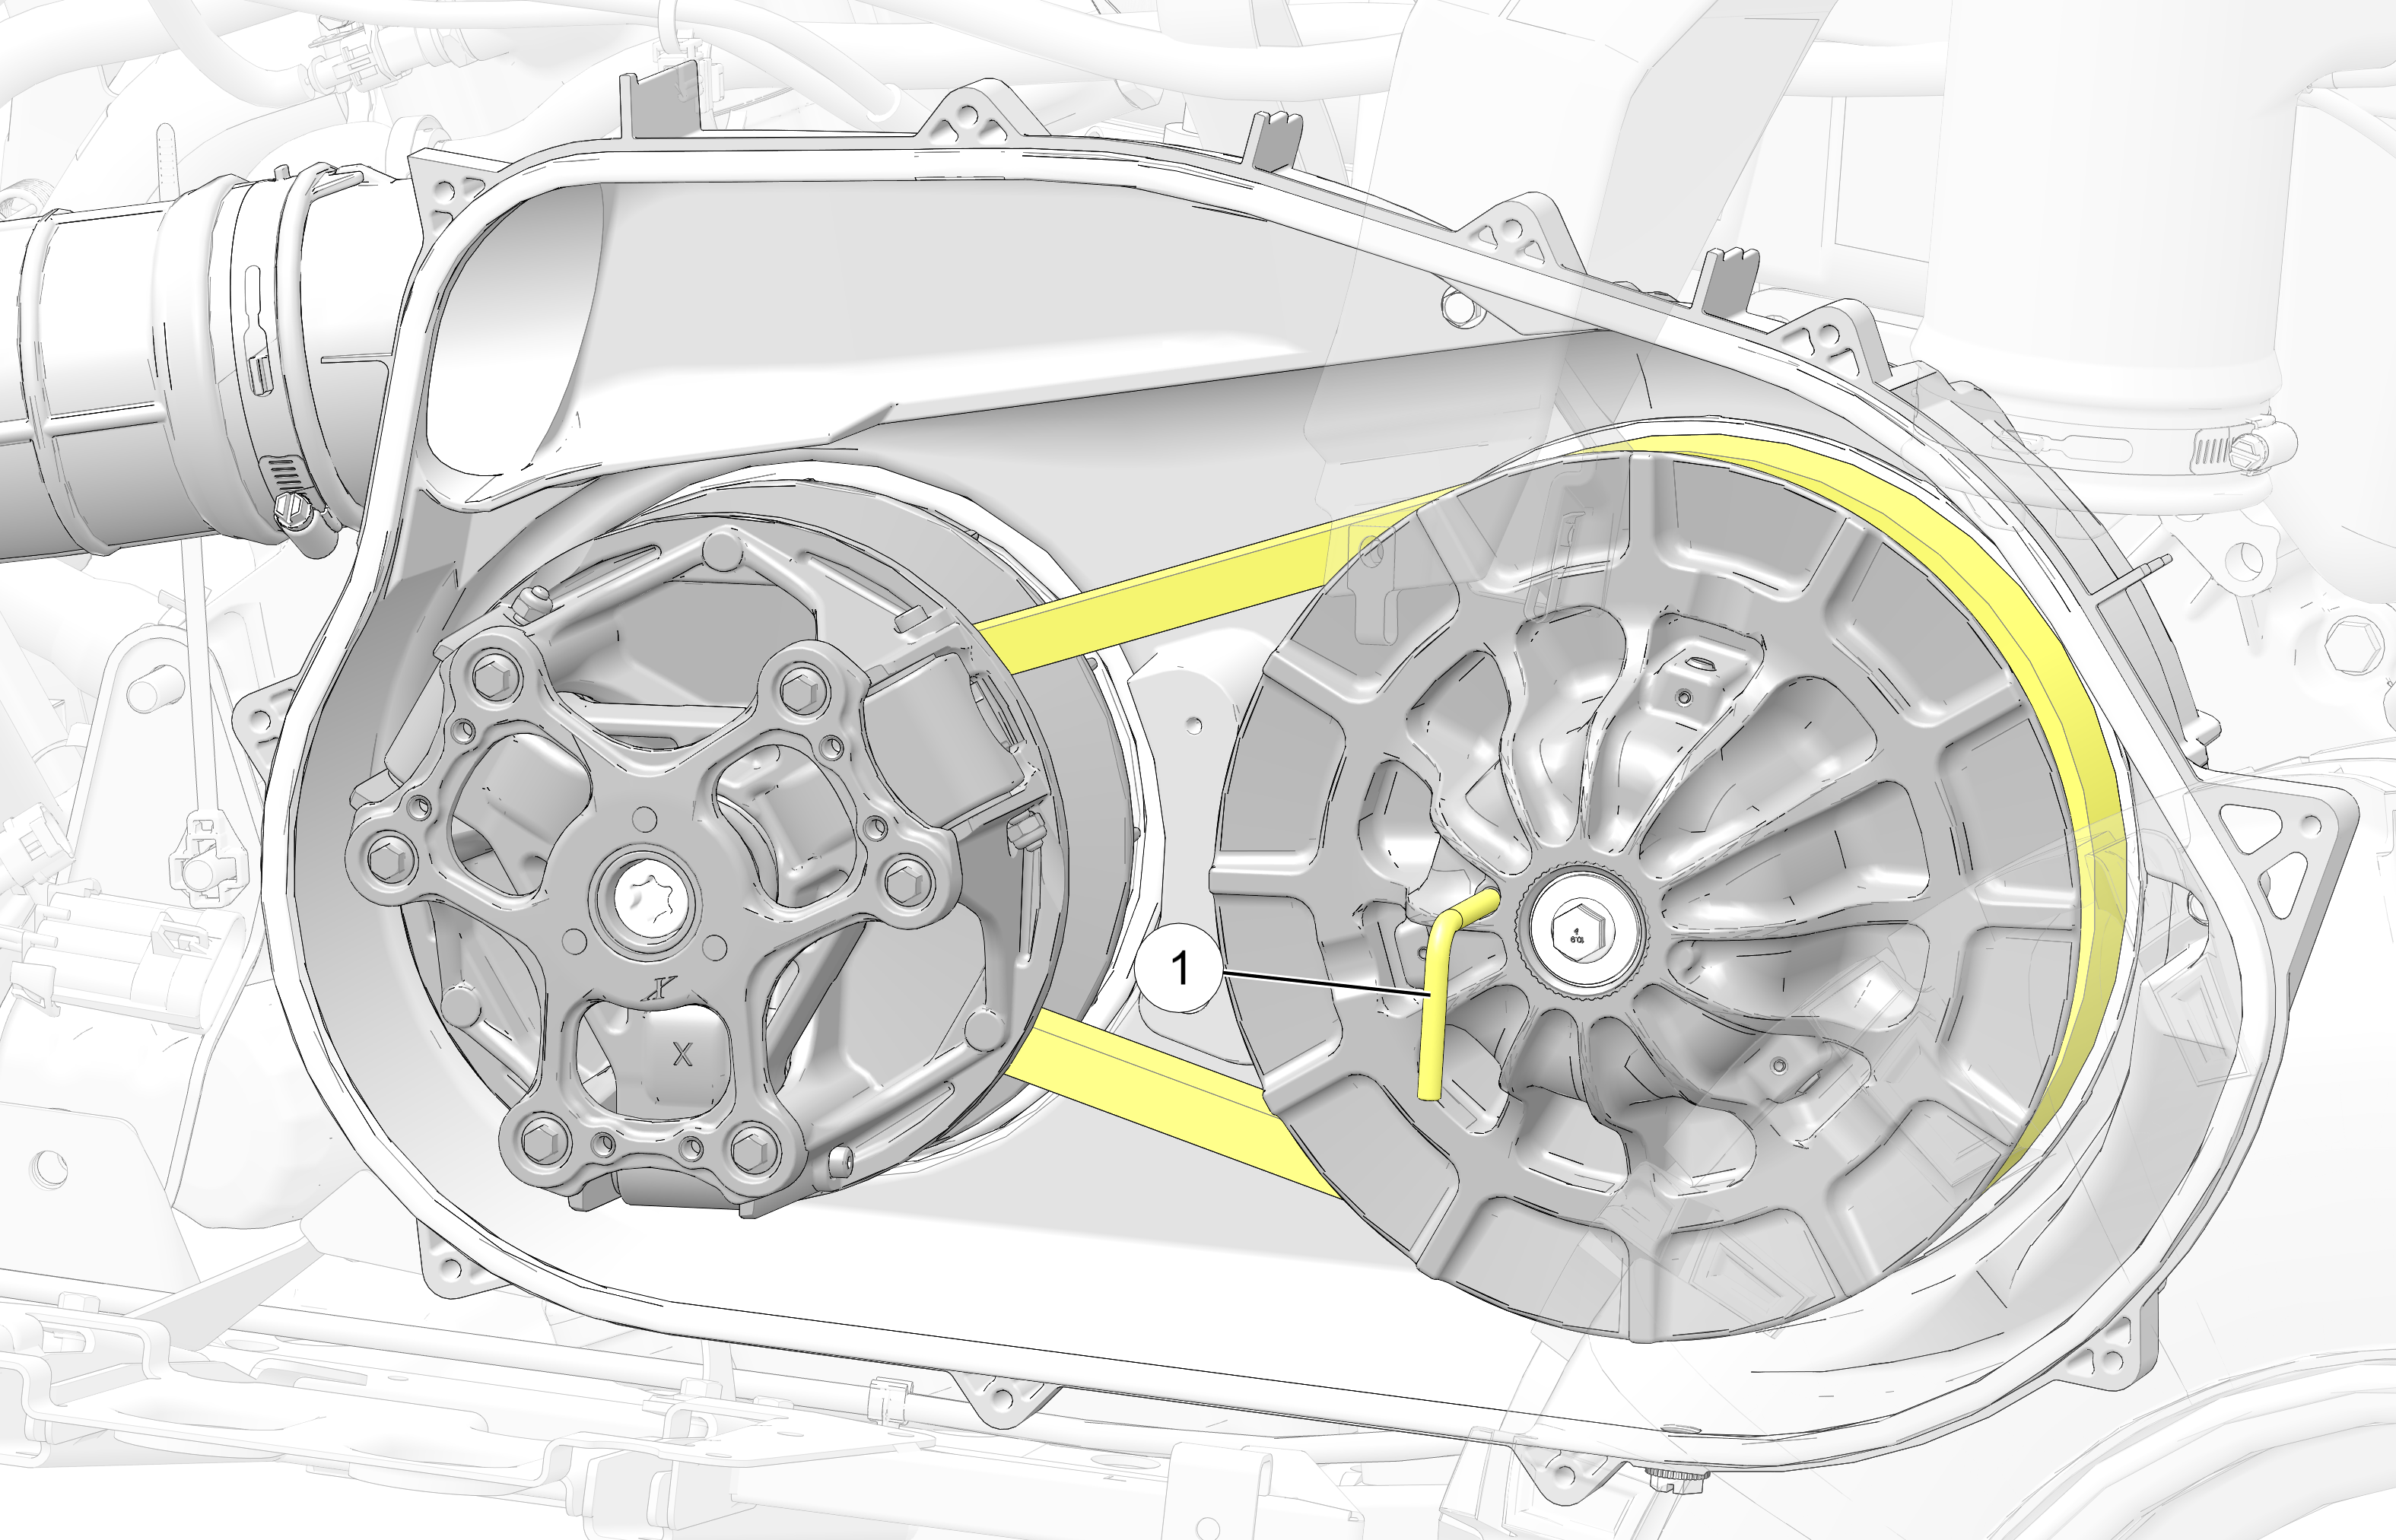
Rotate the driven clutch and walk the belt into the clutch.
Remove the Belt Removal Tool from driven clutch.
Rotate / spin the driven clutch and belt approximately 5-7 times clockwise to properly seat the belt into the driven clutch.
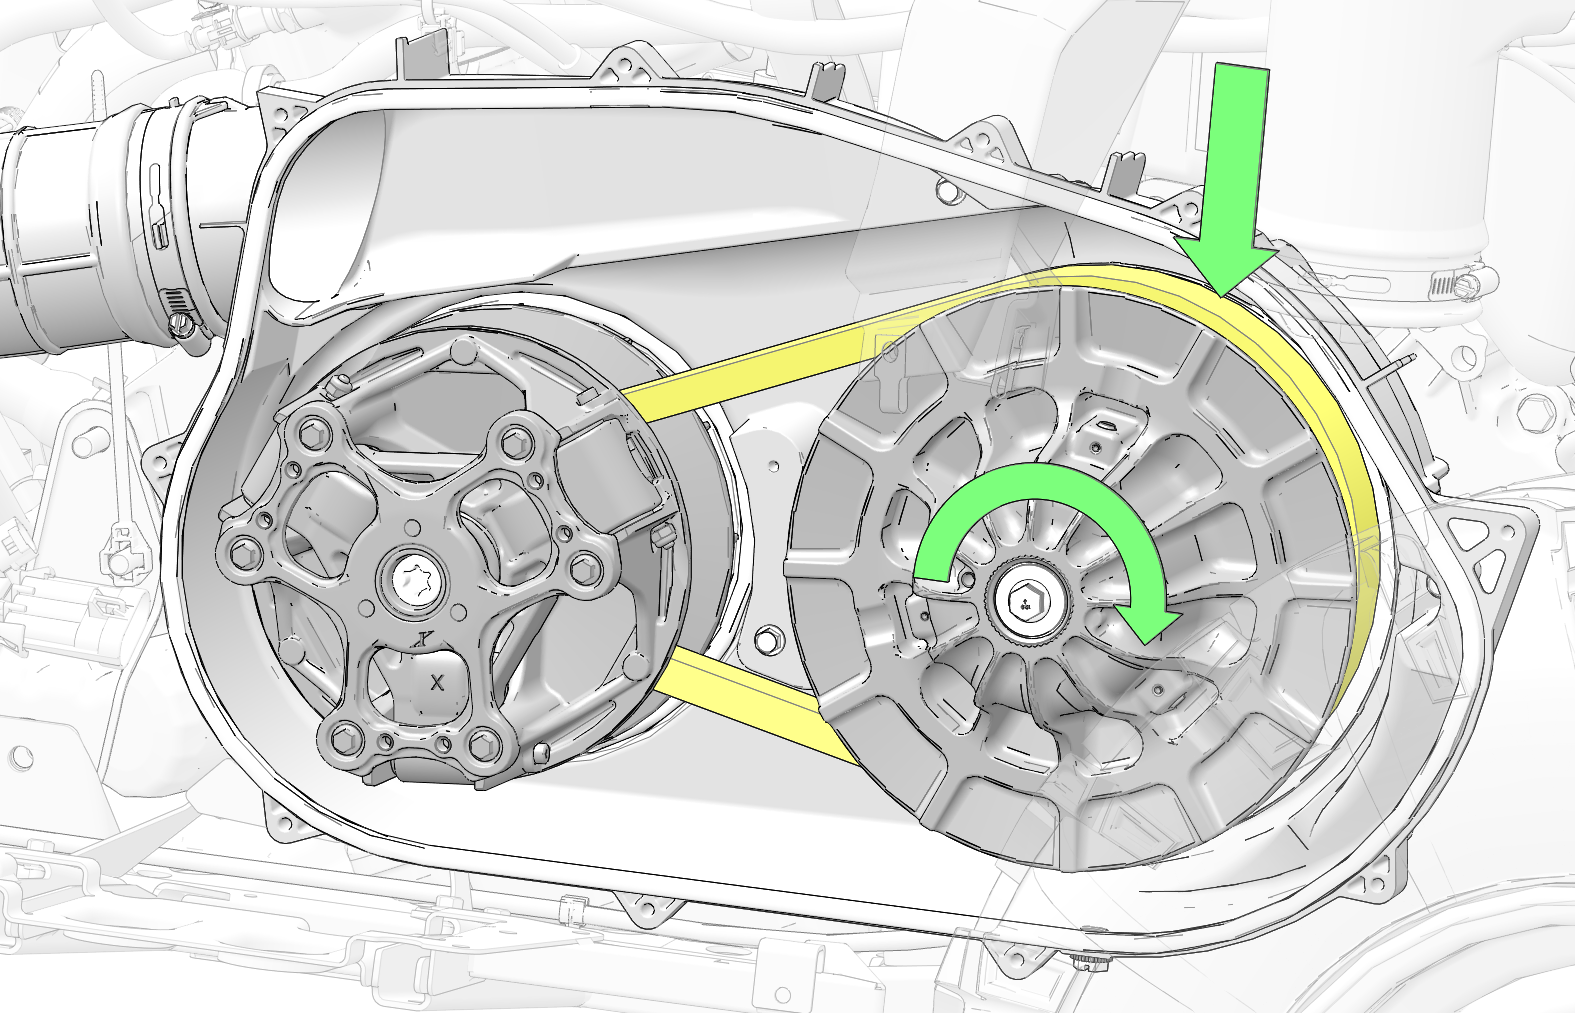
Install the outer PVT cover and 10 fasteners. Torque fasteners to specification.
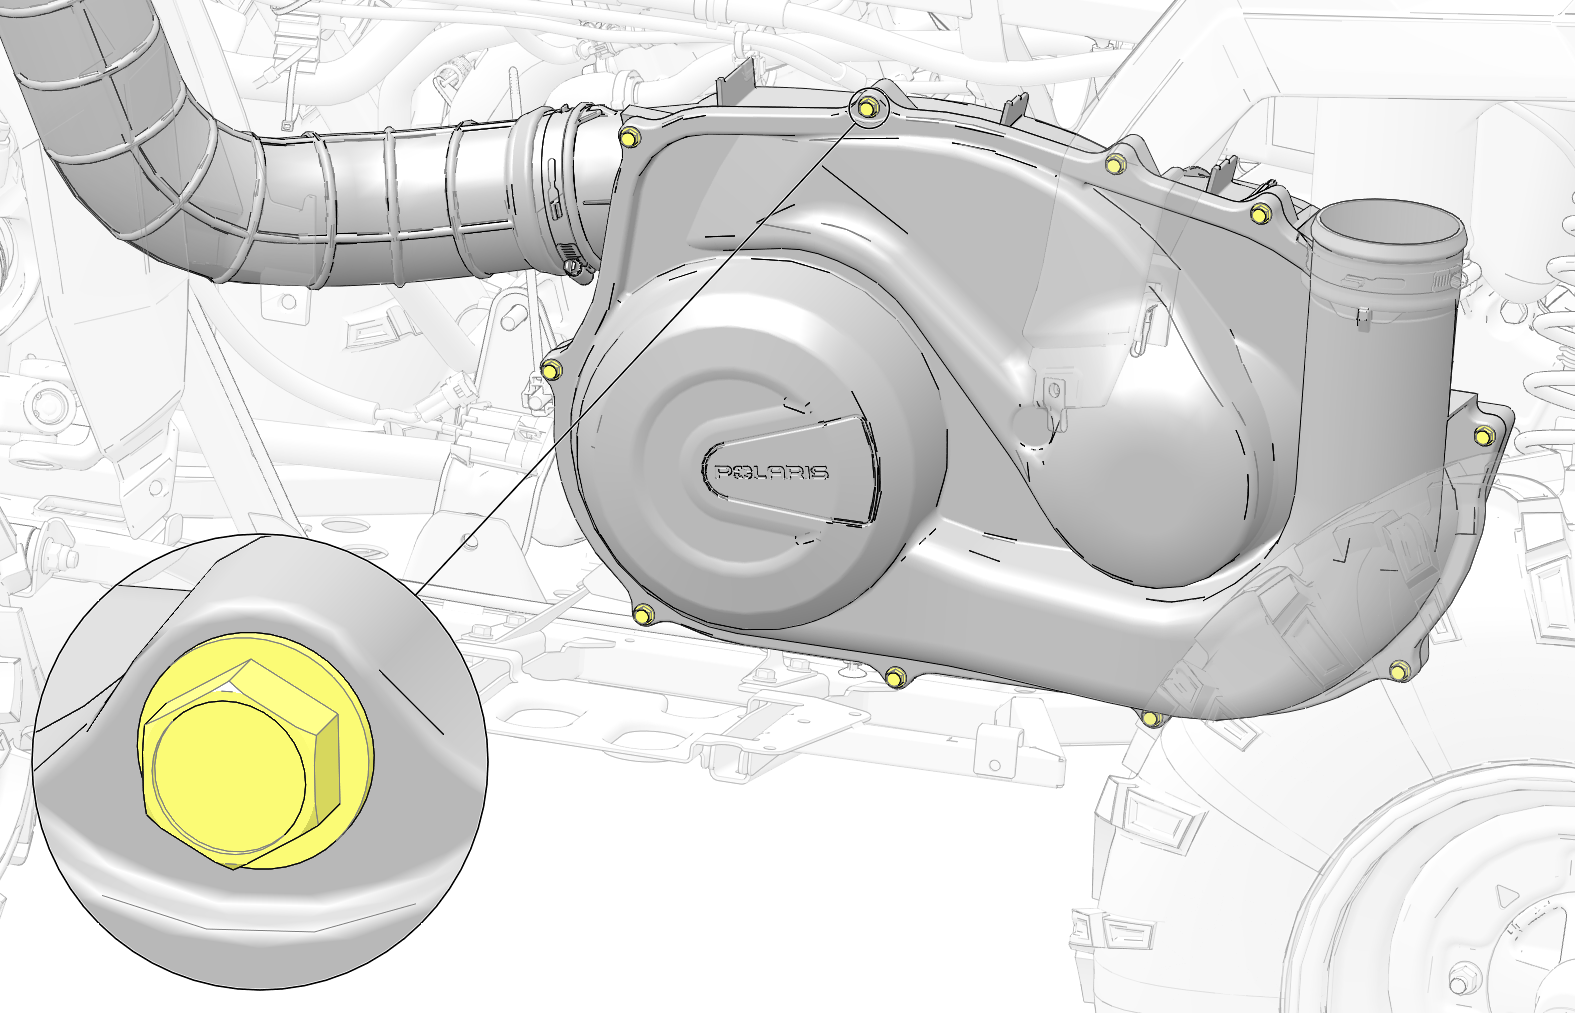
Outer PVT Cover Fasteners:
44 in-lbs (5 N·m)
Install the PVT outlet duct and clamp.
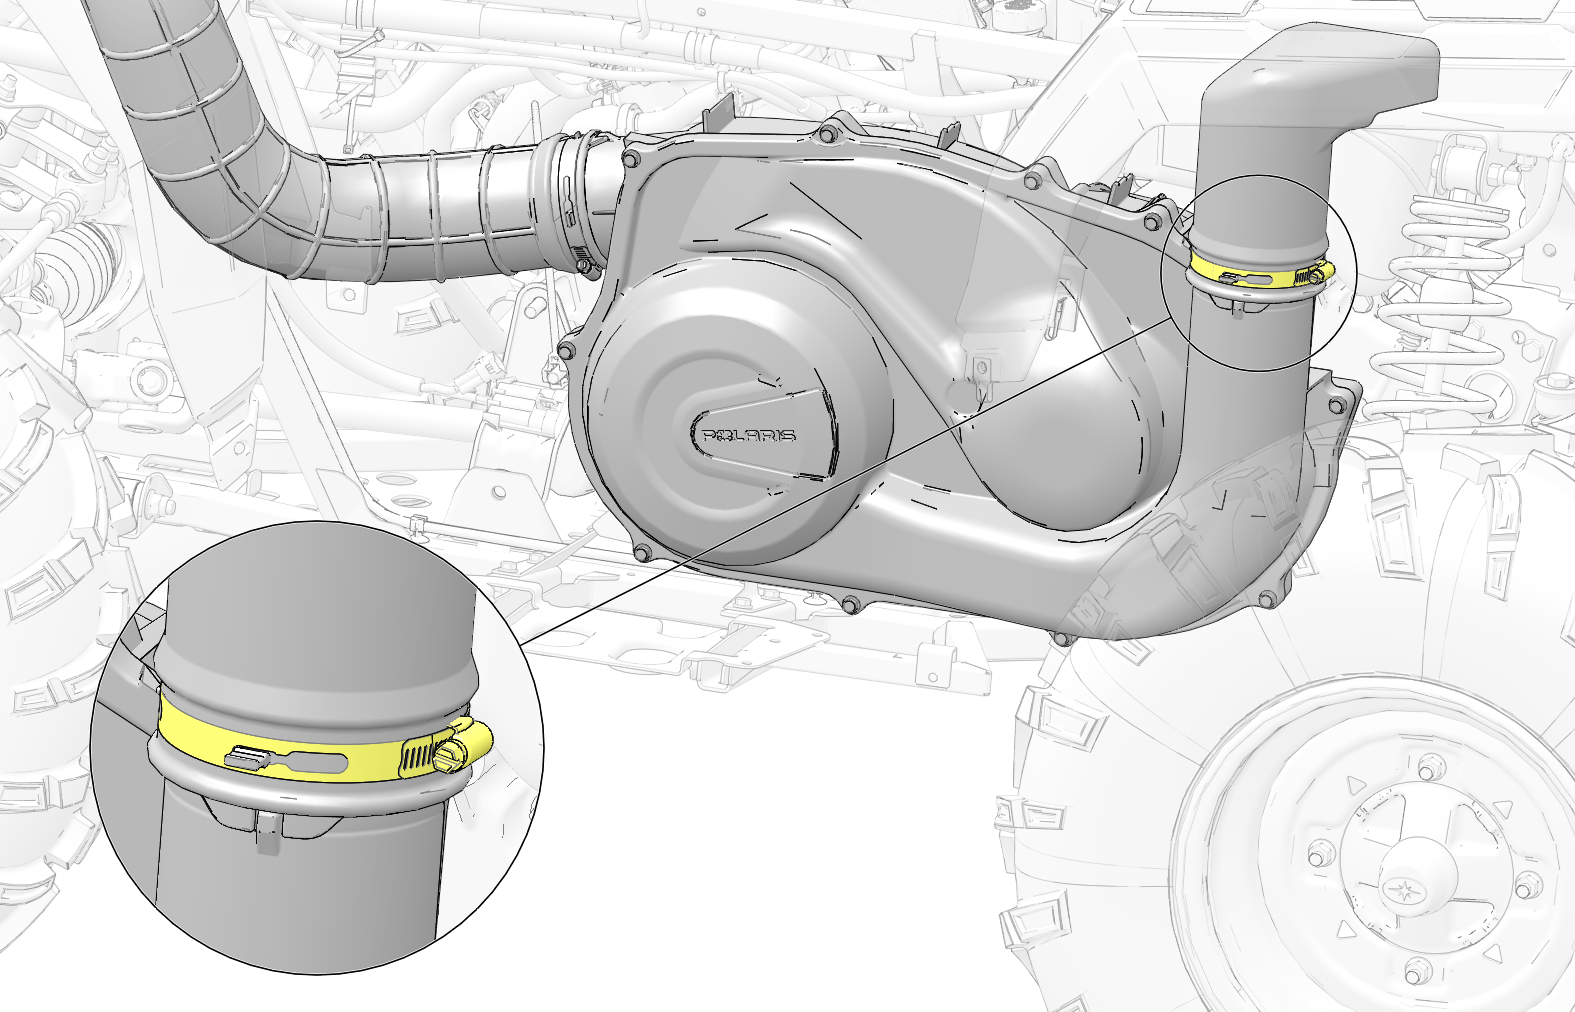
Torque the PVT outlet duct clamp to specification.
Outlet Duct Clamp:
27 in-lbs (3 N·m)
Install the left side panel / footwell. See Side Panel / Footwell Installation.
Your ATV is equipped with a sealed battery, which requires little maintenance. Polaris does not recommend using a conventional battery in this vehicle. The orientation of the battery could result in electrolyte leakage, which would shorten the life of the battery considerably.
Always keep battery terminals and connections free of corrosion. If cleaning is necessary, remove corrosion with a stiff wire brush. Wash with a solution of one tablespoon baking soda and one cup water. Rinse well with tap water and dry off with clean shop towels. Coat the terminals with dielectric grease or petroleum jelly.
To remove the battery, do the following:
Unlock the front rack latches and open the front rack.
Remove the two battery hold down strap screws 1 and remove the strap from the vehicle.
Disconnect the negative (black) cable 2 first. Then disconnect the positive (red) cable 3.
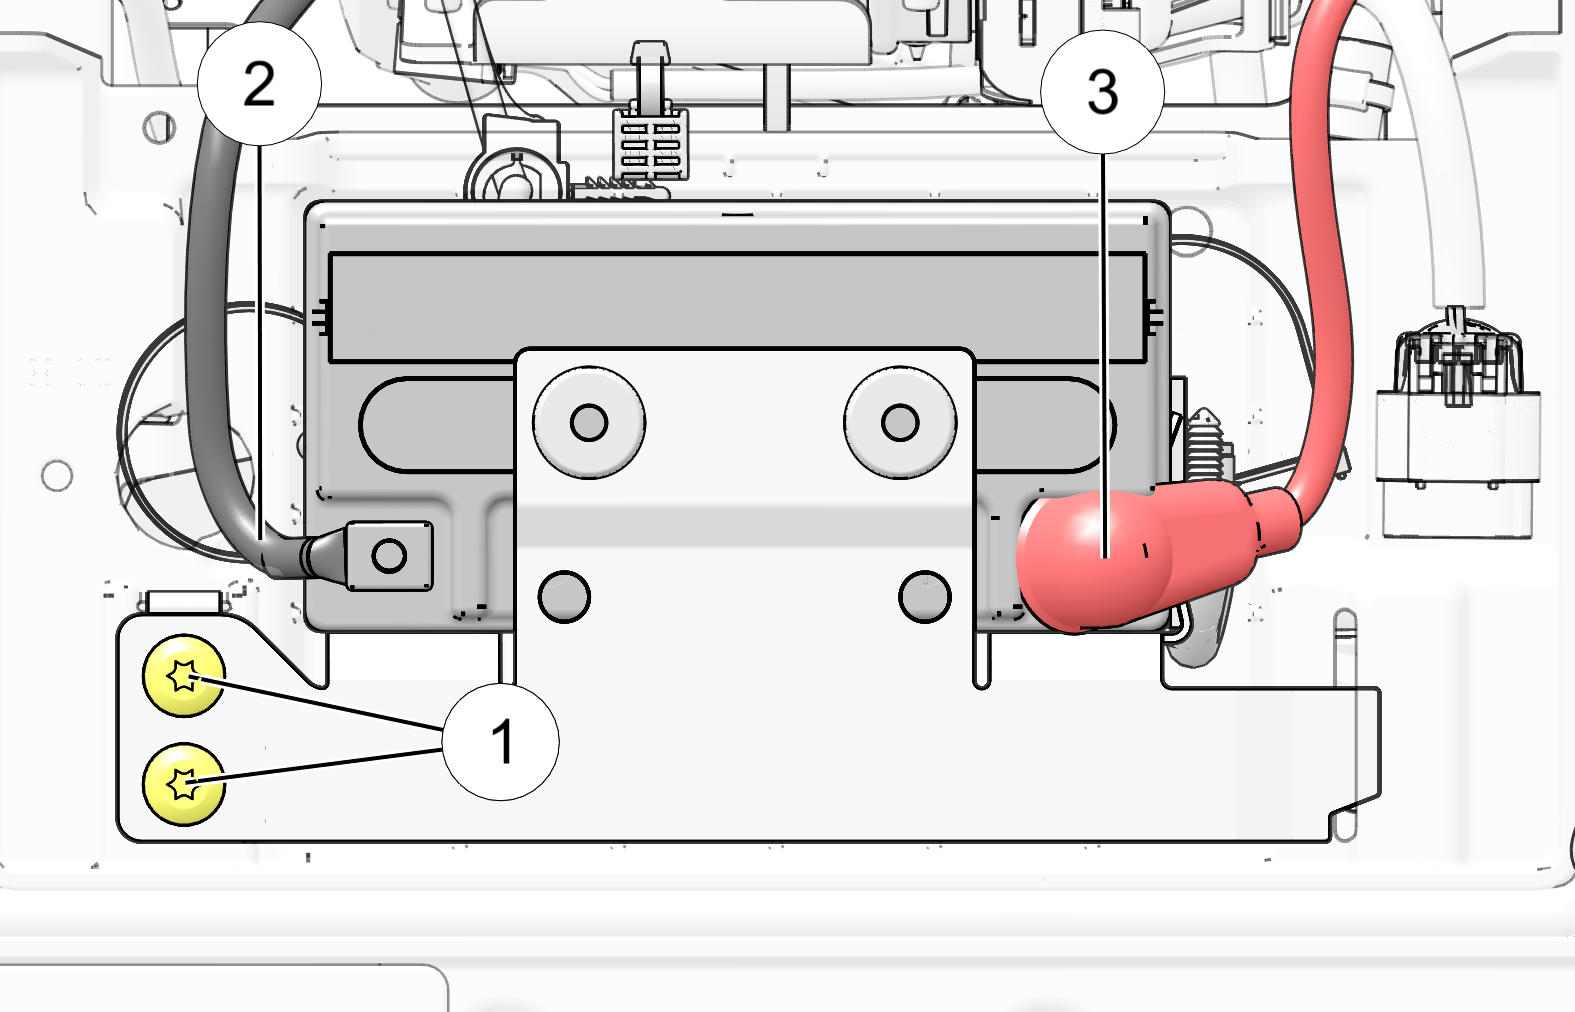
Carefully lift the battery out of the vehicle.
Using a new battery that has not been fully charged can damage the battery and result in a shorter life. It can also hinder vehicle performance. Follow the instructions in the Battery Charging section before installing the battery.
To reduce the chance of sparks when installing the battery, always connect the negative (black) cable last.
Clean battery cables and terminals with a stiff wire brush. Corrosion can be removed using a solution of one cup water and one tablespoon baking soda. Rinse well with clean water and dry thoroughly.
Carefully install the battery into the vehicle.
Connect the positive (red) cable as shown below. Torque to specification.
1 Flange Bolt
2 Battery Cable
3 Internal Tooth Lock Washer
4 Flat Washer
5 Flange Nut (Torque Applied)
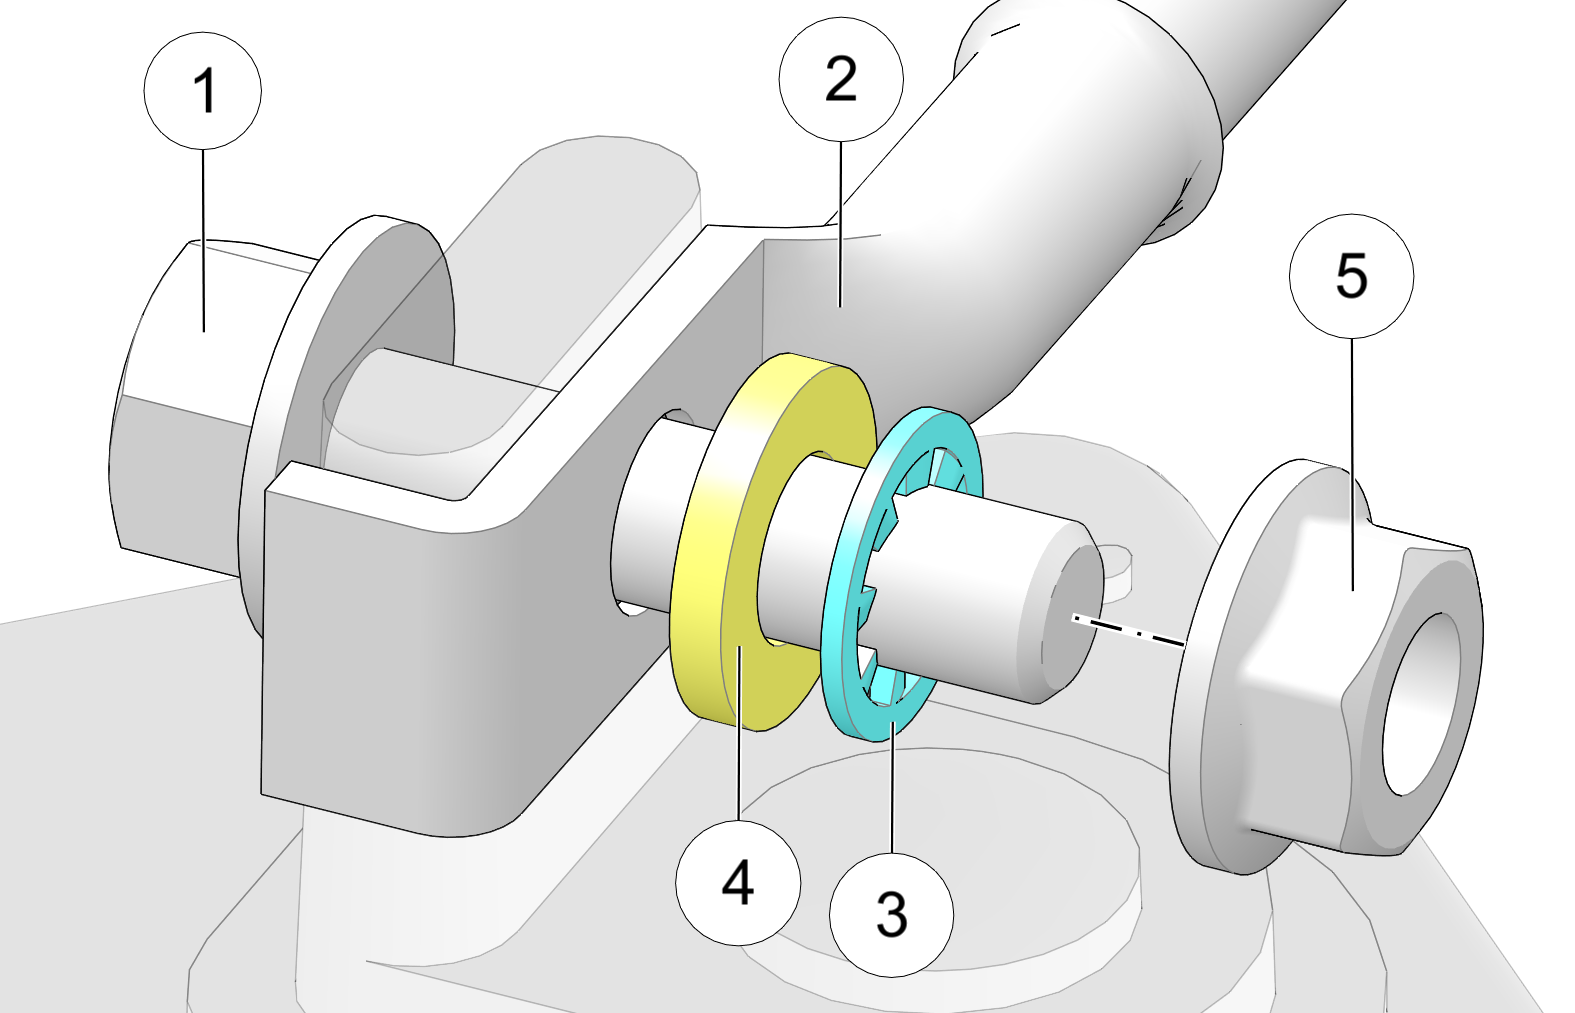
Battery Terminal Fasteners:
62 in-lbs (7 N·m)
Install the positive battery boot.
Connect and tighten the negative (black) cable. Torque to specification.
Verify the battery cables are properly routed.
Close and secure the front rack.
Whenever the vehicle is not used for a period of three months or more, remove the battery from the vehicle, ensure that it’s fully charged, and store it out of the sun in a cool, dry place. Check battery voltage each month during storage and recharge as needed to maintain a full charge.
Polaris recommends maintaining battery charge by using a Polaris battery trickle charger or by charging once a month using the battery charge port 1. The Polaris offered battery trickle charger can be left connected during the storage period, and will automatically charge the battery if the voltage drops below a pre-determined point. See the Polaris Products chapter for the part number.
Read all instructions before proceeding with the installation of this battery.
The battery is already filled with electrolyte and has been fully charged at the factory. Never pry the caps off or add any other fluid to this battery.
The single most important thing about maintaining the battery is to keep it fully charged. Use a voltmeter to measure DC voltage to determine the battery state of charge.
For a refresh charge, follow all instructions carefully.
The battery should be disconnected from a load or charger for at least two hours before checking voltage. Check the battery voltage with a voltmeter. A fully charged battery will register 12.6 v or higher.
If the voltage is less than 12.6 v, recharge the battery at 2 amps or less until the battery charger indicates the charge is complete.
When using an automatic charger, refer to the charger manufacturer’s instructions for recharging. When using a constant current charger, use the following guidelines.
Always verify battery condition before and 1-2 hours after the end of charging.
|
State of Charge |
Voltage |
Action |
Charge Time (Using constant current charger @ standard amps specified on top of battery) |
|---|---|---|---|
|
100% |
12.6 - 12.8 v |
Low Maintenance Battery: Check after 60 days |
None required |
|
50%-75% |
12.0 - 12.5 v |
Needs charge |
5-11 hours |
|
25%-50% |
11.5 - 12.0 v |
Needs charge |
At least 13 hours, verify state of charge |
|
0%-25% |
11.5 v or less |
Needs charge |
At least 20 hours |
It is important to identify the type of battery installed in the vehicle. Different types of batteries require different service procedures. Proper servicing and upkeep of the battery is very important for maintaining long battery life. All Polaris ORV models include either a Conventional battery or a Low Maintenance battery.
The battery is NOT activated when packaged
Distilled water and electrolyte added as required
Removable cap plugs located on top of battery
Vent tube located on side of battery
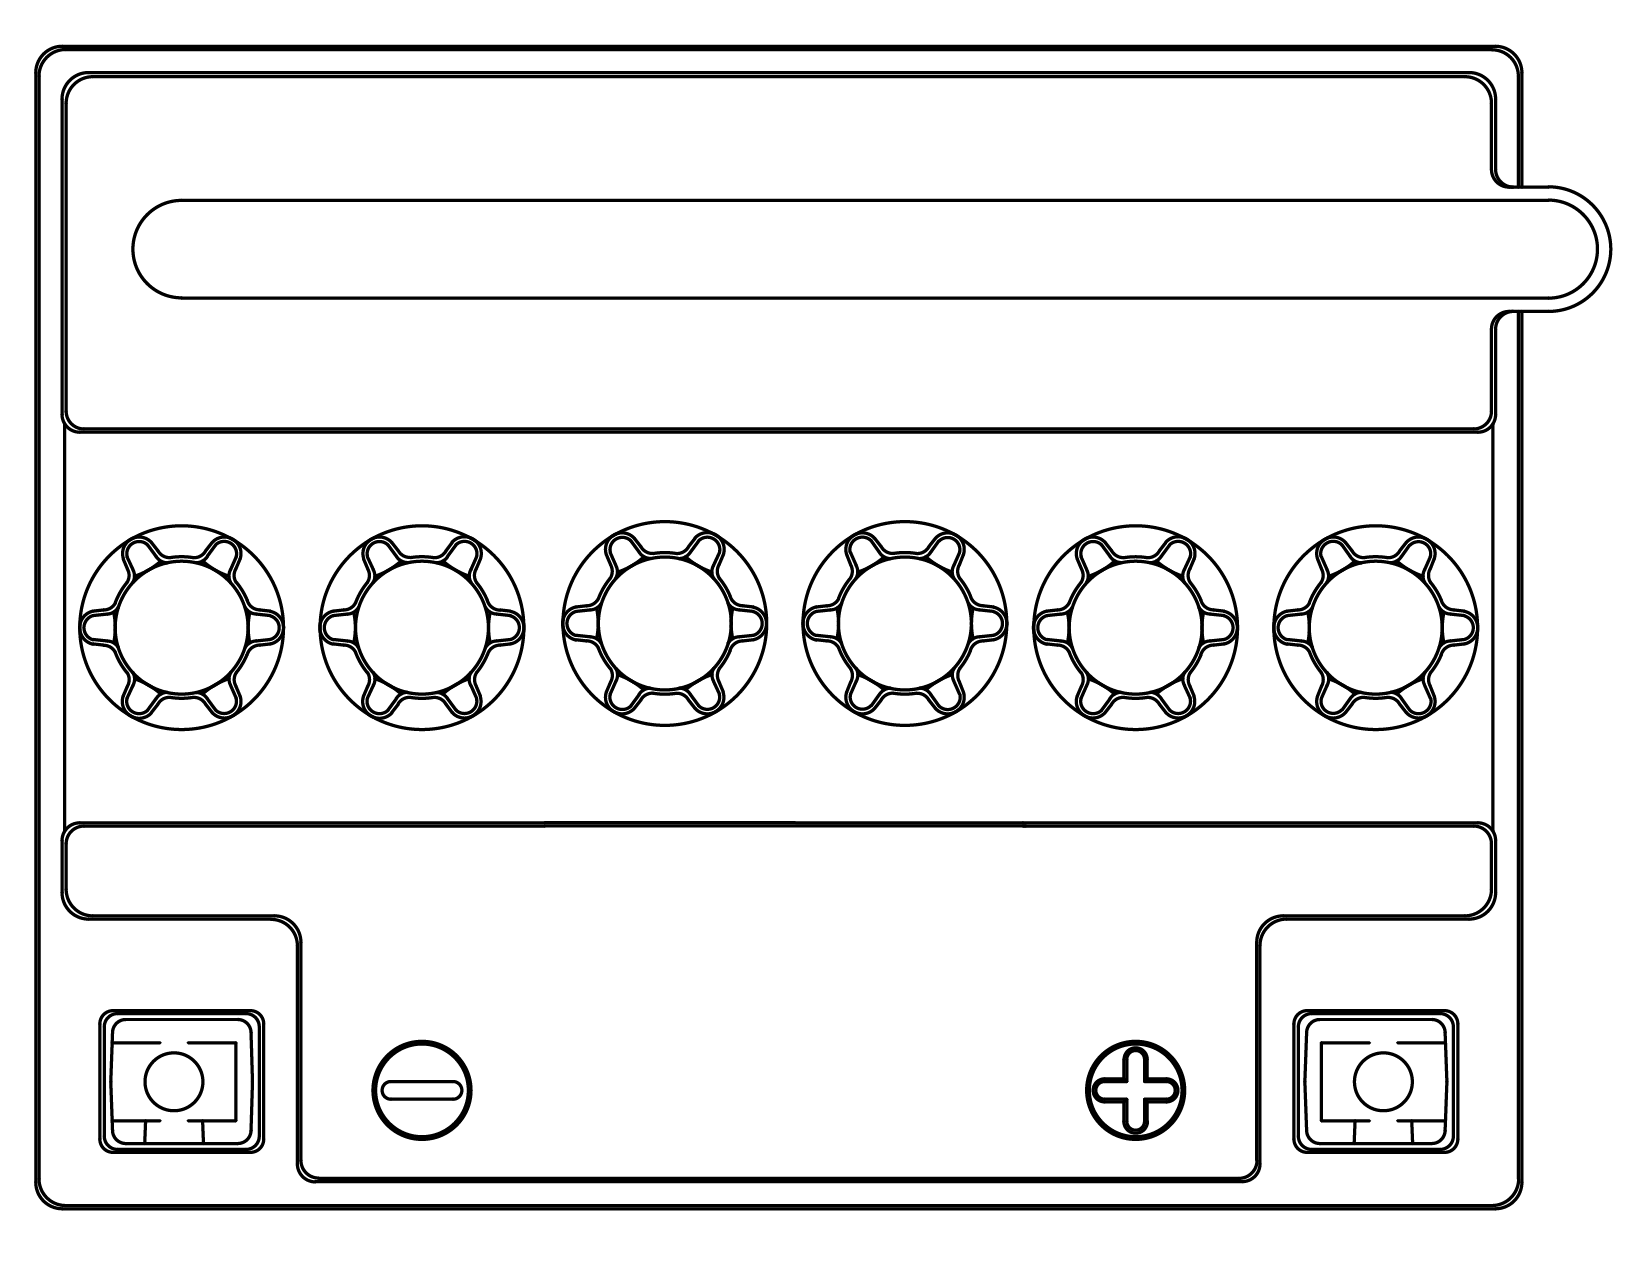
Battery activated when packaged
Distilled water and electrolyte NEVER added
Non removable cap(s) located on top of battery
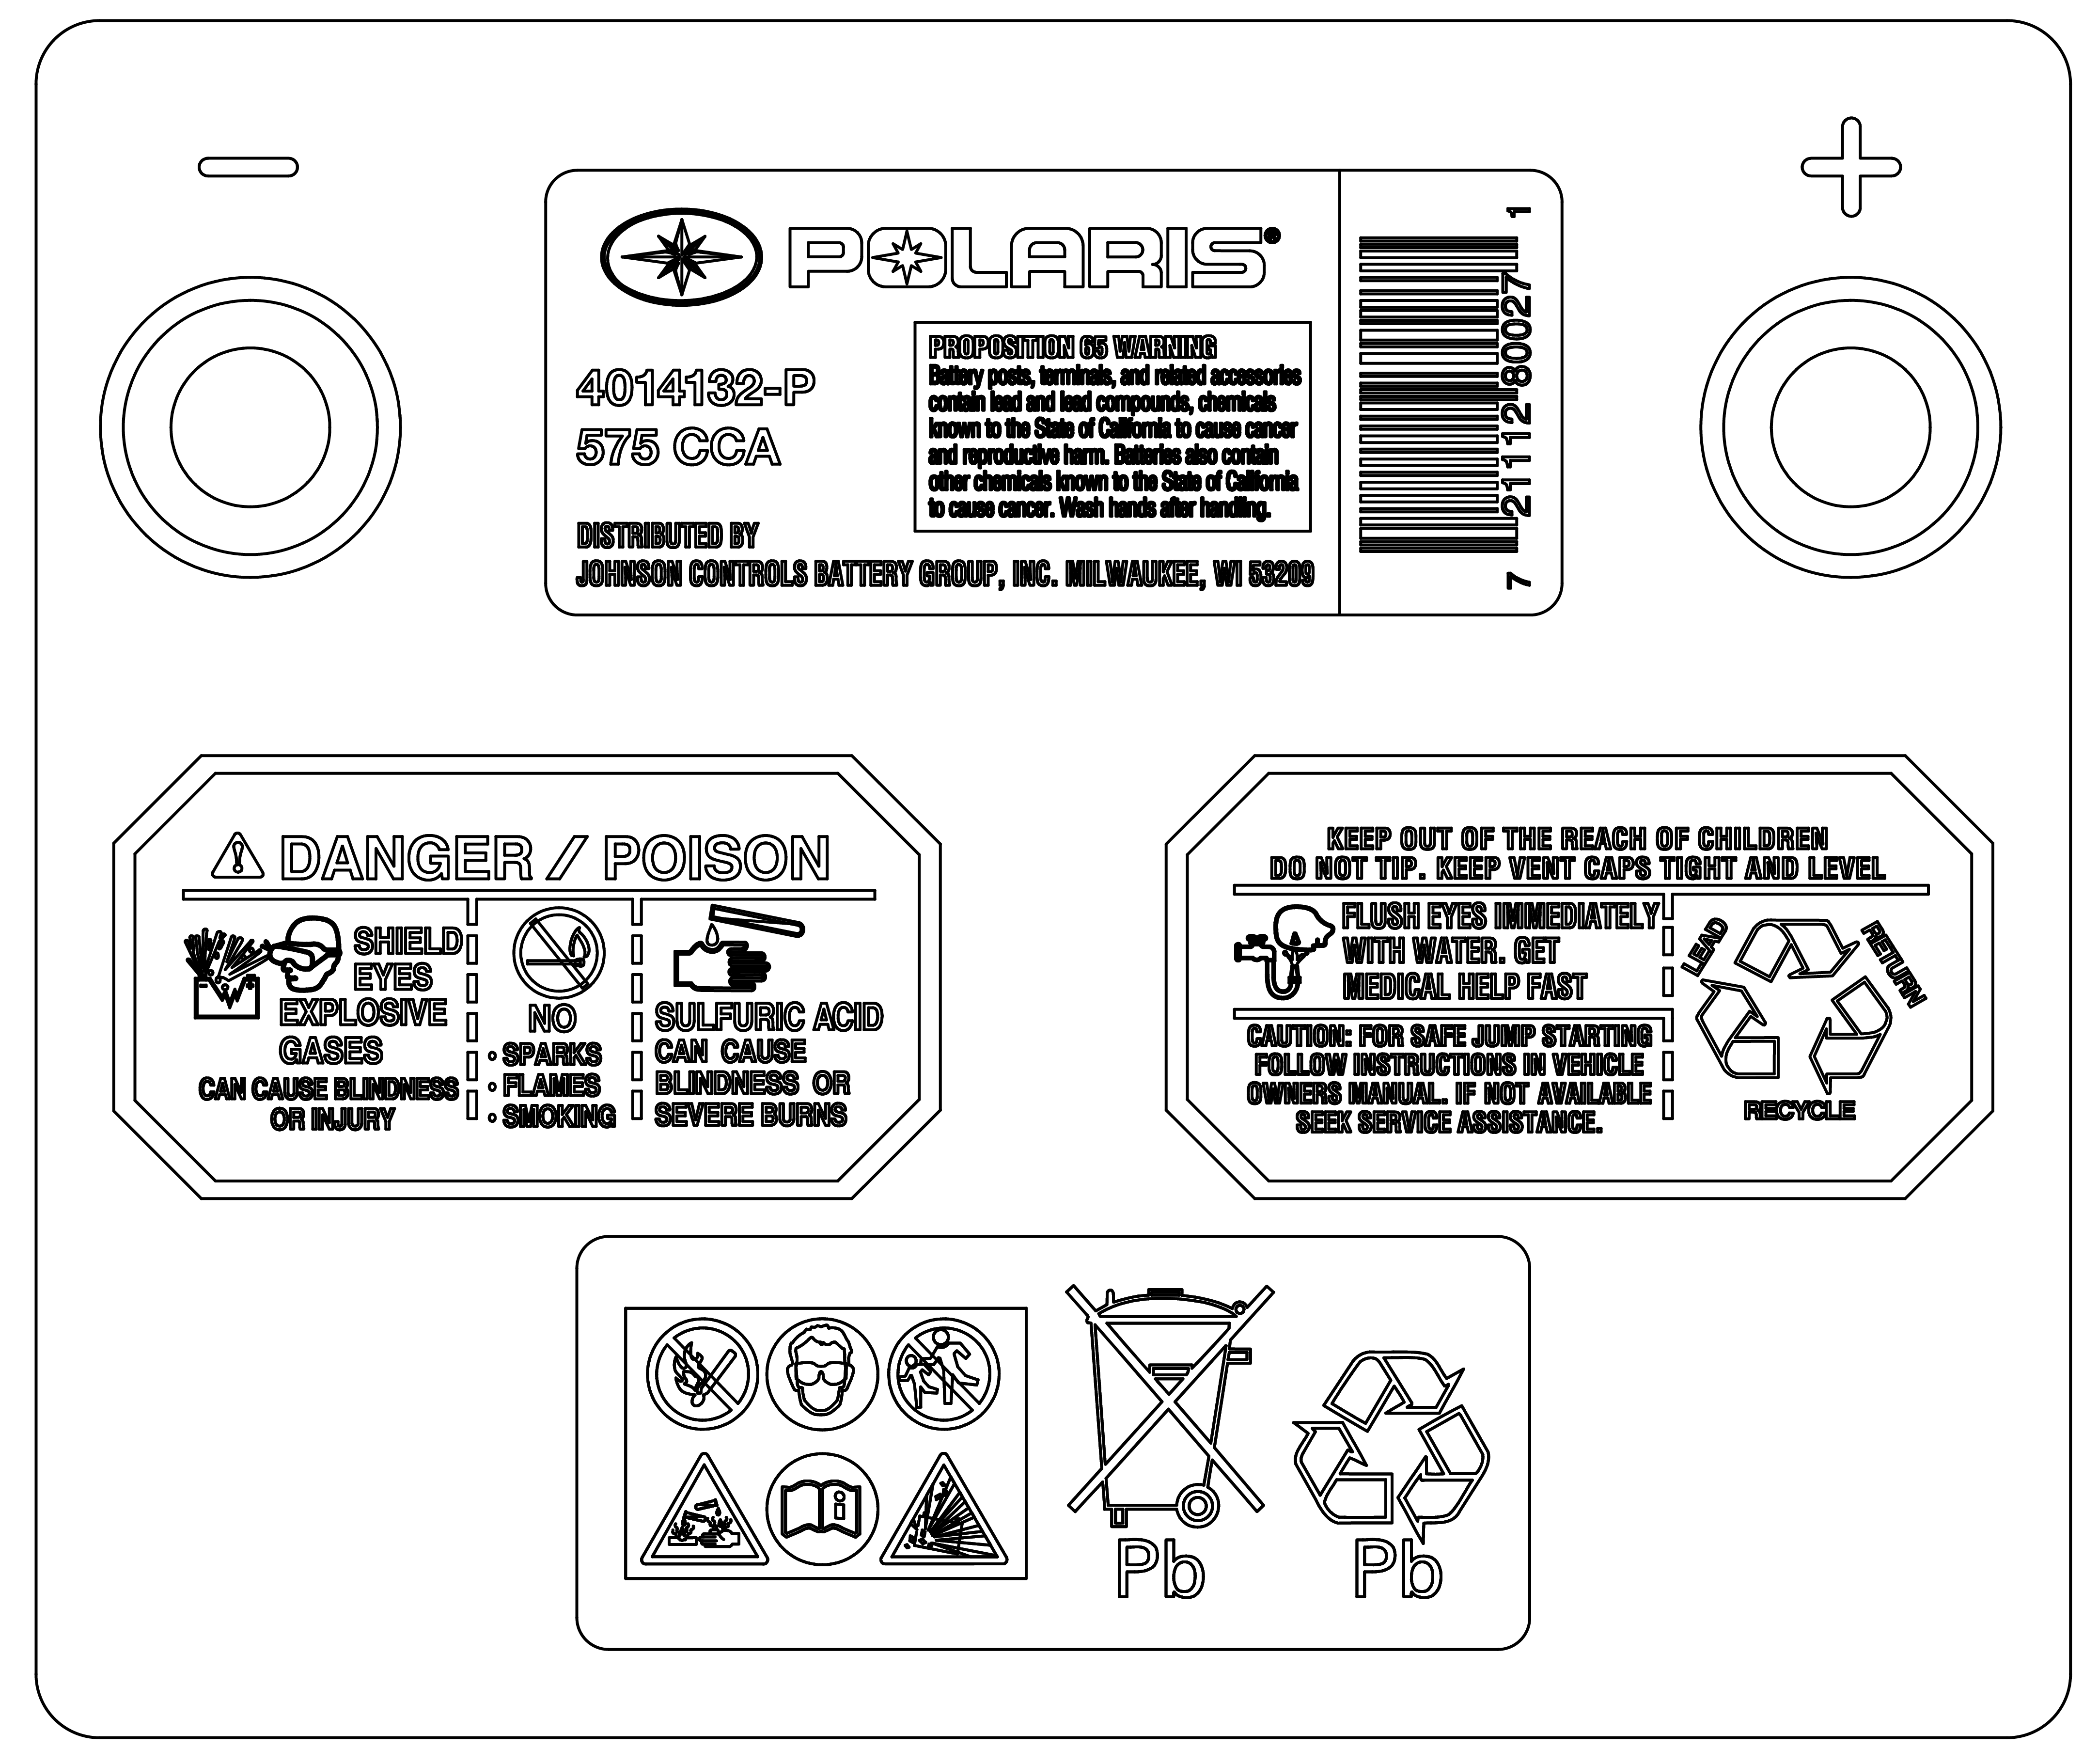
Some Polaris ORV models include either a Lead Acid Conventional battery or a Dry Shipped Absorbed Glass Mat (AGM) battery. See the Service Manual for procedures on how to activate, charge, maintain, and test a Lead Acid Conventional or Dry Shipped AGM battery.
Do NOT activate the battery unless it will be put into regular service within 30 days. Bulk acid should be used to activate the battery.
Always remove the sealing cap from the vent elbow before activating the battery. Never put the sealing cap back onto the battery. The gas pressure can cause the battery to rupture.
Let the battery sit for 30 minutes after you add the initial electrolyte. Once absorbed, fill the battery with additional electrolyte to the upper line of the electrolyte level indicator. This is the only time that electrolyte should be added to the battery.
Once the battery is fully charged, replace cap plugs by hand. Do NOT use a tool to install the cap plugs.
The battery must be fully charged before use or battery life will be significantly reduced by 10-30% of the battery's full potential.
Nominal voltage is 12.6 to 12.8 Volts when fully charged. If the voltage falls below 12.5V, charge it immediately, or the battery service life and vehicle performance may be affected.
Polaris recommends using a BatteryMINDer® 12V 1.5 AMP Convertible (PN 2830511) charger (or a similar charger), which can be ordered through your normal parts channel.
Charge the battery with a charging output no larger than 10% of the battery’s amp-hour rating.
Recharge the battery to its full capacity every 30 to 60 days.
If the battery is stored or used in a partially charged condition, battery service life and vehicle performance may be adversely affected.
Never add any electrolyte to the battery once the battery is in service. After the battery is initially activated, only distilled water should be added to maintain electrolyte levels.
Store the battery in the vehicle with the cables disconnected, or store the battery in a cool / dry location. Batteries will self discharge more rapidly when stored in extreme temperatures.
If the test fails, fully charge the battery.
Proper load testing of the battery requires special equipment and can be performed by your dealer.
Do NOT activate the battery unless it will be put into regular service within 30 days. Only use the electrolyte container supplied with the battery to activate the battery.
Keep the electrolyte container in place for 20 minutes or longer until the container is completely empty. If necessary, gently tap the container to empty it.
Once the battery is fully charged, replace the strip of caps by hand. Do NOT use a tool to install the strip.
Polaris recommends using a BatteryMINDer® 2012 AGM - 2 AMP (PN 2830438) charger, which can be ordered through your normal parts channel.
Nominal voltage is 12.8 Volts when fully charged. If the voltage falls below 12.5V, charge it immediately, or the battery runs the risk of sulfation.
Never add any electrolyte or distilled water to the battery once the battery is in service.
If you do not drive the vehicle for more than TWO weeks, maintain the battery with the BatteryMINDer® 2012 AGM - 2 AMP (PN 2830438) charger.
If you plan to store the vehicle for ONE month or longer, remove the battery from the vehicle and store the battery in a cool / dry location. Continue to maintain the battery with the BatteryMINDer® 2012 AGM - 2 AMP (PN 2830438) charger and inspect the battery every 60 days.
If the test fails, fully charge the battery.
If the battery is too low to accept a charge, see the AGM Battery Charging - Deeply Discharged (Below 3 Volts) procedure in the Service Manual.
Proper load testing of the battery requires special equipment and can be performed by your dealer.
Some Polaris ORV models include either a Lead Acid or Absorbed Glass Mat (AGM) Low Maintenance battery. See the Service Manual for procedures on how to charge, maintain, and test a Lead Acid or AGM Low Maintenance battery.
The battery must be fully charged before use or battery life will be significantly reduced by 10-30% of the battery's full potential.
Nominal voltage is 12.6 to 12.8 Volts when fully charged. If the voltage falls below 12.5V, charge it immediately, or the battery service life and vehicle performance may be affected.
Polaris recommends using a BatteryMINDer® 12V 1.5 AMP Convertible (PN 2830511) charger (or a similar charger), which can be ordered through your normal parts channel.
Charge the battery with a charging output no larger than 10% of the battery’s amp-hour rating.
Recharge the battery to its full capacity every 30 to 60 days.
If the battery is stored or used in a partially charged condition, hard crystal sulfation will form on the plates, reducing the efficiency and service life of the battery.
Never add electrolyte or distilled water to the battery. Doing so will damage the case and shorten the life of the battery.
Store the battery in the vehicle with the cables disconnected, or store the battery in a cool / dry location. Batteries will self discharge more rapidly when stored in extreme temperatures.
Test the battery using the PU-50296 battery tester.
Proper load testing of the battery requires special equipment and can be performed by your dealer.
Polaris recommends using a BatteryMINDer® 2012 AGM - 2 AMP (PN 2830438) charger, which can be ordered through your normal parts channel.
Nominal voltage is 12.6–12.8 Volts when fully charged. If the voltage falls below 12.5V, charge it immediately, or the battery runs the risk of sulfation.
Never add electrolyte or distilled water to the battery. Doing so will damage the case and shorten the life of the battery.
If you do not drive the vehicle for more than TWO weeks, maintain the battery with the BatteryMINDer® 2012 AGM - 2 AMP (PN 2830438) charger.
If you plan to store the vehicle for ONE month or longer, remove the battery from the vehicle and store the battery in a cool / dry location. Continue to maintain the battery with the BatteryMINDer® 2012 AGM - 2 AMP (PN 2830438) charger and inspect the battery every 60 days.
If the test fails, fully charge the battery.
If the battery is too low to accept a charge, see the AGM Battery Charging - Deeply Discharged (Below 3 Volts) procedure in the Service Manual.
Proper load testing of the battery requires special equipment and can be performed by your dealer.
With the exception of MacPherson strut models, the front and rear suspensions of your ATV are preload adjustable to five possible settings. The spring preload is factory-set to the lowest setting and is appropriate for almost all riding conditions.
Adjust the suspension to maintain vehicle handling, brake performance, and clearance height while carrying cargo loads.
When adjusting the suspension of your ATV, heed the following rules:
Always return the suspension to the factory (lowest) setting after the cargo load is removed from the vehicle as the increased suspension height will negatively affect vehicle stability when operating without cargo.
Always apply the same adjustment setting to all four wheels (MacPherson strut models excluded).
Adjust the shock springs by rotating the adjustment cam clockwise to increase spring tension or counterclockwise to decrease tension.
1 Cam
2 High Tension
3 Low Tension
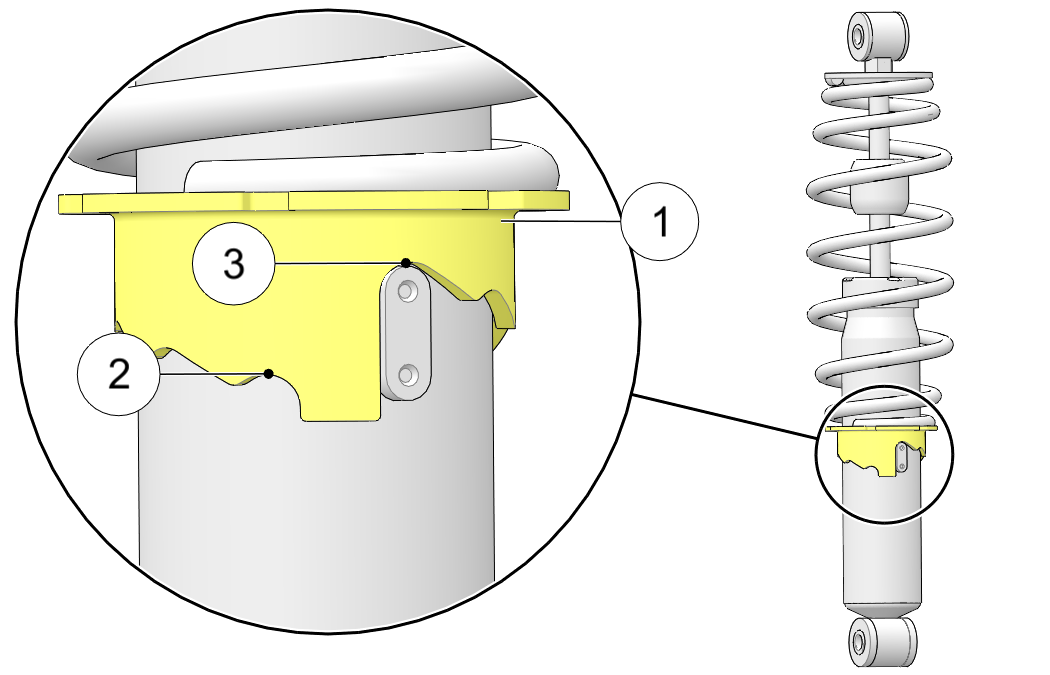
The handlebars can be adjusted for rider preference.
Remove the work light pod.
Loosen the four handlebar bolts.
Adjust the handlebar to the desired height. Be sure the handlebars do not contact the gas tank or any other part of the machine when turned fully to the left or right.
Torque the front two bolts to specification, then torque the rear two bolts. A gap of up to 1/8 in (3 mm) will remain at the rear of the clamp blocks.
Handlebar Bolts:
14 ft-lbs (19 N·m)
Reinstall the work light pod.
Keeping your Polaris vehicle clean will not only improve its appearance but it can also extend the life of various components.
Water in the PVT system could cause the drive belt to become wet and slip in the clutches. Always avoid spraying water directly toward any intake pre-filters. If water does enter the PVT intake, follow the procedure in the PVT Drying section.
Certain products, including insect repellents and chemicals, will damage plastic surfaces. Do not allow these types of products to contact the vehicle.
The best way to clean your Polaris vehicle is with a garden hose and a pail of mild soap and water.
Use a professional-type washing cloth, cleaning the upper body first and the lower parts last.
Rinse with clean water frequently.
Dry surfaces with a chamois to prevent water spots.
Avoid the use of harsh cleaners, which can damage the finish.
Do not use medium to heavy duty compounds on the finish.
Always use clean cloths and pads for cleaning and polishing. Old or reused cloths and pads may contain dirt particles that will scratch the finish.
Do not use high-speed polishers/buffers on body panels, as damage or color fading may occur.
If a high pressure water system is used for cleaning, exercise extreme caution. The maximum pressure should not exceed 3000 psi (20684.27 kPa), 2.5 GPM (567.81 LPH) with a 40° pressure washer nozzle. Make sure to keep the pressure washer nozzle 2 ft (60 cm) from the vehicle and away from the surface being cleaned. High water pressure could remove paint and labels and damage radiator fins and/or impair a radiator’s effectiveness. High water pressure with a hot temperature could also damage brake lines with the nozzle at a close proximity even with a short exposure time. Avoid directing the water stream at the following items:
Wheel bearings
Radiator
Transmission seals
Brakes / brake lines
Body panels
Labels and decals
Electrical components and wiring
Air intake components
Throttle and shift cables and controls
Seats
If warning and safety labels are damaged, contact your Polaris dealer for free replacement.
Grease all zerk fittings immediately after washing. Allow the engine to run for a while to evaporate any water that may have entered the engine or exhaust system.
Polaris recommends the use of common household aerosol furniture polish for polishing the finish on your Polaris vehicle. Follow the instructions on the container.
Avoid the use of automotive products, some of which can scratch the finish of your vehicle.
Always use clean cloths and pads for cleaning and polishing. Old or reused cloths and pads may contain dirt particles that will scratch the finish.
Starting the engine during the storage period will disturb the protective film created by fogging and damage could occur. Never start the engine during the storage period.
Make any necessary repairs and clean the vehicle as recommended. See the Washing the Vehicle section.
Fill the fuel tank.
Add Polaris Carbon Clean Fuel Injection Cleaner or Polaris Advanced Fuel Treatment Fuel Stabilizer or equivalent fuel treatments or stabilizers. Follow the instructions on the container for the recommended amount. Carbon Clean removes water from fuel systems, stabilizes fuel and removes carbon deposits from pistons, rings, valves and exhaust systems.
Allow the engine to run for 15-20 minutes to allow the stabilizer to disperse through the entire fuel delivery system.
Change the oil and filter. See the Engine Oil section.
Replace the air filter. See the Maintenance chapter. Clean the air box.
Inspect the fluid levels. Add or change fluids as recommended in the Polaris Maintenance Schedule.
Demand drive fluid (front gearcase)
Rear gearcase fluid (if equipped)
Transmission fluid
Brake fluid (change every two years and any time the fluid looks dark or contaminated)
Coolant (test strength / fill)
Inspect all cables and lubricate all areas of the vehicle as recommended in the Polaris Maintenance Schedule.
Treat the fuel system with Polaris Carbon Clean Fuel Injection Cleaner or other equivalent fuel treatment. Follow the instructions on the container. Start the engine. Allow it to idle for several minutes so the Carbon Clean reaches the injectors. Stop the engine.
Remove the spark plugs and add 1-1.5 oz (29.5-44 cc) of engine oil. To access the plug holes, use a section of clear 1/4 in (6 mm) hose and a small plastic squeeze bottle filled with the pre-measured amount of oil.
Reinstall the spark plugs. Torque to specification.
Apply dielectric grease to the inside of each spark plug cap.
Turn the engine over several times. Oil will be forced in and around the piston rings and ring lands, coating the cylinder with a protective film of fresh oil.
Reinstall the spark plug caps.
If a Polaris fuel system additive is not used, the fuel tank, fuel lines, and injectors should be completely drained of gasoline.
See the Battery Storage and Battery Charging sections for storage and charging procedures.
Be sure the storage area is well ventilated. Cover the vehicle with a genuine Polaris cover. Do not use plastic or coated materials. They do not allow enough ventilation to prevent condensation, and may promote corrosion and oxidation.
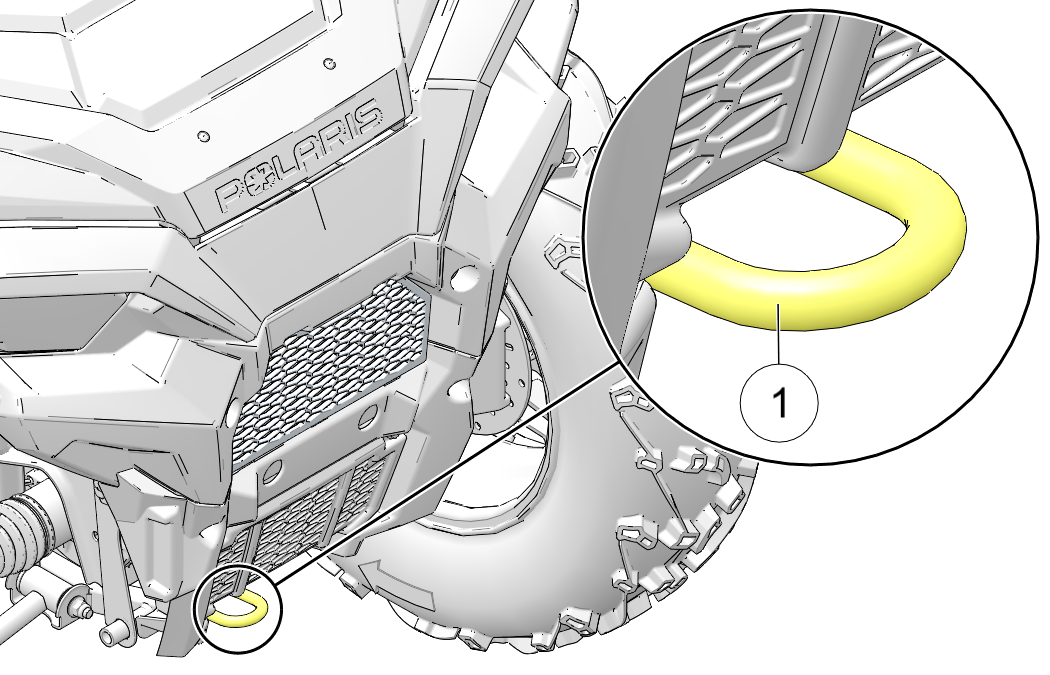
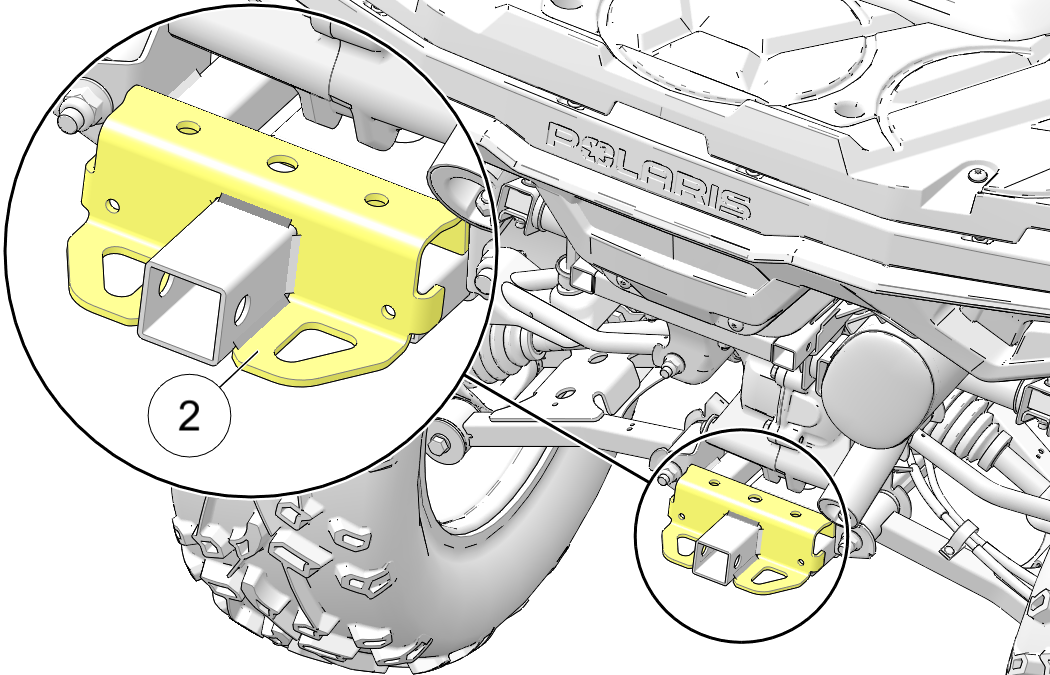
Follow this procedure when transporting your vehicle:
Stop the engine.
Place the transmission in PARK (P).
Secure the fuel cap, oil cap, and seat.
Remove the key to prevent loss during transportation.
Use suitable straps or rope to secure the vehicle to the front tow hook 1 and rear tow bracket 2. Do not attach tie straps to the front A-arm bolt pockets, racks, or handlebars.
|
Sportsman 570 2-Up |
|
|---|---|
|
Maximum Weight Capacity |
485 lb (220 kg) (operator, cargo, accessories) |
|
Dry Weight |
776 lb (352 kg) |
|
Fuel Capacity |
4.5 gal (17 l) |
|
Engine Oil Capacity |
2 qt (1.9 l) |
|
Coolant Capacity |
2.7 qt (2.5 l) |
|
Front Gearcase Fluid Capacity |
9 oz (265 ml) |
|
Transmission Fluid Capacity |
32 oz (948 ml) |
|
Front Rack / Storage Box Capacity |
90 lb (41 kg) |
|
Rear Rack Capacity |
181 lb (82 kg) |
|
Overall Length |
83 in (211 cm) |
|
Overall Width |
48 in (122 cm) |
|
Overall Height |
55.5 in (141 cm) |
|
Wheelbase |
50.9 in (129.3 cm) |
|
Ground Clearance |
11.8 in (30 cm) |
|
Minimum Turning Radius |
65 in (165 cm) unloaded |
|
Engine |
Dual overhead cam, 4 valve 4 stroke single cylinder |
|
Displacement |
567 cc |
|
Bore x Stroke |
99mm x 73.6mm |
|
Alternator Output |
660 W @ 5000 RPM |
|
Compression Ratio |
10:1 |
|
Starting System |
Electric |
|
Ignition System |
ECU |
|
Idle RPM |
1200 +/- 50 |
|
Spark Plug Type / Gap |
NGK® MR7F 0.030 in (0.762 mm) |
|
Lubrication System |
Wet Sump |
|
Driving System Type |
Automatic PVT (Polaris Variable Transmission) |
|
Front Suspension |
MacPherson Ride® Strut with 8.2 in (21 cm) travel |
|
Rear Suspension |
Linear rate with 9.5 in (24 cm) travel |
|
Transmission |
H/L/N/R/P |
|
Gear Reduction, Low |
23.91:1 |
|
Gear Reduction, Reverse |
21.74:1 |
|
Gear Reduction, High |
11.12:1 (EBS Models) 9.75:1 (Non-EBS Models) |
|
Drive Ratio, Front |
3.82:1 |
|
Tires / Pressure, Front |
25x8-12 61K / 7 psi (48.3 kPa / 0.48 bar) |
|
Tires / Pressure, Rear |
25x10-12 68K / 7 psi (48.3 kPa / 0.48 bar) |
|
Brakes, Front / Rear |
Hand-Activated Hydraulic Disc, All Wheel |
|
Brakes, Auxiliary |
Foot-Activated Hydraulic Disc, Rear Wheel |
|
Headlights |
LED Work Light / Headlights |
|
Brake Lights / Taillights |
Dual LED Brake Lights / Taillights |
|
Instrument Cluster |
LCD |
|
Receiver Hitch Tongue Capacity |
165 lb (75 kg) Rear rack load and tongue weight not to exceed 181 lb (82 kg) |
|
Unbraked Trailer Mass |
815 lb (370 kg) |
|
Braked Trailer Mass |
1830 lb (830 kg) |
|
Driver’s Exposure to Noise Level |
79,4 dB(A) |
|
Pass-By Noise Level |
78,1 dB(A) |
| Tractor Seat Vibration | |||
|---|---|---|---|
| Driver Weight | Frequency-weighted r.m.s. frame vibration Awf [m/s2] | Frequency-weighted r.m.s. seat vibration Aws (seat) [m/s2] | Ratio (Awf/Aws) |
| 98 kg | 2.35 | 1.24 | 0.53 |
| 59 kg | 2.58 | 1.47 | 0.57 |
| PRODUCT | SIZE | PART NUMBER |
|---|---|---|
|
Fogging Oil |
12 oz (340 g) aerosol |
2870791 |
|
PS-4 5W-50
4-Cycle |
1 qt (0.95 l) |
2876244 |
|
1 gal (3.8 l) |
2876245 |
|
|
PS-4 5W-50 4-Cycle |
Includes 2 qt of engine oil, 1 oil filter, and 1 drain plug washer |
2877473 |
|
PS-4 Extreme
0W-50 4-Cycle |
1 qt (0.95 l) |
2889395 |
|
1 gal (3.8 l) |
2889396 |
|
|
PS-4 Extreme 0W-50 4-Cycle |
Includes 2 qt of engine oil, 1 oil filter, and 1 drain plug washer |
2890056 |
|
AGL Gearcase Lubricant & Transmission Fluid |
1 qt (0.95 l) |
2878068 |
|
1 gal (3.8 l) |
2878069 |
|
|
Pump for Gallon Jug |
— |
2870465 |
|
Demand Drive Fluid |
1 qt (0.95 l) |
2877922 |
|
Angle Drive Fluid |
1 qt (0.95 l) |
2889280 |
|
Antifreeze 50/50 Pre-Mix |
1 qt (0.95 l) |
2880514 |
|
1 gal (3.8 l) |
2880513 |
|
|
Grease Gun Kit, Premium All Season |
— |
2871312 |
|
All Season Grease |
4-pack 3 oz (85.05 g) cartridge |
2871322 |
|
14 oz (396.9 g) cartridge |
2871423 |
|
|
U-Joint Grease |
3 oz (85.05 g) cartridge |
2871515 |
|
14 oz (396.9 g) cartridge |
2871551 |
|
|
Carbon Clean Fuel Injection Cleaner |
12 floz (355 ml) |
2881413 |
|
Advanced Fuel Treatment Fuel Stabilizer |
12 floz (355 ml) |
2881416 |
|
DOT 4 Brake Fluid |
12 floz (355 ml) |
2872189 |
|
BatteryMINDer® 2012 AGM - 2 AMP Charger |
— |
2830438 |
|
BatteryMINDer® 12V 1.5 AMP Convertible Charger |
— |
2830511 |
|
BatteryMINDer® 12V 1.5 AMP Charger |
— |
2830404 |
Open Load: There is a break in the wires that lead to the item listed in the chart (injector, fuel pump, etc.), or the item has failed.
Short-to-Ground: The wire is shorted to ground between the electronic control unit and the item listed in the chart.
Shorted Load: The wires leading to the item listed in the chart are shorted together, or the item has shorted internally.
Short-to-Battery: The wire leading from the item listed in the chart to the electronic control unit is shorted to a wire at battery voltage.
|
Diagnostic Codes |
|||
|---|---|---|---|
|
Component |
Condition |
SPN |
FMI |
|
Accelerator Position 2 |
Data Valid But Above Normal Operational Range |
29 |
0 |
|
Not Plausible |
2 |
||
|
Voltage Too High |
3 |
||
|
Voltage Too Low |
4 |
||
|
Throttle Position Sensor 1 |
Data Valid But Above Normal Operational Range |
51 |
0 |
|
Data Valid But Below Normal Operational Range |
1 |
||
|
Signal Out of Range |
2 |
||
|
Voltage Too High |
3 |
||
|
Voltage Too Low |
4 |
||
|
Abnormal Rate Of Change |
10 |
||
|
Out Of Calibration |
13 |
||
|
Vehicle Speed Sensor |
Data Valid But Above Normal Operational Range |
84 |
0 |
|
Data Valid But Below Normal Operational Range |
1 |
||
|
Data Erratic or Intermittent (or missing) |
2 |
||
|
Voltage Too High |
3 |
||
|
Voltage Below Normal, Or Shorted To Low Source |
4 |
||
|
Abnormal Frequency Or Pulse Width Or Period |
8 |
||
|
Abnormal Update Rate |
9 |
||
|
Abnormal Rate Of Change |
10 |
||
|
Bad Intelligent Device Or Component |
12 |
||
|
Received Vehicle Speed Has Error |
19 |
||
|
Accelerator Position 1 |
Voltage Too High |
91 |
3 |
|
Voltage Too Low |
4 |
||
|
Fuel Level Signal |
Data Erratic, Intermittent Or Incorrect |
96 |
2 |
|
Voltage Above Normal, Or Shorted To High Source |
3 |
||
|
Voltage Too Low |
4 |
||
|
Data Valid But Above Normal Operating Range |
16 |
||
|
Data Valid But Below Normal Operating Range |
18 |
||
|
Engine Oil Pressure |
Data Valid But Below Normal Operational Range - Most Severe Level |
100 |
1 |
|
Data Erratic, Intermittent Or Incorrect |
2 |
||
|
Current Below Normal Or Open Circuit |
5 |
||
|
Bad Intelligent Device Or Component |
12 |
||
|
Data Valid But Below Normal Operating Range - Least Severe Level |
17 |
||
|
Data Valid But Below Normal Operating Range - Moderately Severe Level |
18 |
||
|
Manifold Absolute Pressure Sensor |
Data Erratic, Intermittent Or Incorrect |
102 |
2 |
|
Voltage Above Normal, Or Shorted To High Source |
3 |
||
|
Voltage Too Low |
4 |
||
|
Mechanical System Not Responding Or Out Of Adjustment |
7 |
||
|
Abnormal Rate Of Change |
10 |
||
|
Intake Air Temperature Sensor (T-MAP) |
Data Valid But Above Normal Operational Range - Most Severe Level |
105 |
0 |
|
Data Erratic, Intermittent Or Incorrect |
2 |
||
|
Voltage Too High |
3 |
||
|
Voltage Too Low |
4 |
||
|
Abnormal Rate Of Change |
10 |
||
|
Data Valid But Above Normal Operating Range |
15 |
||
|
Intake Air Pressure Sensor |
Data Valid But Above Normal Operational Range |
106 |
0 |
|
Data Valid But Below Normal Operational Range |
1 |
||
|
Data Erratic, Intermittent Or Incorrect |
2 |
||
|
Voltage Too High |
3 |
||
|
Voltage Too Low |
4 |
||
|
Barometric Pressure Sensor |
Data Erratic, Intermittent Or Incorrect |
108 |
2 |
|
Voltage Above Normal, Or Shorted To High Source |
3 |
||
|
Voltage Below Normal, Or Shorted To Low Source |
4 |
||
|
Abnormal Rate Of Change |
10 |
||
|
Engine Temperature Sensor |
Engine Overheat Shutdown |
110 |
0 |
|
Data Erratic, Intermittent Or Incorrect |
2 |
||
|
Voltage Too High |
3 |
||
|
Voltage Too Low |
4 |
||
|
Abnormal Rate Of Change |
10 |
||
|
Data Valid But Above Normal Operating Range |
15 |
||
|
Temperature Too High |
16 |
||
|
Data Valid But Below Normal Operating Range |
17 |
||
|
Received Network Data In Error |
19 |
||
|
Battery Potential |
Voltage Above Normal, Or Shorted To High Source |
158 |
3 |
|
Voltage Below Normal, Or Shorted To Low Source |
4 |
||
|
Transmission Range |
Invalid |
162 |
2 |
|
Alternator Power Supply Potential |
Data Valid But Above Normal Operational Range - Most Severe Level |
167 |
0 |
|
Data Valid But Below Normal Operational Range - Most Severe Level |
1 |
||
|
Voltage Above Normal, Or Shorted To High Source |
3 |
||
|
Voltage Below Normal, Or Shorted To Low Source |
4 |
||
|
Data Valid But Above Normal Operating Range - Moderately Severe Level |
16 |
||
|
Data Valid But Below Normal Operating Range - Moderately Severe Level |
18 |
||
|
System Power |
Data Valid But Above Normal Operational Range - Most Severe Level |
168 |
0 |
|
Data Valid But Below Normal Operational Range - Most Severe Level |
1 |
||
|
Data Erratic, Intermittent Or Incorrect |
2 |
||
|
Voltage Too High |
3 |
||
|
Voltage Too Low |
4 |
||
|
Data Valid But Above Normal Operating Range - Moderately Severe Level |
16 |
||
|
Data Valid But Below Normal Operating Range - Moderately Severe Level |
18 |
||
|
Engine Speed |
Data Valid But Above Normal Operational Range - Most Severe Level |
190 |
0 |
|
Data Valid But Below Normal Operational Range - Most Severe Level |
1 |
||
|
Data Erratic, Intermittent Or Incorrect |
2 |
||
|
Mechanical System Not Responding Or Out Of Adjustment |
7 |
||
|
Received Engine Speed Has Error |
19 |
||
|
Error in Engine Speed Computation |
31 |
||
|
Gear Sensor Signal |
Data Erratic, Intermittent Or Incorrect |
523 |
2 |
|
Voltage Above Normal, Or Shorted To High Source |
3 |
||
|
Voltage Too Low |
4 |
||
|
Abnormal Update Rate |
9 |
||
|
Root Cause Not Known |
11 |
||
|
Transmission Requested Gear |
Received Network Data In Error |
525 |
19 |
|
Cruise Control Panel Switches |
Condition Exists |
527 |
31 |
|
Brake Switch |
Data Erratic, Intermittent Or Incorrect |
597 |
2 |
|
Abnormal Update Rate |
9 |
||
|
Abnormal Rate Of Change |
10 |
||
|
Received Network Data In Error |
19 |
||
|
System Voltage |
Data Valid But Above Normal Operating Range - Least Severe Level |
627 |
15 |
|
Data Valid But Below Normal Operating Range - Least Severe Level |
17 |
||
|
ECU Memory |
Bad Intelligent Device Or Component |
628 |
12 |
|
Out Of Calibration |
13 |
||
|
Calibration |
Out Of Calibration |
630 |
13 |
|
Checksum/CRC Error |
19 |
||
|
Crankshaft Position Sensor |
Plausibility Fault |
636 |
2 |
|
Abnormal Frequency Or Pulse Width Or Period |
8 |
||
|
Camshaft Position Sensor |
Mechanical System Not Responding Or Out Of Adjustment |
637 |
7 |
|
Abnormal Frequency Or Pulse Width Or Period |
8 |
||
|
Injector 1 (MAG) |
Voltage Below Normal / Shorted To Low Source / Driver Circuit Grounded. |
651 |
4 |
|
Current Below Normal / Open Circuit / Driver Circuit Open / Grounded |
5 |
||
|
Injector 2 (PTO) |
Voltage Above Normal, Or Shorted To High Source / Driver Circuit Short to B+ |
652 |
3 |
|
Voltage Below Normal, Or Shorted To Low Source / Driver Circuit Grounded |
4 |
||
|
Current Below Normal Or Open Circuit / Driver Circuit Open / Grounded |
5 |
||
|
Starter Solenoid Driver Circuit |
Voltage Above Normal, Or Shorted To High Source |
677 |
3 |
|
Voltage Below Normal, Or Shorted To Low Source |
4 |
||
|
Current Below Normal Or Open Circuit |
5 |
||
|
Rear Differential Output (Turf) |
Driver Circuit Short to B+ |
746 |
3 |
|
Driver Circuit Grounded |
4 |
||
|
Driver Circuit Open / Grounded |
5 |
||
|
Fan Relay Driver Circuit |
Voltage Above Normal |
1071 |
3 |
|
Voltage Below Normal |
4 |
||
|
Current Below Normal Or Open Circuit |
5 |
||
|
Ignition Coil Primary Driver 1 (MAG) |
Voltage Above Normal |
1268 |
3 |
|
Voltage Below Normal |
4 |
||
|
Current Below Normal Or Open Circuit |
5 |
||
|
Ignition Coil Primary Driver 2 (PTO) |
Voltage Above Normal |
1269 |
3 |
|
Voltage Below Normal |
4 |
||
|
Current Below Normal Or Open Circuit |
5 |
||
|
Starter Enable Circuit |
Voltage Above Normal |
1321 |
3 |
|
Voltage Below Normal |
4 |
||
|
Current Below Normal Or Open Circuit |
5 |
||
|
Fuel Pump Driver Circuit |
Voltage Above Normal |
1347 |
3 |
|
Voltage Below Normal |
4 |
||
|
Current Below Normal Or Open Circuit |
5 |
||
|
Abnormal Frequency Or Pulse Width Or Period |
8 |
||
|
EFI Relay Control Circuit |
Voltage Above Normal |
1485 |
3 |
|
Voltage Below Normal |
4 |
||
|
Current Below Normal Or Open Circuit |
5 |
||
|
Fan Driver 2 |
Voltage Above Normal |
1557 |
3 |
|
Voltage Below Normal, Or Shorted To Low Source |
4 |
||
|
Current Below Normal Or Open Circuit |
5 |
||
|
PTO Solenoid Driver Circuit |
Voltage Above Normal, Or Shorted To High Source |
1888 |
3 |
|
Voltage Below Normal, Or Shorted To Low Source |
4 |
||
|
Current Below Normal Or Open Circuit |
5 |
||
|
Vehicle Speed |
Data Valid But Above Normal Operating Range - Moderately Severe Level |
2590 |
16 |
|
Oxygen Sensor Bank 1 Sensor 1 |
Data Erratic, Intermittent Or Incorrect |
3056 |
2 |
|
Voltage Above Normal, Or Shorted To High Source |
3 |
||
|
Voltage Below Normal, Or Shorted To Low Source |
4 |
||
|
Bad Intelligent Device Or Component |
12 |
||
|
Data Valid But Below Normal Operating Range - Least Severe Level |
17 |
||
|
Oxygen Sensor Bank 1 Sensor 2 |
Data Erratic, Intermittent Or Incorrect |
3057 |
2 |
|
Voltage Above Normal, Or Shorted To High Source |
3 |
||
|
Voltage Below Normal, Or Shorted To Low Source |
4 |
||
|
ECU Output Supply Voltage 1 |
Data Valid But Above Normal Operational Range - Most Severe Level |
3597 |
0 |
|
Data Valid But Below Normal Operational Range - Most Severe Level |
1 |
||
|
Voltage Above Normal, Or Shorted To High Source |
3 |
||
|
Voltage Below Normal, Or Shorted To Low Source |
4 |
||
|
Data Valid But Above Normal Operating Range - Moderately Severe Level |
16 |
||
|
Data Valid But Below Normal Operating Range - Moderately Severe Level |
18 |
||
|
ECU Output Supply Voltage 2 |
Data Valid But Above Normal Operational Range - Most Severe Level |
3598 |
0 |
|
Data Valid But Below Normal Operational Range - Most Severe Level |
1 |
||
|
Voltage Above Normal, Or Shorted To High Source |
3 |
||
|
Voltage Below Normal, Or Shorted To Low Source |
4 |
||
|
Data Valid But Above Normal Operating Range - Moderately Severe Level |
16 |
||
|
Data Valid But Below Normal Operating Range - Moderately Severe Level |
18 |
||
|
ECU Output Supply Voltage 3 |
Data Valid But Above Normal Operational Range - Most Severe Level |
3599 |
0 |
|
Data Valid But Below Normal Operational Range - Most Severe Level |
1 |
||
|
Voltage Above Normal, Or Shorted To High Source |
3 |
||
|
Voltage Below Normal, Or Shorted To Low Source |
4 |
||
|
Data Valid But Above Normal Operating Range - Moderately Severe Level |
16 |
||
|
Data Valid But Below Normal Operating Range - Moderately Severe Level |
18 |
||
|
CAN1 Bus Hardware |
Root Cause Not Known |
65559 |
11 |
|
Condition Exists |
31 |
||
|
ETC Accelerator Position Sensor Correlation |
Data Erratic, Intermittent Or Incorrect |
65613 |
2 |
|
Cylinder Misfire |
Mechanical System Not Responding Or Out Of Adjustment |
65590 |
7 |
|
Cylinder 1 Misfire |
Mechanical System Not Responding Or Out Of Adjustment |
65591 |
7 |
|
ETC Accelerator Position Sensor Outputs 1 & 2 Correlation |
Data Erratic, Intermittent Or Incorrect |
65613 |
2 |
|
CAN 1 |
Abnormal Update Rate |
516125 |
9 |
|
Idle Engine speed |
Received Network Data In Error |
516178 |
19 |
|
Winch In Commanded State |
Data Valid But Below Normal Operational Range - Most Severe Level |
516246 |
1 |
|
Voltage Above Normal, Or Shorted To High Source |
3 |
||
|
Voltage Below Normal, Or Shorted To Low Source |
4 |
||
|
Winch Out Commanded State |
Voltage Above Normal, Or Shorted To High Source |
516247 |
3 |
|
Voltage Below Normal, Or Shorted To Low Source |
4 |
||
|
Winch Auto Stop Signal |
Voltage Below Normal, Or Shorted To Low Source |
516248 |
4 |
|
Plowing In High Range |
Data Valid But Above Normal Operating Range - Moderately Severe Level |
516249 |
16 |
|
CAN1 Bus Wiring |
Condition Exists |
520141 |
31 |
|
Throttle Release Signal |
Data Erratic, Intermittent Or Incorrect |
520194 |
2 |
|
Voltage Above Normal, Or Shorted To High Source |
3 |
||
|
Voltage Below Normal, Or Shorted To Low Source |
4 |
||
|
Mechanical System Not Responding Or Out Of Adjustment |
7 |
||
|
Throttle Position Sensor 2 |
Data Valid But Above Normal Operational Range - Most Severe Level |
520198 |
0 |
|
Data Valid But Below Normal Operational Range - Most Severe Level |
1 |
||
|
Voltage Above Normal, Or Shorted To High Source |
3 |
||
|
Voltage Below Normal, Or Shorted To Low Source |
4 |
||
|
Abnormal Rate Of Change |
10 |
||
|
Out Of Calibration |
13 |
||
|
Canister Purge Valve |
Voltage Above Normal, Or Shorted To High Source |
520202 |
3 |
|
Voltage Below Normal, Or Shorted To Low Source |
4 |
||
|
Current Below Normal Or Open Circuit |
5 |
||
|
Front Wheel Back Drive (Active Descent System) |
Voltage Above Normal, Or Shorted To High Source |
520203 |
3 |
|
Voltage Below Normal, Or Shorted To Low Source |
4 |
||
|
Current Below Normal Or Open Circuit |
5 |
||
|
Fuel Correction Front |
Data Valid But Above Normal Operating Range - Least Severe Level |
520204 |
15 |
|
Data Valid But Below Normal Operating Range - Least Severe Level |
17 |
||
|
Fuel Correction Rear |
Data Valid But Above Normal Operating Range - Least Severe Level |
520205 |
15 |
|
Data Valid But Below Normal Operating Range - Least Severe Level |
17 |
||
|
Reverse Alarm |
Data Erratic, Intermittent Or Incorrect |
520206 |
2 |
|
Voltage Above Normal, Or Shorted To High Source |
3 |
||
|
Voltage Below Normal, Or Shorted To Low Source |
4 |
||
|
Current Below Normal Or Open Circuit |
5 |
||
|
All Wheel Drive Control Circuit |
Voltage Above Normal, Or Shorted To High Source |
520207 |
3 |
|
Voltage Below Normal, Or Shorted To Low Source |
4 |
||
|
Current Below Normal Or Open Circuit |
5 |
||
|
Chassis Relay |
Voltage Above Normal, Or Shorted To High Source |
520208 |
3 |
|
Voltage Below Normal, Or Shorted To Low Source |
4 |
||
|
Current Below Normal Or Open Circuit |
5 |
||
|
Idle Speed |
Voltage Above Normal, Or Shorted To High Source |
520211 |
3 |
|
Voltage Below Normal, Or Shorted To Low Source |
4 |
||
|
Accessory Relay |
Voltage Above Normal, Or Shorted To High Source |
520219 |
3 |
|
Voltage Below Normal, Or Shorted To Low Source |
4 |
||
|
Current Below Normal Or Open Circuit |
5 |
||
|
Battery Charge Relay |
Voltage Above Normal, Or Shorted To High Source |
520220 |
3 |
|
Voltage Below Normal, Or Shorted To Low Source |
4 |
||
|
Current Below Normal Or Open Circuit |
5 |
||
|
Steering Over Current Shut Down |
Current Above Normal Or Grounded Circuit |
520221 |
6 |
|
Bad Intelligent Device Or Component |
12 |
||
|
Steering Excessive Current Error |
Current Above Normal Or Grounded Circuit |
520222 |
6 |
|
Steering Torque Partial Failure |
Condition Exists |
520223 |
31 |
|
Steering Torque Full Failure |
Condition Exists |
520224 |
31 |
|
EPS Inverter Temperature |
Data Valid But Above Normal Operational Range - Most Severe Level |
520225 |
0 |
|
Bad Intelligent Device Or Component |
12 |
||
|
Data Valid But Above Normal Operating Range - Moderately Severe Level |
16 |
||
|
EPS Communications Receive Data Error |
Data Erratic, Intermittent Or Incorrect |
520226 |
2 |
|
Condition Exists |
31 |
||
|
EPS CAN Communications Transmit Error |
Data Erratic, Intermittent Or Incorrect |
520227 |
2 |
|
Position Encoder Error |
Root Cause Not Known |
520228 |
11 |
|
Bad Intelligent Device Or Component |
12 |
||
|
Condition Exists |
31 |
||
|
Software Error |
Bad Intelligent Device Or Component |
520229 |
12 |
|
Condition Exists |
31 |
||
|
IC CAN Communication with EPS |
Condition Exists |
520230 |
31 |
|
EPS Power Save Condition |
Condition Exists |
520231 |
31 |
|
Fuel Pull Solenoid Relay Driver Circuit (Low Side) |
Voltage Above Normal, Or Shorted To High Source |
520273 |
3 |
|
Voltage Below Normal, Or Shorted To Low Source |
4 |
||
|
Current Below Normal Or Open Circuit |
5 |
||
|
Accelerator Position/Brake Position Interaction |
Condition Exists |
520275 |
31 |
|
Throttle Position Sensor (1 or 2 Indeterminable) |
Data Erratic, Intermittent Or Incorrect |
520276 |
2 |
|
Bad Intelligent Device Or Component |
12 |
||
|
Throttle Body Control - Power Stage |
Data Erratic, Intermittent Or Incorrect |
520277 |
2 |
|
Voltage Above Normal, Or Shorted To High Source |
3 |
||
|
Voltage Below Normal, Or Shorted To Low Source |
4 |
||
|
Abnormal Frequency Or Pulse Width Or Period |
8 |
||
|
Condition Exists |
31 |
||
|
Throttle Body Control - Return Spring Check Failed |
Condition Exists |
520278 |
31 |
|
Throttle Body Control - Adaption Aborted |
Condition Exists |
520279 |
31 |
|
Throttle Body Control - Limp Home Position Check Failed |
Condition Exists |
520280 |
31 |
|
Throttle Body Control - Mechanical Stop Adaptation Failure |
Condition Exists |
520281 |
31 |
|
Throttle Body Control - Repeated Adaptation Failed |
Condition Exists |
520282 |
31 |
|
Throttle Body Control |
Data Erratic, Intermittent Or Incorrect |
520283 |
2 |
|
Voltage Above Normal, Or Shorted To High Source |
3 |
||
|
Voltage Below Normal, Or Shorted To Low Source |
4 |
||
|
Throttle Body Control - Position Deviation Fault |
Condition Exists |
520284 |
31 |
|
Brake Switch (1 or 2 Indeterminable) |
Data Erratic, Intermittent Or Incorrect |
520285 |
2 |
|
ECU Monitoring Error |
Condition Exists |
520286 |
31 |
|
ECU Monitoring Error (Level 3) |
Condition Exists |
520287 |
31 |
|
ECU Monitoring of Injection Cut Off (Level 1) |
Condition Exists |
520288 |
31 |
|
ECU Monitoring of Injection Cut Off (Level 2) |
Condition Exists |
520289 |
31 |
|
Throttle Body Control - Requested Throttle Angle Not Plausible |
Condition Exists |
520305 |
31 |
|
ECU ADC Fault - No Load |
Condition Exists |
520306 |
31 |
|
ECU ADC Fault - Voltage |
Condition Exists |
520307 |
31 |
|
Accelerator Sensor Sync Fault - Sensor Diff Exceeds Limit |
Condition Exists |
520308 |
31 |
|
ECU Fault - ICO |
Condition Exists |
520309 |
31 |
|
ECU Fault - Hardware Disruption |
Condition Exists |
520311 |
31 |
|
Idle Fuel Correction Bank 1 |
Data Valid But Above Normal Operating Range - Least Severe Level |
520342 |
15 |
|
Idle Fuel Correction Bank 2 |
Data Valid But Above Normal Operating Range - Least Severe Level |
520343 |
15 |
|
Data Valid But Below Normal Operating Range - Least Severe Level |
17 |
||
|
Adaptive Fuel Correction Bank 1 |
Data Valid But Above Normal Operating Range - Least Severe Level |
520344 |
15 |
|
Data Valid But Below Normal Operating Range - Least Severe Level |
17 |
||
|
Internal fault - Chassis Output Disabled |
Condition Exists |
520376 |
31 |
|
Non Functional Application SW Installed |
Condition Exists |
520381 |
31 |
|
Stator |
Voltage Below Normal, Or Shorted To Low Source |
520498 |
4 |
|
Current Below Normal Or Open Circuit |
5 |
||
|
Display Relay |
Current Below Normal Or Open Circuit |
520522 |
5 |
|
Drive Mode Select Switch |
Data Erratic, Intermittent Or Incorrect |
524067 |
2 |
|
Voltage Above Normal, Or Shorted To High Source |
3 |
||
|
Voltage Below Normal, Or Shorted To Low Source |
4 |
||
|
Operator Presence Switch |
Voltage Above Normal, Or Shorted To High Source |
524070 |
3 |
|
EPS Fault Lamp Driver Circuit |
Bad Intelligent Device Or Component |
524085 |
12 |
|
EPS SEPIC Voltage Error |
Voltage Above Normal, Or Shorted To High Source |
524086 |
3 |
|
Voltage Below Normal, Or Shorted To Low Source |
4 |
||
|
Possible Cause |
Solution |
|---|---|
|
Driving onto a pickup or tall trailer in high range |
Use low range during loading. |
|
Starting out going up a steep incline |
Use low range. |
|
Driving at low RPM or ground speed – 3–7 mph (4.8–11.3 kph) |
Drive at a higher speed or use low range more frequently. |
|
Insufficient warm-up at low ambient temperatures |
Warm the engine at least 5 minutes. With the transmission in neutral, advance the throttle to about 1/8 throttle in short bursts, 5 to 7 times. The belt will become more flexible and prevent belt burning. |
|
Slow/easy clutch engagement |
Use the throttle quickly and effectively. |
|
Towing/pushing at low RPM/low ground speed |
Use low range only. |
|
Utility use/plowing |
Use low range only. |
|
Stuck in mud or snow |
Shift the transmission to low range and carefully use fast, aggressive throttle application to engage clutch. WARNING: Excessive throttle may cause loss of control and vehicle rollover. |
|
Climbing over large objects from a stopped position |
Shift the transmission to low range and carefully use fast, brief, aggressive throttle application to engage clutch. WARNING: Excessive throttle may cause loss of control and vehicle rollover. |
|
Belt slippage from water or snow ingestion into the PVT system |
Dry out the PVT. Prevent water from entering the PVT intake duct. See the PVT Drying section for more information. Inspect clutch seals for damage if repeated leaking occurs. |
|
Clutch malfunction |
An authorized dealer can assist. |
|
Poor engine performance |
Check for clogged air filter, clogged fuel filter, water in the fuel or foreign material in fuel tank or fuel lines. An authorized dealer can assist. |
|
Slippage from failure to warm up belt |
Always warm up the belt by operating below 30 mph (48 kph) for 1 mi (1.6 km) (5 mi (8 km) or more when temperature is below freezing). |
|
Wrong or missing belt |
Install the recommended belt. |
|
Improper break-in |
Always break in a new belt and/or clutch. |
| Possible Cause | Solution |
|---|---|
|
Low battery voltage |
Recharge the battery. |
|
Loose battery connections |
Check all connections and tighten. |
|
Loose solenoid connections |
Check all connections and tighten. |
|
Loose electronic control box connections |
Inspect, clean, reinstall connectors. |
| Possible Cause | Solution |
|---|---|
|
Out of fuel |
Refuel. |
|
Water is present in fuel |
Drain the fuel system and refuel. |
|
Old or non-recommended fuel |
Replace with fresh recommended fuel. |
|
Fouled or defective spark plug |
Inspect plug and replace if necessary. |
|
No spark to spark plug |
Inspect plug and replace if necessary. |
|
Water or fuel in crankcase |
Your authorized dealer can assist. |
|
Low battery voltage |
Recharge the battery to 12.8 VDC. |
|
Mechanical failure |
Your authorized dealer can assist. |
| Possible Cause | Solution |
|---|---|
|
Weak spark from spark plug |
Inspect, clean and / or replace spark plug. |
|
Incorrect spark plug gap or heat range |
Set gap to specs or replace plug. |
|
Old or non-recommended fuel |
Replace with fresh recommended fuel. |
|
Incorrectly installed spark plug wires |
Your authorized dealer can assist. |
|
Mechanical failure |
Your authorized dealer can assist. |
|
Loose ignition connections |
Check all connections and tighten. |
|
Water present in fuel |
Replace with fresh recommended fuel. |
| Possible Cause | Solution |
|---|---|
|
Poor quality or low octane fuel |
Replace with recommended fuel. |
|
Incorrect spark plug gap or heat range |
Set gap to specs or replace plug. |
| Possible Cause | Solution |
|---|---|
|
Fouled or defective spark plug |
Inspect, clean and / or replace spark plug. |
|
Worn or defective spark plug wires |
Your authorized dealer can assist. |
|
Incorrect spark plug gap or heat range |
Set gap to specs or replace plug. |
|
Loose ignition connections |
Check all connections and tighten. |
|
Water present in fuel |
Replace with new fuel. |
|
Low battery voltage |
Recharge battery to 12.8 VDC. |
|
Incorrect fuel |
Replace with recommended fuel. |
|
Clogged air filter |
Inspect and clean or replace. |
|
Clogged intake pre-filter |
Inspect and clean (with soapy water) or replace. |
|
Other mechanical failure |
Your authorized dealer can assist. |
| Possible Cause | Solution |
|---|---|
|
Out of fuel |
Refuel. |
|
Kinked or plugged fuel vent line |
Inspect and replace. |
|
Water is present in fuel |
Replace with new fuel. |
|
Fouled or defective spark plug |
Inspect, clean and / or replace spark plug. |
|
Worn or defective spark plug wires |
Your authorized dealer can assist. |
|
Incorrect spark plug gap or heat range |
Set gap to specs or replace plug. |
|
Loose ignition connections |
Check all connections and tighten. |
|
Low battery voltage |
Recharge the battery. |
|
Incorrect fuel |
Replace with fresh recommended fuel. |
|
Clogged air filter |
Inspect and clean or replace. |
|
Clogged intake pre-filter |
Inspect and clean (with soapy water) or replace. |
|
Other mechanical failure |
Your authorized dealer can assist. |
|
Overheated engine |
Clean radiator screen and core, clean engine exterior, and check coolant level. Your dealer can assist. |
Polaris Industries Inc., 2100 Highway 55, Medina, MN 55340 (POLARIS) gives a SIX MONTH LIMITED WARRANTY on all components of your Polaris vehicle against defects in material or workmanship. Laws and regulations in your jurisdiction may give extra protection. Polaris further warrants that the spark arrestor in this product will meet the efficiency requirements of USFS standard 5100-1D for at least 1000 hours when subjected to normal use and when maintenance and installation are in accordance with Polaris recommendations.
This warranty covers parts and labor charges for repair or replacement of defective parts and begins on the date of purchase by the original retail purchaser. The duration of this warranty may vary by international region based upon local laws and regulations.
At the time of sale, the Warranty Registration Form must be completed by your dealer and submitted to Polaris within ten days of purchase. Upon receipt of this registration, Polaris will record the registration for warranty. No verification of registration will be sent to the purchaser as the copy of the Warranty Registration Form will be your proof of warranty coverage. If you have not signed the original registration and received the customer copy, please contact your dealer immediately. Initial dealer preparation and set-up of your vehicle is very important in ensuring trouble-free operation.
The manufacturer will warrant this product to maintain an acceptable spark arresting effectiveness for a minimum of 1,000 hours, subject to normal use, with maintenance and mounting in accordance with the manufacturing recommendation.
This Polaris limited warranty excludes any failures that are not caused by a defect in material or workmanship. THIS WARRANTY DOES NOT COVER CLAIMS OF DEFECTIVE DESIGN. This warranty also does not cover acts of God, accidental damage, normal wear and tear, abuse or improper handling. This warranty also does not cover damage to any vehicle, component, or part as a result of being structurally modified, neglected, improperly maintained or used for racing, competition or purposes other than for which it was designed.
This warranty excludes damages or failures resulting from improper lubrication; improper engine timing; improper fuel; surface imperfections caused by external stress, heat, cold or contamination; operator error or abuse; improper component alignment, tension, adjustment or altitude compensation; snow, water, dirt or other foreign substance ingestion/contamination; improper maintenance; modified components; use of aftermarket or unapproved components, accessories, or attachments; use of unapproved software or calibration; unauthorized repairs; or repairs made after the warranty period expires or by an unauthorized repair center.
This warranty excludes damages or failures caused by abuse, accident, fire, or any other cause other than a defect in materials or workmanship and provides no coverage for consumable components, general wear items, or any parts exposed to friction surfaces, stresses, environmental conditions and/or contamination for which they were not designed or not intended, including but not limited to the following items:
Wheels and tires
Suspension components
Brake components
Seat components
Clutches and components
Steering components
Batteries
Light bulbs / sealed beam lamps
Filters
Lubricants
Bushings
Finished and unfinished surfaces
Carburetor / throttle body components
Engine components
Drive belts
Hydraulic components and fluids
Circuit breakers / fuses
Electronic components
Spark plugs
Sealants
Coolants
Bearings
Mixing oil brands or using non-recommended oil may cause engine damage. We recommend the use of Polaris engine oil.
Damage or failure resulting from the use of non-recommended lubricants or fluids is not covered by this warranty.
This warranty provides no coverage for personal loss or expense, including mileage, transportation costs, hotels, meals, shipping or handling fees, product pick-up or delivery, replacement rentals, loss of product use, loss of profits, or loss of vacation or personal time.
THE EXCLUSIVE REMEDY FOR BREACH OF THIS WARRANTY SHALL BE, AT POLARIS' OPTION, REPAIR OR REPLACEMENT OF ANY DEFECTIVE MATERIALS, COMPONENTS, OR PRODUCTS. THE REMEDIES SET FORTH IN THIS WARRANTY ARE THE ONLY REMEDIES AVAILABLE TO ANY PERSON FOR BREACH OF THIS WARRANTY. POLARIS SHALL HAVE NO LIABILITY TO ANY PERSON FOR INCIDENTAL, CONSEQUENTIAL OR SPECIAL DAMAGES OF ANY DESCRIPTION, WHETHER ARISING OUT OF EXPRESS OR IMPLIED WARRANTY OR ANY OTHER CONTRACT, NEGLIGENCE, OR OTHER TORT OR OTHERWISE. THIS EXCLUSION OF CONSEQUENTIAL, INCIDENTAL, AND SPECIAL DAMAGES IS INDEPENDENT FROM AND SHALL SURVIVE ANY FINDING THAT THE EXCLUSIVE REMEDY FAILED OF ITS ESSENTIAL PURPOSE.
THE IMPLIED WARRANTY OF FITNESS FOR A PARTICULAR PURPOSE IS EXCLUDED FROM THIS LIMITED WARRANTY. ALL OTHER IMPLIED WARRANTIES (INCLUDING BUT NOT LIMITED TO THE IMPLIED WARRANTY OF MERCHANTABILITY) ARE LIMITED IN DURATION TO THE ABOVE SIX MONTH WARRANTY PERIOD. POLARIS DISCLAIMS ALL EXPRESS WARRANTIES NOT STATED IN THIS WARRANTY. SOME STATES DO NOT PERMIT THE EXCLUSION OR LIMITATION OF INCIDENTAL OR CONSEQUENTIAL DAMAGES OR ALLOW LIMITATIONS ON THE DURATION OF IMPLIED WARRANTIES, SO THE ABOVE LIMITATIONS MAY NOT APPLY TO YOU IF INCONSISTENT WITH CONTROLLING STATE LAW.
You are responsible for presenting your vehicle to an authorized Polaris dealer as soon as a problem exists. The warranty repairs should be completed in a reasonable amount of time, not to exceed 30 days. However any damage caused to the product by you or any non-authorized third party may void this warranty. Warranty or Service Bulletin repairs must be done by an authorized Polaris dealer, or other qualified person authorized by Polaris.
Outside the Country where your product was purchased:
If you are traveling temporarily outside the country where your product was purchased, you should take your product to an authorized Polaris dealer. You must show the dealer photo identification from the country of the selling dealer's authorized location as proof of residence. Upon residence verification, the servicing dealer will be authorized to perform the warranty repair.
If you move:
If you move to another country, be sure to contact Polaris Owner Connections and the customs department of the destination country before you move. Product importation rules vary considerably from country to country. You may be required to present documentation of your move to Polaris to continue your warranty coverage. You may also be required to obtain documentation from Polaris to register your product in your new country. We recommend that you register your product at a local authorized Polaris dealer promptly after you move.
If you purchase from a private party:
If you purchase a Polaris product from a private party, to be kept and used outside of the country in which the product was originally purchased, all warranty coverage will be denied. However, we encourage you to promptly register your product at your local authorized Polaris dealer to receive safety information and notice regarding your product.
EXCEPT WHERE SPECIFICALLY REQUIRED BY LAW, THERE IS NO WARRANTY OR SERVICE BULLETIN COVERAGE ON THIS PRODUCT IF IT IS SOLD OUTSIDE THE COUNTRY OF THE SELLING DEALER’S AUTHORIZED LOCATION. This policy does not apply to products that have received authorization for export from Polaris. Dealers may not give authorization for export. You should consult an authorized dealer to determine this product’s warranty or service coverage if you have any questions. This policy does not apply to products registered to government officials or military personnel on assignment outside the country of the selling dealer’s authorized location. This policy does not apply to Safety Bulletins.
If your product is registered outside of the country where it was purchased and you have not followed the procedure set above, your product will no longer be eligible for warranty or service bulletin coverage of any kind, other than safety bulletins. Products registered to government officials or military personnel on assignment outside of the country where the product was purchased will continue to be covered by the Limited Warranty.
Please work with your dealer to resolve any warranty issues. Dealership contacts can be found via this website, if needed:
Should your dealer require any additional assistance, they will contact the appropriate person at Polaris.
This warranty gives you specific legal rights, and you may also have other rights which vary from state to state or in different countries. If any of the above terms are void because of federal, state, local law, all other warranty terms will remain in effect.
For questions, call Polaris Owner Connections:
1-800-POLARIS (1-800-765-2747)
Use the following chart to record periodic maintenance.
| DATE | MILES (KM) or HOURS |
TECHNICIAN | SERVICE PERFORMED / COMMENTS |
|---|---|---|---|
Was this helpful?