Belt Removal and Replacement
If a belt fails, always clean any debris from the outlet duct and from the clutch and engine compartments when replacing the belt.
-
Wiggling and rocking the cover will help it move around the bolts on the clutch towers.
-
Make sure the clutch cover bolts are not catching on other parts.
-
Rotating the drive clutch slightly by hand can provide more clearance in some cases.
-
For easiest removal, make sure the vehicle is sitting on the ground at normal ride height or lower, which will provide more clearance between the cover and the shock absorber. Turning the drive clutch slightly by hand can also help provide more room for removal.
-
If reinstalling the belt, reference the print on the belt to reinstall in the same direction.
-
Allow hot components to cool before performing this procedure.
NOTEIf the vehicle is on solid ground, removal of the left rear wheel or shock is not necessary for belt replacement. If the vehicle is on a lift, the shock must be removed in order to remove the clutch cover. -
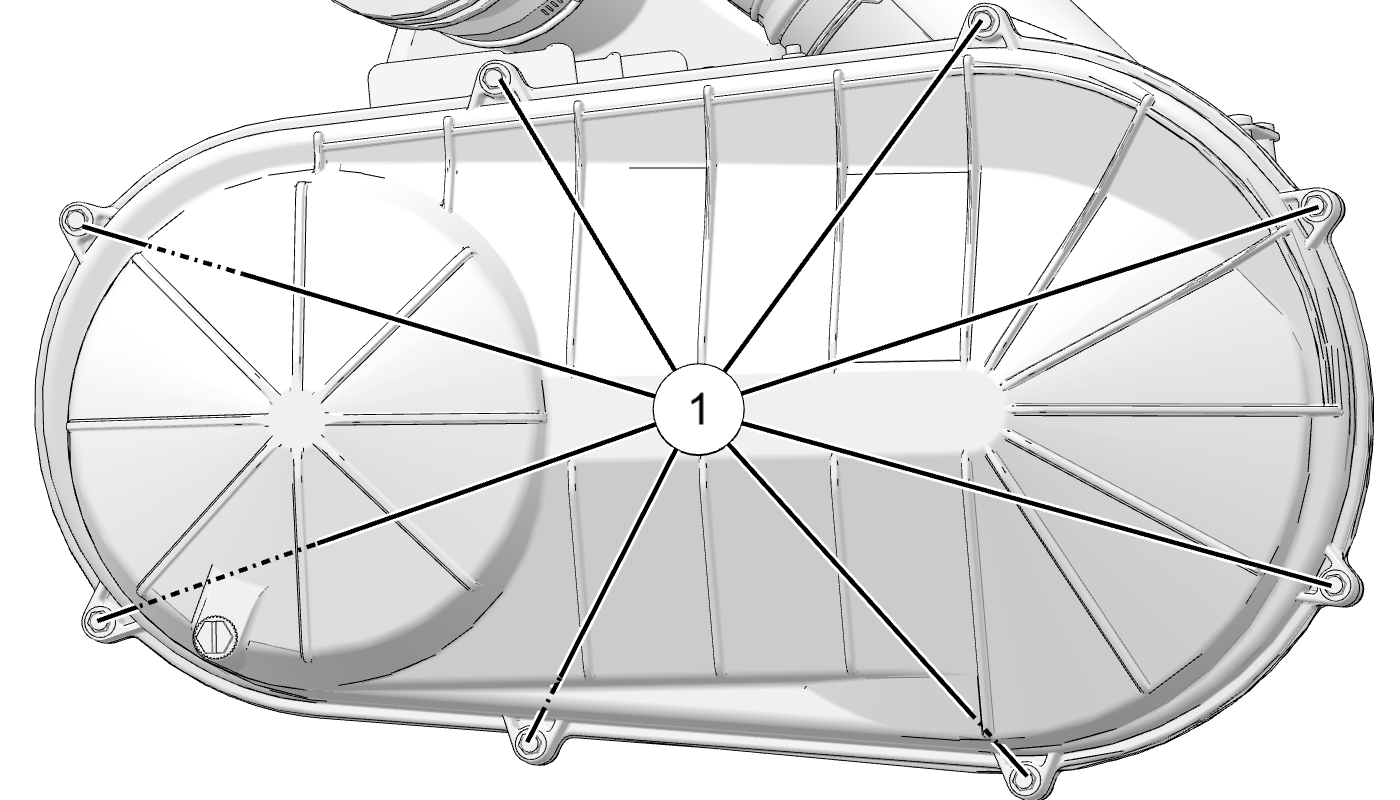
Remove the eight (8) clutch cover screws 2.
-
Maneuver the outer clutch cover outward to access the drive belt.
-
Mark the drive belt direction of rotation so that it can be installed in the same direction.
-
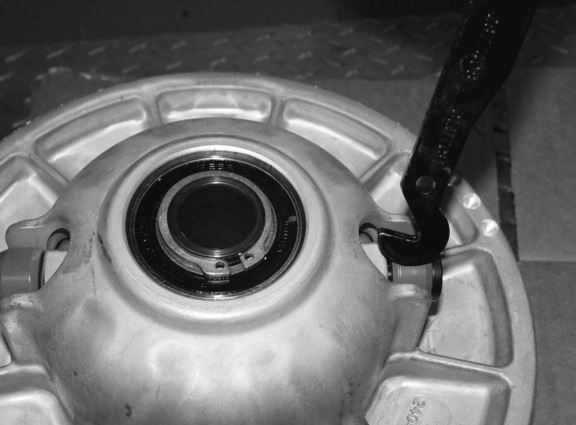
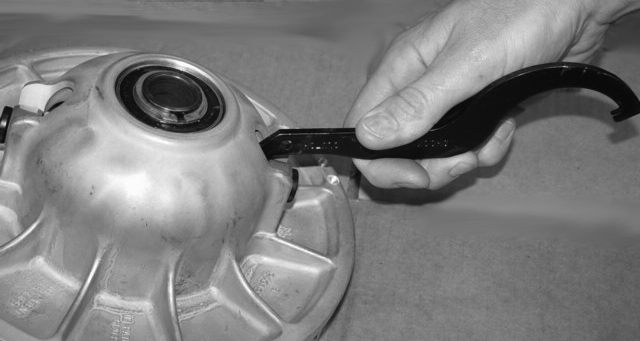
Use the shock/clutch tool from the tool kit to slightly open the sheaves to aid in debris removal and belt installation.
TIPIf a replacement tool is required, it can be ordered through your authorized Polaris dealer using part number 2877408–329.Insert hooked end of tool
Apply force to opposite end of tool to spread sheaves
-
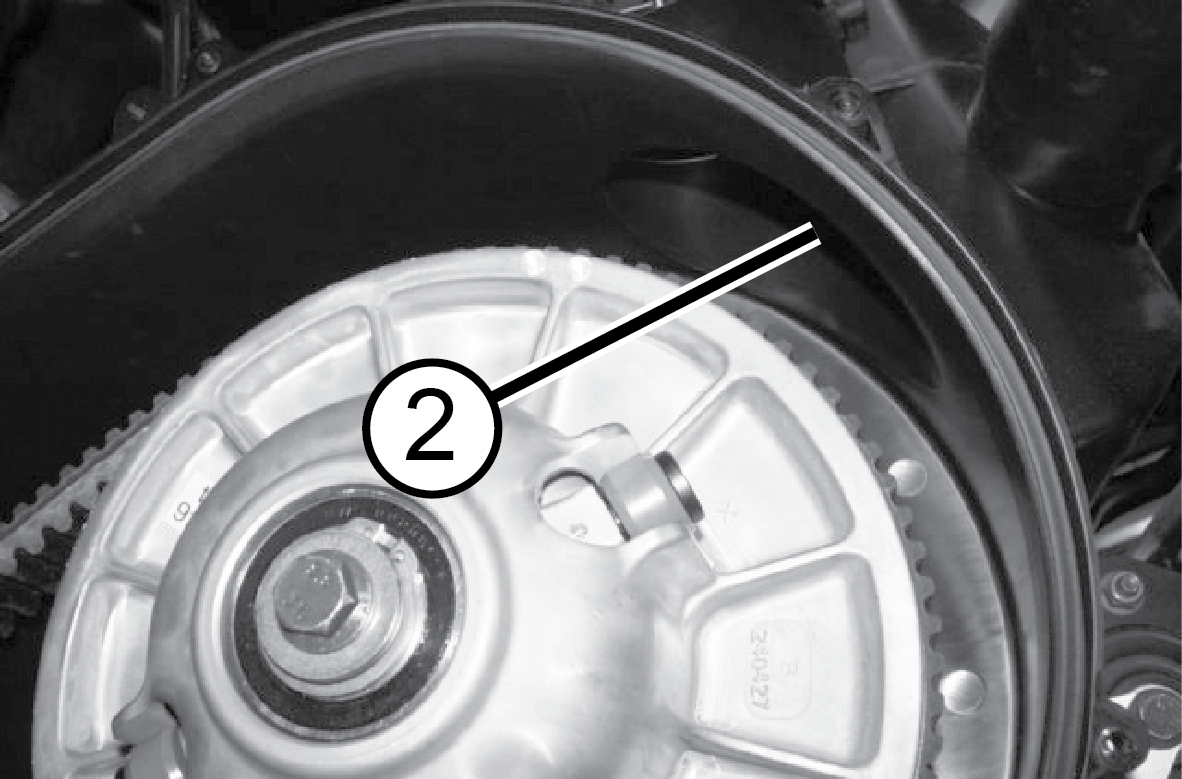
Remove ALL DEBRIS from the entire clutch air duct passage 2.
-
Check for signs of damage to seals on the transmission and engine. If any seals appear to be damaged, your vehicle requires prompt service. Your POLARIS dealer can assist.
-
With the clutch spreader tool installed, loop the belt over the drive clutch and over part of the driven clutch. Be sure to install belt in the direction previously marked.
-
Rotate the driven clutch and walk the belt into the clutch.
-
Remove the clutch spreader tool from the driven clutch.
-
Rotate / spin the driven clutch and belt approximately 5-7 times to properly seat the belt in the driven clutch.
-
Install the outer clutch cover and eight fasteners 1. Torque fasteners to specification.
TORQUEOuter Clutch Cover Fasteners:
4.5 in-lbs (6 N·m)