Battery Installation
Using a new battery that has not been fully charged can damage the battery and result in a shorter life. It can also hinder vehicle performance. Follow the instructions in the Battery Charging section before installing the battery.
An optional extreme use battery may be available for your model. If the performance of the factory-installed battery is inadequate due to operation in extreme cold or due to extended use of multiple electrical accessories, your authorized dealer can assist. Your dealer can provide any installation procedures that may differ for an extreme use battery.
-
Make sure the battery is fully charged.
-
Install the battery into the battery support bracket.
-
Coat the terminals with dielectric grease or petroleum jelly.
-
Align the positive (red) battery cable with the positive terminal, then align the negative (black) battery cable with the negative terminal.
IMPORTANTYou must align all cable connections as shown in the image provided. Otherwise, the cable connections will interfere with the body plastics.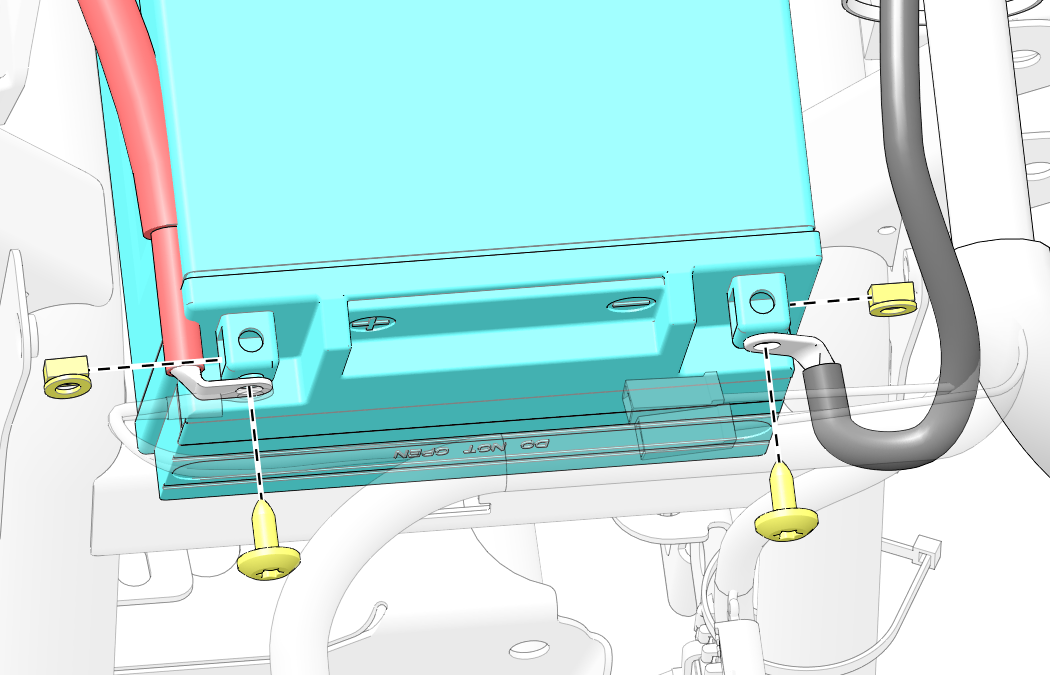
If your vehicle includes a winch, align the positive winch cable with the positive terminal, then align the negative winch cable with the negative terminal.
Once all cable connections are aligned, attach cables to the battery. Torque fasteners to specification.
TORQUEBattery Terminal Fasteners:
6 ft-lbs (8 N·m)
-
Install the battery hold-down strap and fasteners. Torque fasteners to specification.
TORQUEBattery Hold-Down Strap Fasteners:
4 ft-lbs (5 N·m)
-
Install the front cover Tuflock fastener and two screws. Torque screws to specification.
TORQUEFront Cover Screws:
30 in-lbs (3 N·m)
-
Install and secure the front storage compartment.
-
Close and secure the front rack.