Track Tension
Moving parts can cut and crush body parts. When performing the checks and adjustments recommended on the following pages, stay clear of all moving parts. Never perform track measurement or adjustments with the engine running.
Proper track tension adjustment is critical for proper snow bike handling. Always maintain proper track alignment and tension. Each track is slightly unique and will break-in a bit differently depending on where and how you ride.
Track tension warning signs:
-
Too loose: Track is skipping on the drivers.
-
Too tight: The rail sliders (hifax) are wearing quickly.
Measuring Track Tension
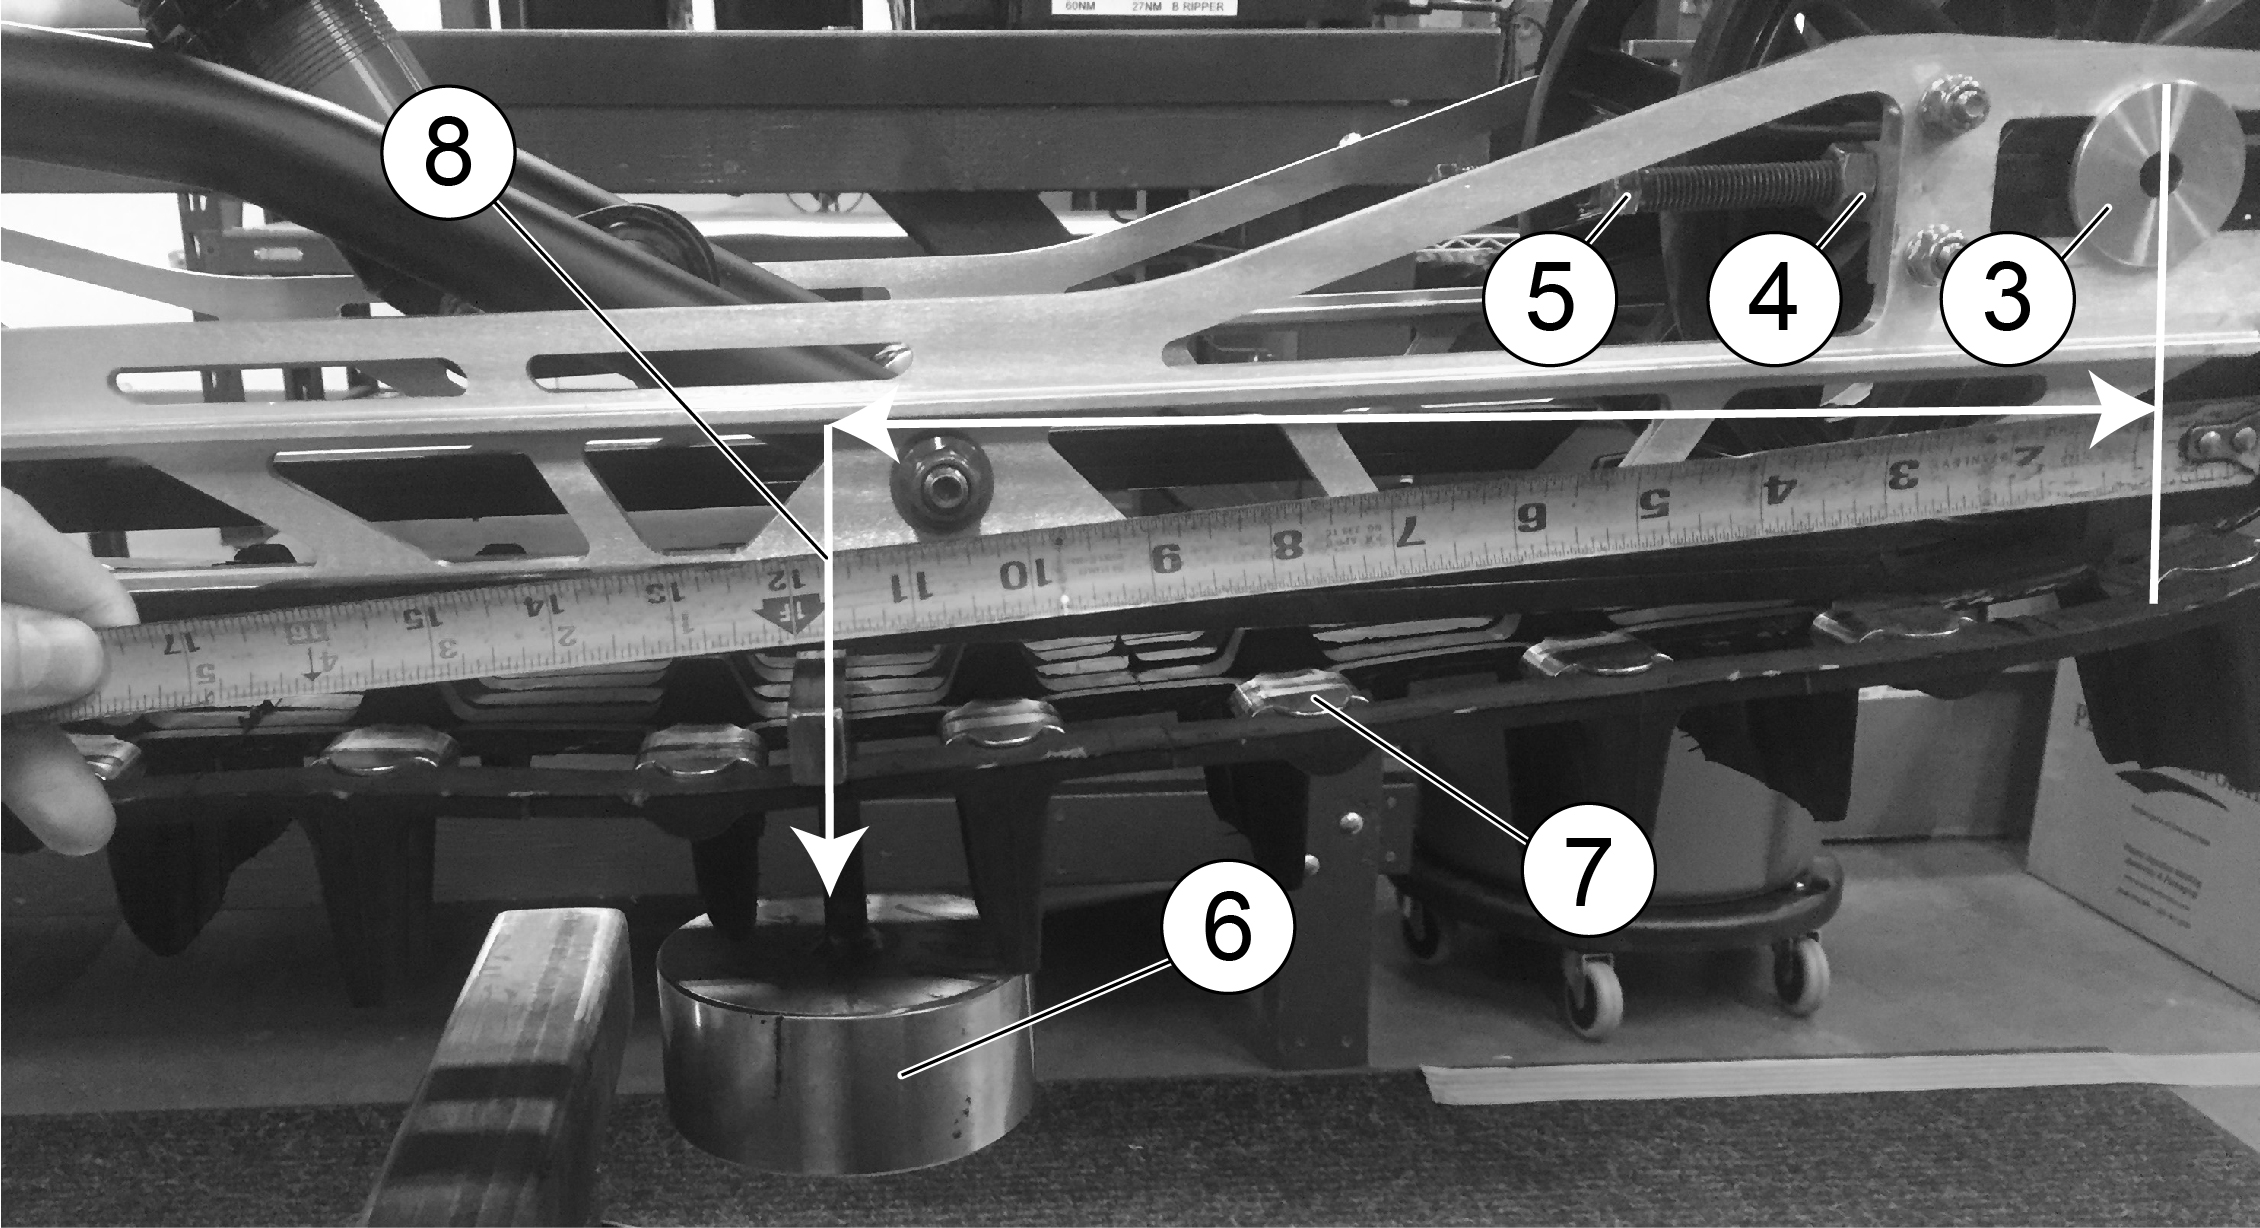
| TRACK TENSION DATA | |||
| SUSPENSION | PROPER SLACK MEASUREMENT | APPLIED WEIGHT | MEASUREMENT LOCATION - 8 |
| All Model Types | 3/4” to 1” | 10 lbs | 10” to 15” in front of the rear axle |
To measure track tension:
-
Using an appropriate hoist or stand, safely lift and support the rear of the snow bike off the ground.
-
Place the recommended weight 6 or downward pressure on the track at the measurement location 8 specified (see table).
-
At the measurement location 8, measure the vertical slack or space 9 between the bottom of the hifax 1 (i.e. rail slider) and the wear surface of the track clip 7. This is the slack measurement9.
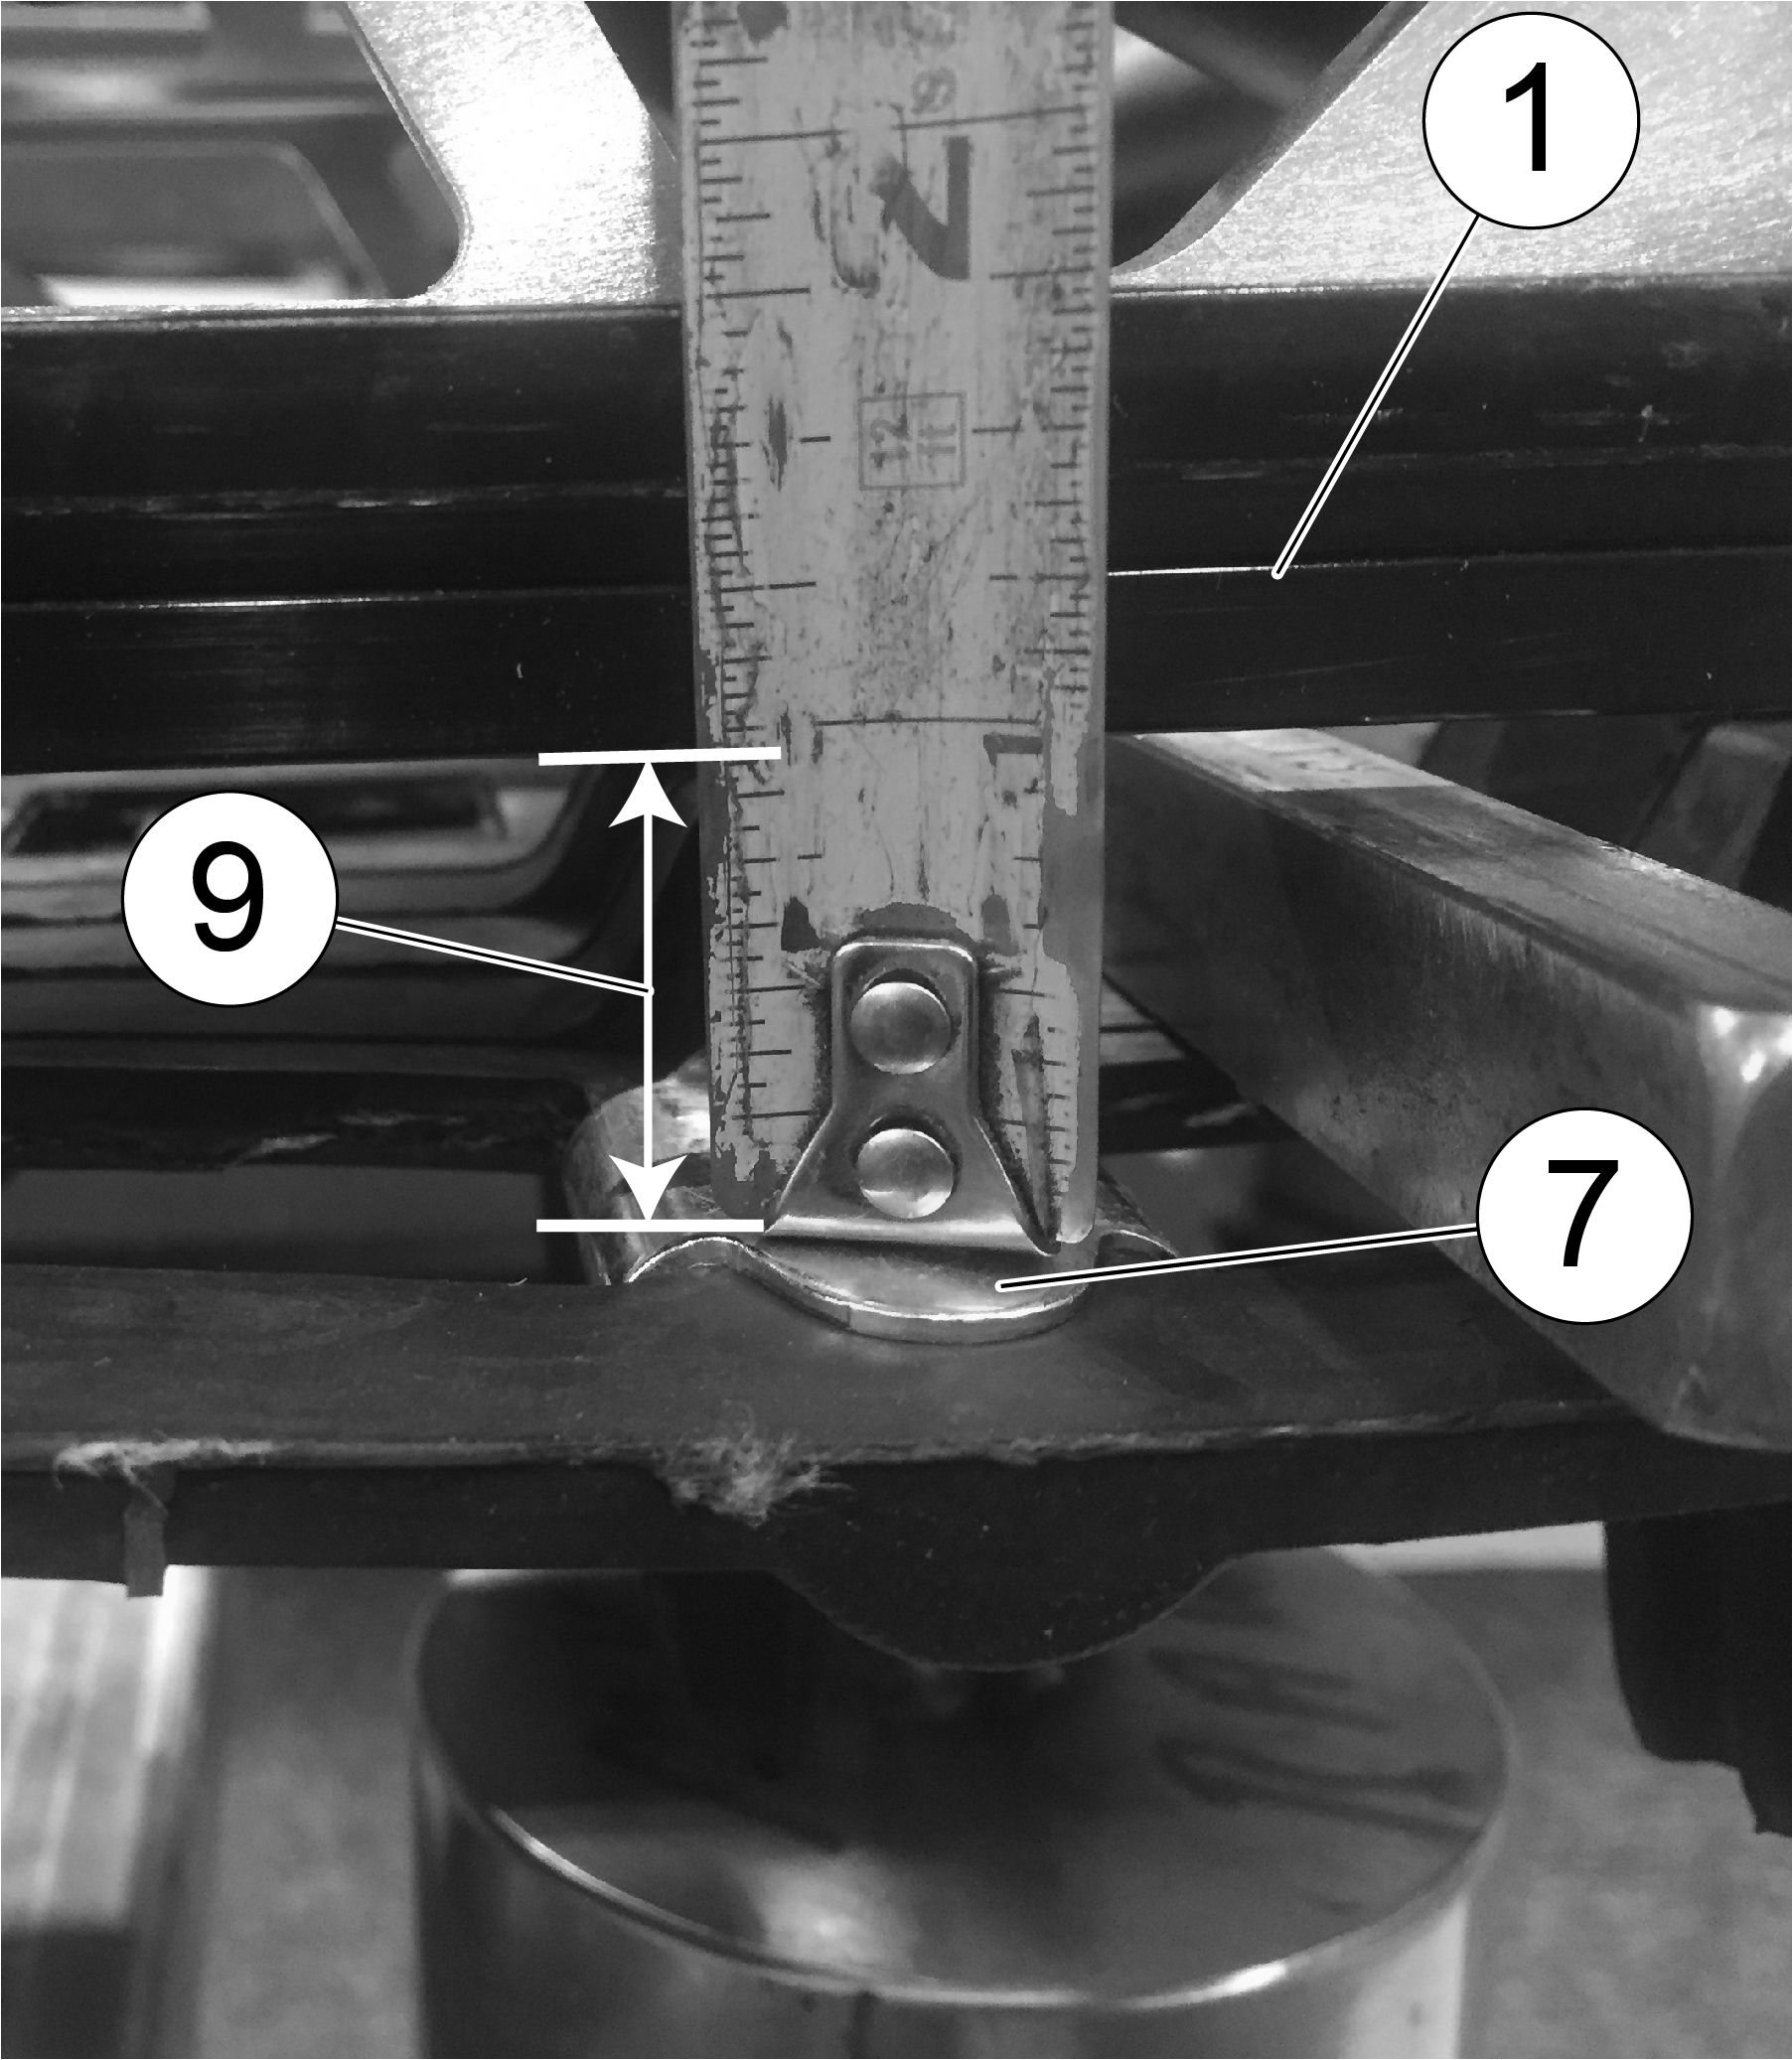
-
If the track is properly tensioned, the slack measurement 9 should be between 3/4” to 1” (as shown in the table).
If the slack measurement 9 is less or greater than the proper slack measurement ( 3/4” to 1”), the track tension should be adjusted (see the following section, Adjusting Track Tension).
Adjusting Track Tension
Measure track tension to be sure adjustment is needed.

-
With the rear of the bike off the ground and properly supported by a stand, loosen the axle bolt 3 on the track tensioning block.
-
Loosen the adjustment bolt’s jam nut 4.
-
Then tighten or loosen the tension adjustment bolt 5, a half-turn at a time on both the right and left side of the bike. Turn the adjustment bolts the same amount on both sides of the track to tension the track evenly and keep the track aligned (track alignment should be performed before measuring and adjusting track tension).
Turning the adjustment bolts 5 on each side of the bike to the right will push the rear axle 3 back and tighten track tension.
Turning the adjustment bolts 5 on each side of the bike to the left will allow the rear axle 3 to move forward toward the front of the bike putting less tension on the track.
-
Re-tighten the adjustment bolt’s jam nut.
-
Torque the axle bolt once again.
TORQUEAxle Bolt
36.9 ft-lbs (50 N·m) -
With the bike still secure and the track off the ground, rotate the track several times by hand or by running the engine in gear for several seconds. Then stop or turn the bike off. (It takes several track revolutions for track adjustment to take effect.)
-
Measure the track tension again (see Measuring Track Tension).
If the slack measurement 9 is within the proper slack measurement range, your track tension is set properly.
If the tension is still too loose or too tight, repeat the steps above until your track tension is set properly.
-
Once the track tension is set, check to ensure the track is still properly aligned. To check and adjust track alignment, see the Track Alignment section.