Quick Drive Belt Inspection & Adjustment
-
Do not crimp or bend the belt to a diameter less than the upper sprocket.
-
Do not bend the belt beyond how it would bend over a sprocket or the idler.
-
Do not back-bend the belt.
-
Do not twist or flip the belt.
Folding, twisting, or otherwise manipulating the belt in a way not intended will cause damage to the belt and decrease its strength and life.
Belt debris during break in of a new belt is normal, clean with a dry cloth, or soft bristle brush.
Quick Drive Belt Inspection
-
Inspect Quick Drive belt at 10–hour intervals. Inspect more often if under extreme use.
-
Check for excessive wear including frayed edges, missing cogs, or cracks.
-
Replace belt if excessive wear is found.
-
Check tension measurement. Belt deflection should be between 1/4 and 1/2 inches when a 10–pound force is applied to the center of the long span. See Belt Adjustment section for details.
Belt Adjustment
-
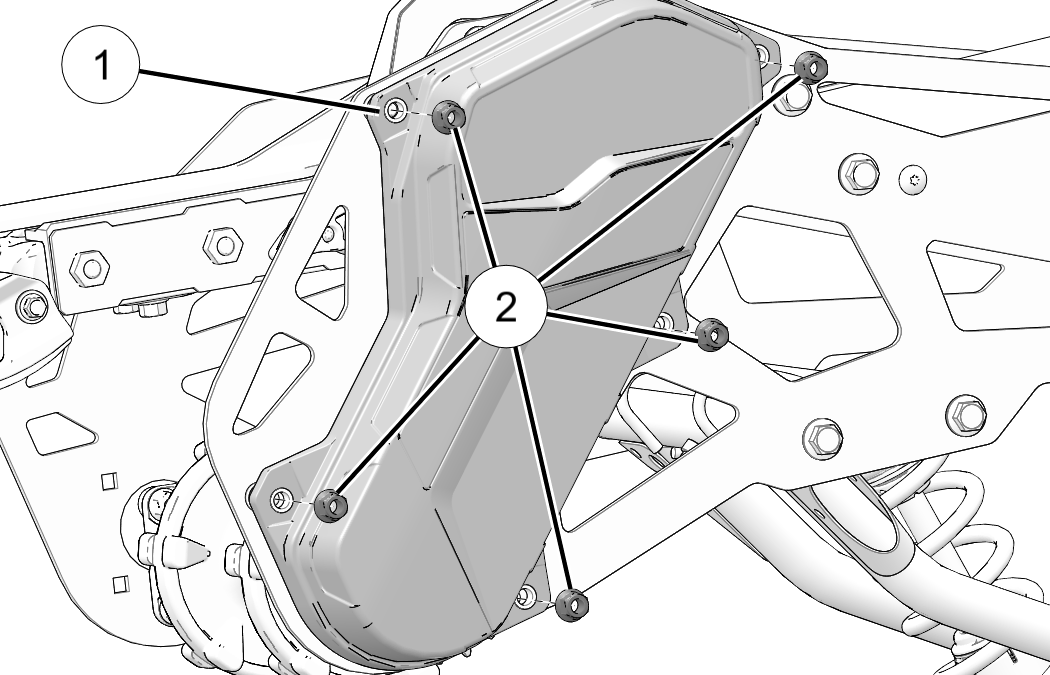
Remove the Quick Drive cover 1 and cover nuts 2.
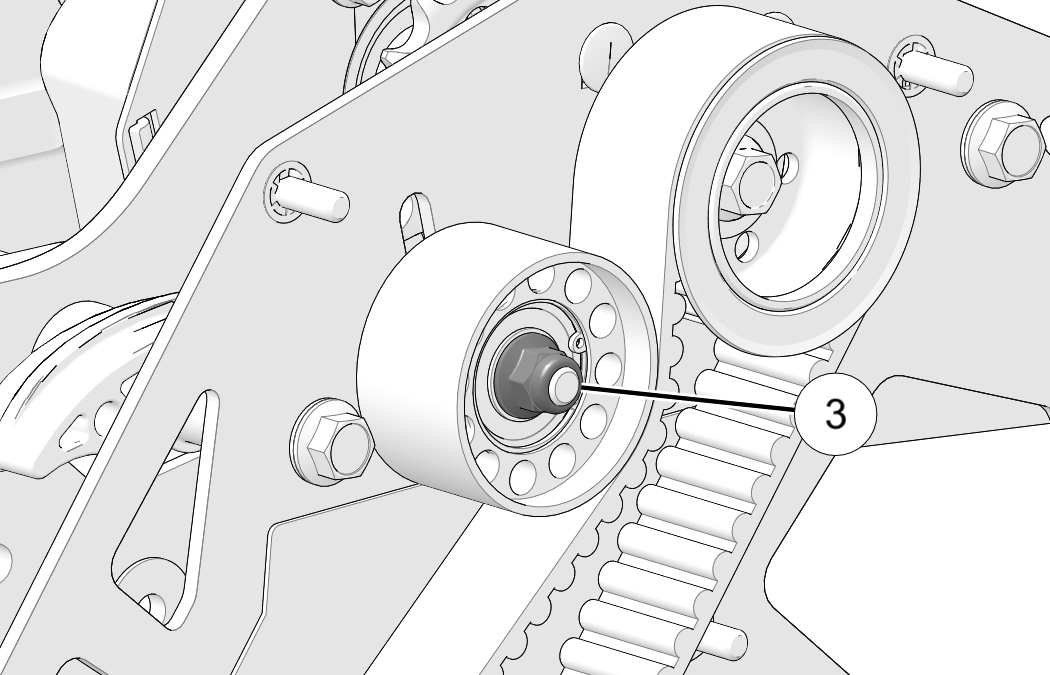
- Loosen idler pulley mount nut 3.
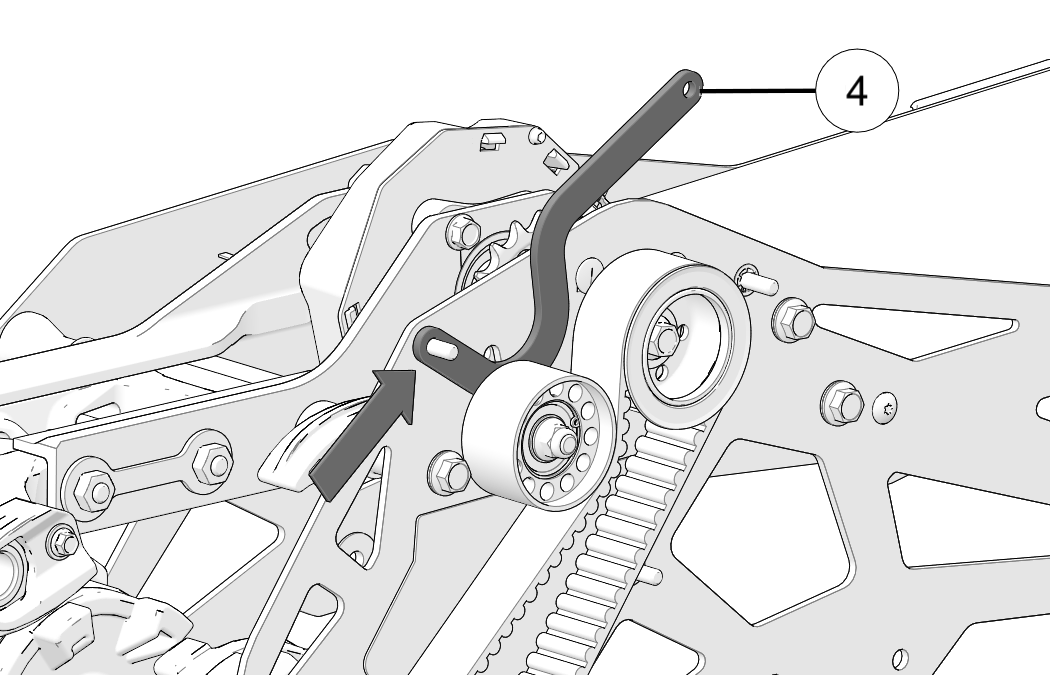
- Install belt adjust tool 4 onto cover mounting stud.
-
Push belt adjustment tool 4 down to set belt tension.
NOTICEMake sure belt tool is pushing on idler mount and not the pulley.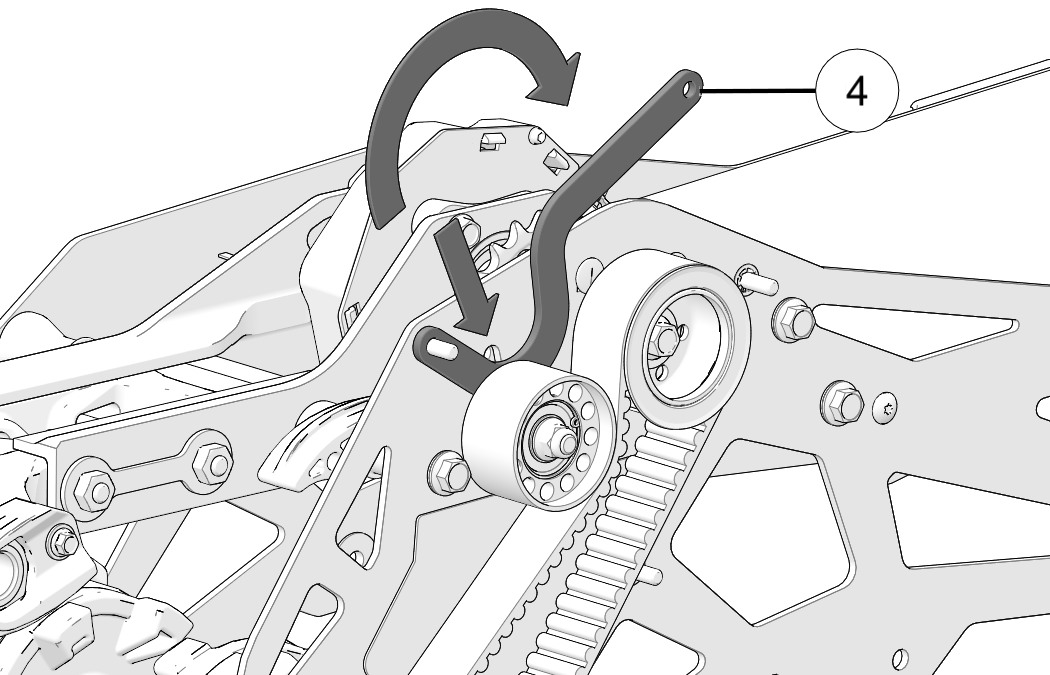
-
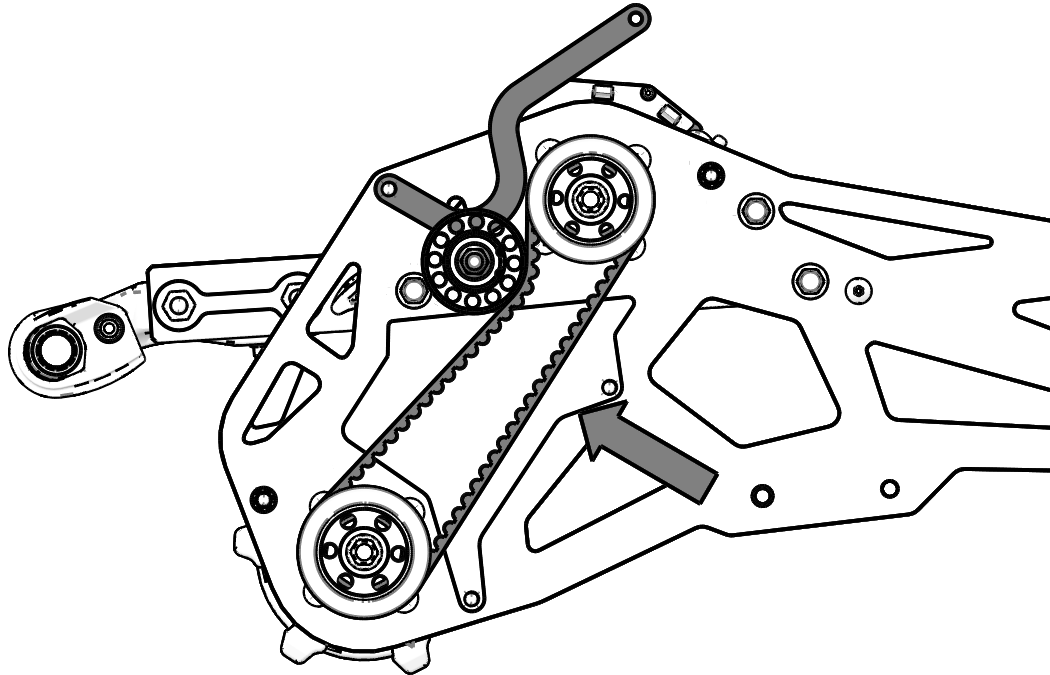
To check belt tension, make sure the bike is in neutral and the brake is released. Apply 10 pounds of tension to the belt in the position indicated by the arrow and measure deflection. Adjust as necessary.
MEASUREMENTBelt Deflection (Inspection)
0.25–0.5 in (6.35–12.7 mm)
New Belt Install Specification
0.18–0.20 (4.6-5.1 mm) Deflection
Used Belt Install Specification
0.25–0.30 in (6.4-7.6 mm) Deflection
- Torque the idler nut 3 to specification.
TORQUE
Idler Nut
44 ft-lbs (60 N·m)
-
Install the Quick Drive cover 1. Install five nuts 2. Torque to specification.
TORQUECover Nuts
18.4 ft-lbs (25 N·m)