Halogen Pod Headlight Replacement
(If Equipped)
-
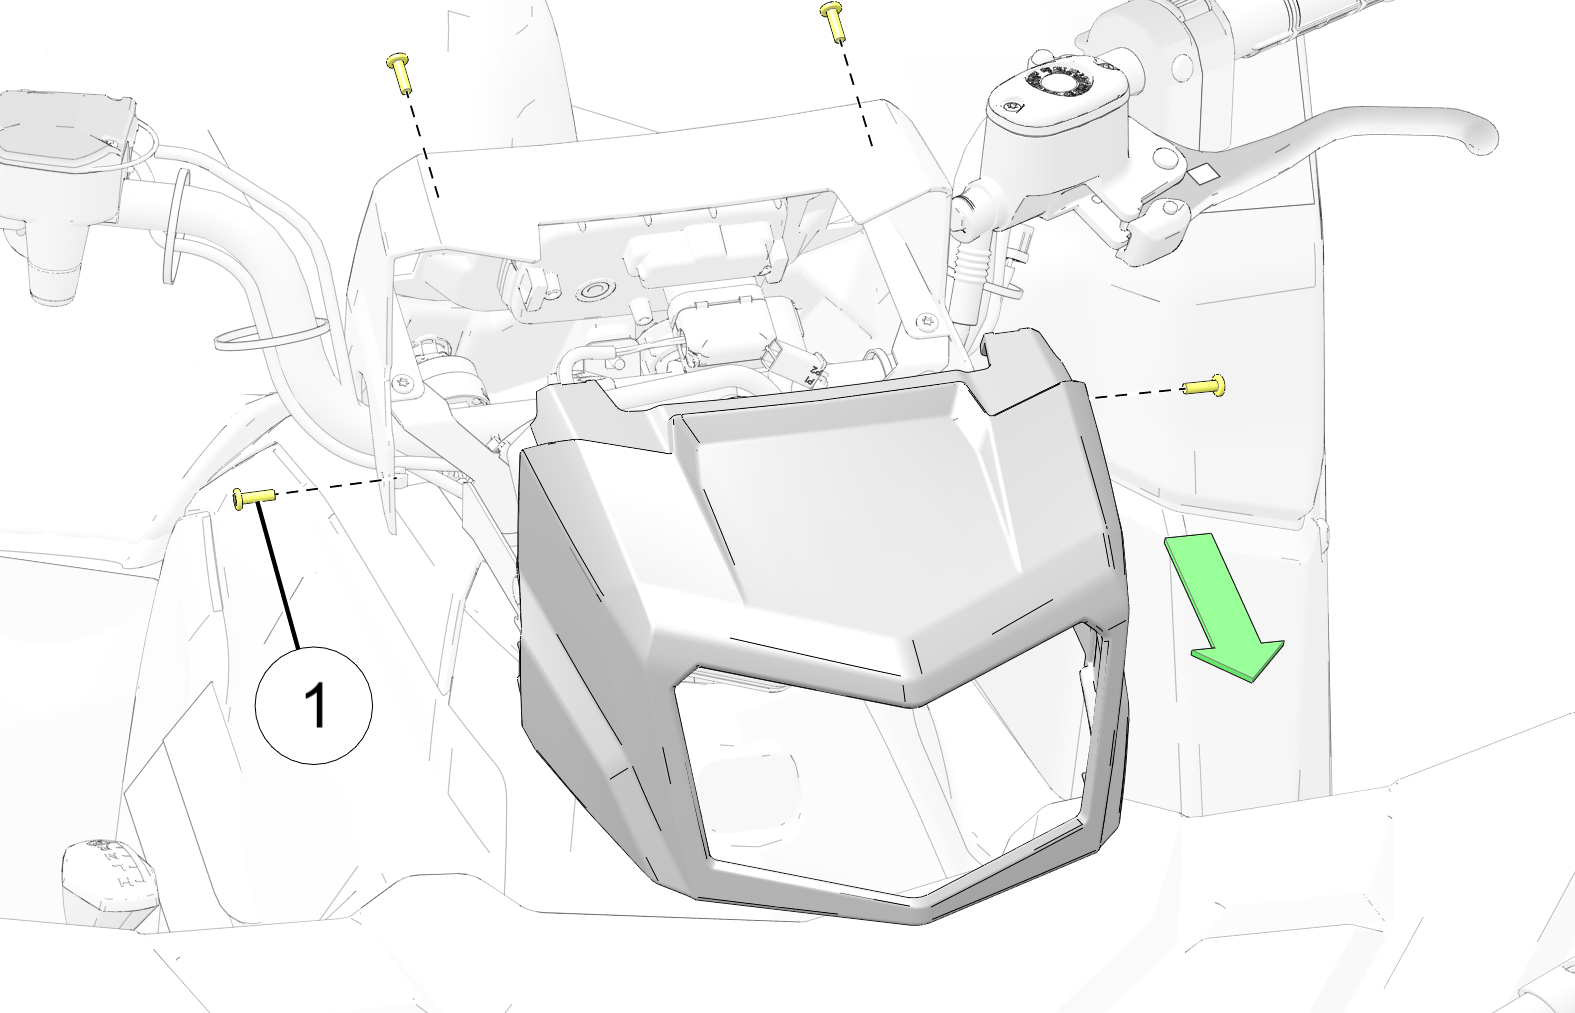
Remove the four headlight pod screws 1 and remove the front half of the pod from the vehicle.
-
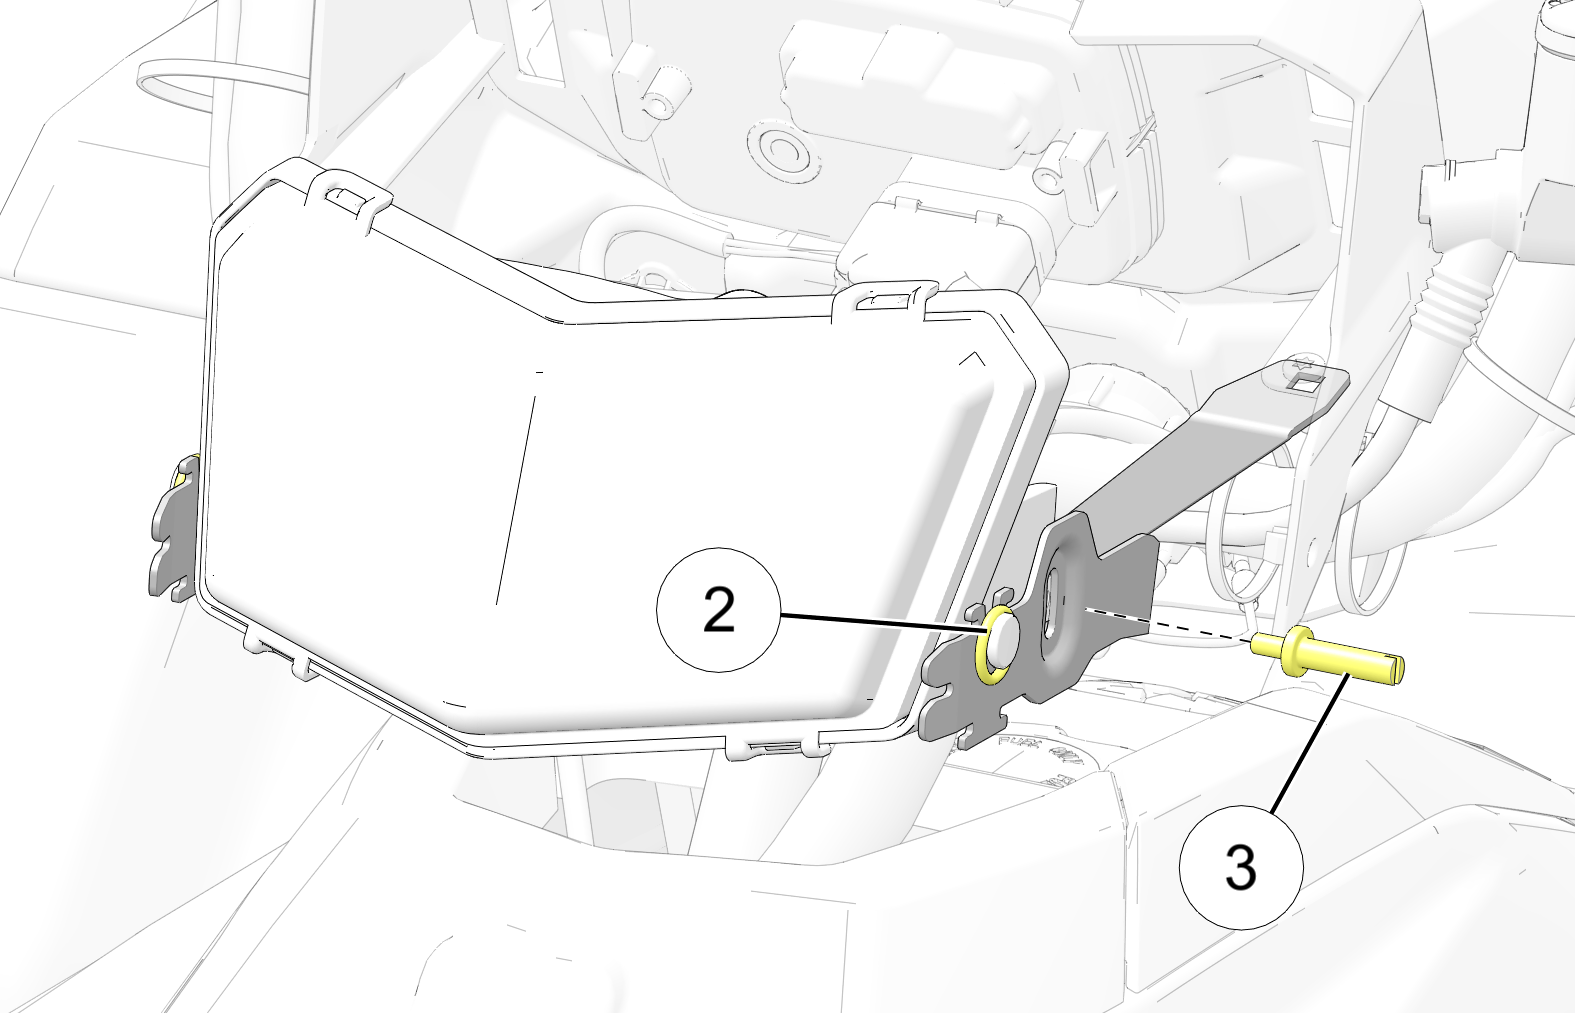
Remove each rubber o-ring retainer 2 on each side of the pod bracket and remove the headlight adjuster screw 3.
 NOTICE
Be mindful of o-ring orientation for reinstallation. Image shows o-ring in relaxed state.
-
Disconnect the main wiring harness 4 from the back of the headlight housing.
IMPORTANTBe sure to pull on the connector and not the wiring.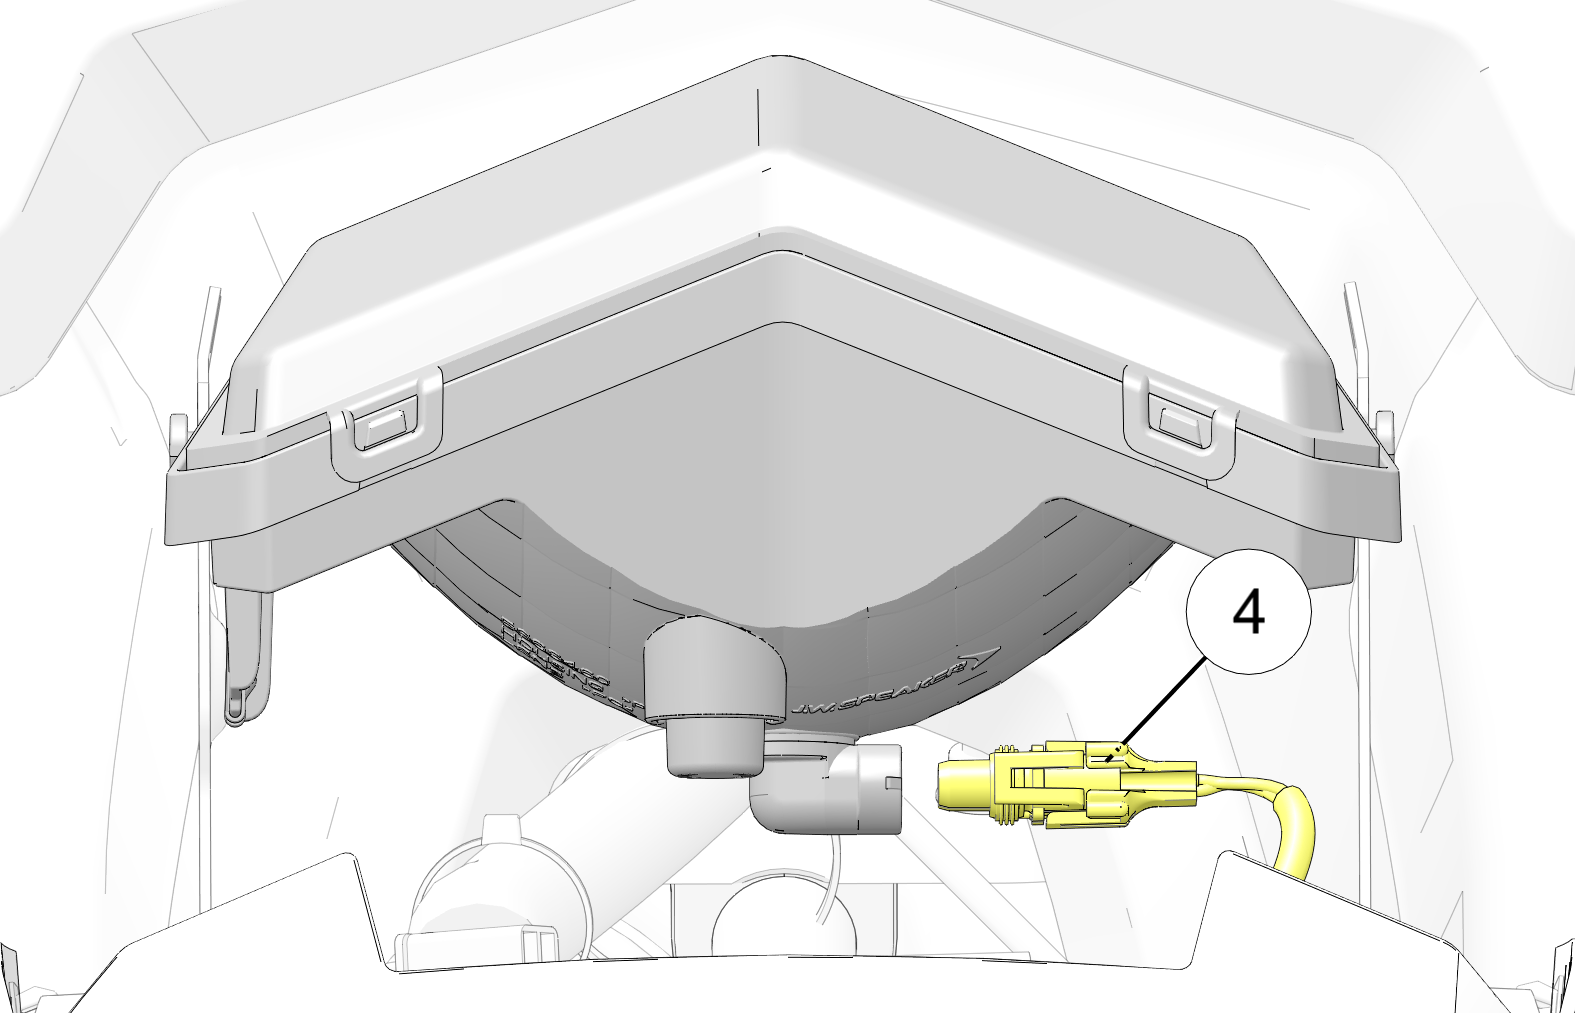
-
Lift the headlight housing out of the vehicle to remove it.
-
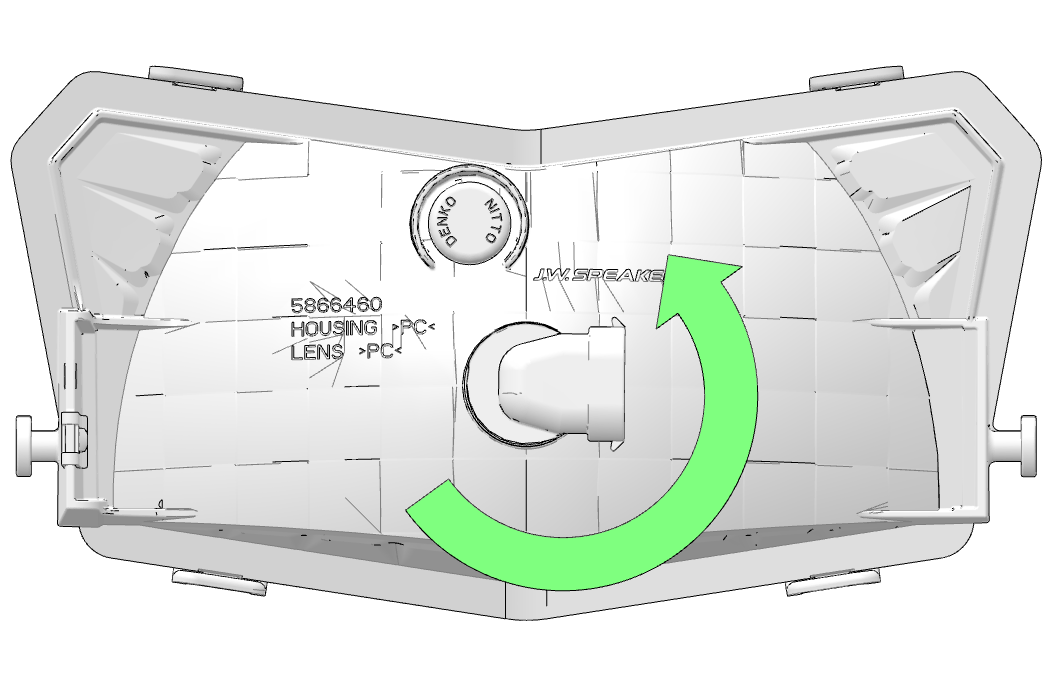
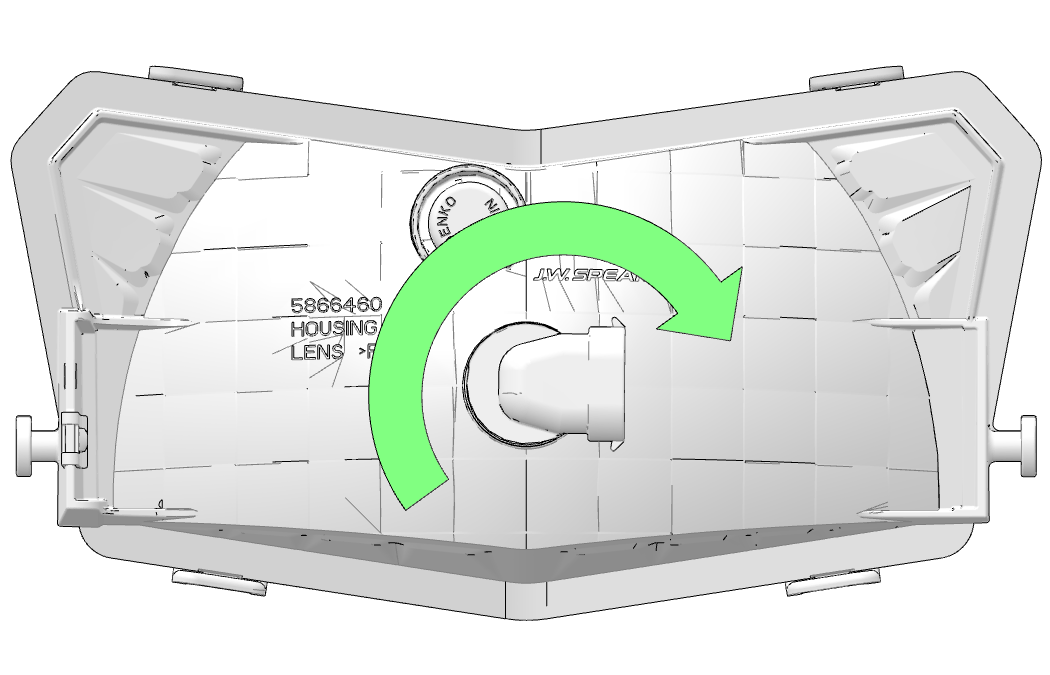
Turn the lamp socket counter-clockwise to remove it from the headlight housing.
-
Apply dielectric grease to the socket and install a new lamp. Turn the lamp socket clockwise to secure the lamp into place.
-
Connect the main wiring harness to the back of the headlight housing.
-
Reassemble the pod. Torque screws to specification.
TORQUEHeadlight Pod Screws:
10 in-lbs (1 N·m)
-
Adjust the headlight if needed.