Rider Information Center
Clock Mode
-
Turn the key to the ON position.
-
Press and hold the MODE button to enter the Options Menu.
-
Press the UP or DOWN arrows to toggle to the “CLOCK” menu option, then press MODE.
-
Use the UP or Down arrows to cycle through the different digit or setting options (12HR vs. 24HR, for example). Once the desired digit or setting is found, press the MODE button to set.
-
Continue the process outlined in Step 4 until the options have cycled back to the “CLOCK” menu. Use the UP or DOWN arrows to choose other Options Menu items, or press MODE to cycle through clock settings again.
-
To exit the OPTIONS Menu, hold the MODE button momentarily or press no buttons for 10 seconds.
Odometer Mode
The odometer records and displays the distance traveled by the ORV.
Trip Meter Mode
The trip meter records the distance traveled by the ORV if reset before each trip. To reset, select the trip meter mode. Press and hold the Up or Down arrow to initiate the reset.
Hour Meter Mode
This mode logs the total hours the engine has been in operation.
Programmable Service Interval
When the hours of engine operation equal the programmed service interval setting, the wrench icon will flash for 5 seconds each time the engine is started. When this feature is enabled, it provides a convenient reminder to perform routine maintenance. The service interval is programmed at 25 hours at the factory. Use the following procedure to change the service interval.
-
Press the MODE button until remaining service hours display.
-
Press and hold the MODE button.
-
When the service hours flash, press and release the MODE button to advance the hours to the desired setting (including OFF). Press and hold the MODE button to set the new service hour interval.
Diagnostic Display Mode
The EFI diagnostic display mode is for informational purposes only. Your POLARIS dealer can provide for all major repairs.
The diagnostic mode is accessible only when the check engine warning indicator activates after the key has been turned on. Leave the key on if you want to view the active code (failure code).
The diagnostic mode becomes inaccessible if the key is turned off and on and the warning indicator is no longer active. This allows the determination of persistent as well as intermittent faults.
Inactive codes are stored in the history of the unit.
Engine Error Codes
The error screen displays only when the CHECK ENGINE light is on or when it goes on and off during one ignition cycle. Error codes are not stored in the gauge when the key is turned off. The code and message is lost, but will reappear if the fault reoccurs after restarting the engine.
If the CHECK ENGINE light illuminates, retrieve the error codes from the display.
| 1 Failure Mode Indicator (FMI) | 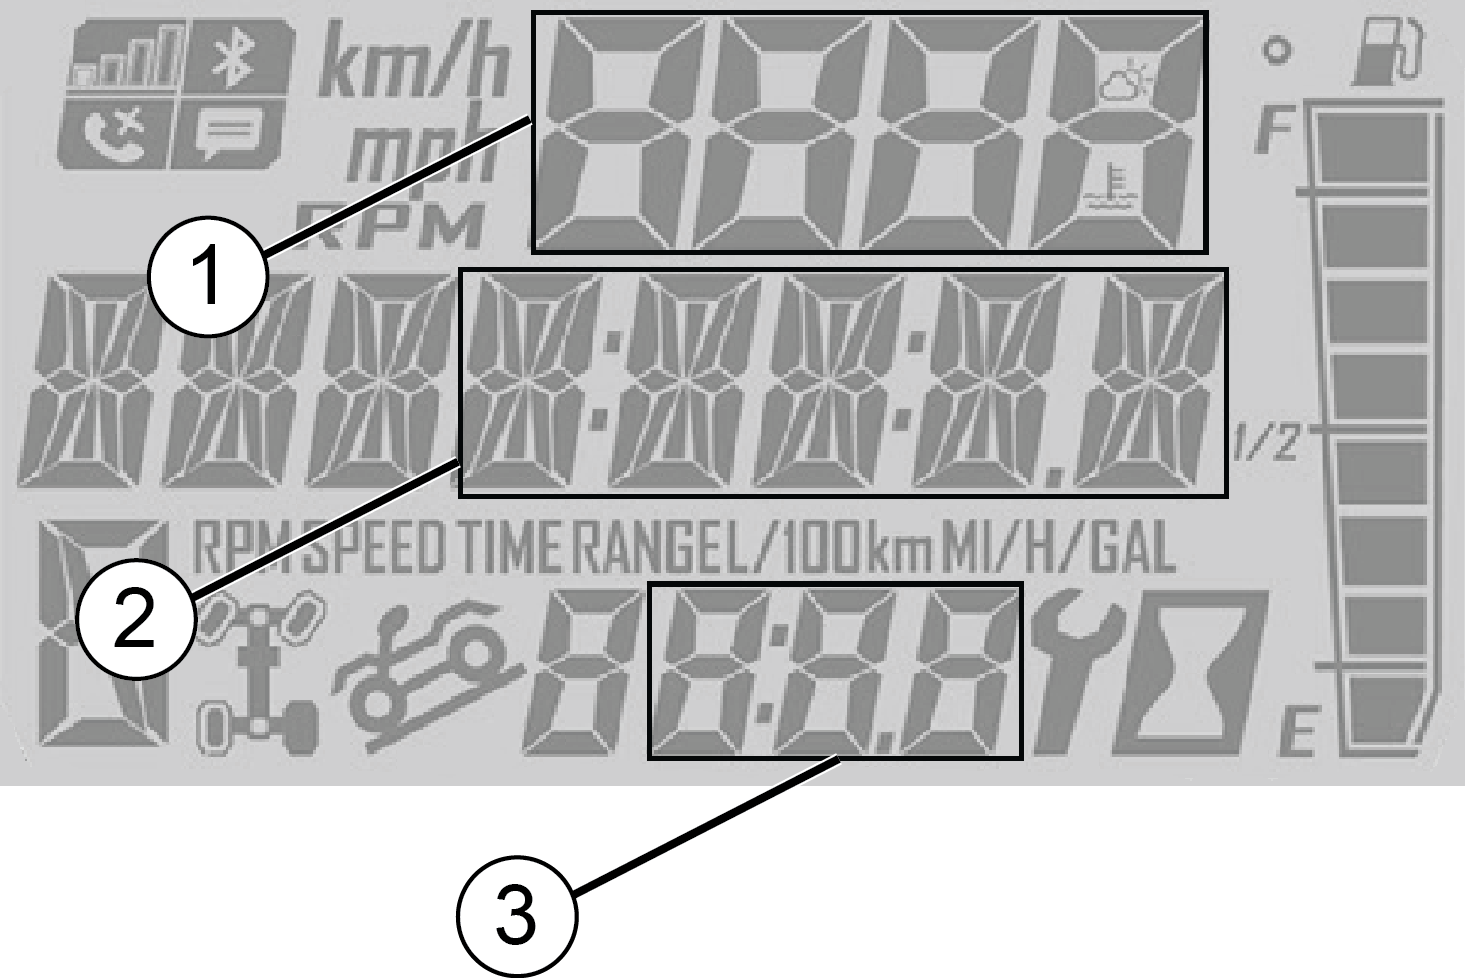 |
| 2 Suspect Parameter # (SPN) | |
| 3 Count Display |
-
Press and hold the MODE button to enter the OPTIONS menu and use the UP or DOWN arrows to access the DIAGCODE option.
-
Use the UP or DOWN arrows to display active and historic fault codes.
-
Your authorized POLARIS dealer can provide code details and diagnosis.