Belt Installation
Be sure to install belt in the same direction as it was removed.
-
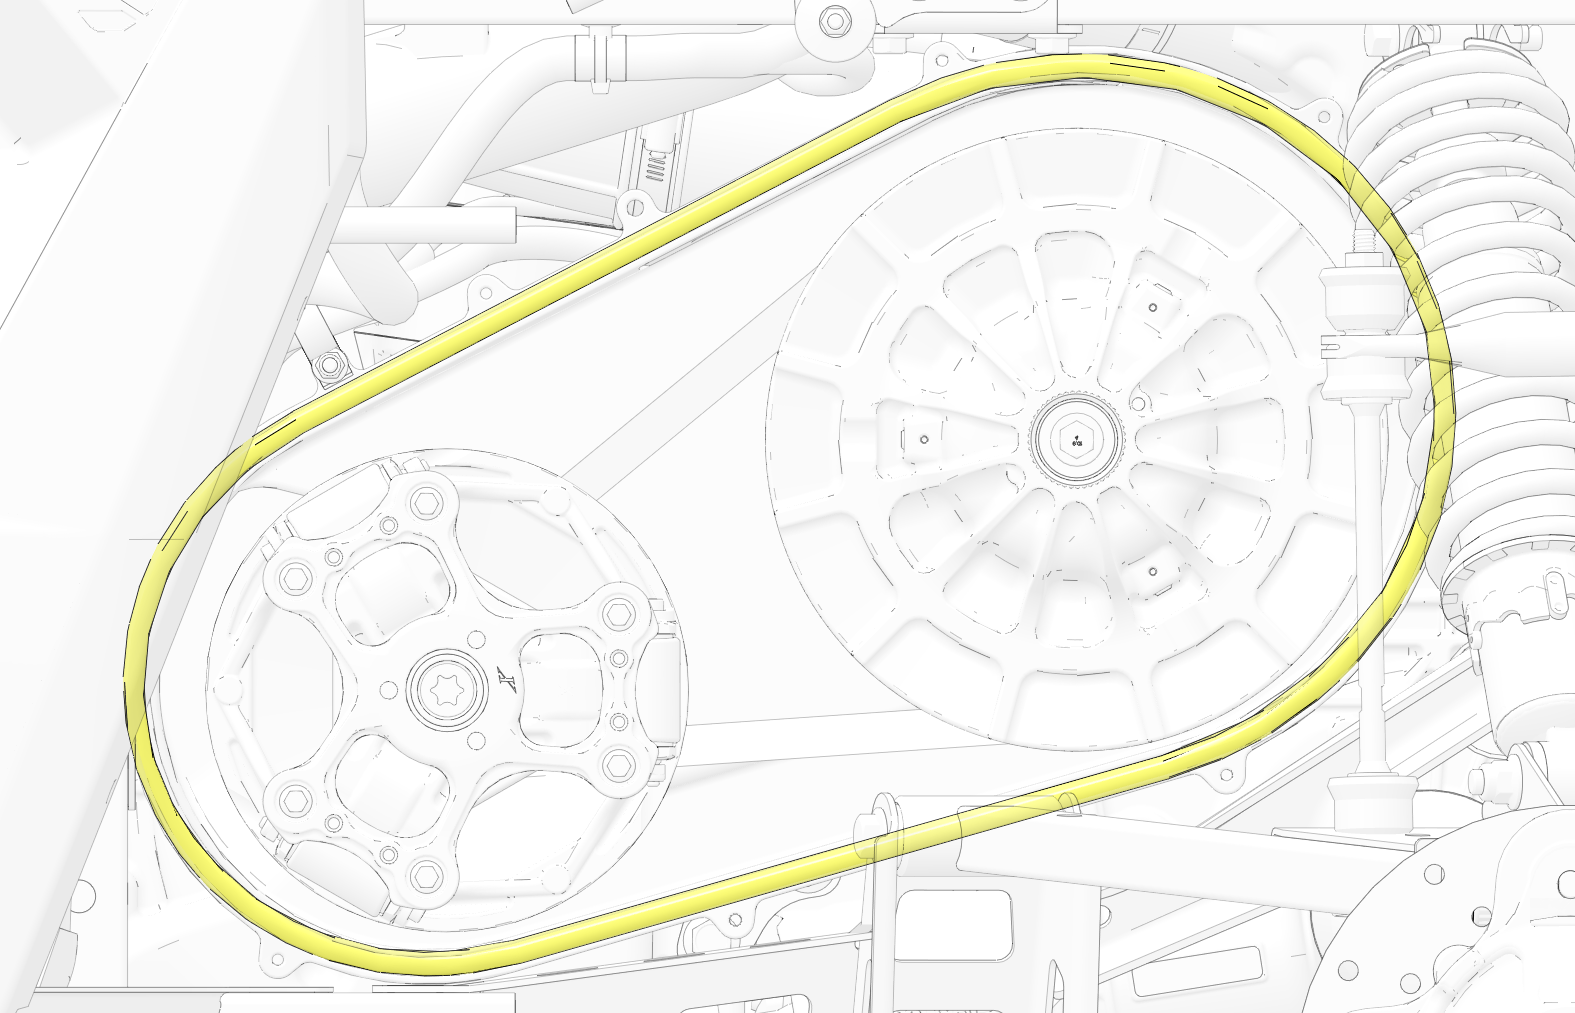
With the clutch spreader tool installed, loop the belt over the drive clutch and over the driven clutch.
-
Rotate the driven clutch and walk the belt into the clutch.
-
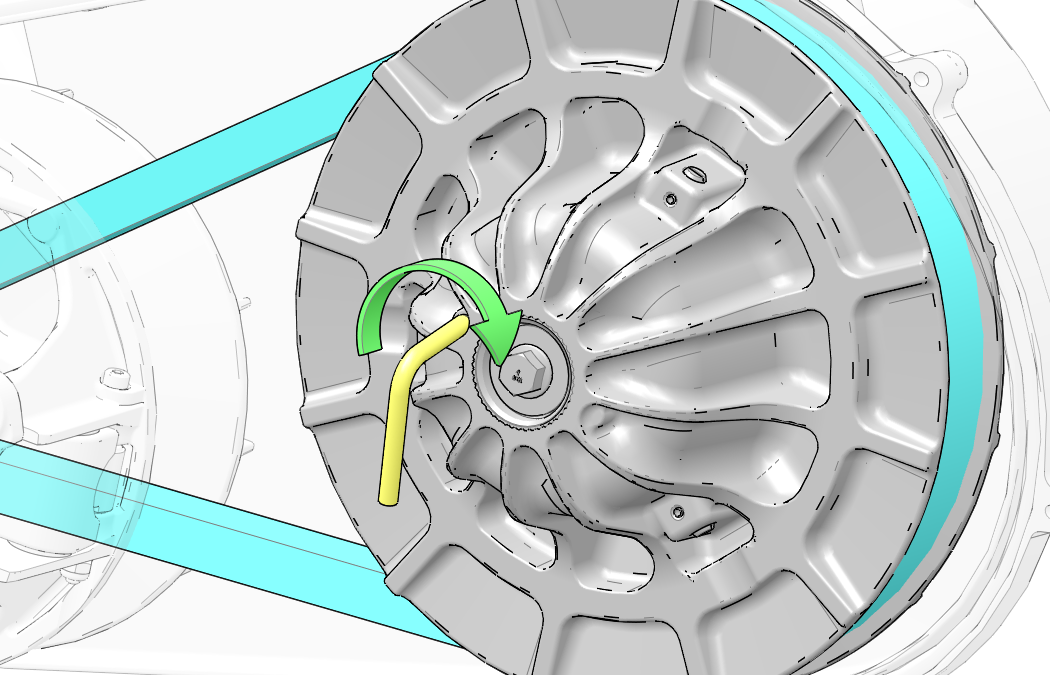
Turn the clutch spreader tool counterclockwise to remove from the driven clutch.
-
Rotate / spin the driven clutch and belt approximately 5-7 times to properly seat the belt in the driven clutch.
-
Remove any debris found in the clutch ducting before reassembly.
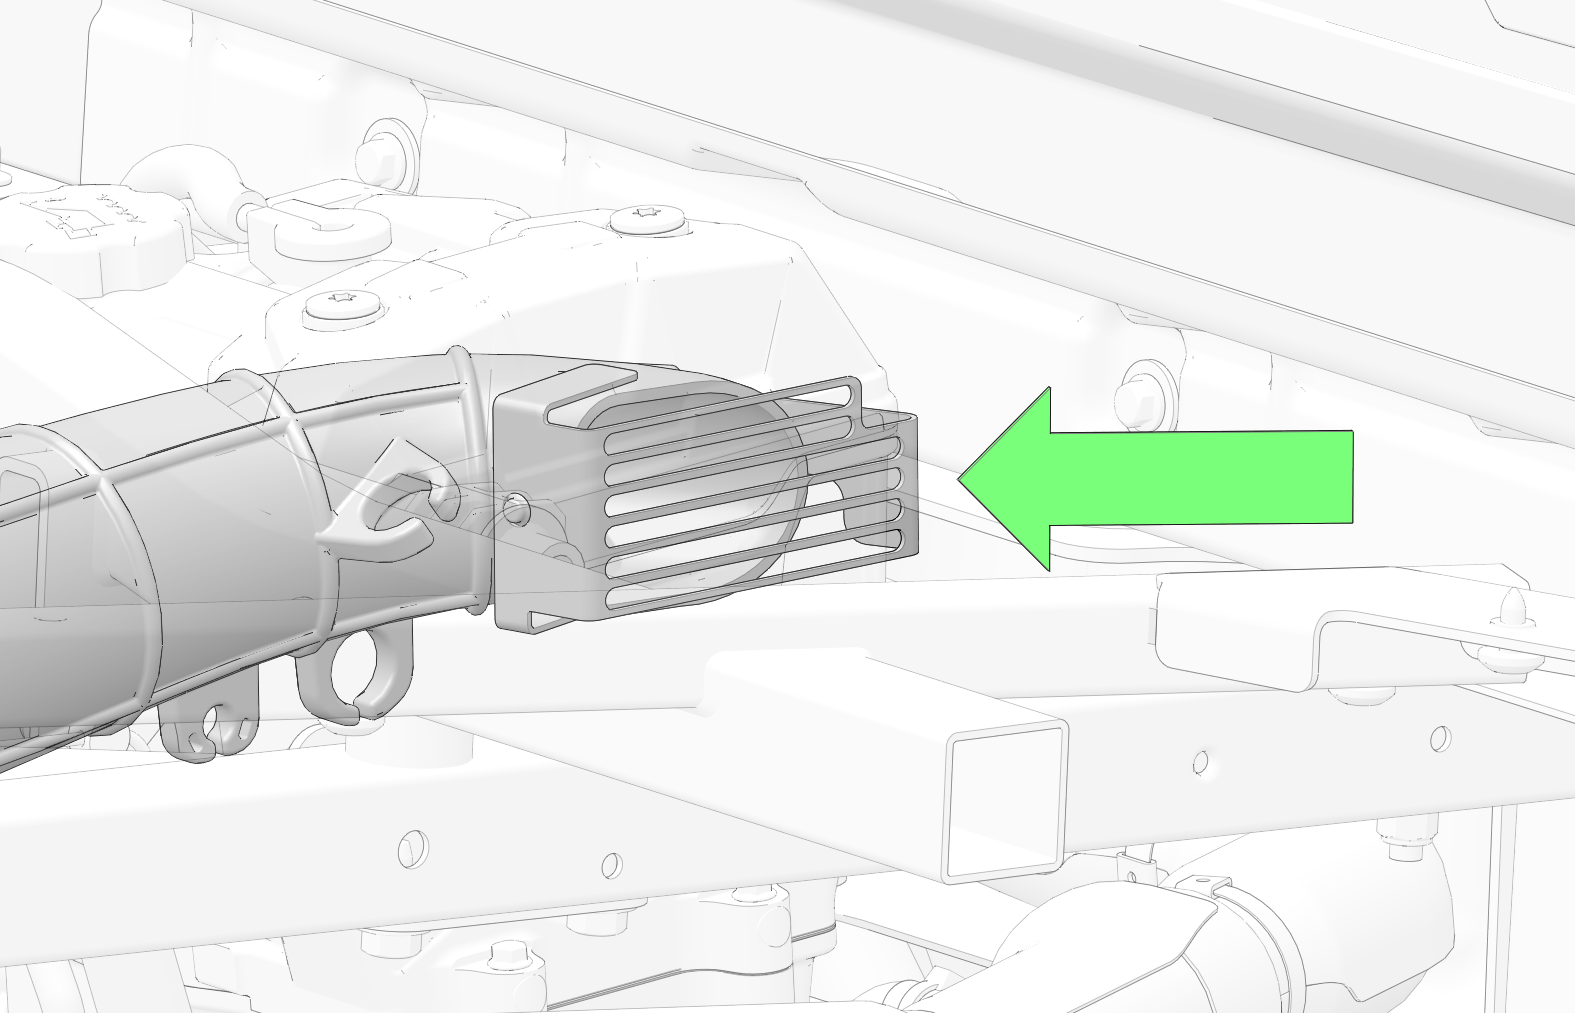 NOTEUse care when installing the clutch cover. Do not damage cover, intake boot, or electrical harness.
 -
Make sure the PVT cover seal is fully seated and inspect for damage. Replace if necessary.
-
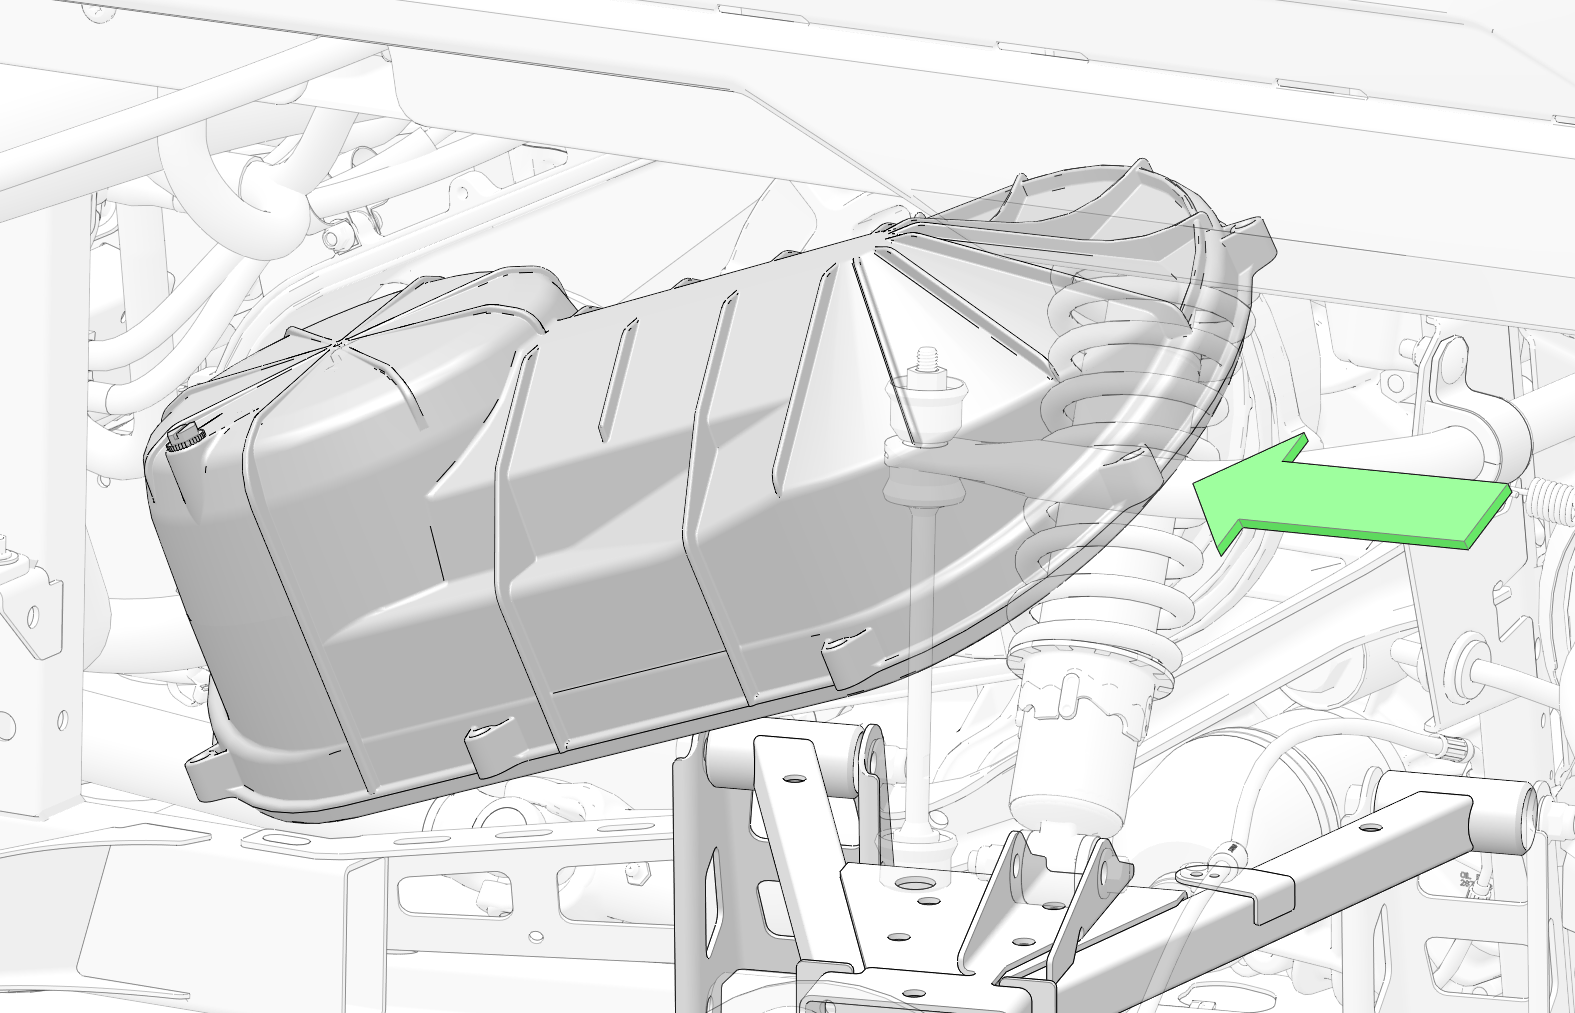
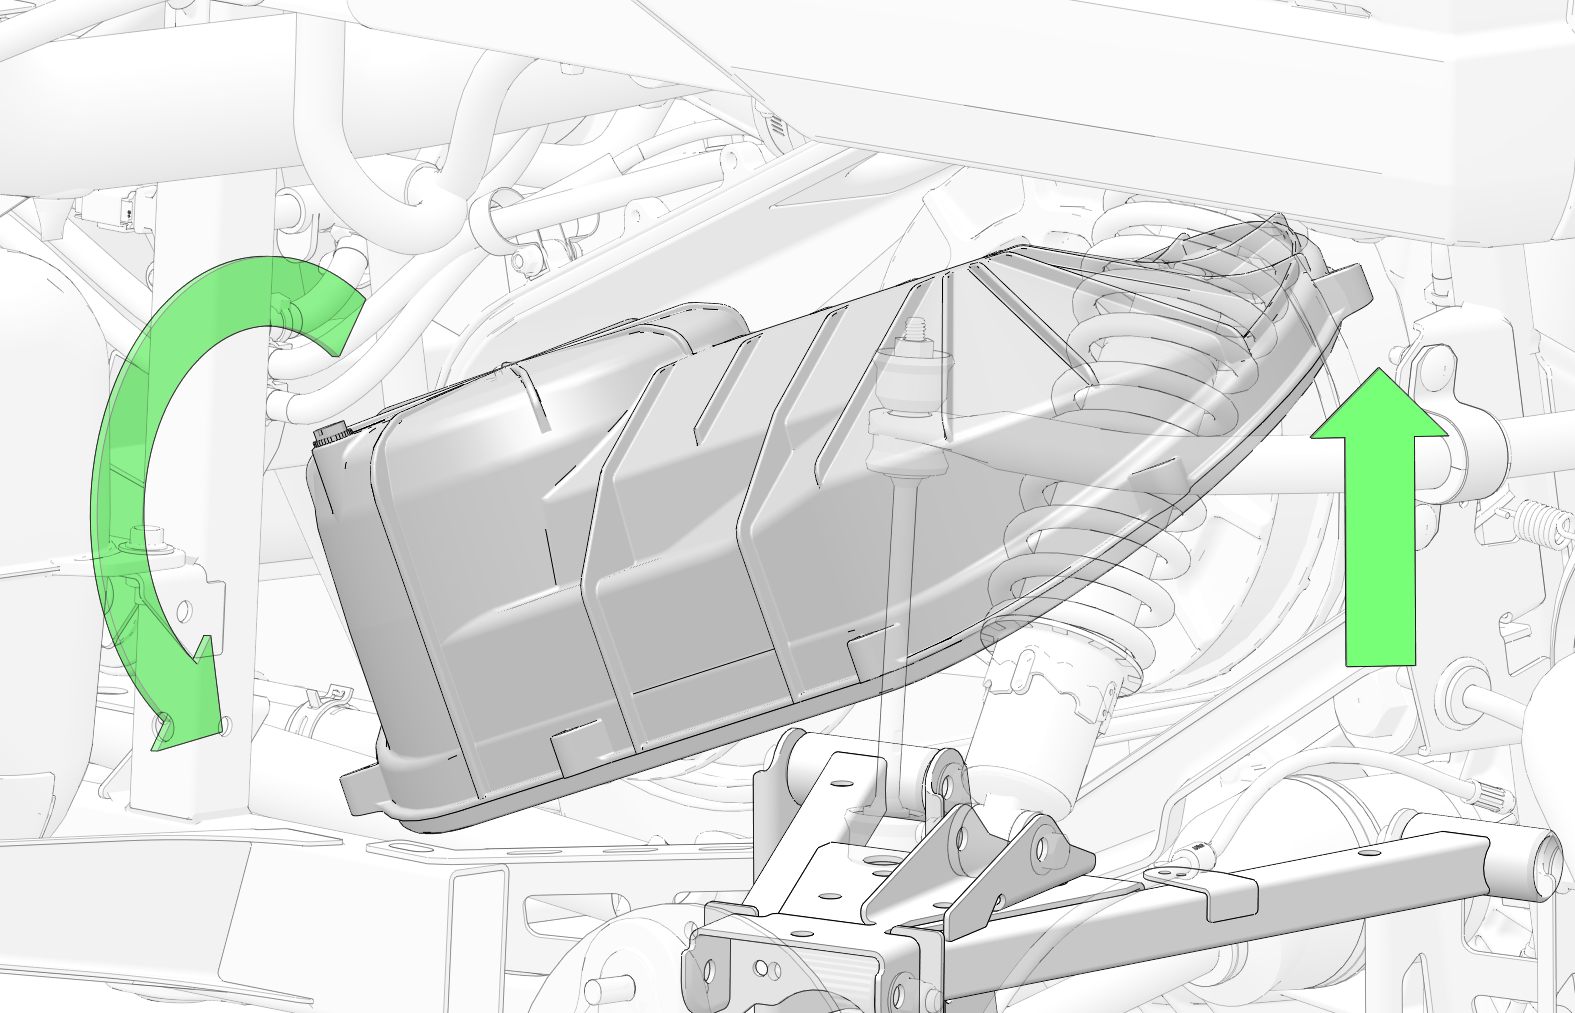
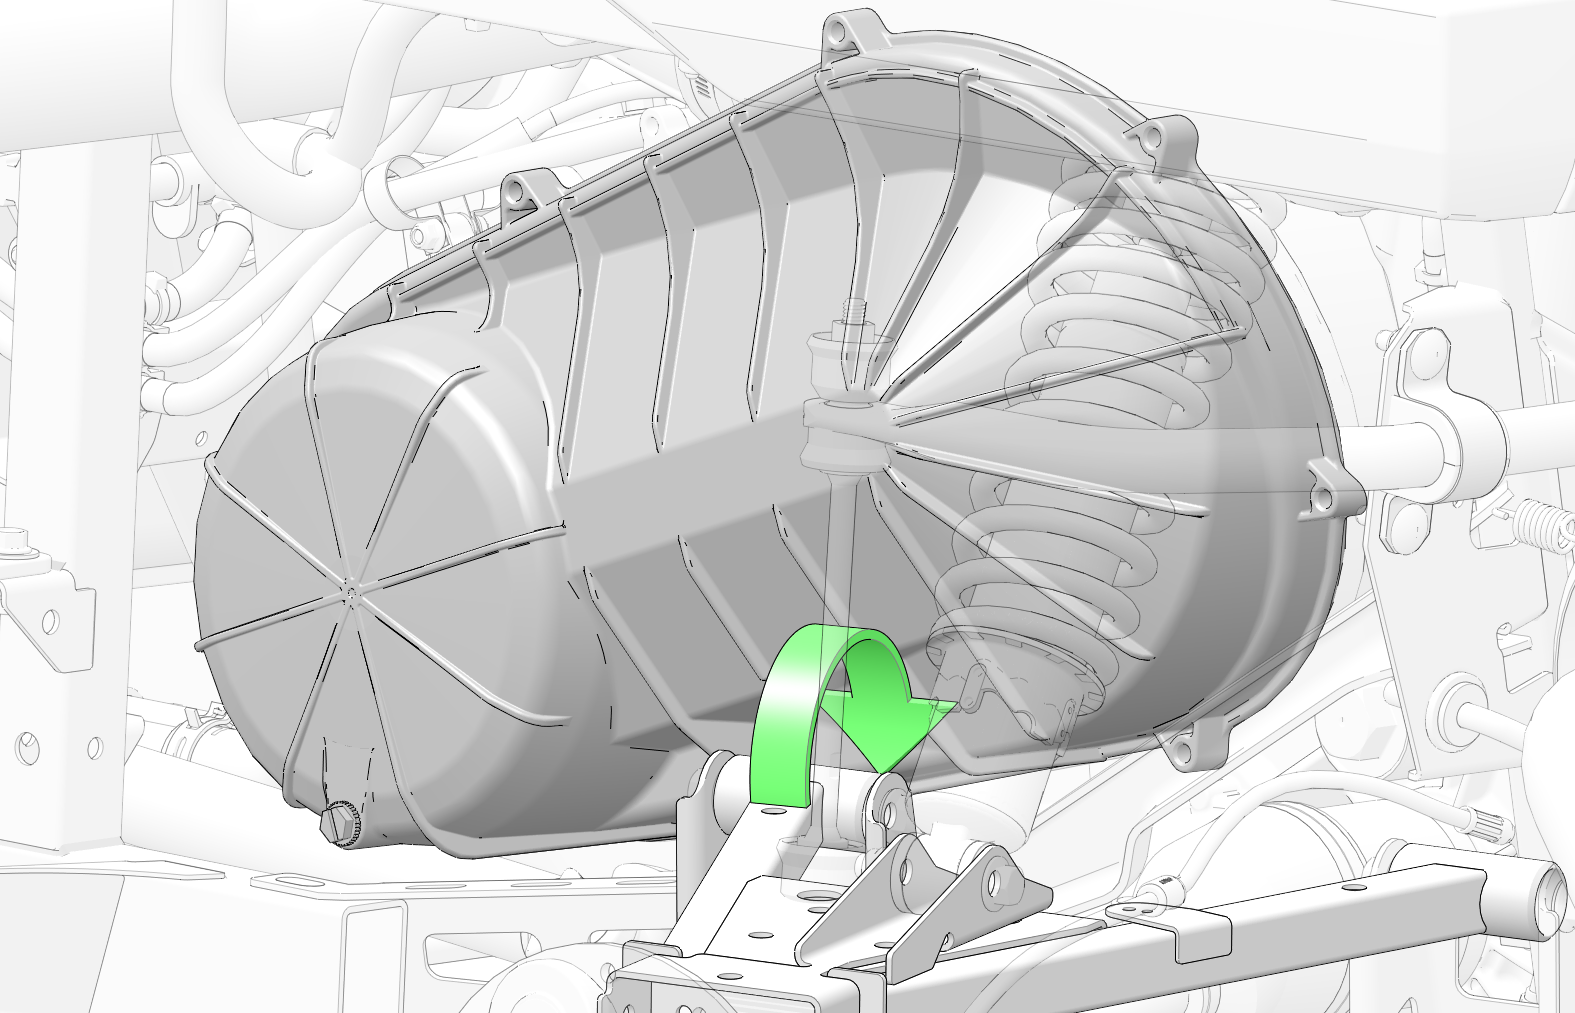
Install the cover into the vehicle and rotate counter-clockwise.
-
Lift the rear of the cover up to the A-arm while simultaneously rotating it away from the engine.
-
Lift the cover over the A-arm assembly and line it up with the mounting holes.
-
Install the eight bolts 1 that secure the outer PVT cover to the vehicle. Torque the bolts to specification.
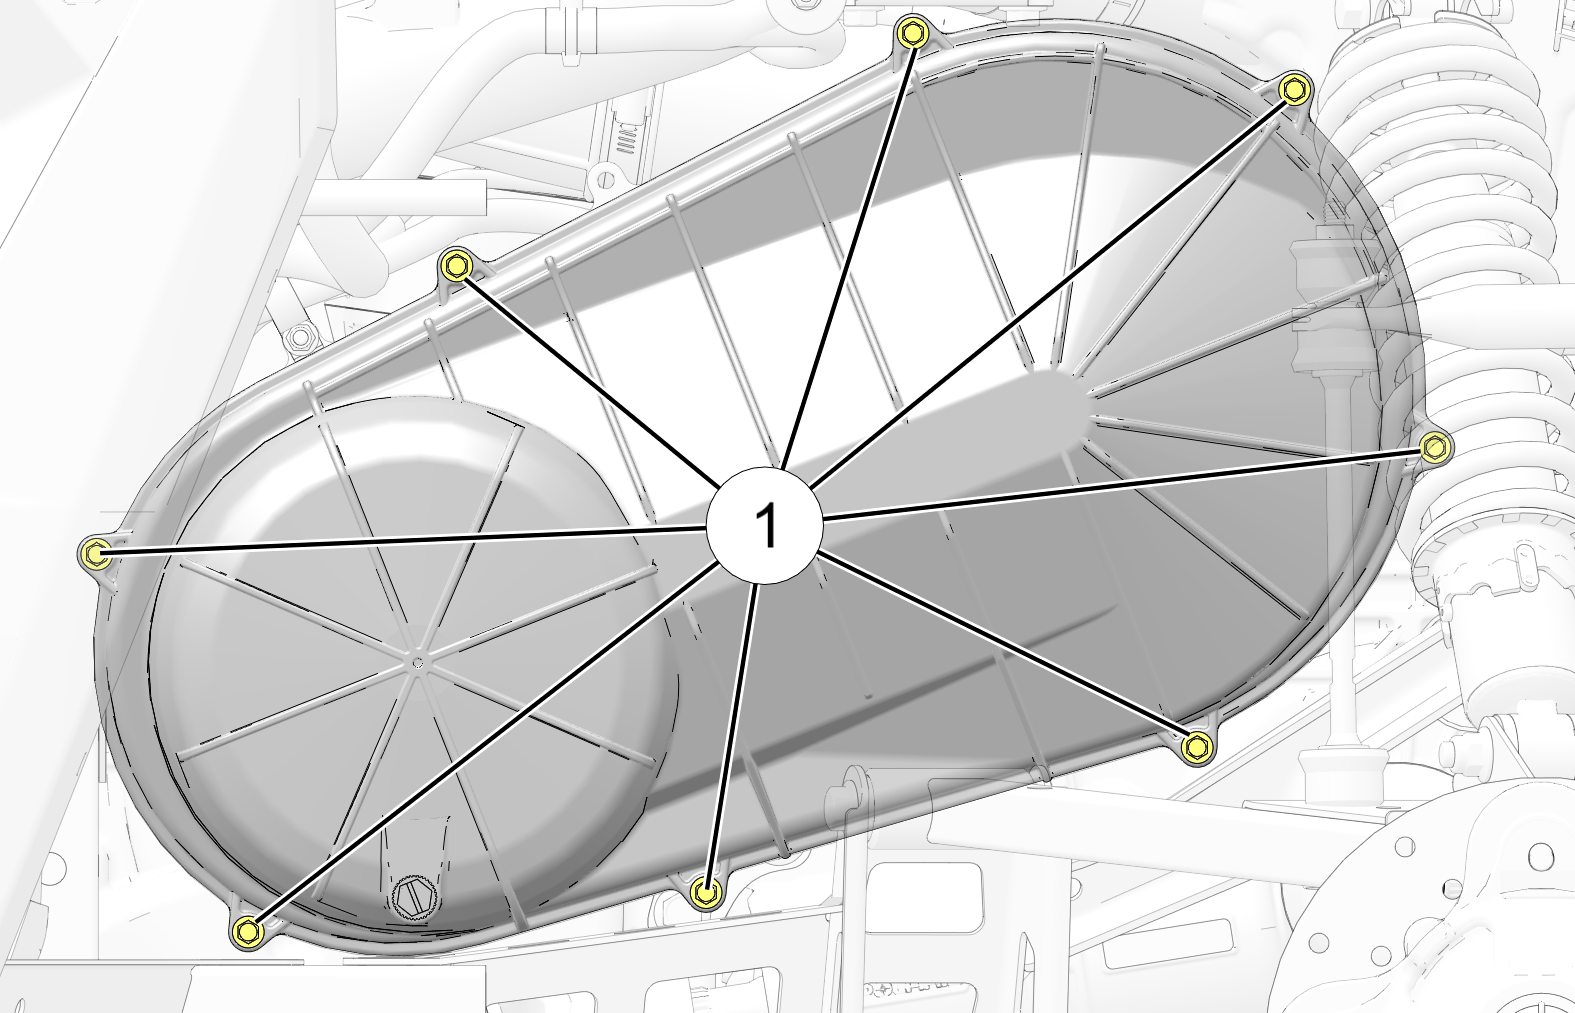 TORQUE
PVT Outer Cover Fasteners: 44 in-lbs (5 N·m)