Fuel Tank Removal
Allow engine and exhaust to cool completely before disconnecting fuel line or removing tank. Protect fuel tank finish when removing, storing, and installing tank.
Be prepared to place the fuel tank in a secure location with a drain pan positioned to catch any fuel that may leak or drip from disconnected hoses or fittings.
-
Remove the seat. See the seat removal section.
-
Depressurize the fuel system. See the fuel tank depressurization section..
-
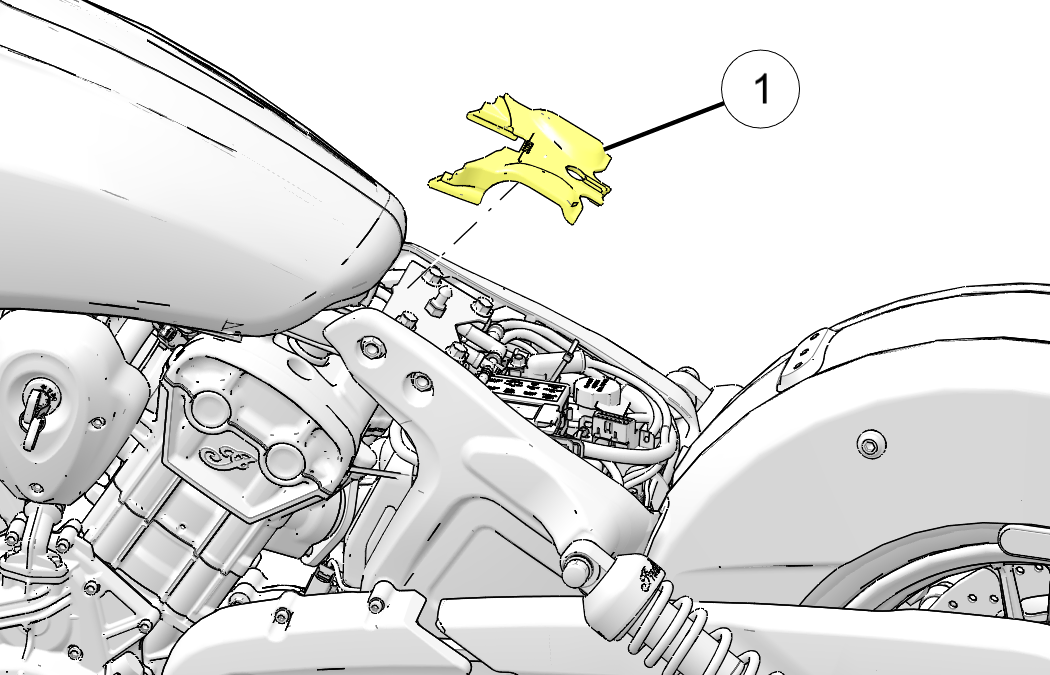
Remove the fuel tank filler pad 1.
-
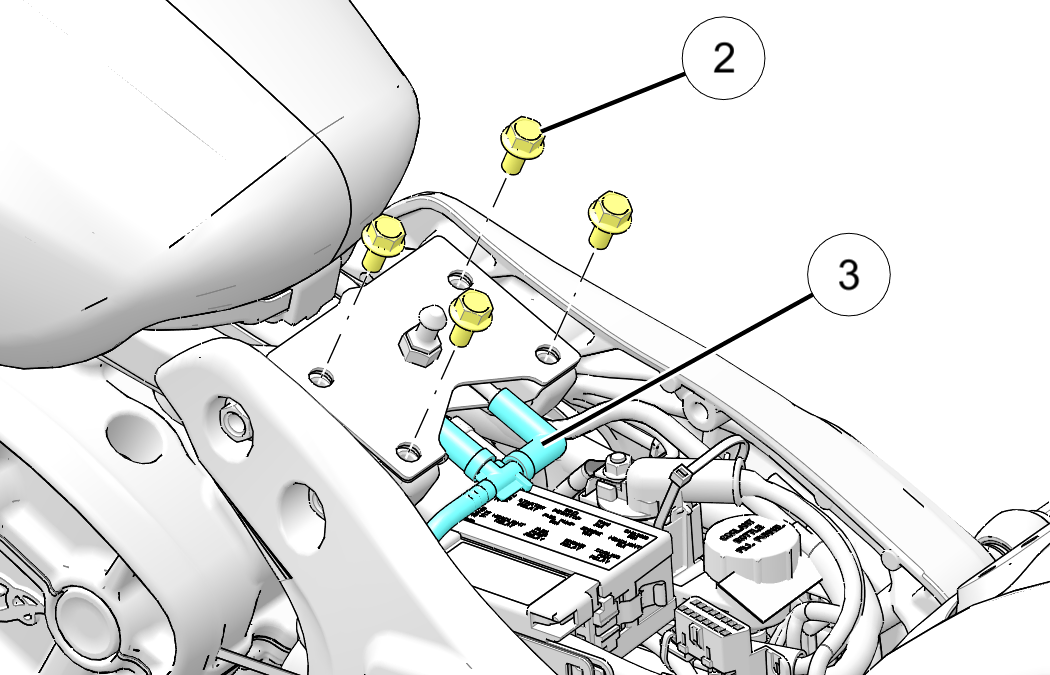
Remove the four bolts 2 at the rear of the fuel tank.
-
Disconnect the fuel tank vent line and recess drain line 3 at the rear of fuel tank.
-
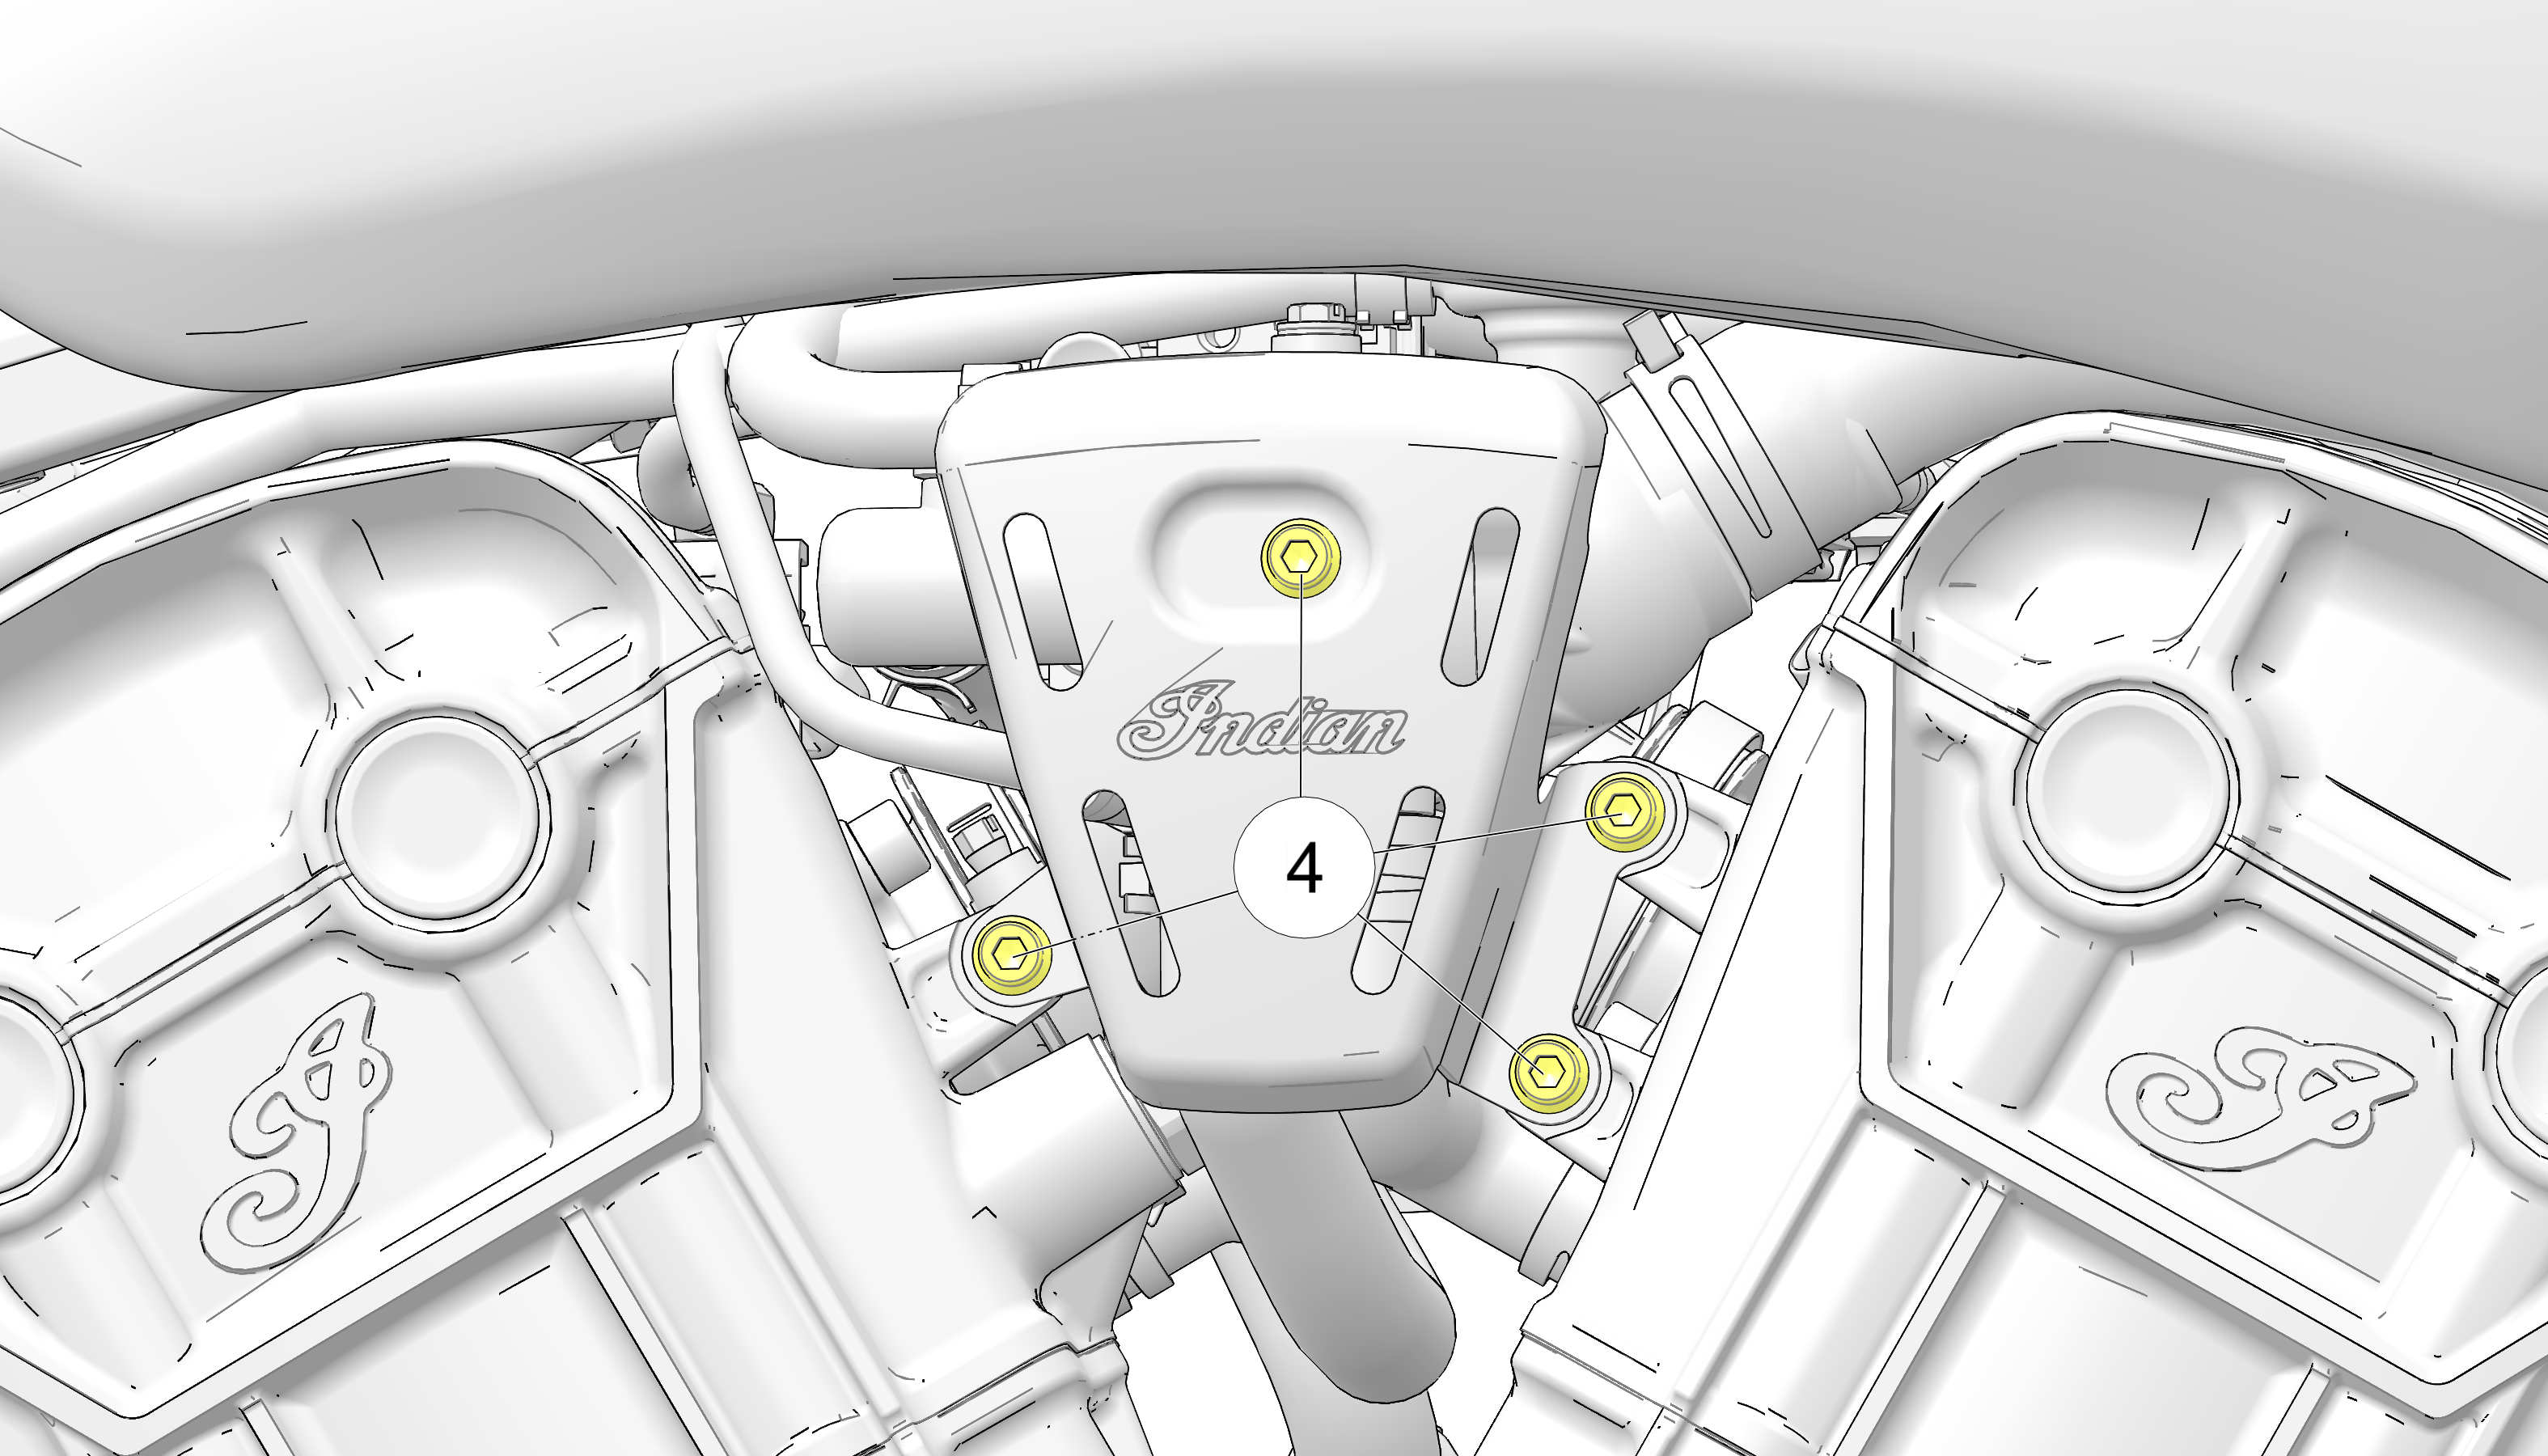
Remove thermostat cover by removing its fasteners 4.
-
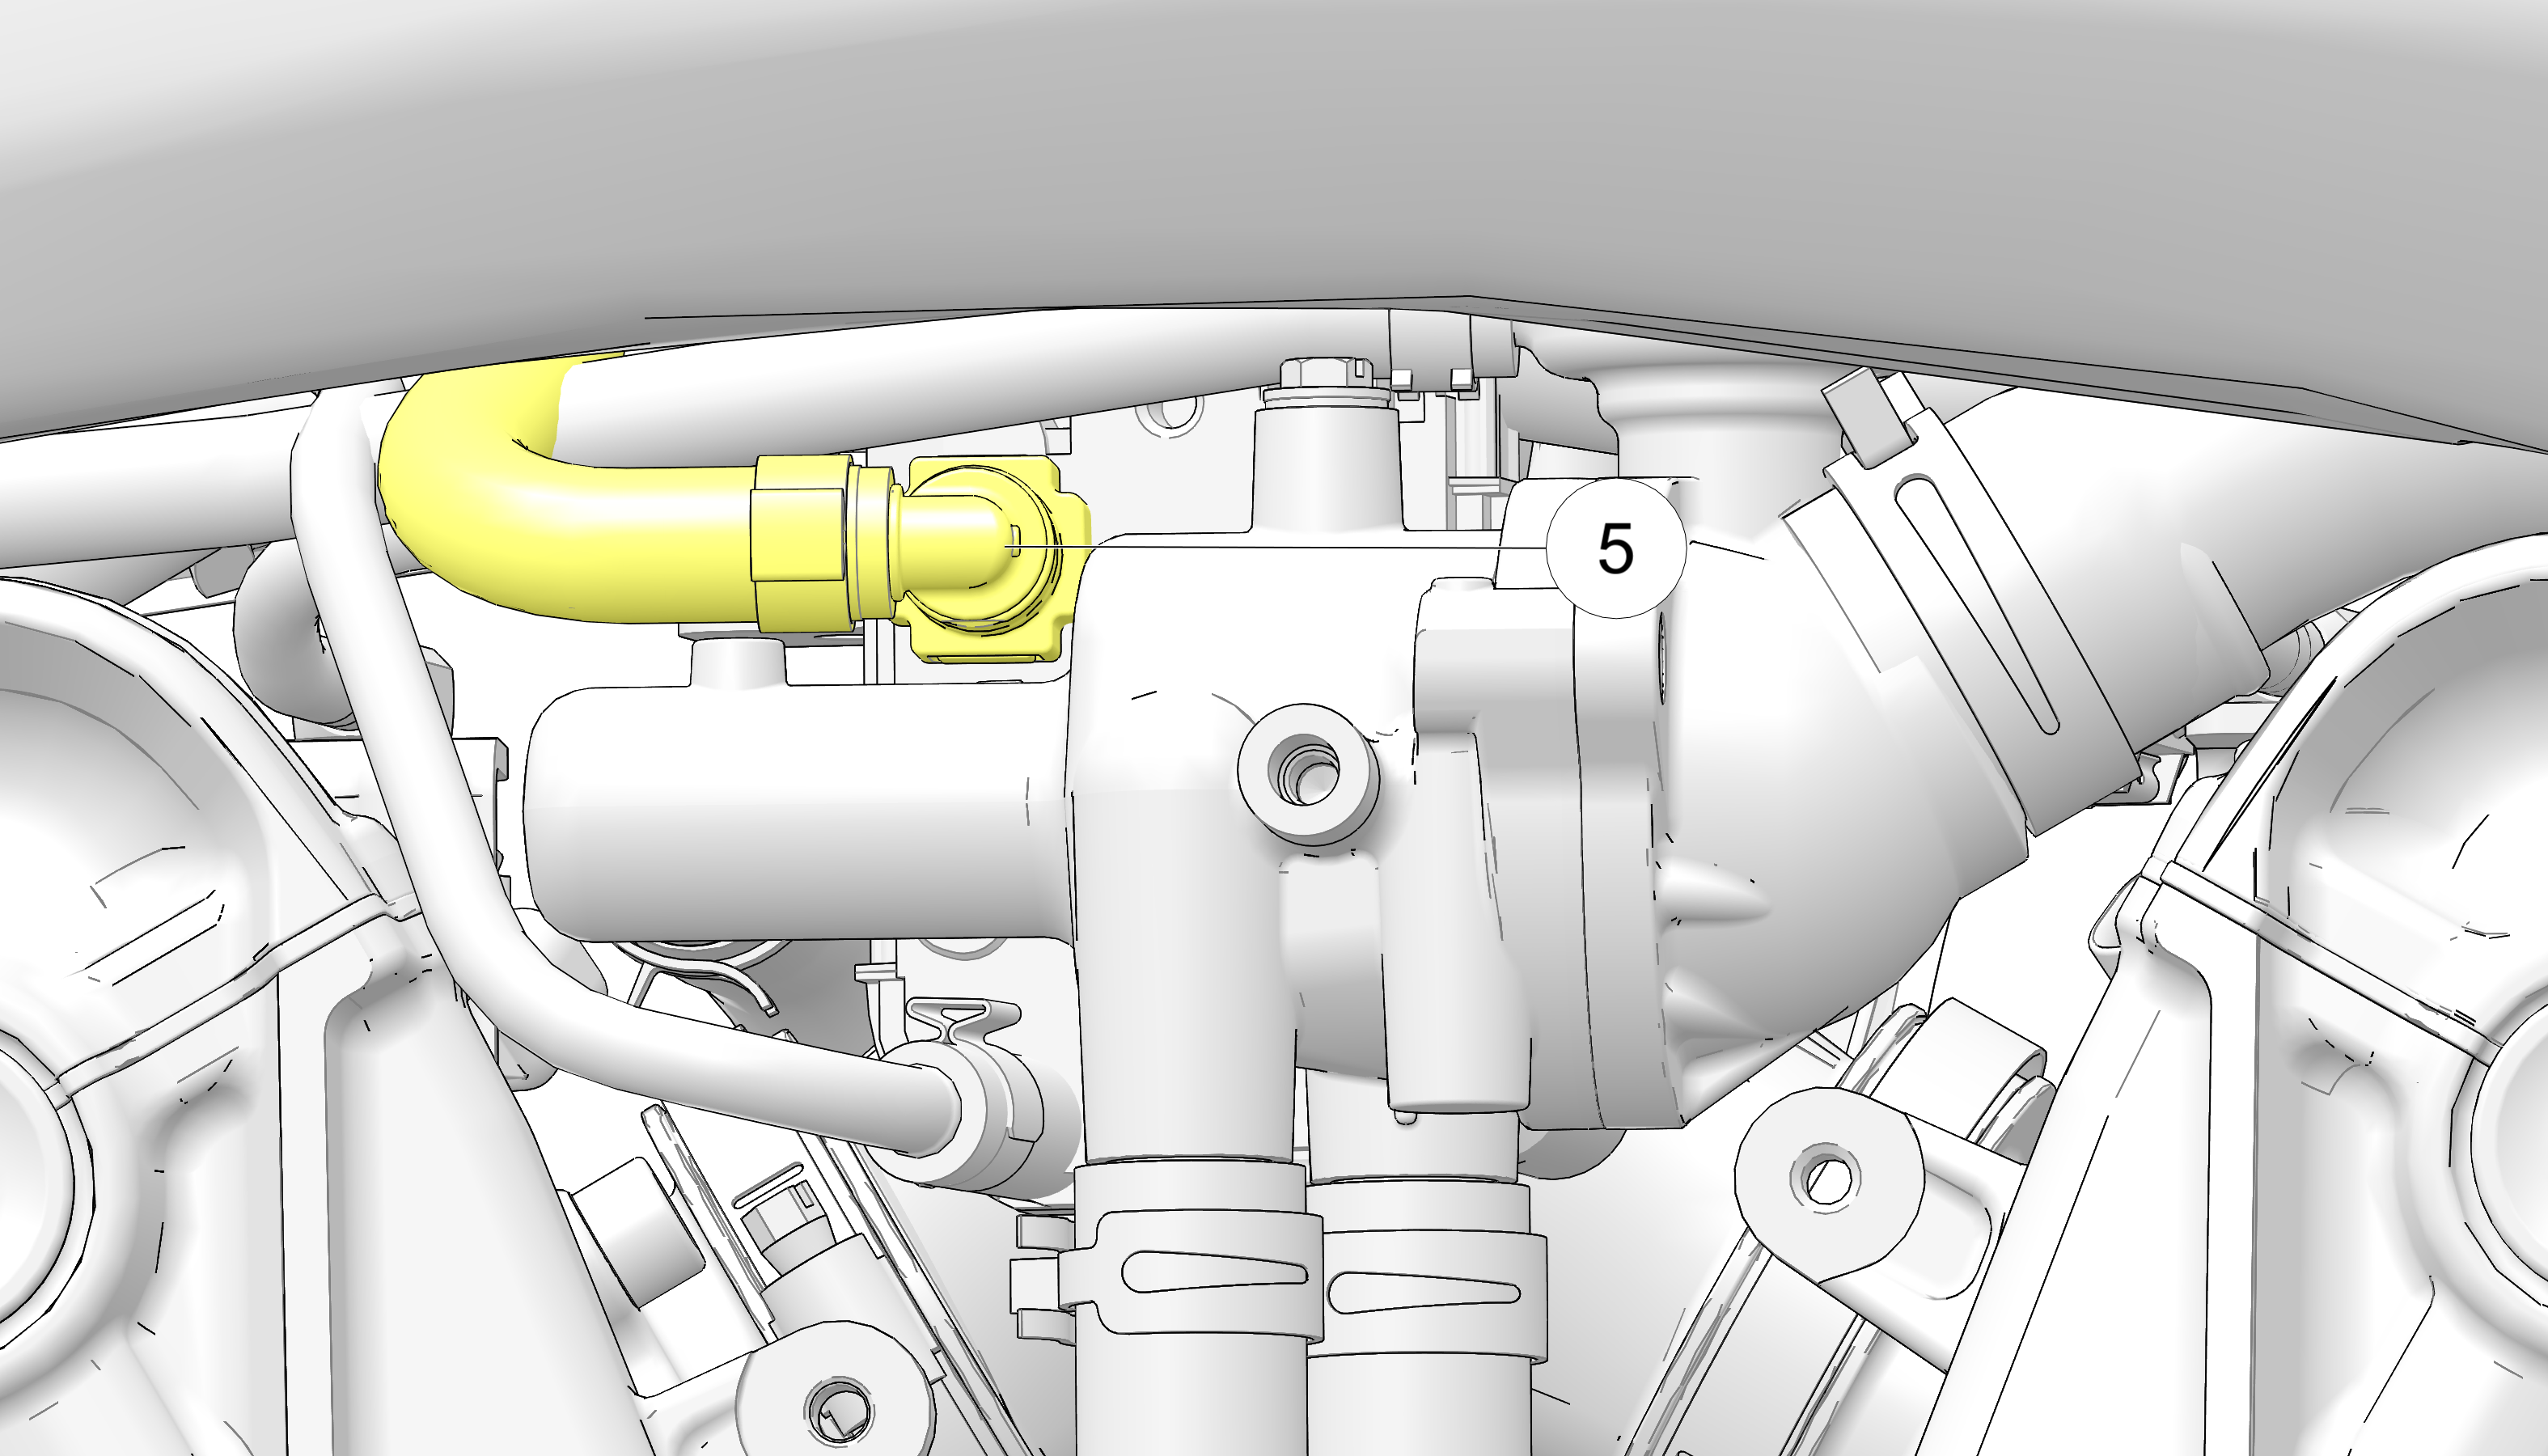
Disconnect the fuel line 5 from the fuel rail by squeezing both release buttons.
CAUTIONDo not use anything other than fingers to remove the quick connection. The use of tools can damage the connection.
IMPORTANTUse a shop rag to catch any residual fuel in the system.
-
Lift the rear of the fuel tank and unplug the fuel tank electrical connector 6.

-
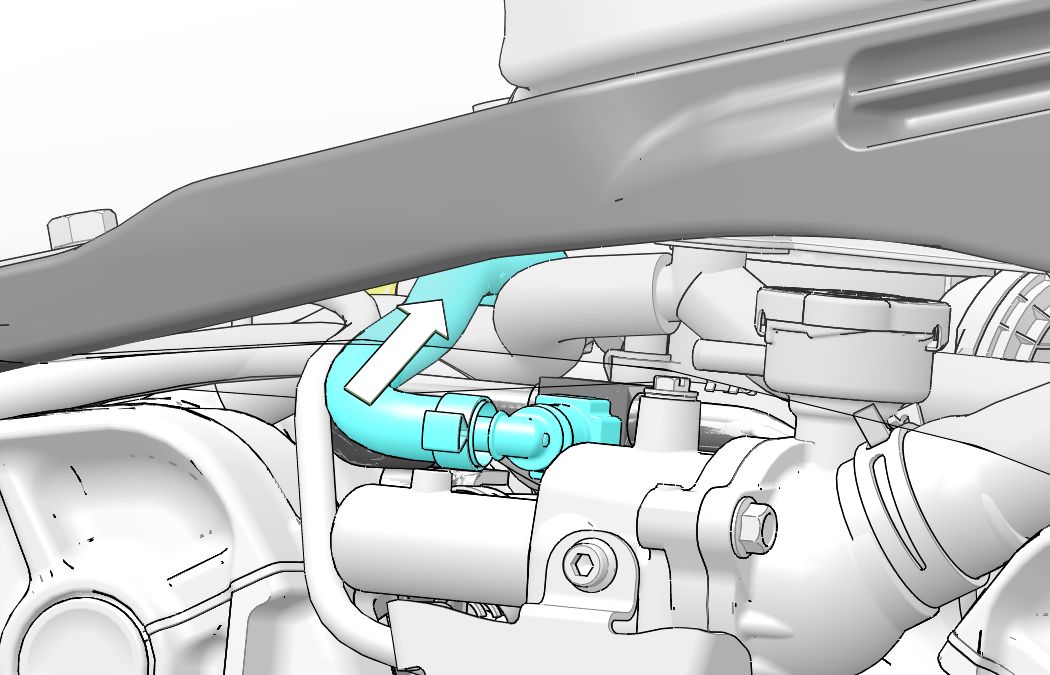
Gently feed fuel rail end of the fuel hose toward the center of the vehicle. Ensure the hose and connector are clear of coolant hose and all wire harnesses.
IMPORTANTNote fuel line routing for installation.
-
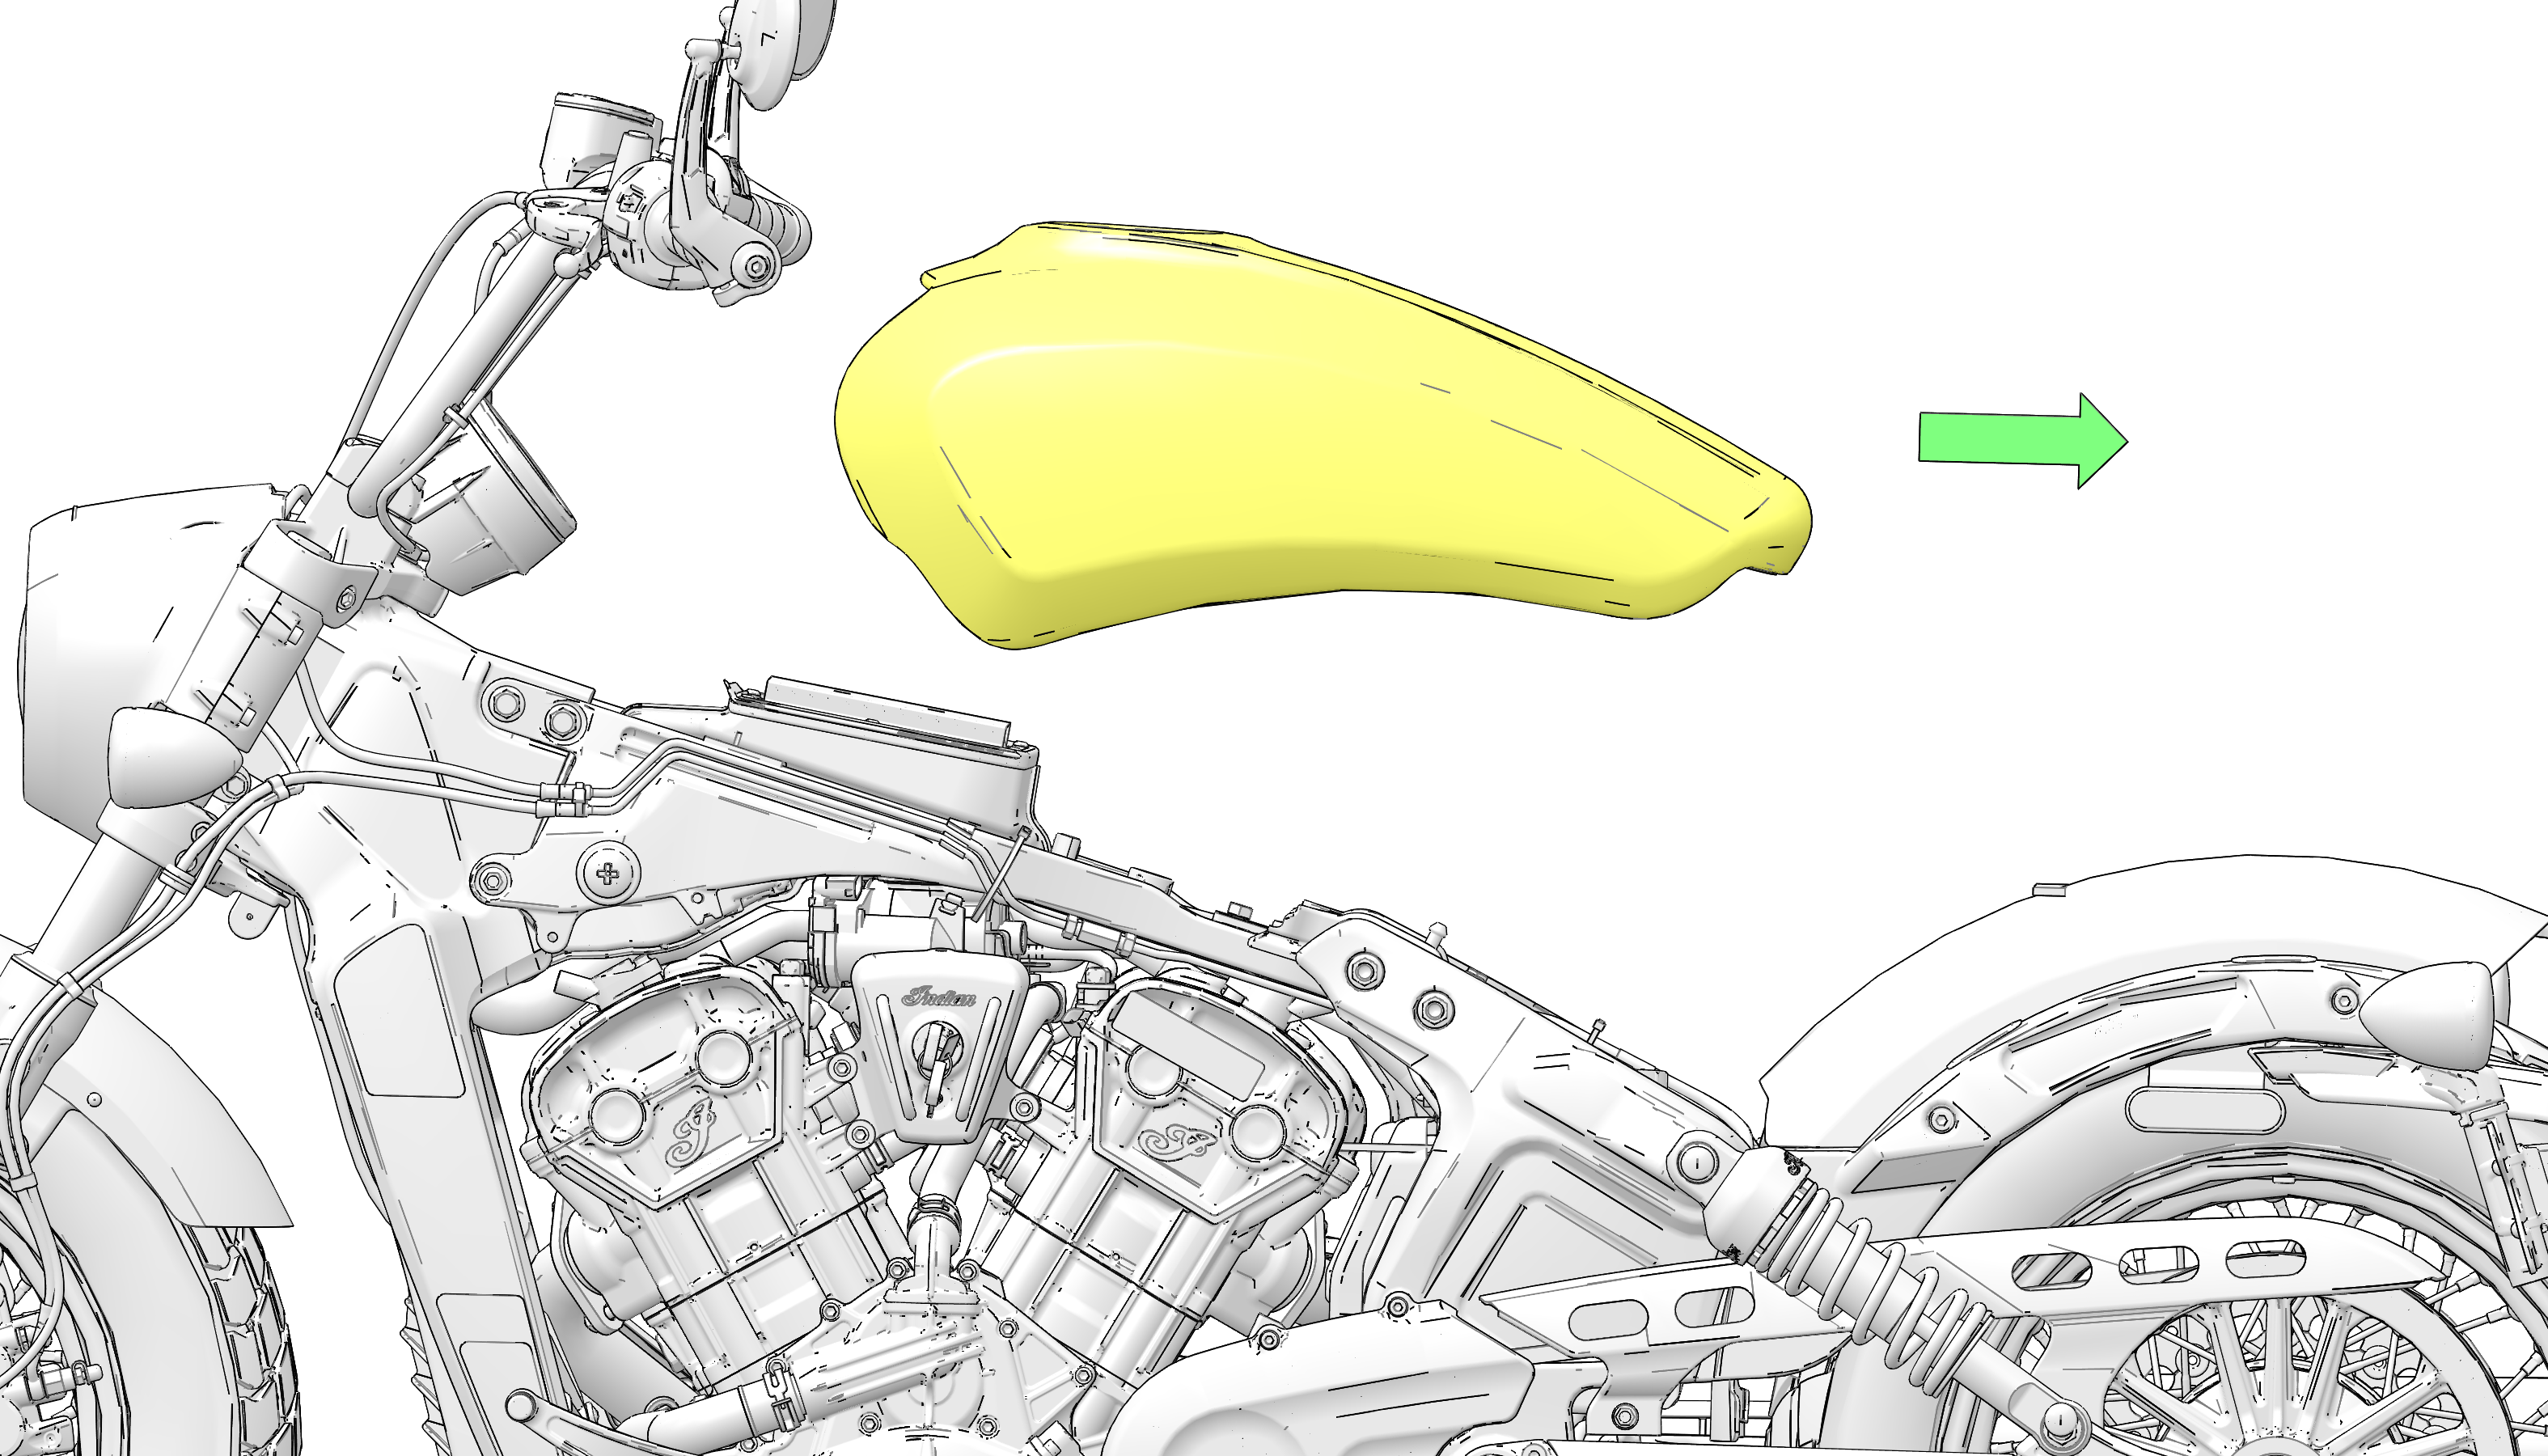
Lift the rear of the fuel tank and slide rearward to release from the front isolators.
-
Lift the fuel tank off the motorcycle and place on a suitable flat surface to prevent tank damage.
IMPORTANTDuring removal, ensure fuel line does not get tangled or retained on any components or features that may cause damage. Do not lift tank away from motorcycle if fuel line is constrained.
-
Wrap a shop towel around the fuel fitting and disconnect the fuel supply line connector from the fuel pump by squeezing release tabs on both sides of the fitting and disconnect from pump.