Center Headlamp Aim Adjustment
-
Verify that headlamp aim inspection conditions are met.
-
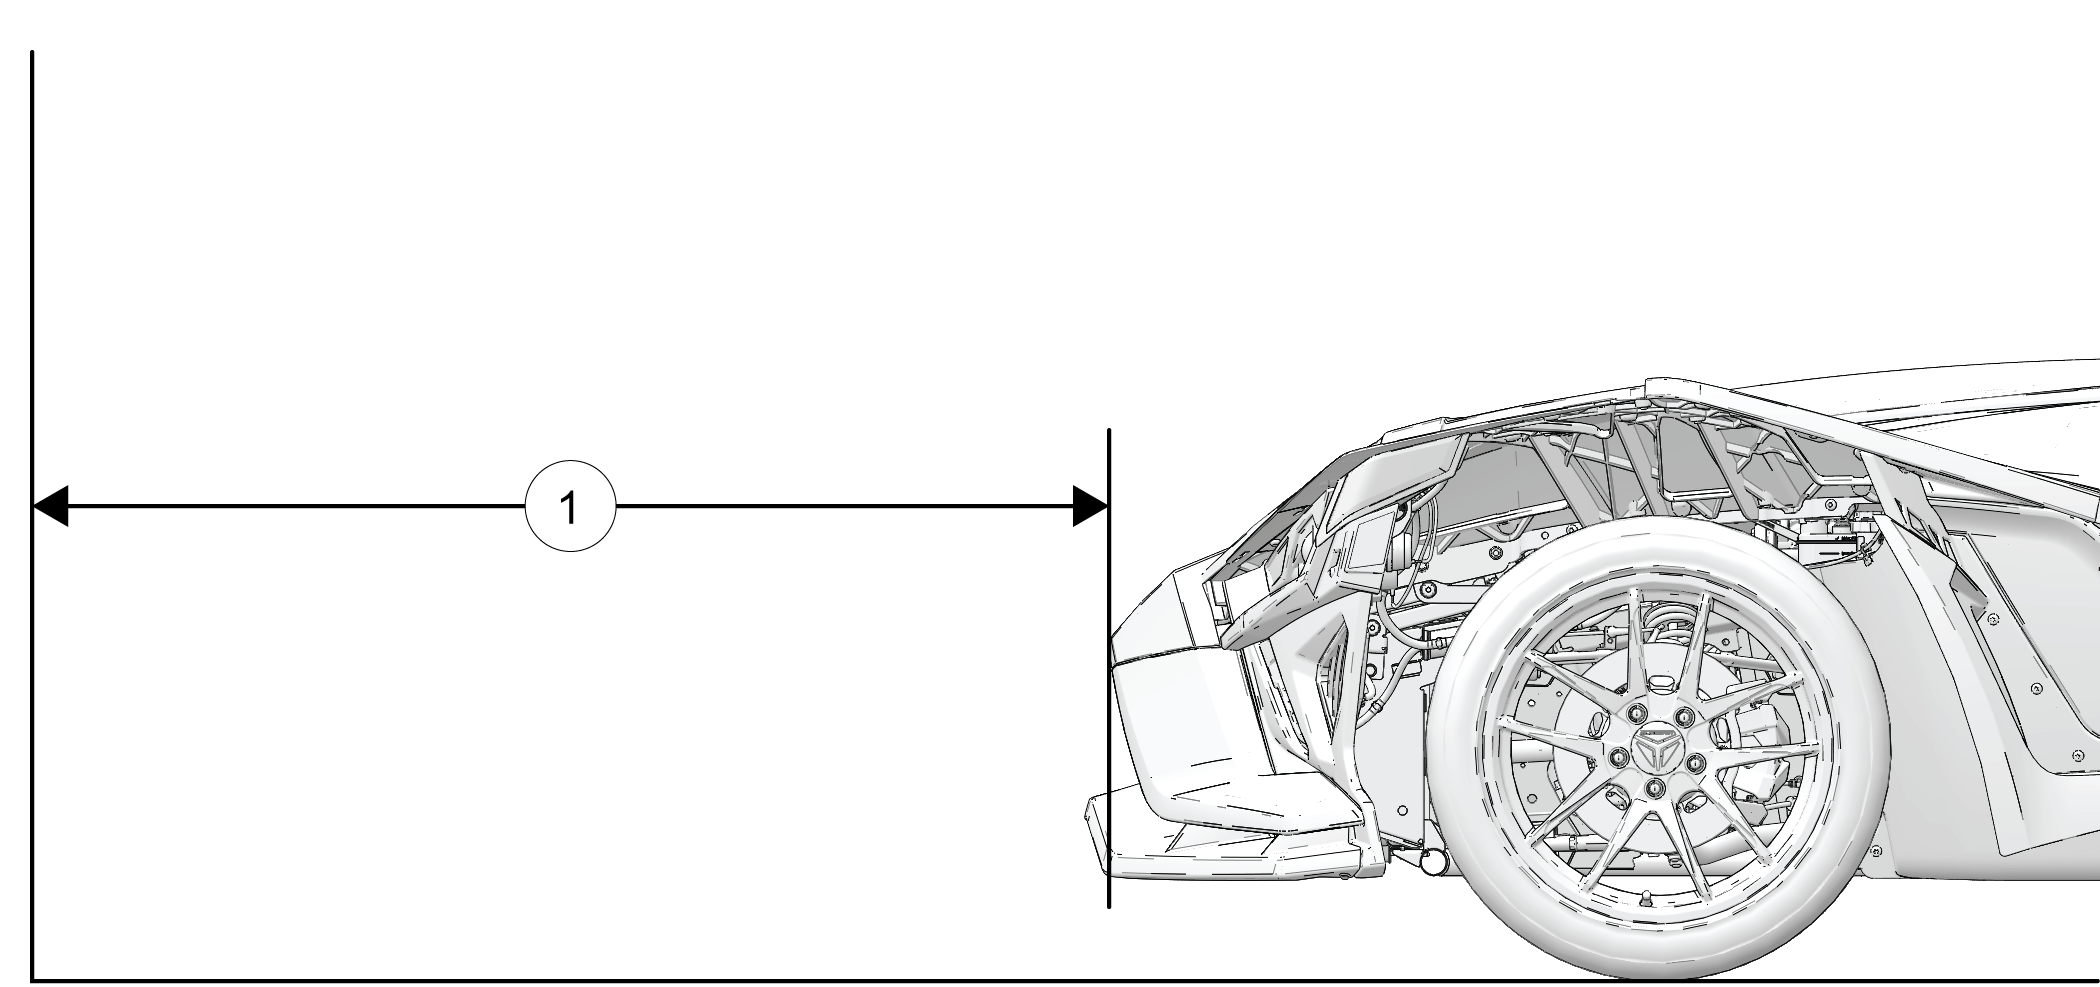
Position the vehicle on a level surface with the nose approximately 9.5 ft (2.9 m) 1 from a wall.
-
Press the Engine Start button twice to enter Accessory Mode, then pull the turn signal lever rearward (as if to activate the high beams).
IMPORTANTIf the engine was last powered-off with the high beams still on, then pulling the turn signal lever in Accessory Mode will reactivate the high beams. Verify that the LOW BEAM lights (not high beams) are activated to perform headlamp aim adjustment. -
Observe the headlamp beam display on the wall. The beam displays at two levels – higher on the right side and lower on the left side. When the beam is properly adjusted, this measurement from the ground to the lower level beam cutoff should be 21.5 in (54.6 cm)
-
To adjust a headlight beam, open the hood and turn the two upper headlamp adjustment screws simultaneously and equally. Turning the adjustment screws in tandem keeps the beam pointed straight, so as not to skew left or right.
-
Clockwise adjustment raises the beam
-
Counter-clockwise adjustment lowers the beam
-