Battery Removal and Installation - Pro R 4
Battery Removal for Pro R 4 with One Battery
To remove the battery, do the following:
-
Ensure the key switch is set to OFF position before removing the battery.
-
Remove the driver’s seat. See Seat Removal.
-
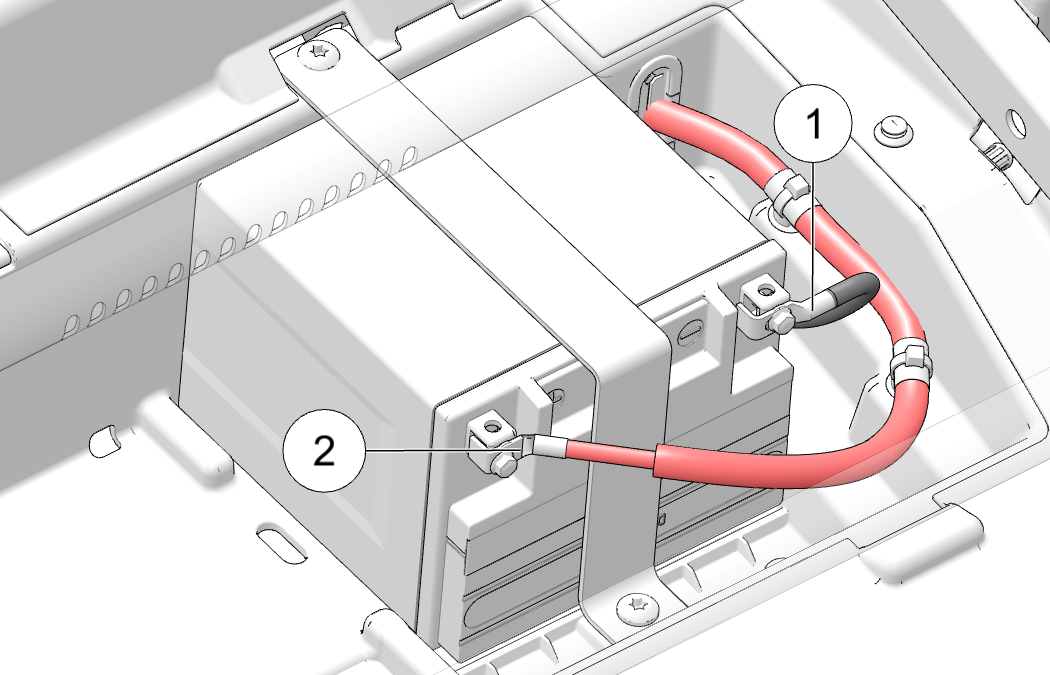
Disconnect the black (negative) battery cable first, and secure away from the battery terminals 1.
-
Disconnect the red (positive) battery cable 2.
-
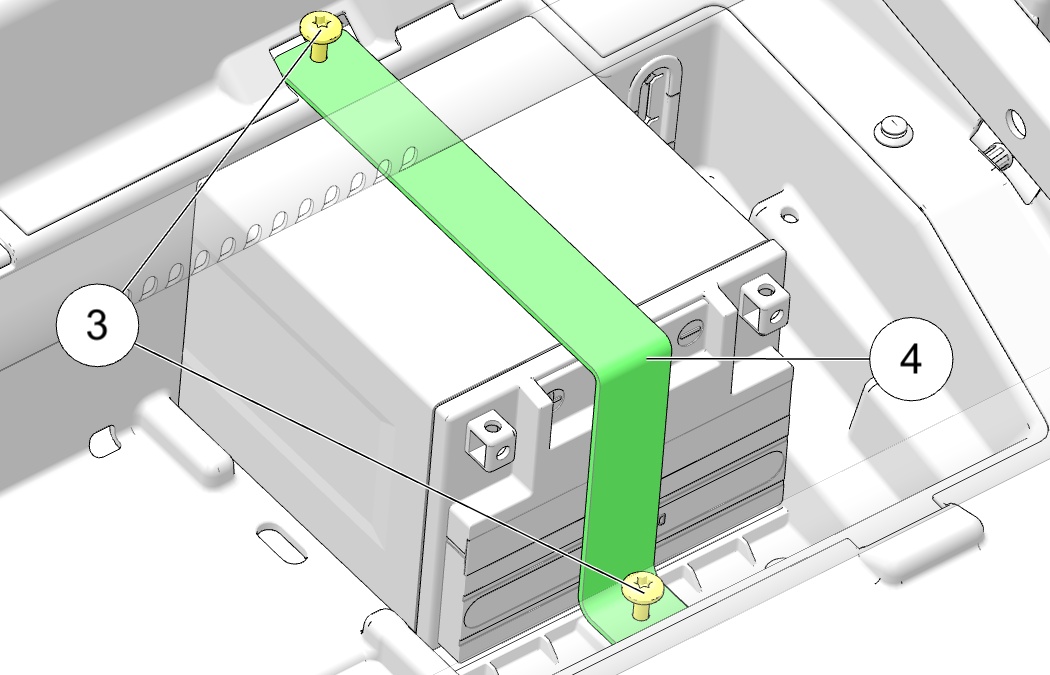
Remove the two screws 3 securing the battery hold-down strap.
-
Remove the battery hold-down strap 4.
-
Lift the battery out of the vehicle.
Battery Removal for Pro R 4 with Two Batteries
To remove the battery, do the following:
-
Park vehicle on a flat surface and shift to PARK.
-
Ensure the key switch is set to OFF position before removing the battery.
-
Remove the driver’s seat. See Seat Removal.
-
Remove the battery terminal fastener and washer.
-
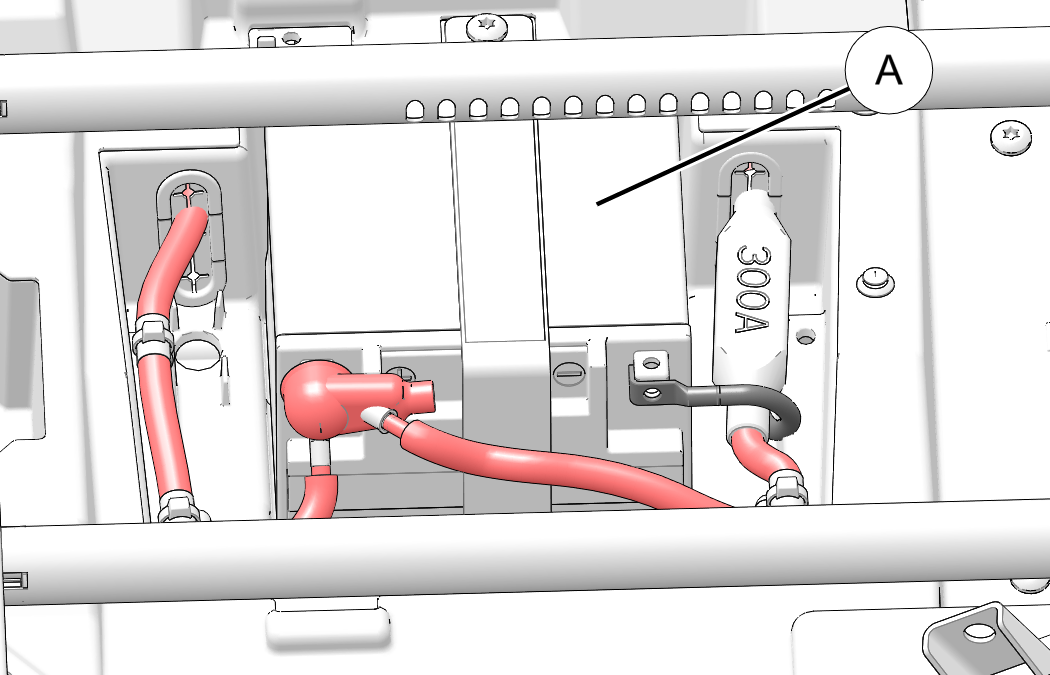
Disconnect the cables in the following order:
-
On the primary battery A NEGATIVE (-) black cable battery cable.
-
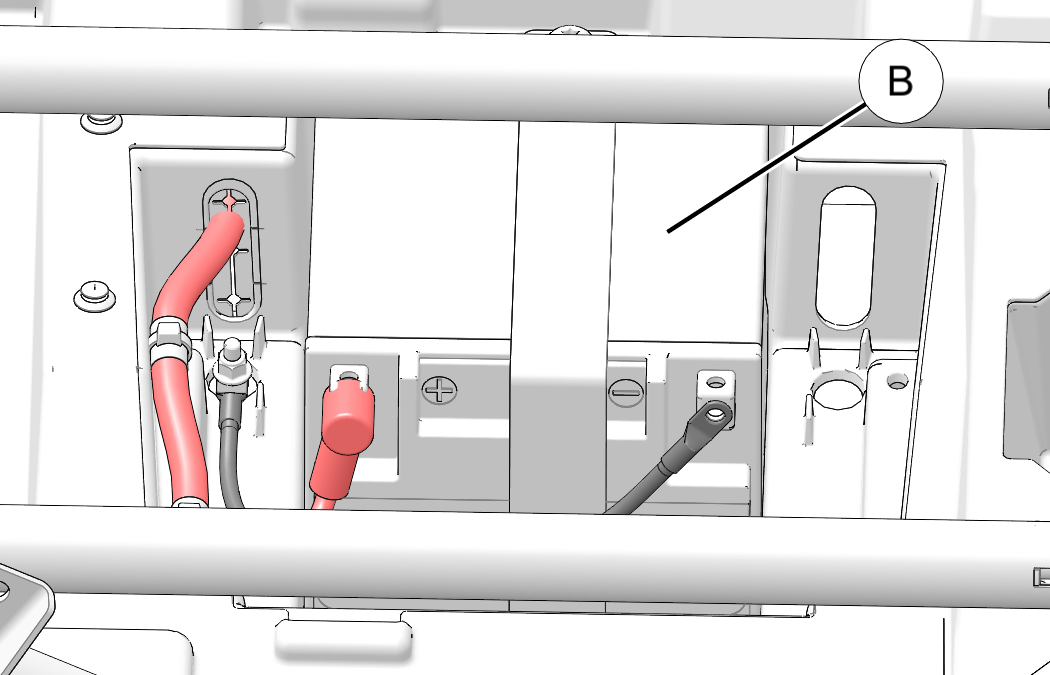
On the auxiliary battery B NEGATIVE (-) black cable battery cable.
-
On the primary battery A POSITIVE (+) red battery cable.
Driver Side
Passenger Side
 IMPORTANT
Use caution when removing the battery cables. The cables that connect the battery are not fused and could cause damage if these cables are shorted to power or ground.
Cover the exposed battery terminals and cable ends with electrical tape to prevent incidental electrical contact.
-
Battery Installation for Pro R 4 with One Battery
Using a new battery that has not been fully charged can damage the battery and result in a shorter life. It can also hinder vehicle performance. Follow the instructions in the Battery Charging section before installing the battery.

-
Ensure the key switch is set to OFF position before installing the battery.
-
Remove the driver’s seat. See Seat Removal.
-
Place the battery in the battery holder.
-
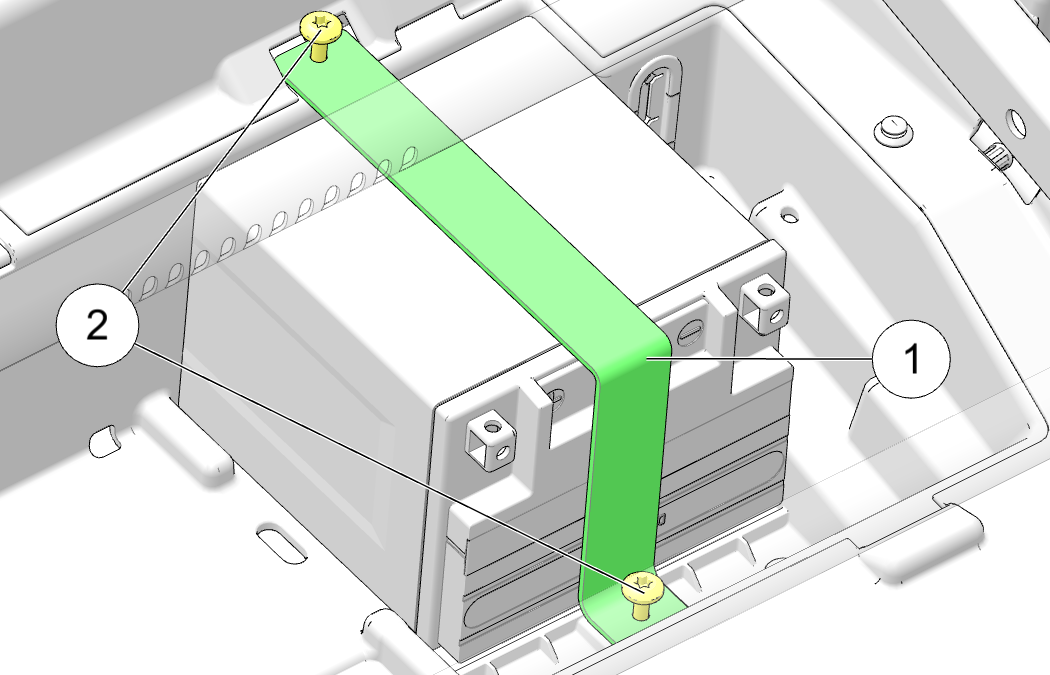
Place the battery hold-down strap 1 across the battery.
-
Install the two screws 2 securing the battery hold-down strap. Torque fasteners to specification.
TORQUEBattery Mount Bracket Fasteners:
53 in-lbs (6 Nm)
-
Coat the terminals with dielectric grease or petroleum jelly.
-
Connect and tighten the POSITIVE (+) red cable 3.
-
Connect and tighten the NEGATIVE (-) black cable 4.
TORQUEBattery Terminal Fasteners:
44 in-lbs (5 Nm)
-
Verify that cables are properly routed.
-
Reinstall the seat.
Battery Installation for Pro R 4 with Two Batteries
Using a new battery that has not been fully charged can damage the battery and result in a shorter life. It can also hinder vehicle performance. Follow the instructions in the Battery Charging section before installing the battery.
|
|
|
|
|
|
|
|
Driver’s Side |
Passenger Side |
|
TORQUE
Battery Terminal Fasteners: 44 in-lbs (5 Nm) |
|
|
|