Drive Belt Installation
DRIVE BELT INSTALLATION (EBS MODELS)
-
Clean the inside of the PVT covers thoroughly.
WARNINGFailure to remove all debris when replacing the belt could result in vehicle damage, loss of control, and severe injury or death.IMPORTANTOrient the belt as it was removed or orient the new belt so that you can read the text.
-
With the Belt Removal Tool 1 installed, loop the belt over the drive clutch and over the driven clutch.
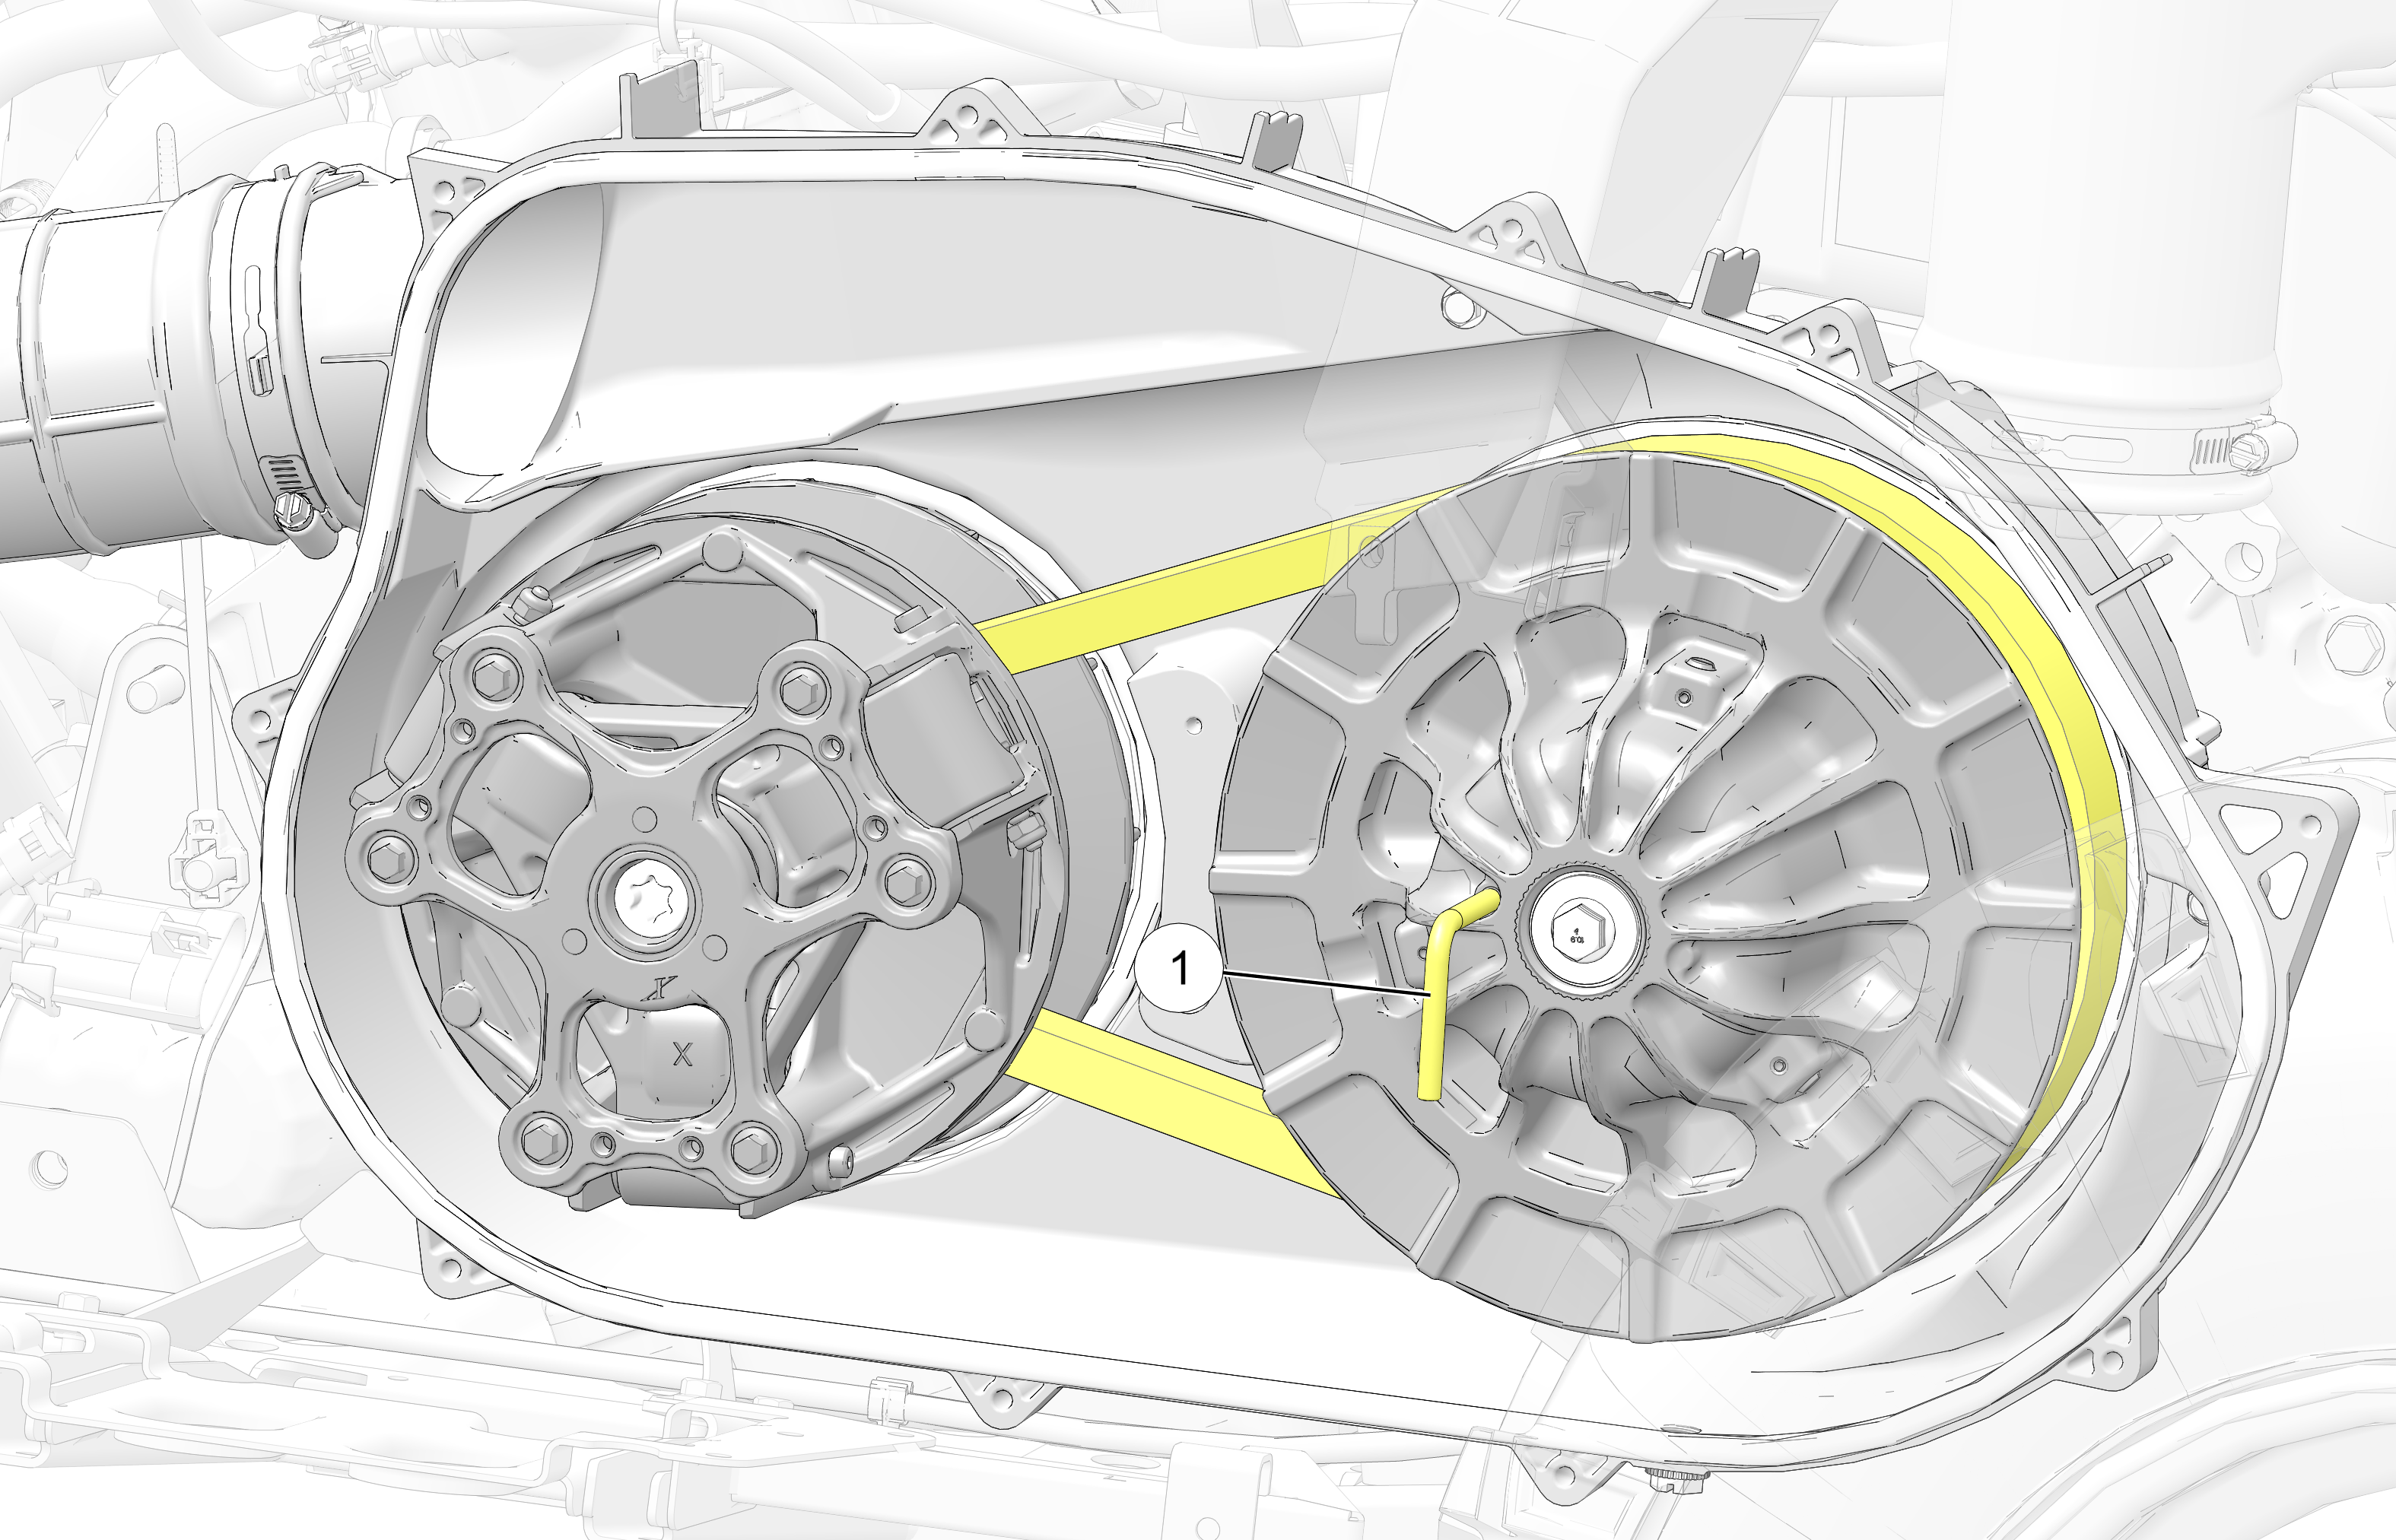
-
Rotate the driven clutch and walk the belt into the clutch.
-
Remove the Belt Removal Tool from driven clutch.
-
Rotate / spin the driven clutch and belt approximately 5-7 times clockwise to properly seat the belt into the driven clutch.
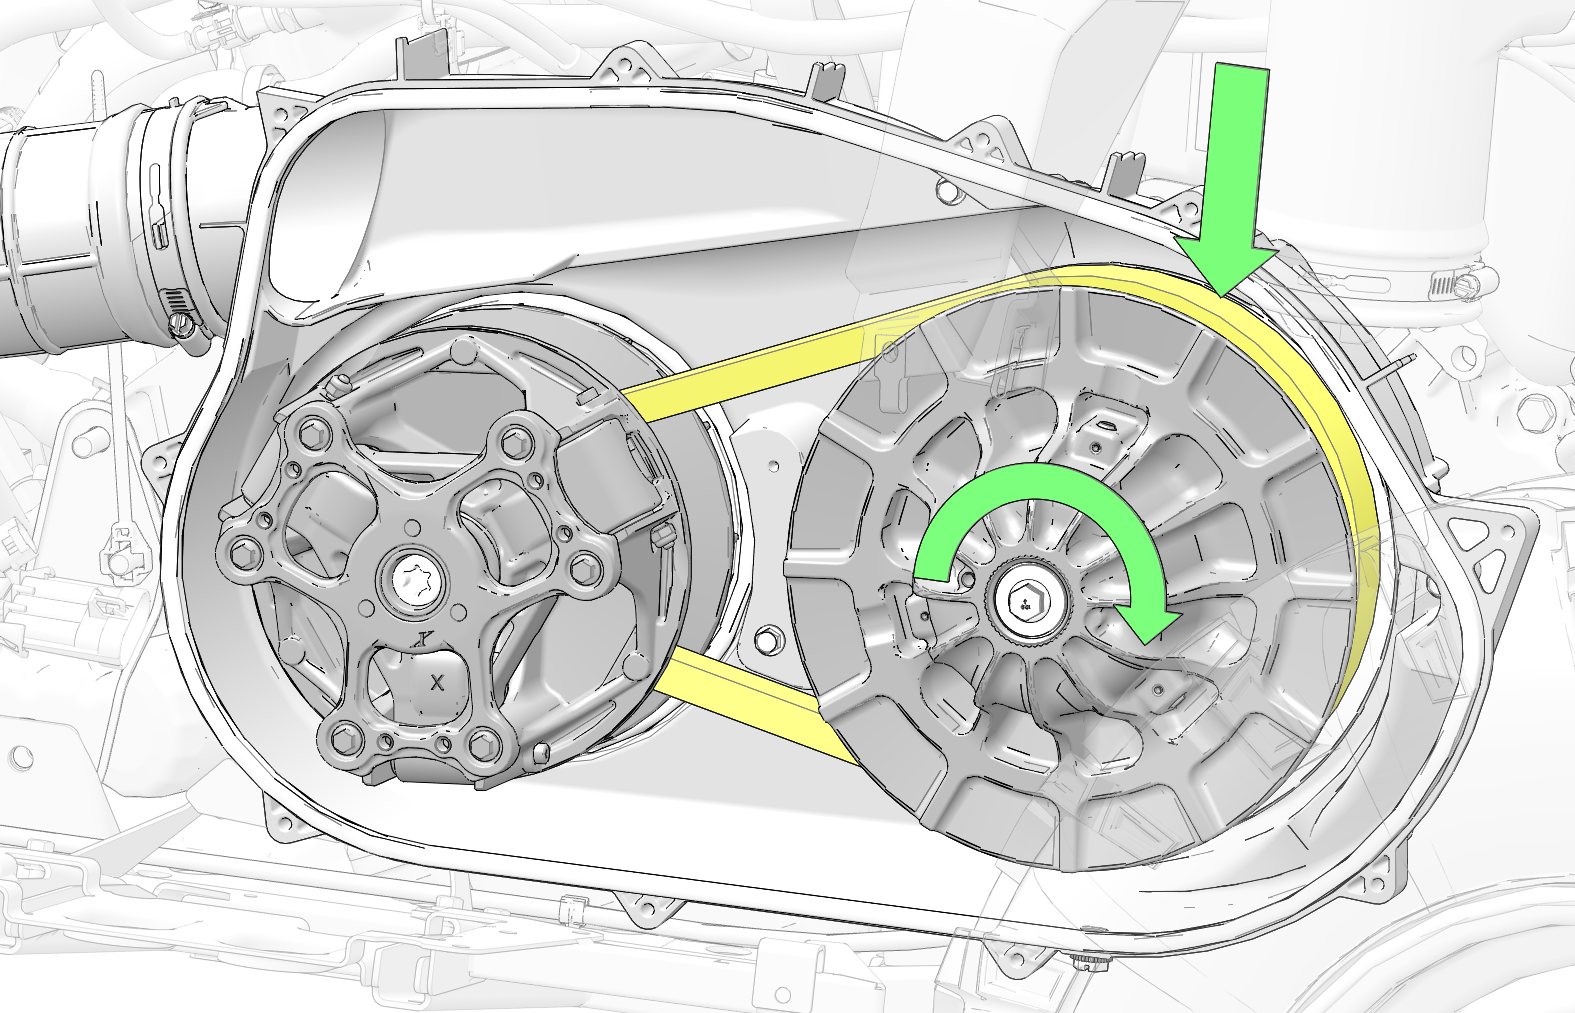
-
Install the outer PVT cover and 10 fasteners. Torque fasteners to specification.
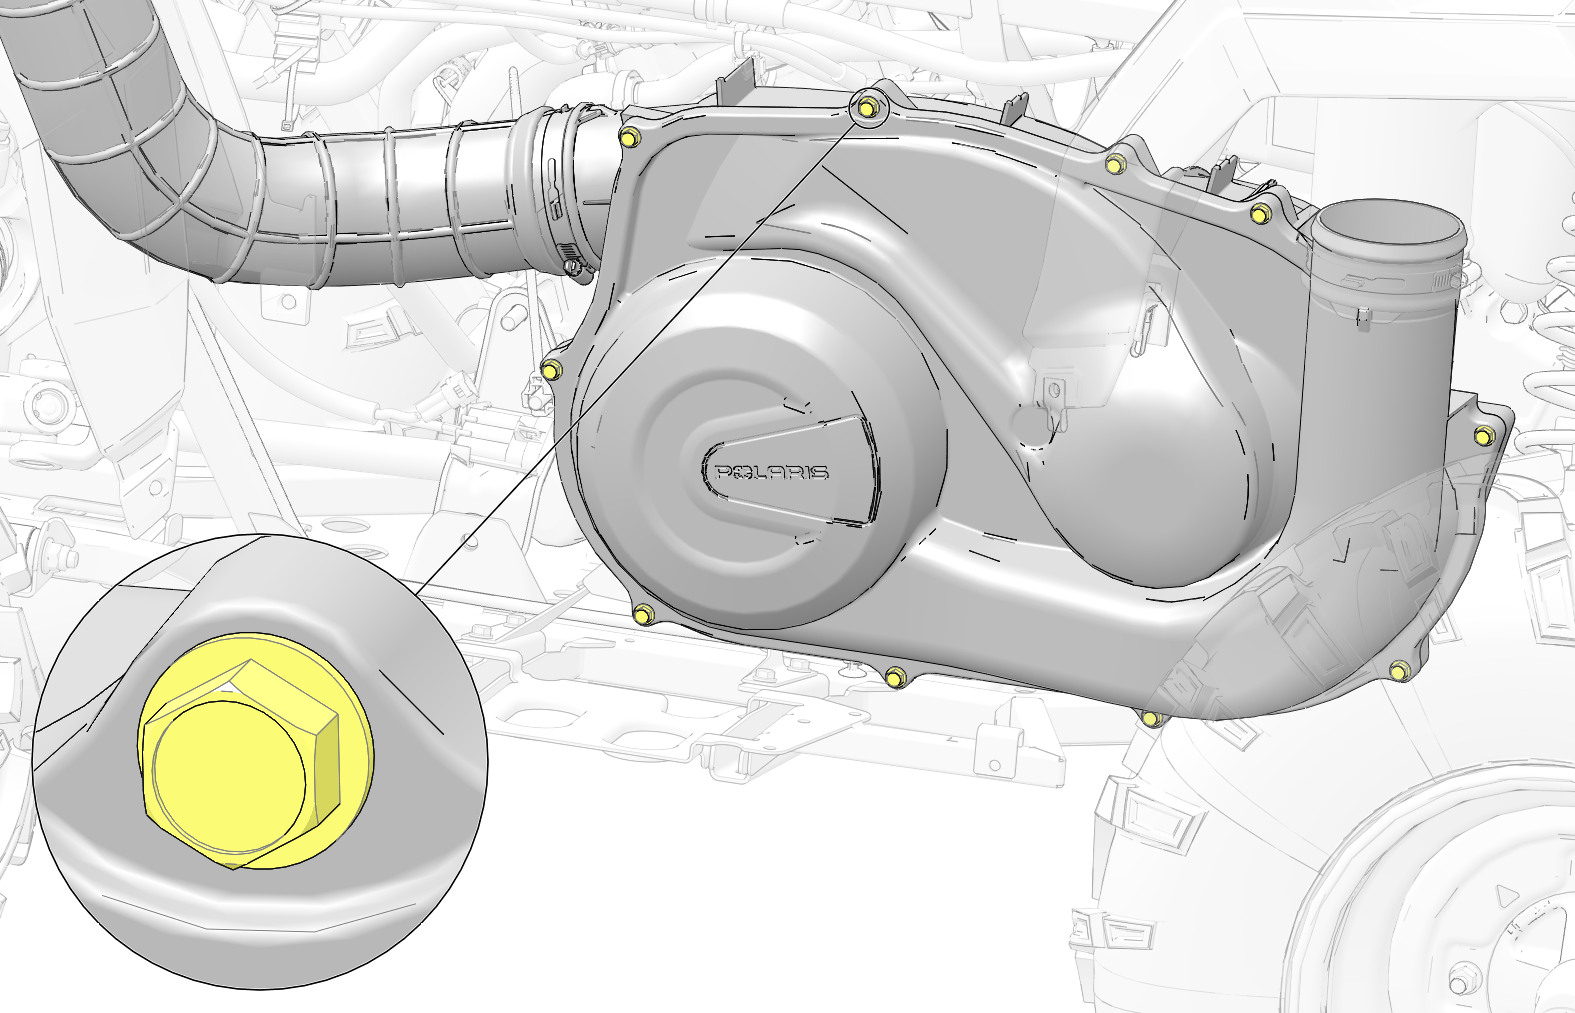 TORQUE
Outer PVT Cover Fasteners:
44 in-lbs (5 N·m)
-
Install the PVT outlet duct and clamp.
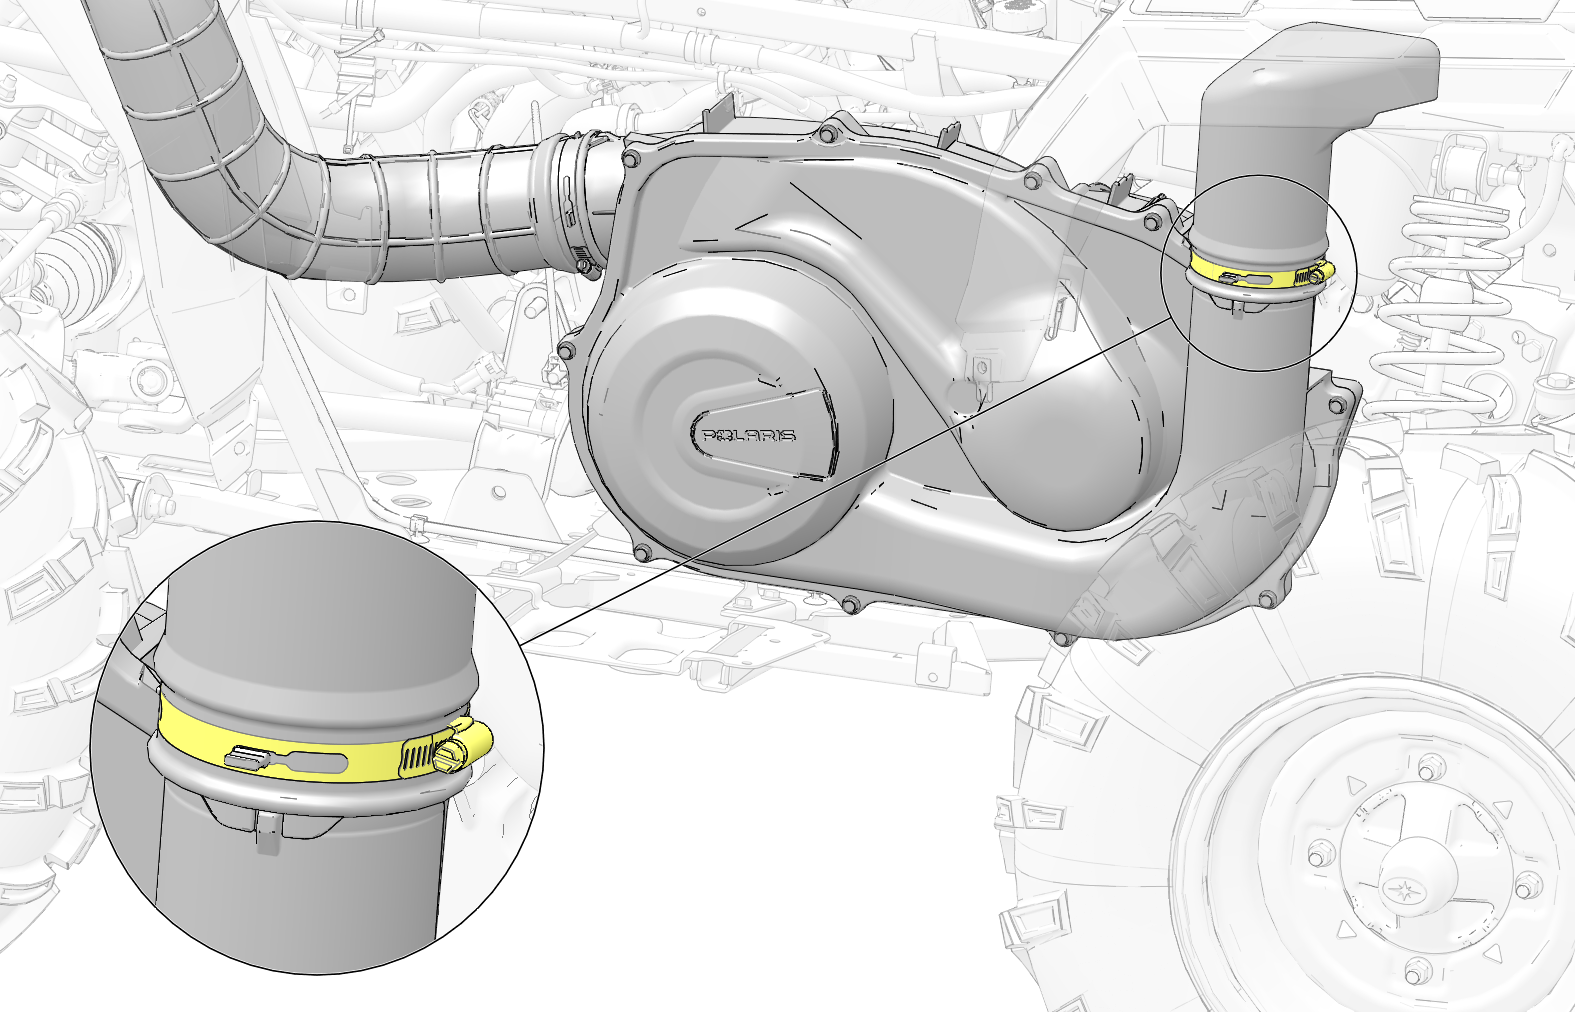
-
Torque the PVT outlet duct clamp to specification.
TORQUEOutlet Duct Clamp:
27 in-lbs (3 N·m)
-
Install the left side panel / footwell. See Side Panel / Footwell Installation.
-
Install the seat.
DRIVE BELT INSTALLATION (NON-EBS MODELS)
-
Clean the inside of the PVT covers thoroughly.
WARNINGFailure to remove all debris when replacing the belt could result in vehicle damage, loss of control, and severe injury or death.IMPORTANTOrient the belt as it was removed or orient the new belt so that you can read the text.
-
Loop the belt over the drive clutch and begin to walk it over the driven clutch sheave.
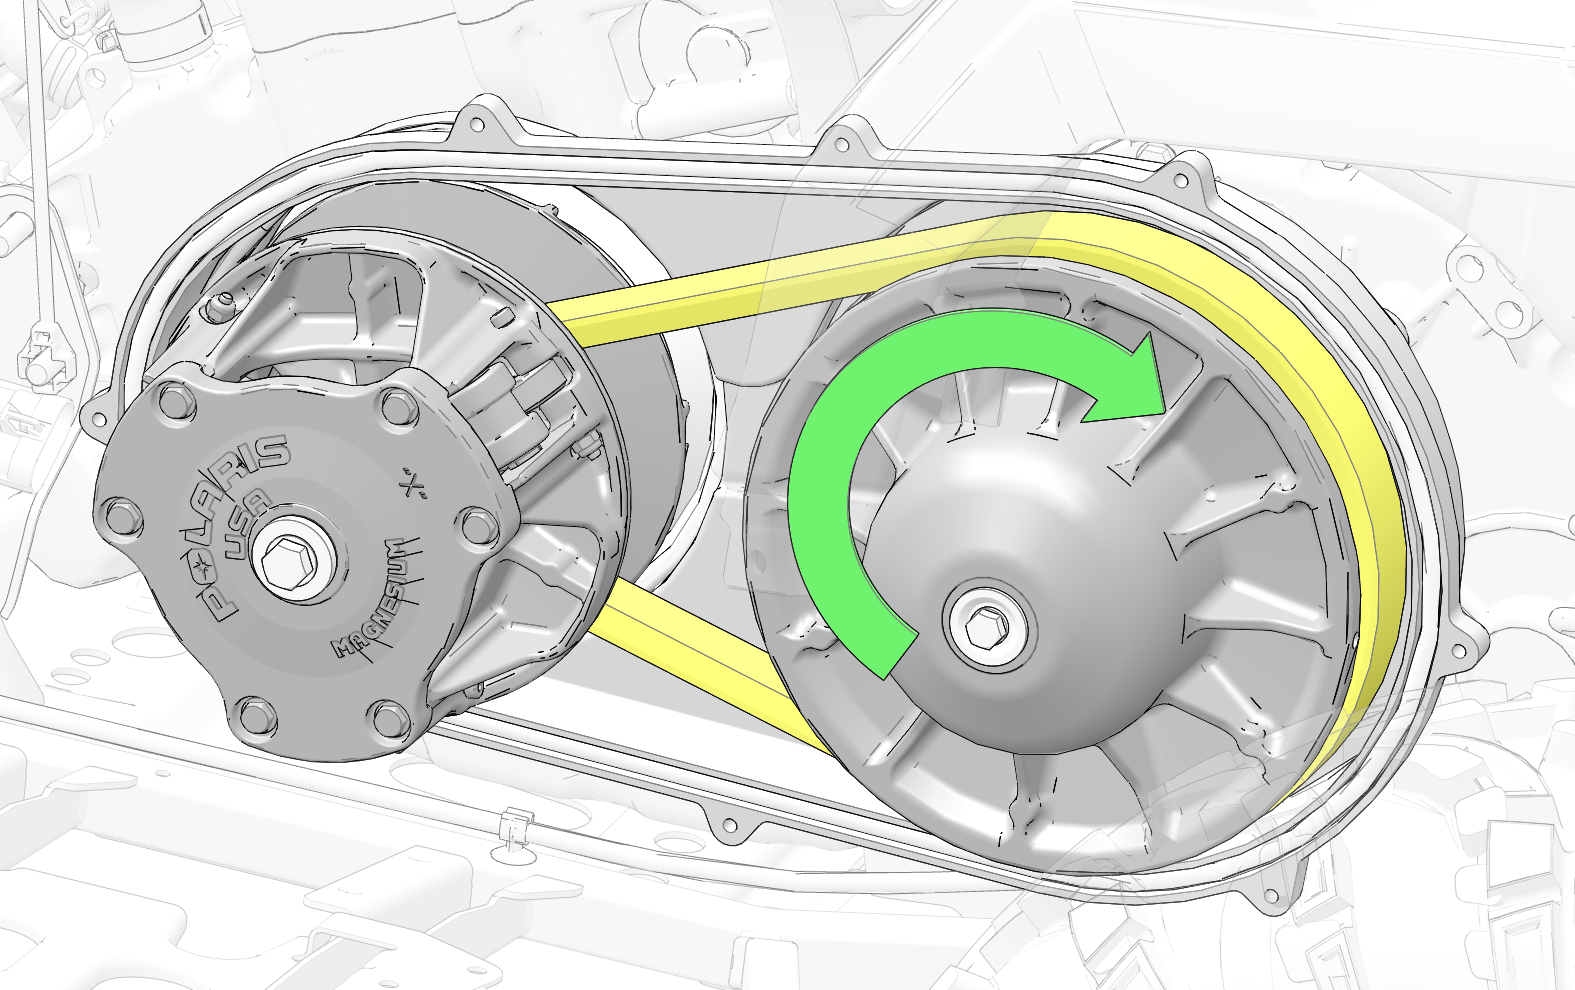 NOTICEThe belt might curl up around the bottom of the driven clutch sheave. If this occurs, push the bottom of the belt down when needed to aid installation.
 -
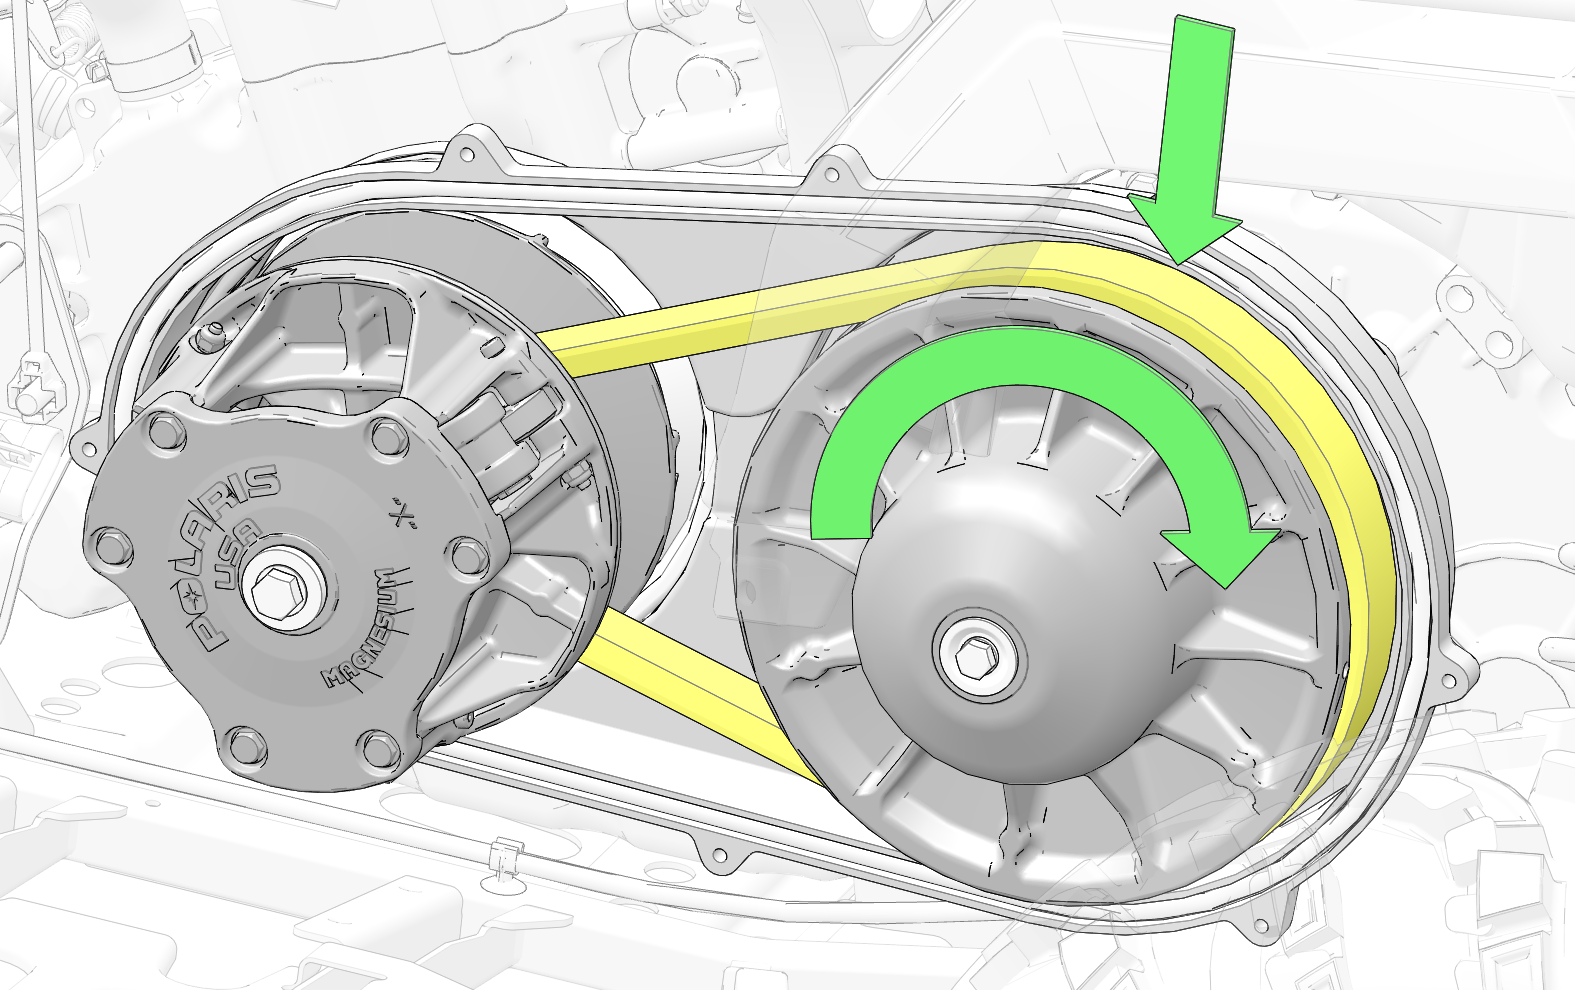
Rotate / spin the driven clutch and belt approximately 5-7 times clockwise to properly seat the belt into the driven clutch.
-
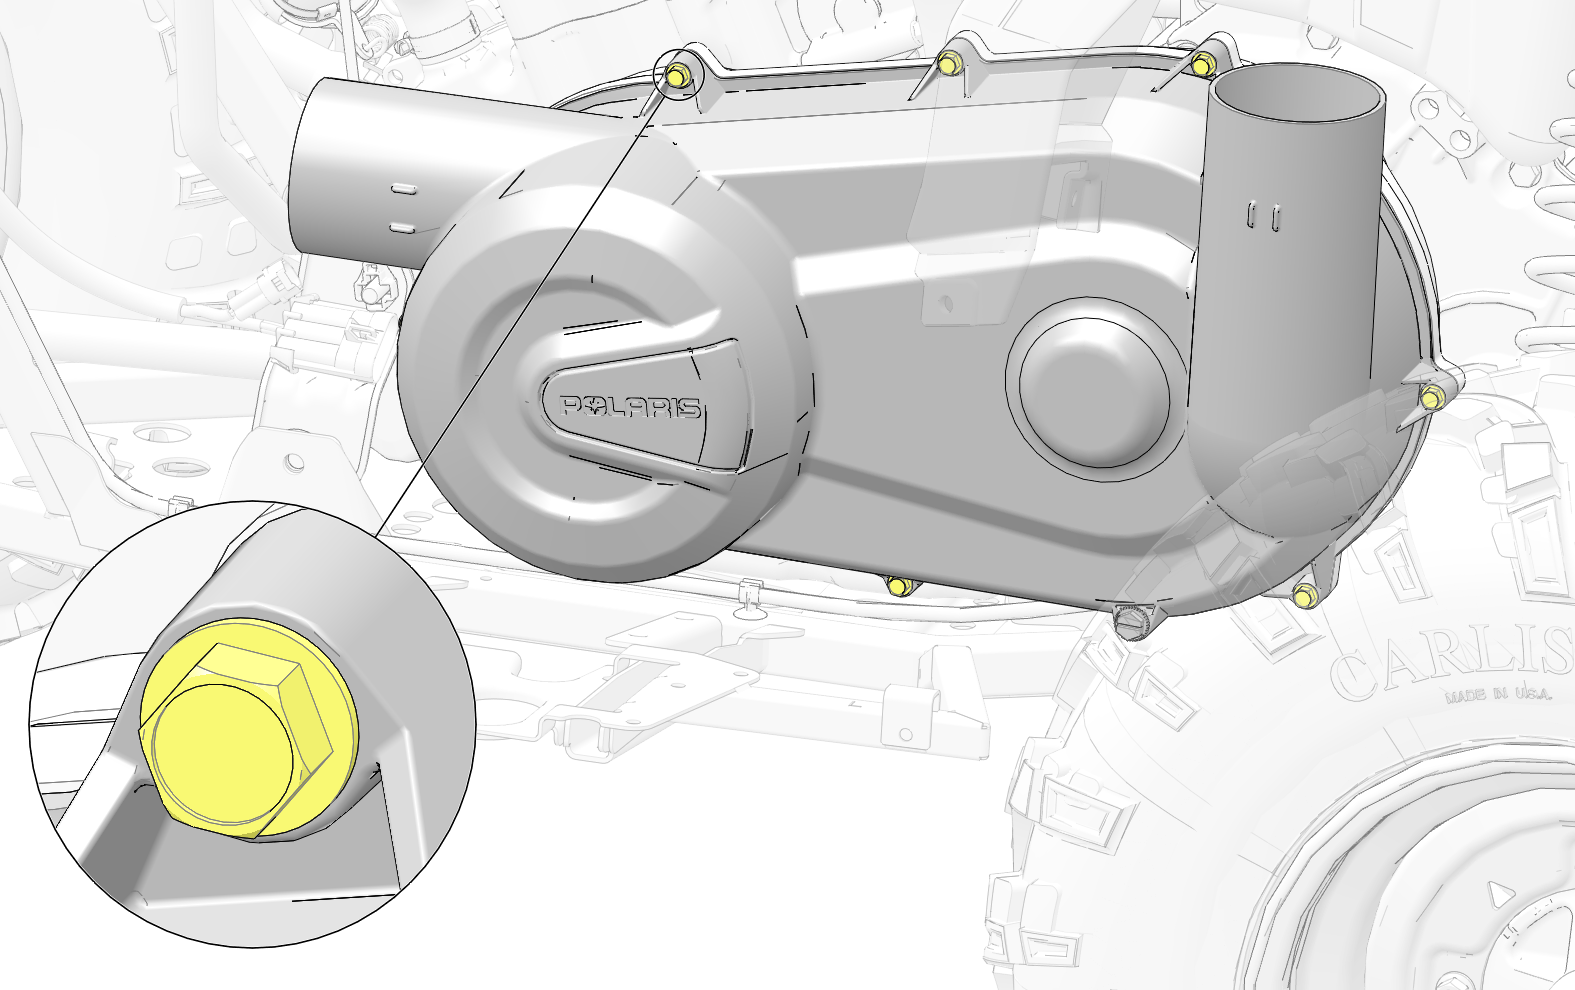
Install the outer PVT cover and fasteners. Torque fasteners to specification.
 TORQUE
Outer PVT Cover Fasteners:
44 in-lbs (5 N·m)
-
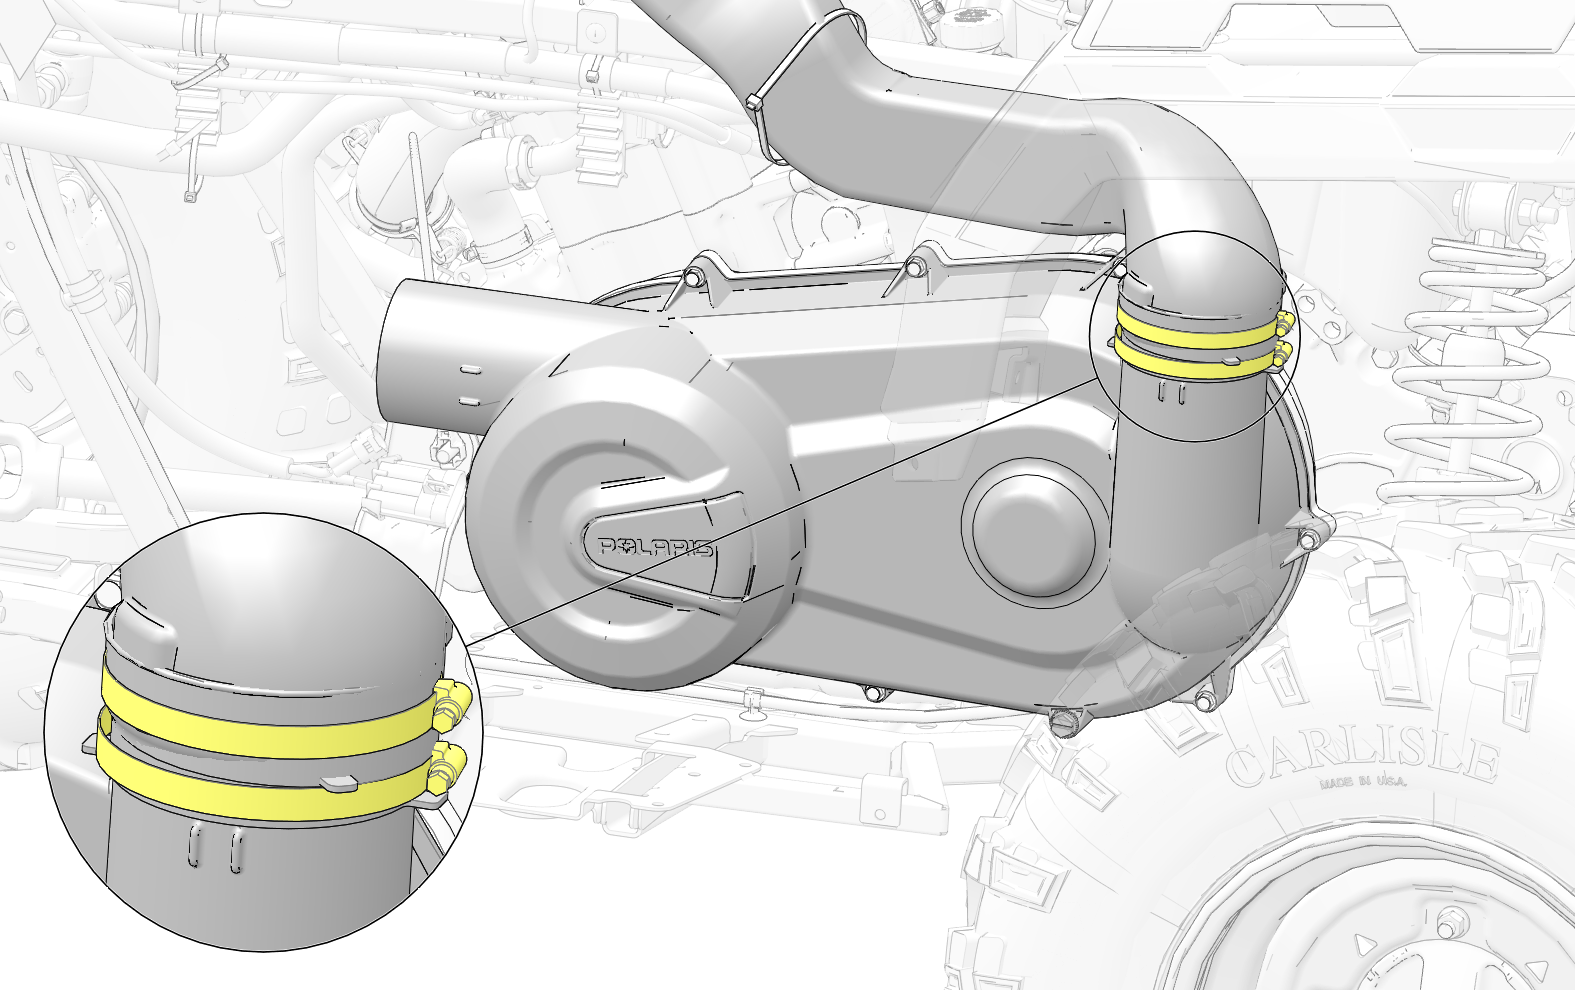
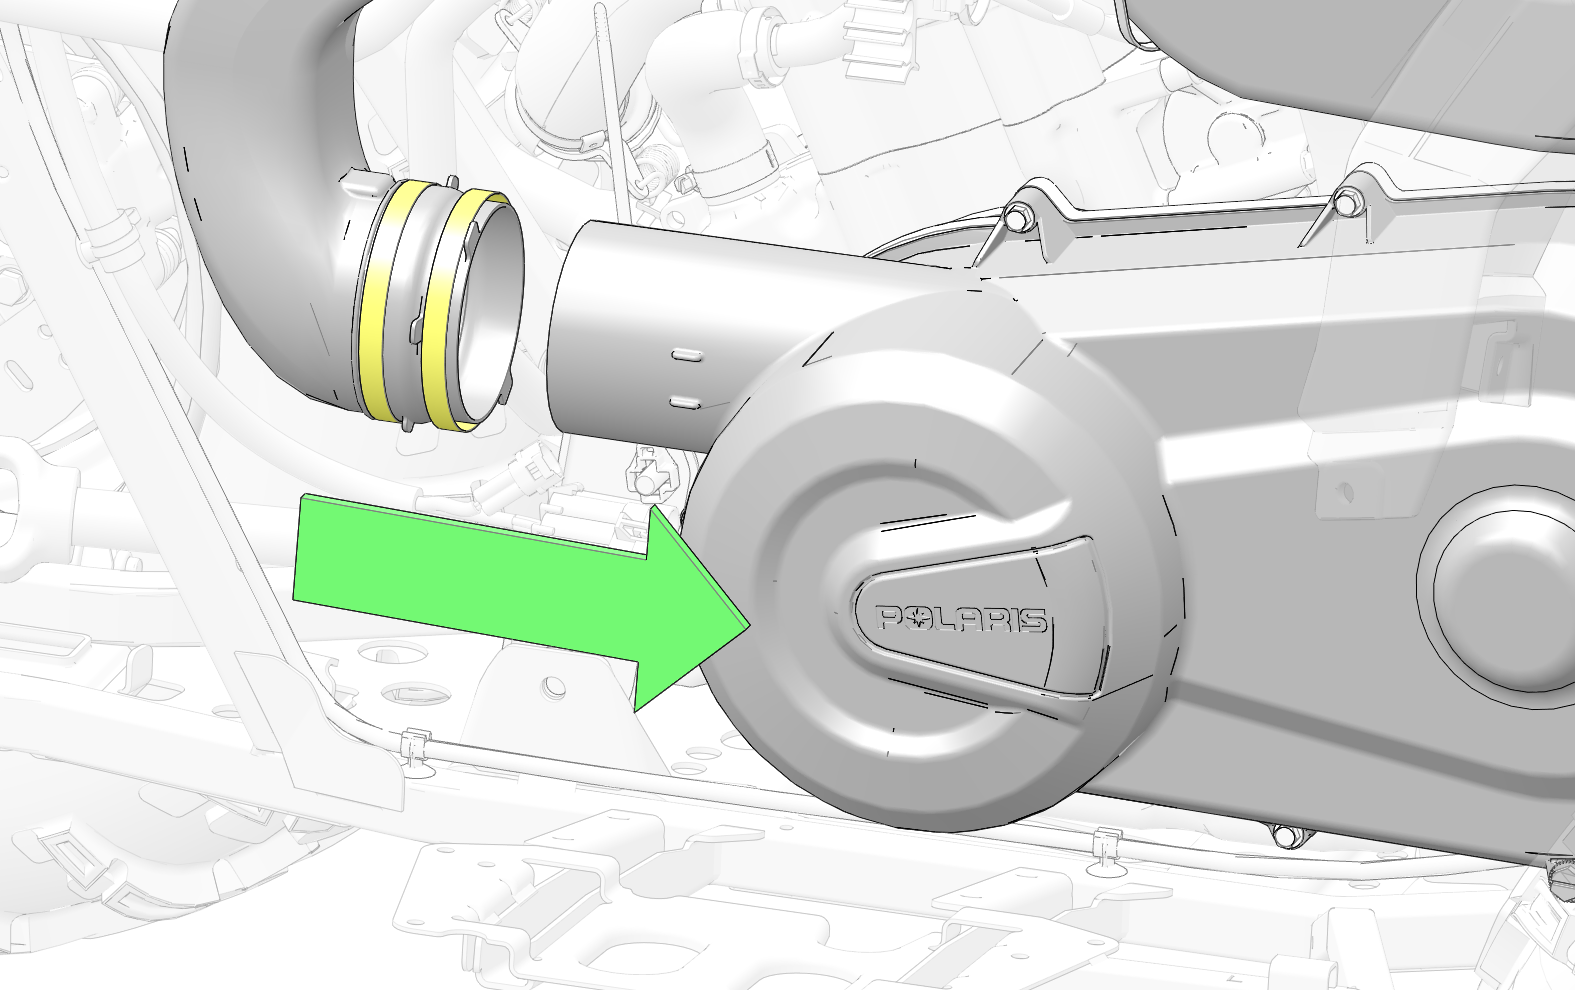
Install the PVT outlet duct and clamps.
-
Install the PVT inlet duct and clamps.
-
Torque the PVT inlet and outlet duct clamps to specification.
TORQUEInlet / Outlet Duct Clamps:
20 in-lbs (2 N·m)
-
Install the left side panel / footwell. See Side Panel / Footwell Installation.
-
Install the seat.