Belt Removal and Replacement
If a belt fails, always clean any debris from the outlet duct and from the clutch and engine compartments when replacing the belt.
-
Wiggling and rocking the cover will help it move around the bolts on the clutch towers.
-
Make sure the clutch cover bolts are not catching on other parts.
-
Rotating the drive clutch slightly by hand can provide more clearance in some cases.
-
If reinstalling the belt, reference the print on the belt to reinstall in the same direction.
-
Allow hot components to cool before performing this procedure.
-
Remove the seats and engine access panel.
-
Thoroughly clean ALL DEBRIS from the engine compartment.
-
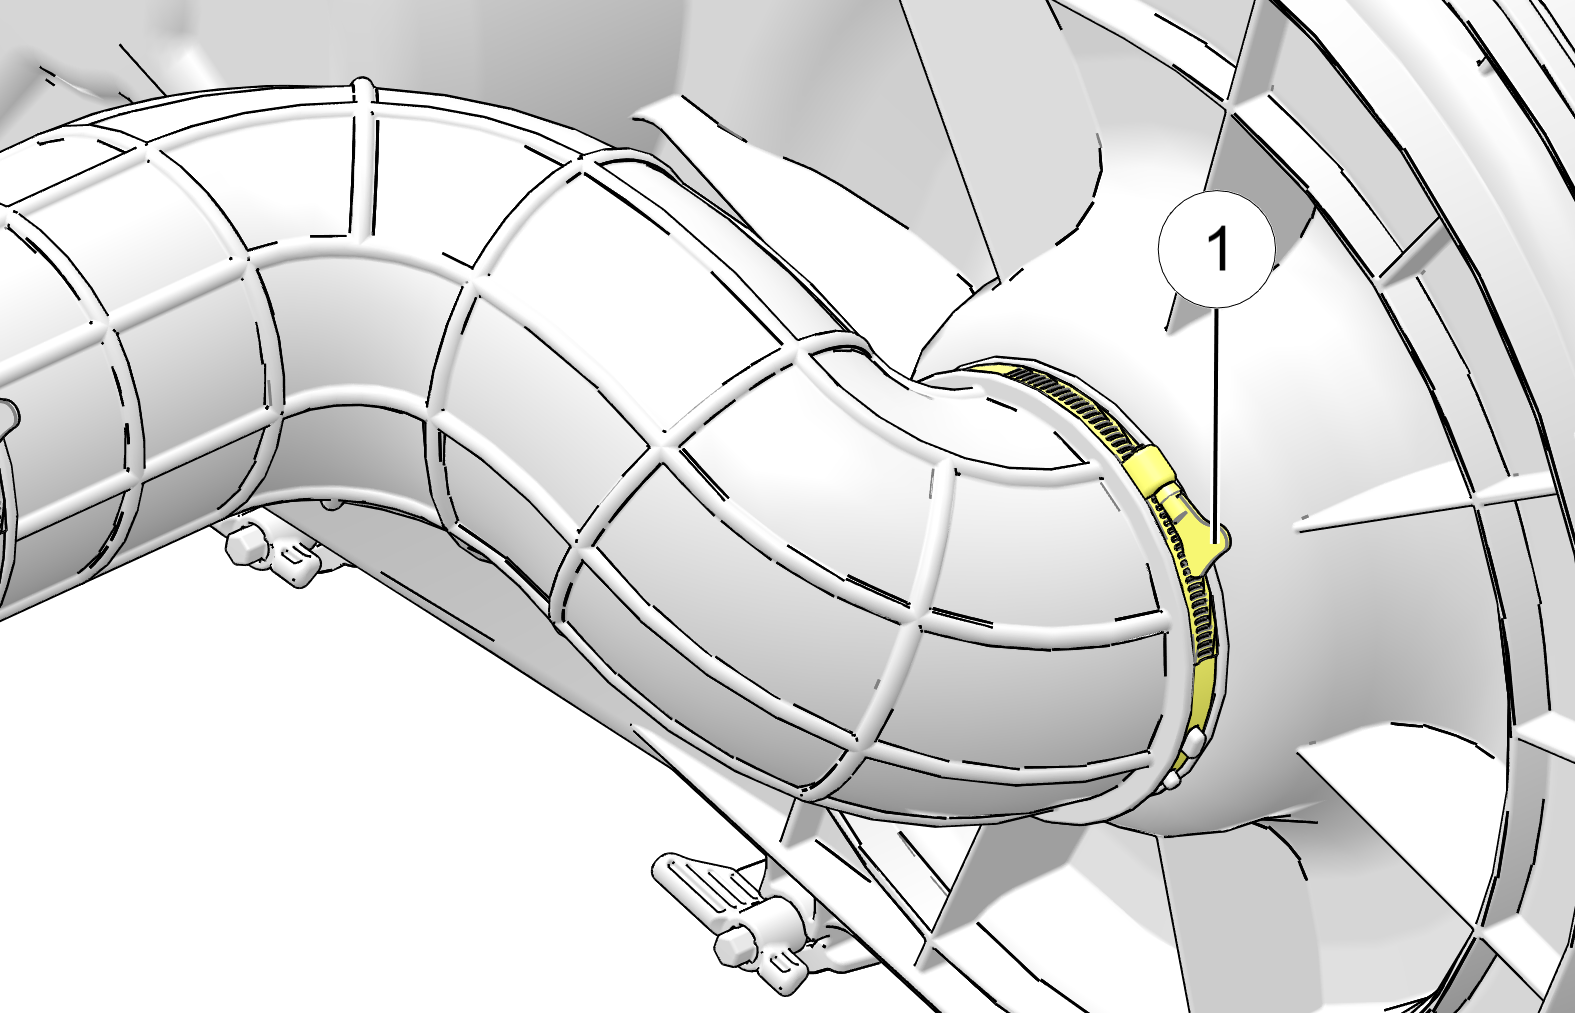
Loosen the clamp 1 retaining the PVT inlet duct to the outer clutch cover.
-
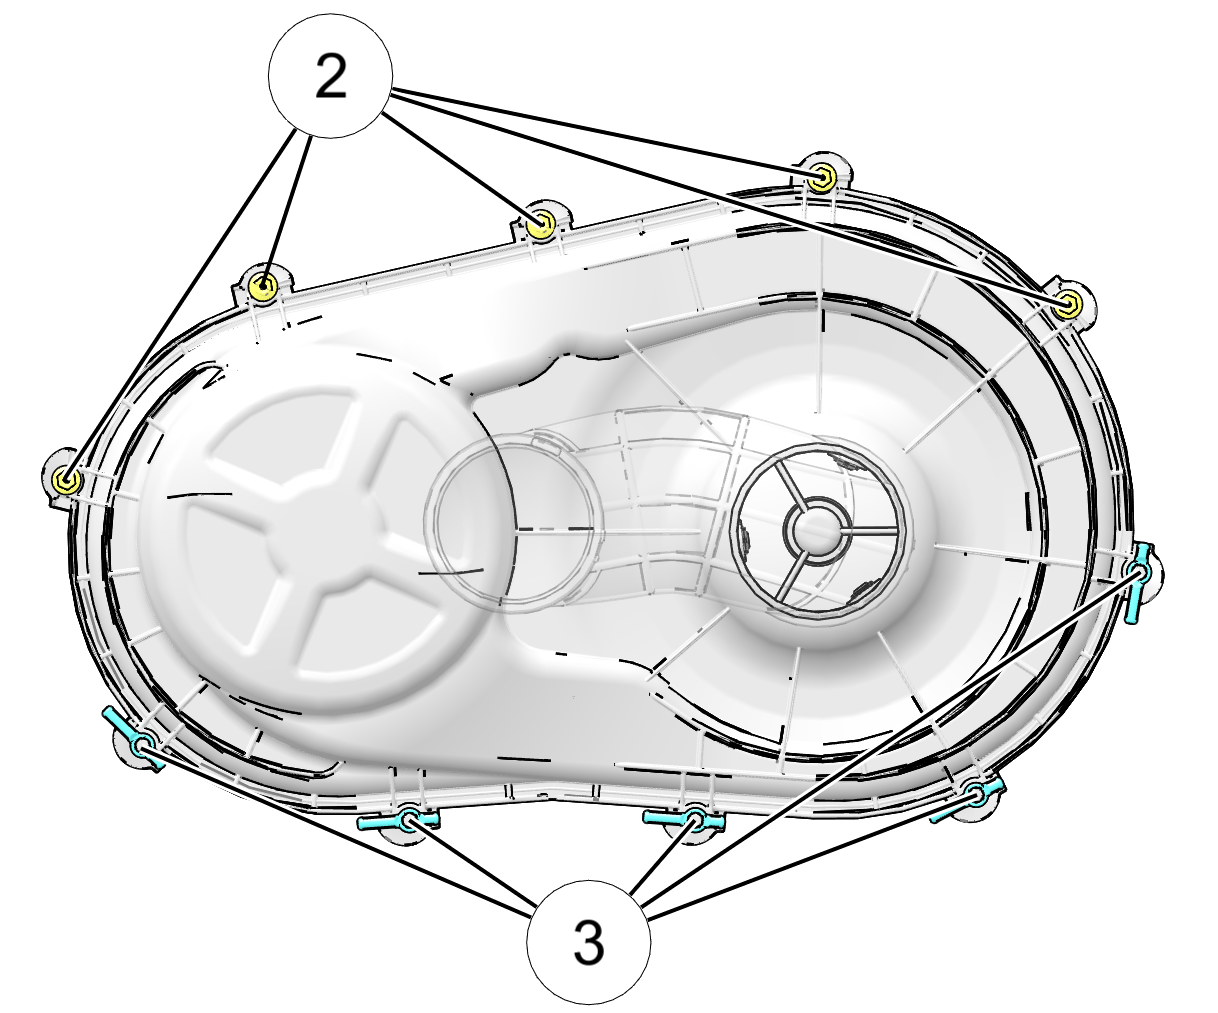
Using a 10 mm wrench, remove the five clutch cover bolts securing the upper portion of the clutch cover 2.
-
Then remove the 5 quick release fasteners located on the lower part of the clutch cover 3.
-
Maneuver the outer clutch cover outward and upward to access the drive belt.
-
Mark the drive belt direction of rotation so that it can be installed in the same direction.
-
Remove the clutch spreader tool from the top of the clutch housing.
-
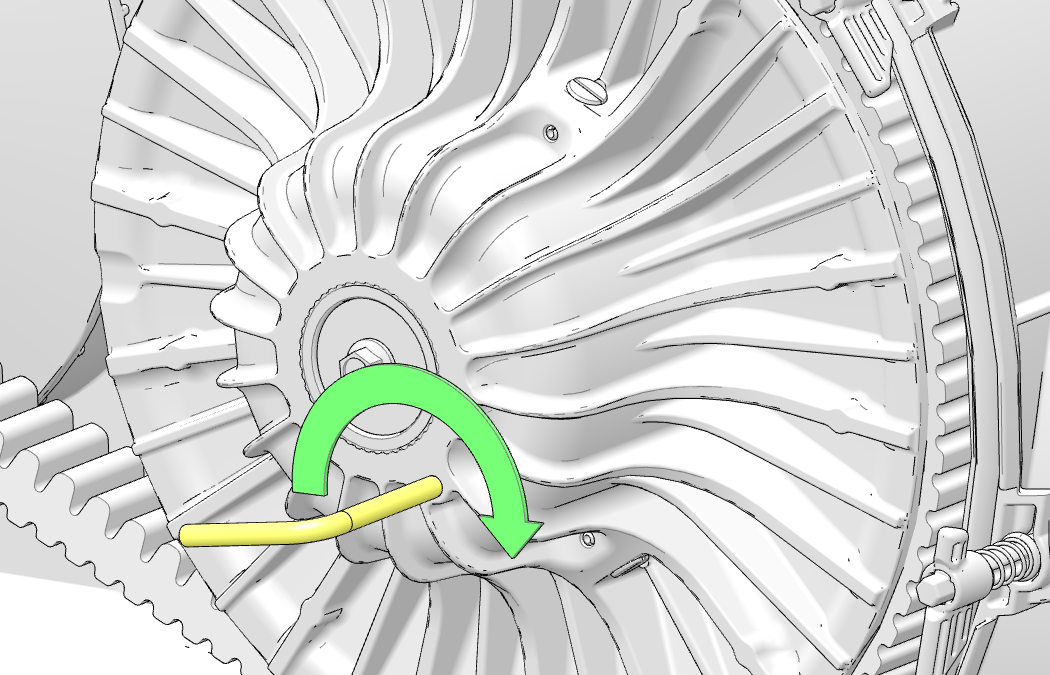
Insert the clutch spreader tool into the driven clutch.
-
Turn the tool clockwise to open the sheaves on the driven clutch.
-
Walk the belt out of the driven and drive clutch. Remove the belt.
-
Remove ALL debris wrapped in and around the PVT system.
-
Remove ALL debris from the entire clutch air duct passage.
-
Check for signs of damage to seals on the transmission and engine. If any seals appear to be damaged, your vehicle requires prompt service. Your POLARIS dealer can assist.
-
With the clutch spreader tool installed, loop the belt over the drive clutch and over part of the driven clutch. Be sure to install belt in the direction previously marked.
-
Rotate the driven clutch and walk the belt into the clutch.
-
Remove the clutch spreader tool from the driven clutch.
-
Rotate / spin the driven clutch and belt approximately 5-7 times to properly seat the belt in the driven clutch.
-
Once finished, return the clutch spreader tool to the clutch housing and reattach the clutch cover.
-
Tighten the five quick release fasteners located on the lower part of the clutch cover, then reinstall the 5 clutch cover bolts securing the top of the clutch cover.
TORQUEClutch Cover Bolts:
(4 N·m) 37 in-lbs -
Reattach the PVT inlet duct to the outer clutch cover (and fasten with the clamp).
TORQUEPVT Intake Hose Clamp:
(3 N·m) 35 in-lbs -
Reinstall and secure the close off panel.
-
Reinstall the seats. Ensure the seats latch securely.