Spark Plug Removal / Installation
Removal
-
Remove the side panels and hood.
-
Remove the upper plenum fasteners 1 and push rivets 2.
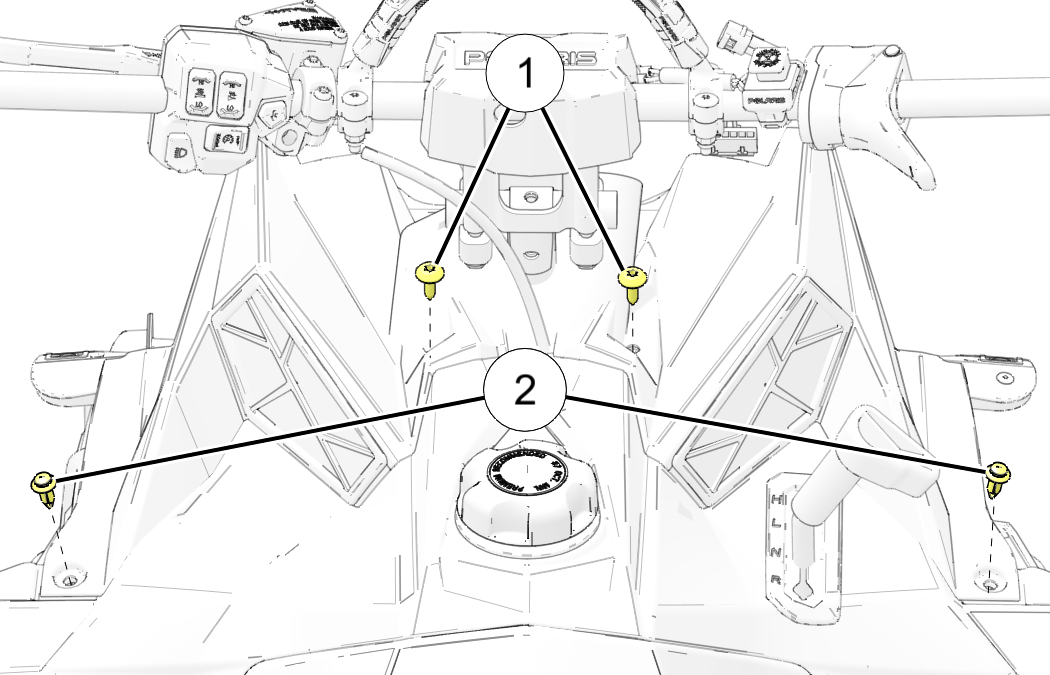 NOTICEImage for reference only. Console configuration may vary slightly based on model.
 -
Remove the push rivets 3 that fasten the front intake tube to the intake plenum.
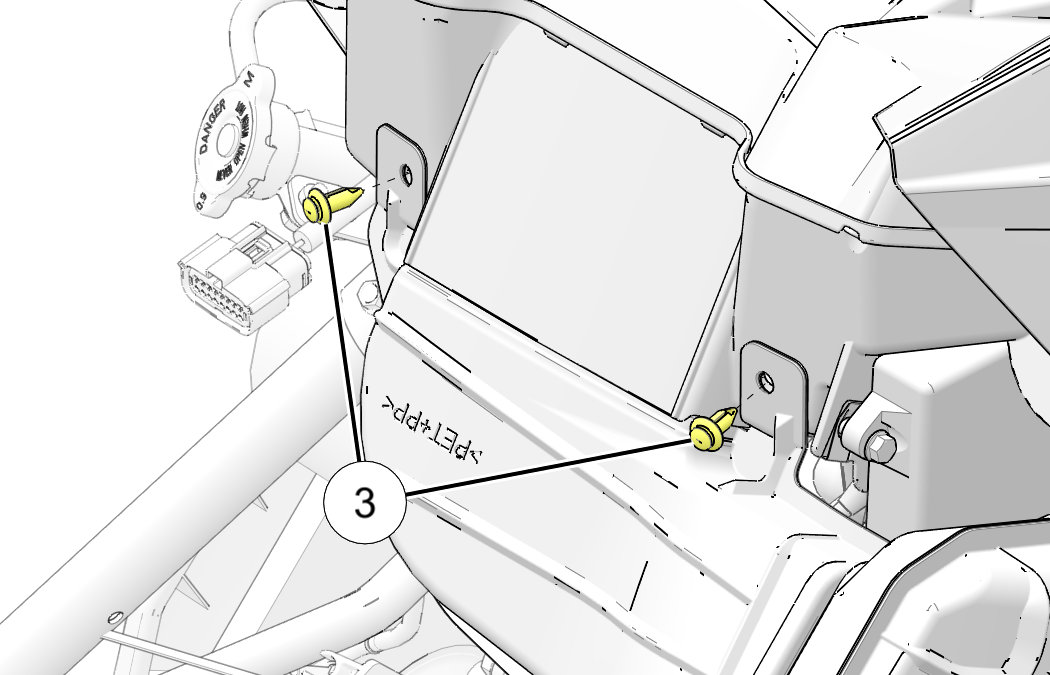
-
Remove the breather box fasteners.
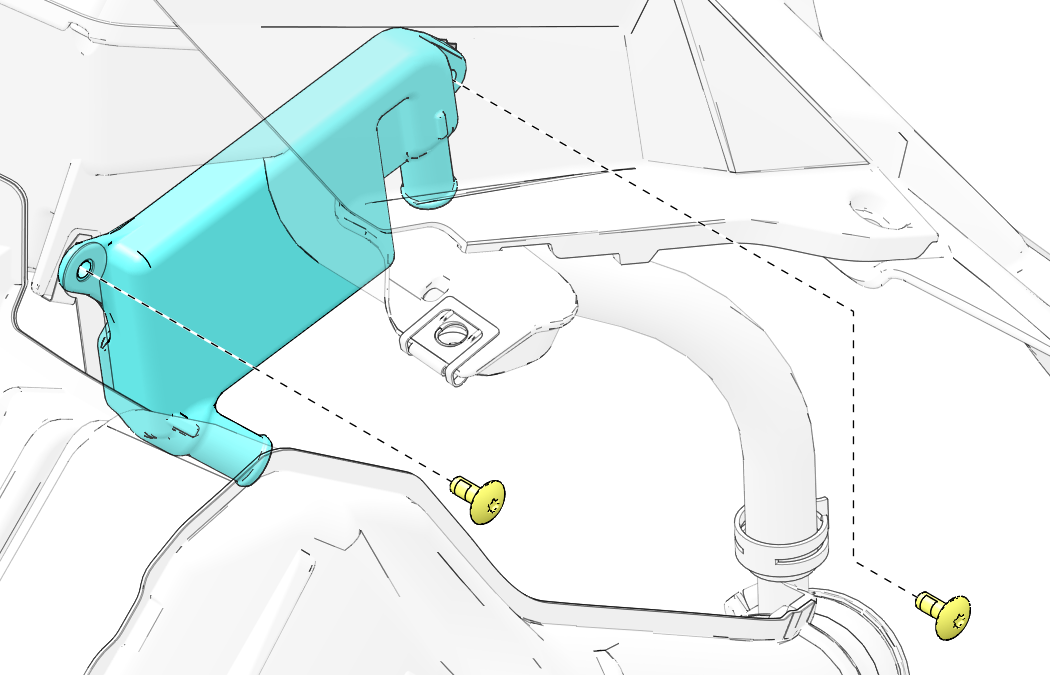
-
Remove the intake plenum.
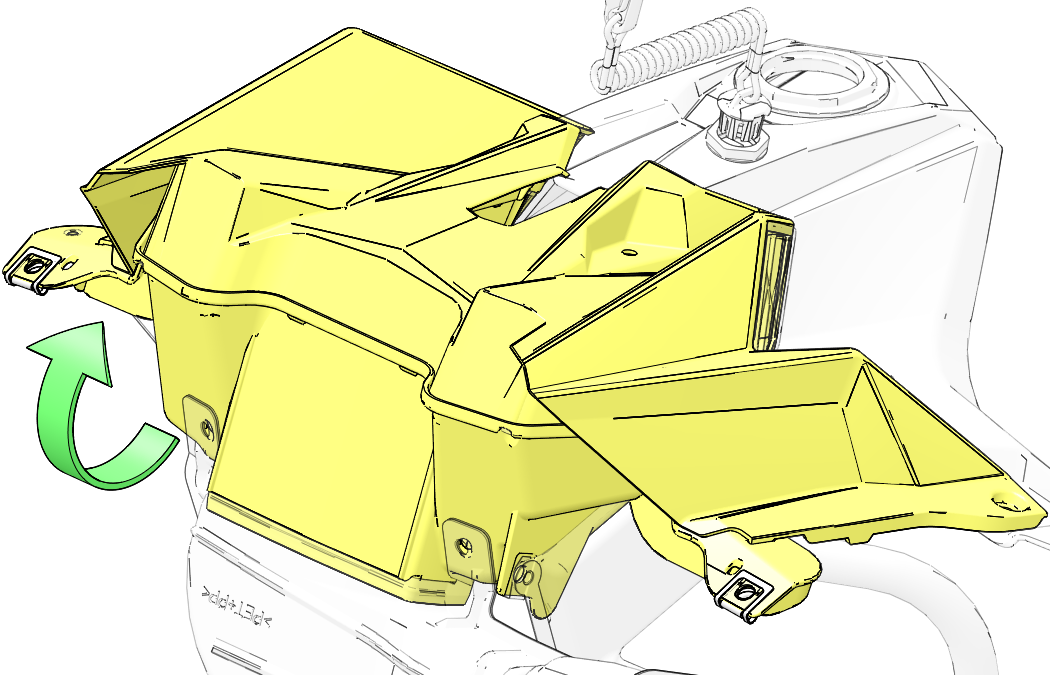
-
Clean the area around the ignition coils.
-
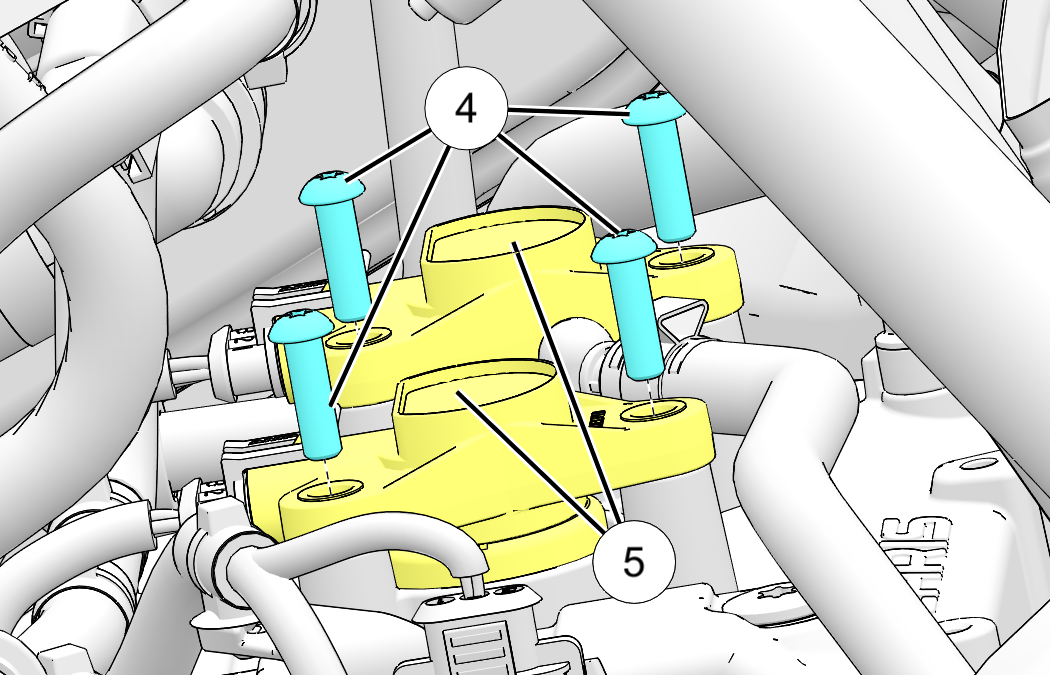
Remove the two fasteners 4 on the each ignition coil 5.
-
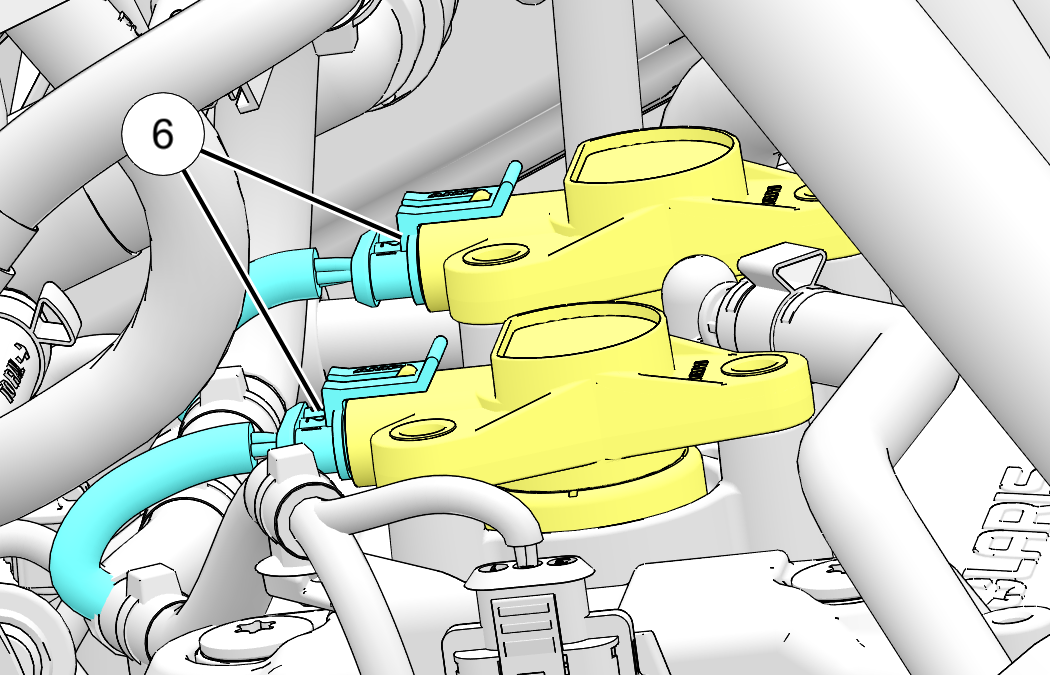
Disconnect the connectors 6 on the rear of the coils.
-
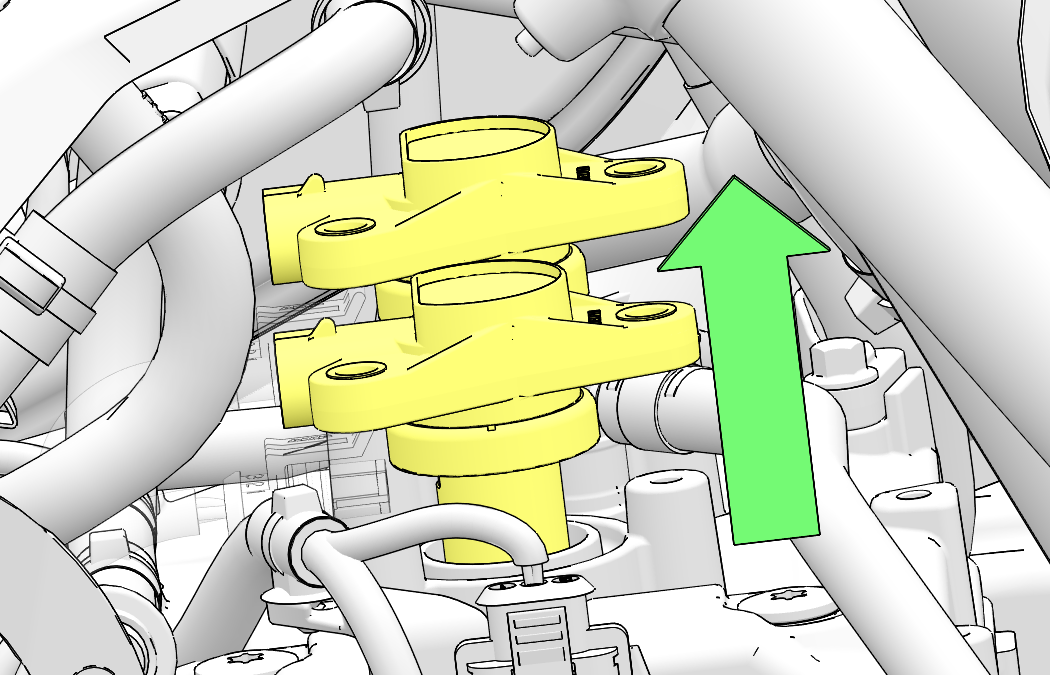
Carefully pull upward on both ignition coils to remove.
-
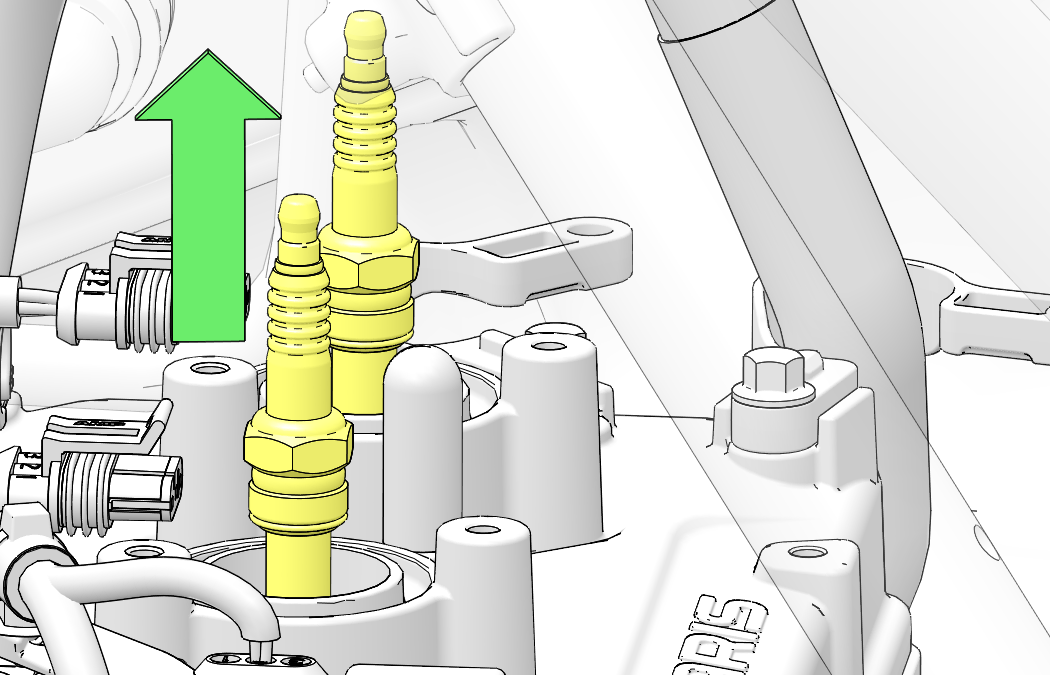
Remove both spark plugs.
Installation
-
Set the spark plug gap to specification.
MEASUREMENTNGK® 95897 MR7F Gap:
0.030 in (0.75 mm) -
Install both spark plugs. Torque to specification.
TORQUESpark Plug:
106 in-lbs (12 N·m)NOTICEUse pre-installation tool to prevent damage to the spark plug ground strap.
-
Install both ignition coils and carefully push the coils onto the spark plugs to make sure they are secure.
-
Install the fasteners to secure the ignition coils and torque to specification.
TORQUEIgnition Coil Fastener:
70 in-lbs (8 N·m) -
Connect the connectors to the rear of the coils.
-
Install the intake plenum.
-
Install the breather box fasteners. Torque to specification.
TORQUEBreather Box Fastener:
62 in-lbs (7 N·m) -
Install the push rivets 3 that fasten the front intake tube to the intake plenum.
-
Install the upper plenum fasteners and push rivets. Torque to specification.
TORQUEUpper Plenum Fastener:
88 in-lbs (10 N·m) -
Install the hood and side panels.