Oil and Filter Change
Always change the oil and filter at the intervals outlined in the Periodic Maintenance Chart beginning on Maintenance Chart Tables.
-
Position the vehicle on a level surface. Place the transmission in PARK.
-
Allow engine to cool down before draining oil.
-
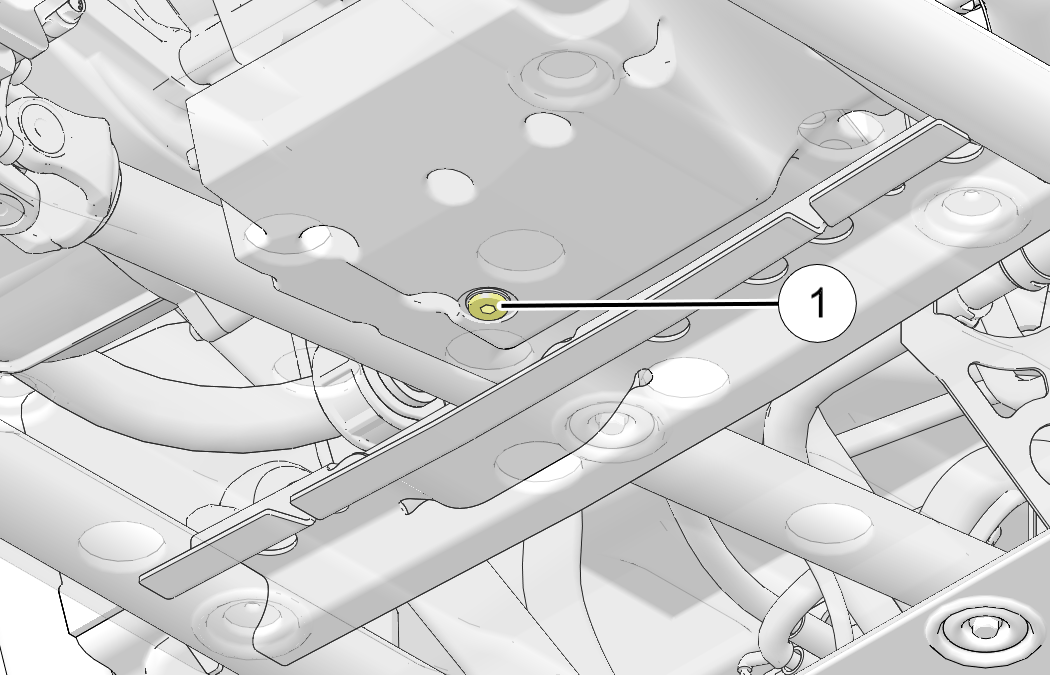
Place a drain pan under the engine crankcase and remove the drain plug 1.
-
Access the oil filter through the driver’s side rear wheel well.
NOTEThe engine should be off for at least 2 minutes prior to removing the oil filter. -
Place the shop rags under filter to catch any spilled oil during removal. Using the Oil Filter Wrench, turn the oil filter counterclockwise to remove it. Tip the open end of the oil filter up to minimize oil spill.
-
Clean the filter sealing surface on the engine crankcase with a clean rag and ensure the original oil filter o-ring is not stuck to the crankcase.
WARNINGDo not use a hose/pressure washer to clean up spilled oil on a vehicle. This may spread oil into surfaces that may get hot which may lead to a fire. -
Lubricate the o-ring on the new oil filter with a film of clean engine oil. Check to make sure the o-ring is in good condition. Tighten to specification (Turn by hand until filter O-ring contacts sealing surface, then turn an additional 3/4 turn.)
-
Inspect the sealing washer on the drain plug for burrs or nicks. Replace the washer if it is damaged.
-
Reinstall the engine crankcase drain plug. Torque drain plug to specification [12 ft-lbs (16 Nm)].
-
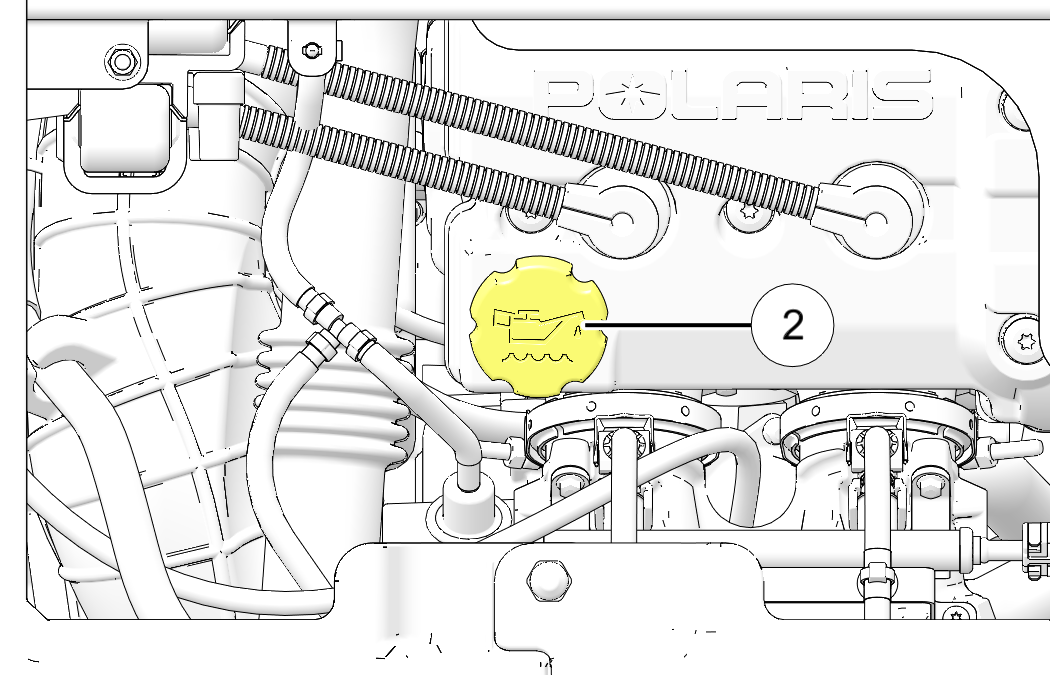
Remove the cargo box access panel. Add engine oil through the oil fill cap 2 located on top of the engine valve cover.
-
Fill the engine to the recommended specification.
-
Start engine and allow it to idle for 30 seconds.
-
Stop the engine and inspect for leaks. Wait at least 15 seconds before removing the oil dipstick.
-
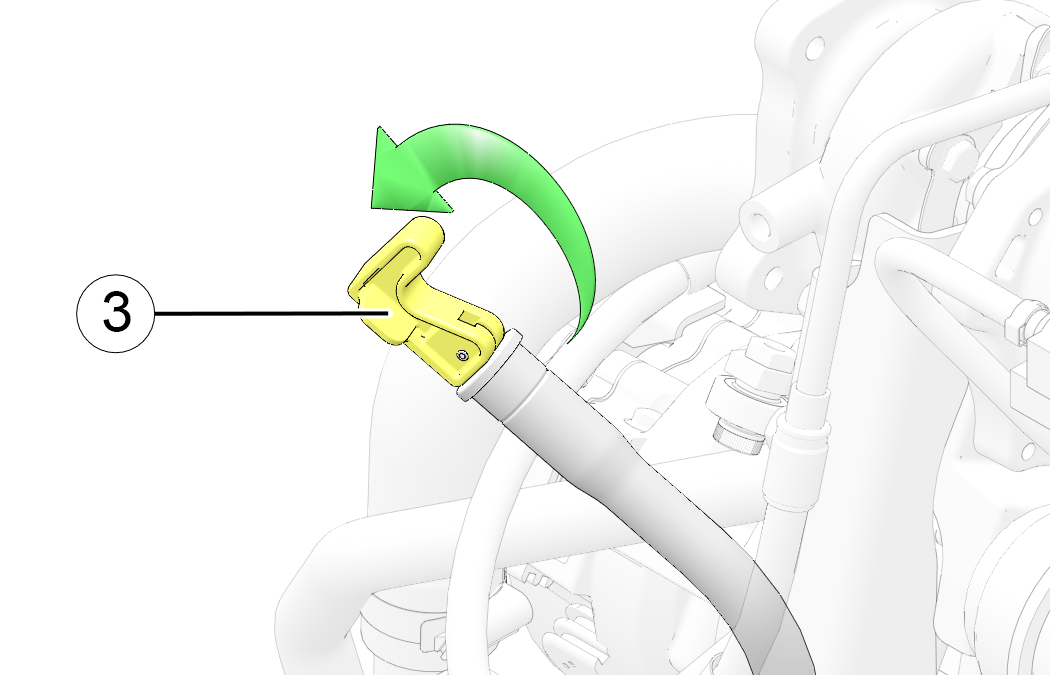
Unlock the dipstick lever 3. Remove the dipstick and wipe it dry with a clean rag.
-
Reinstall the dipstick to fully seat it. Do not lock the dipstick.
NOTEMake certain the dipstick is inserted all the way down to ensure an accurate reading. -
Remove the dipstick and check the oil level.
-
Add the recommended oil as necessary to bring the oil level within the SAFE range (between the holes) on the dipstick. Do NOT overfill.
NOTEA rising oil level between checks during cold weather operation can indicate contaminants such as gas or moisture collecting in the crankcase. If the oil level is over the upper mark, change the oil immediately. -
When finished, reinstall dipstick and lock the lever.
-
Reinstall the cargo box access panel, engine service panel, and seats.
-
Dispose of used oil, filter, and rags properly.