Battery Installation
Using a new battery that has not been fully charged can damage the battery and result in a shorter life. It can also hinder vehicle performance. Follow the instructions in the Battery Charging section before installing the battery.
-
Ensure the key switch is set to OFF position before installing the battery.
-
Remove the driver’s seat. See Seat Removal.
-
Place the battery in the battery holder.
-
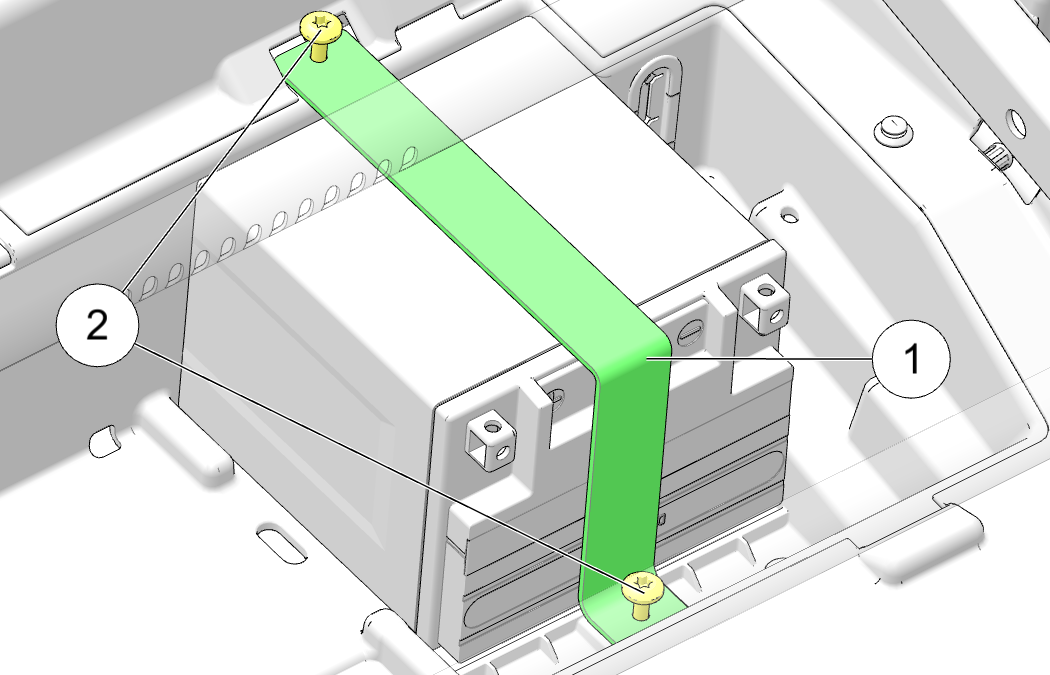
Place the battery hold-down strap 1 across the battery.
-
Install the two screws 2 securing the battery hold-down strap. Torque fasteners to specification.
TORQUEBattery Mount Bracket Fasteners:
53 in-lbs (6 Nm)
-
Coat the terminals with dielectric grease or petroleum jelly.
-
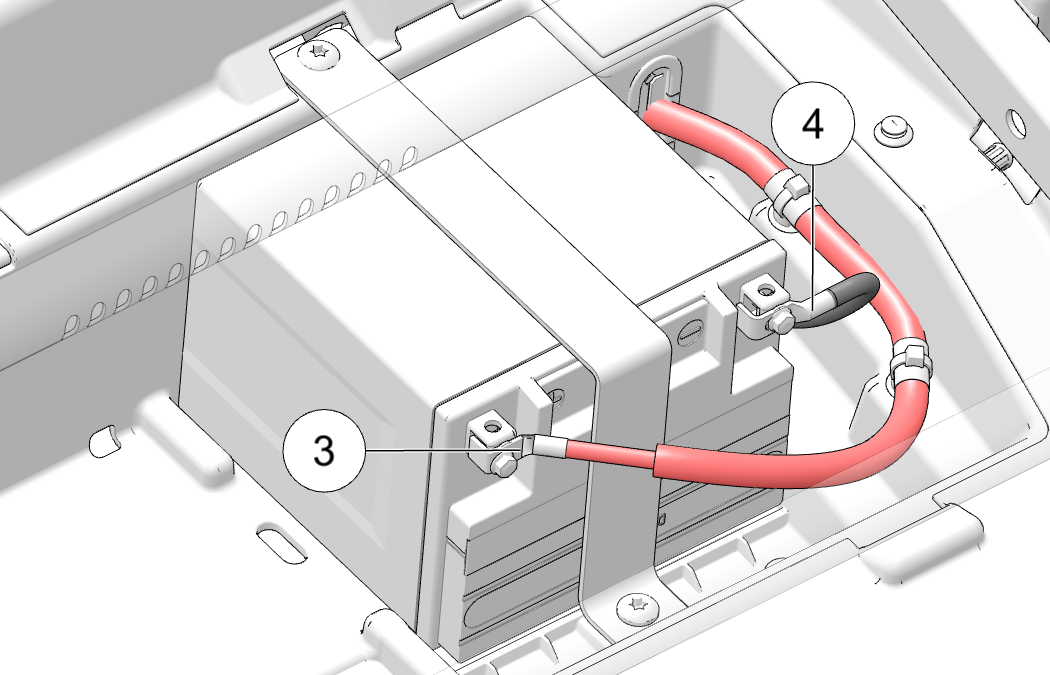
Connect and tighten the POSITIVE (+) red cable 3.
-
Connect and tighten the NEGATIVE (-) black cable 4.
TORQUEBattery Terminal Fasteners:
30 in-lbs (7 Nm)
-
Verify that cables are properly routed.
-
Reinstall the seat.
Models Equipped with Two Batteries
On models equipped with two batteries, do the following:
-
Ensure the key switch is set to OFF position before installing the battery.
-
Remove the driver’s seat. See Seat Removal.
-
Place the both of the batteries in the battery holder.
-
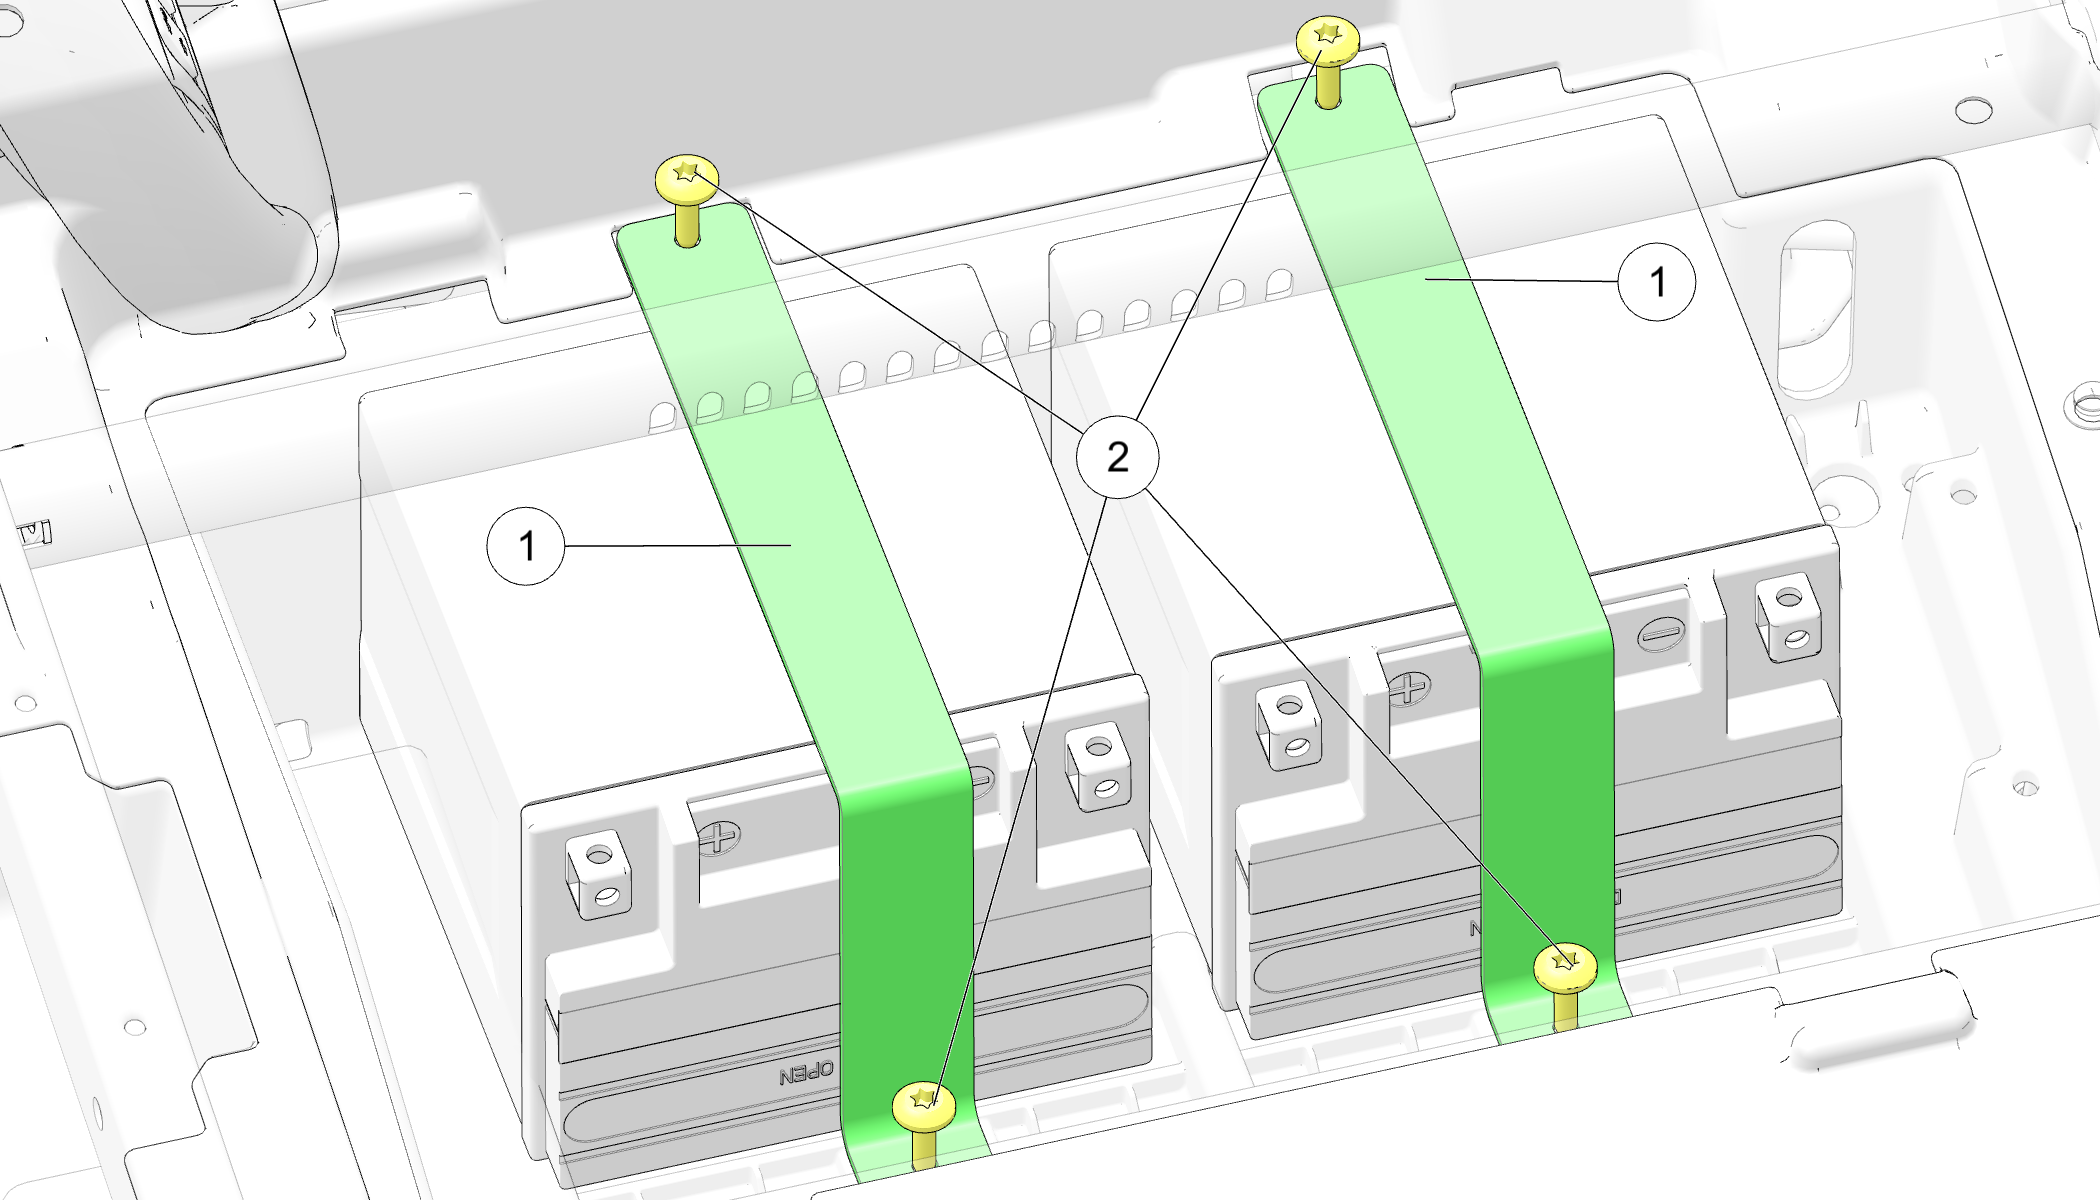
Place the battery hold-down strap 1 across the battery.
-
Install the four screws 2 securing the two battery hold-down straps. Torque fasteners to specification.
TORQUEBattery Mount Bracket Fasteners:
53 in-lbs (6 Nm)
-
Coat the terminals with dielectric grease or petroleum jelly.
-
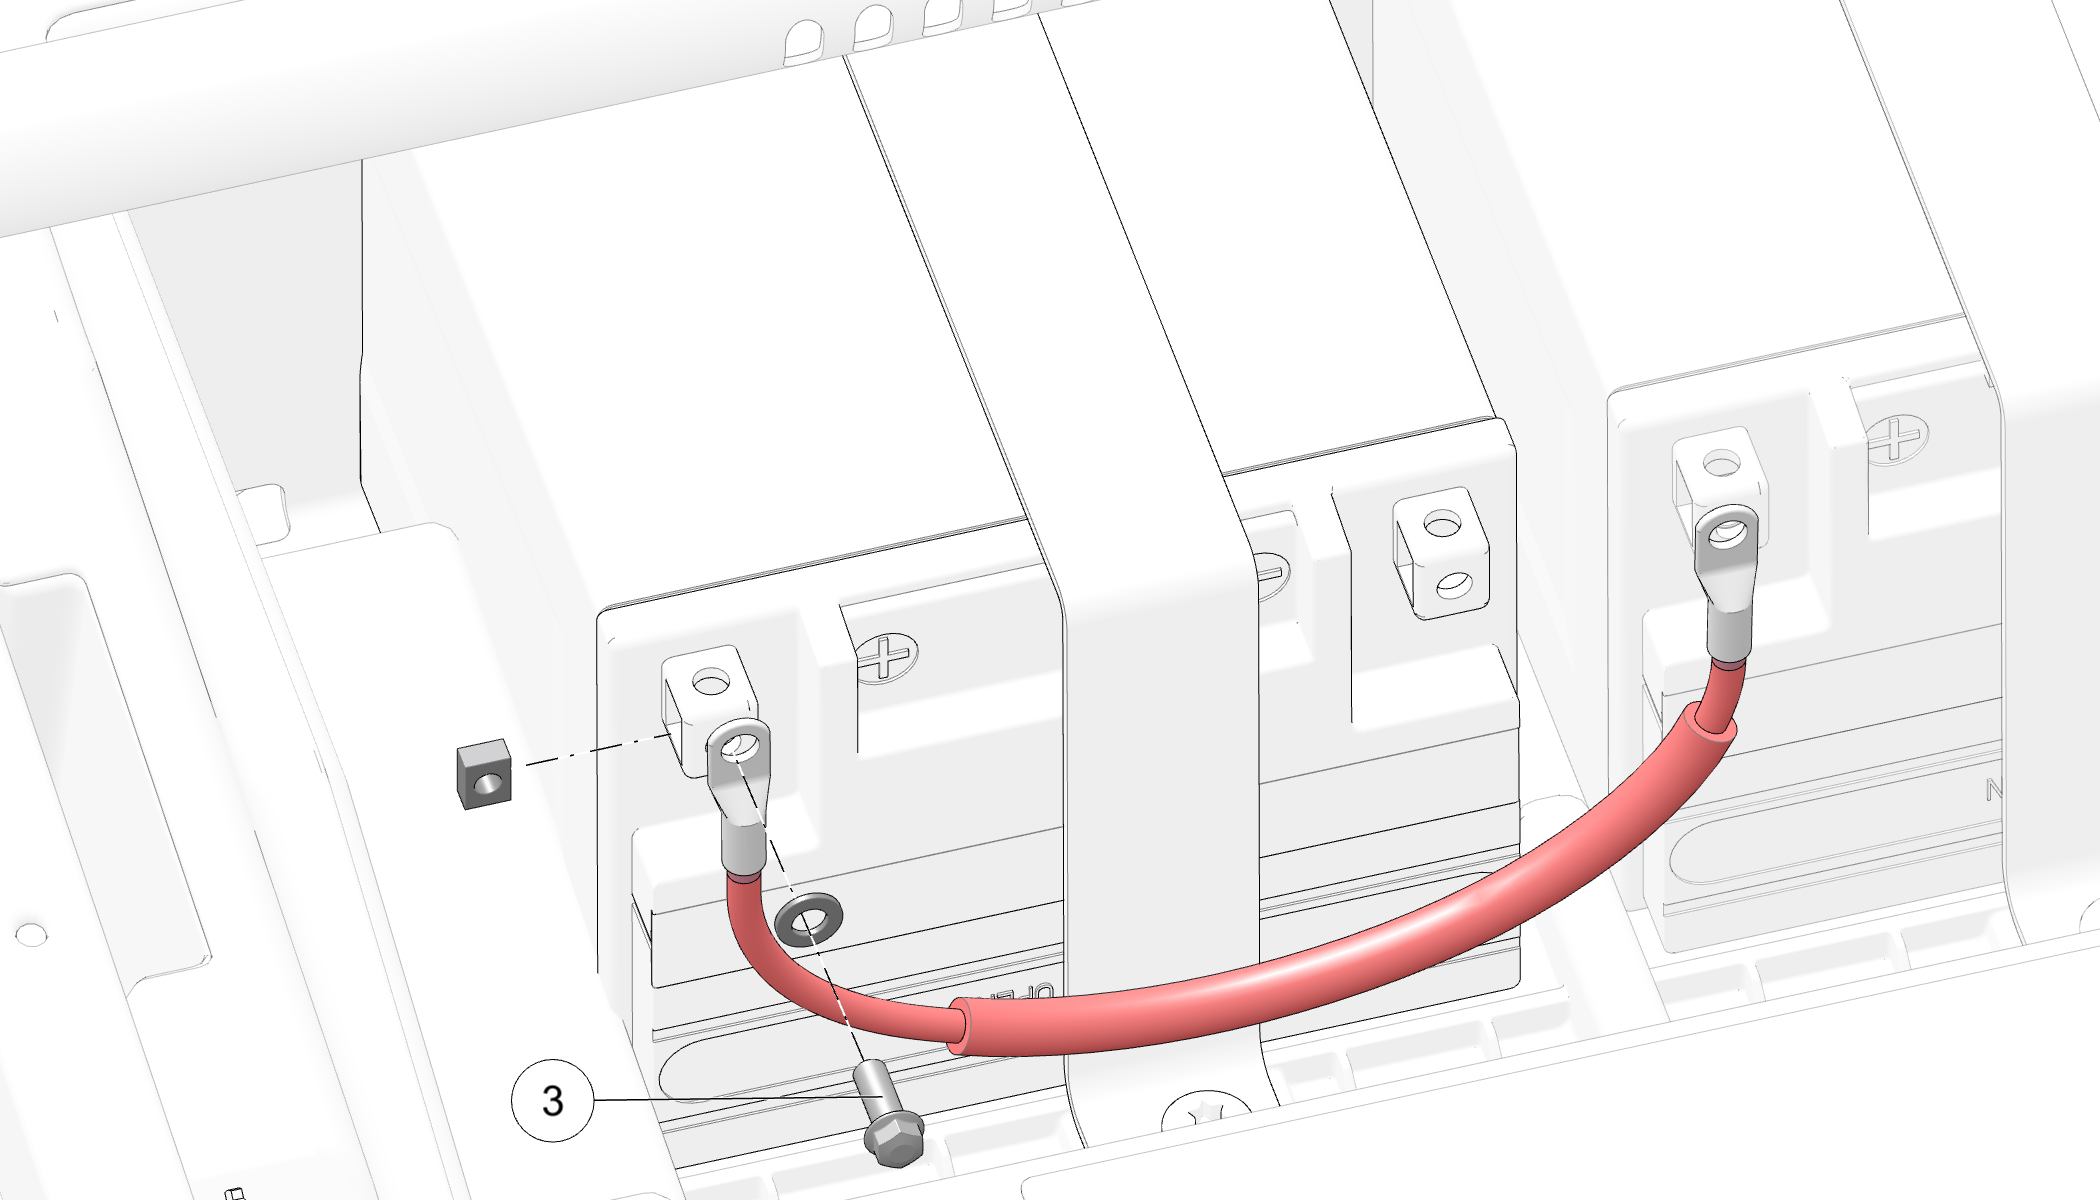
On the left-most battery, connect and tighten the POSITIVE (+) red cable 3.
-
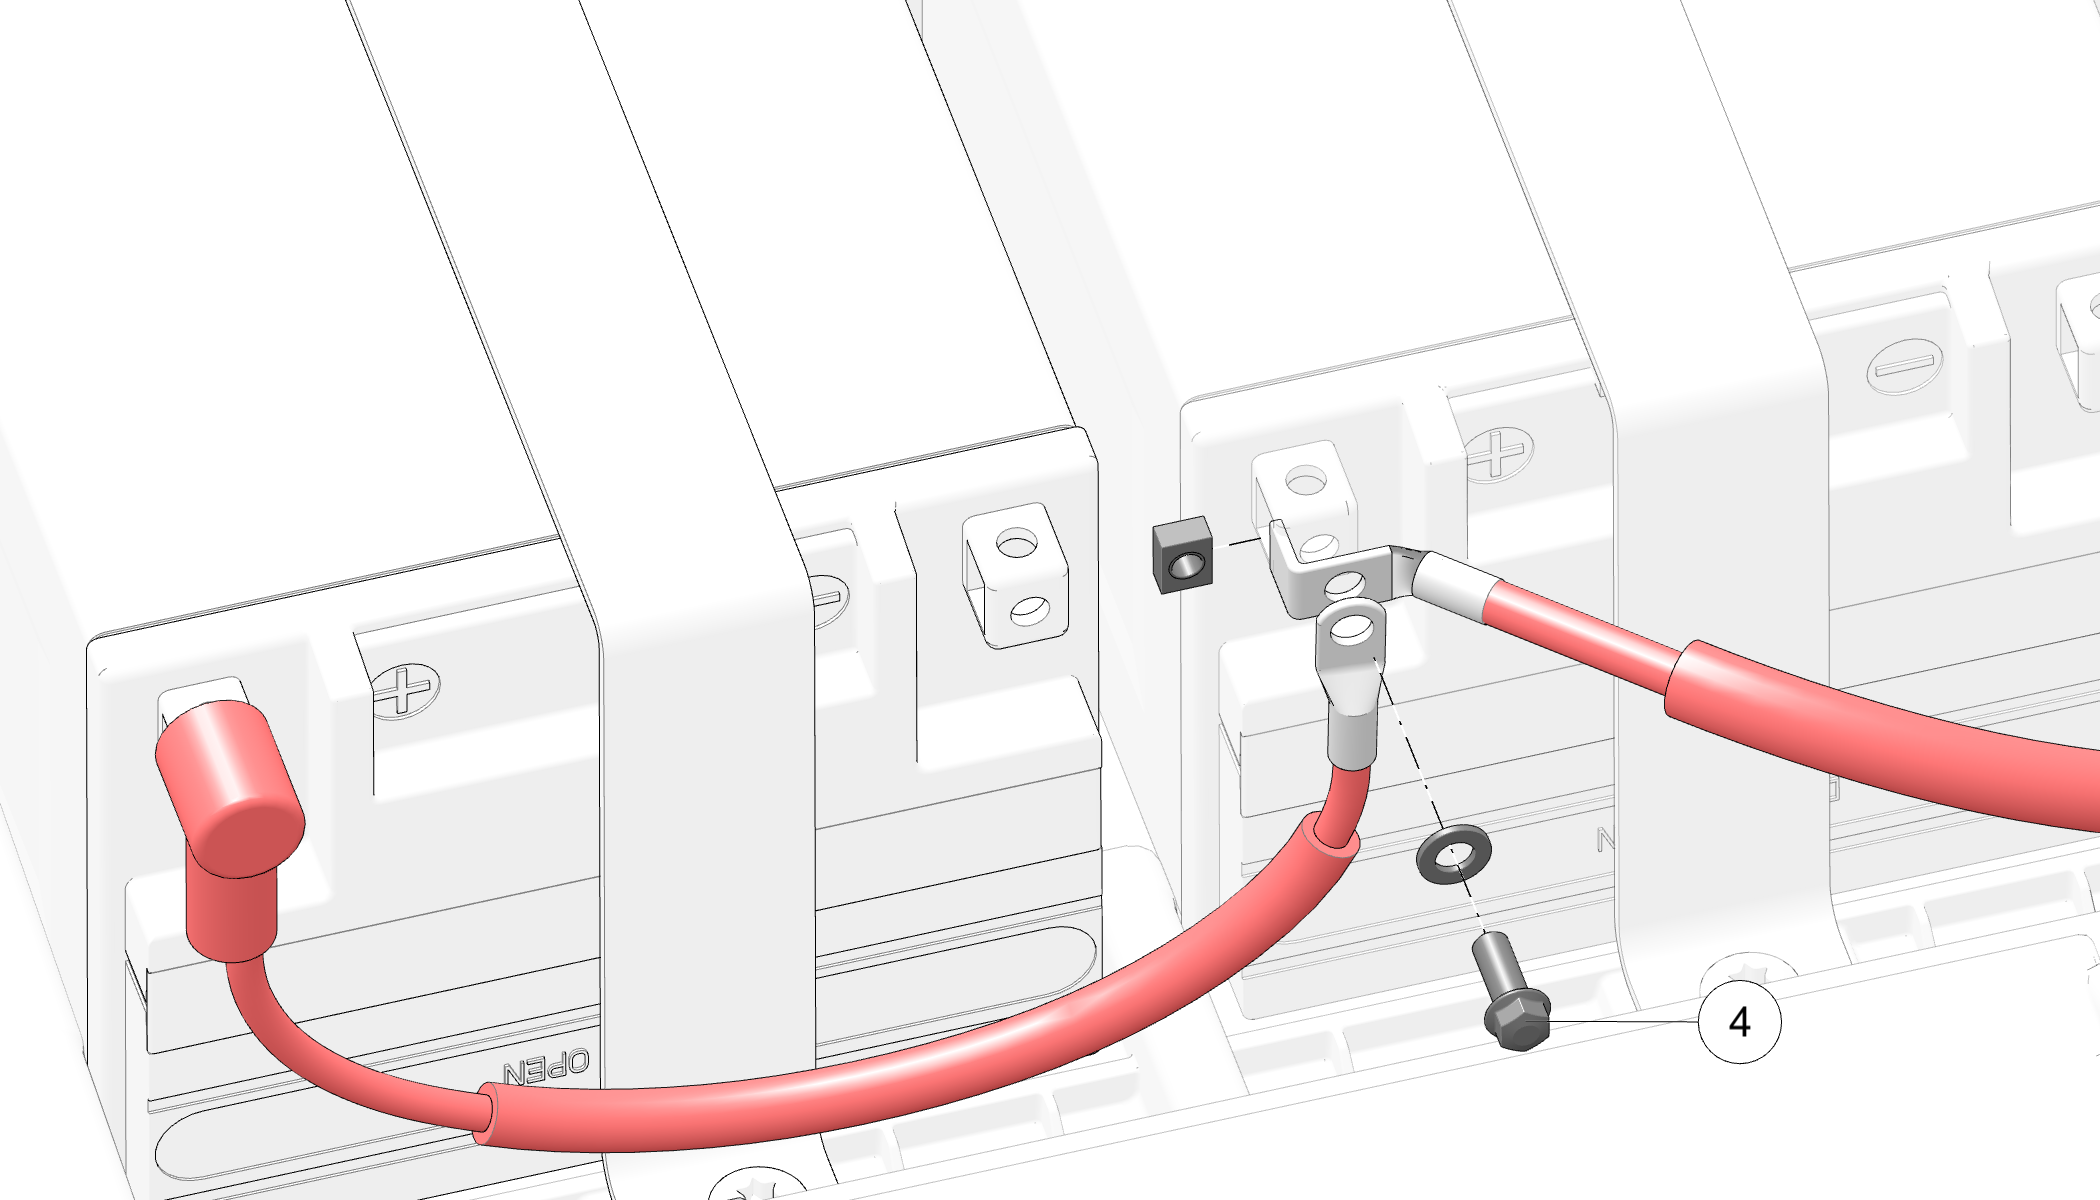
On the right-most battery, connect and tighten the POSITIVE (+) red cable 4.
-
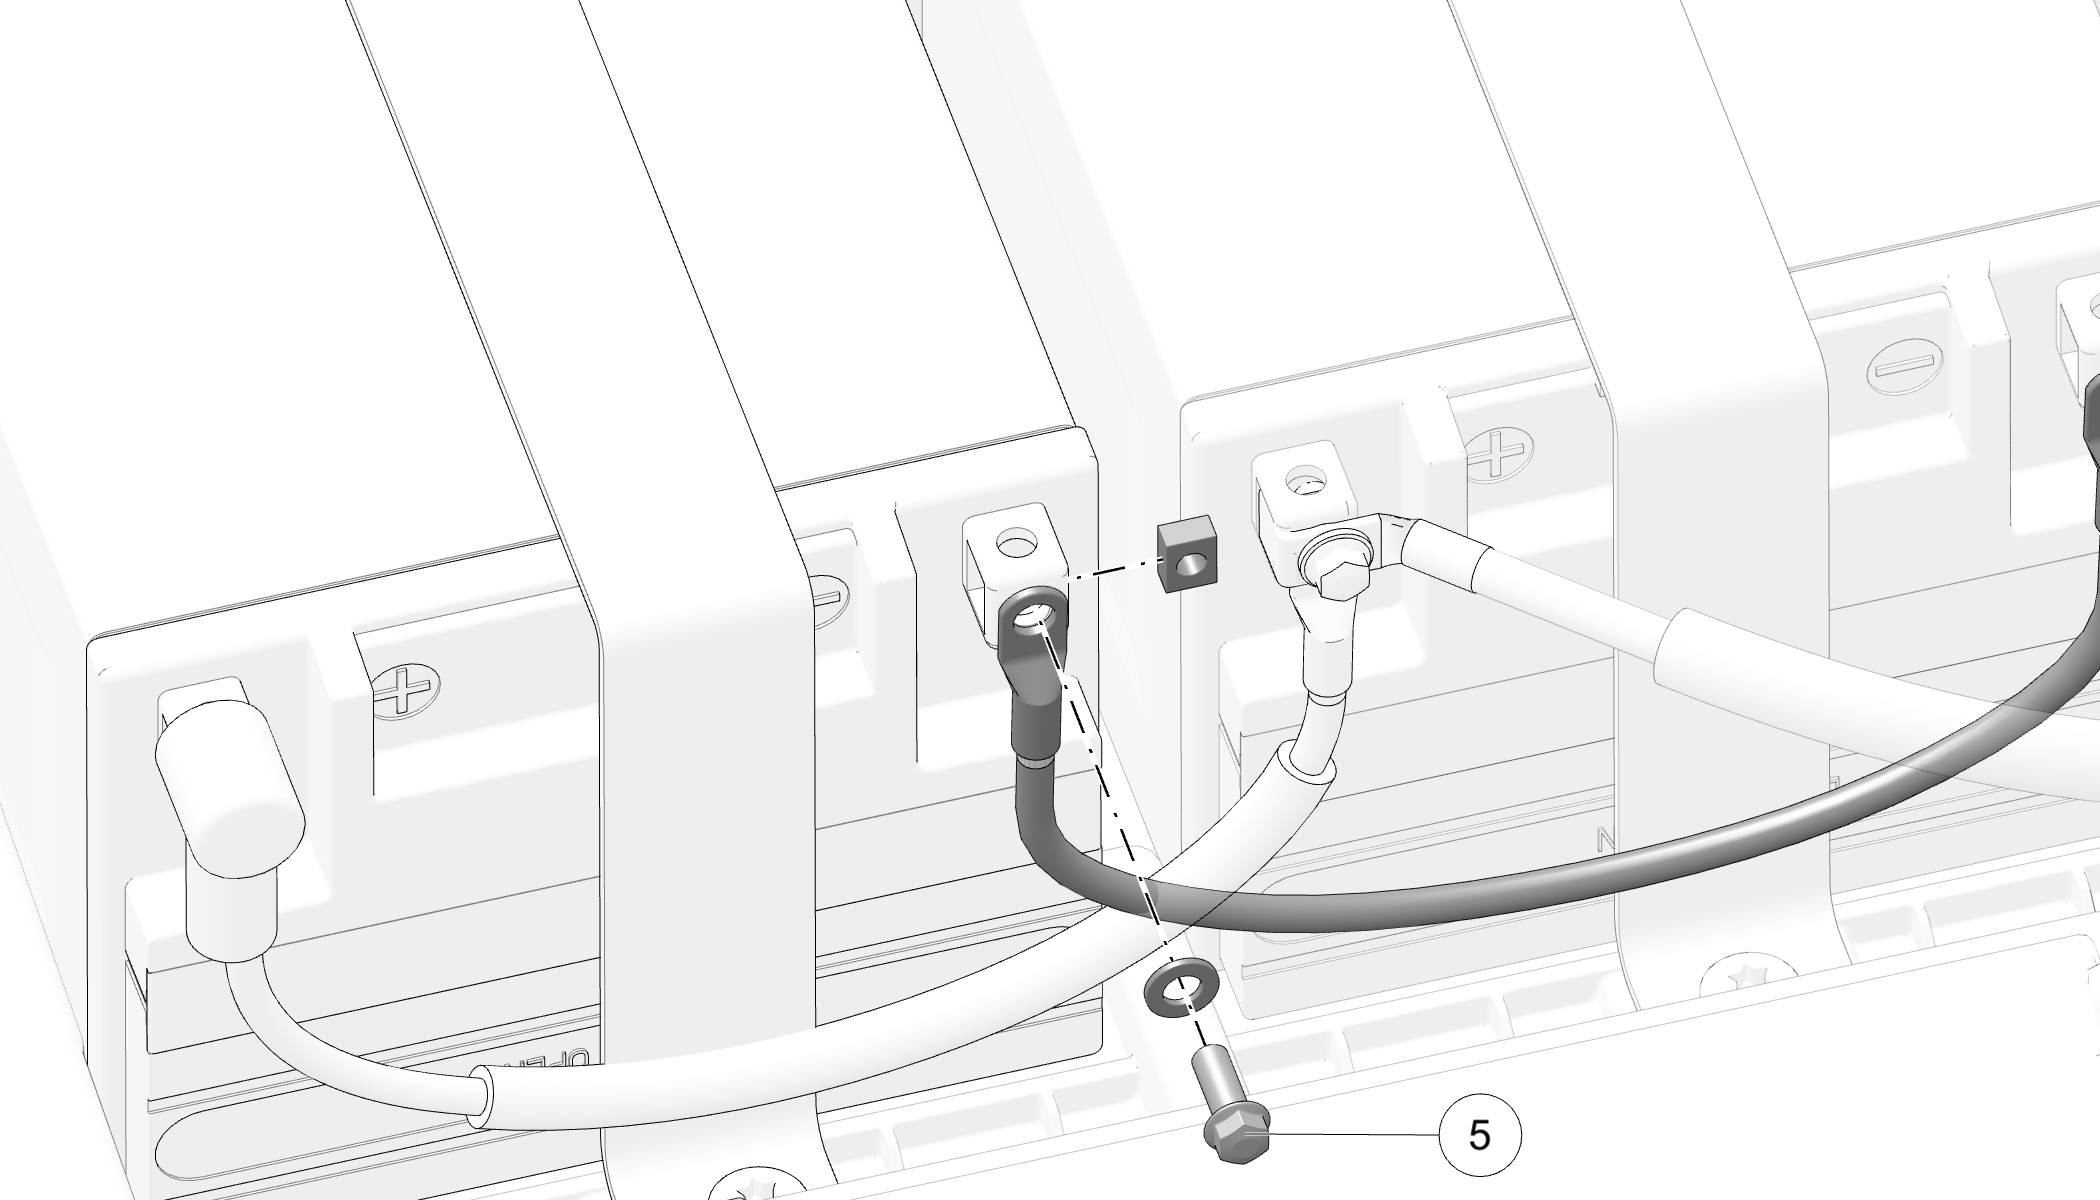
On the left-most battery, connect and tighten the NEGATIVE (-) black cable 5.
-
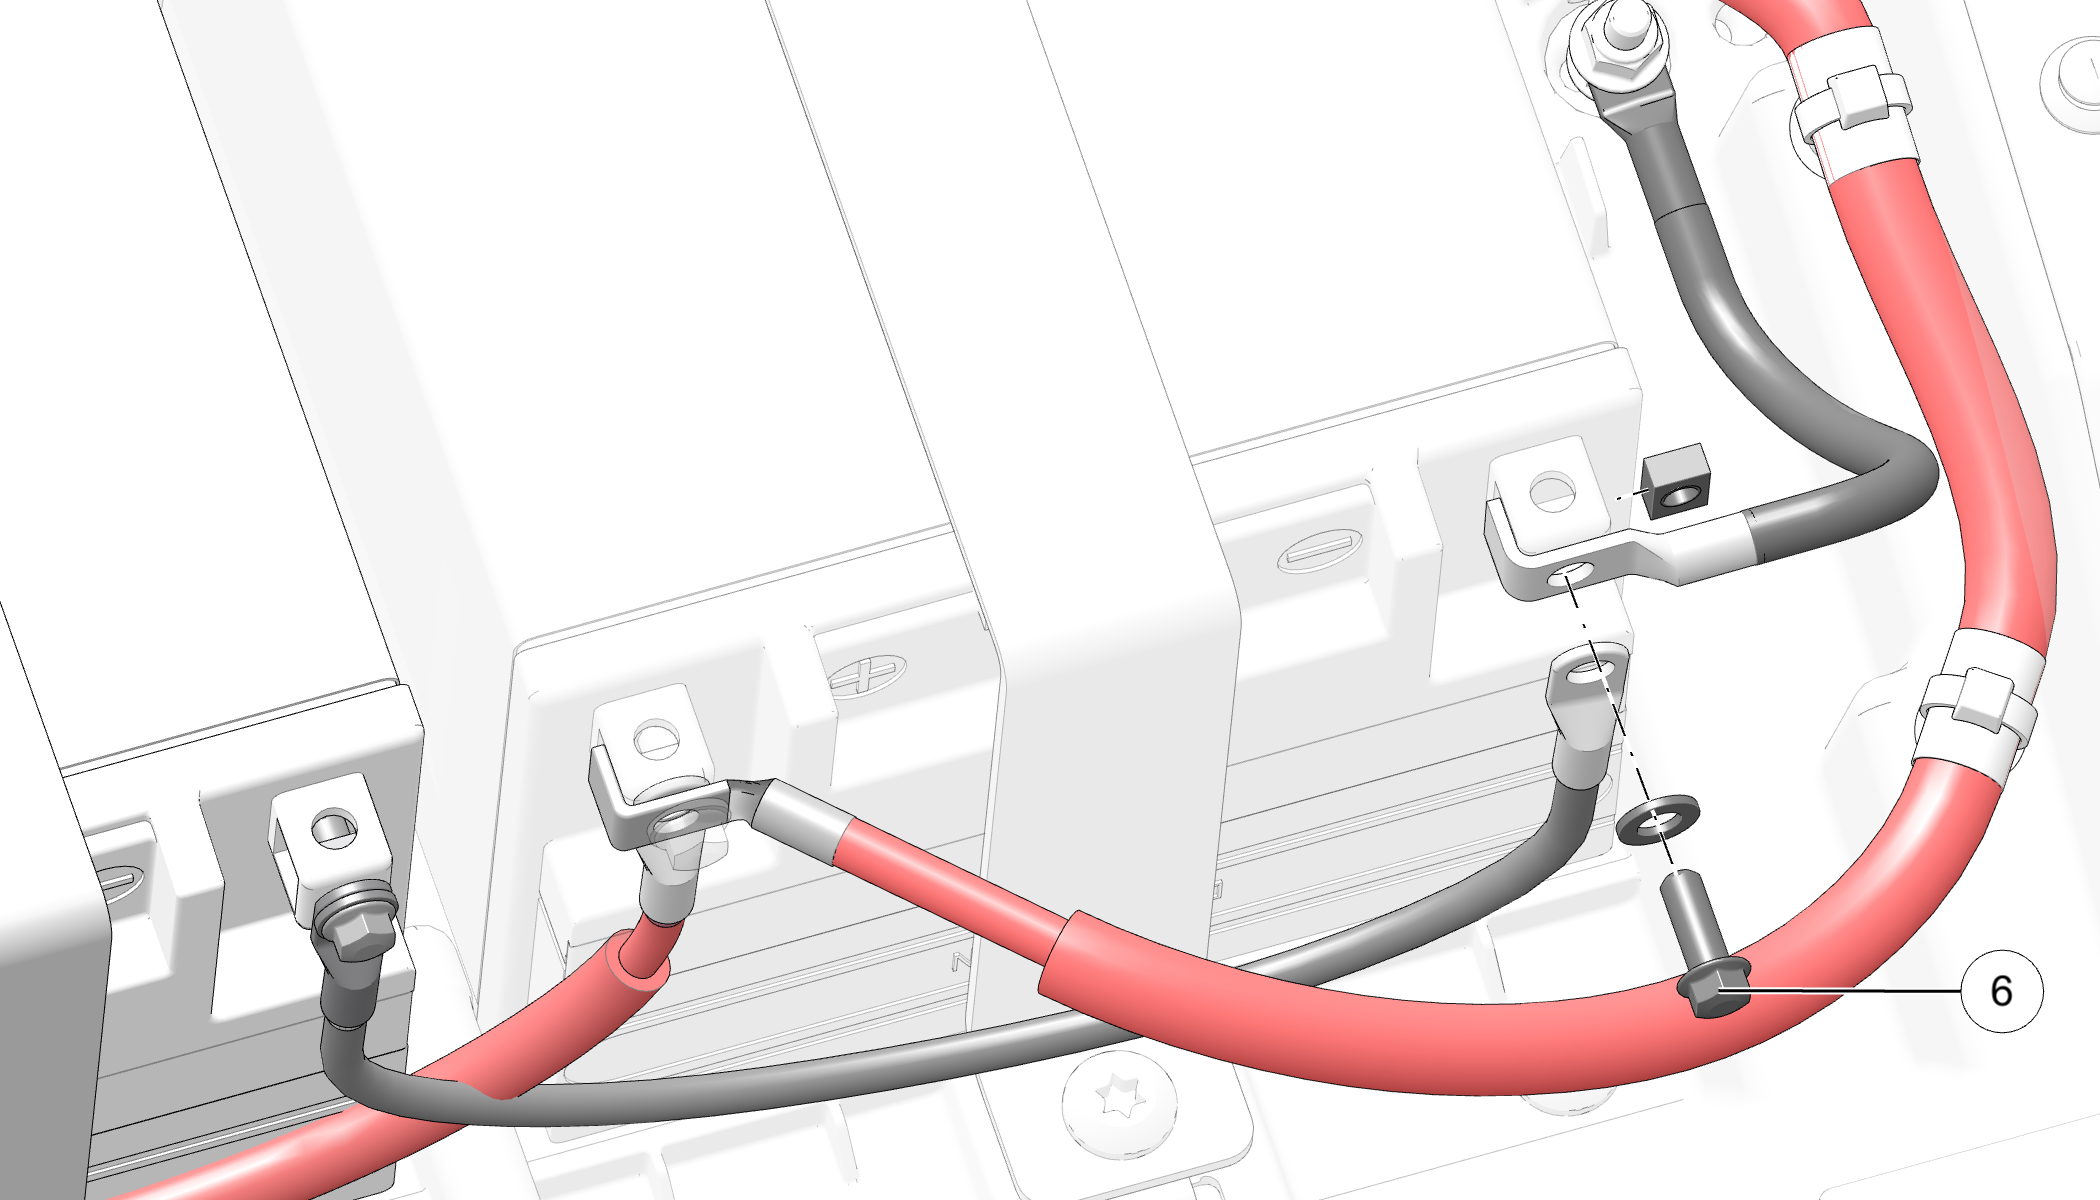
On the right-most battery, connect and tighten the NEGATIVE (-) black cable 6.
 TORQUE
Battery Terminal Fasteners:
30 in-lbs (7 Nm)
-
Verify that cables are properly routed.
-
Reinstall the seat.