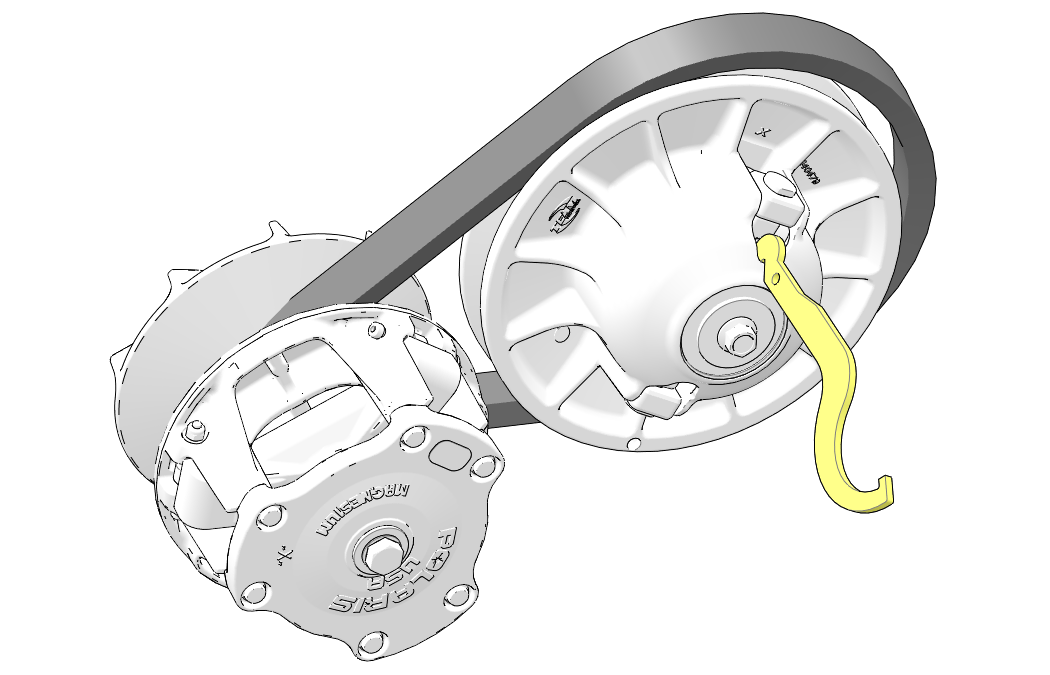
Drive Belt Installation
Orient the belt as it was removed or orient the new belt so that you can read the text.
-
Spread the sheaves and walk the drive belt on to the drive clutch and driven clutch.
Spanner Wrench / Spreader:
PN 2877408
NOTICEMake sure the tool is square with the moveable sheave surface of the driven clutch.
-
Release the sheaves and rotate the driven clutch counter-clockwise to make sure the sheaves close against the belt.
-
Make sure the clutch cover seal is secure in the outer PVT cover.
-
Install outer PVT cover and secure with fasteners. Torque fasteners to specification.
Outer PVT Cover Fasteners
30 in-lbs (3 N·m)
-
Install the (4) bolts retaining the lower LH frame support to the frame. Torque bolts to specification.
TORQUELower LH Frame Support Fasteners
37 ft-lbs (50 N·m)
-
Install the left rear wheel and torque wheel nuts to specification.
TORQUEWheel Lug Nuts (Aluminum)
75 ft-lbs (102 N·m)
Wheel Lug Nuts (Steel)
45 ft-lbs (61 N·m)
-
Install the seat and remaining body components.
-
Install the rear skid plate and the (6) T40 Torx-headed screws.
-
Start the engine and test the operation of the PVT system.
-
Always break in the drive belt after a belt replacement. For drive belt break-in information, see the Operation chapter.