Belt Replacement / Debris Removal
If a belt fails, always clean any debris from the duct and from the clutch and engine compartments when replacing the belt. Allow the vehicle to cool before performing this procedure.
-
Position the vehicle on a flat, level surface. Place blocks behind front and rear tires to keep vehicle from moving.
-
Place the transmission in PARK.
-
Stand clear and pull up on the cargo box release lever. Lift the front of the cargo box.
-
Thoroughly clean all debris from the debris bracket 6 and from the engine compartment.
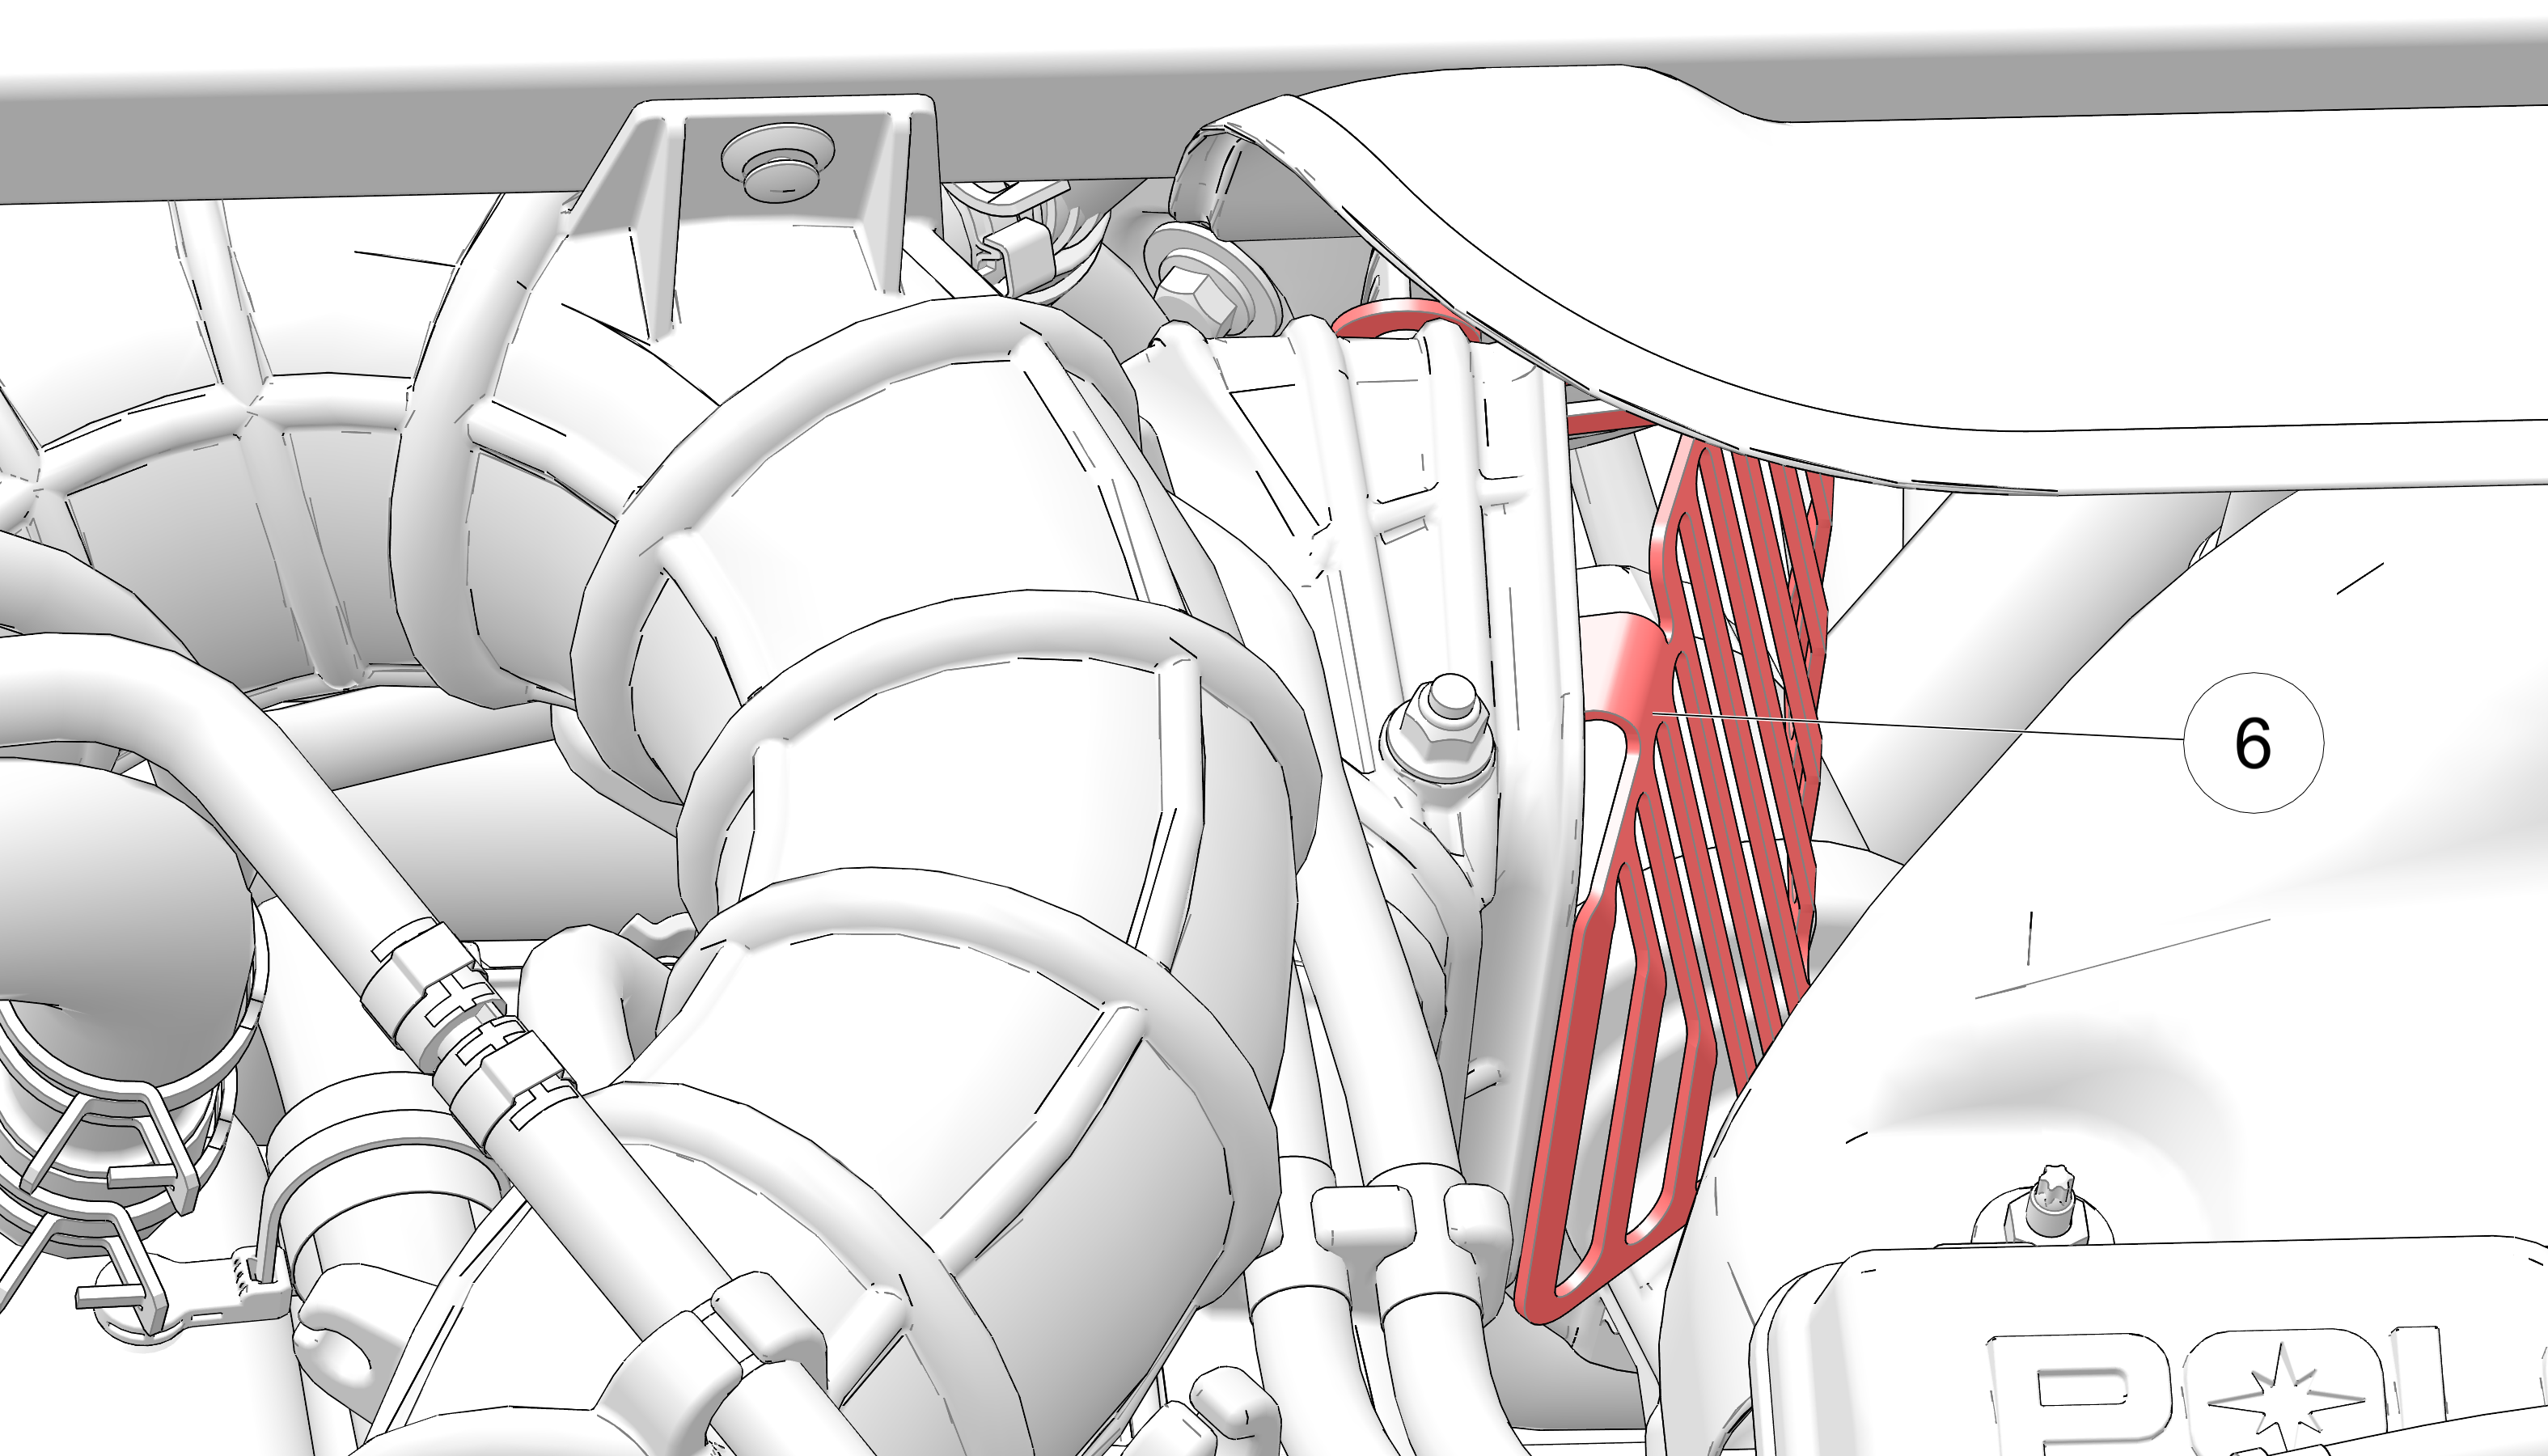 NOTICESome models may require the removal of additional panels to access the debris bracket.
-
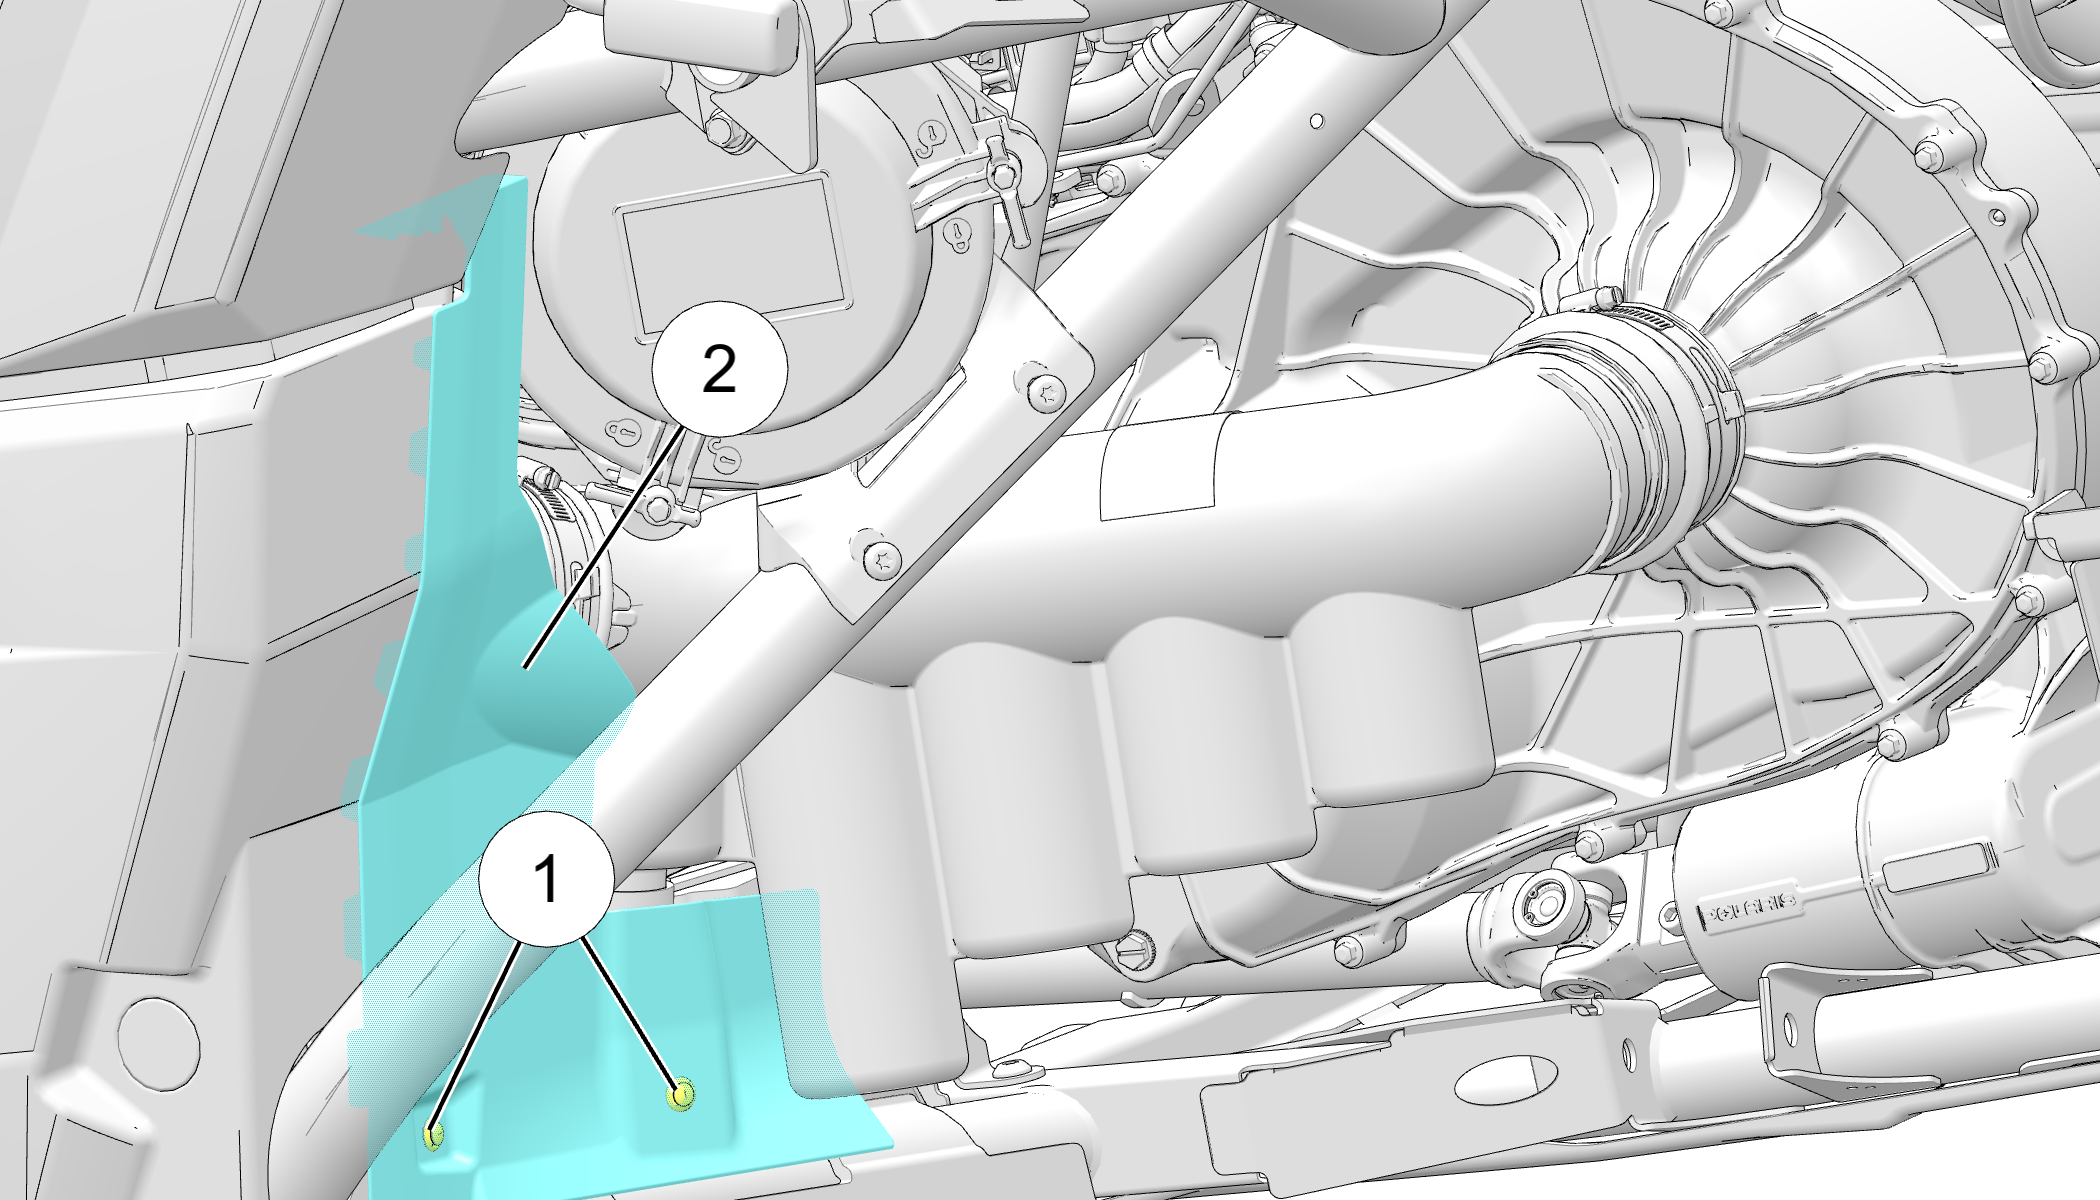
Remove two snap rivets 1 from the splash shield 2. Push the splash shield upwards to disengage the upper and side alignment tabs.
-
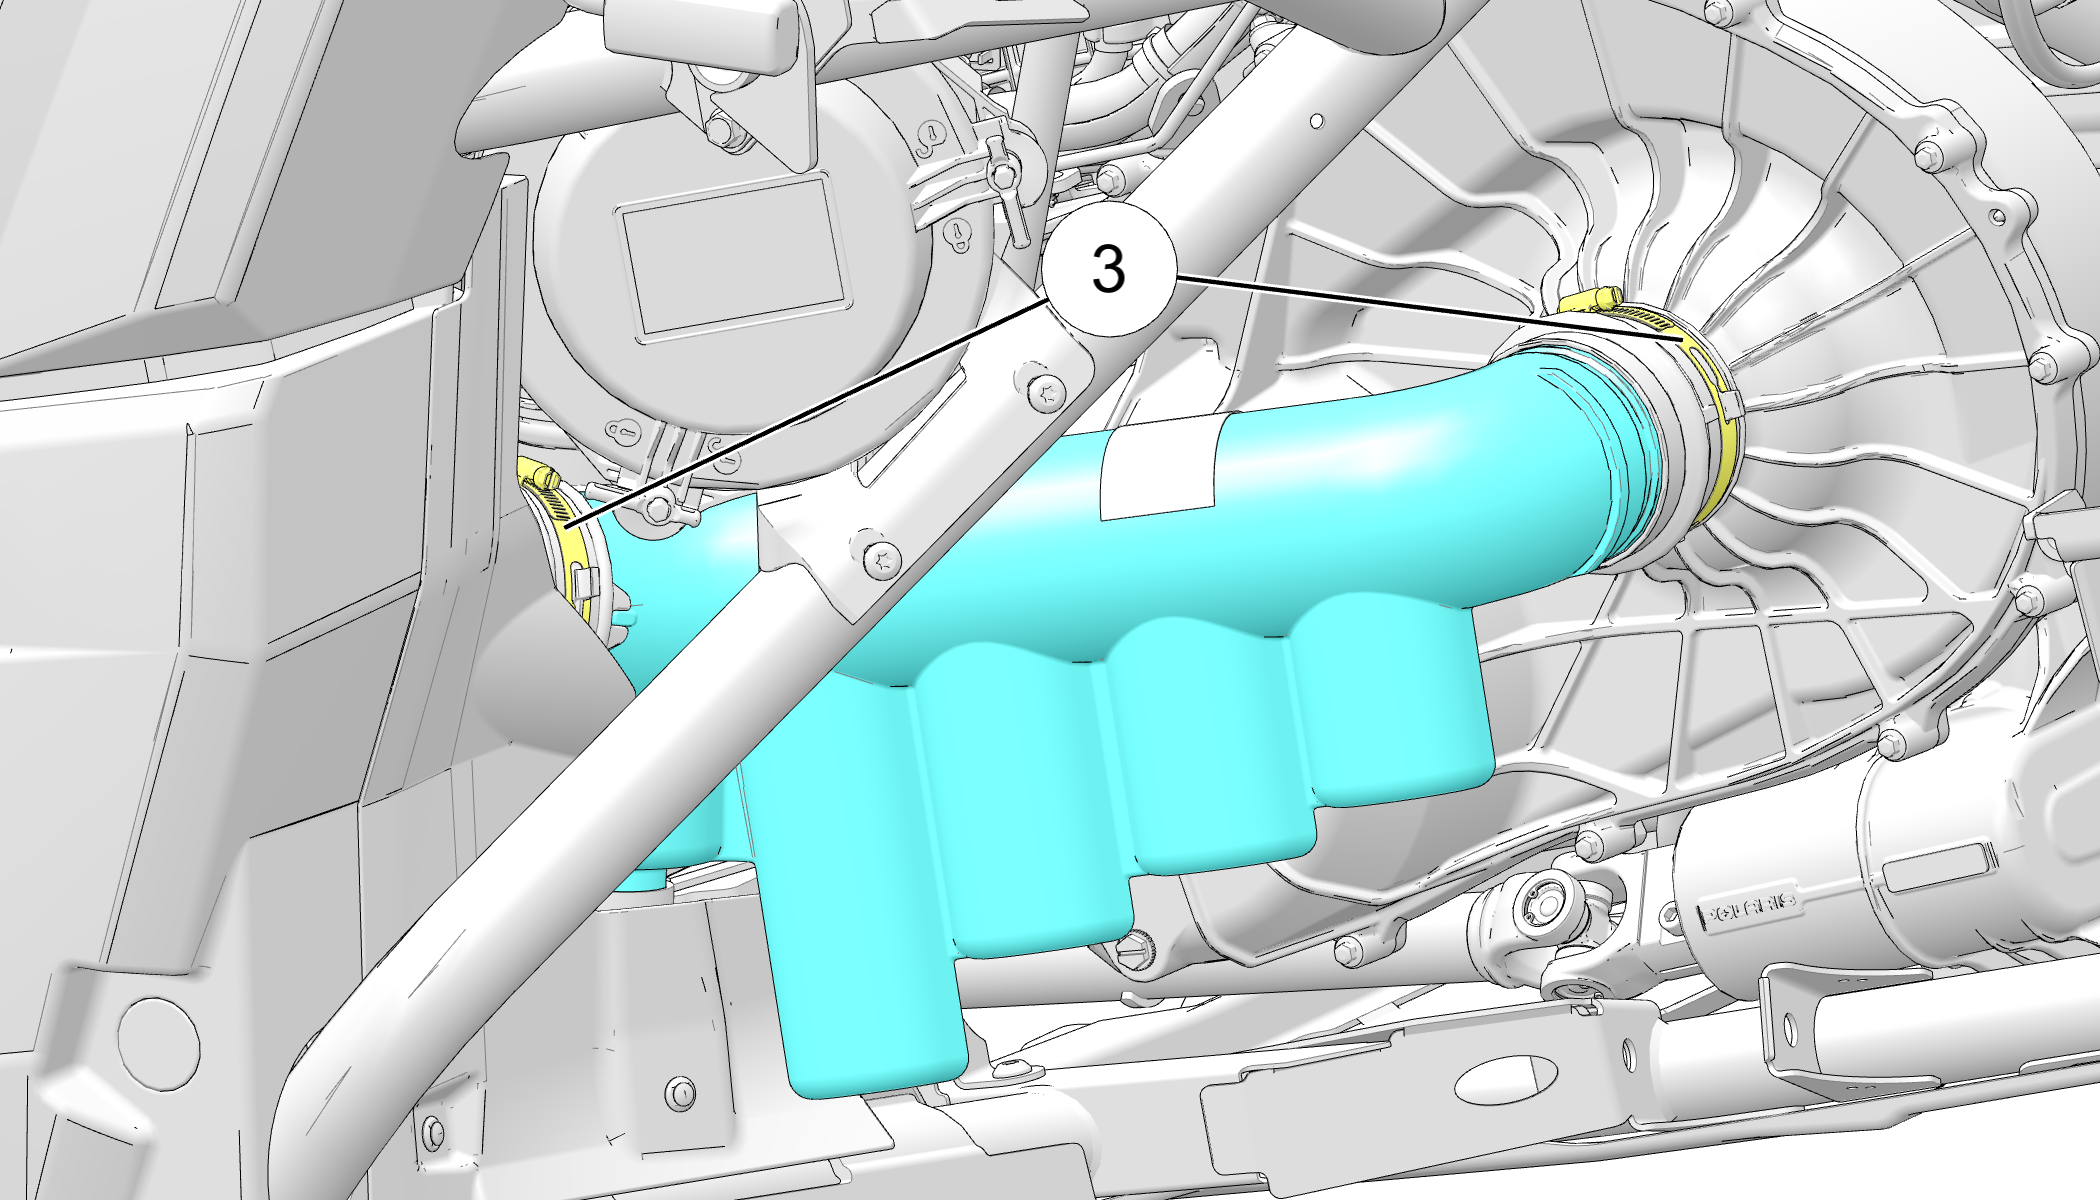
Remove inlet duct by loosening its hose clamps 3.
 NOTICE
Rear suspension hidden for image clarity.
- Remove the upper cargo box shock pin, then remove the lower pin.
Remove the shock from the vehicle.
WARNINGAn unsupported or unstrapped box may fall if the cargo box shock is removed, and cause injury. Secure the box in place before attempting any work on the vehicle
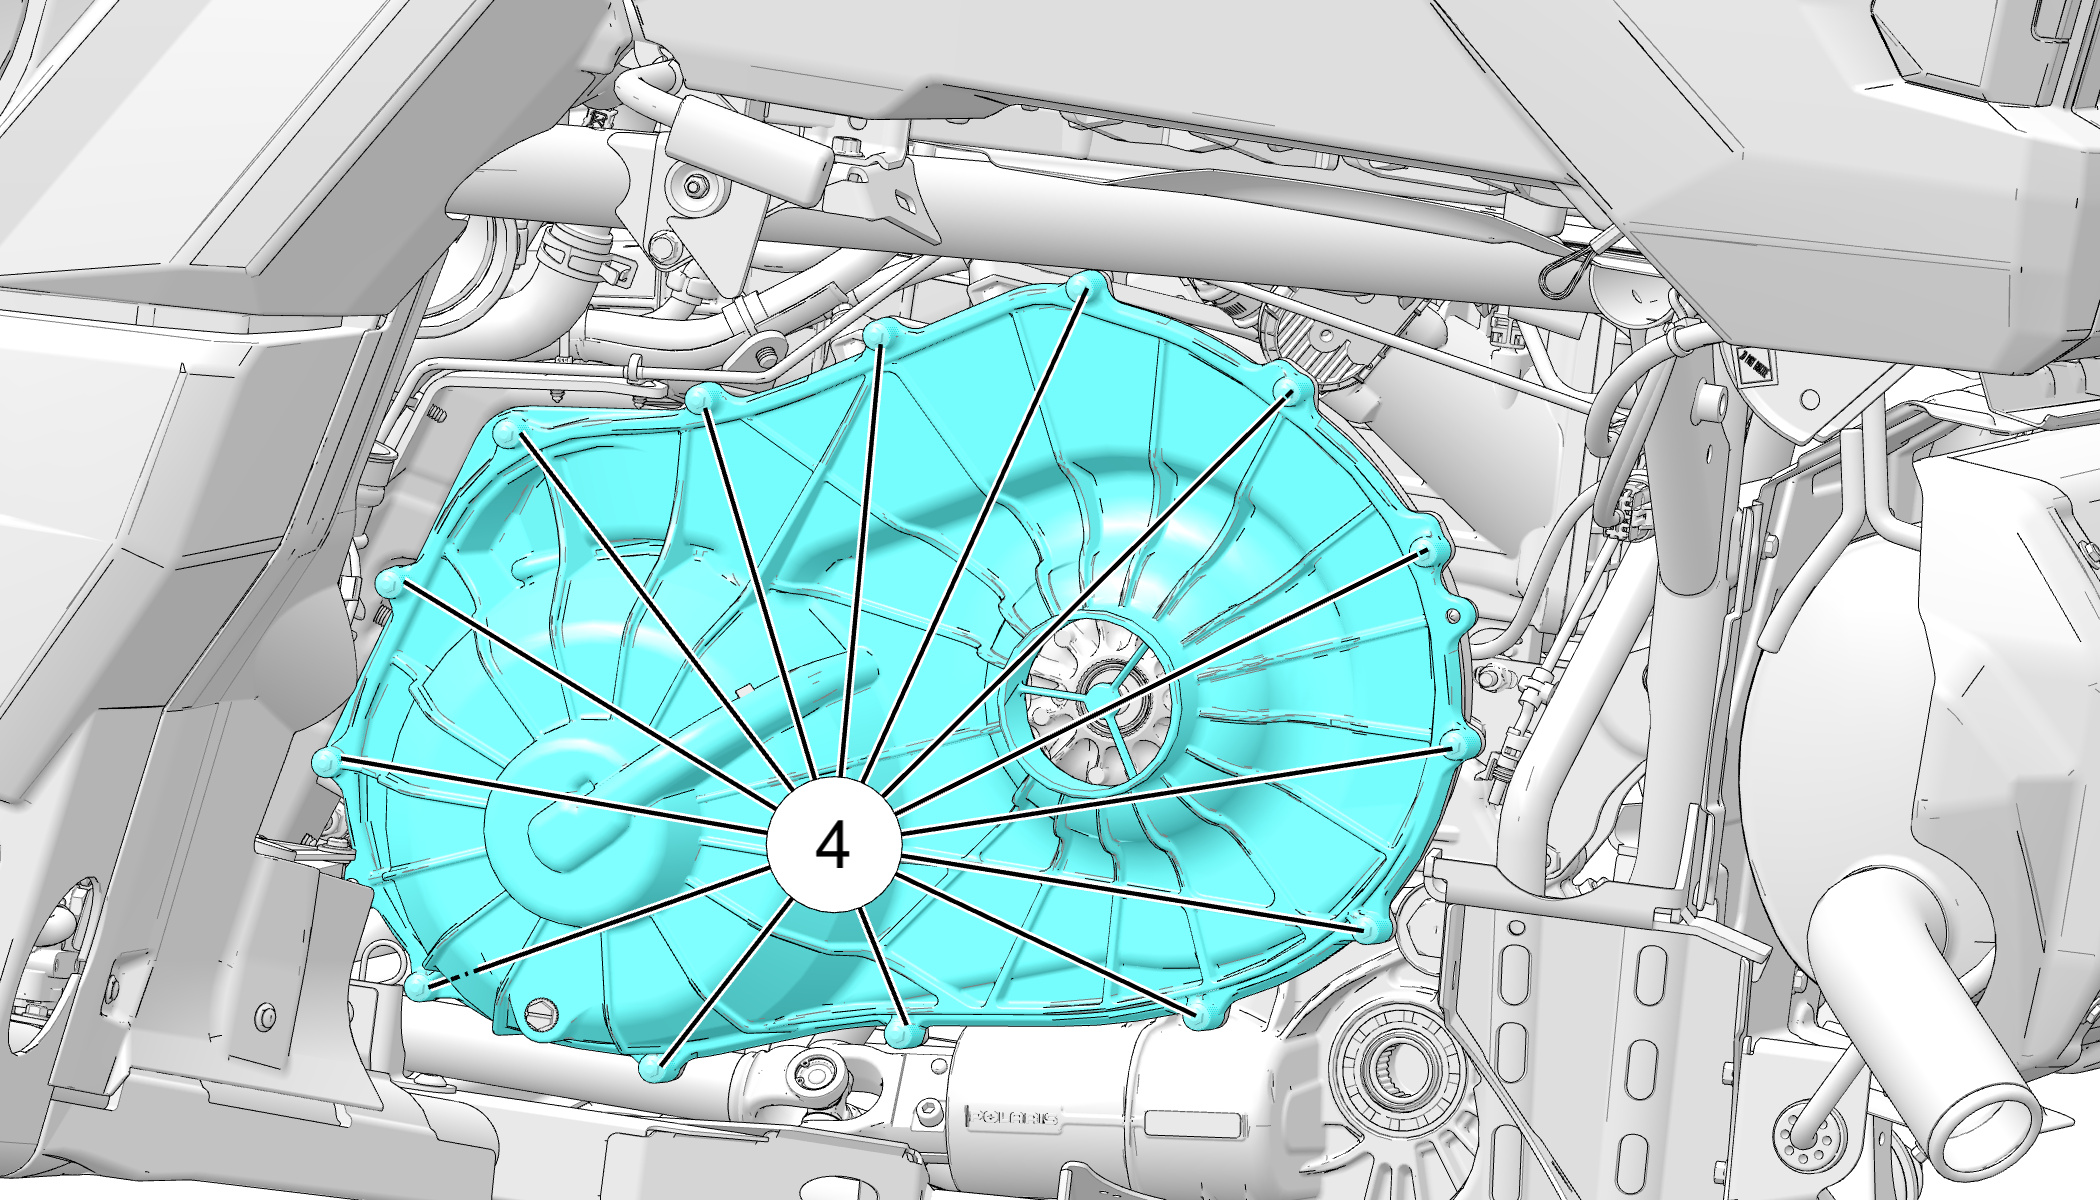
- Loosen the outer cover fasteners 4. These will remain
on the cover.
-
Remove the drive belt cover from the vehicle. Pivot the rear of the cover up to remove.
-
Inspect the cover seal on the clutch housing for wear or damage. Replace if necessary.
-
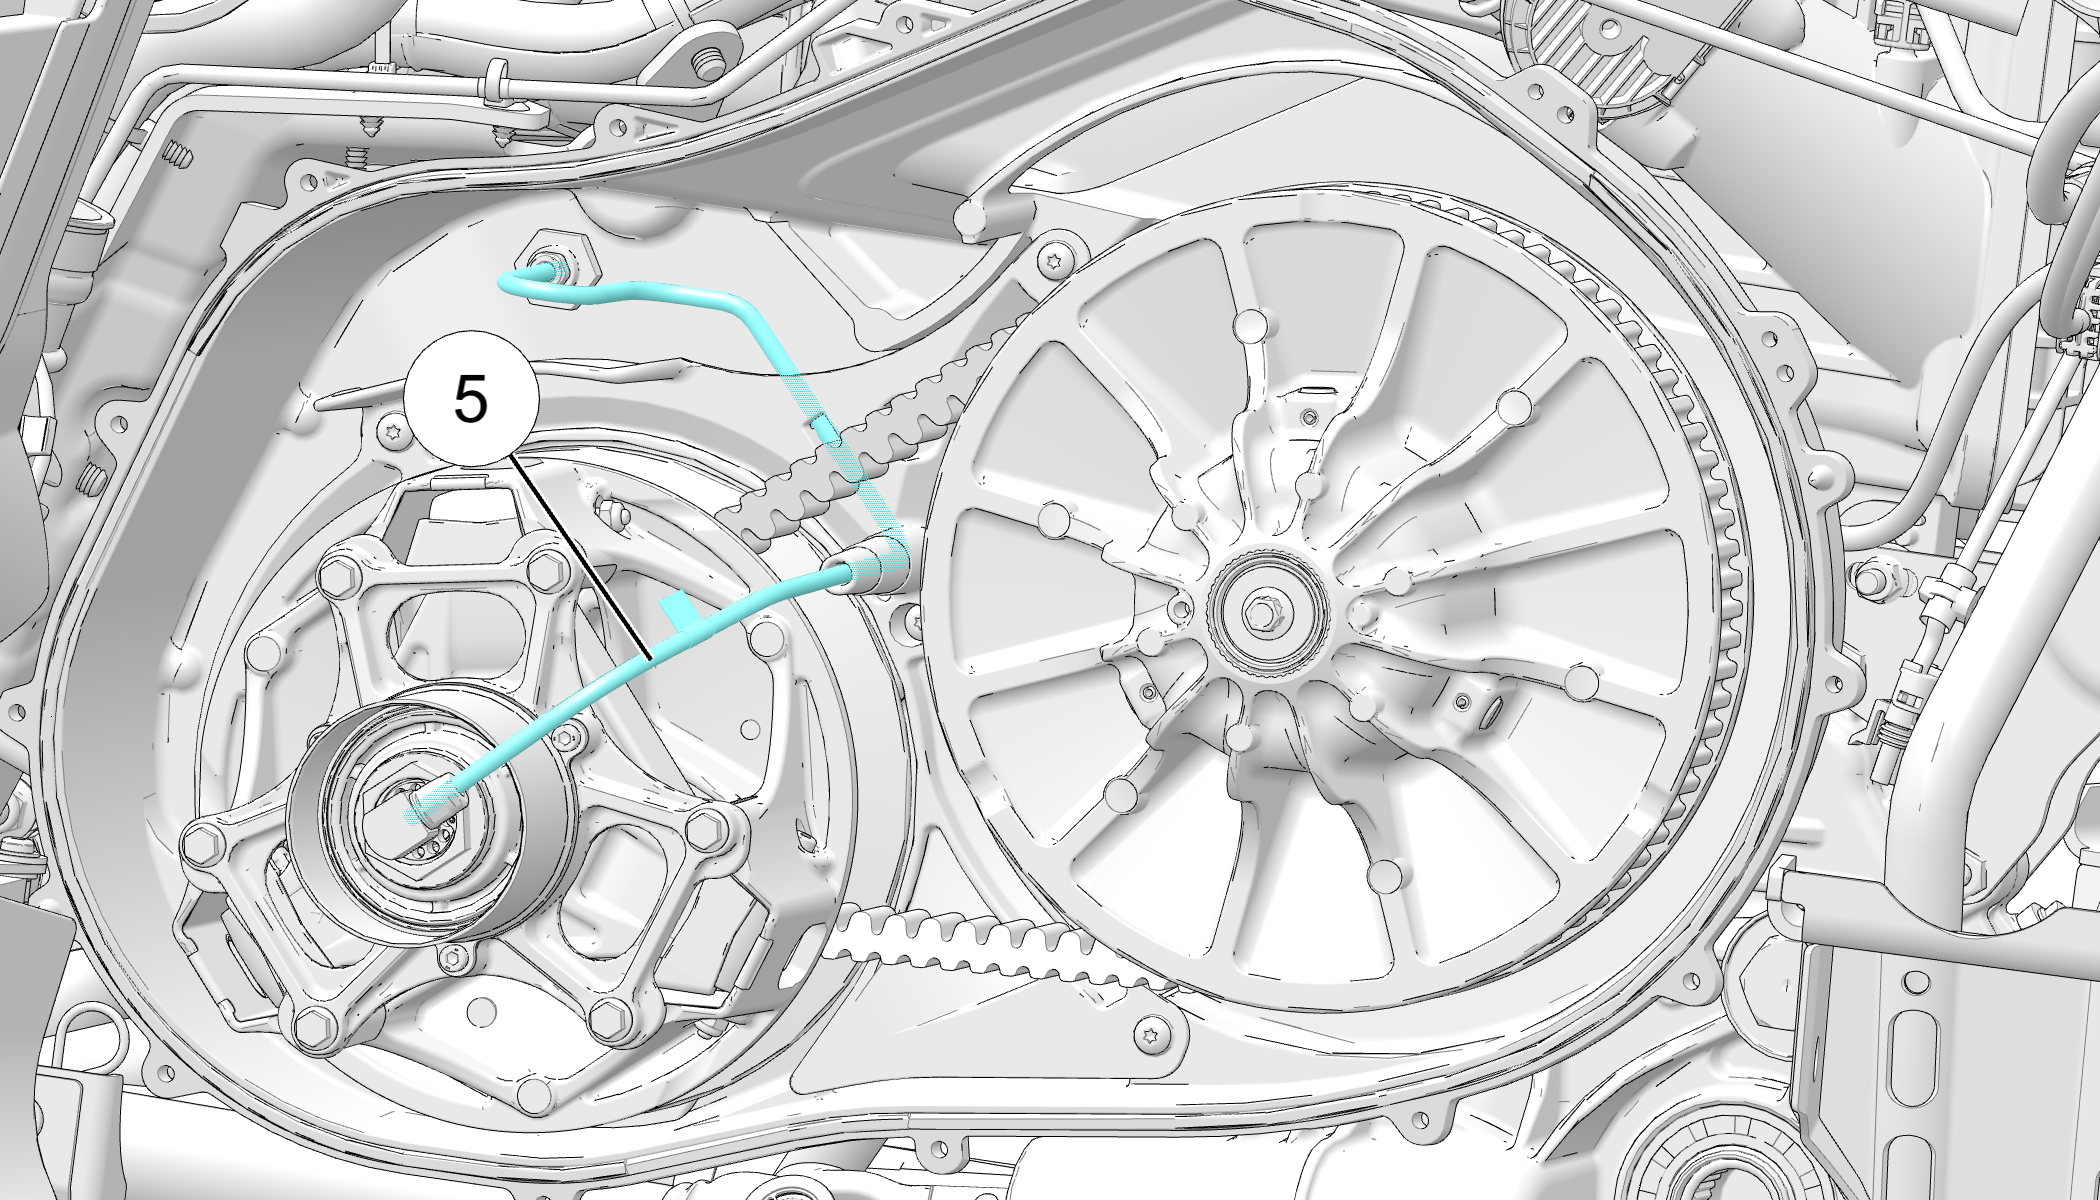
Inspect the NUMATIX air line 5 for damage or wear.
-
Mark or note the direction of the NUMATIX Controlled CVT drive belt. The belt must be installed in the same direction if the belt will be reinstalled.
-
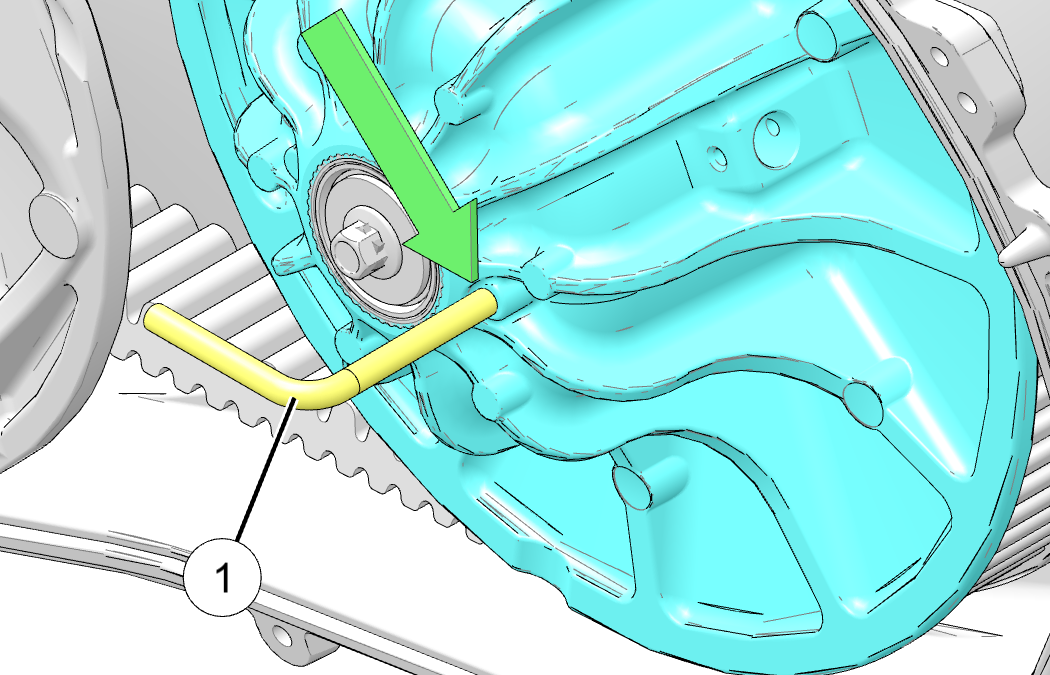
Insert the drive belt removal tool into the threaded hole on the driven clutch, and then turn the tool clockwise to spread the clutch sheaves
 NOTE
Drive Belt Removal Tool:
2883577NOTICEIf the tool does not readily turn, rotate the driven clutch one quarter of a turn counterclockwise. Repeat the above step. -
Remove the belt from the driven clutch.
TIPRemoving the belt from the bottom of the driven clutch first can help provide additional clearance for belt removal. -
Inspect the belt for any fraying, hour-glassing, loose cords, missing cogs, abrasions, burns, or damage. Replace if needed.
-
Clean the inside of the drive belt covers thoroughly and ensure that all debris from the air duct is removed.
-
Check for signs of damage to seals on the transmission and engine. If any seals appear to be damaged, your vehicle requires prompt service. Your POLARIS dealer or other qualified person can assist.
-
Loop the new belt over the drive clutch, and begin to install it over the driven clutch sheave. Then, remove the clutch spreader tool from the driven clutch.
-
Rotate the driven clutch clockwise five to seven times to help seat the belt onto the sheaves.
-
Reinstall the drive belt cover. Ensure that the clutch air line is aligned to the drive belt cover inset. Before tightening fasteners, ensure that the drive belt cover sits flush against the housing. Torque the fasteners to specifications.
PVT Outer Cover Fasteners
35 in-lbs (4nm) -
Reinstall the air duct to both the airbox and the drive belt cover. Torque the clamps to specifications.