Multi-point Seat Belt
On vehicles equipped with an IMMI safety harness with built-in interlock, the safety harness requires proper adjustment for each rider and will need to be adjusted when riders change seats.
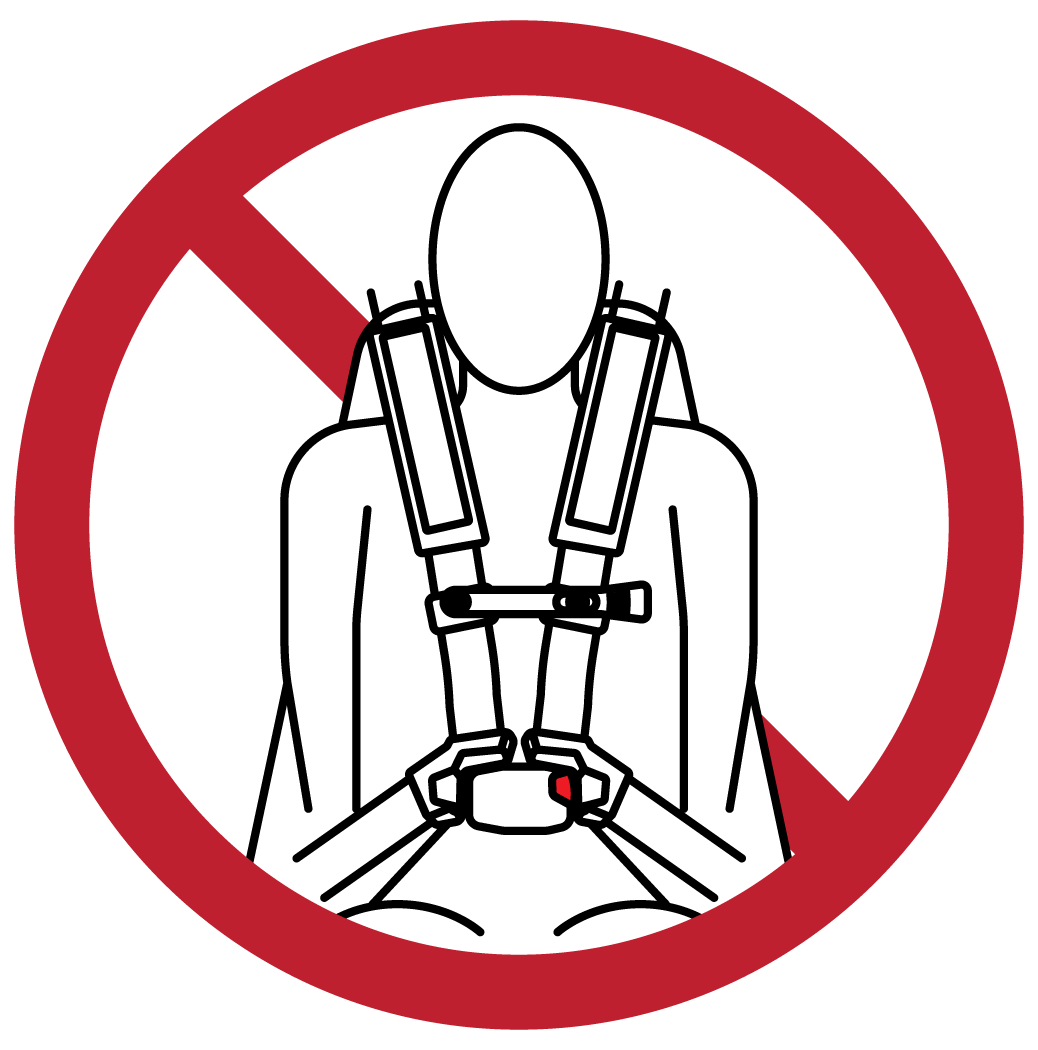
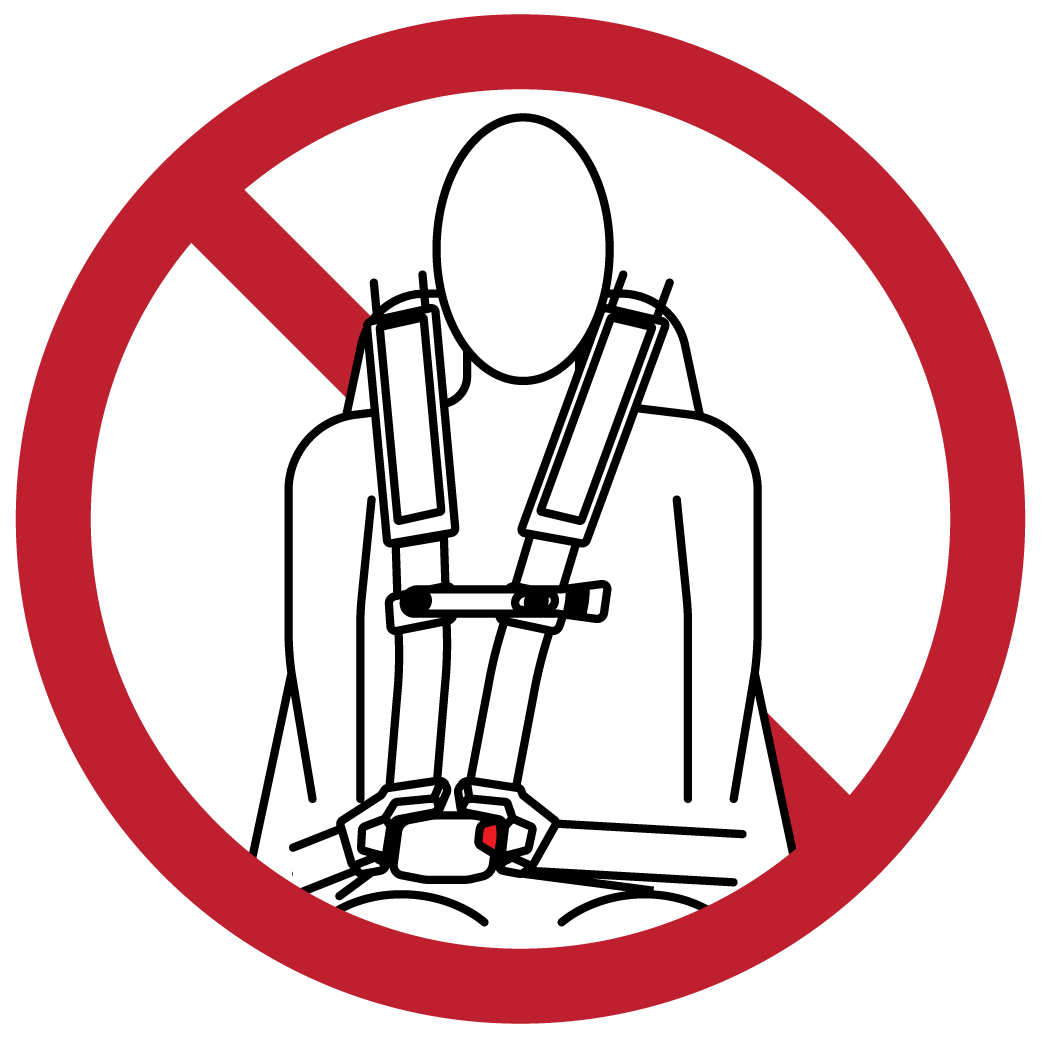
Improper use or adjustment of the harness can cause serious injury or death. For example, you can slide under the harness in an accident if the lap belt portion of the harness is not pressed against the pelvic bones. Always adjust the harness for each rider to make sure it fits them.
-
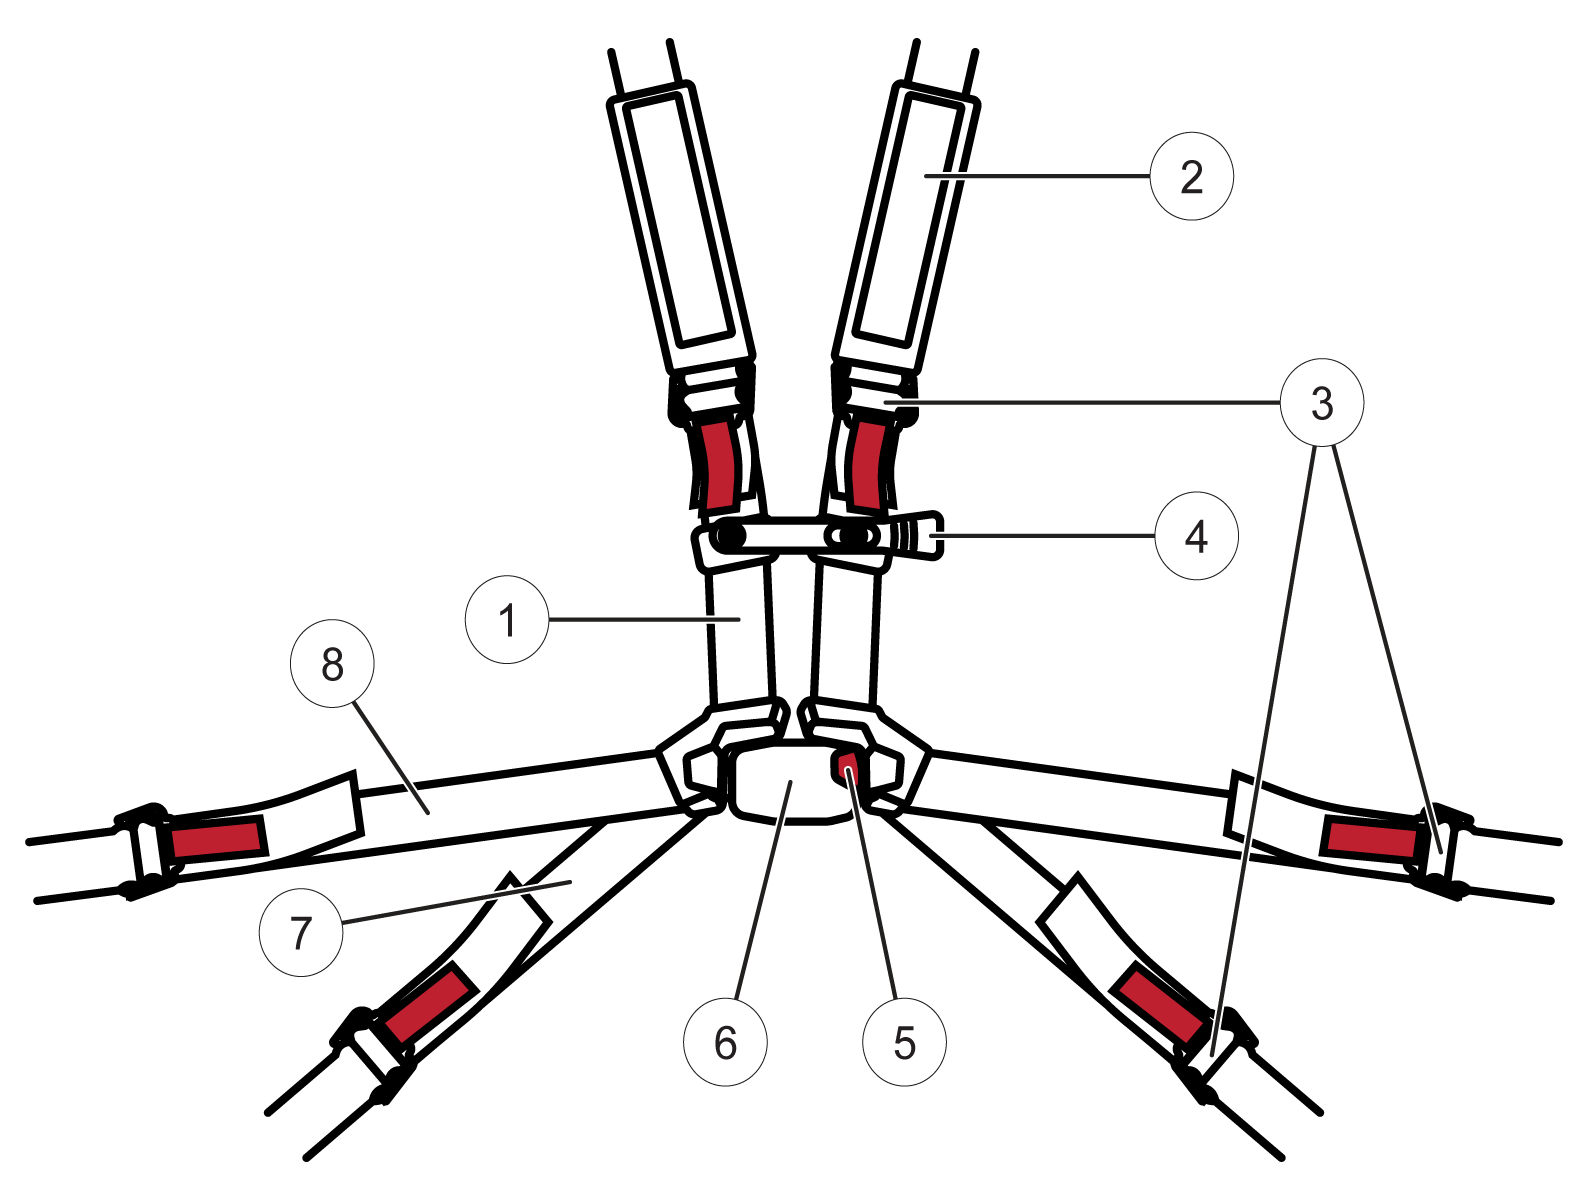
1 Shoulder Belt
-
2 Harness Pads
-
3 Tilt-locks
-
4 Chest Clip
-
5 Buckle Release Button
-
6 Harness Buckle
-
7 Thigh Belt
-
8 Lap Belt
Inspecting the Harness
Before each ride, perform the following inspection:
-
Inspect belt fabric on entire system for cuts, fraying, extreme or unusual wear. Most common areas of belt wear include the buckle/ tongue area, the shoulder guide area and any place where the belt makes contact with vehicle or seat.
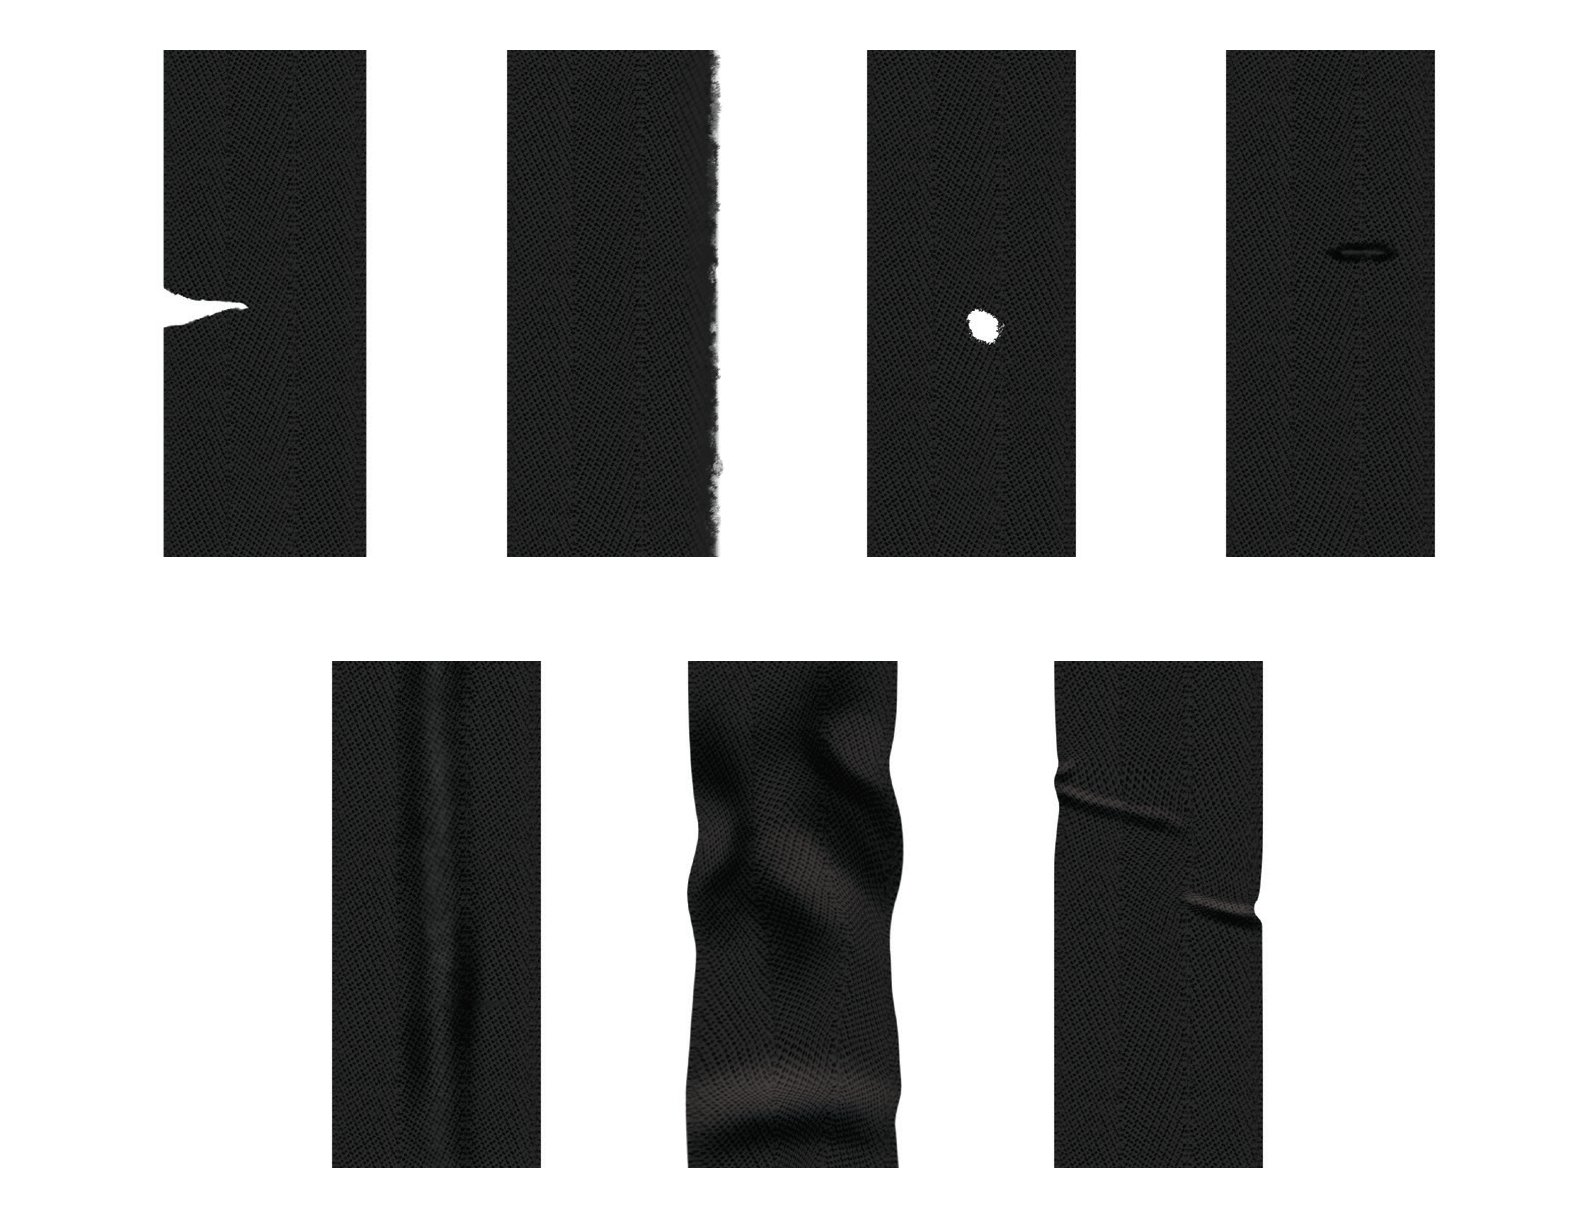
Corrective Action: Replace entire belt system
-
Inspect buckle for proper operation by inserting tongue and listening for an audible click. Verify buckle is not damaged, cracked or broken.
Corrective Action: Replace entire belt system
-
Inspect electrical wires (optional component). Internal cable wires must not be exposed, frayed or broken.
Corrective Action: Replace entire belt system
-
Inspect tongue for proper operation by inserting into buckle. Tongue must insert smoothly and you must hear an audible click. Verify proper latching by tugging on belt. Tongue must not be worn, deformed or corroded.
Corrective Action: Replace entire belt system
-
Inspect shoulder web guide. Seat belt must move freely through shoulder web guide. Shoulder web guides must be free of obstructions and must not snag or wear webbing fabric.
Corrective Action: Adjust shoulder web guide hardware and/or remove obstruction.
-
Inspect retractor operation (if equipped). When pulled and released slowly, seat belt must spool out and retract without locking.
Corrective Action: Replace entire belt system
-
Inspect mounting hardware on all belt system attachment points. Hardware should be tight. Hardware must not be missing, rusted, corroded or damaged.
Corrective Action: Replace defective or missing hardware with authorized parts and or tighten hardware.
-
If a harness is used to restrain a rider during an accident, that entire harness system must be replaced. Inspect non-retractable harness pads containing controlled deceleration technology for evidence of a blown fuse (e.g., exposed threading).
Corrective Action: Replace entire belt system
Putting on the Harness
To prepare the rider:
-
Do not wear heavy clothing that may interfere with proper fit of the harness. Make sure there are no rigid or breakable items (e.g., eye glasses, pens, jewelry, keys) under the harness.
-
Before entering the vehicle, your helmet should be off, but accessible from the seat.
-
Adjust the seat to the desired position.
-
Unbuckle the harness and loosen all manually adjustable belts:
-
Lap belts
-
Thigh belts (equipped on 6-pt harnesses)
-
Shoulder belts (not adjustable on retractable 6-pt harness)
-
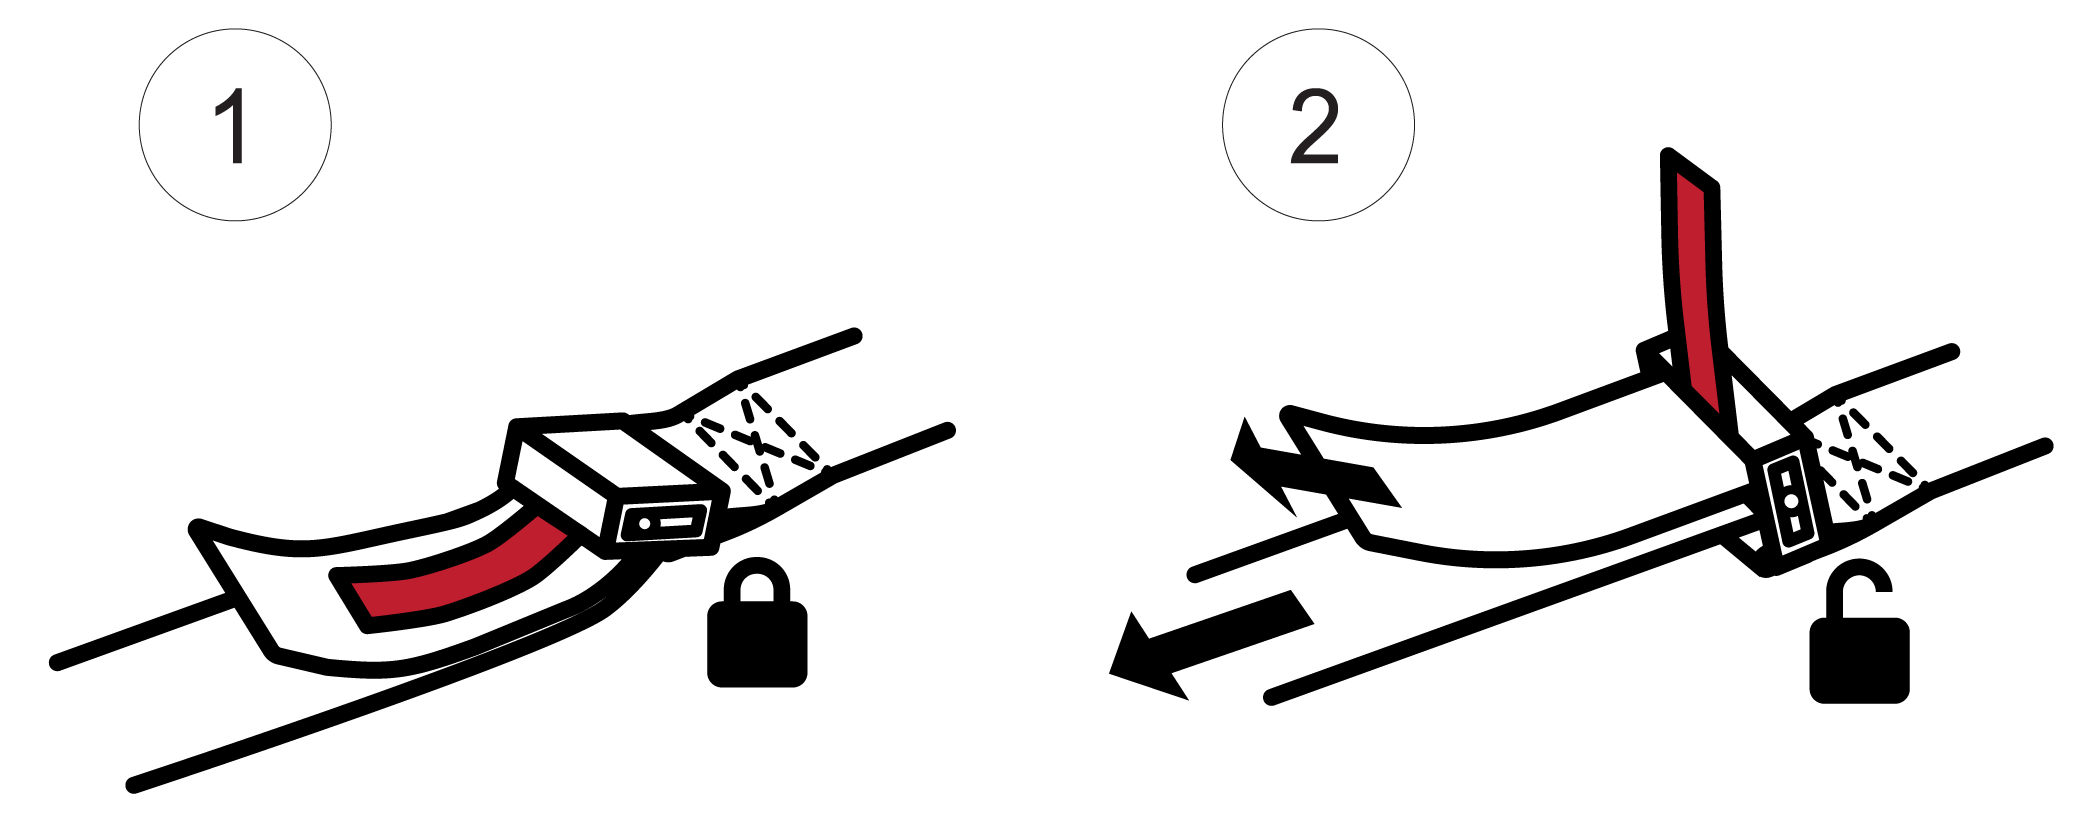
How to use the red straps and tilt-lock feature to tighten
and loosen the belts:
When the tilt-lock is down 1, the belt resists being tightened or loosened. The red straps
are provided so that you can lift the tilt-lock to the up position 2 and unlock it so that you can pull the seat belt through.
To tighten or loosen a belt, grasp the red strap and pull up on the
red strap in one hand and pull the belt with the other. Adjust the
angle of the tilt-lock until the belt pulls more easily.
-
1 Down, locked position
-
2 Up, unlocked position
To adjust the harness:
-
Put your arms through the shoulder belts. The belts should lay flat and not be twisted. The shoulder belt should not rub against your neck or fall off your shoulder.
-
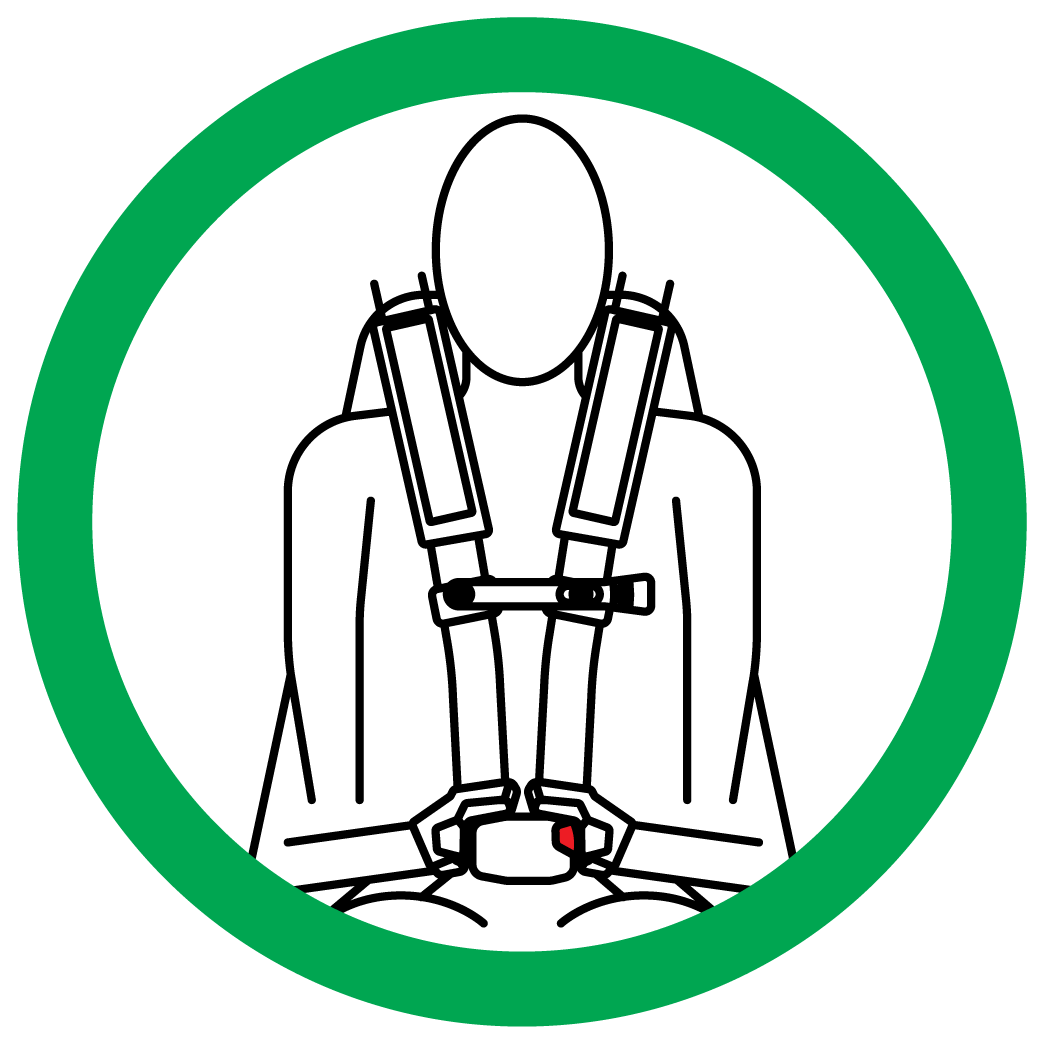
Buckle the harness and check the fit of the lap belt. It should be as short as possible and pressed against your pelvic bones so that you cannot lift yourself from the seat bottom at all. Unbuckle and tighten the lap belts as needed until the seat belt is properly adjusted – it is easier to adjust the belts while unbuckled. Finally, buckle the harness and listen for a click. Check fit and make sure buckle is secure.
-
Tighten shoulder belts. If your harness is equipped with non-retracting, adjustable shoulder belts, tighten the shoulder belts until they are snug across your chest when your back is against the seat. When tightening the shoulder belts, be sure to keep the harness buckle centered and below your belly button. The lap belt must remain pressed against your pelvic bones.
-
Tighten thigh belts. If your harness is equipped with thigh belts, adjust them for comfort and be sure to keep the harness buckle centered and below your belly button. The lap belt must remain pressed against your pelvic bones.
-
Attach the chest clip between the shoulder belts.
-
Put on your helmet.
To take off the harness:
-
Unlatch the chest clip.
-
Push the red button to release the buckle.
-
Remove your arms from the shoulder belt.
-
After exiting the vehicle, buckle the harness to prevent damage which can occur if it is slammed in the door or hangs out of the vehicle.