Engine Oil and Filter Change
Always change the oil and filter at the intervals outlined in the Periodic Maintenance Interval Chart.
-
Park the vehicle on a flat, level surface.
-
Make sure the vehicle is in PARK and remove the key.
-
Allow engine to cool down before draining the oil.
-
Remove the cargo box to access the vehicle’s engine. See the Cargo Box Removal section for details.
-
Clean the area around the oil fill cap and remove.
-
Place a drain pan under the engine crankcase.
-
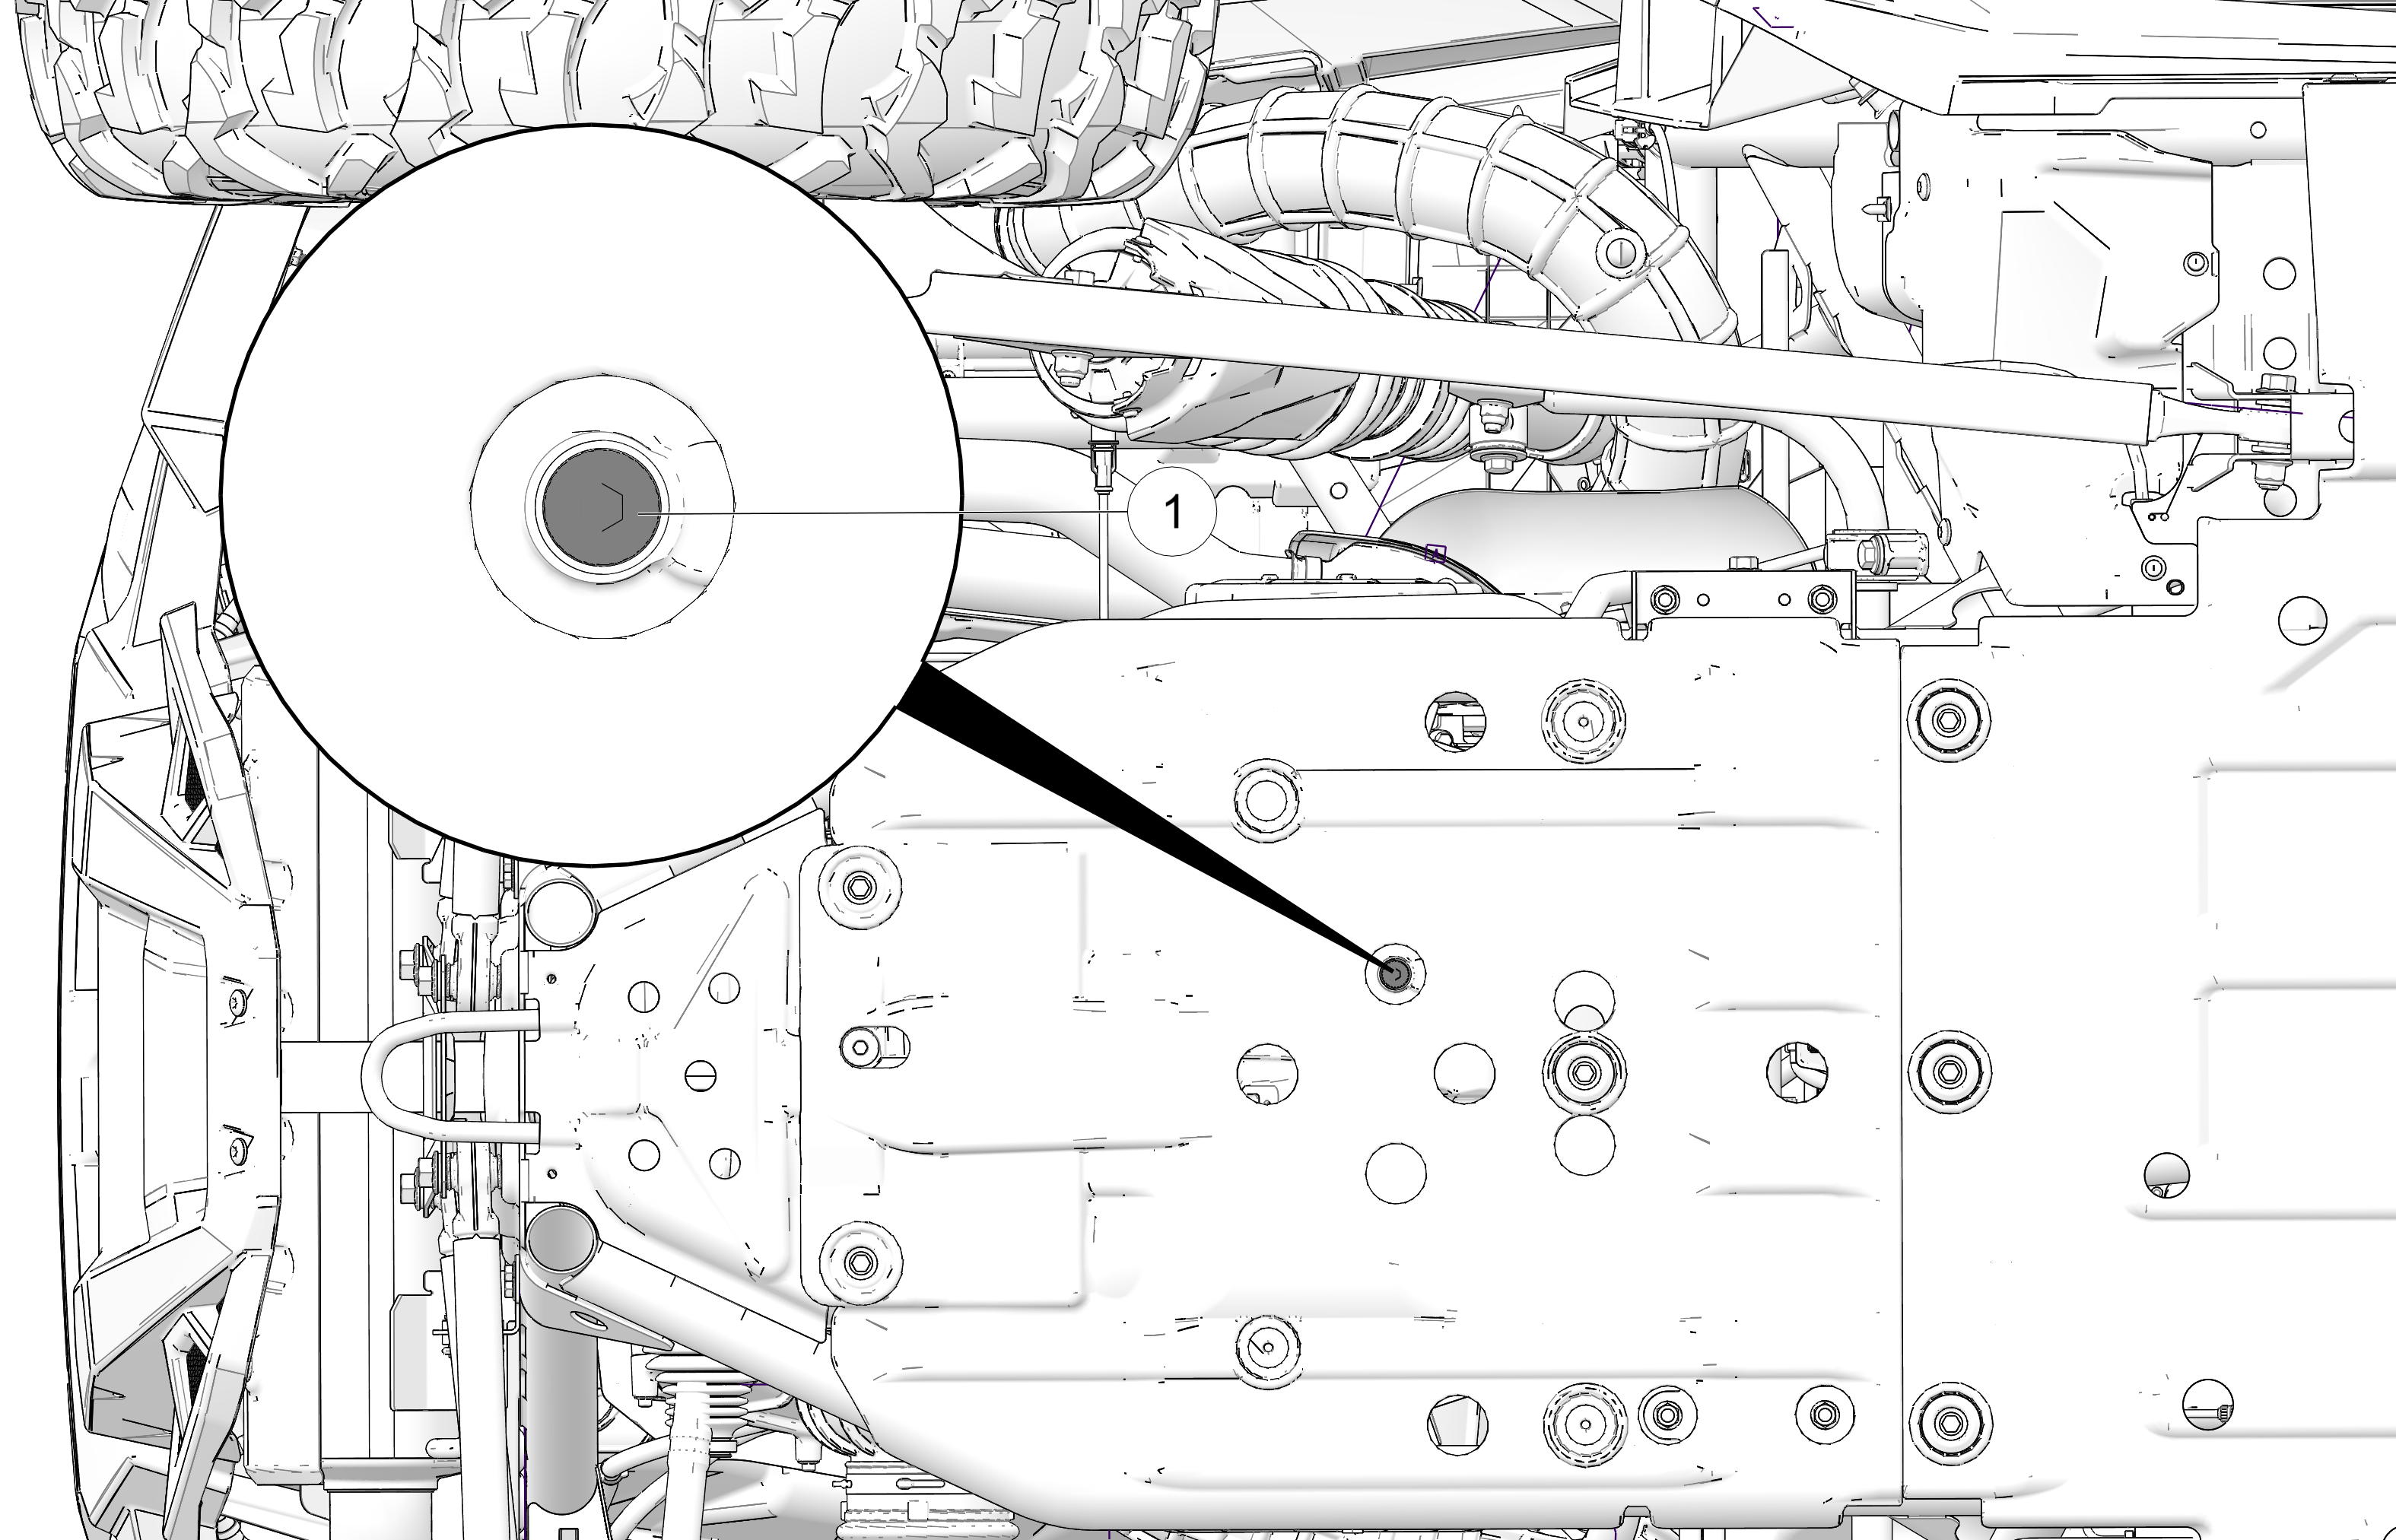
Clean the area around the drain plug 1. Using a 6mm Allen socket, remove the drain plug and allow the oil to drain completely.
-
Remove both seats (two-seat vehicles) or the rear passenger seats (four-seat vehicles).
-
Remove the rear access panel. See the Rear Access Panel section for details.
-
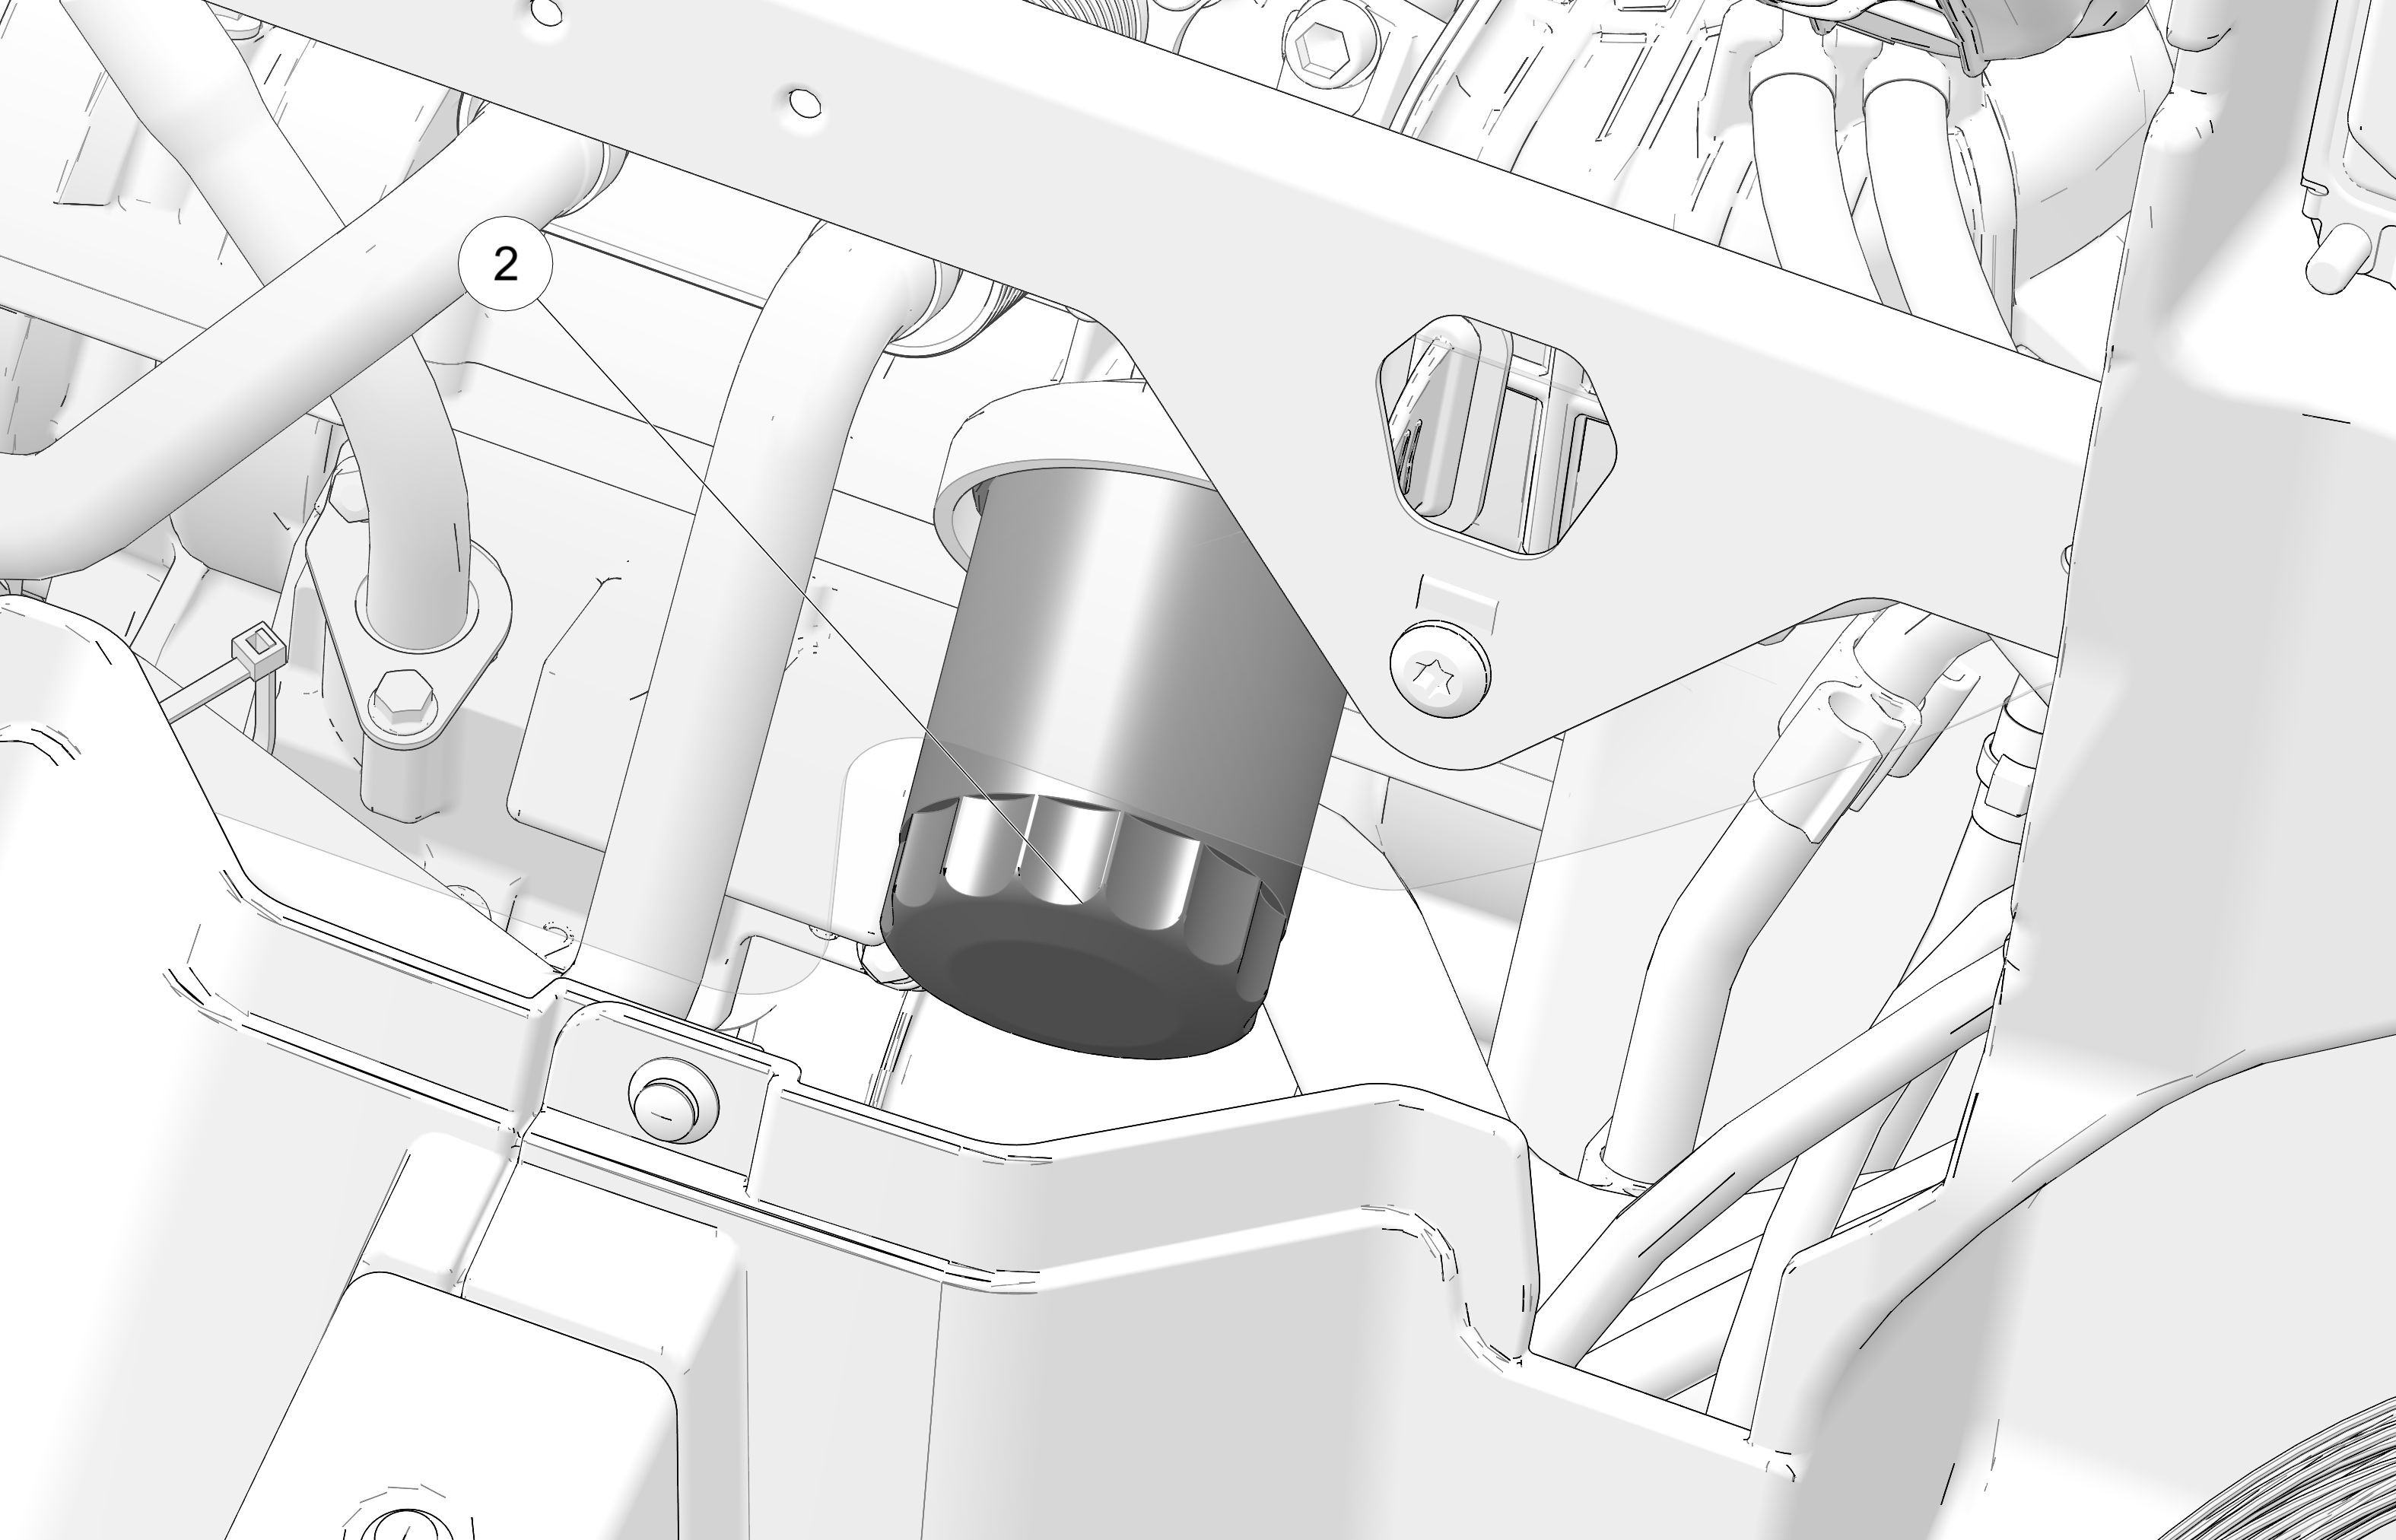
Clean the area around the oil filter 2 and place shop rags under the filter to catch any spilled oil during removal.
-
Using your hand, or an Oil Filter Wrench, turn the oil filter counter-clockwise to remove.
-
Lubricate the O-ring on the new oil filter with a film of fresh engine oil. Make sure the O-ring is in good condition.
-
Using a clean, dry cloth, clean the filter sealing surface on the engine crankcase. Make sure the old filter O-ring is completely removed.
-
Install the new oil filter.
TORQUEOil Filter:
Rotate clockwise by hand until filter gasket contacts sealing surface, then turn an additional 3/4 turn. -
Clean up any spilled oil and make sure that you remove all shop rags.
-
Reinstall the rear access panel.
-
Reinstall the seats.
-
Clean any dirt or debris from the drain plug. Make sure the sealing surfaces are free of any burrs, nicks, or scratches.
-
Remove the old sealing washer and install a new one on the drain plug.
-
Reinstall the drain plug and torque to specification.
TORQUEEngine Oil Drain Plug:
12 ft-lbs (16 N·m)
-
Clean any residual oil off of the vehicle.
-
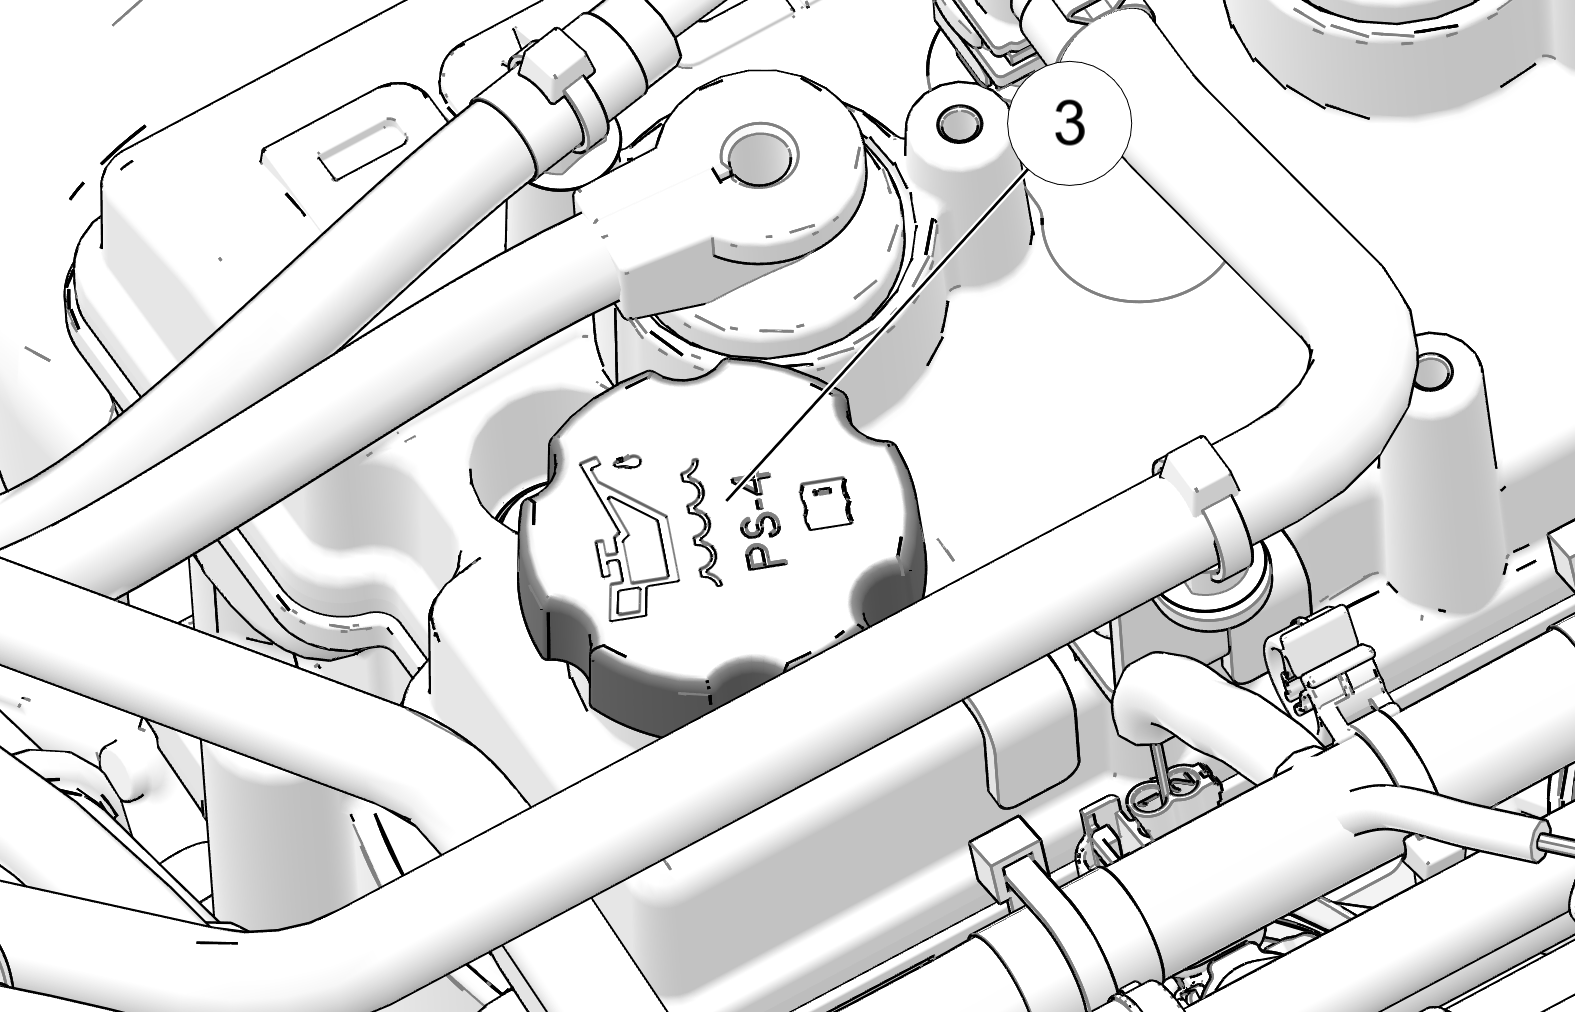
Add the proper amount of the recommended oil through the oil fill cap 3. Do NOT overfill.
-
Reinstall the oil fill cap and wipe up any residual oil.
-
Start the engine and allow the engine to idle for 2 to 3 minutes.
-
Stop the engine and allow the oil to drain back into the engine crankcase for 3 minutes.
-
While you wait, inspect the vehicle for any leaks.
-
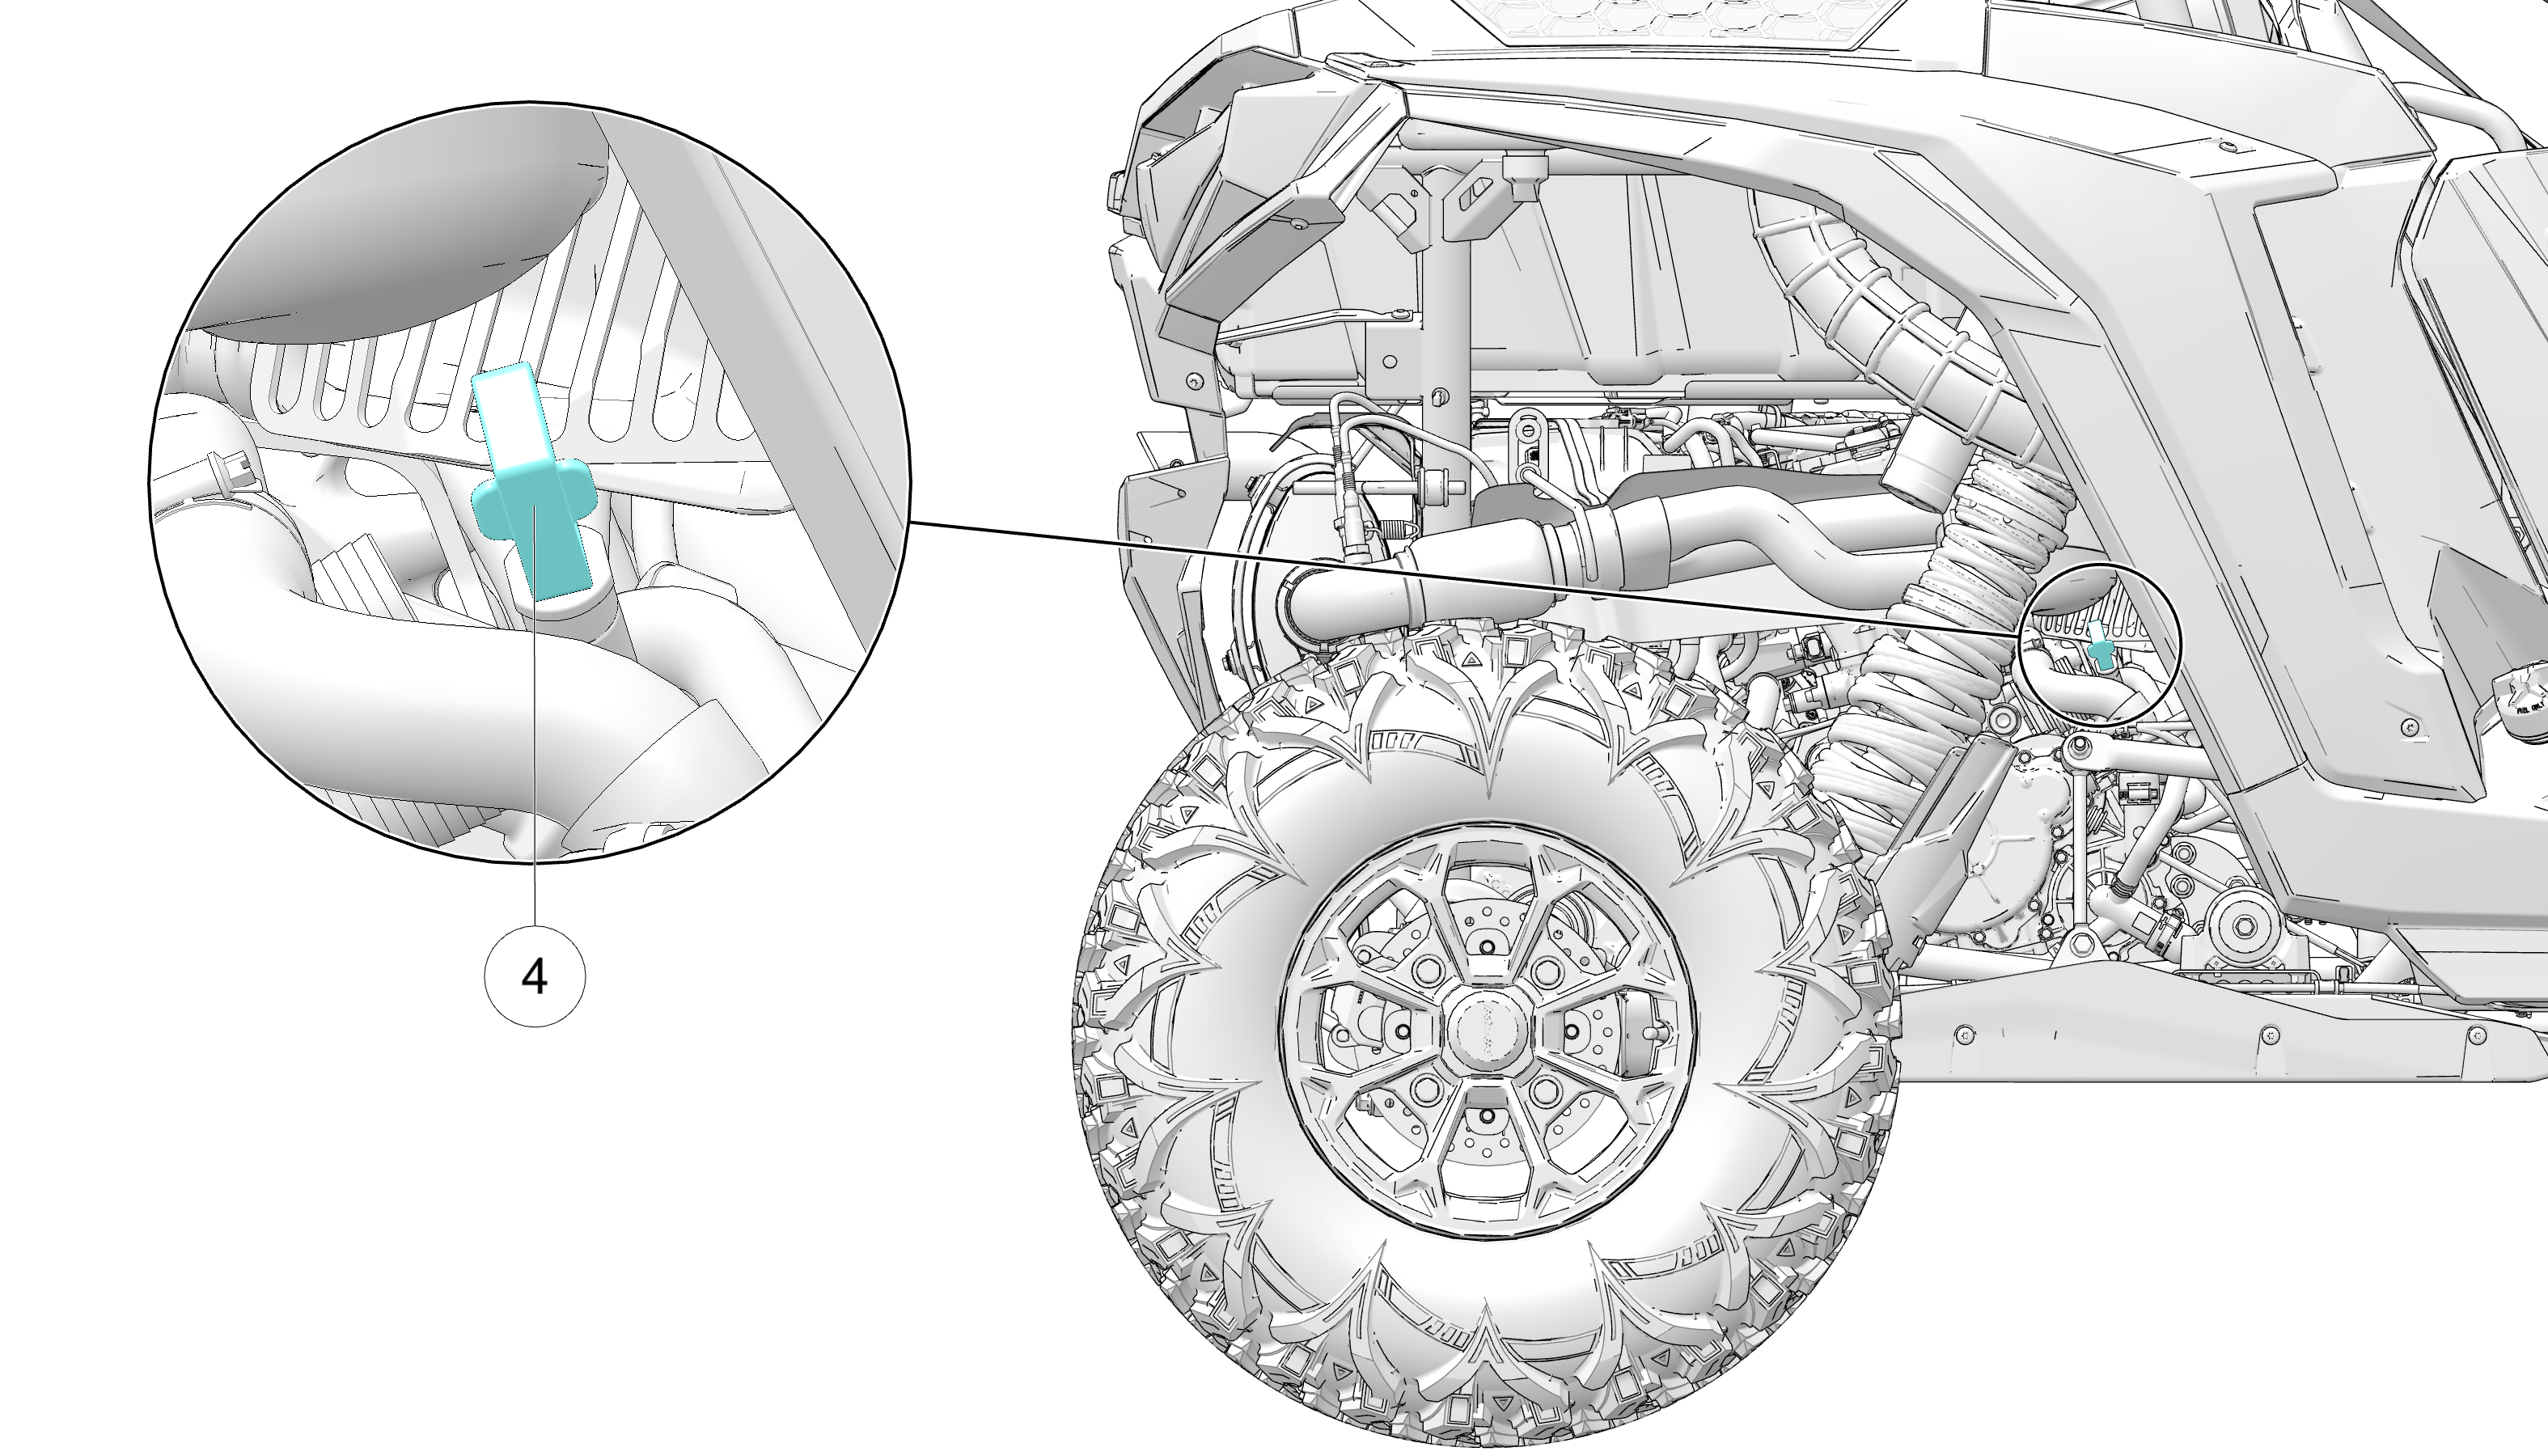
From the rear right wheel well, remove the engine dipstick 4 and wipe it dry with a clean cloth.
-
Reinstall the dipstick fully and remove it again to inspect the dipstick oil level.
-
Add oil as needed to bring the oil level to the upper mark on the dipstick.
-
Reinstall the dipstick and wipe up any residual oil.
-
Dispose of the used oil and oil filter properly.
-
Reinstall the cargo box. Torque fasteners to specification.
TORQUECargo Box Fasteners:
88 in-lbs (10 N·m)