Drive Belt Inspection and Replacement
If a belt fails, always clean any debris from the outlet duct and from the clutch and engine compartments when replacing the belt.
-
Wiggling and rocking the cover will help it move around the bolts on the clutch towers.
-
Make sure the clutch cover bolts are not catching on other parts.
-
Rotating the drive clutch slightly by hand can provide more clearance in some cases.
-
For easiest removal, make sure the vehicle is sitting on the ground at normal ride height or lower, which will provide more clearance between the cover and the shock absorber. Turning the drive clutch slightly by hand can also help provide more room for removal.
-
If reinstalling the belt, reference the print on the belt to reinstall in the same direction.
-
Park the vehicle on a flat, level surface.
-
Make sure the vehicle is in PARK and remove the key.
-
Remove both seats (two-seat vehicles) or the rear passenger seats (four-seat vehicles).
-
Remove the rear access panel. See the Rear Access Panel section for details.
-
Thoroughly clean ALL DEBRIS from the engine compartment.
-
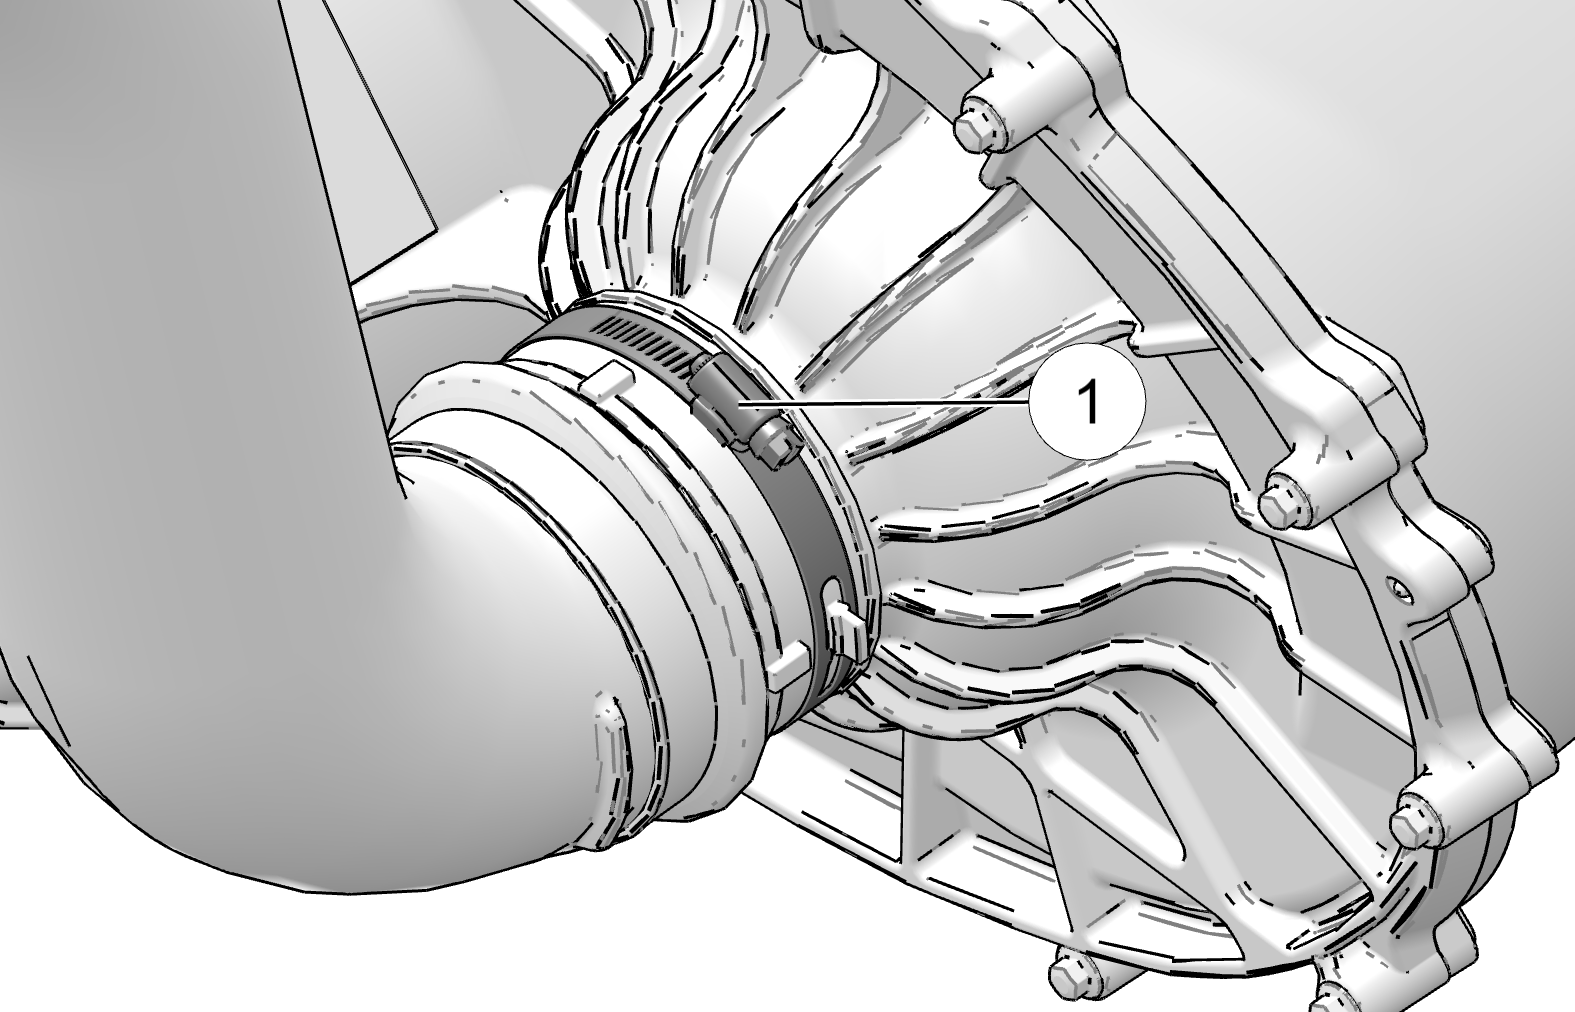
From the driver side rear wheel well, loosen the clamp fastener 1 that secures the PVT inlet duct to the outer clutch cover.
-
Remove the hose from the outer clutch cover.
-
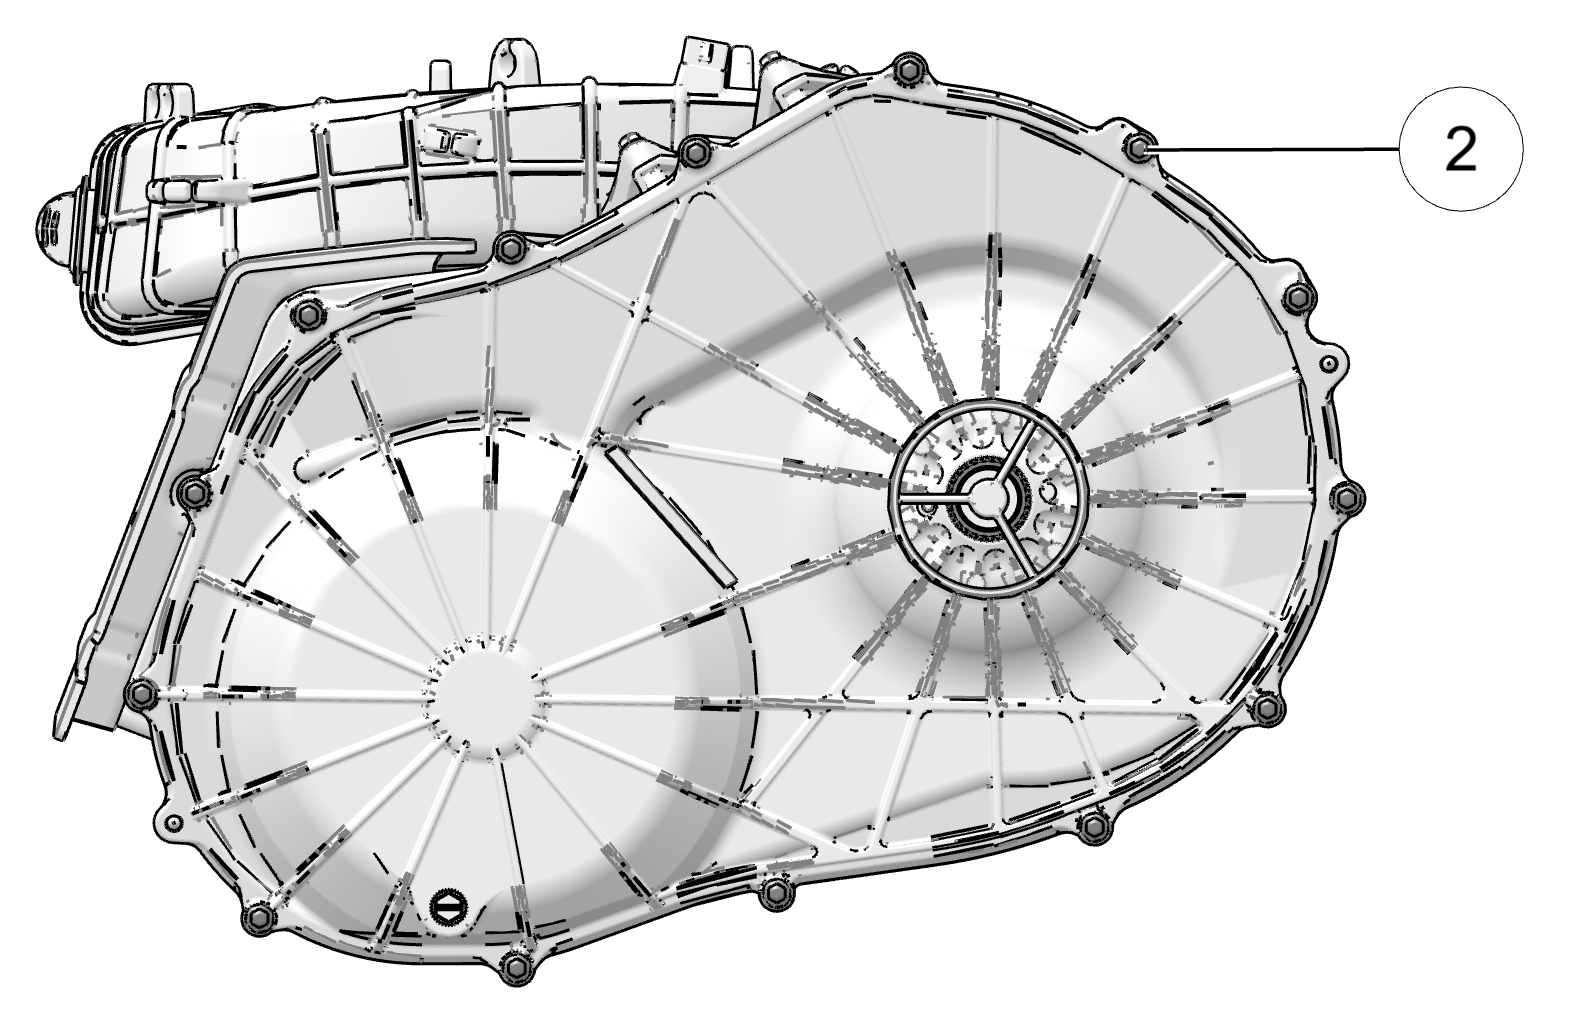
Loosen the 14 clutch cover fasteners 2.
-
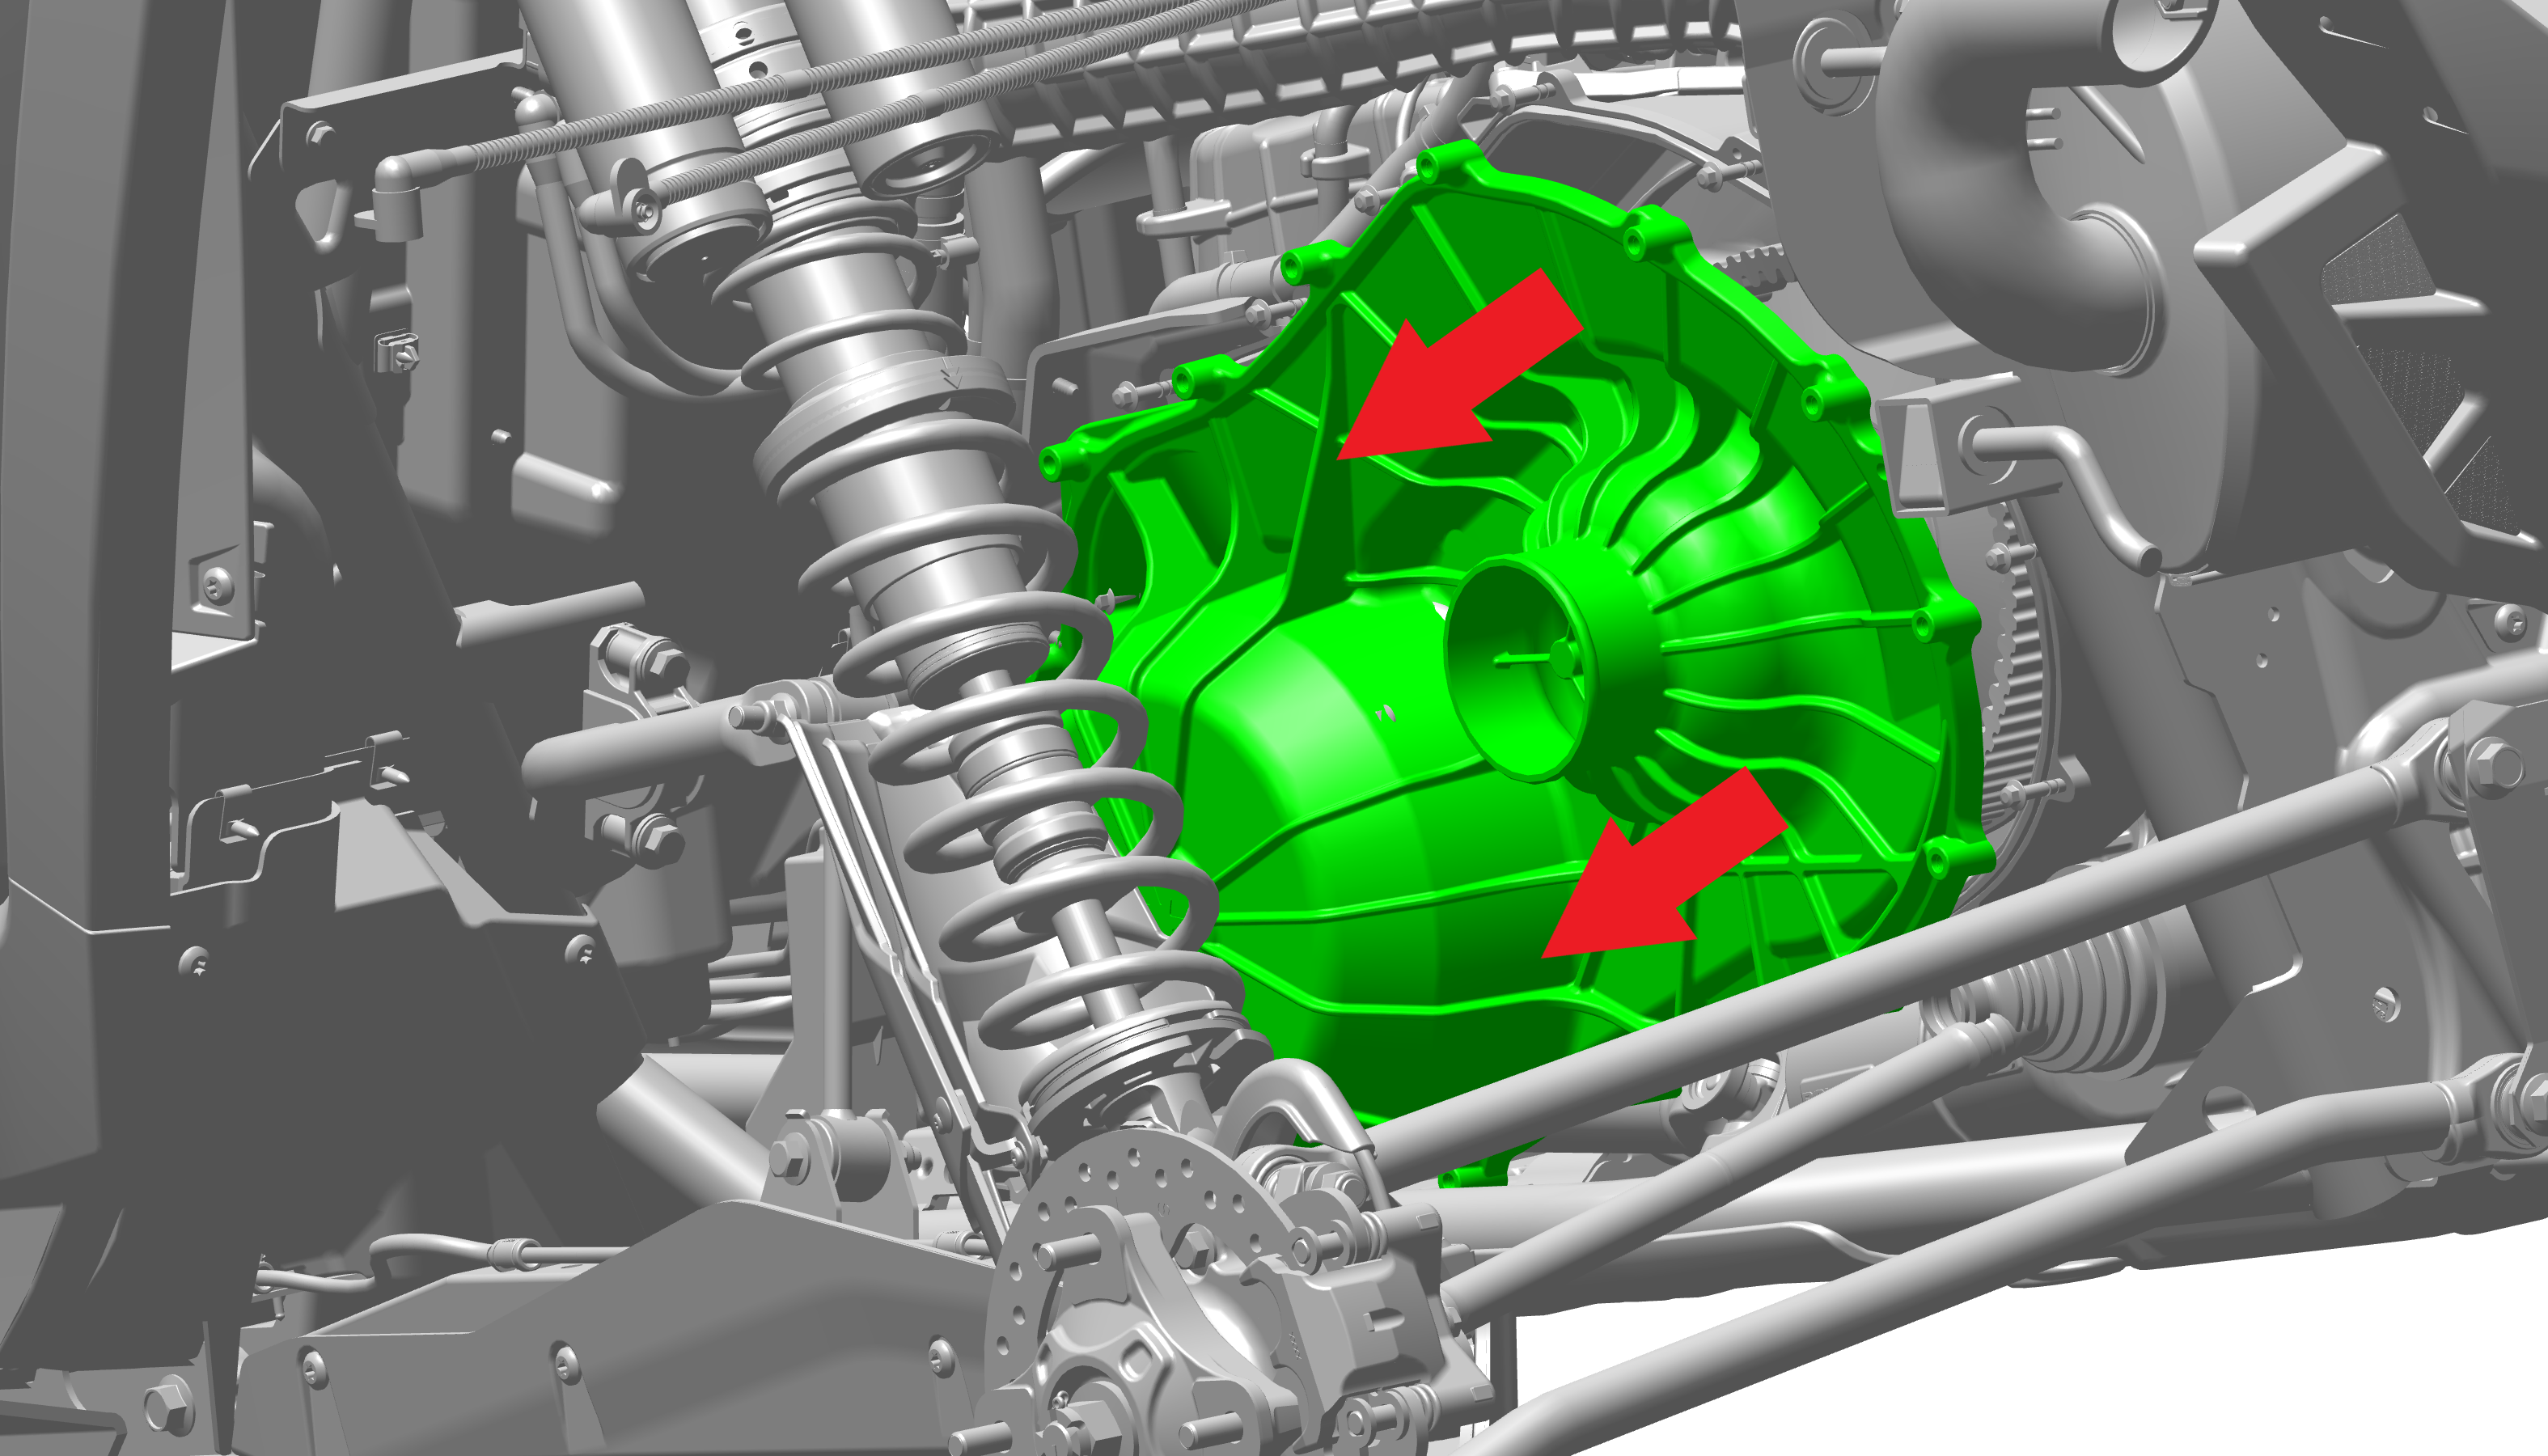
Slide the cover outward until it hits the shock spring.
-
Rotate the cover downward.
TIPKeep the retained fasteners pulled out as much as possible to ease the removal.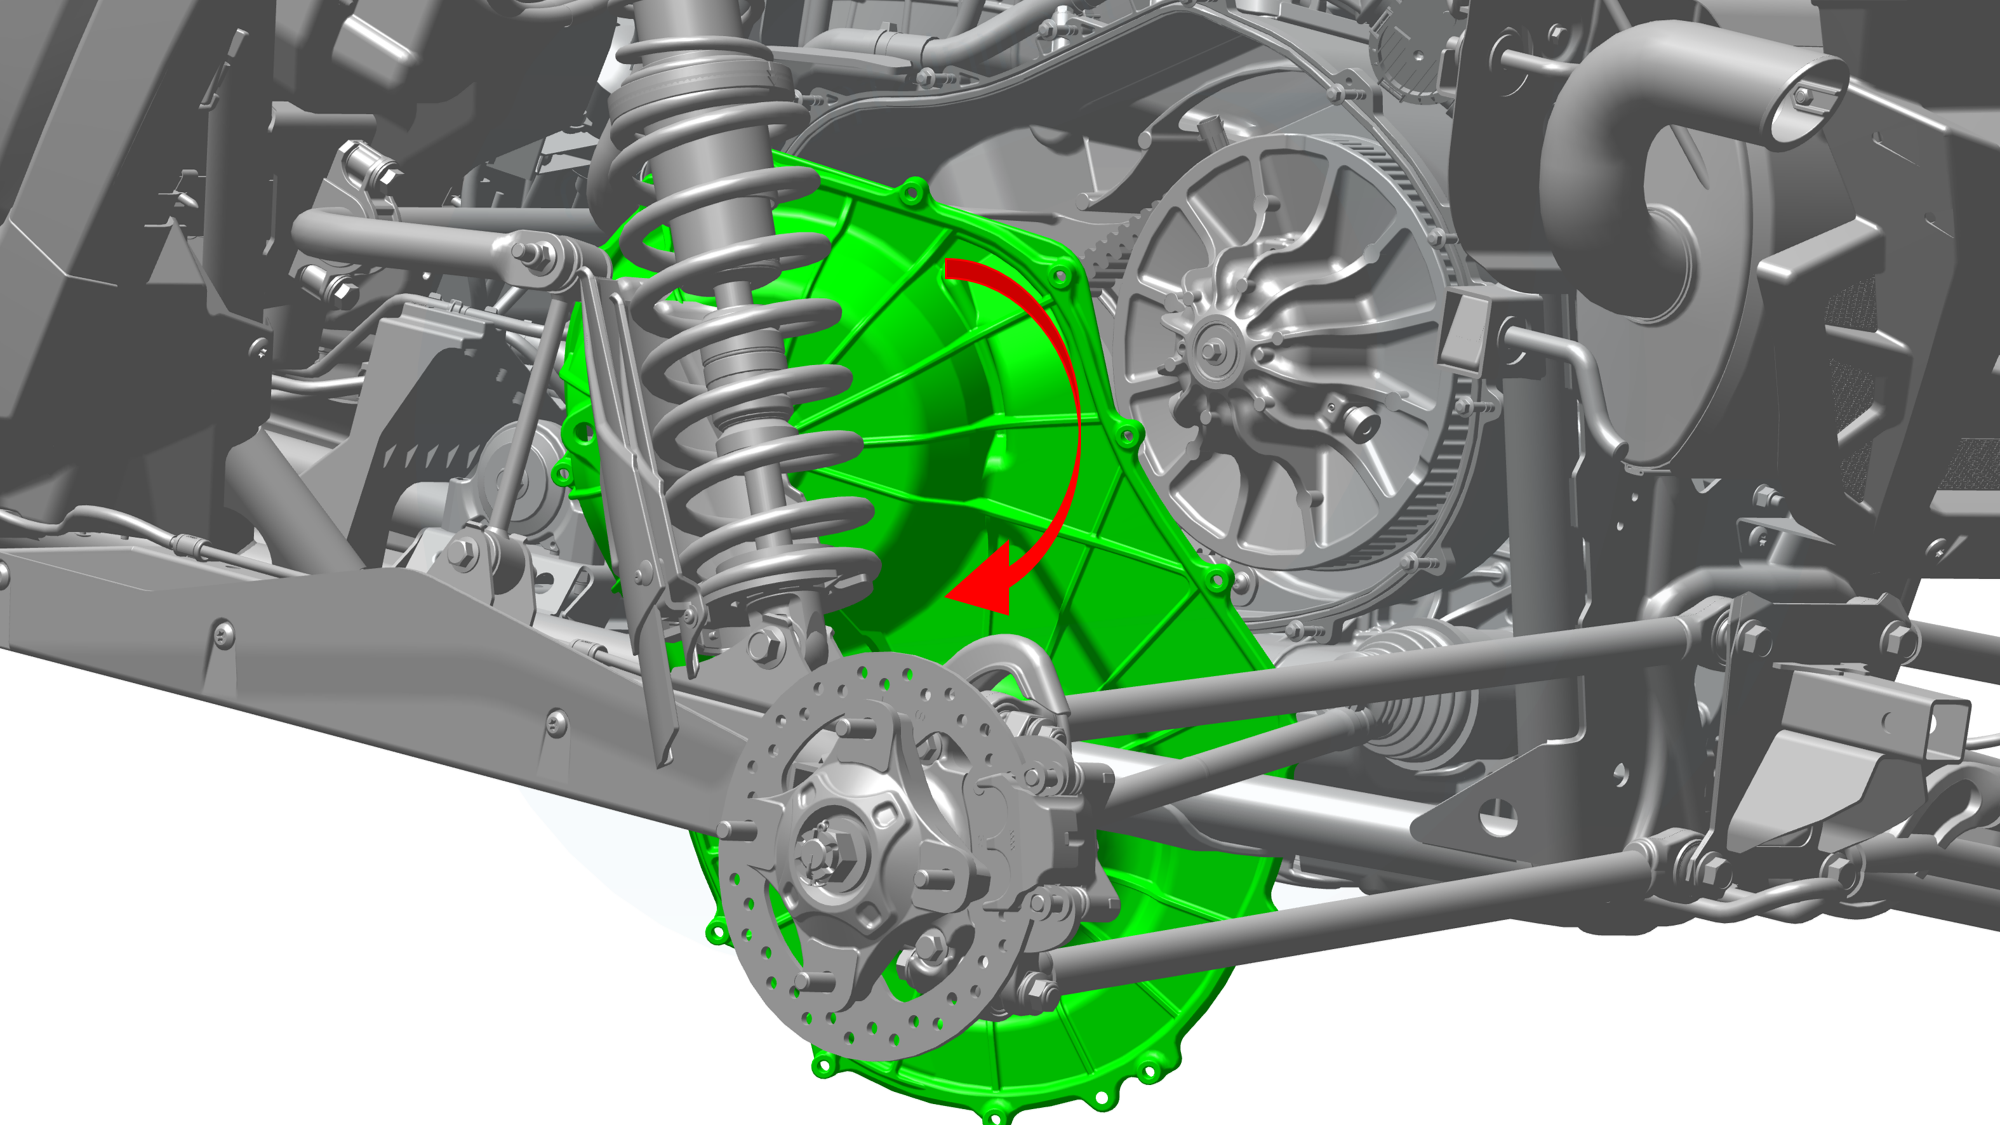
-
Slide the cover down underneath the vehicle to remove.
NOTICEFor easiest removal, make sure the vehicle is sitting on the ground at normal ride height or lower, which will provide more clearance between the cover and the shock absorber. Turning the drive clutch slightly by hand can also help provide more room for removal.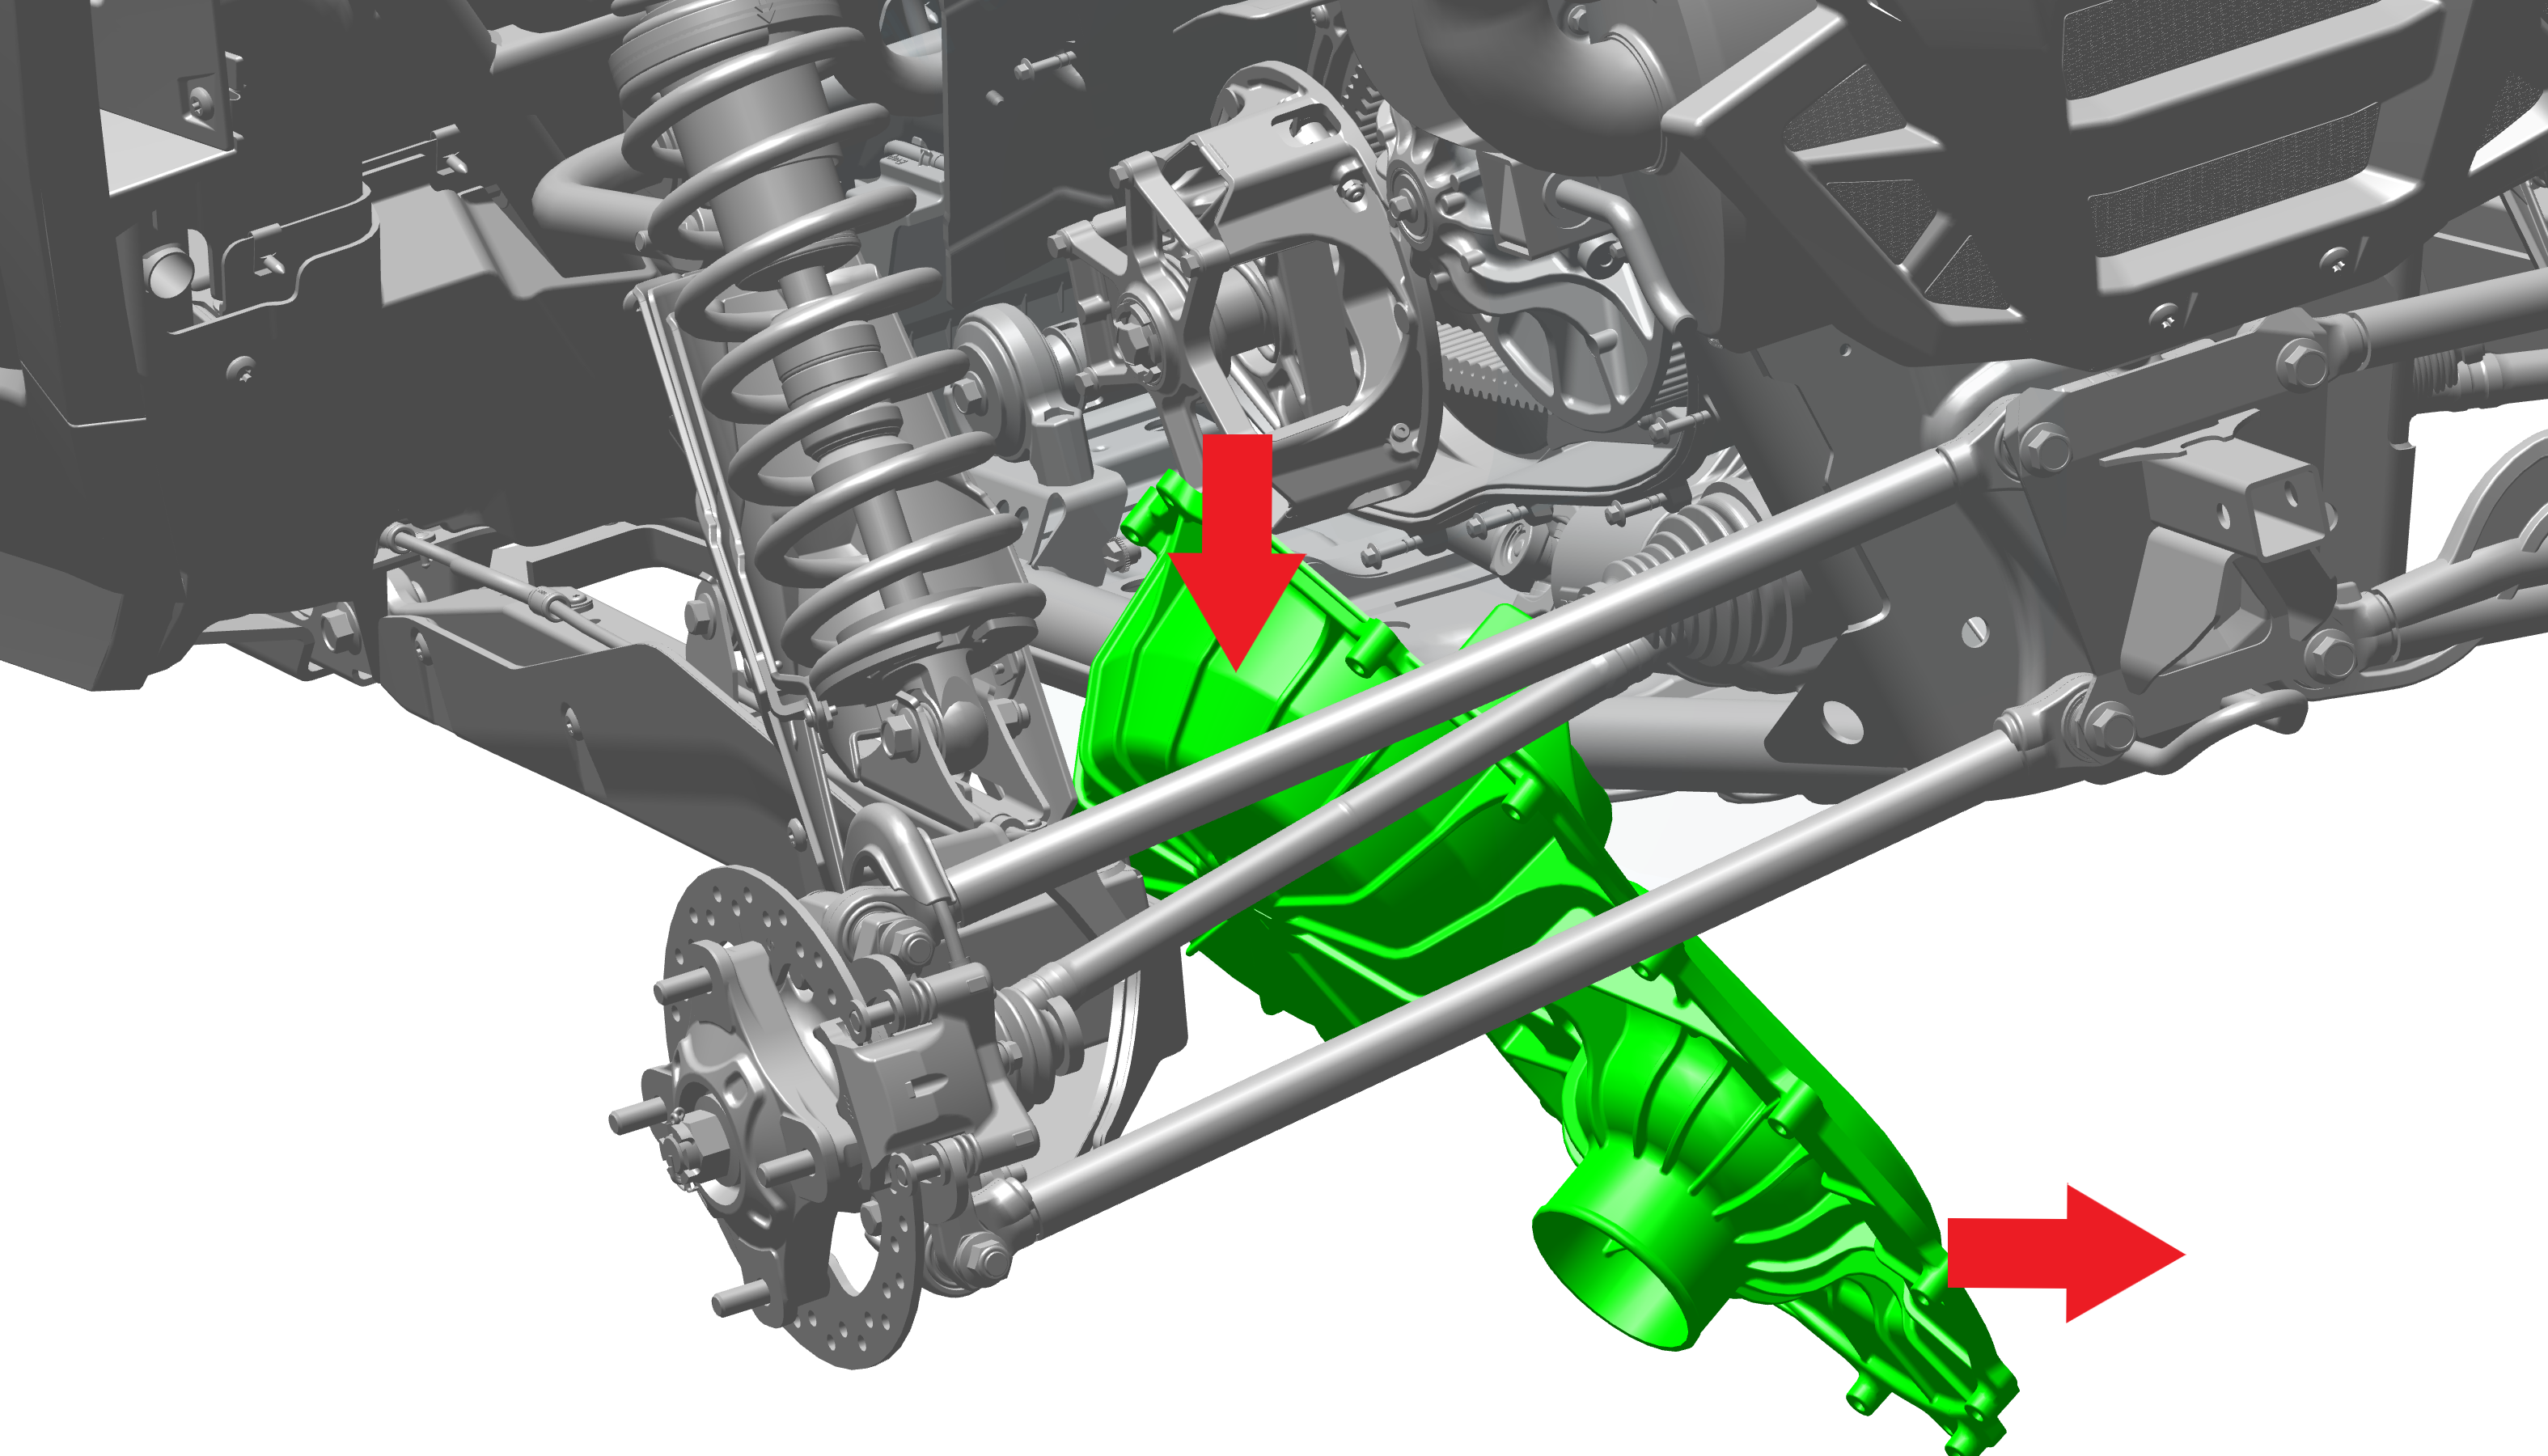
-
Inspect the cover seal for wear or damage, and replace if necessary.
-
Take note of the drive belt direction of rotation. The belt must be installed in the same direction if you are reusing.
-
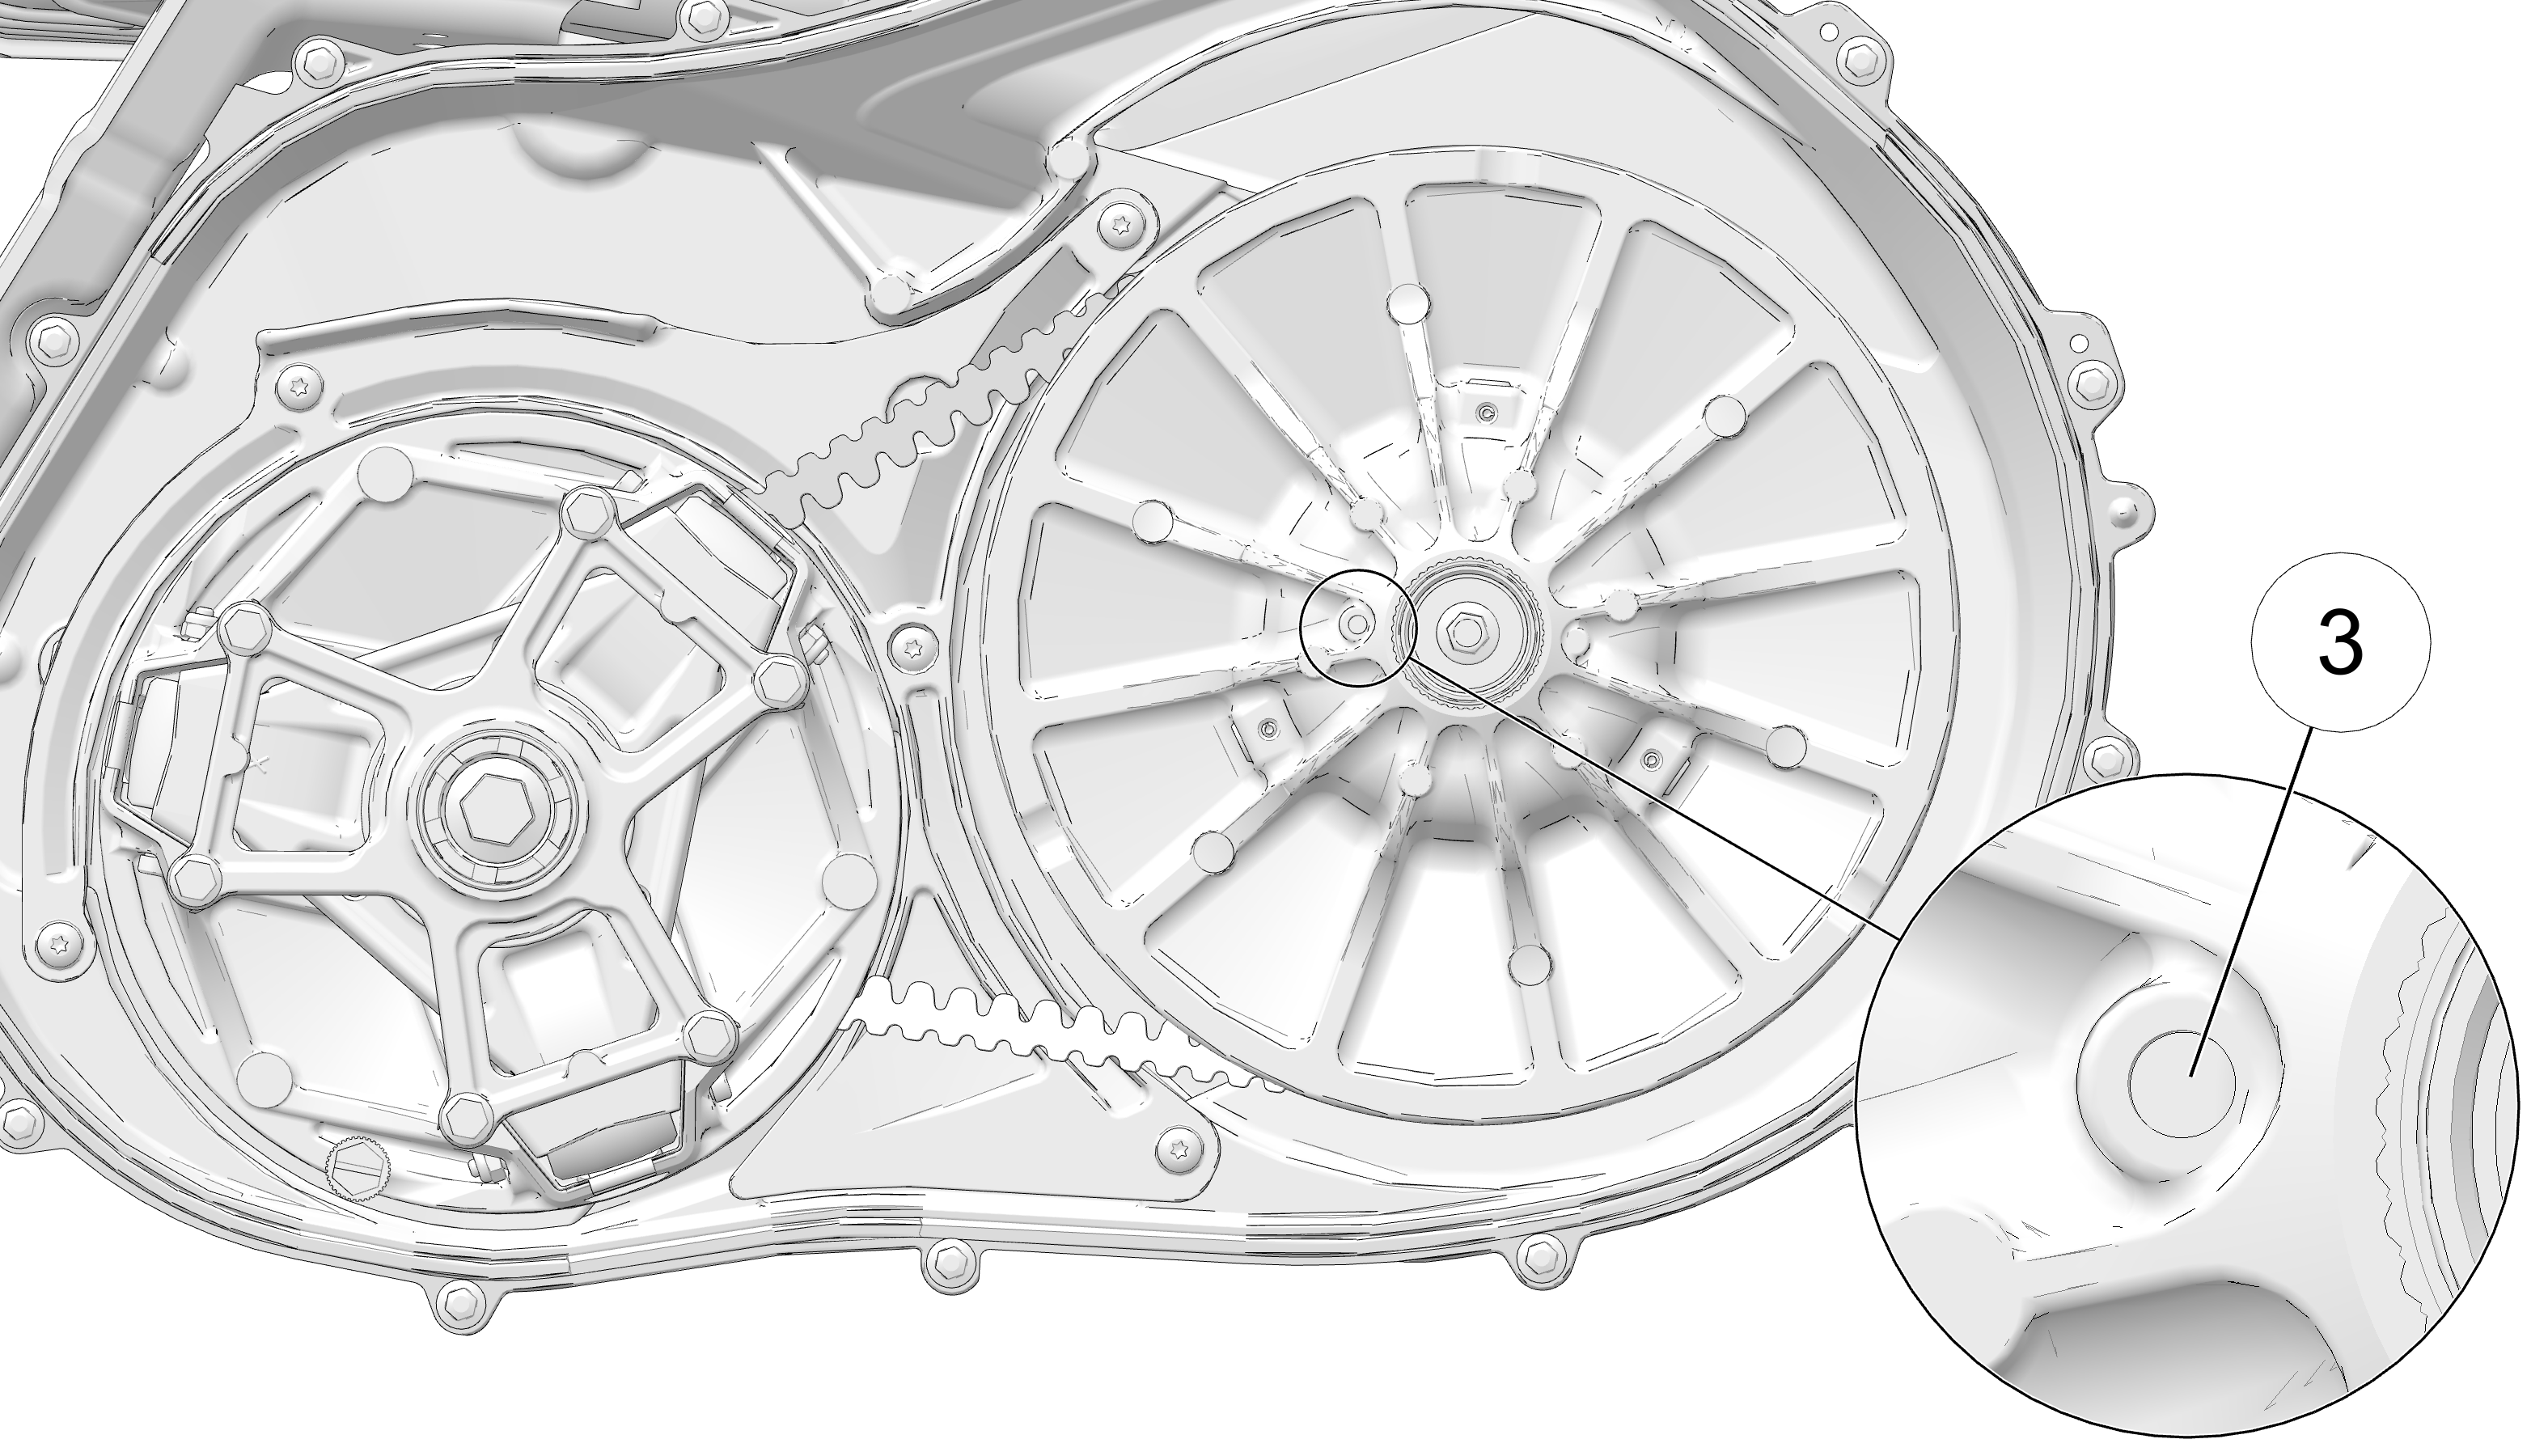
Insert the clutch spreader tool into the driven clutch 3. The clutch spreader tool is provided in the vehicle’s tool kit.
-
Turn the tool clockwise to open the sheaves.
-
Carefully walk the belt off of the driven clutch and remove from the drive clutch.
-
Inspect the belt for any fraying, hour-glassing, loose cords, missing cogs, abrasions, burns, or damage, and replace if needed.
-
Clean the inside of the clutch covers thoroughly.
-
Clean the area around the clutches thoroughly to prevent damage to vehicle components.
TIPA mobile device can be used to see behind the clutches. Any sign of oil leaks indicates that debris may be trapped behind the clutches. -
If replacing the belt, the part number on the belt should face outward when installed.
-
Loop the belt over the drive clutch and begin working it over the driven clutch sheave while spreading the sheave as needed with the spreader tool.
-
Remove the clutch spreader tool.
-
Rotate the clutch five to seven times to help seat the belt on the sheaves.
-
Reinstall the clutch cover by maneuvering around the frame and over the drive clutch.
-
Reinstall the 14 clutch cover fasteners and torque to specification.
TORQUEClutch Cover Fasteners:
4.4 ft-lbs (6 N·m)
-
Reinstall the PVT inlet duct to the outer clutch cover and fasten until fully seated.
-
Reinstall the rear access panel.
-
Reinstall the seats.