Transmission Fluid
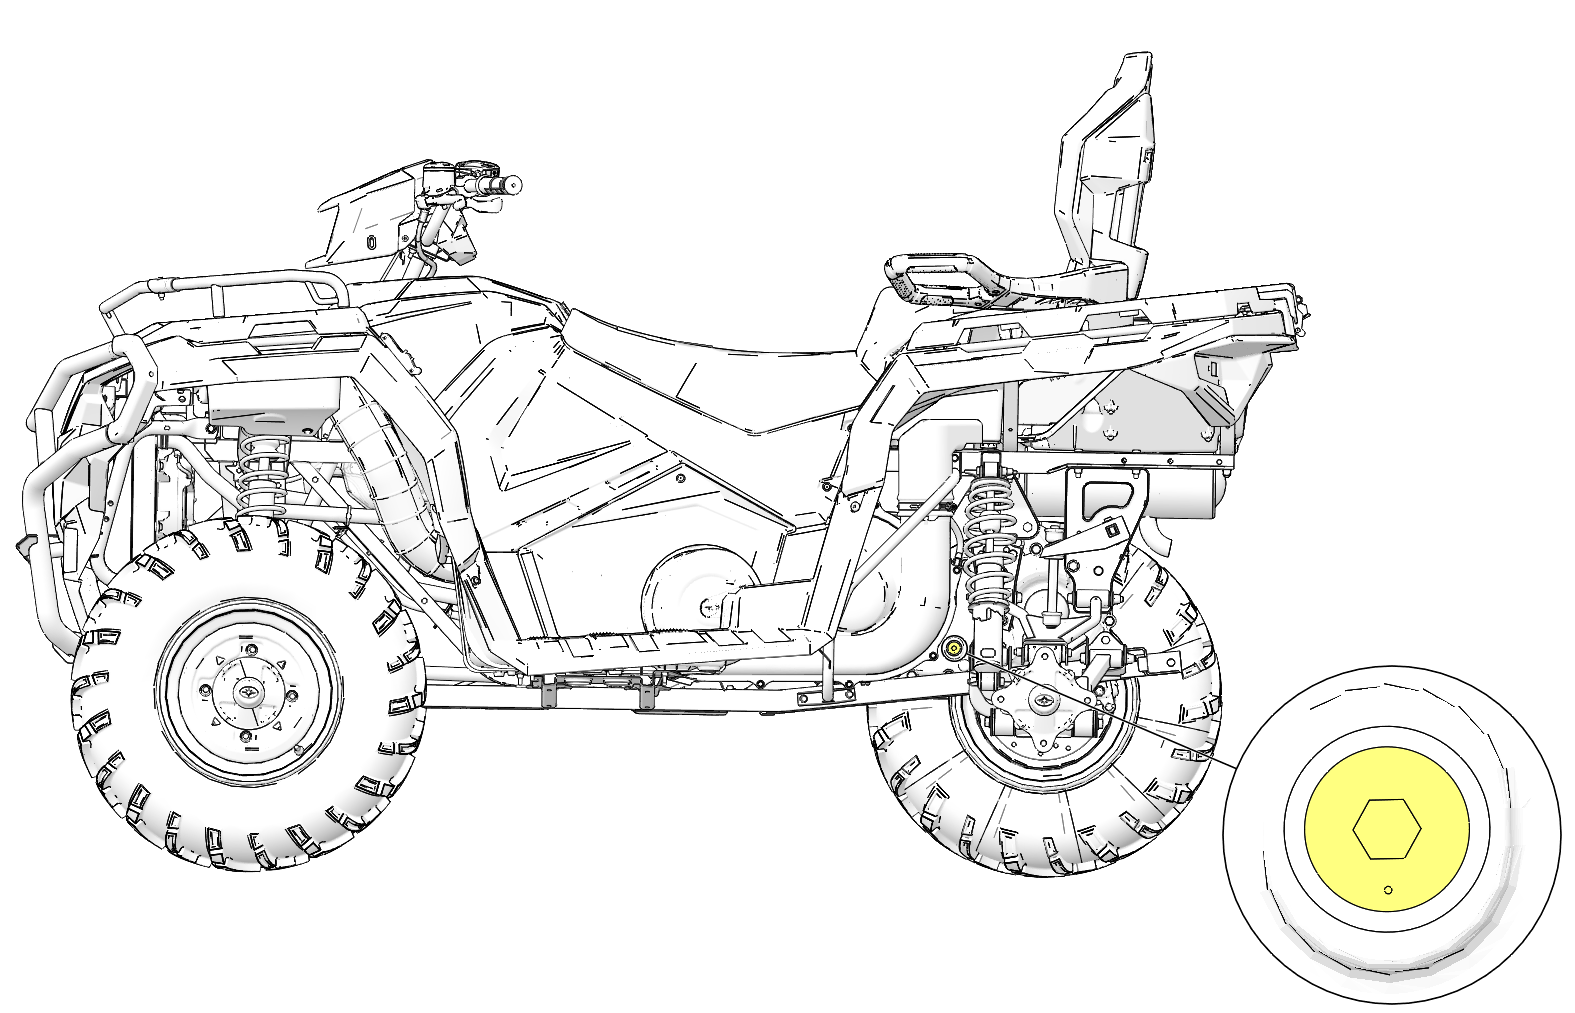
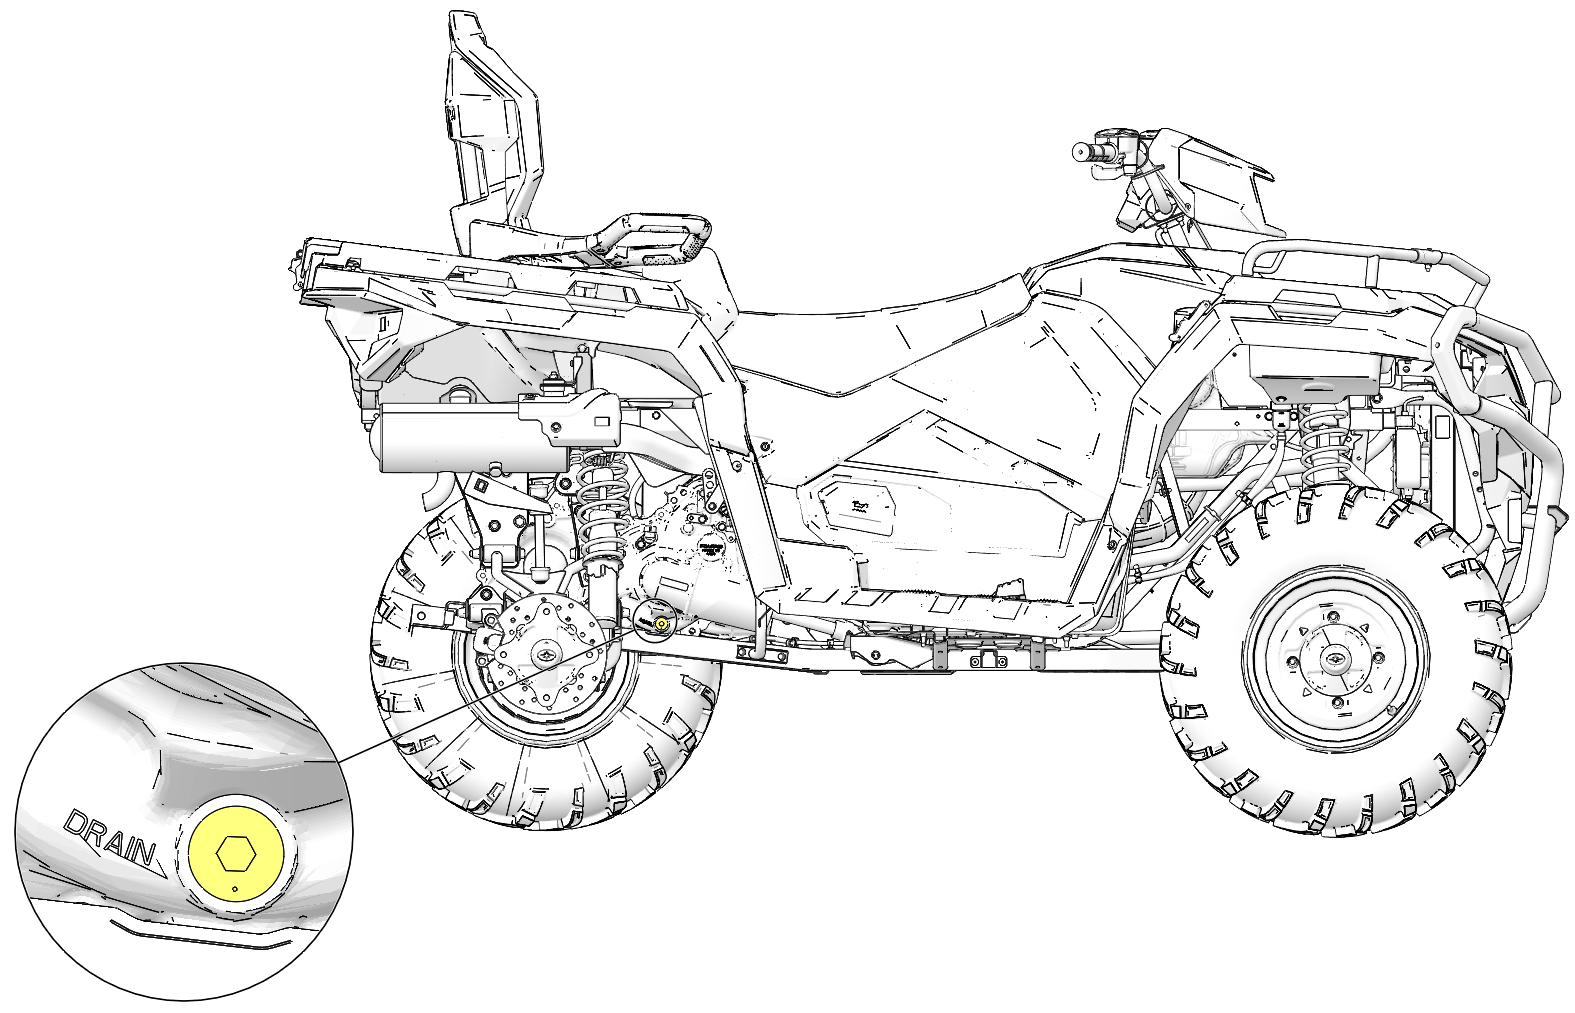
The transmission fluid should be checked and changed in accordance with the Polaris Maintenance Schedule. See the Lubrication Guide section for fluid recommendations and capacities. Maintain the fluid level at the bottom of the fill plug hole. The fill plug is located on the left side of the vehicle behind the footwell. The drain plug is located on the right side of the vehicle.
FLUID CHECK
-
Position the vehicle on a level surface. Put the transmission in PARK (P) and lock the temporary brake lock.
-
Remove the rear left wheel. See Wheel Removal.
-
Clean the area around the fill plug. Remove the fill plug and check the fluid level. The fluid level is correct if fluid is visible at the fill hole threads.
-
If needed, use a funnel to slowly add the recommended fluid to bring the level to the bottom of the fill hole threads.
-
Clean any dirt or debris on the fill plug. Inspect the o-ring and replace if necessary.
-
Install the fill plug and torque to specification.
TORQUETransmission Drain / Fill Plug:
12 ft-lbs (16 N·m)
-
Clean any residual fluid off of the vehicle and inspect for leaks.
-
Install the rear left wheel. See Wheel Installation.
FLUID CHANGE
-
Position the vehicle on a level surface. Put the transmission in PARK (P) and lock the temporary brake lock.
-
Properly lift and elevate the vehicle.
WARNINGUse caution when you lift the vehicle off of the ground. If the vehicle is not properly lifted and supported, serious injury or death could result from the vehicle coming off of the supports or hoist. Always follow the instructions of the equipment being used and make sure it is sufficiently rated for the vehicle being lifted. -
Remove the rear right wheel. See Wheel Removal.
-
Clean the area around the drain plug.
-
Put a drain pan below the drain plug.
-
Remove the drain plug and allow the fluid to drain completely. Discard the used fluid properly.
-
Clean any dirt or debris on the drain plug. Inspect the o-ring and replace if necessary.
-
Install the drain plug and torque to specification.
TORQUETransmission Drain / Fill Plug:
12 ft-lbs (16 N·m)
-
Install the rear right wheel. See Wheel Installation.
-
Remove the rear left wheel.
-
Remove the fill plug.
-
Use a funnel to slowly add the proper amount of the recommended fluid. The fluid level should reach the bottom of the fill hole threads.
CAPACITYRecommended Lubricant:
AGL
Capacity:
32 floz (948 ml)
-
Clean any dirt or debris on the fill plug. Inspect the o-ring and replace if necessary.
-
Install the fill plug and torque to specification.
TORQUETransmission Drain / Fill Plug:
12 ft-lbs (16 N·m)
-
Clean any residual fluid off of the vehicle and inspect for leaks.
-
Install the rear left wheel.