Drive Chain and Sprocket Assembly
-
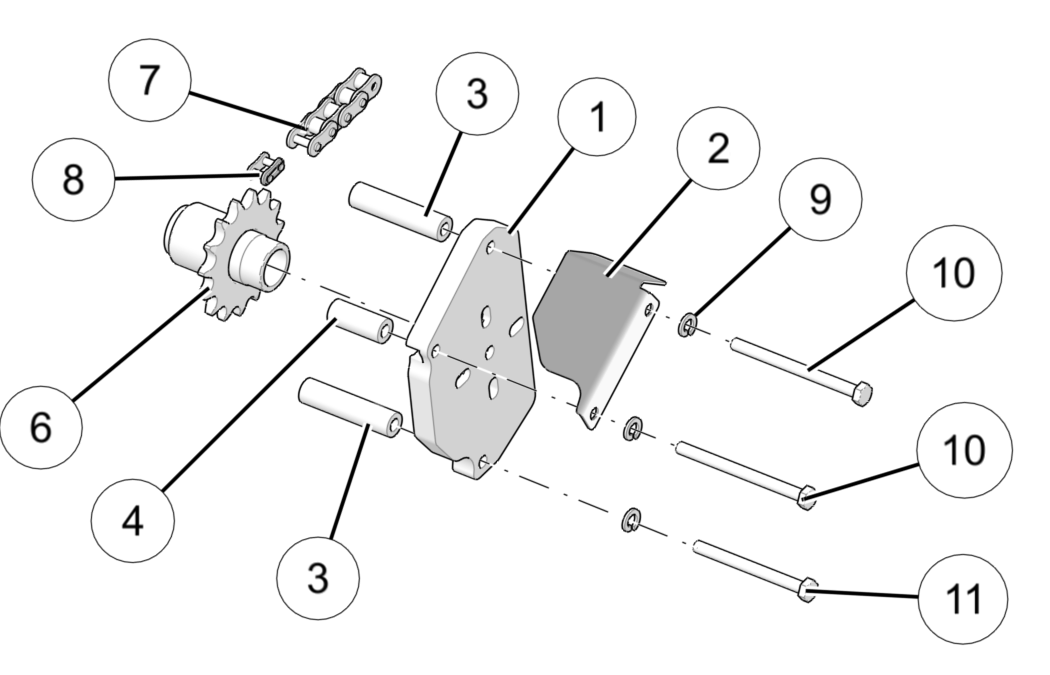
Install provided sprocket 6 onto motorcycle transmission output shaft.
-
Place backer plate spacers 3/4 and chain guard 2 into position on the backer plate 1 as shown and start bolts 10/11 with lock washers 9 as shown to hold spacers and chain guard in position.
IMPORTANTReference your specific install kit’s content image from the Kit Contents section, for spacer 3/4 and bolt 10/11 locations as they vary per kit. Make sure to use Blue Loctite® 243 on the provided 3 button head screws 10/11.
-
Next, slide backer plate, spacer and chain guard assembly onto the transmission output shaft and into position.
-
Tighten the sprocket backer plate 1 to the engine case and torque to bike manufacturer’s specifications before chain 7 is installed and chain tension is set.
NOTICEReference your host bike’s owner’s manual or manufacturer’s specifications for proper torque specifications.
-
Route chain 7 around both front and rear sprockets.
-
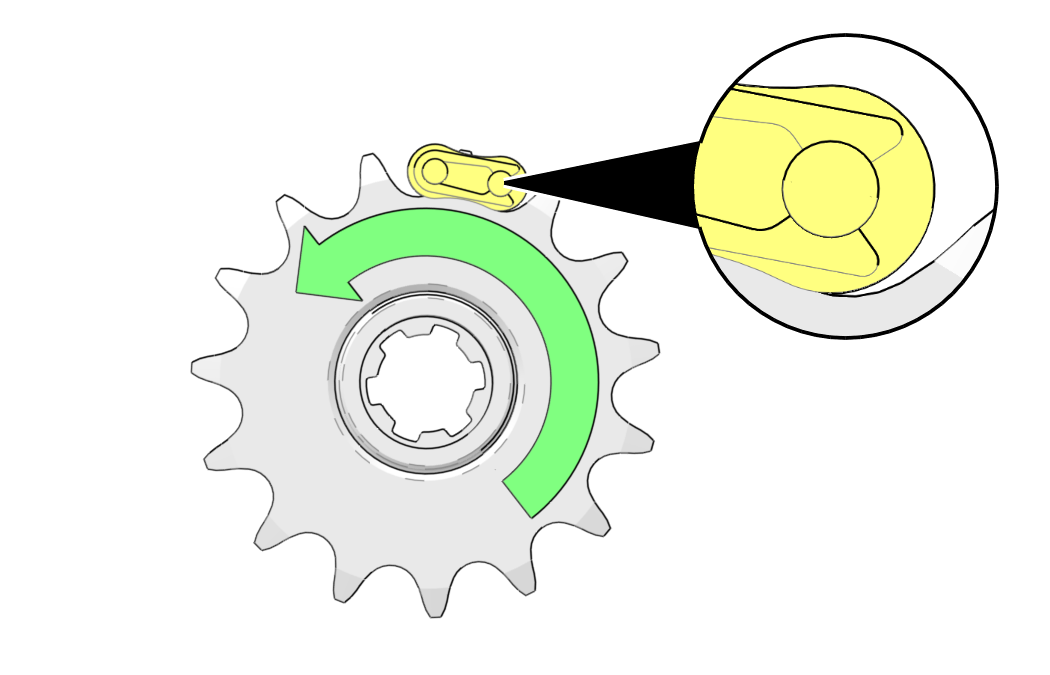
Complete the assembly of the chain with the master link 8 provided. Be sure to install the master link with the opening of the link facing rearward in relation to the chain direction as shown.
-
Set the proper chain tension by loosening chain slider nut and bolt. Slide the chain slider up or down until 1/2 in – 5/8 in of vertical deflection is met in the upper chord of the drive chain. Torque chain slider nut to specification below when proper tension is achieved.
TORQUEChain Slider Nut:
18 ft-lbs (25 N·m)
NOTICEThe chain will stretch within the first 5 hours. You MUST check for proper chain tension after this initial break-in period and readjust as necessary. The chain slider is not intended to roll and can be rotated as needed to keep proper chain tension on the usable surface of slider.