Brake Line Assembly and Routing
When routing brake lines, it is critical that you keep all brake lines away from any surfaces, such as engine or exhaust, that can become hot while operating the vehicle. Failure to comply will adversely affect the vehicle’s brake system and may lead to severe injury or death.
Carefully coil extra brake line and store behind the number plate. Ensure this extra length is secured and does not interfere with the steering of the host bike. Make sure the extra brake line is not kinked or pinched.
Yamaha® Models
Refer to images of Honda® model for routing references.
For the Yamaha® TTR models, run the brake line forward either on top of the strut rod or located parallel against the left hand side of the strut rod. Secure the brake line to the strut rod with a cable tie located at the top of the strut rod and one at the bottom of the strut rod in a similar fashion to the photo for the Honda® model. From here feed the brake line and master cylinder to the right side of the bike feeding the brake line between the bike’s upper sub-frame column and the wiring harness brackets on the frame. This will help hold the brake line against the bike’s frame and as far away from the exhaust system as possible. From here route the brake line forward towards the front of the bike underneath the bike’s fuel tank. Place another cable tie near the front of the bike securing the brake line to the bike’s lower horizontal frame tube.
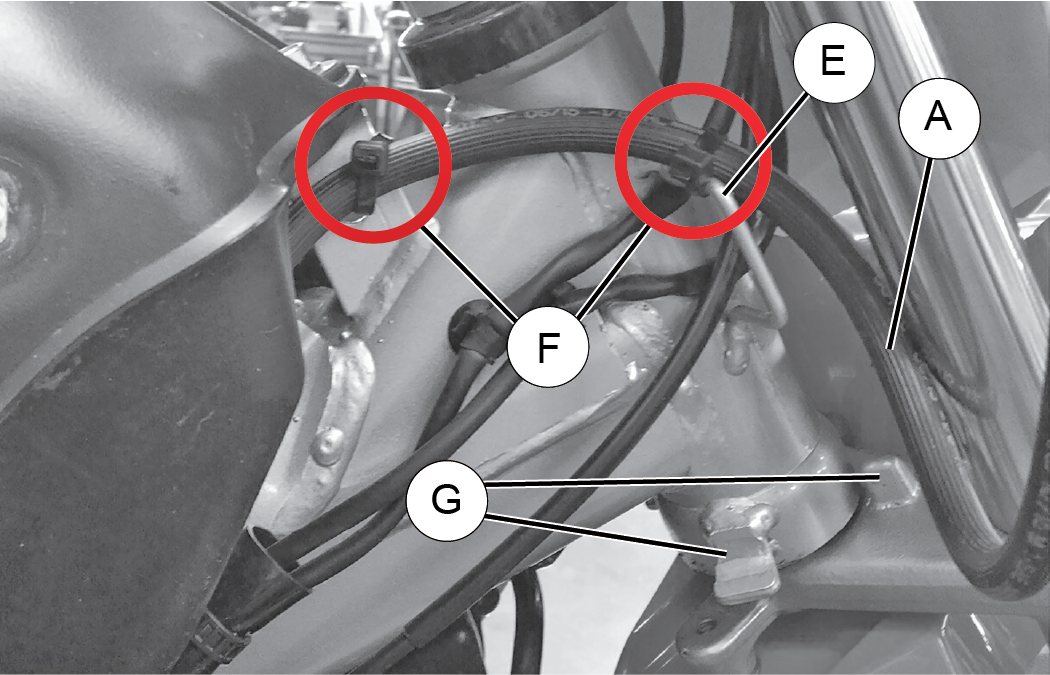
When routing brake lines, make sure there is a minimum of one inch of clearance between the brake line A and the lower head set turning stop posts G to prevent the brake line from being pinched. Failure to comply will adversely affect the vehicle’s brake system and may lead to severe injury or death.
Honda® Models
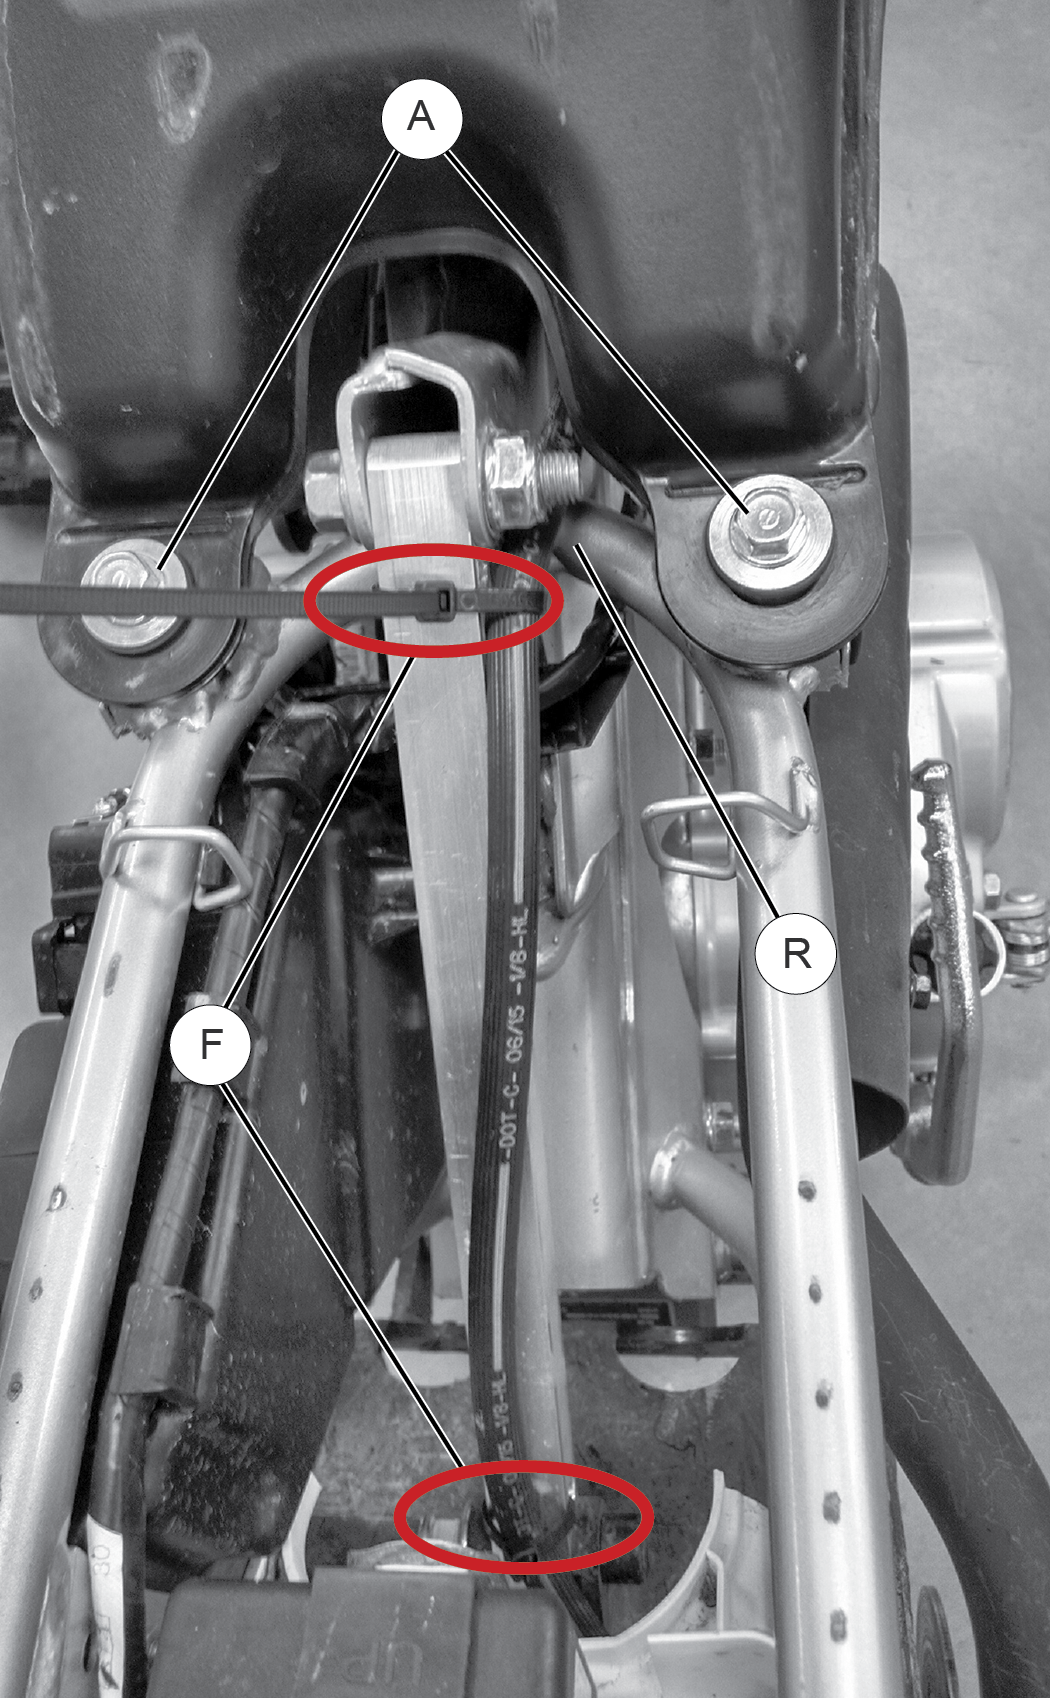
Remove the two rear gas tank bolts A and loosen the front tank bolt on the bike. Lift up on the rear of the gas tank giving yourself enough room to feed the brake line and master cylinder over top of the rear right sub-frame tubing of the bike and under the gas tank as indicated in the image below R. Feed the brake line forward under the bottom of the gas tank along the main frame of the bike. Keeping all of the slack out of the brake line fasten the brake line to the top and the bottom of the strut rod with cable ties as shown F. Reinstall the two rear gas tank bolts A previously removed and torque to bike manufacturer’s specification. Next, torque the front tank bolt to manufacturer’s specifications. See image below for brake line routing reference R.
Near the front of the bike where the brake line is approaching the front neck tube of the bike, cable tie the brake line to the front gas tank frame mount and another cable tie to the bike’s frame-mounted wire harness on the bike’s neck tube. See photo below for cable tie locations F. The remaining brake line can free hang up to the master cylinder mounted on the right handle bar. Adjust the pitch of the brake lever, ensuring it is easily reached and easy to pull. Tighten the brake lever perch hand tight being careful to not strip the mounting perch threads. See image below:
When routing brake lines, make sure there is a minimum of one inch of clearance between the brake line A and the lower head set turning stop posts G to prevent the brake line from being pinched. Failure to comply will adversely affect the vehicle’s brake system and may lead to severe injury or death.