Fuel Tank Removal / Installation
Allow engine and exhaust to cool completely before disconnecting fuel line or removing tank. Protect fuel tank finish when removing, storing, and installing tank.
-
Depressurize fuel system. See Fuel System Depressurization.
-
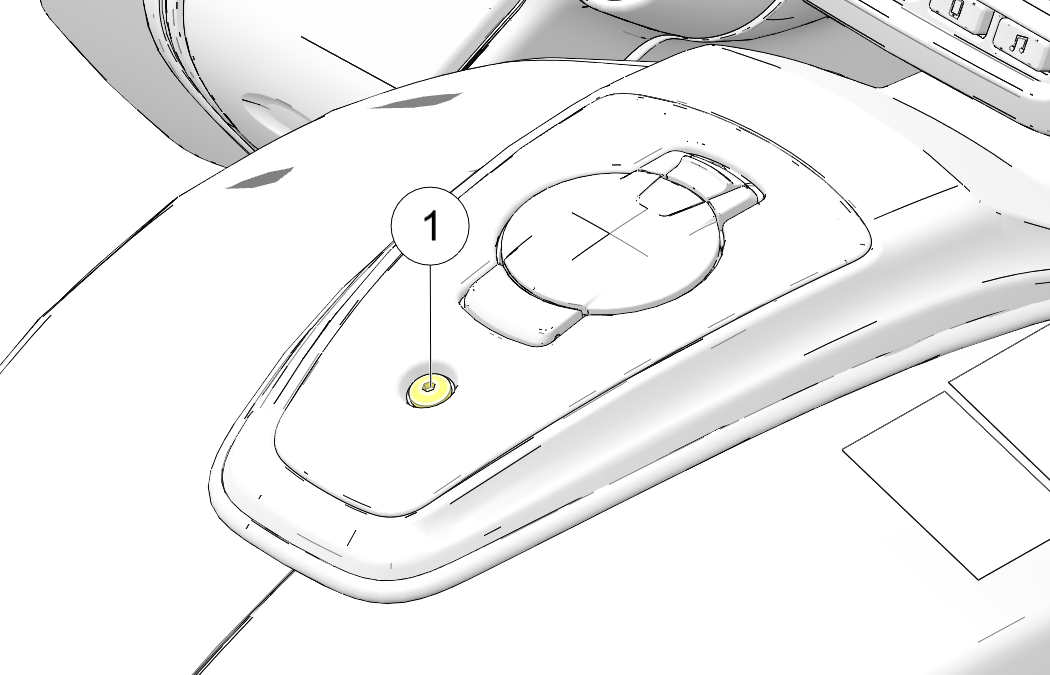
Remove the console by unscrewing fastener at back of console 1.
-
With fastener removed, lift the rear of console enough to clear fuel cap and push forward to release front mount from keyway.
-
Lift console up and out, away from the fuel tank, to complete removal.
STOP!Do not use anything other than fingers to remove the quick connection. The use of tools can damage the connection. -
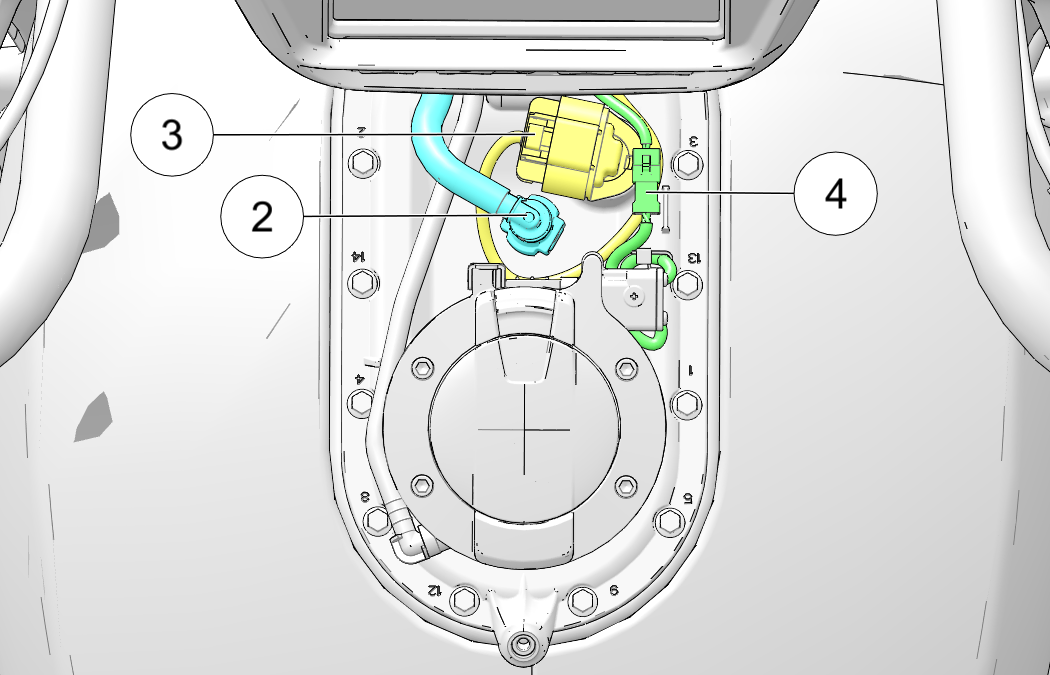
Remove fuel quick connect 2 by wrapping a clean rag around the connector and squeezing both of the release buttons (one on each side of the fitting) and gently slide fitting straight off fuel tank.
-
Unplug electrical connector from fuel pump 3.
-
Unplug electrical connector from fuel cap, and remove electrical harness 4.
-
Remove the left-hand v-cover by removing its fasteners.
STOP!Do not use anything other than fingers to remove the quick connection. The use of tools can damage the connection. -
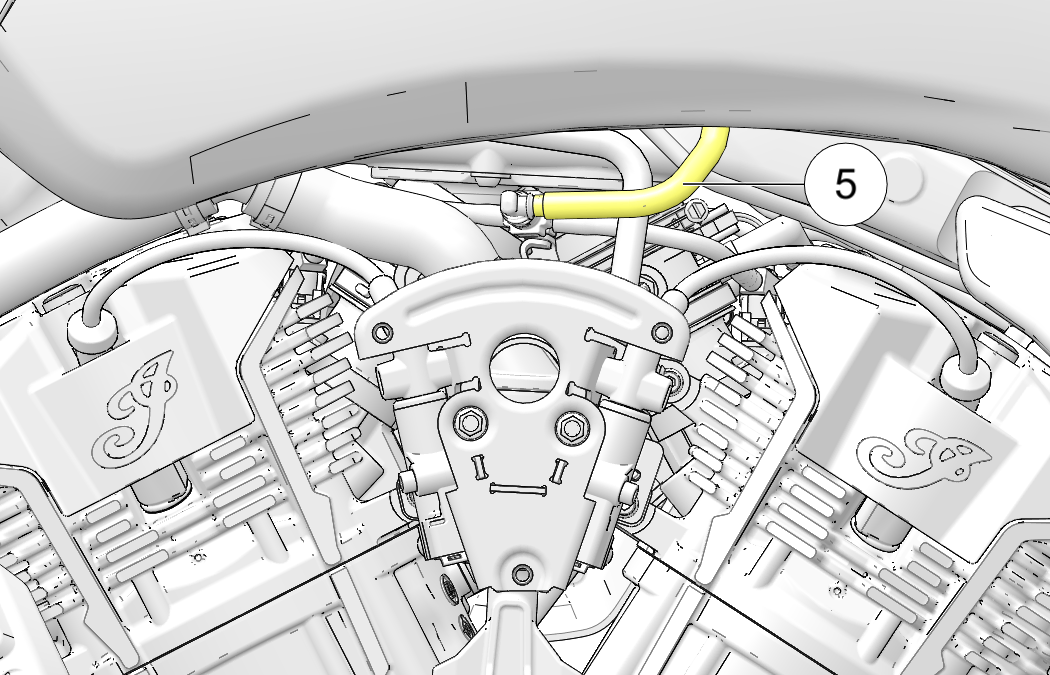
Disconnect fuel line at fuel rail 5 by wrapping a clean rag around the connector and squeezing both of the release buttons (one on each side of the fitting) and gently slide fitting straight off fuel rail. Cover fuel fitting to keep debris out.
-
Remove the seat. See Seat Removal.
-
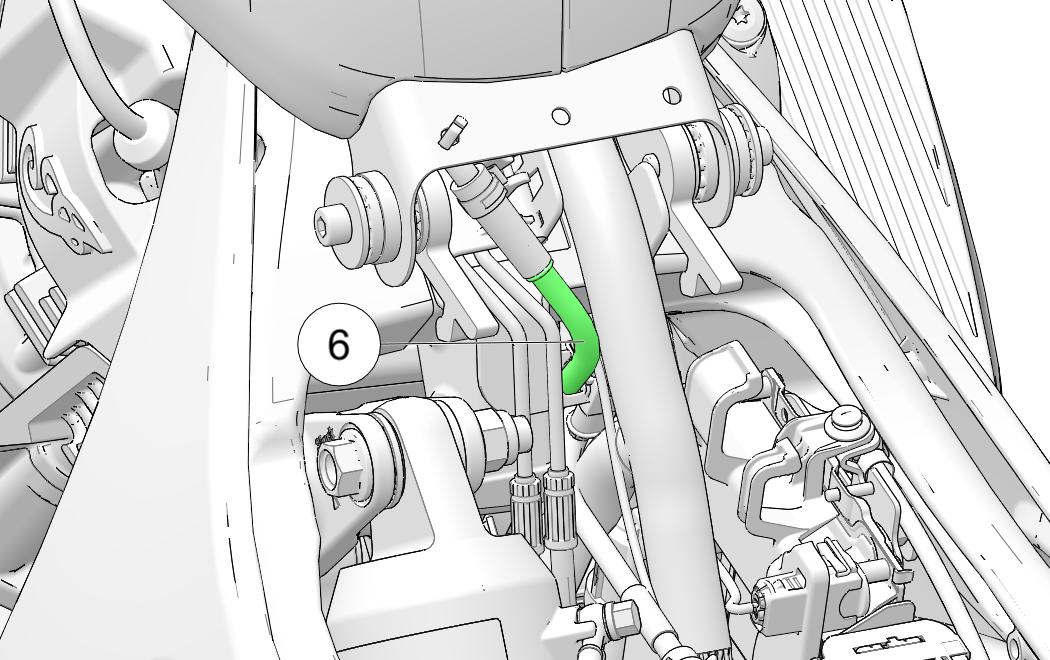
At rear of tank, disconnect the fuel vent line 6.
-
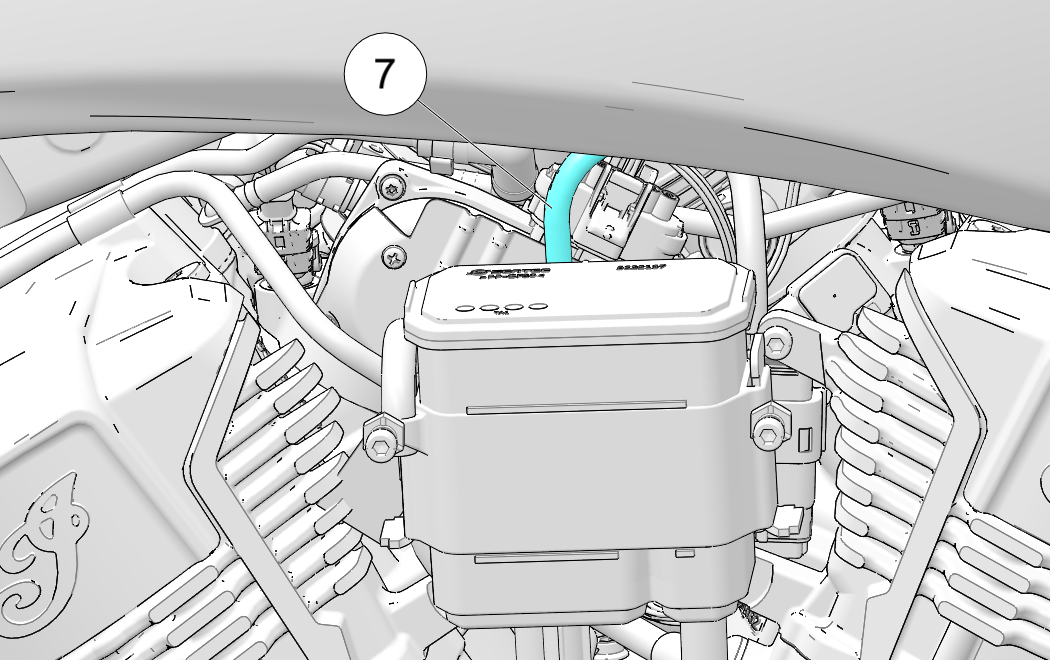
On models equipped with an EVAP system, disconnect the EVAP vent line located above the EVAP canister on the right hand side of the fuel tank 7.
-
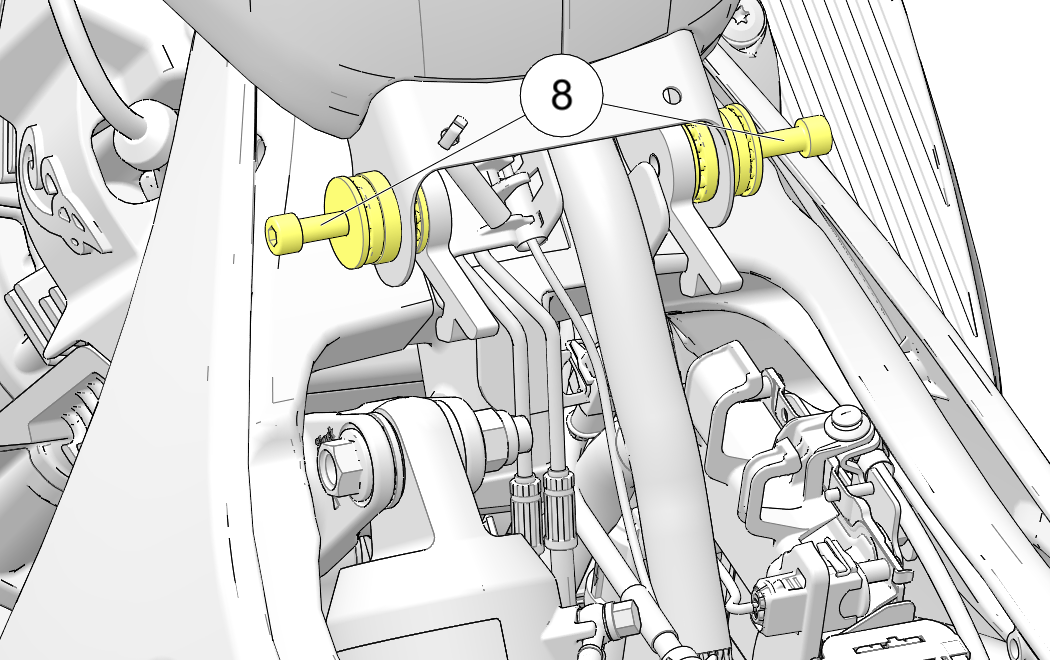
Remove fuel tank fasteners 8.
-
Lift rear of tank upward and pull rearward to remove. Place the fuel tank in a secure location with a drain pan to catch any fuel than may leak or drip from disconnected hoses or fittings.
Installation
Installation is the reverse of the removal procedure. Verify no fuel leaks or kinks are present around the fuel line connectors or fuel pump seal area.Fuel Tank Fastener:
18 ft-lbs (24 N·m)