Battery Installation
-
Inspect the battery box and cover for damage. Be sure pads are in good condition and properly located.
-
Make sure cable ends and battery terminals are clean. Apply a light film of dielectric grease to the terminal bolt threads.
-
Carefully position the battery into the battery box with both terminals toward the rear of the bike.
-
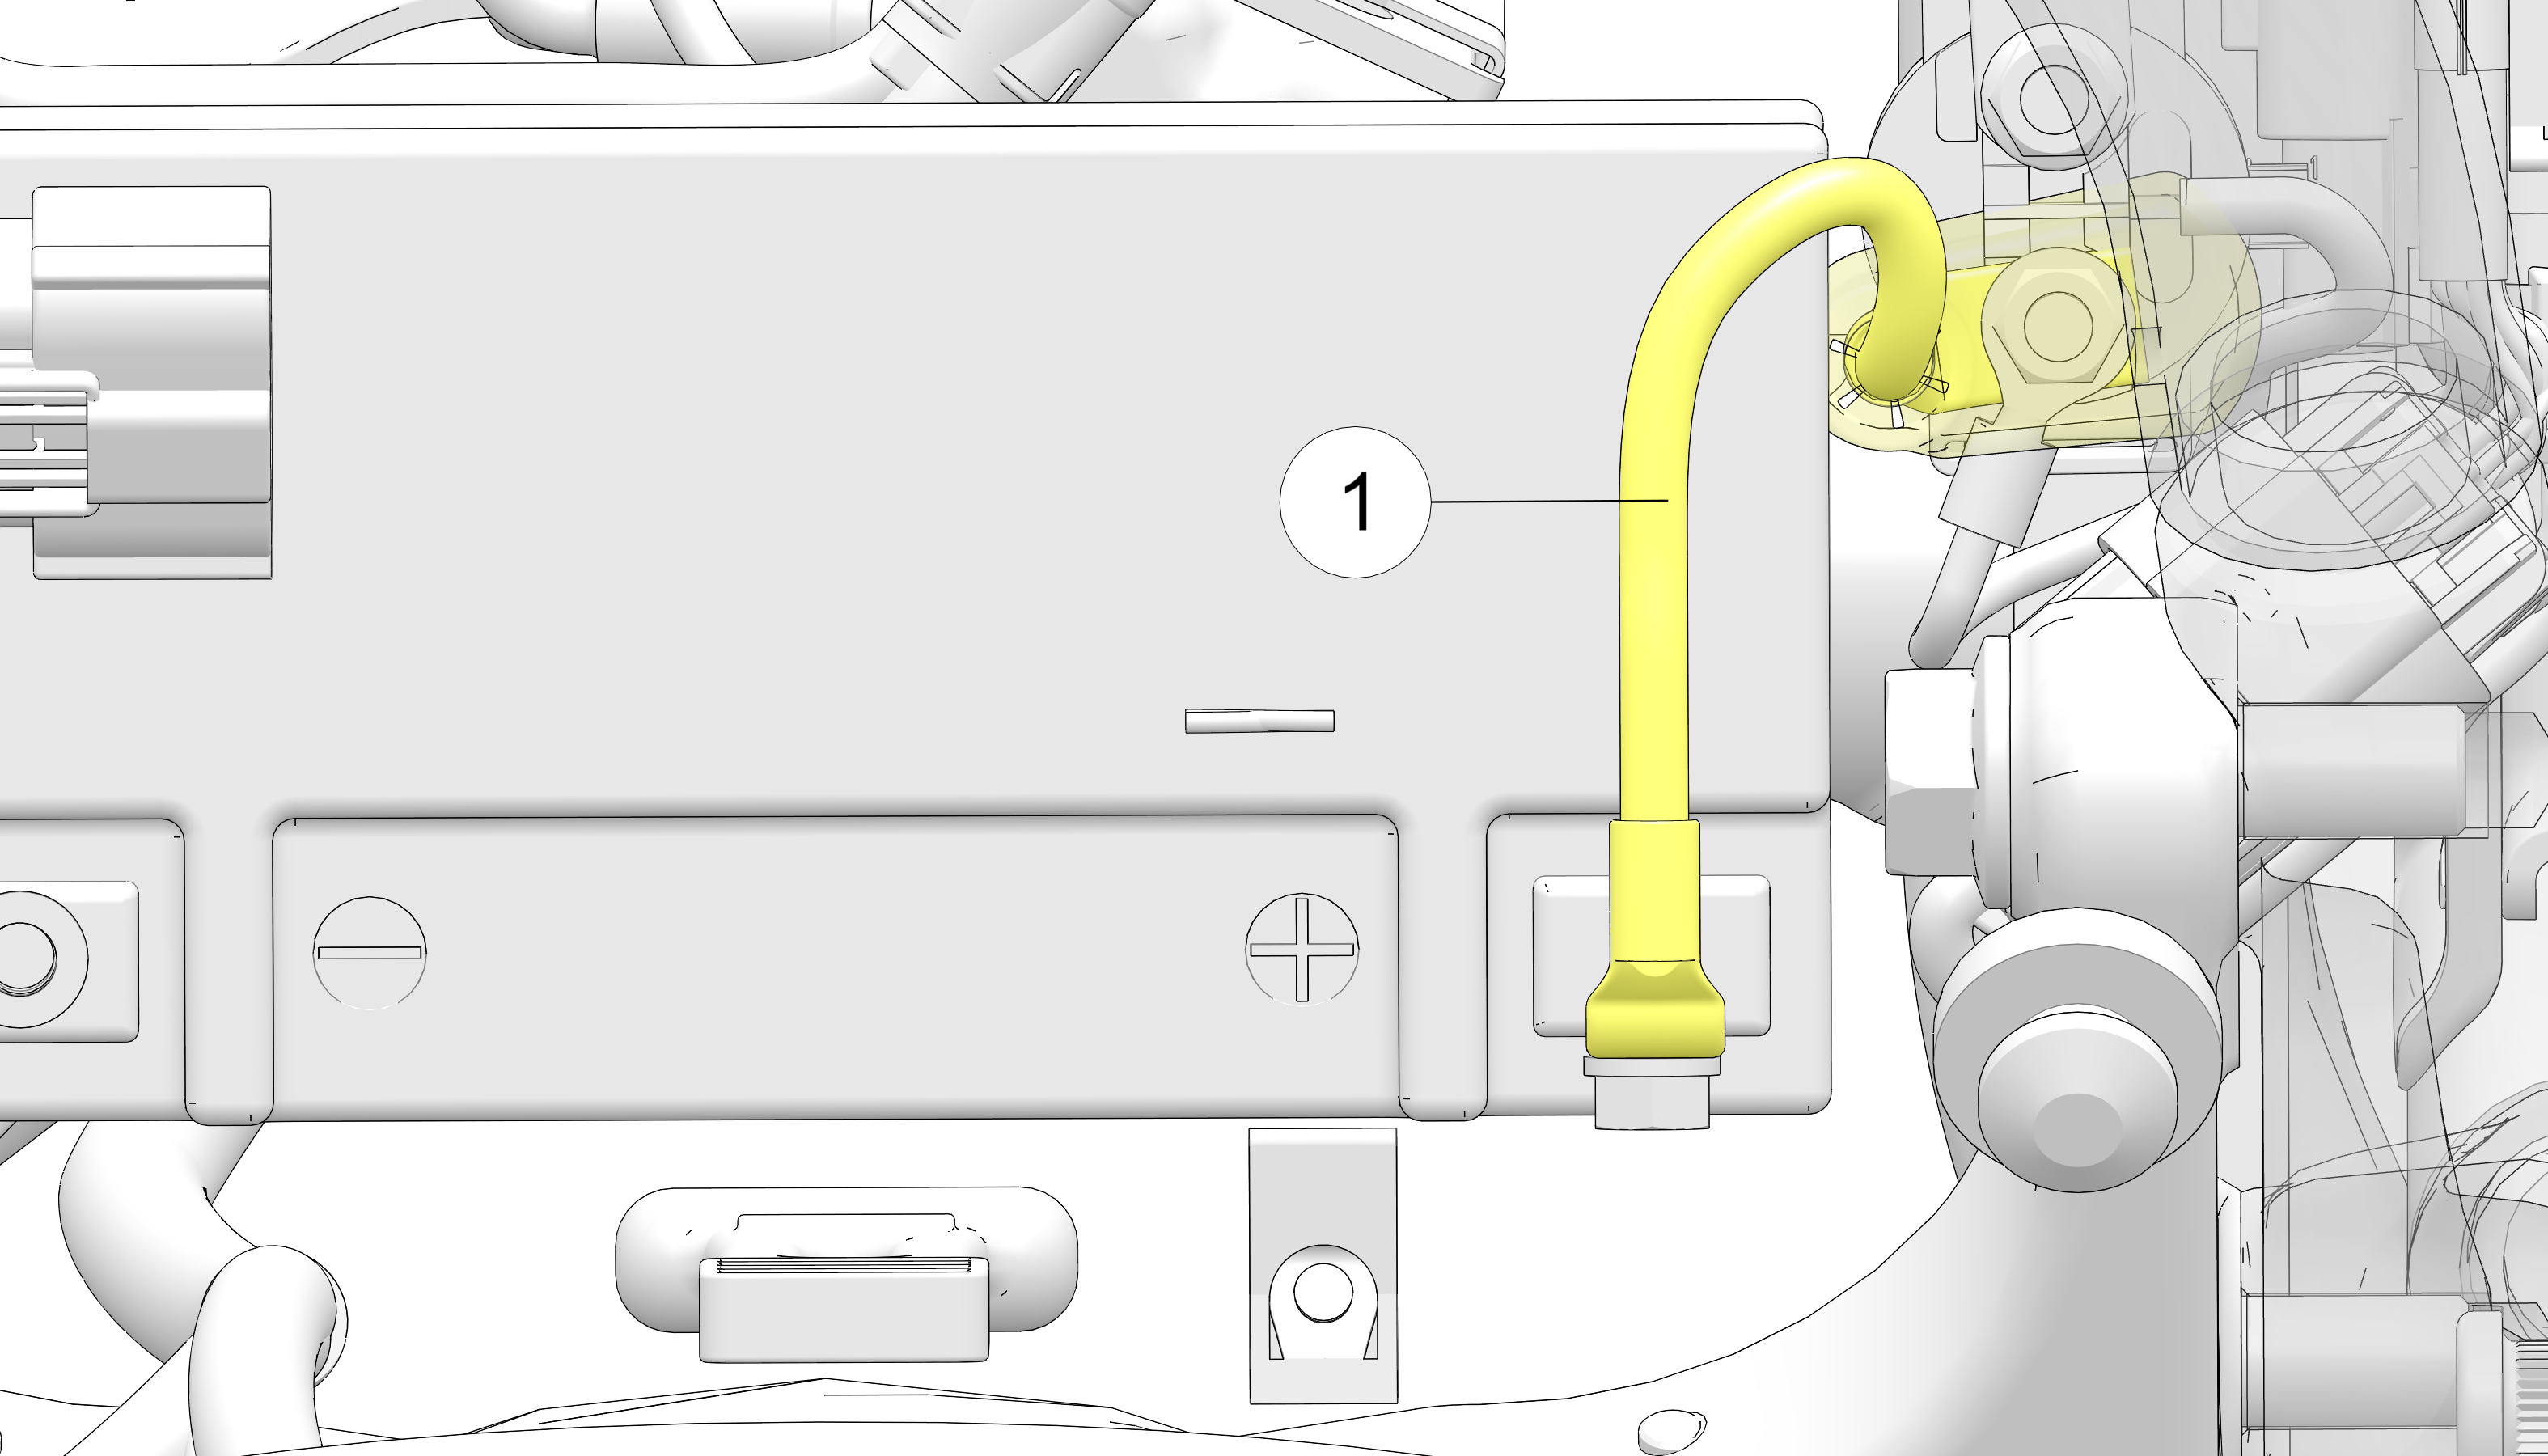
Make sure the positive (+) cable 1 is routed horizontally and parallel to the short side of the battery. Connect the positive (+) cable to the positive (+) battery terminal.
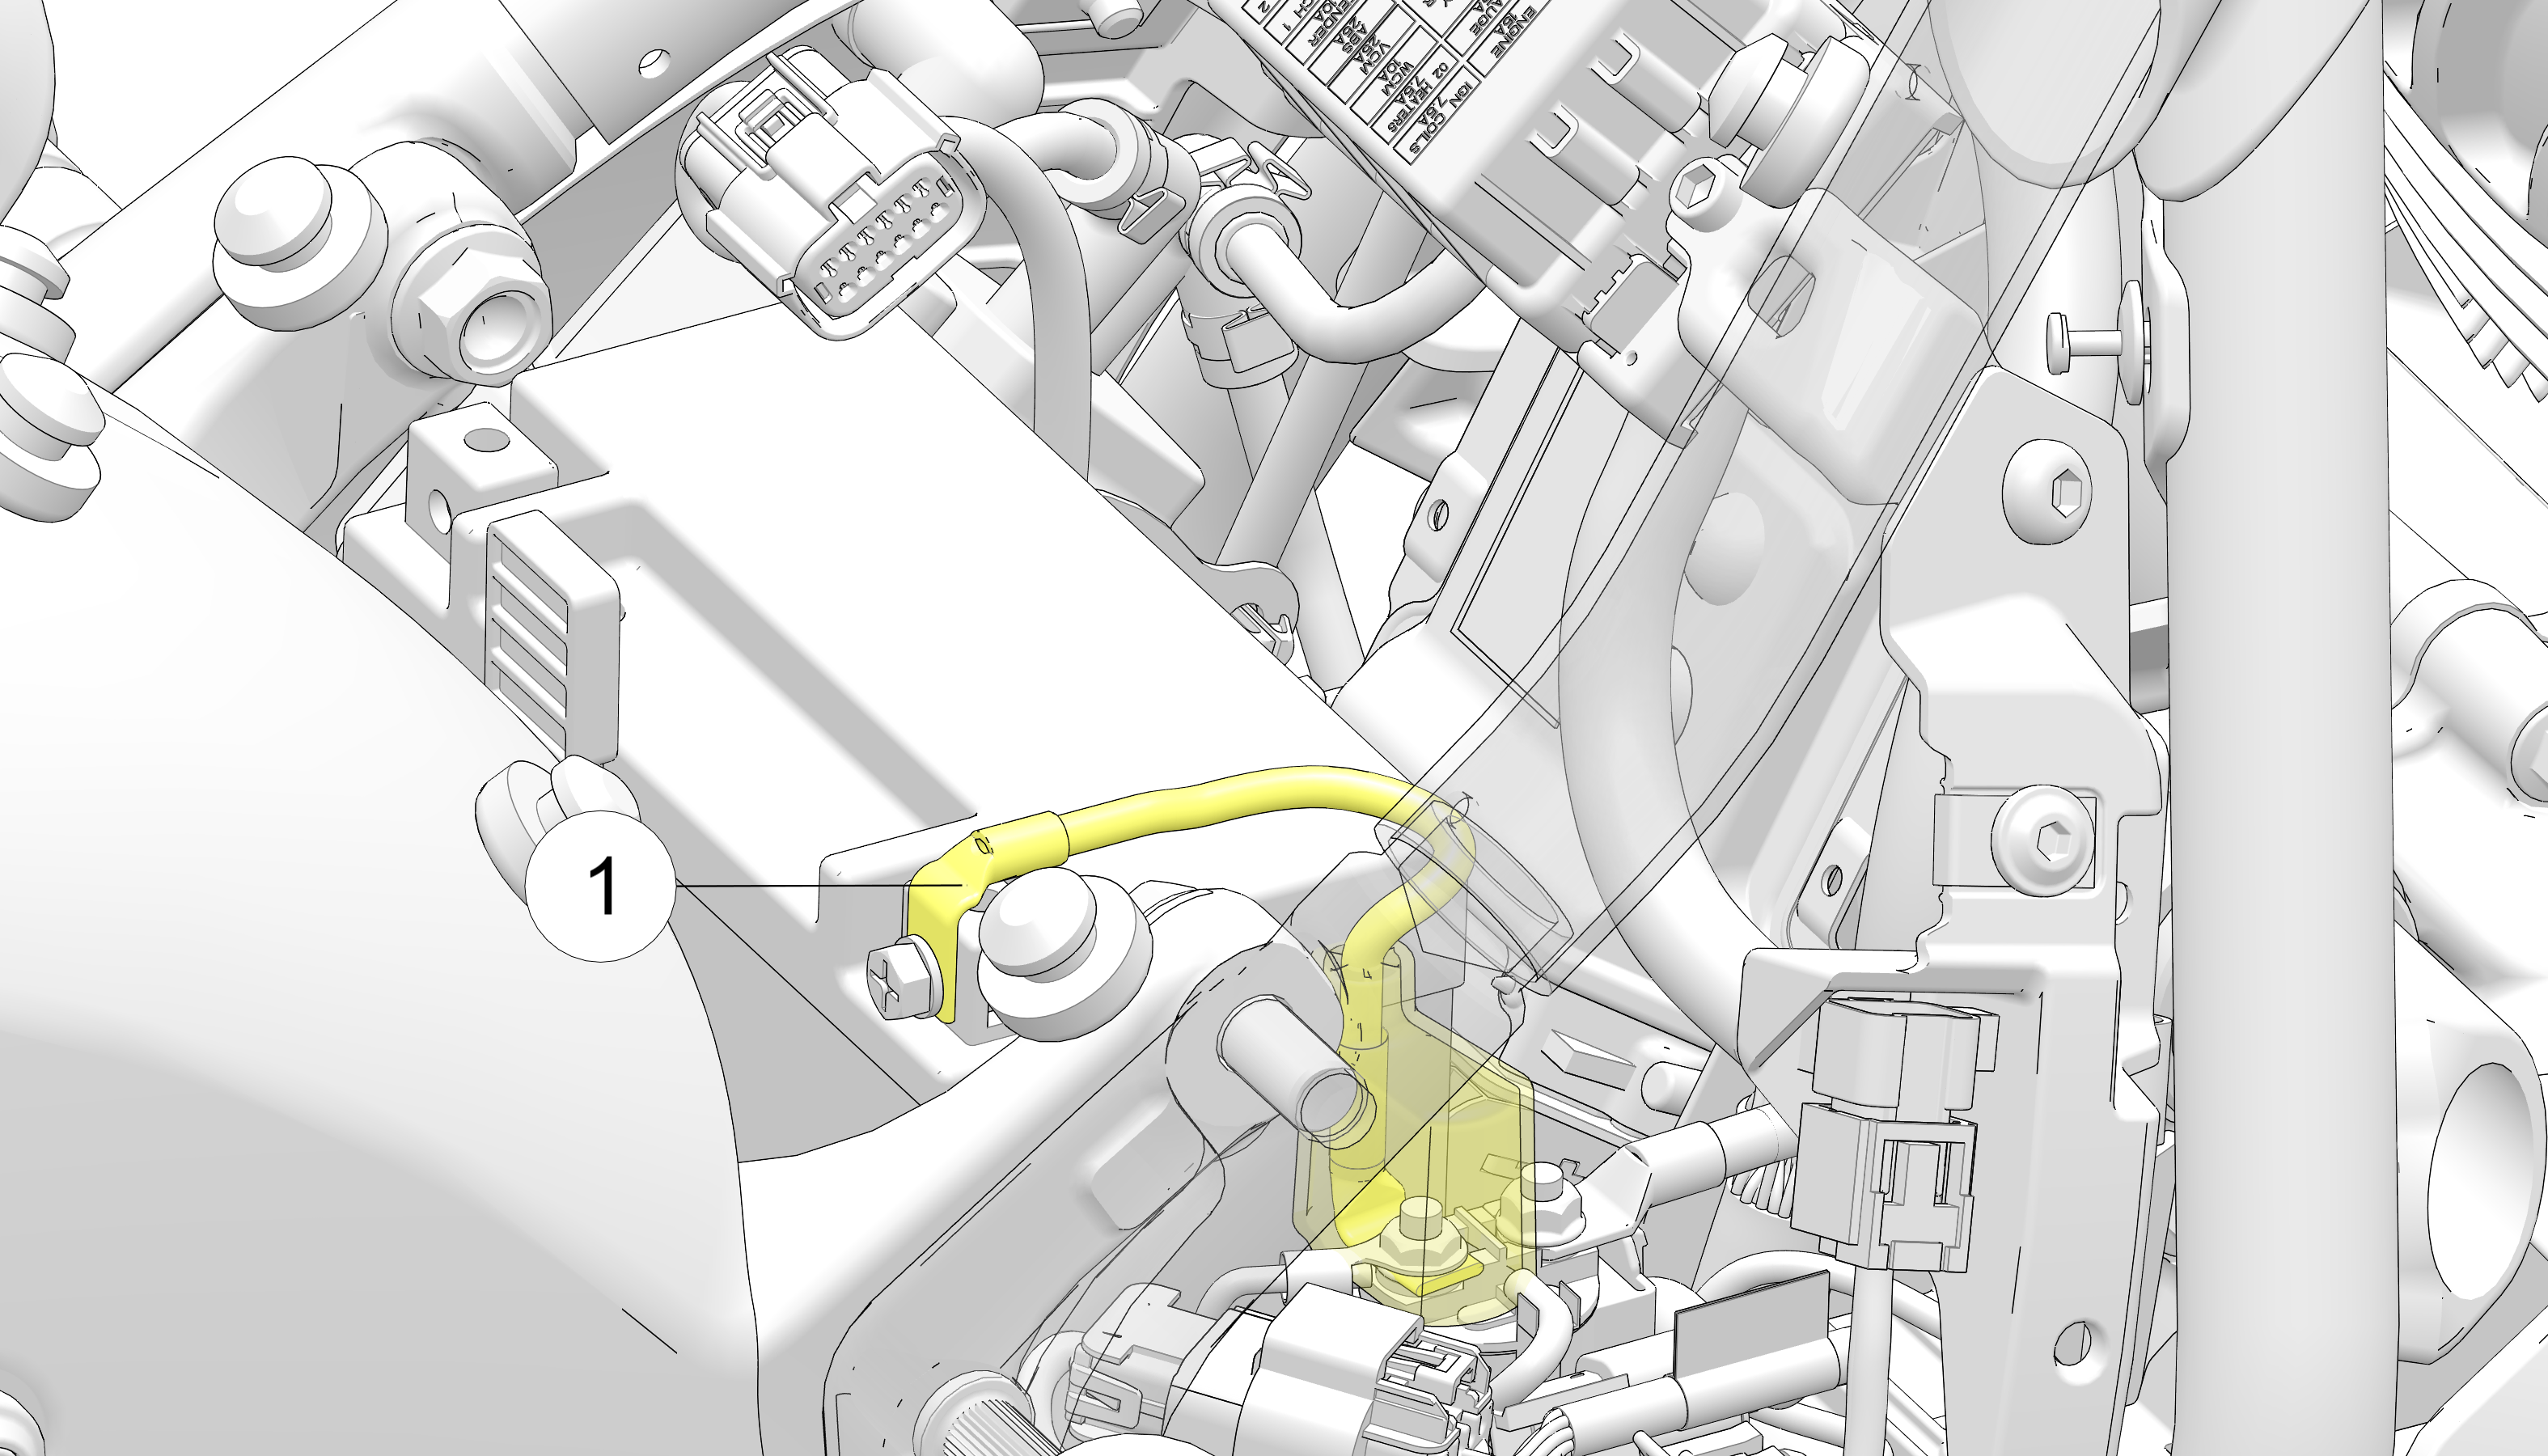 TORQUE45 in-lbs (5 Nm)
 -
Check the positive (+) cable 1 to ensure it is not pinched or wedged between the frame and battery tray.
-
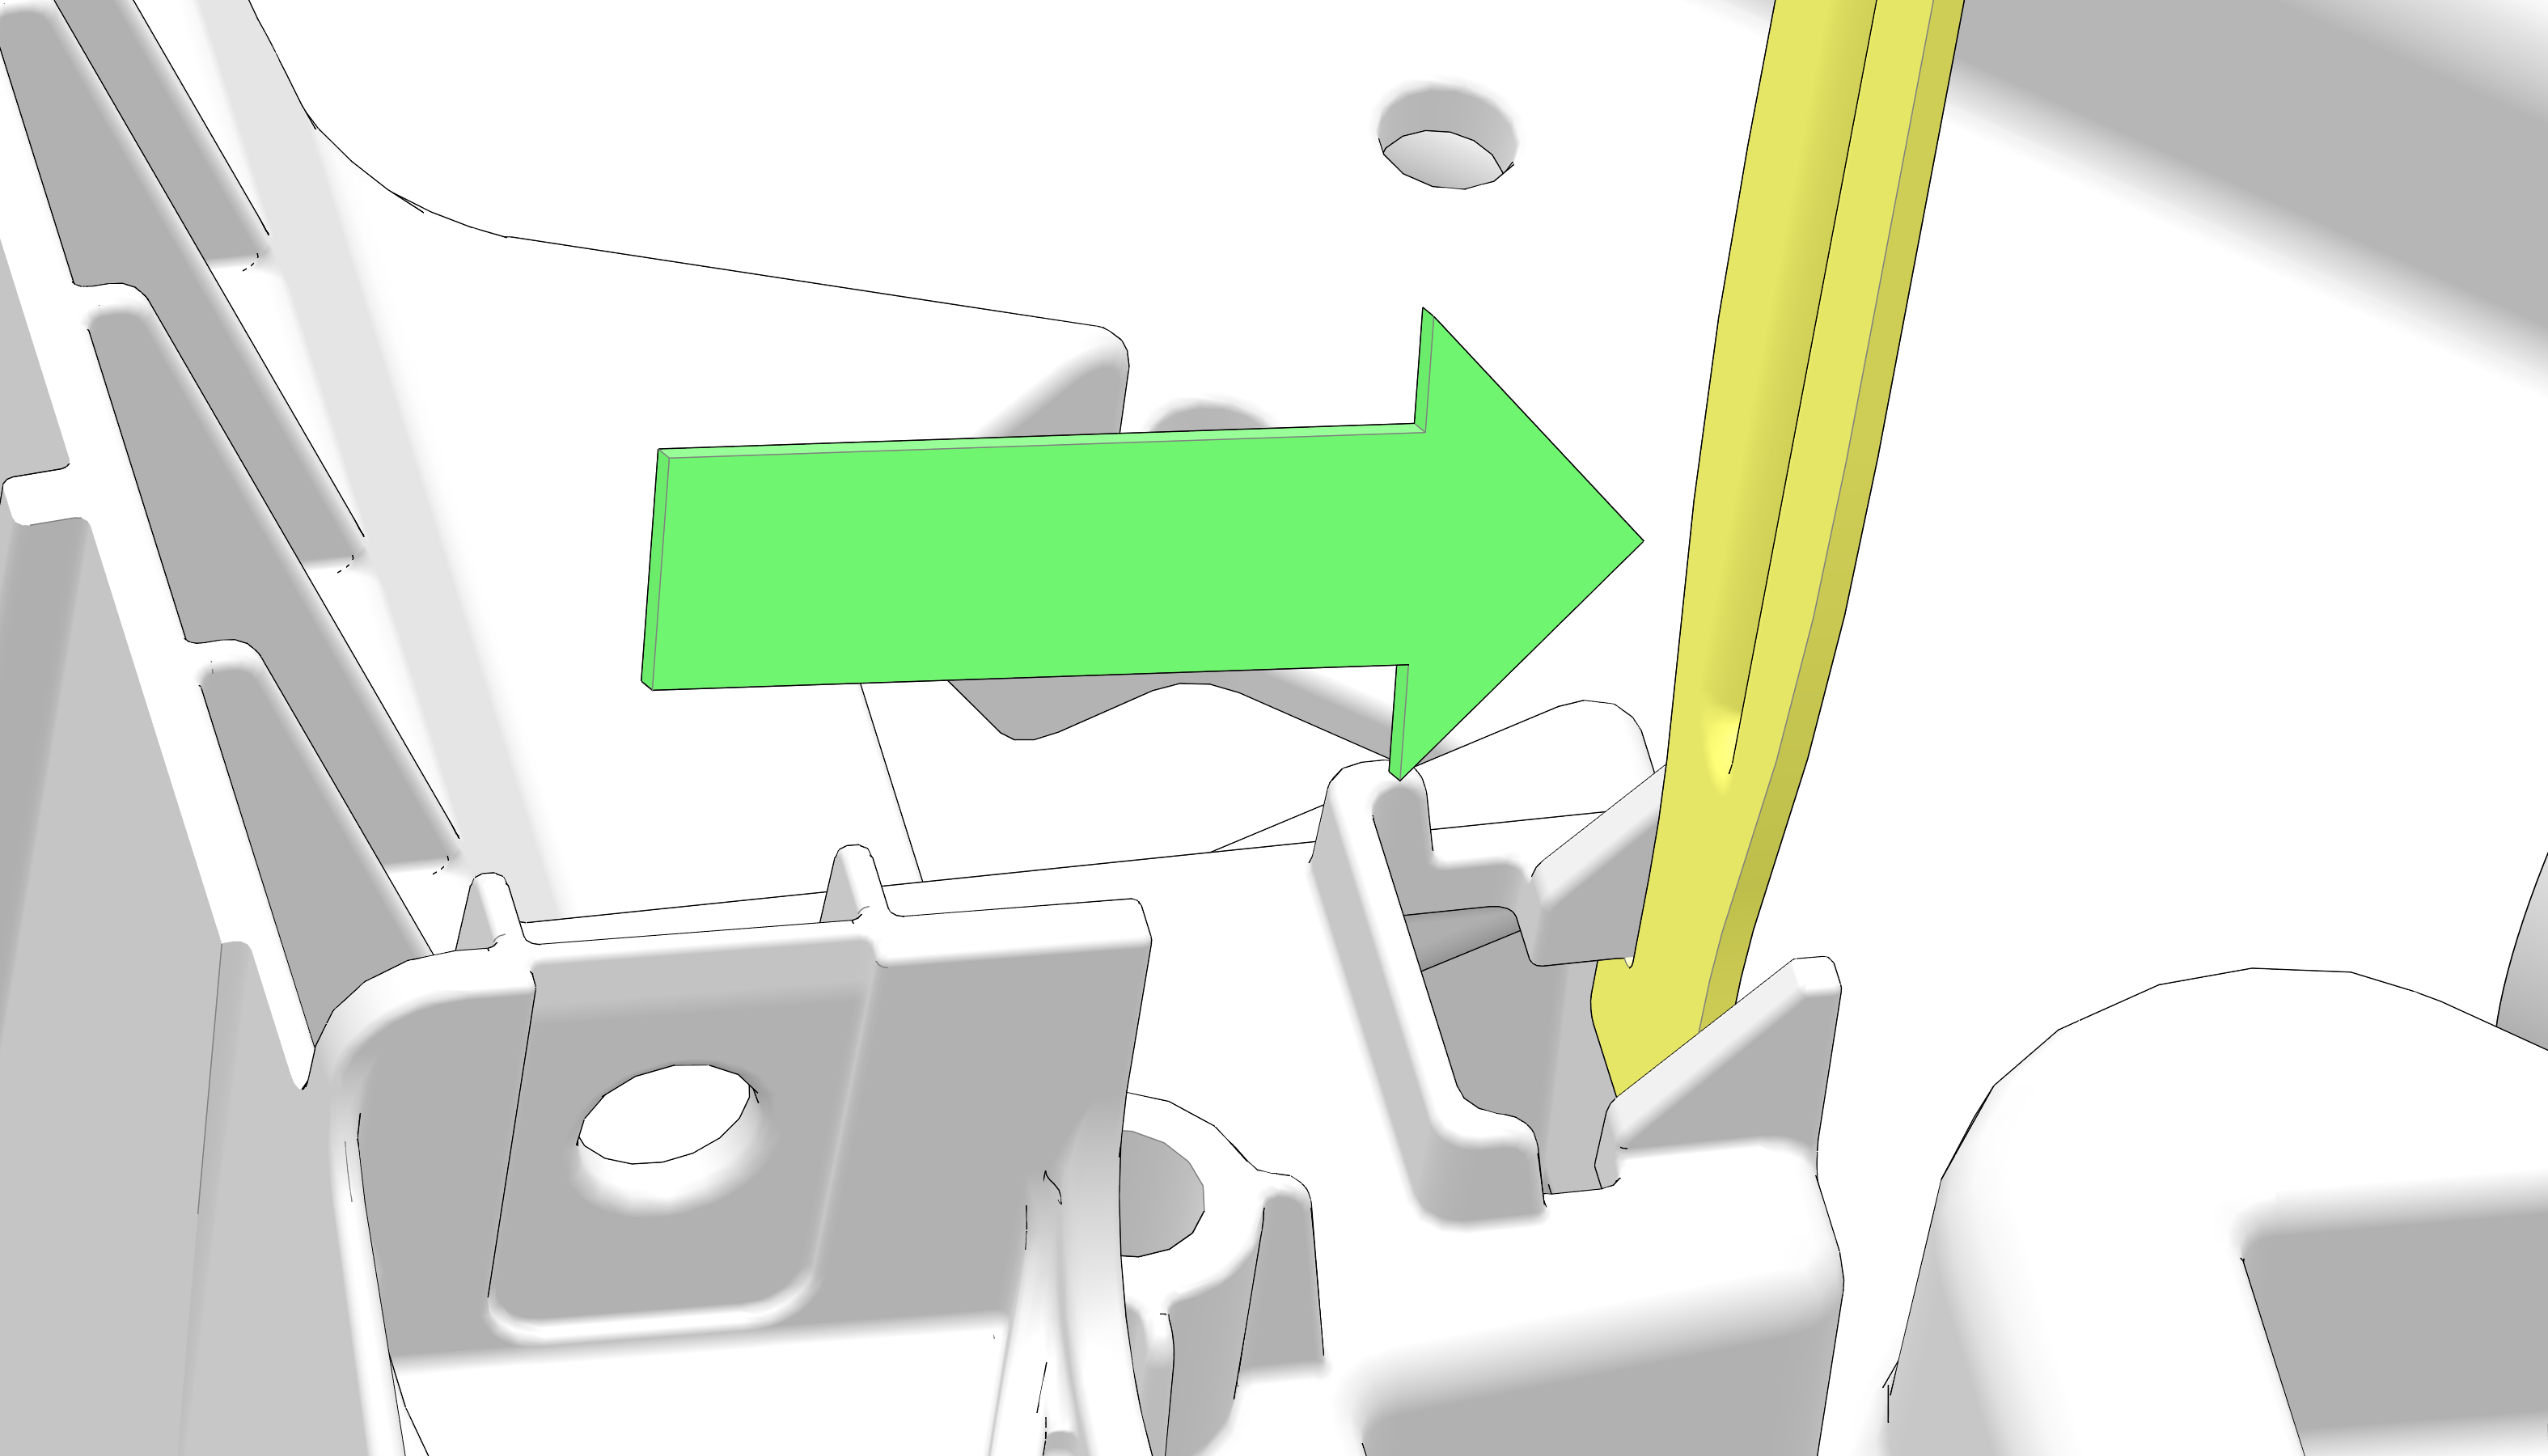
Insert the battery hold down strap into the battery box retention slot and slide the strap towards the rear of the bike.
-
Install the battery hold down strap fastener3 through the battery hold down strap 2.
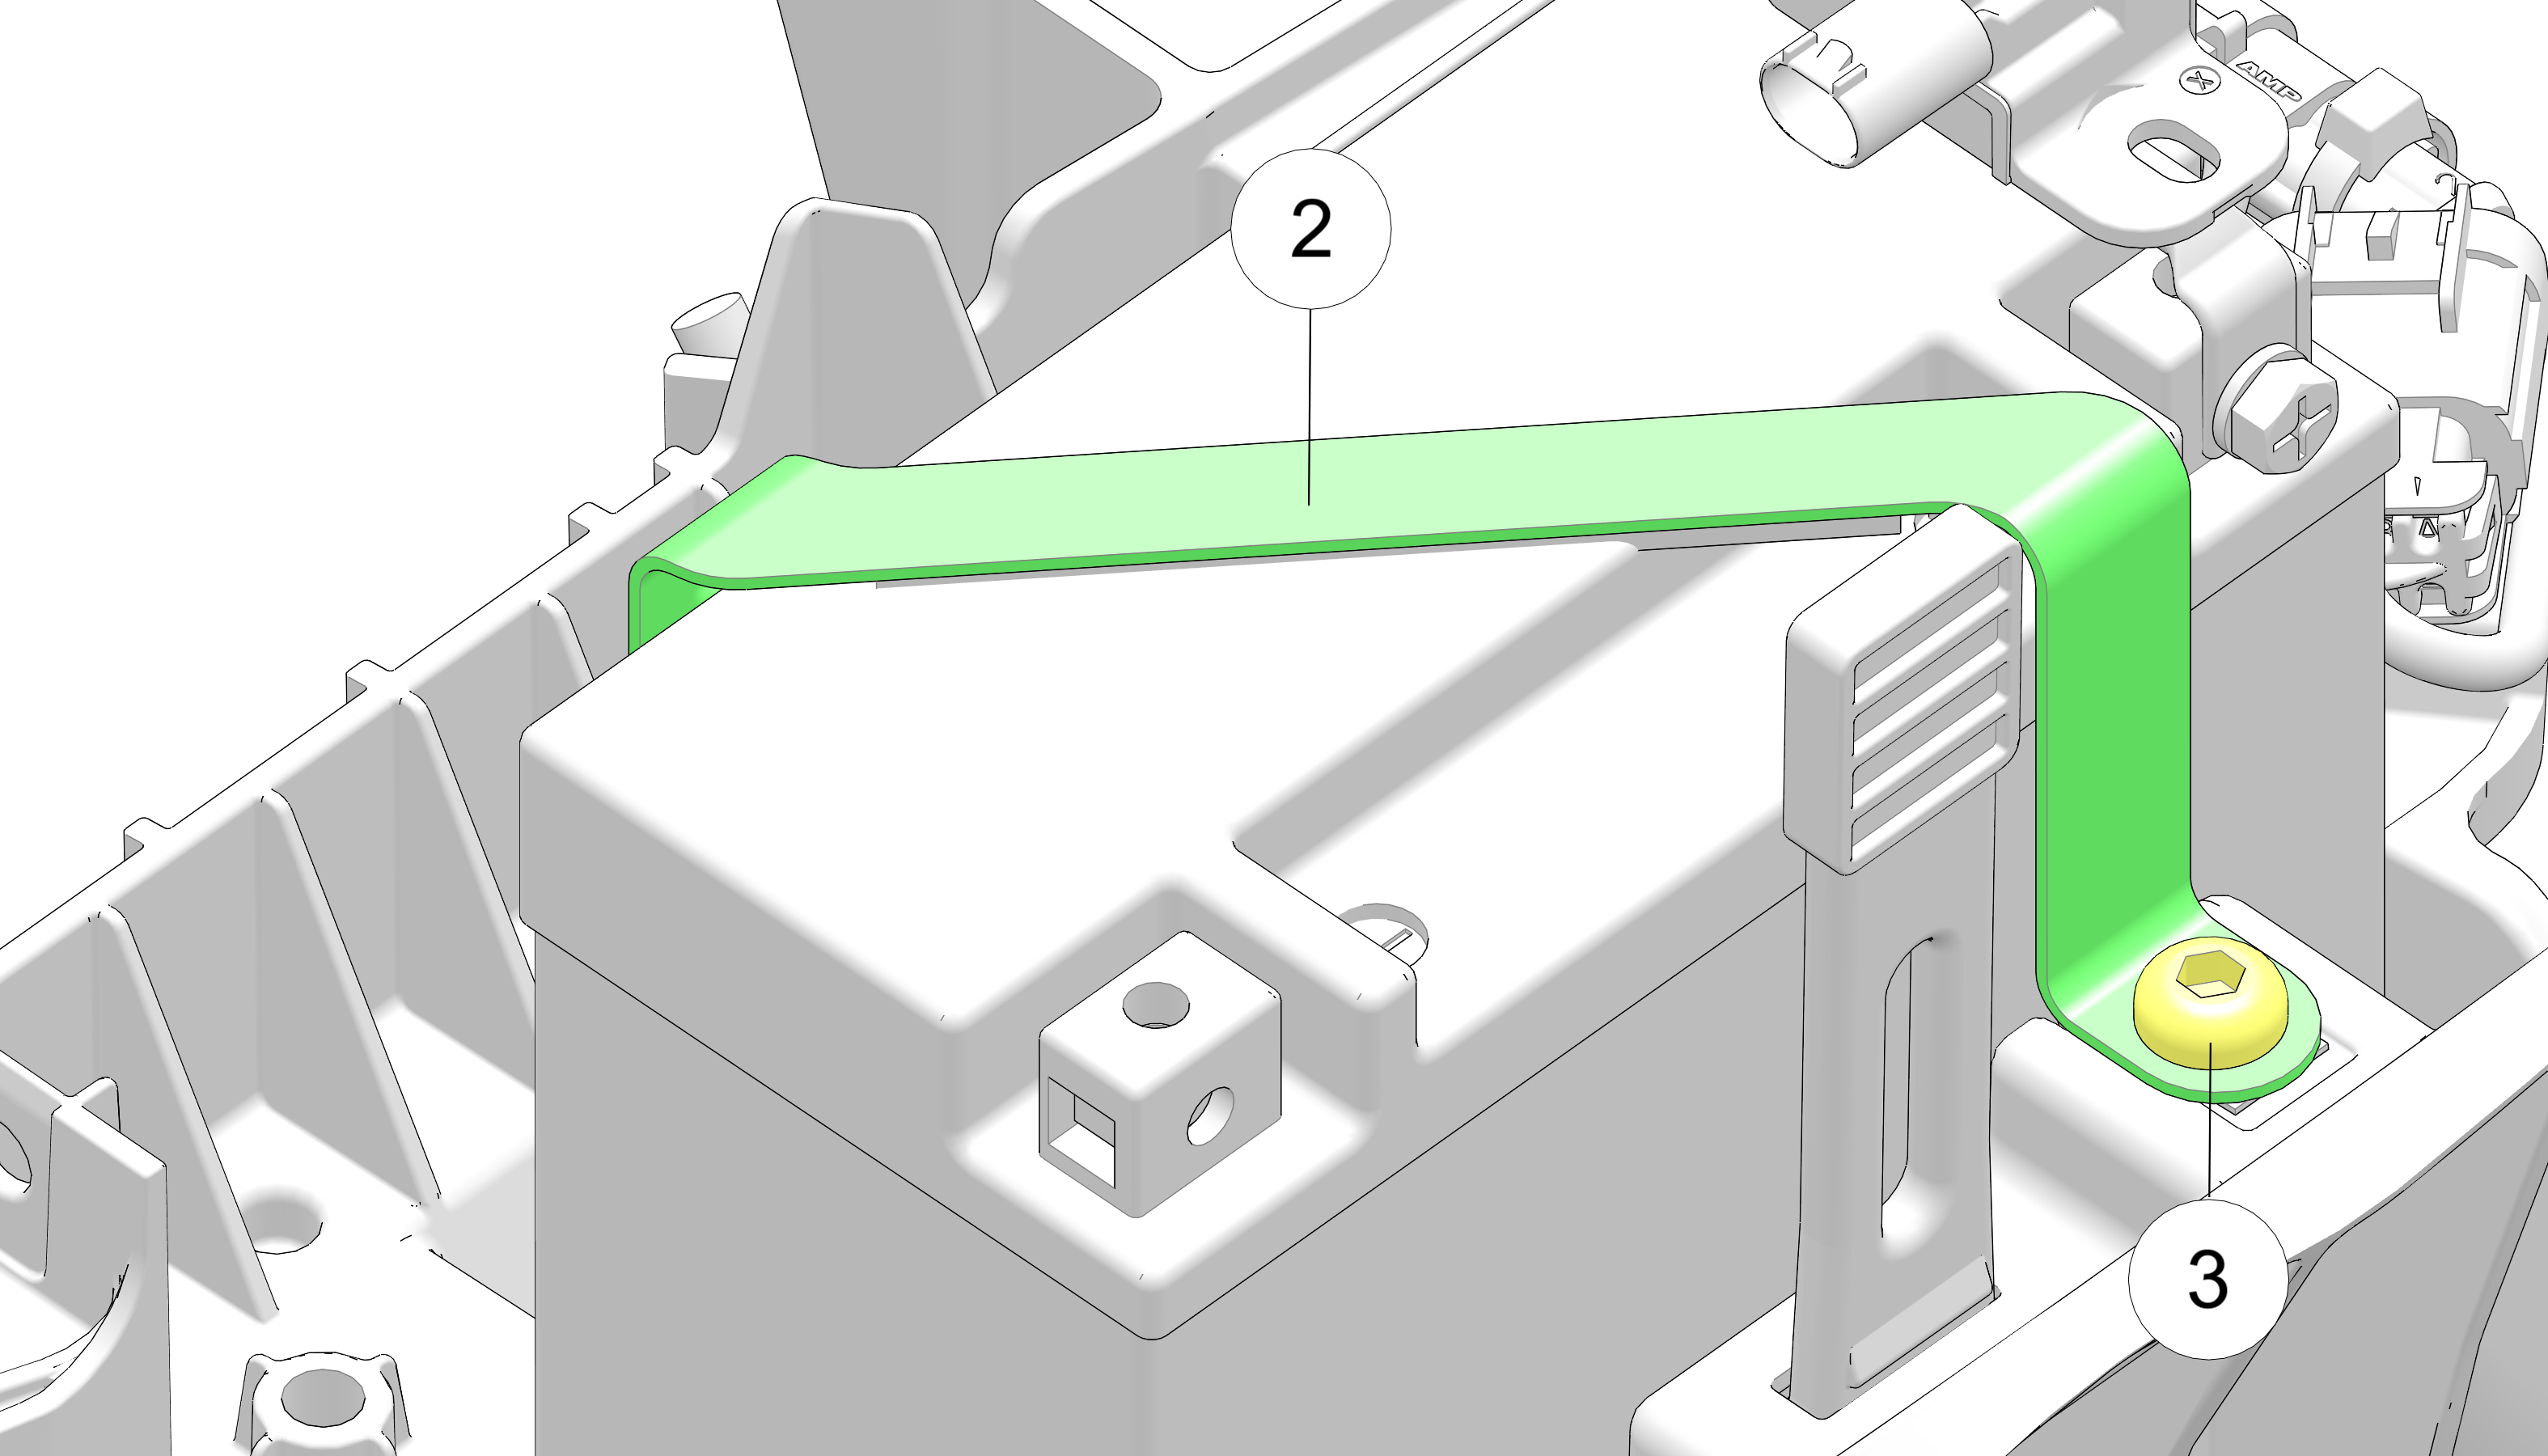 TORQUE84 in-lbs (9.5 Nm)
 -
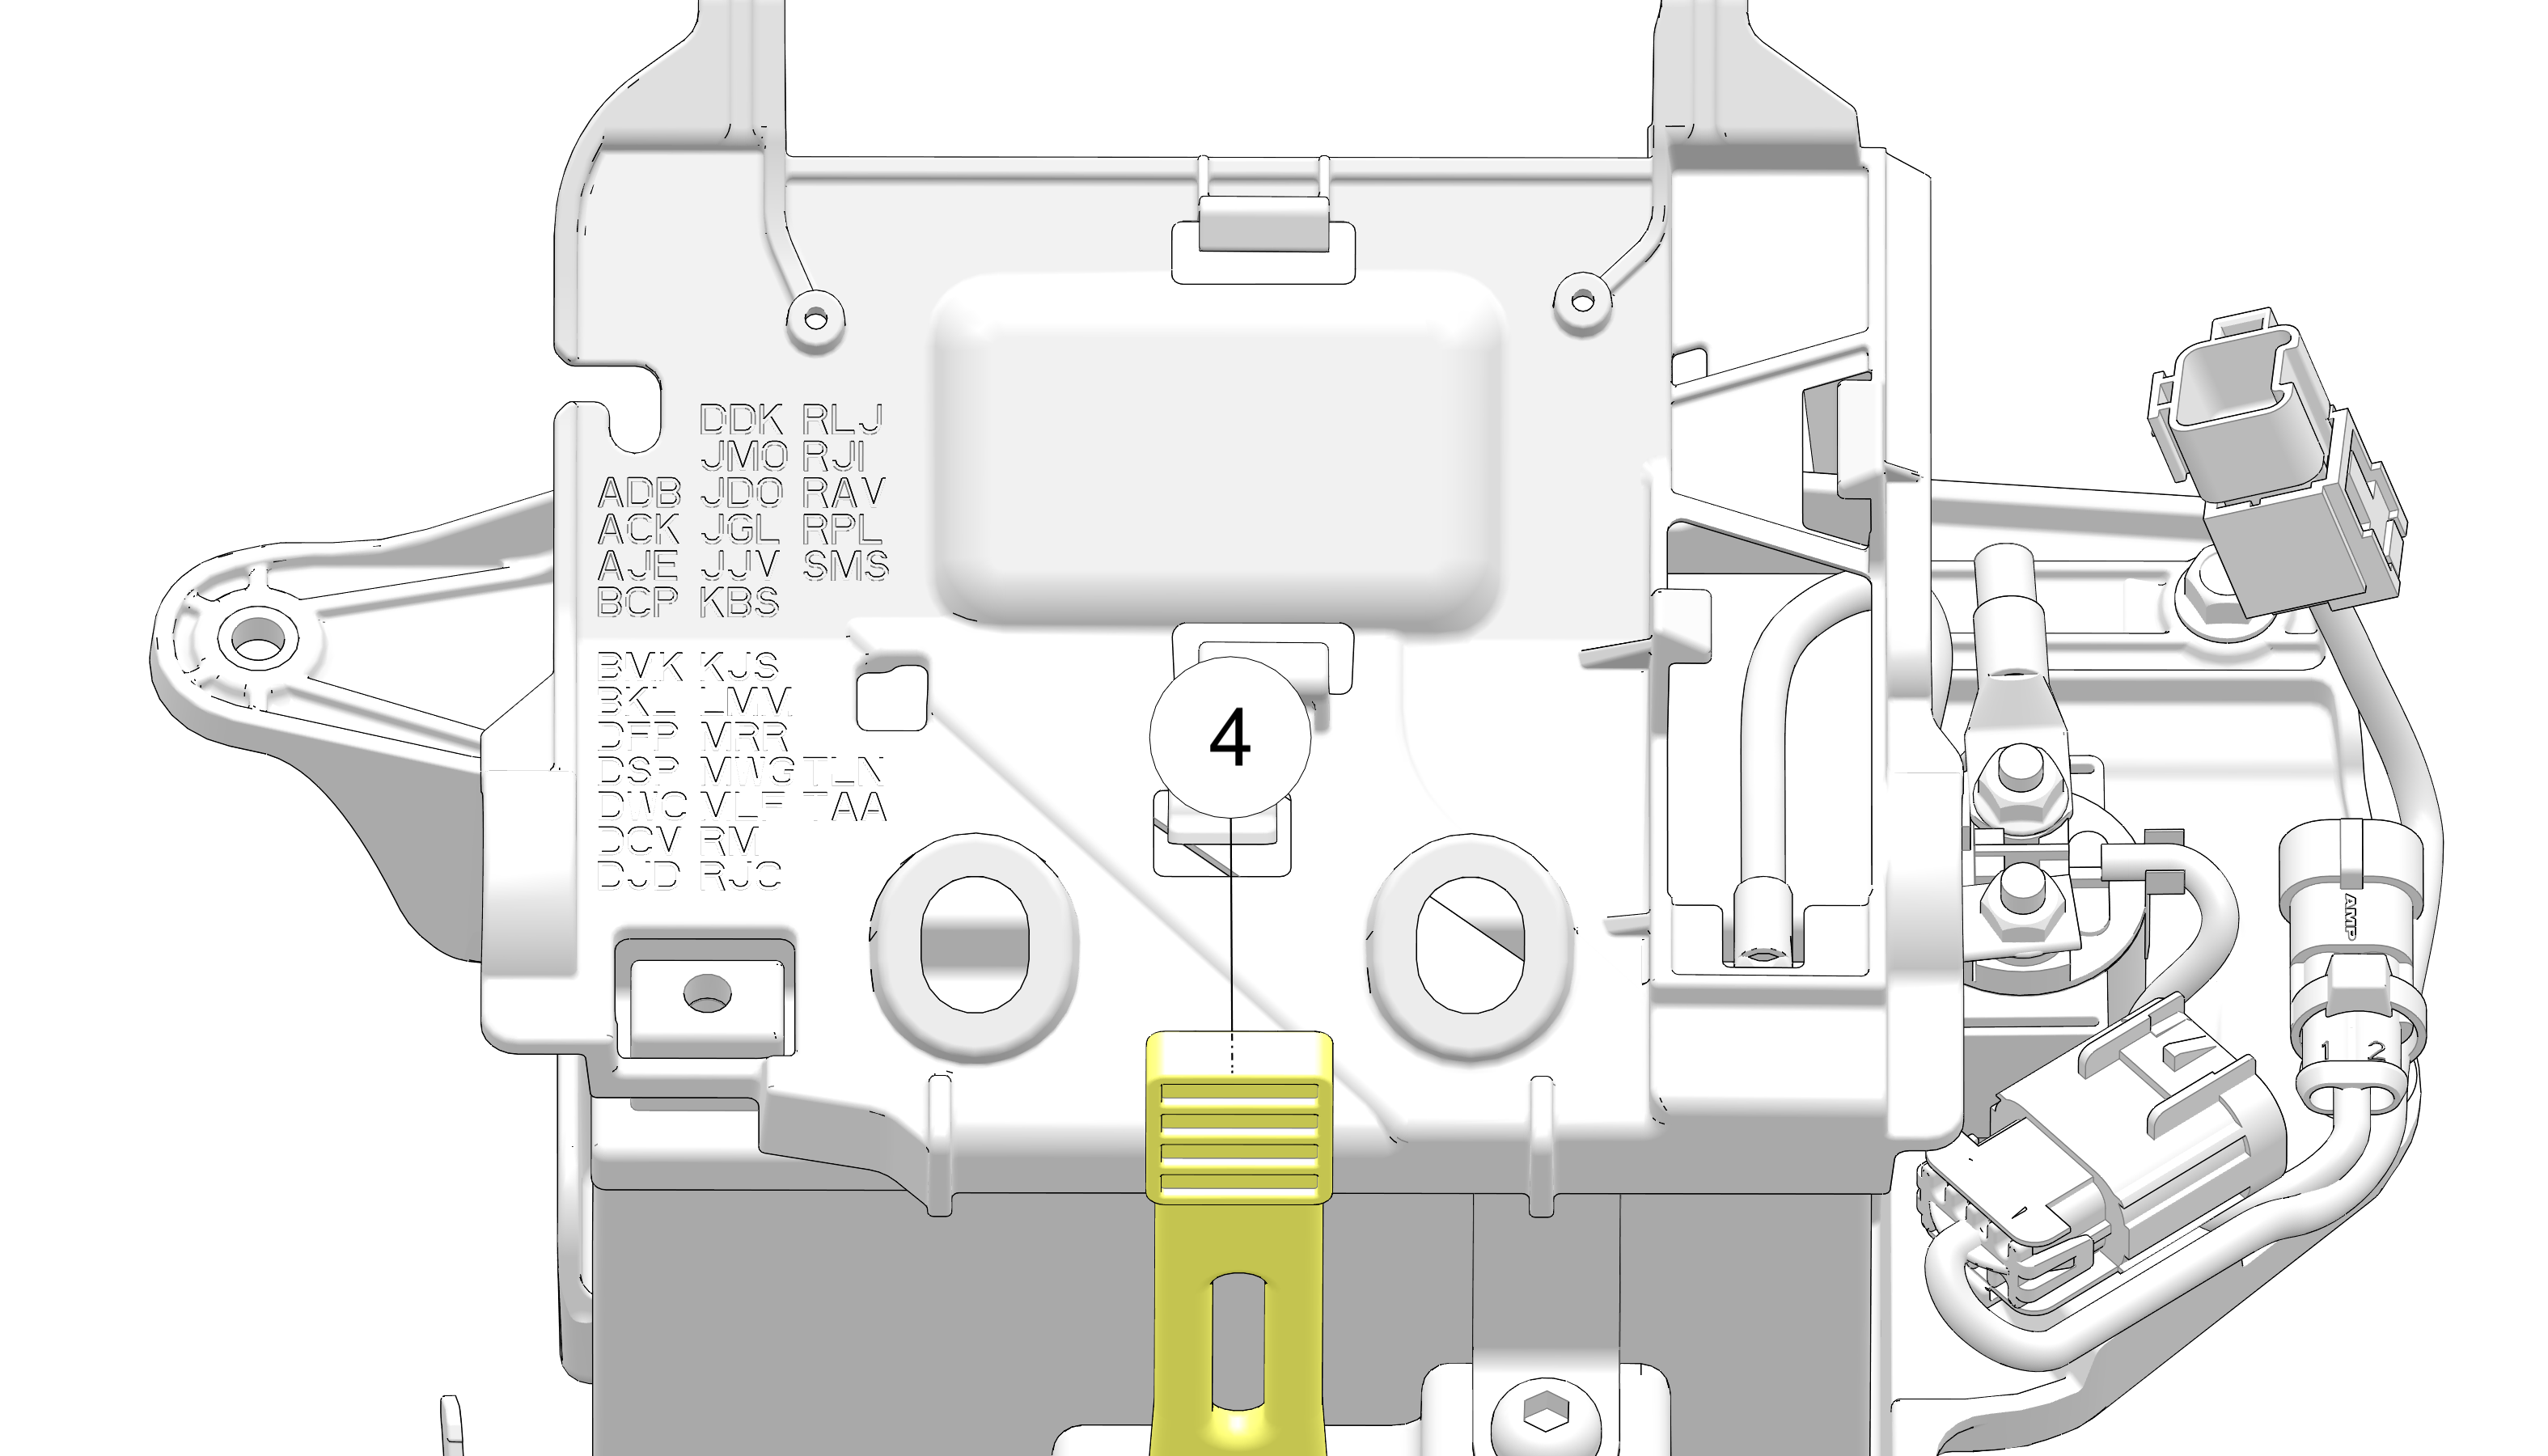
Install the battery cover. Secure the cover with the cover strap 4.
-
Install the negative (-) cable 5. Route the starter ground cable beneath the frame ground cable on the negative battery terminal.
TORQUE45 in-lbs (5 Nm)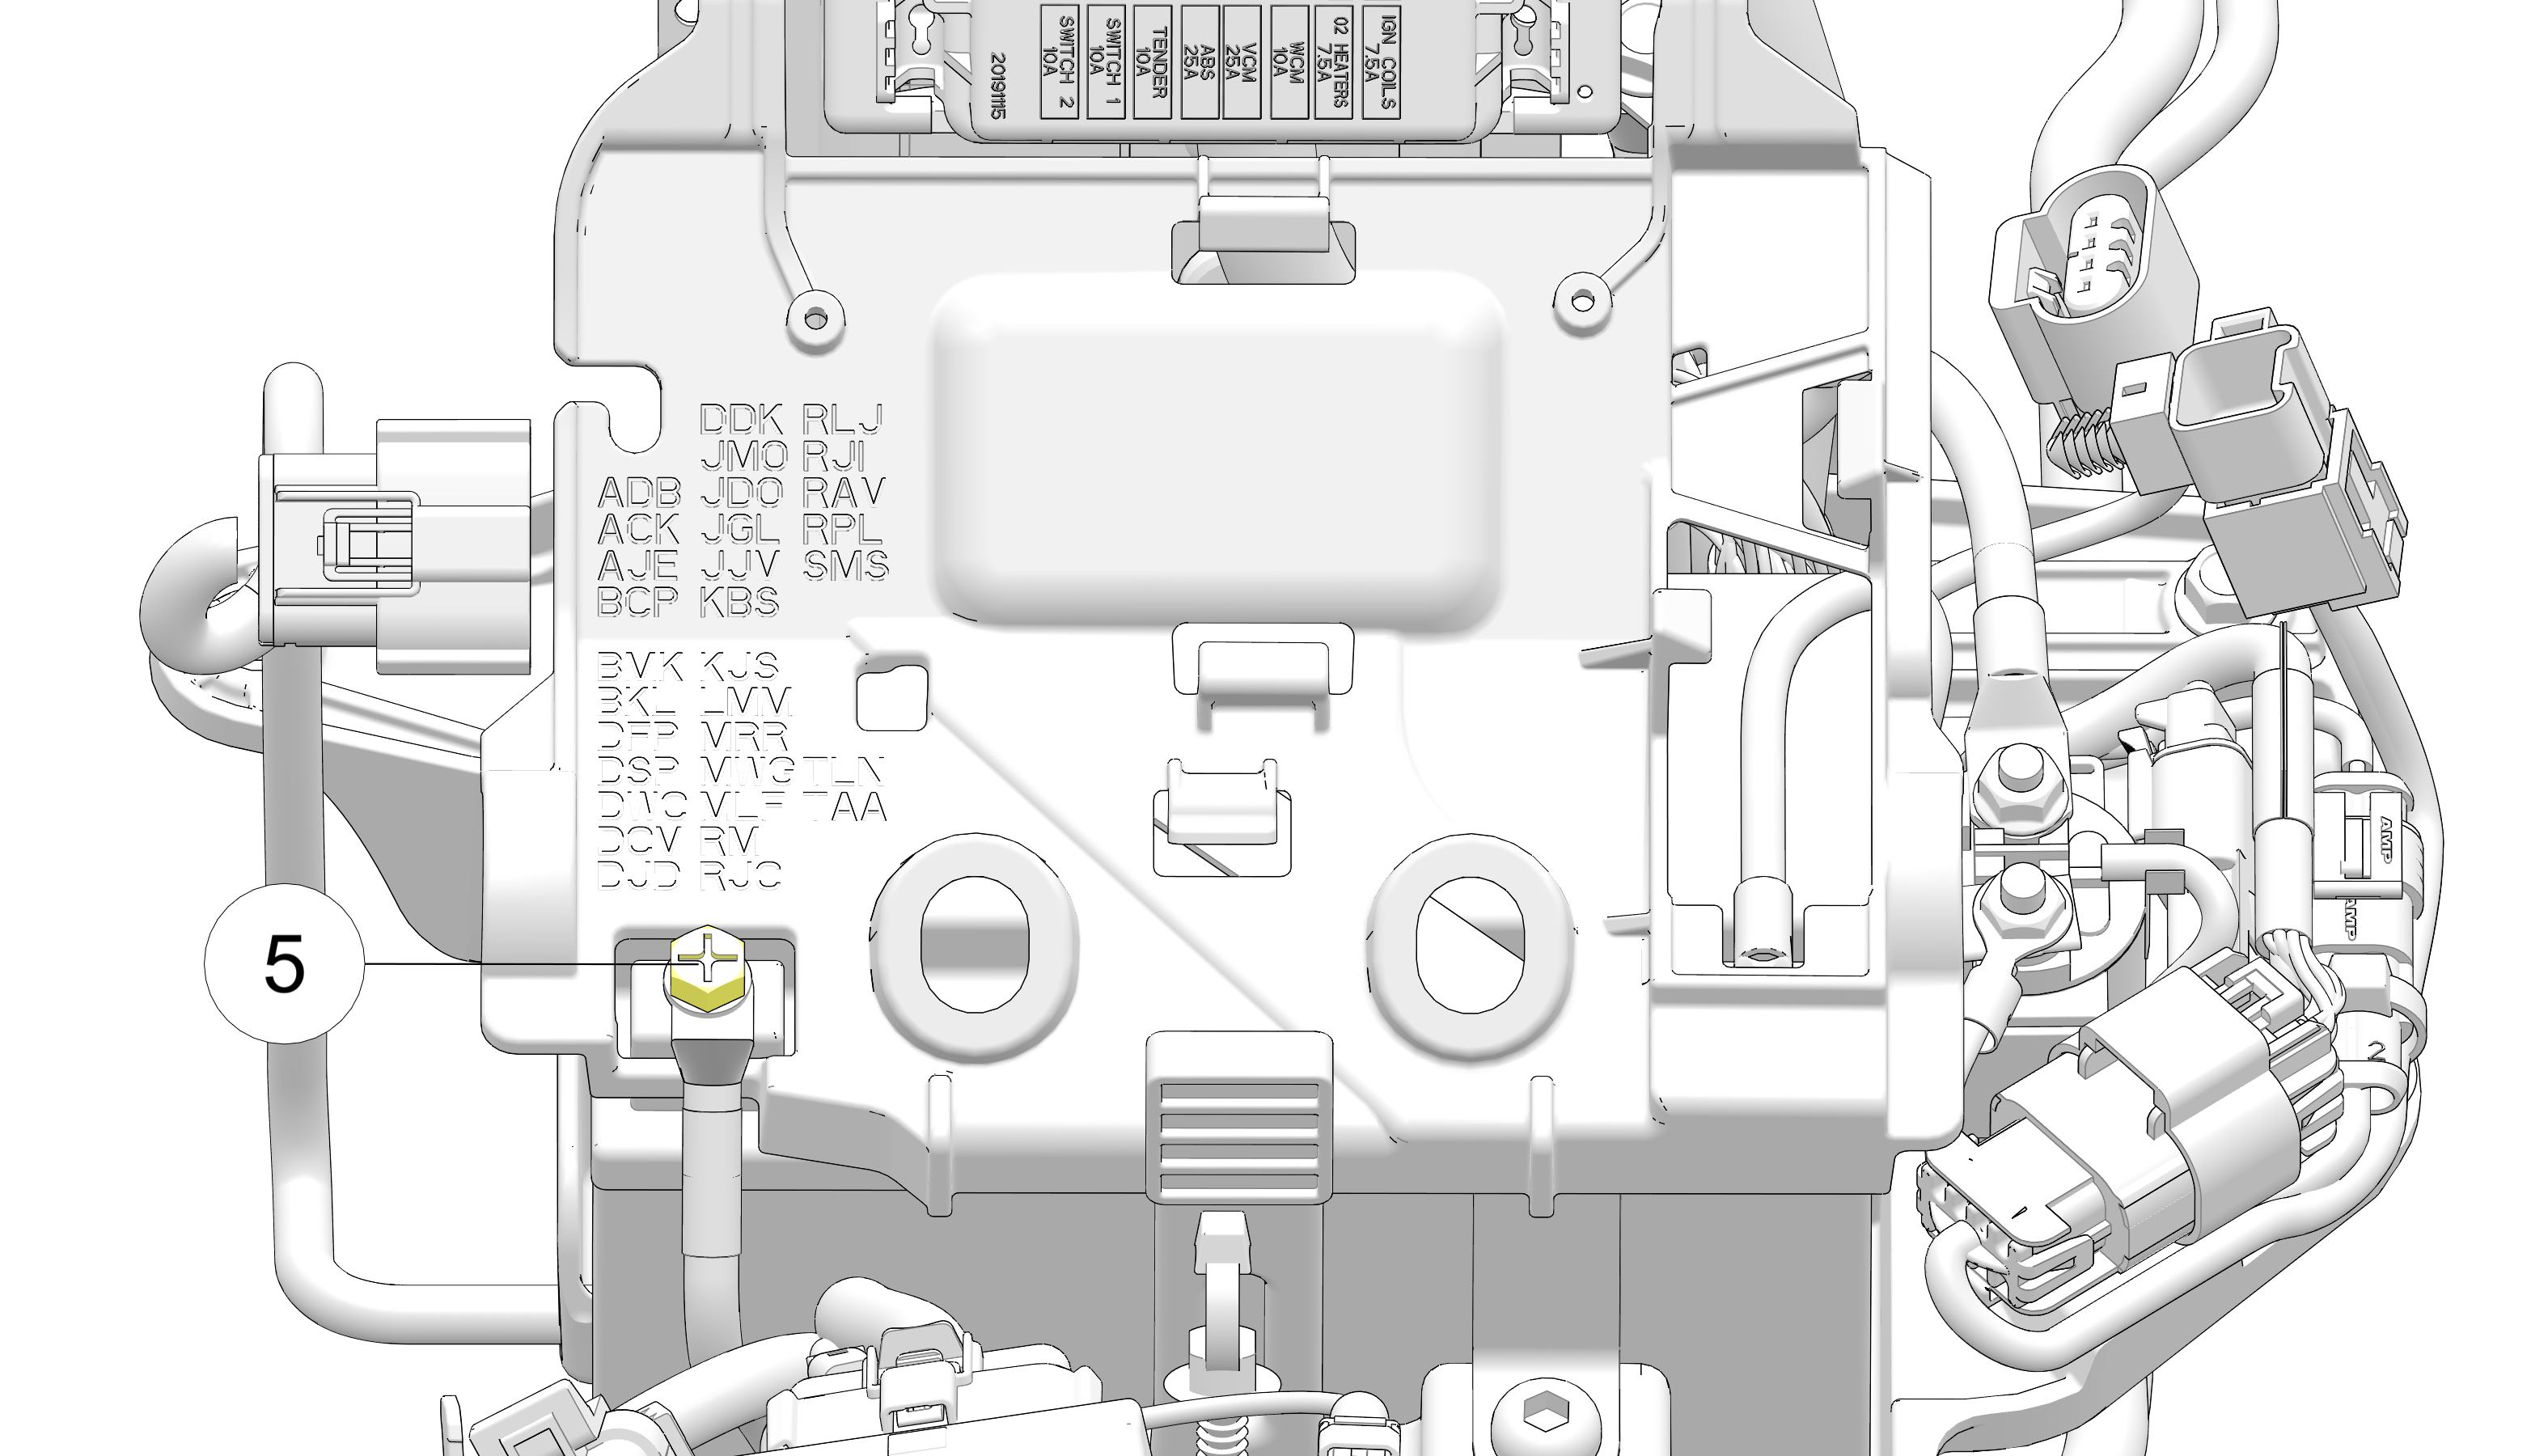
-
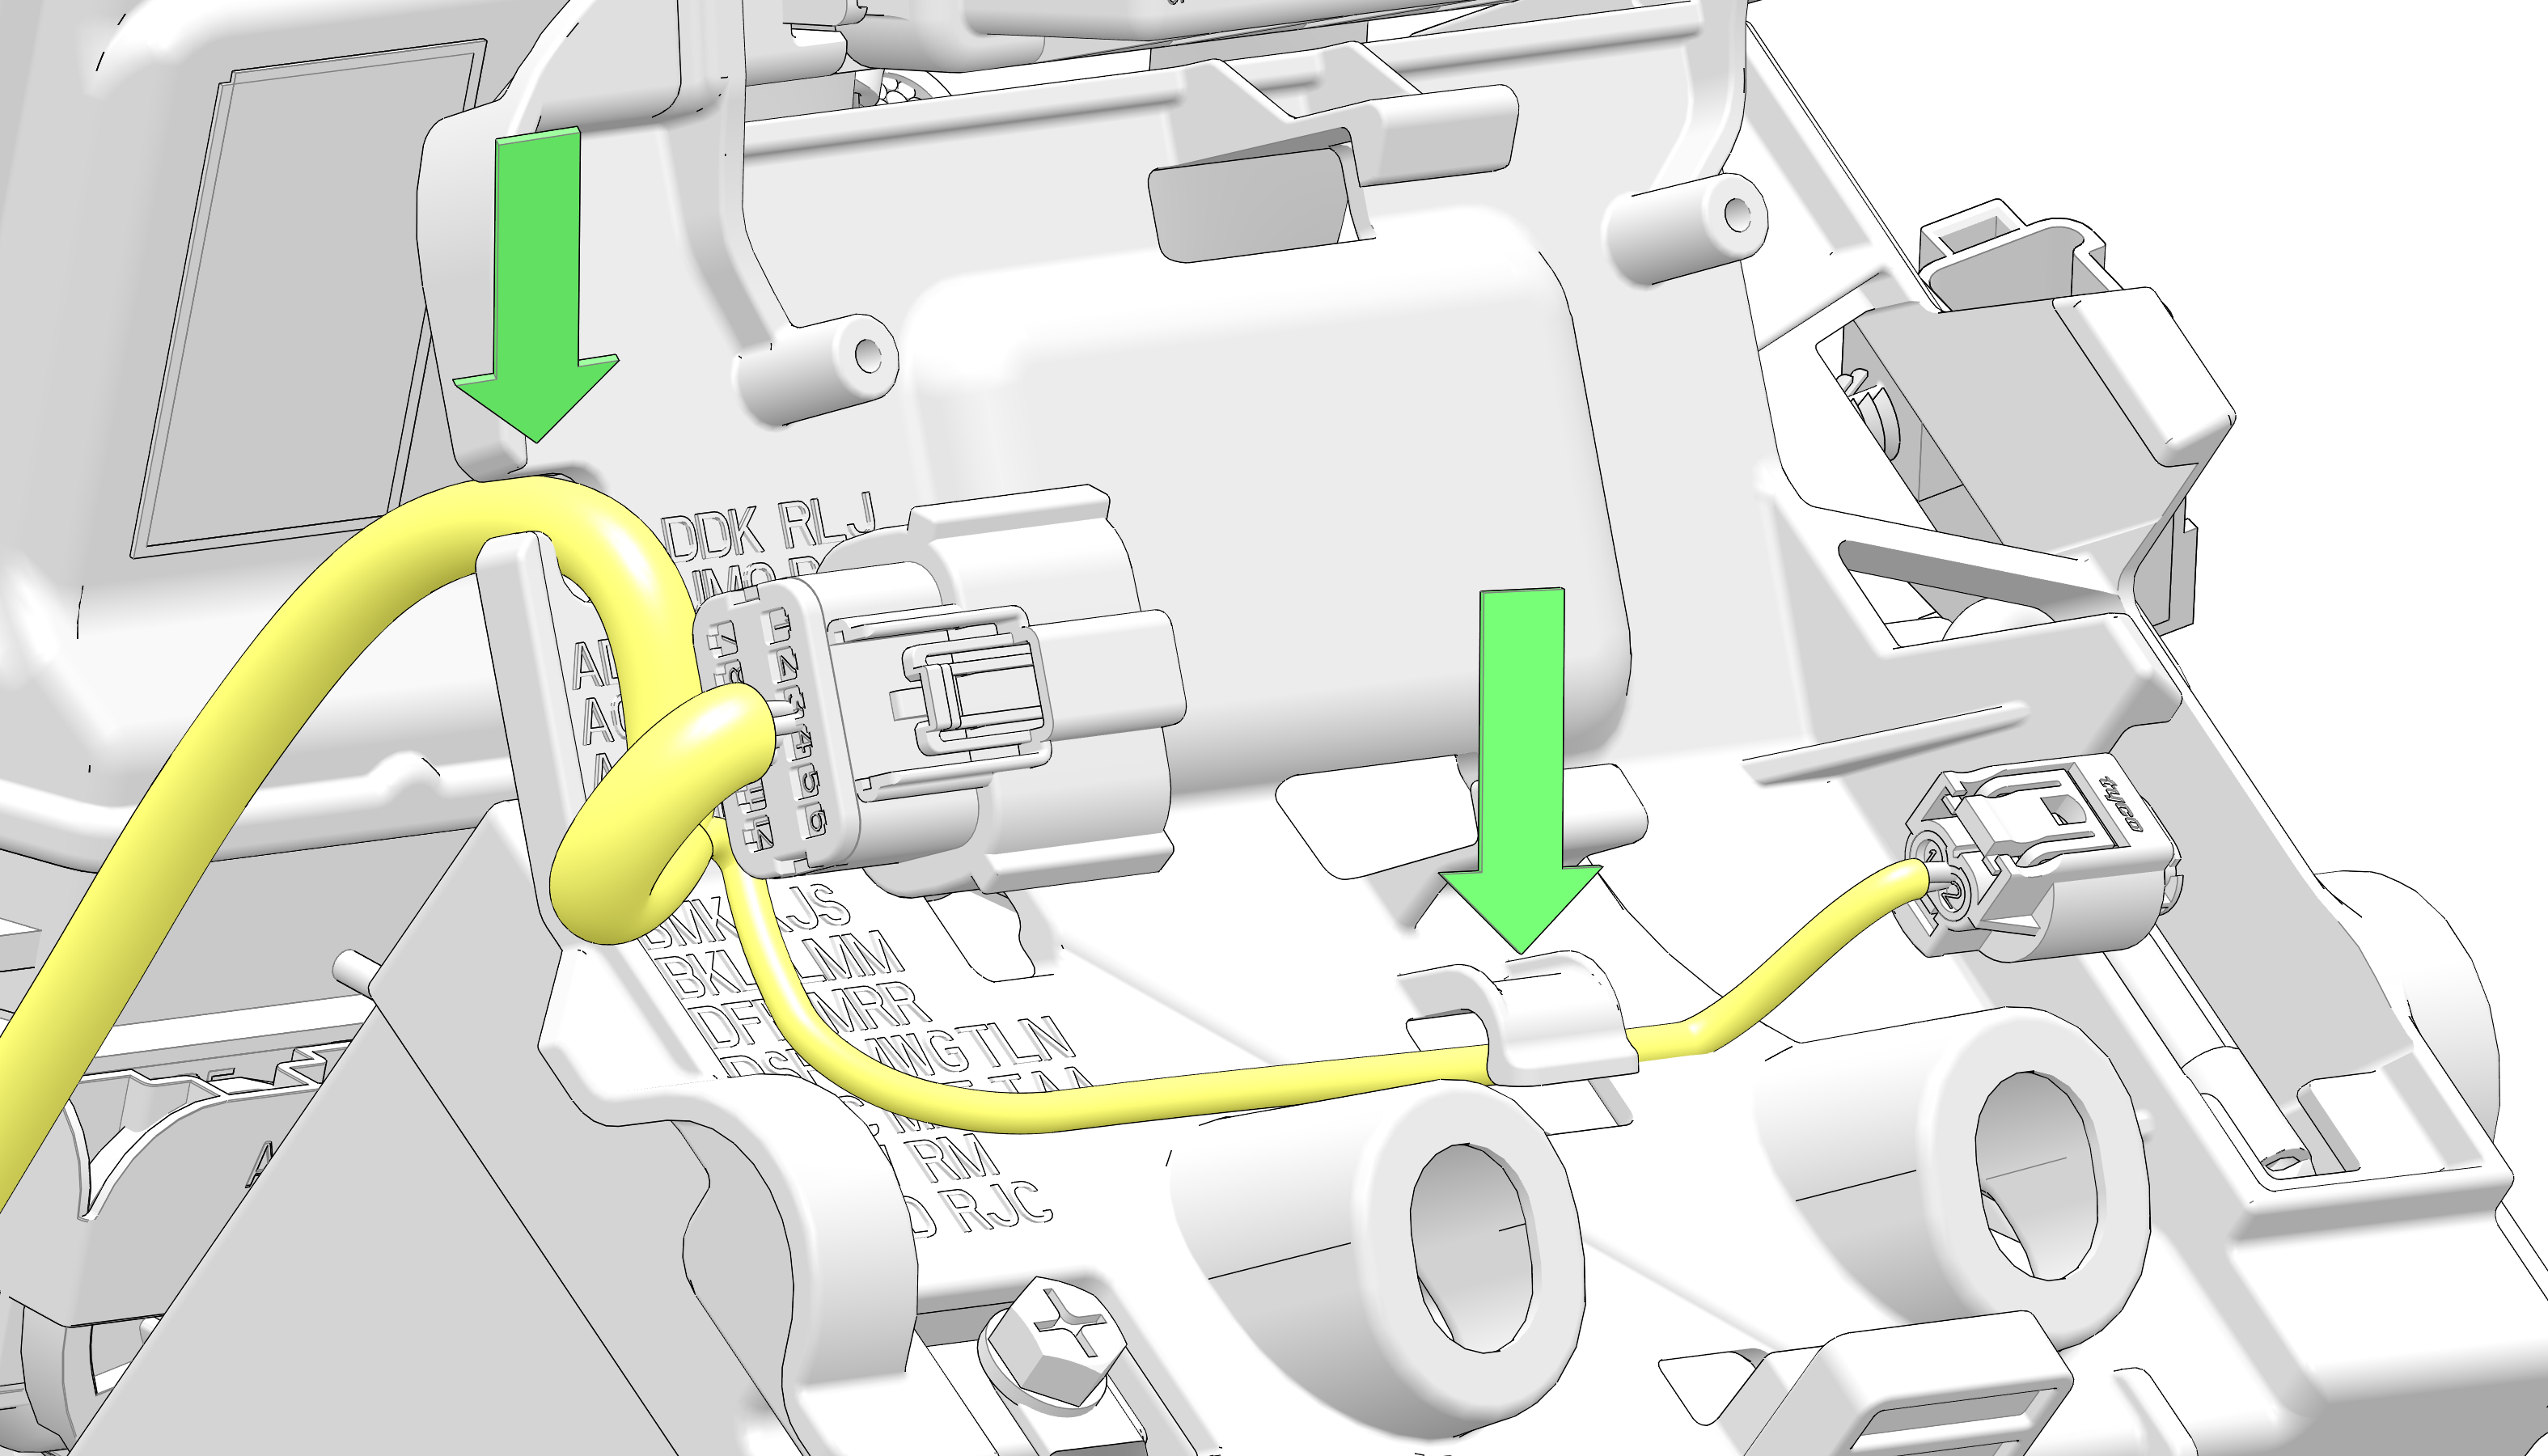
Install the antenna wiring harness onto the upper battery tray. Make sure that the wiring harness is secured in both retention areas.
-
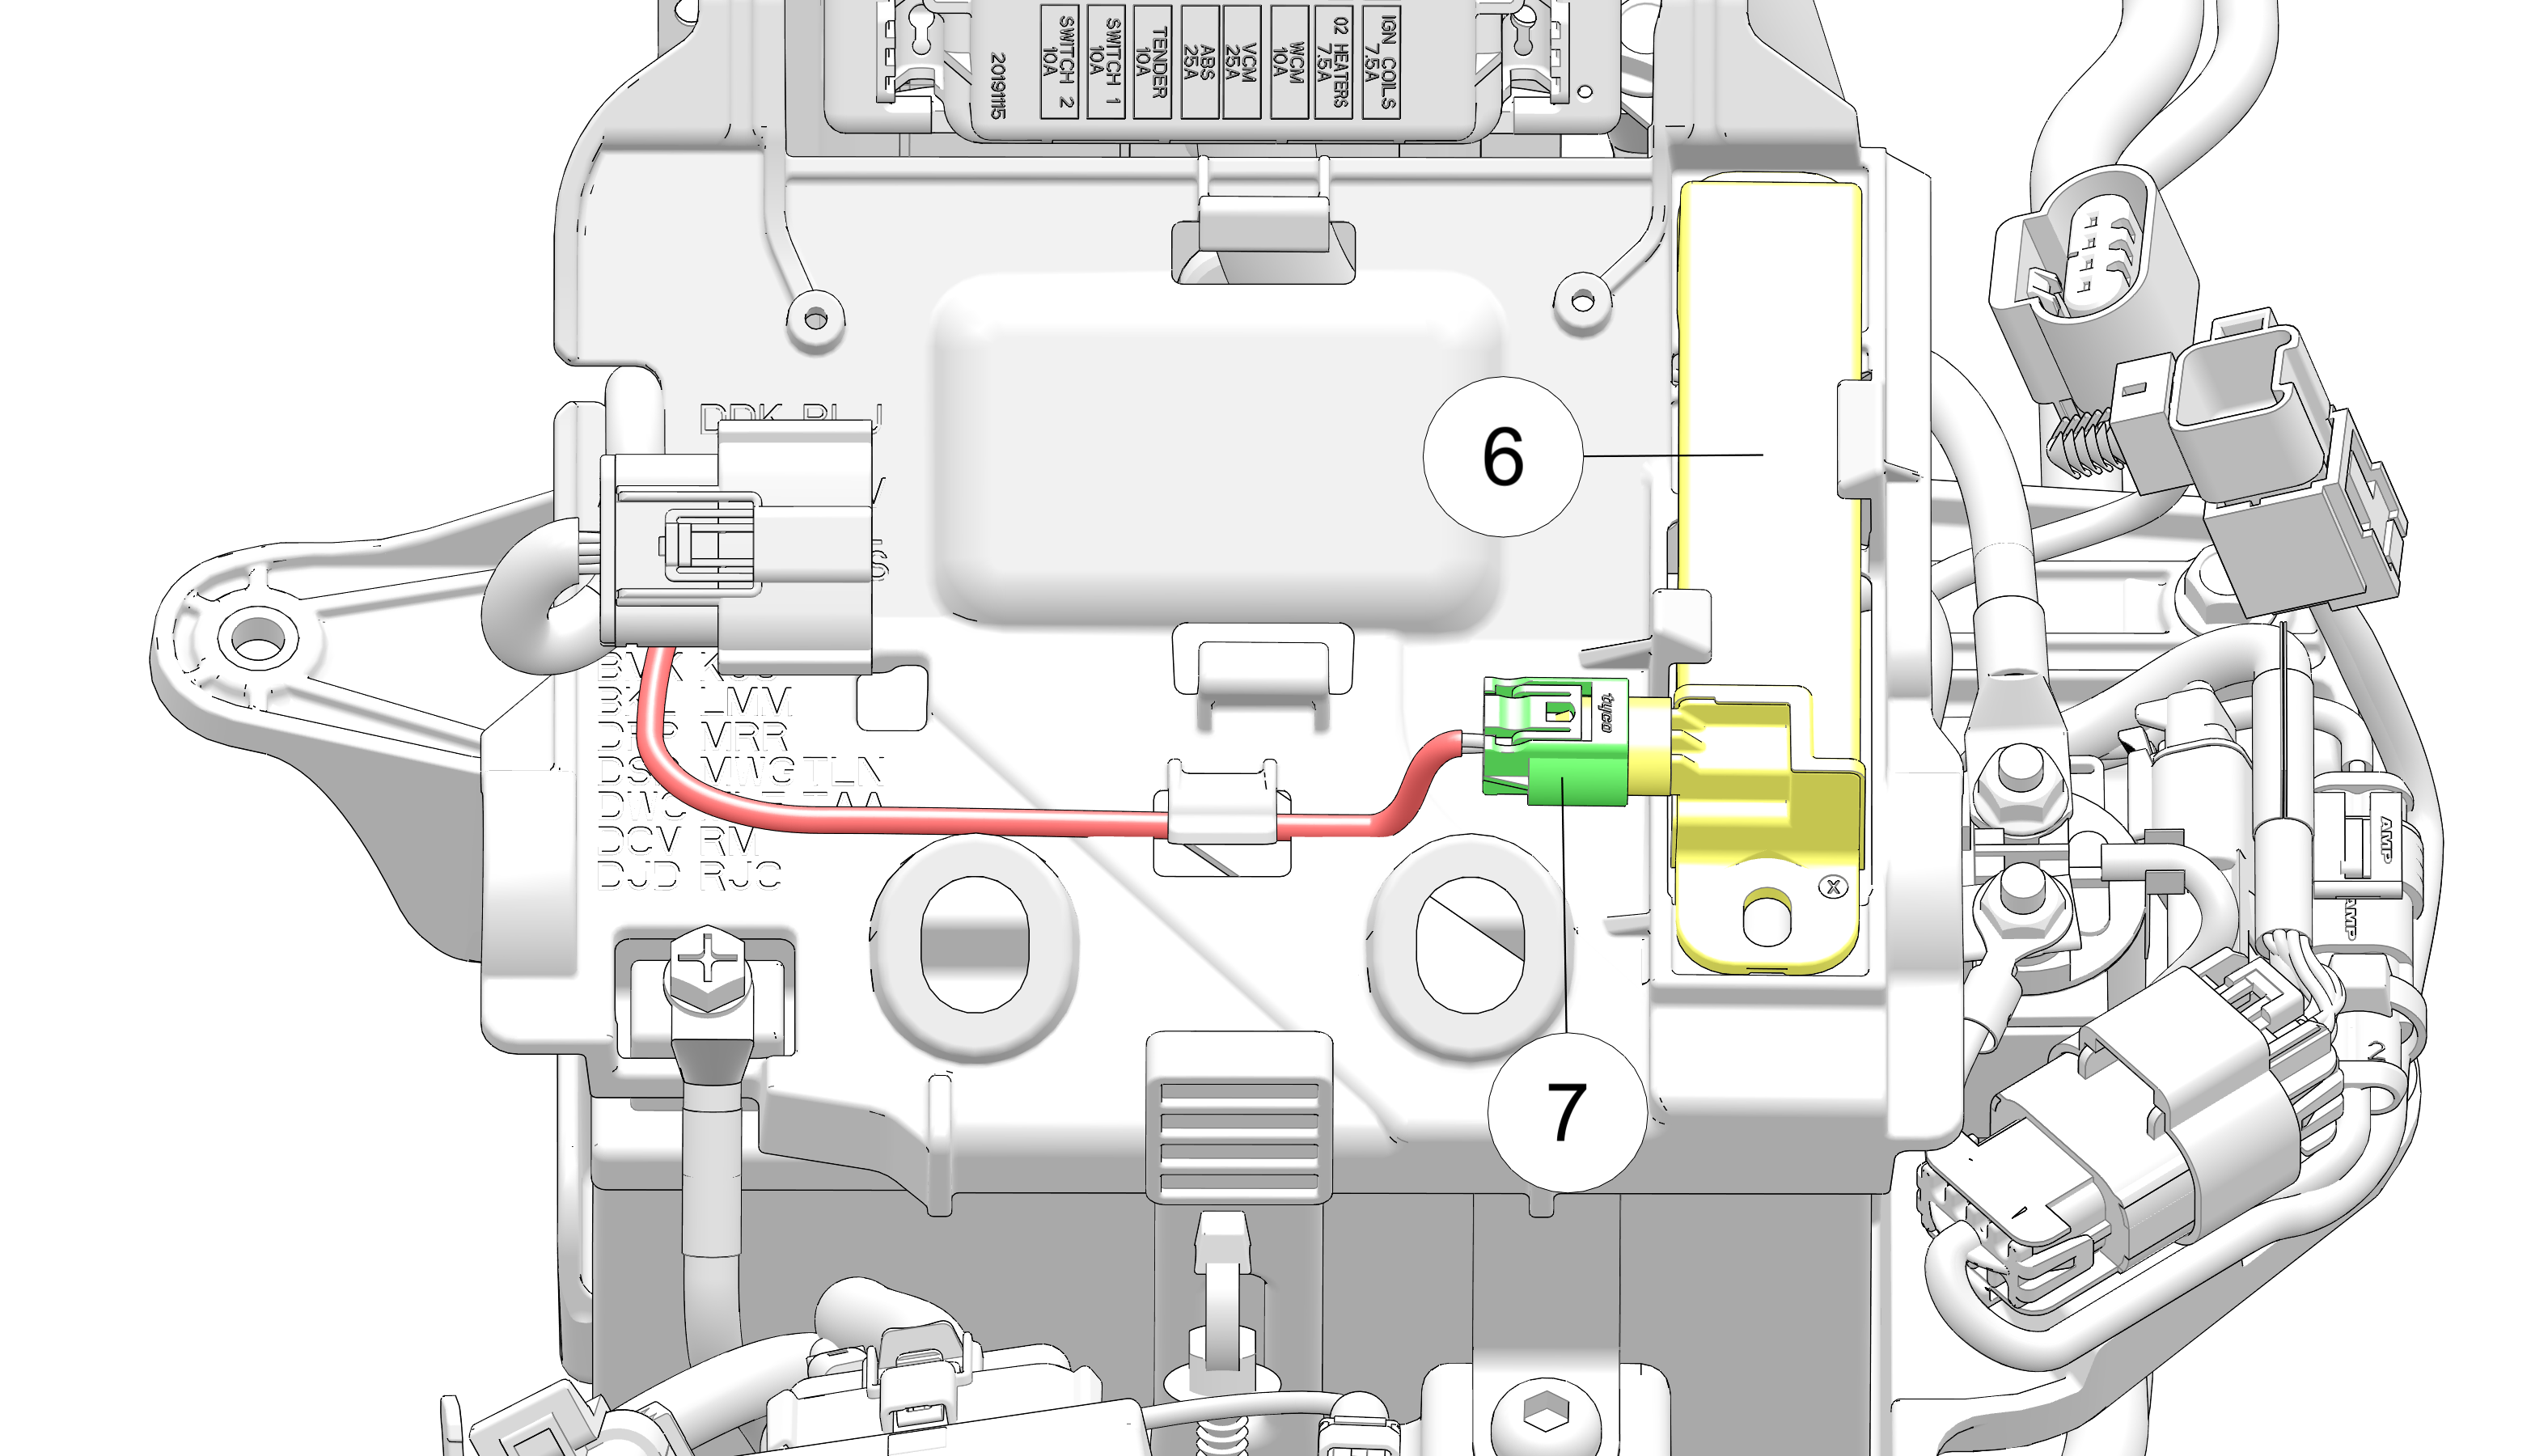
Install the antenna 6 onto the upper battery tray. Connect the antenna harness 7 to the antenna.
-
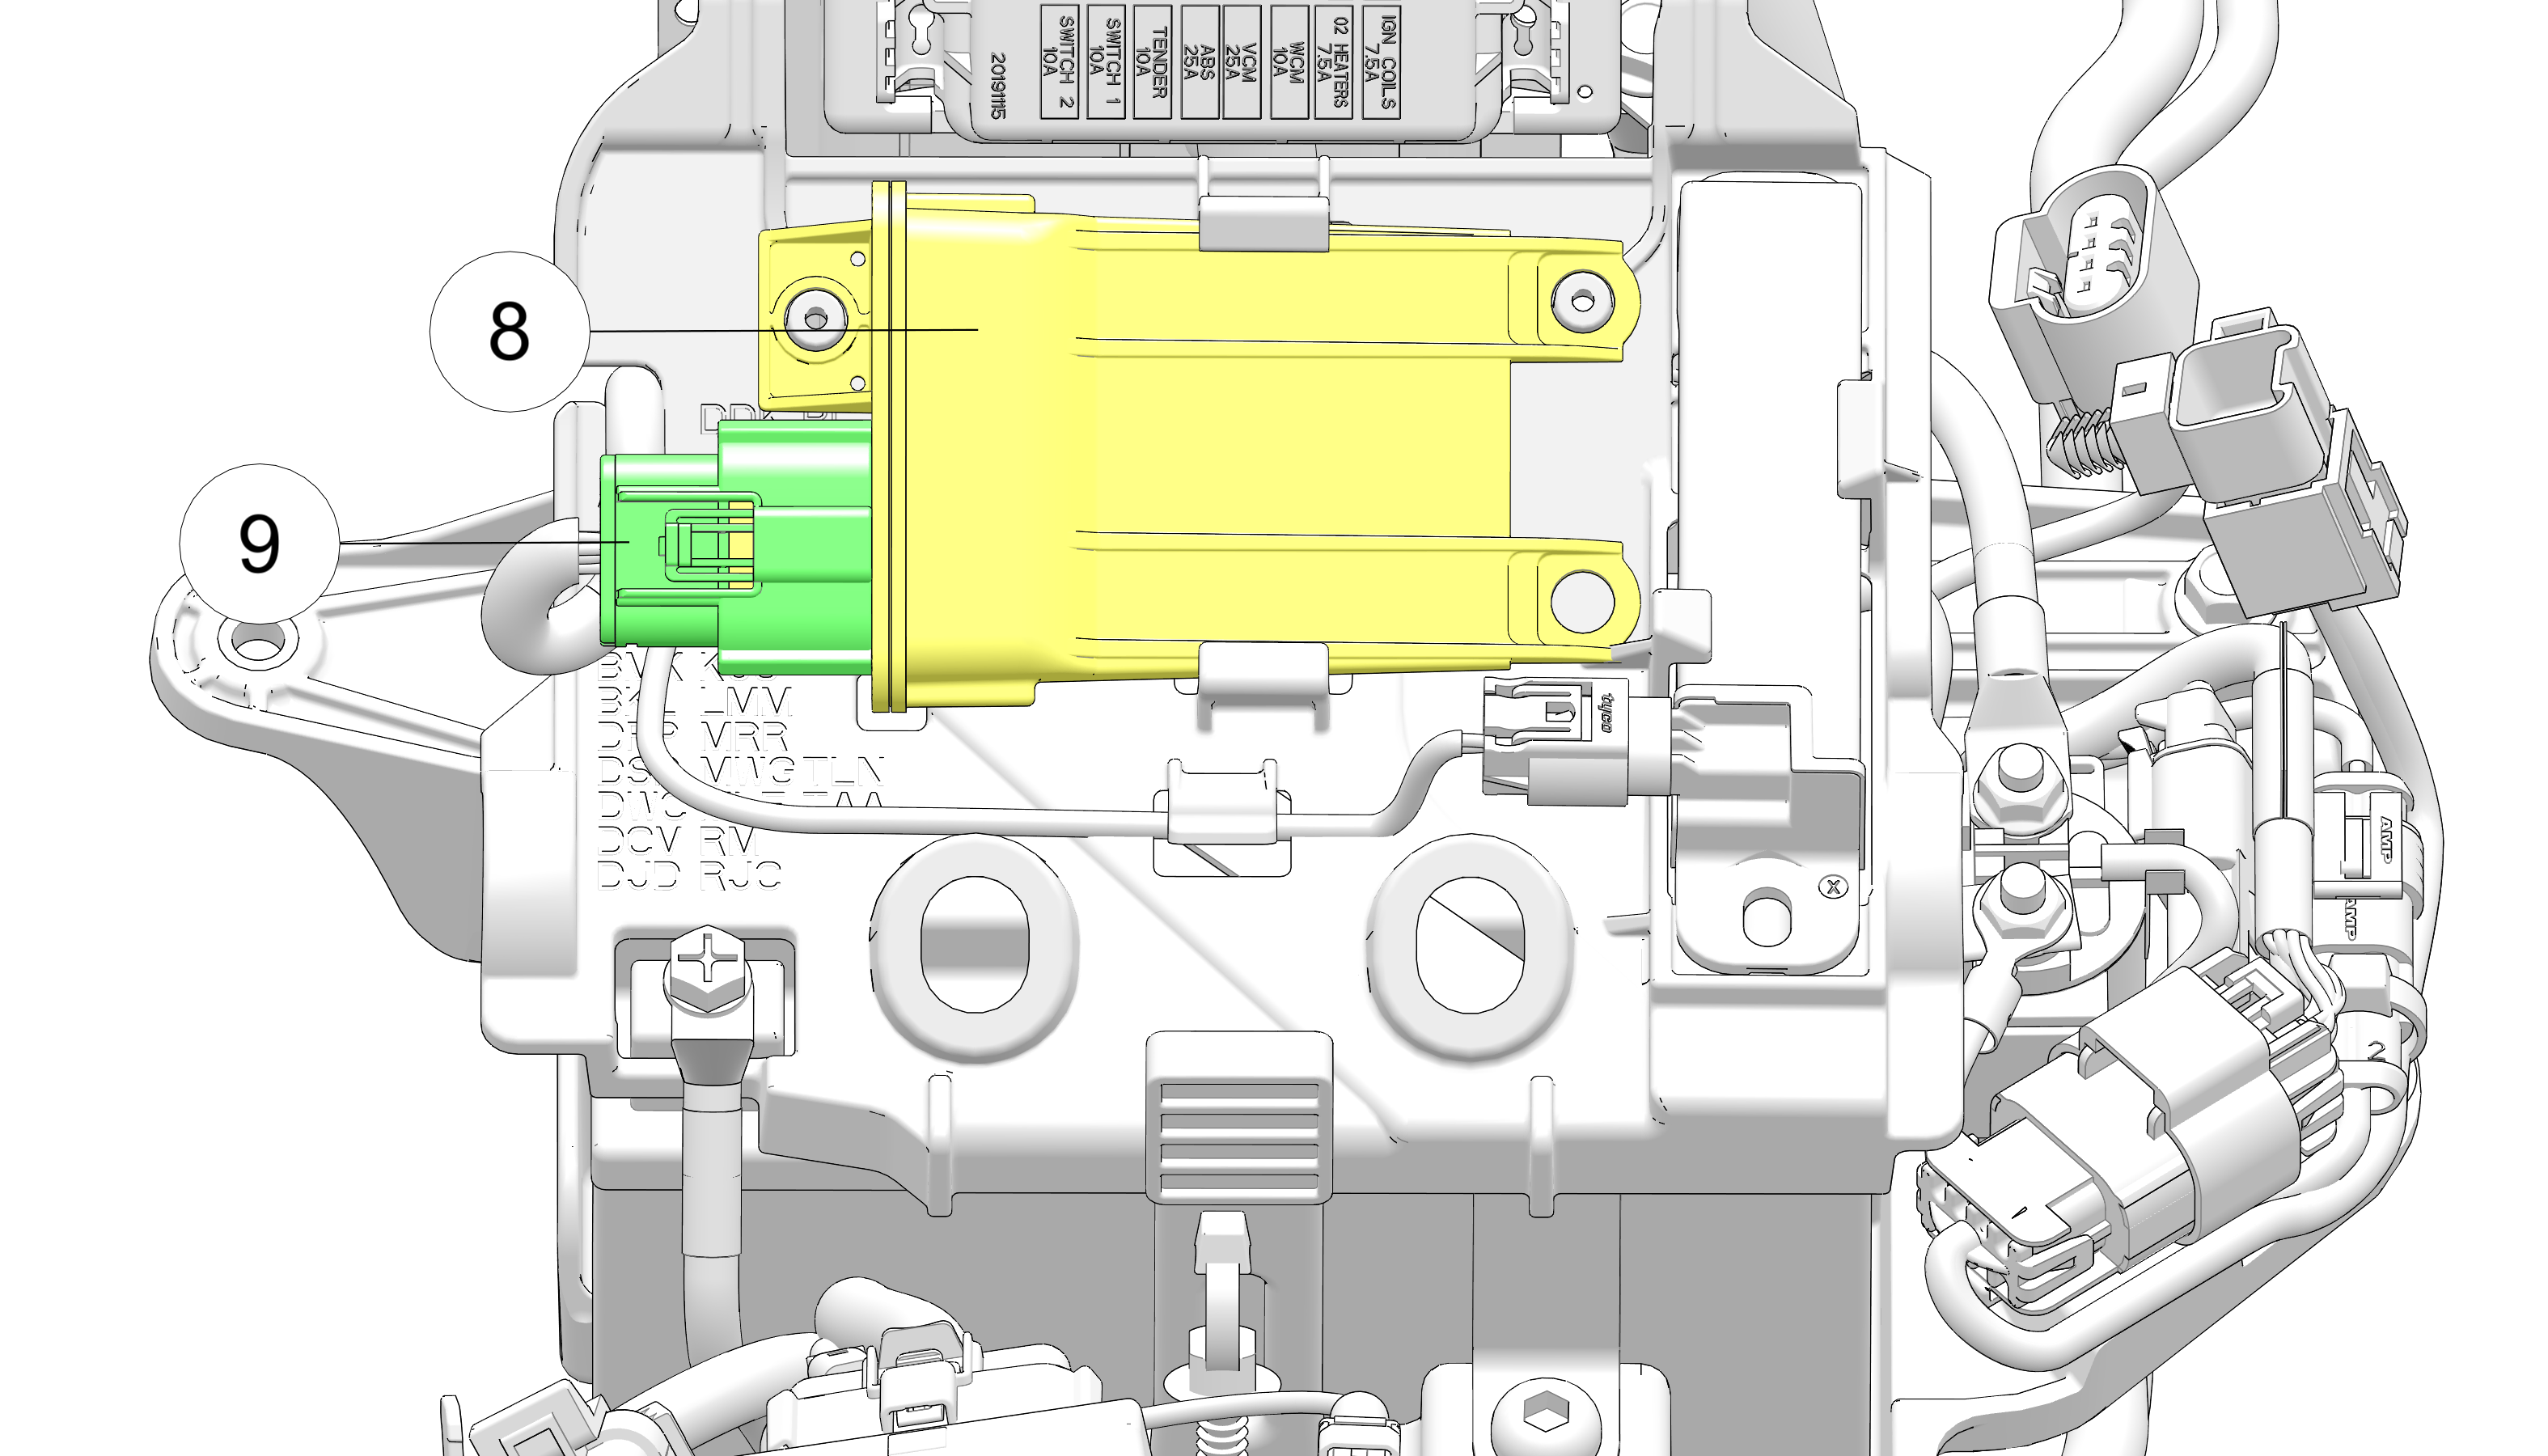
Install the Wireless Control Module (WCM) 8 onto the upper battery tray. Connect the main harness 9 to the WCM.
-
Reinstall the seat. See Seat Installation.