Oil Filter Change
-
Position the vehicle on a flat surface.
-
Clean area around the drain plug.
-
Run engine for two to three minutes until warm.
-
Stop the engine.
CAUTIONHot oil can cause burns to skin. Do not allow hot oil to contact skin. -
Place a drain pan beneath the engine crankcase.
-
Remove the oil access panel and locate the oil filter cap on the crankcase.
-
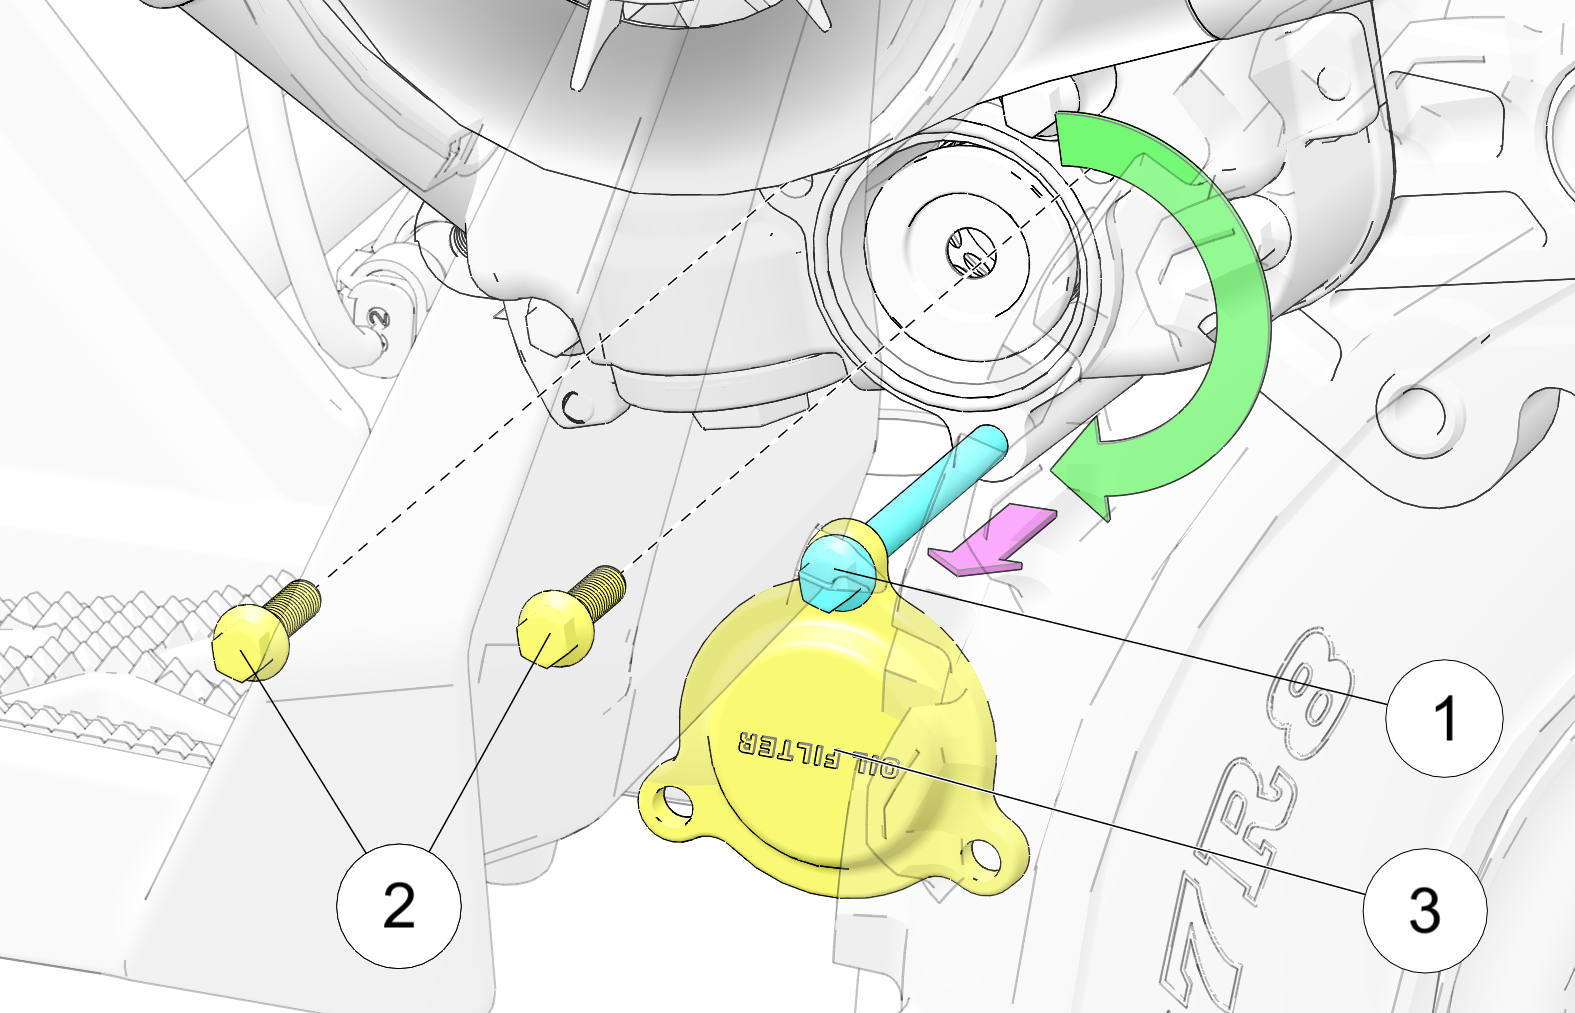
Loosen the bottom screw 1 until free from threading. Pull outward until flush with the footwell.
-
Remove the top two screws 2 from the top of the oil filter cap.

-
Pull cap 3 outward until spring is free from filter bore, then rotate cap downward.
-
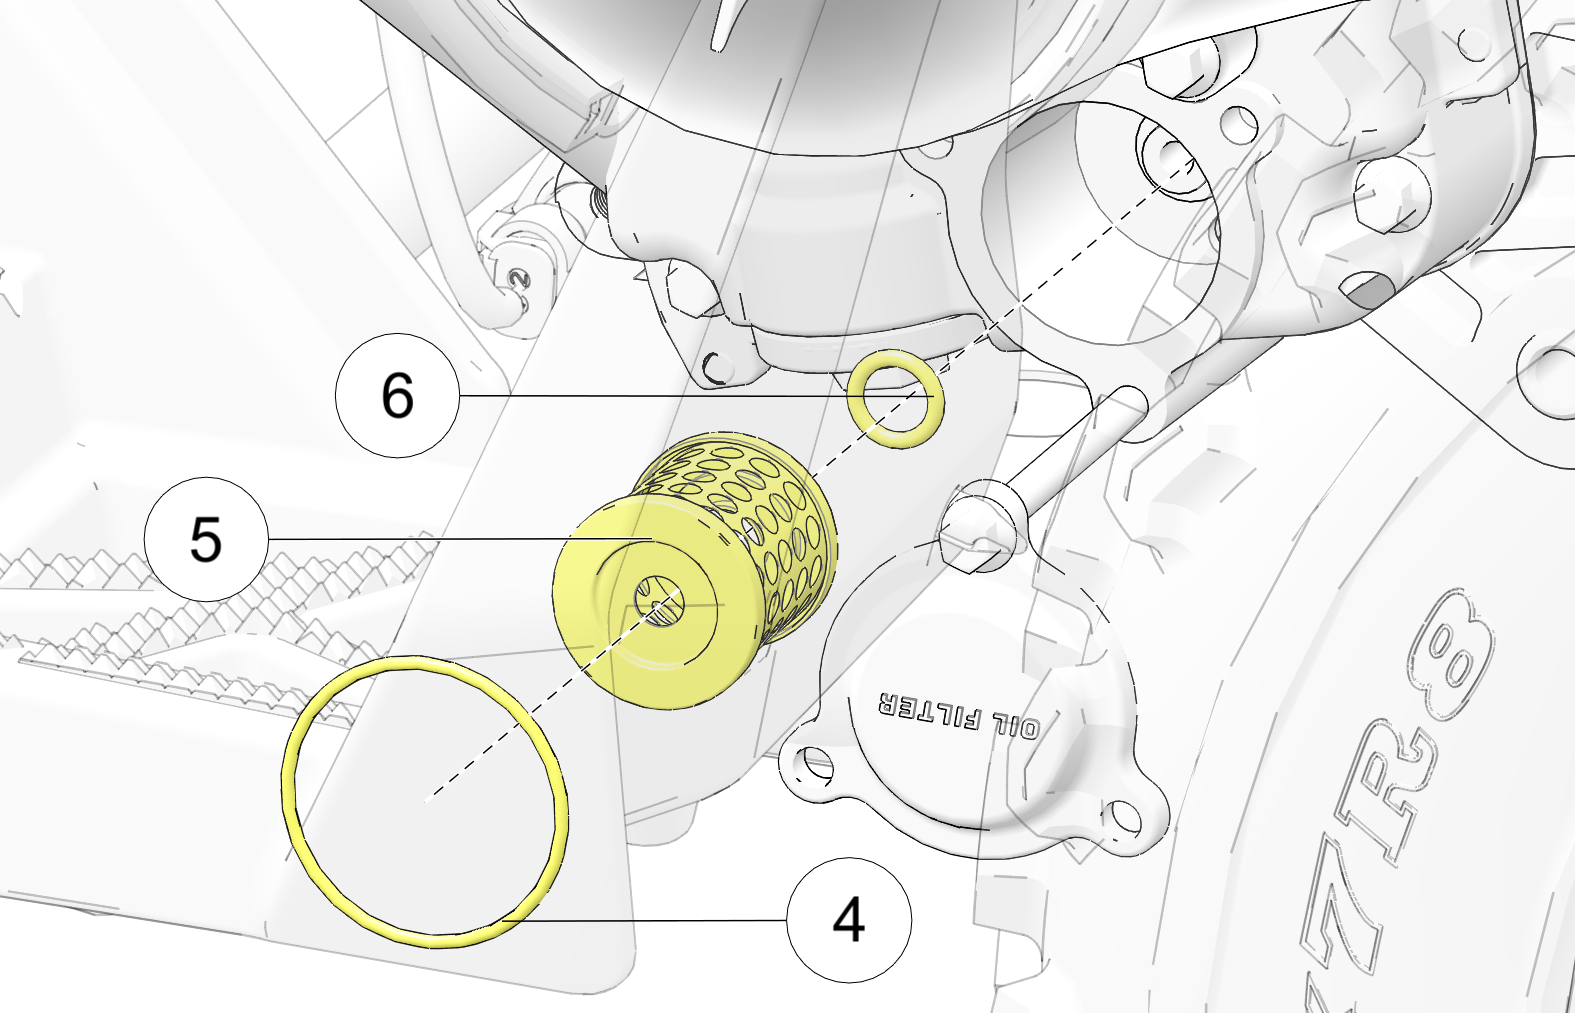
Remove large O-ring, 4 and oil filter 5 from filter bore.

-
Visually inspect the small O-ring 6 for damage. Replace if needed.
NOTICEDo NOT remove the small O-ring unless damage is present. Unnecessary removal may cause damage to the O-ring and prevent a proper seal. -
Verify the oil filter is clean. If needed, clean the oil filter with brake cleaner to remove any debris. Allow the oil filter to air dry.
-
Check the outer screen of the oil filter and large O-ring for damage. Replace if needed.
-
Reinstall the O-ring and oil filter back into the filter bore.
-
Install the engine oil filter cap and torque bolts to specification.
TORQUEEngine Oil Filter Cap Bolts
80 in-lbs (9 N·m)