Battery Installation
When installing a new battery, make sure it's fully charged prior to its initial use. Using a new battery that has not been fully charged can damage the battery and result in a shorter life. It can also hinder vehicle performance. Follow the battery charging instructions before installing the battery.
-
Ensure that the battery is fully charged.
-
Set the battery in the battery holder.
-
Place the battery shield on the battery bracket.
-
Install the battery hold-down strap.
-
Connect and tighten the red (positive) cable first.
-
Connect and tighten the black (negative) cable last.
CAUTIONVerify the battery cables and wiring harness do not come into contact with the brake disc. Move the wiring harness/cables behind the chassis tube and away from the brake disc. -
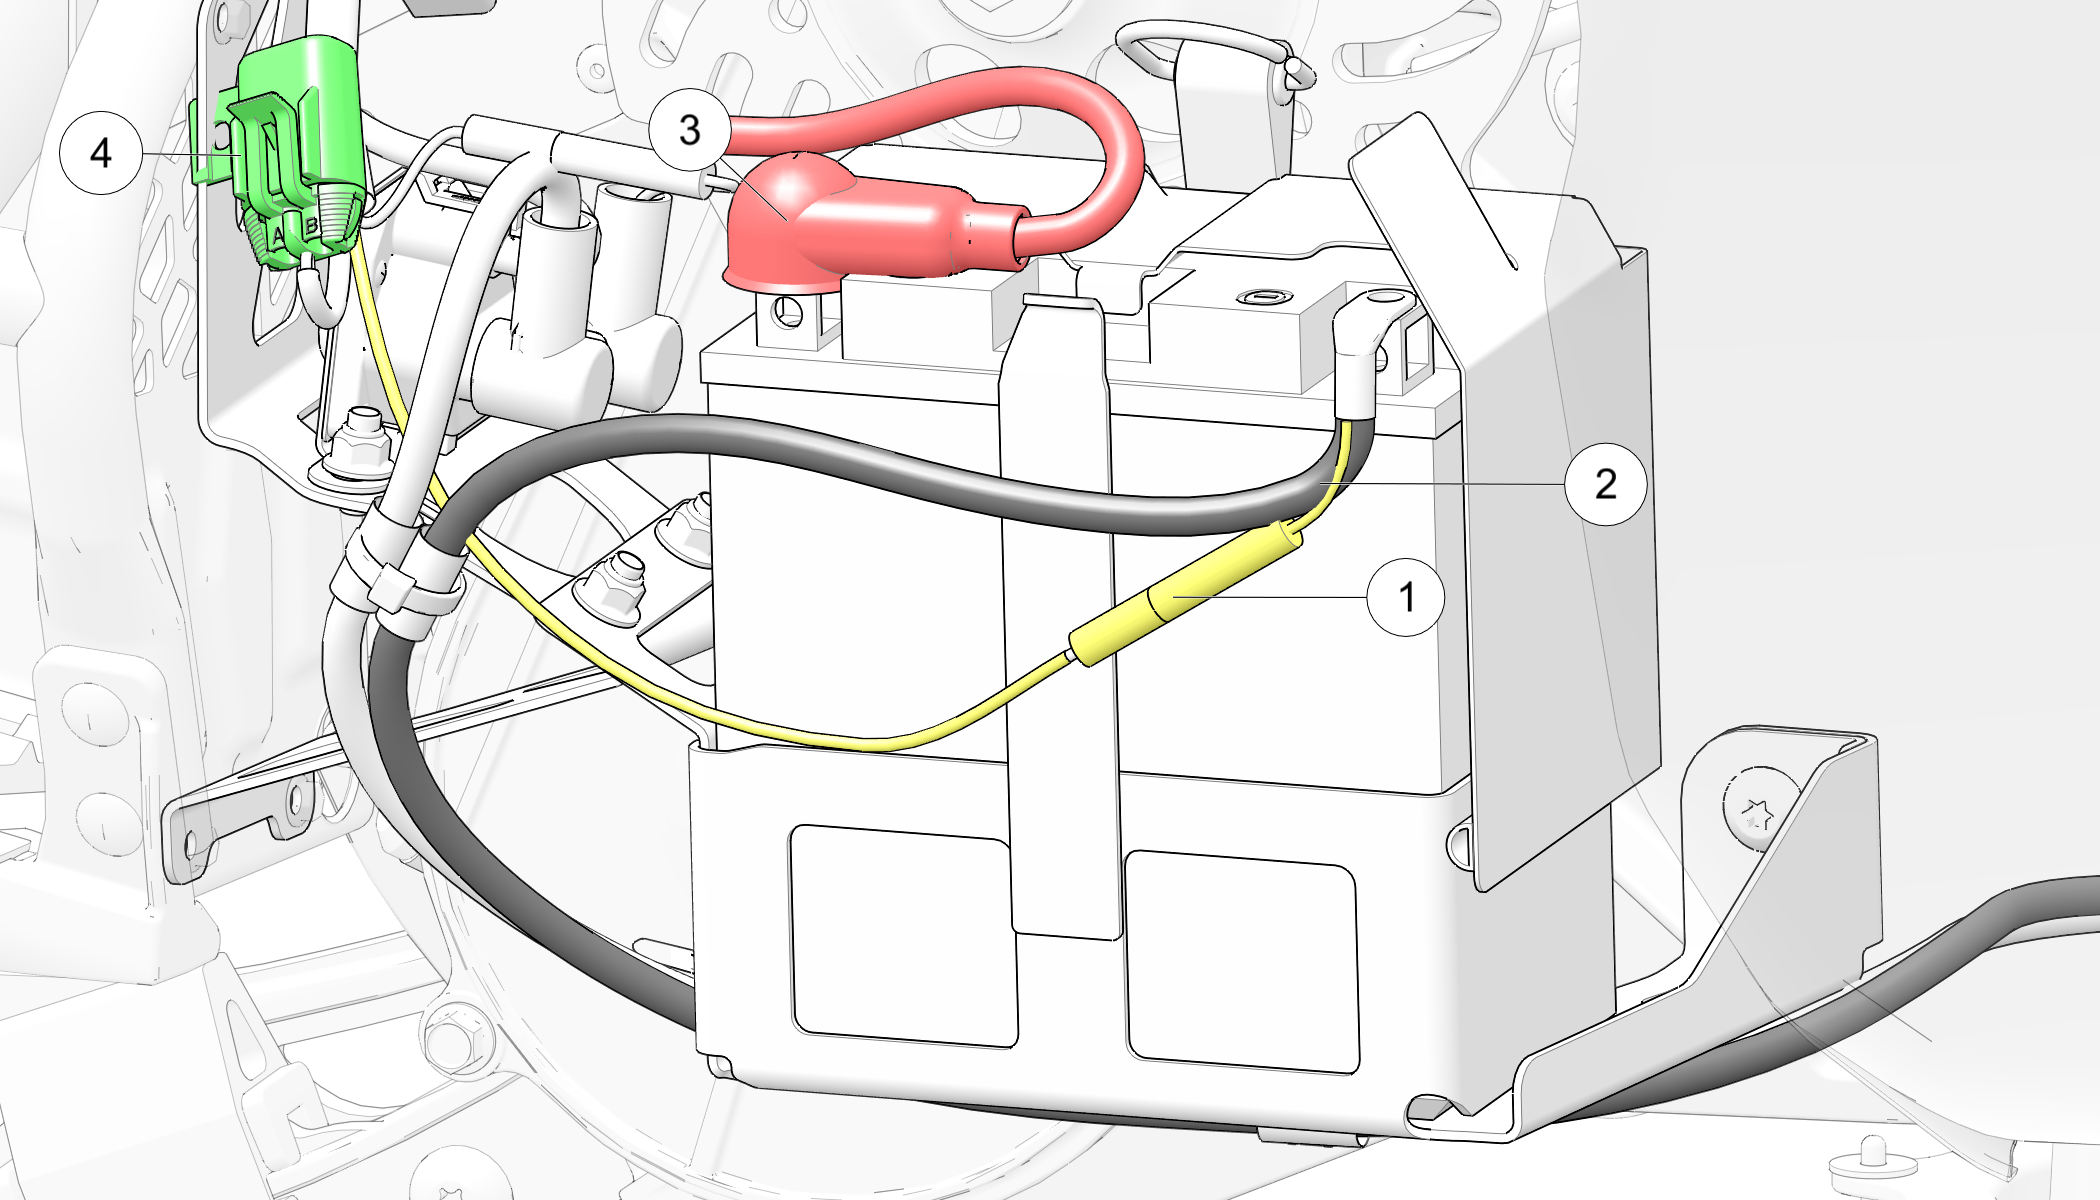
Route the BROWN harness ground wires 1 and BLACK main battery ground cable 2 as shown in the image. Both are routed up and over the rubber strap. If the ground wires/cable are routed down the side of the battery, they may interfere with the rear side panel tab. Note the routing of the RED (positive) battery cable 3 and that the right fender is pulled away from the chassis. Item 4 is the constant power fuse connector.
-
Verify that cables are properly routed.
NOTICEEnsure that the battery wires are routed in such a way that they cannot come into contact with the brake disc. -
Secure the right fender using the plastic rivet.
-
Reinstall the console using the two plastic rivets. Reinstall the side panel.