LED Front Bumper Headlight Adjustment (If Equipped)
The LED front bumper lights can be adjusted slightly upward or downward or to the left or right.
-
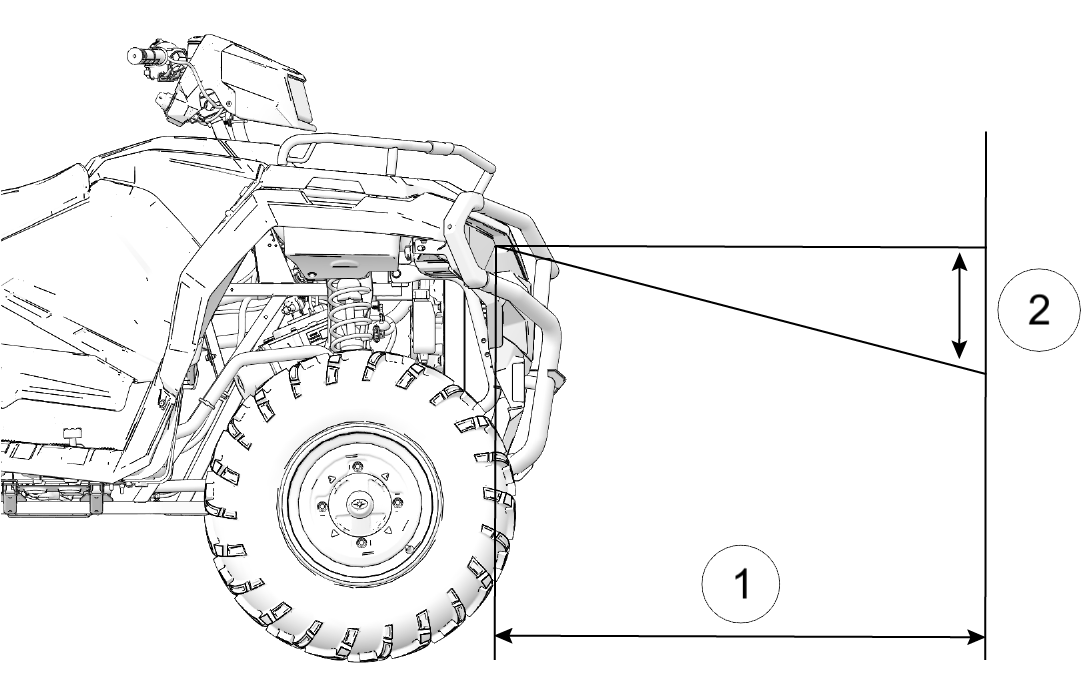
Place the vehicle on a level surface with the front bumper lights approximately 23 ft (7 m) from a wall 1.
-
Put the transmission in PARK (P).
-
Load the vehicle with the equivalent weight of a rider.
-
Measure the distance from the floor to the center of each front bumper light and make a mark on the wall at the same height.
-
Turn the ignition ON and turn the front bumper lights to low beam.
-
Observe the headlight aim on the wall 2. The horizontal line, separating the lit-zone from the unlit-zone should be aimed 8 in (20 cm) below the mark placed on the wall in step 4.
-
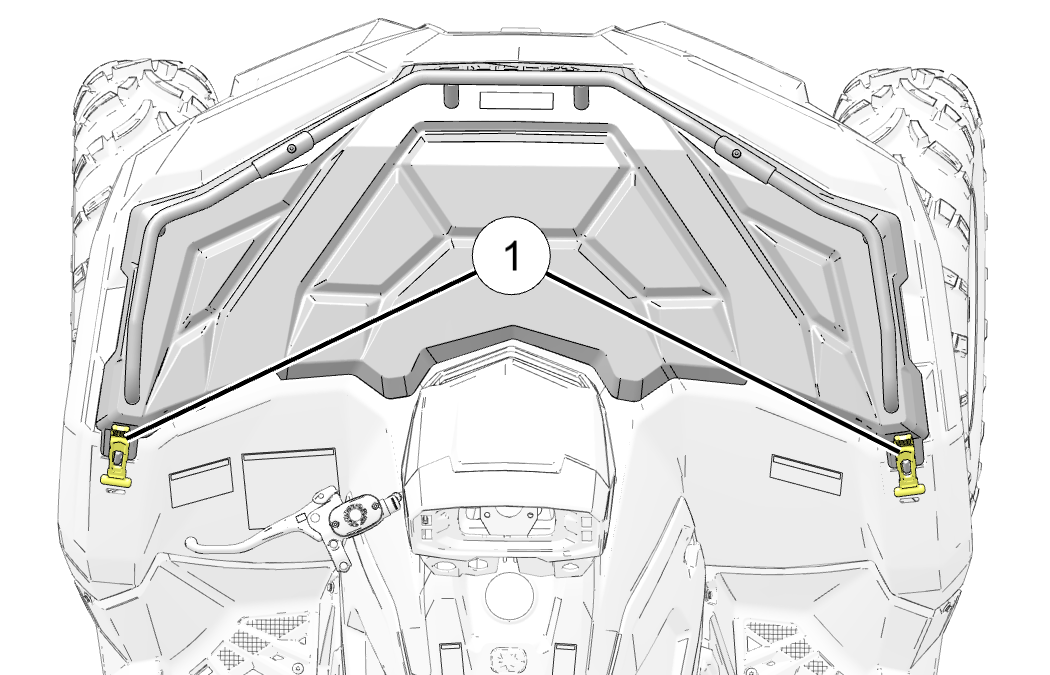
Unlock the front rack latches 1 and open the front rack.
-
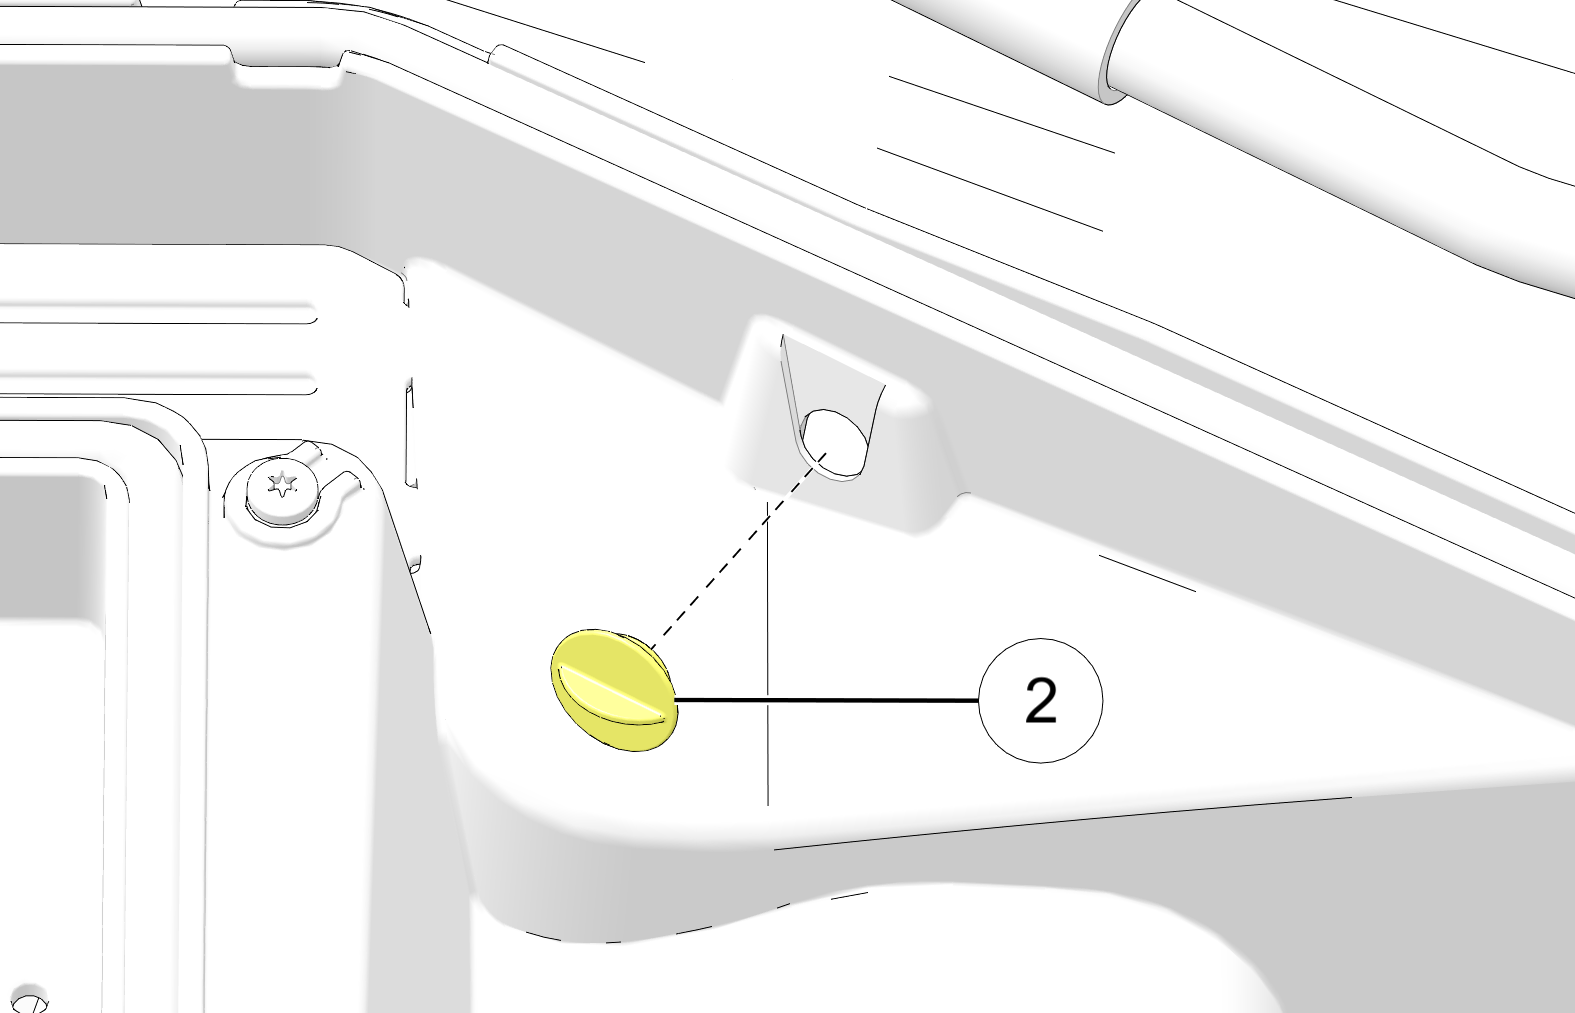
Remove the compartment plug 2 from the front cab.
-
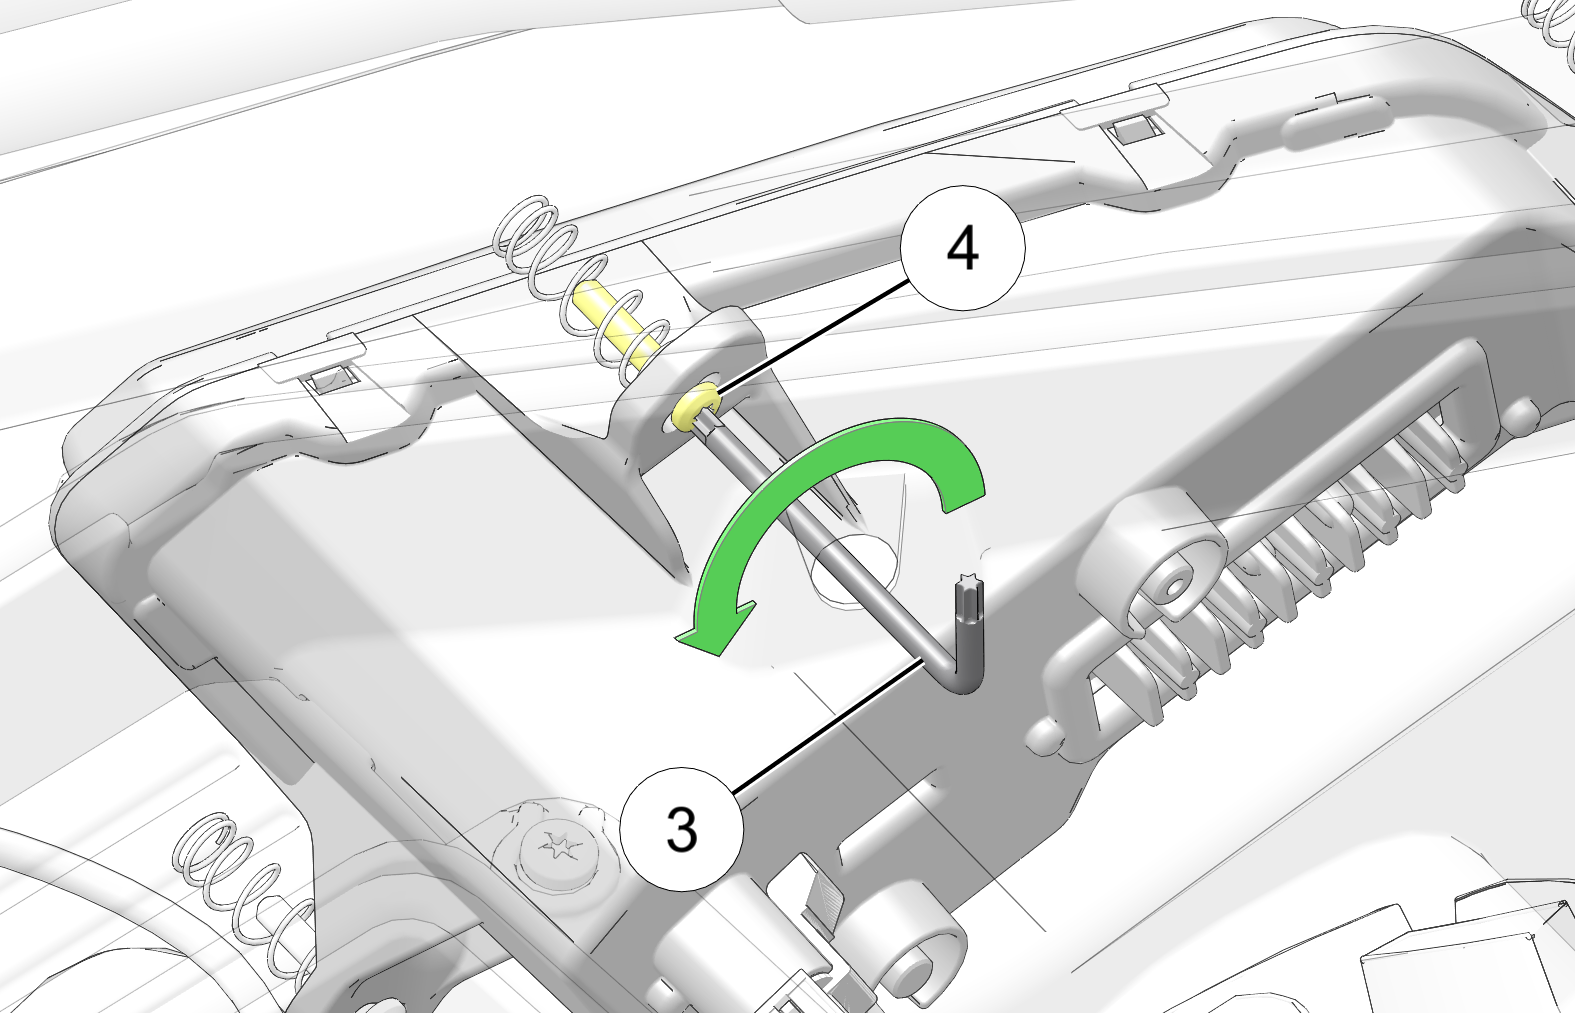
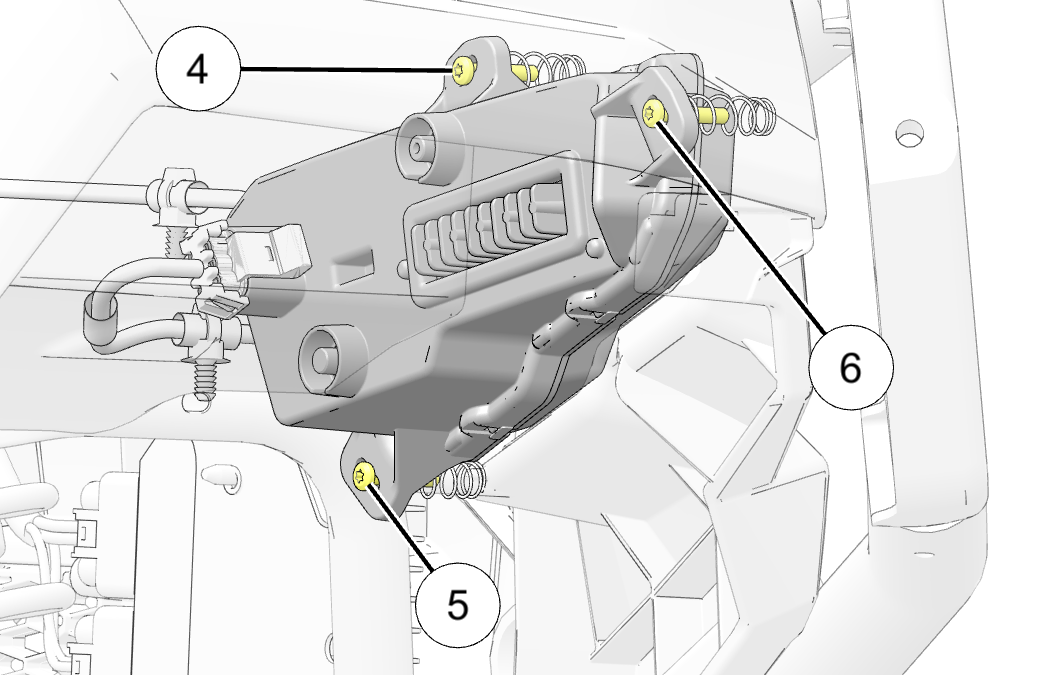
Insert the Torx® wrench tool 3 (included in your vehicle’s tool kit) through the compartment plug hole to access the top center screw 4 on the back of the front bumper light. Loosen the screw.
-
Loosen the other two screws (5 and 6) on the back of the front bumper light.
-
Adjust the screws on the back of the front bumper light as follows:
-
The screws labeled 4 and 5 adjust the light upwards and downwards.
-
The screw labeled 6 adjusts the light to the left and right.
-
-
Tighten the screws.
-
Repeat steps for the other front bumper light.