Configure Gauge Screen
The display allows up to four customized gauge screens. All but one screen can be deleted; one will always remain as the default.
Follow the instructions below to create customized gauge screens.
-
Press the Gear icon in the bottom right corner of the touchscreen.
-
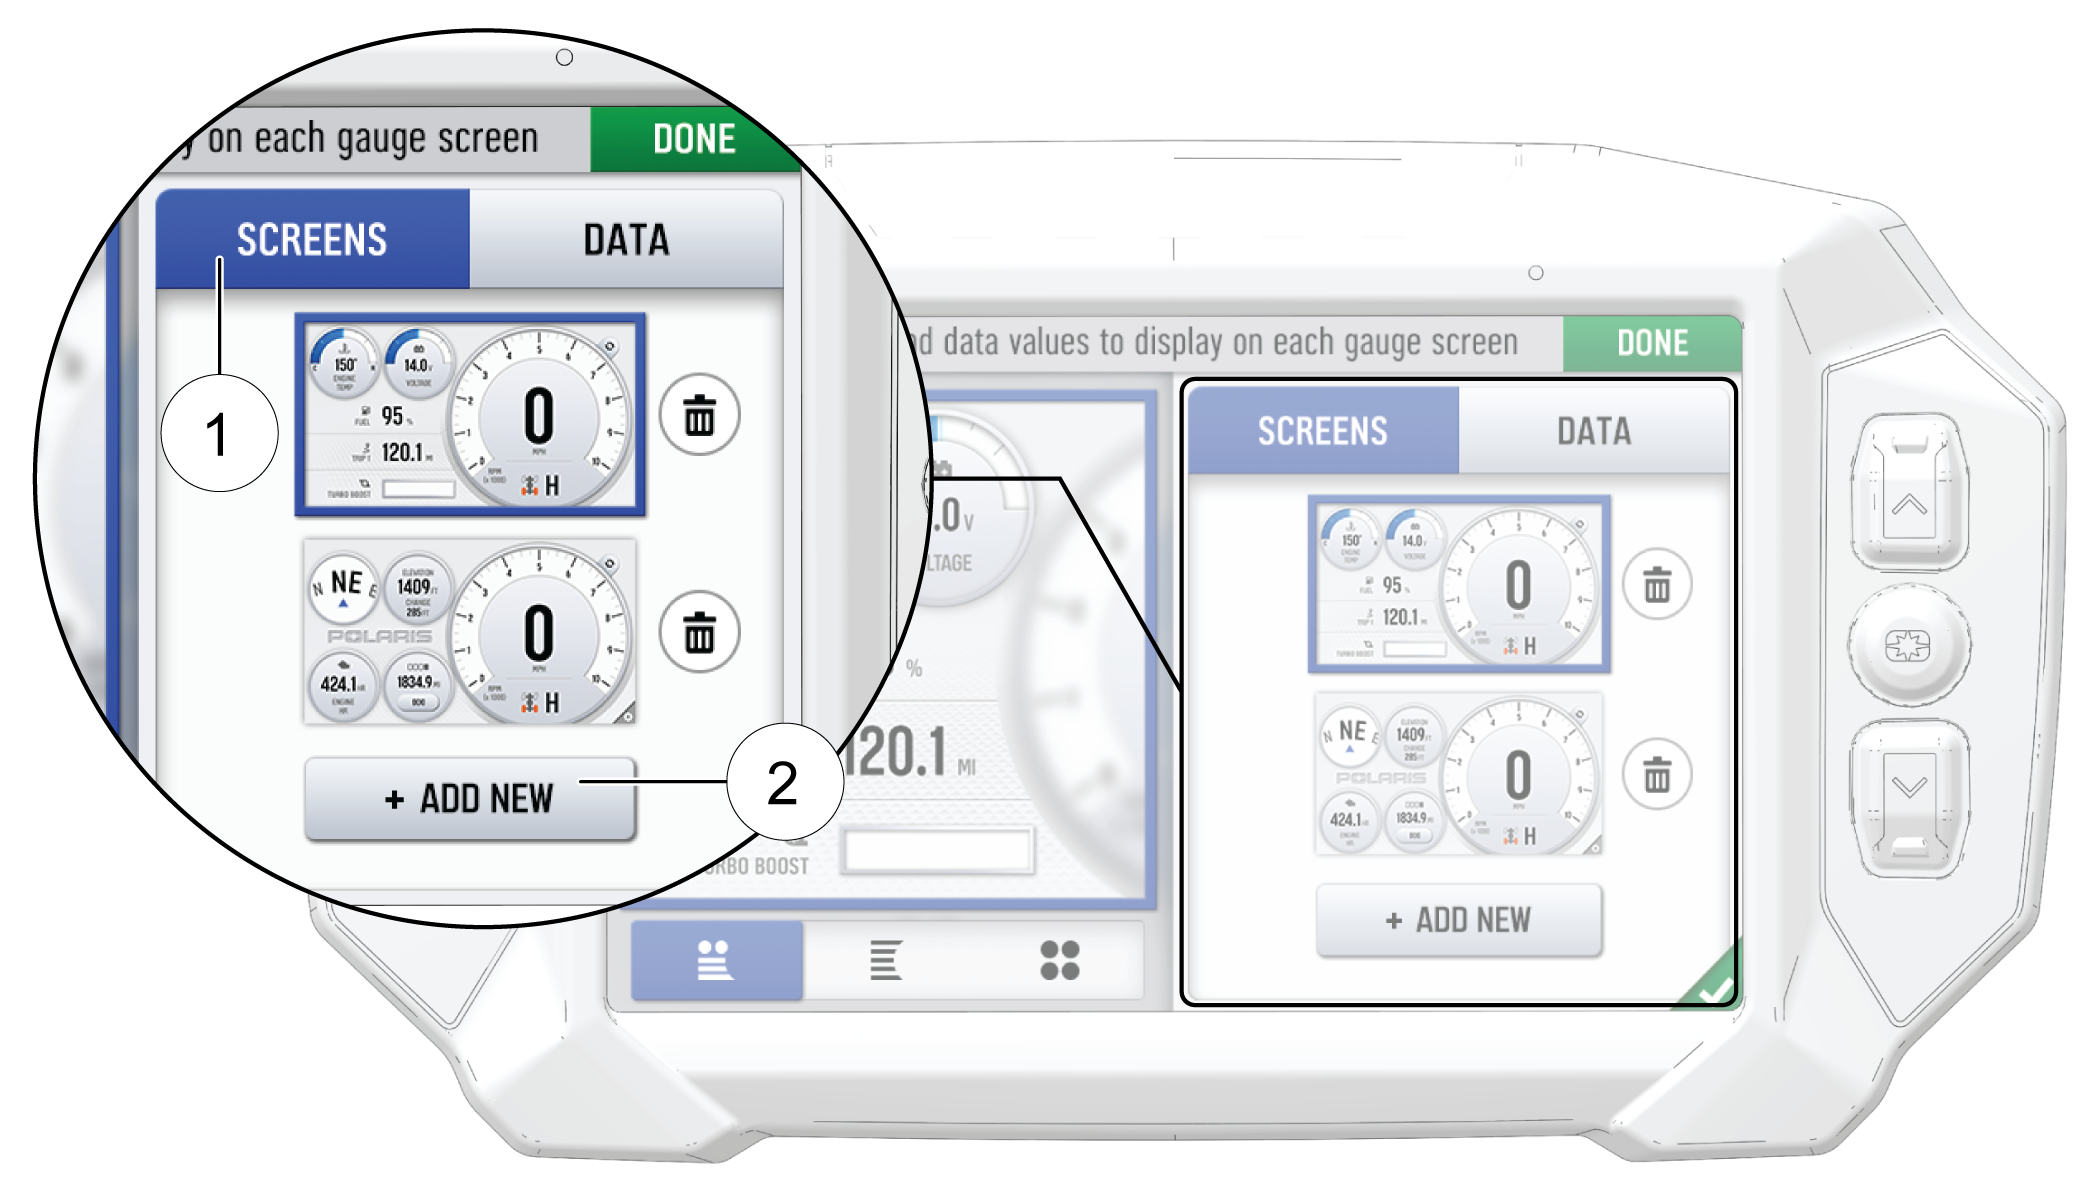
On the right side of the configuration panel, press the Screens tab 1 followed by the Add New button 2.
-
In the left side panel, choose a gauge layout from the three provided options.
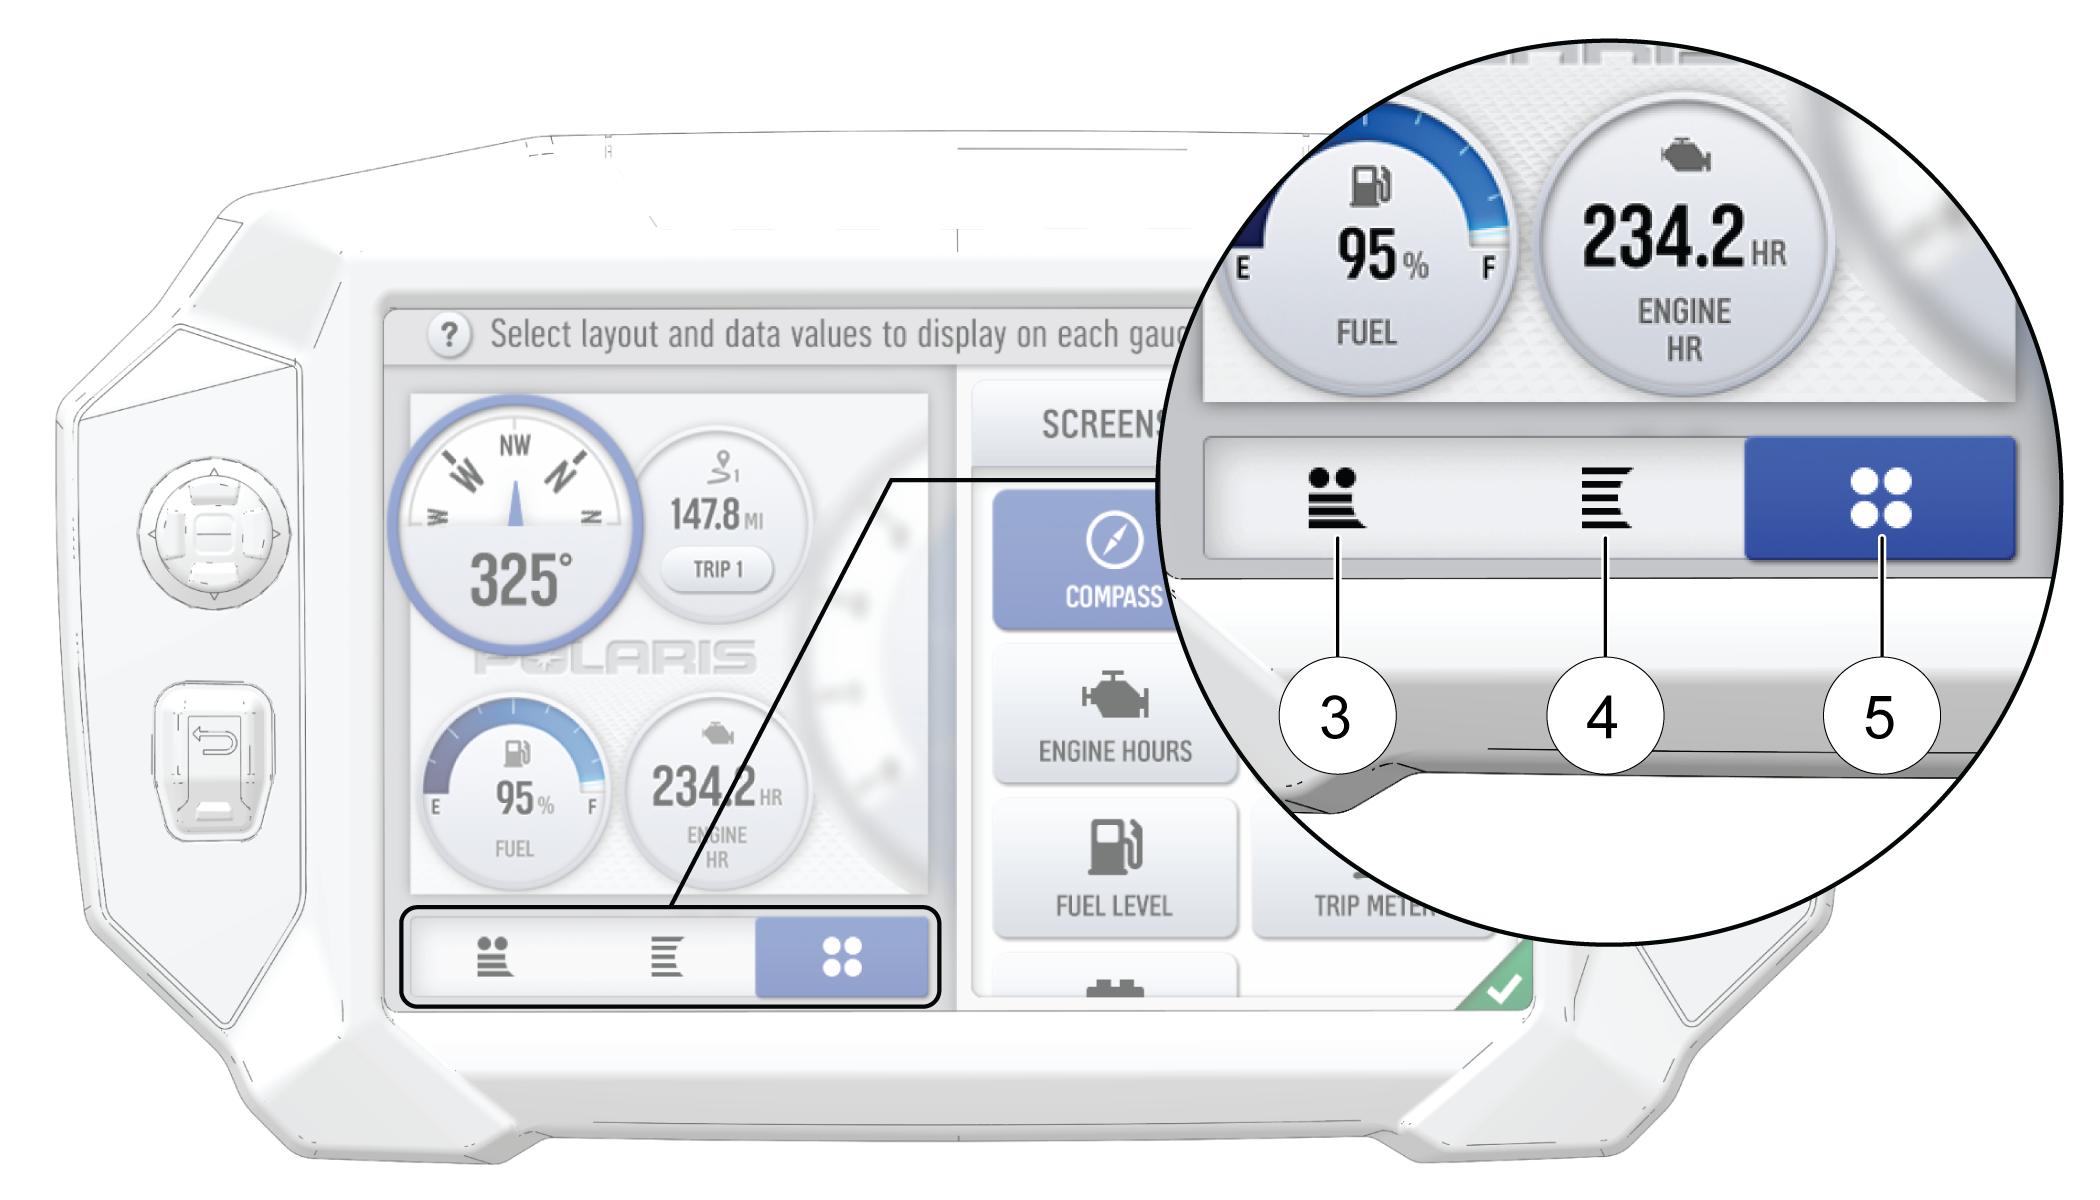
| Icon | Description |
|---|---|
| 3 | Two circular widgets and up to three linear widgets. |
| 4 | Up to five linear widgets. |
| 5 | Four circular widgets. |
-
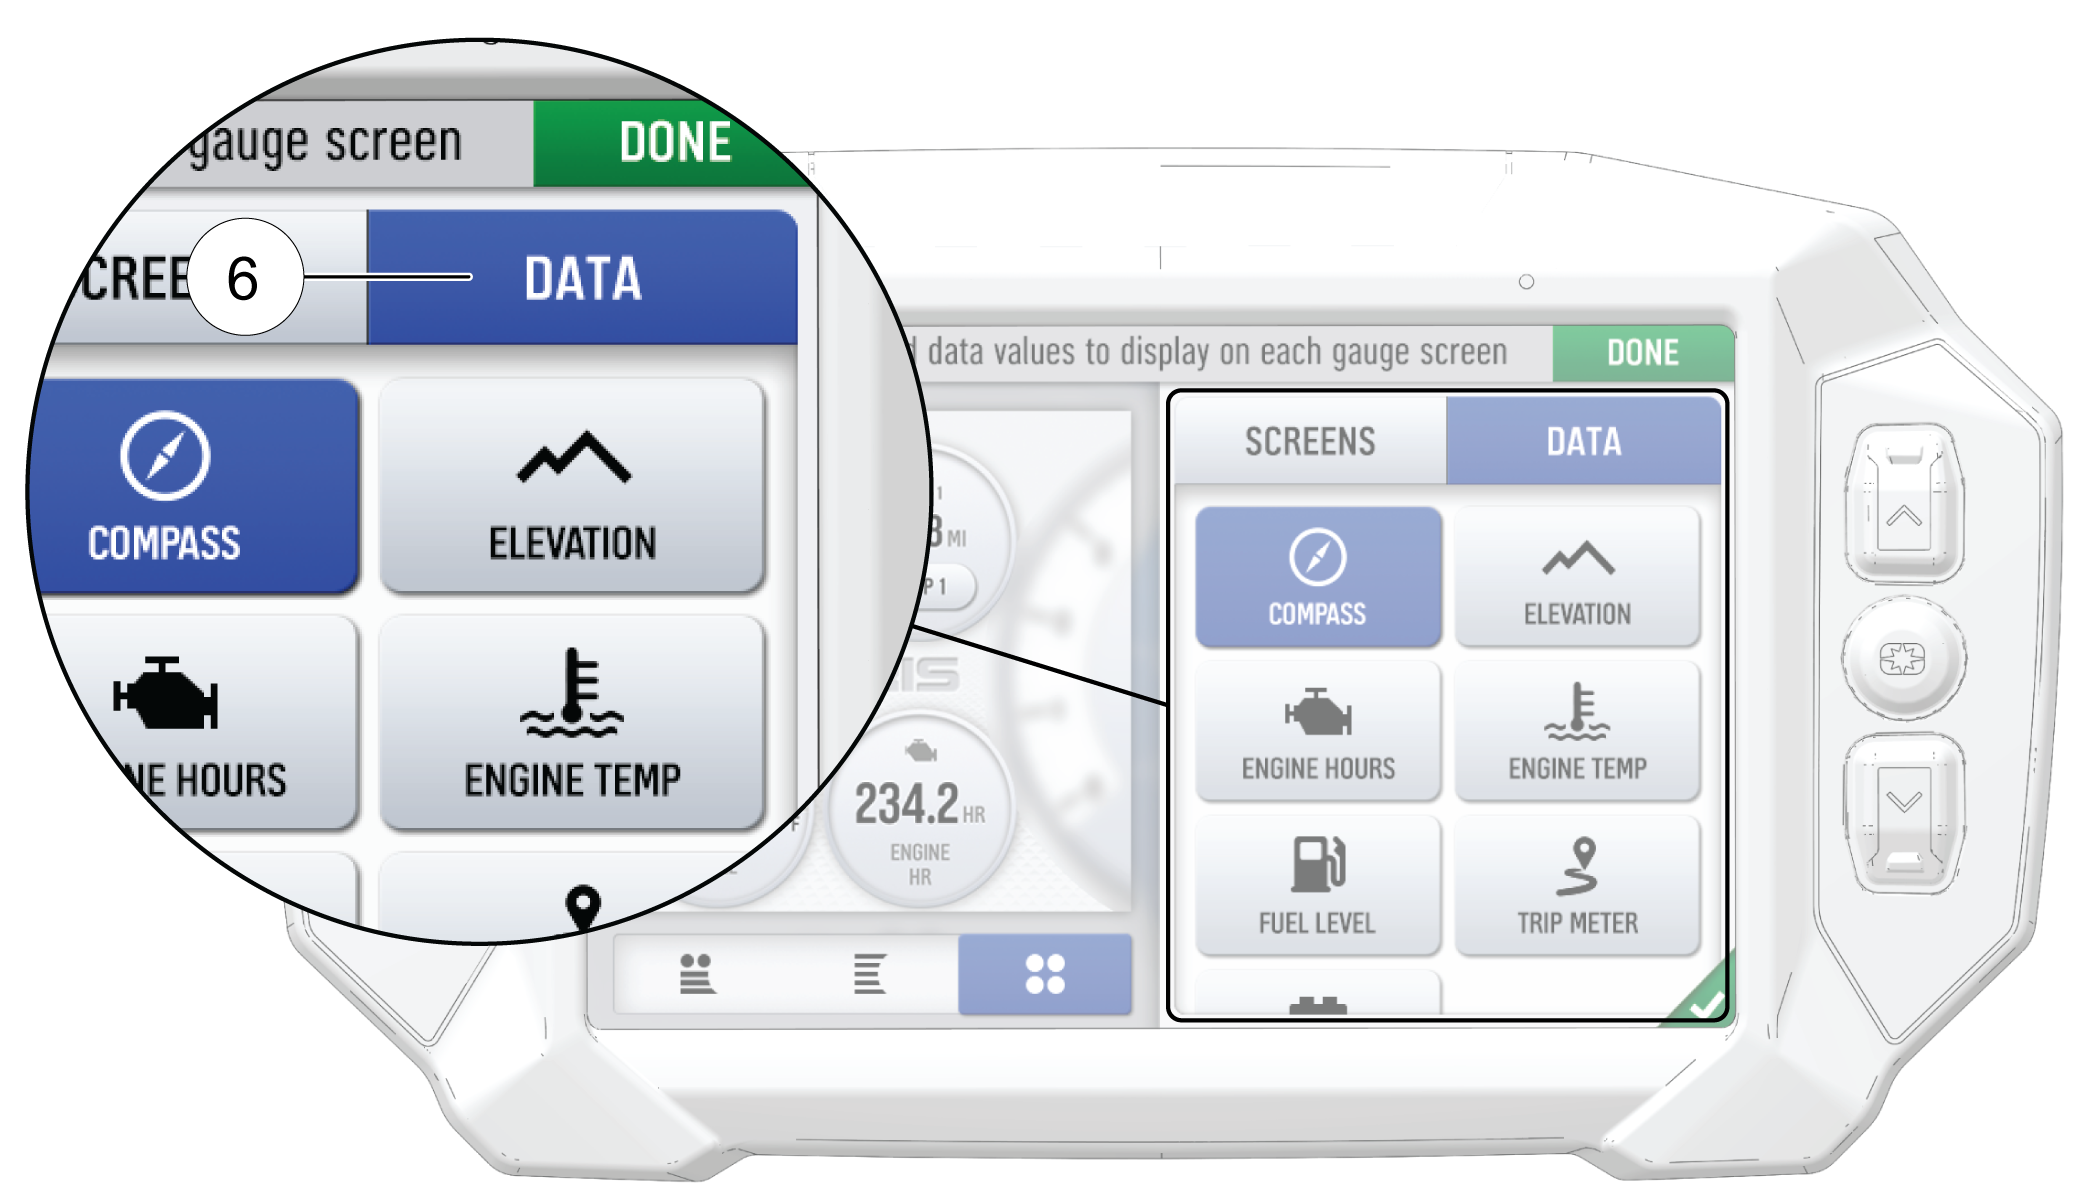
Select the Data tab 6. As the widget slots on the left are selected, the selection of what data item to populate that widget slot with is selected on from the list on the right.
|
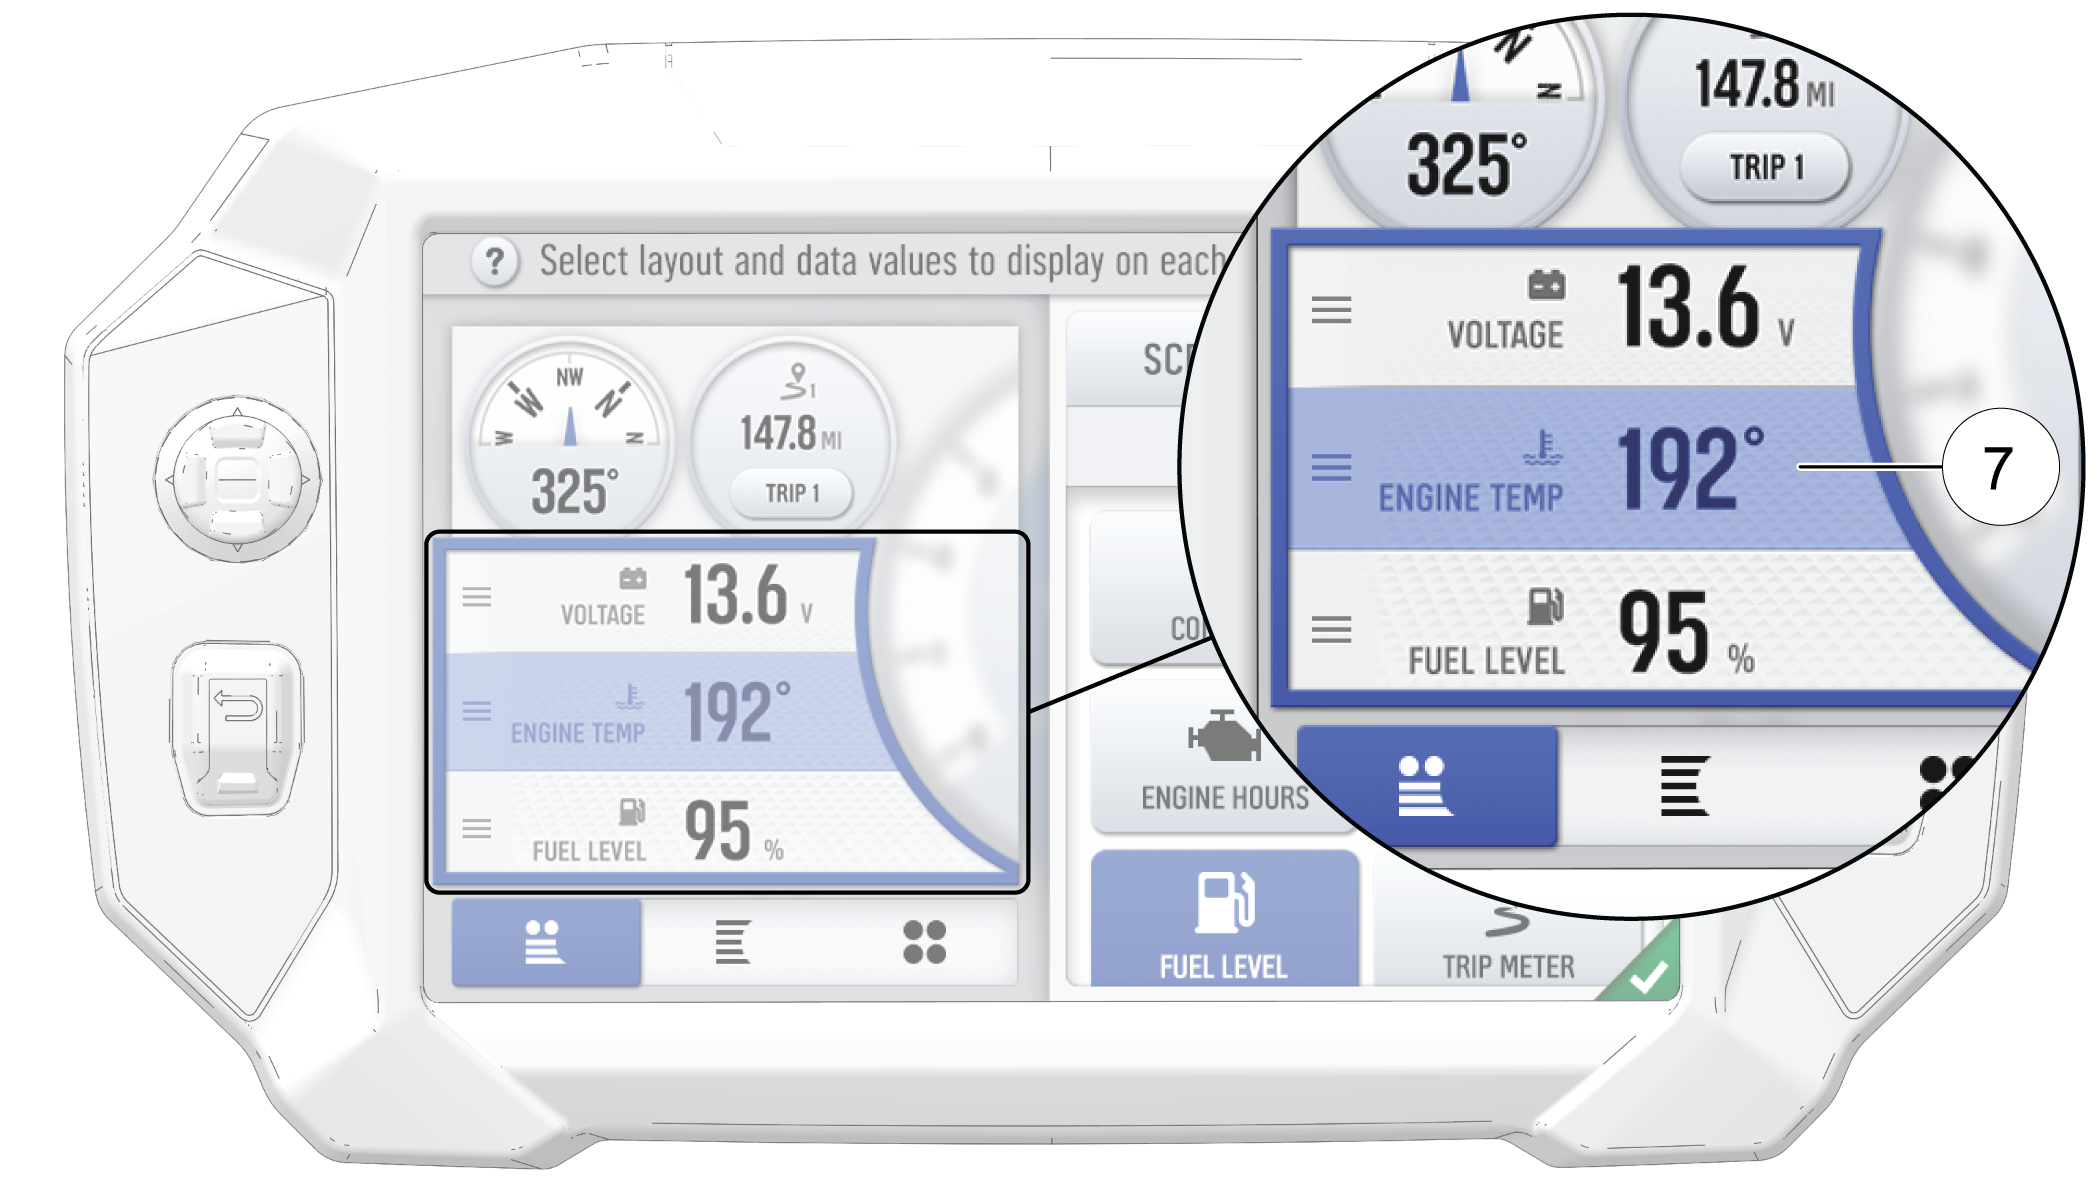
For single value slots, choose 1 data item. For list slots, choose up to 3 or up to 5 data items, depending on the configuration of the gauge layout as selected above. |
|
-
Reorder the widgets by pressing and holding down on the widget and sliding the widget up or down into the desired position.
-
Click the green check mark or Done to close the configuration panel.