Transmission Fluid Level Check
The fill plug is located on the right side of the transmission. Access the fill plug using the following procedure. Make sure fluid level is even with the bottom of the fill plug hole.
-
Park the vehicle on a level surface.
-
Remove the right side panel.
-
Remove the push pin 1 that secures the console to the right fender.
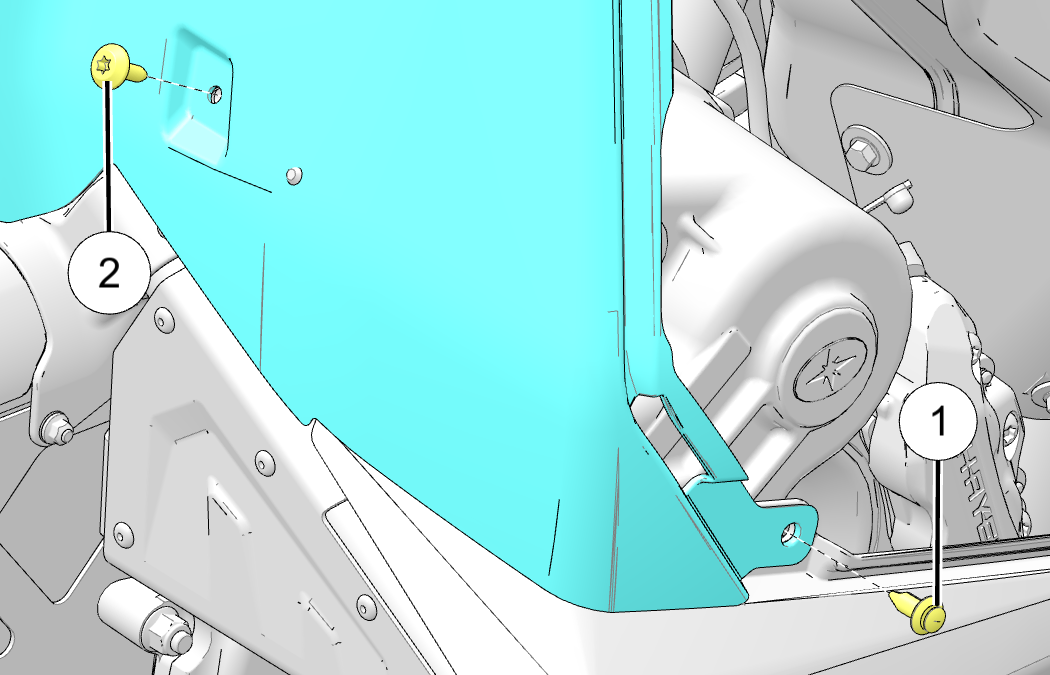
-
Remove the screw 2 that fastens the console to the footrest support.
-
Carefully flex the console out to gain access to the push rivet that secures the right fender to the footrest support.
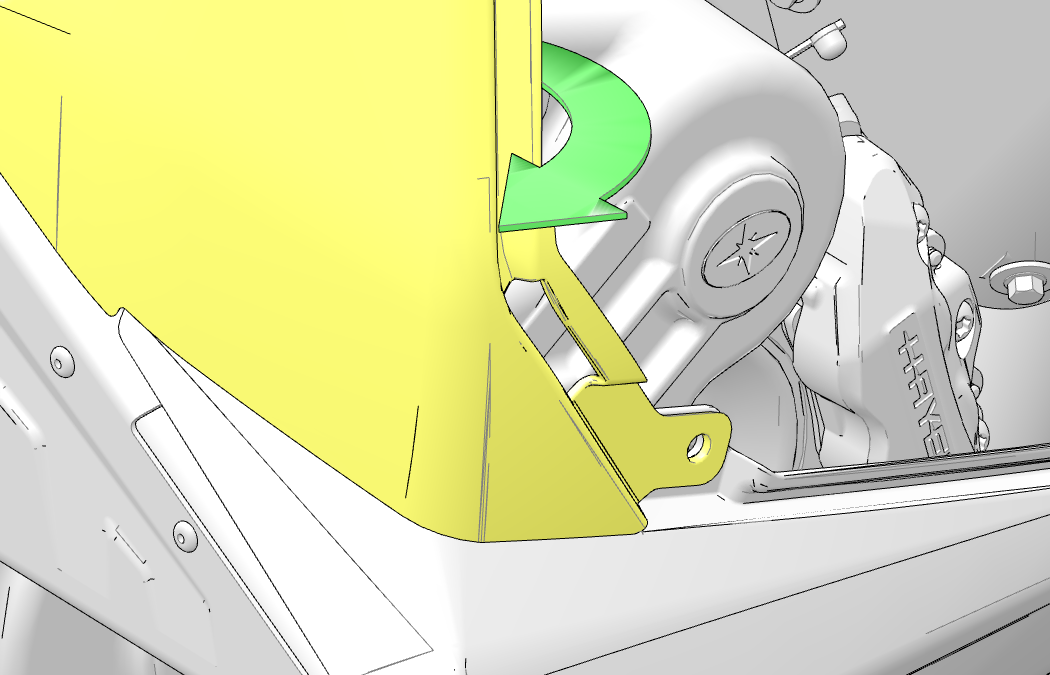
-
Remove the push pin 3 that secures the right fender to the footrest support.
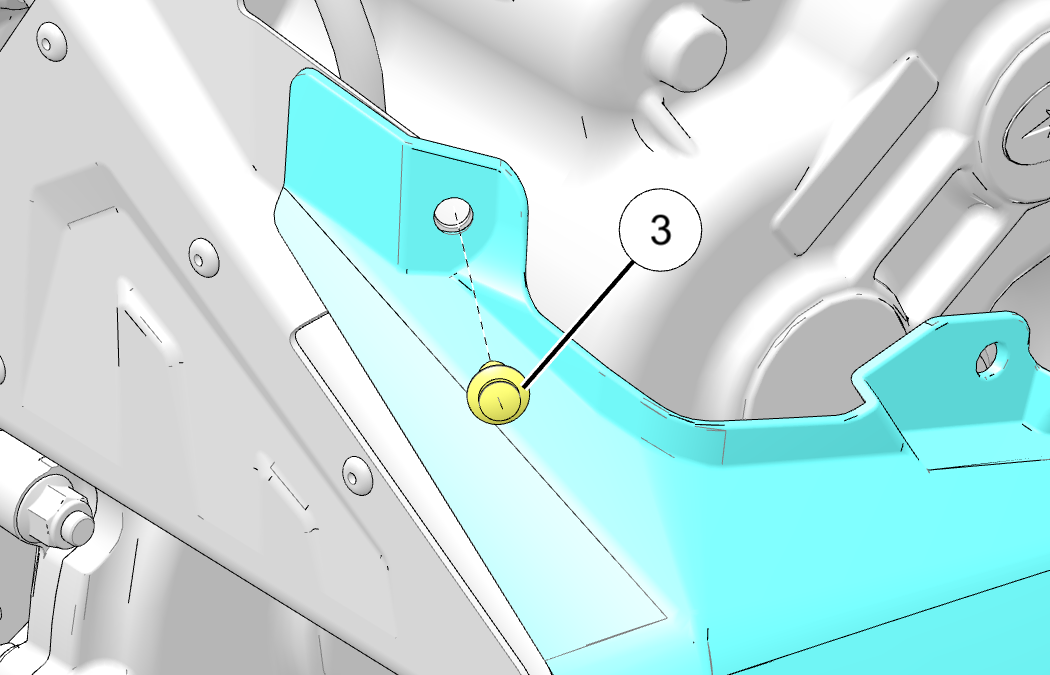 NOTE
NOTEThe console has been removed from the graphic for illustration clarity.
-
Raise the left ski so it is 6 in (15 cm) off the ground.
CAUTIONMake sure the vehicle is secure and safely supported.
IMPORTANTThe left ski must be raised to accurately check the transmission fluid level. Use a jack or hoist, or set the ski on a block. Make sure the right ski stays on the ground.
-
Carefully flex the right fender down to gain access to the transmission fill plug.
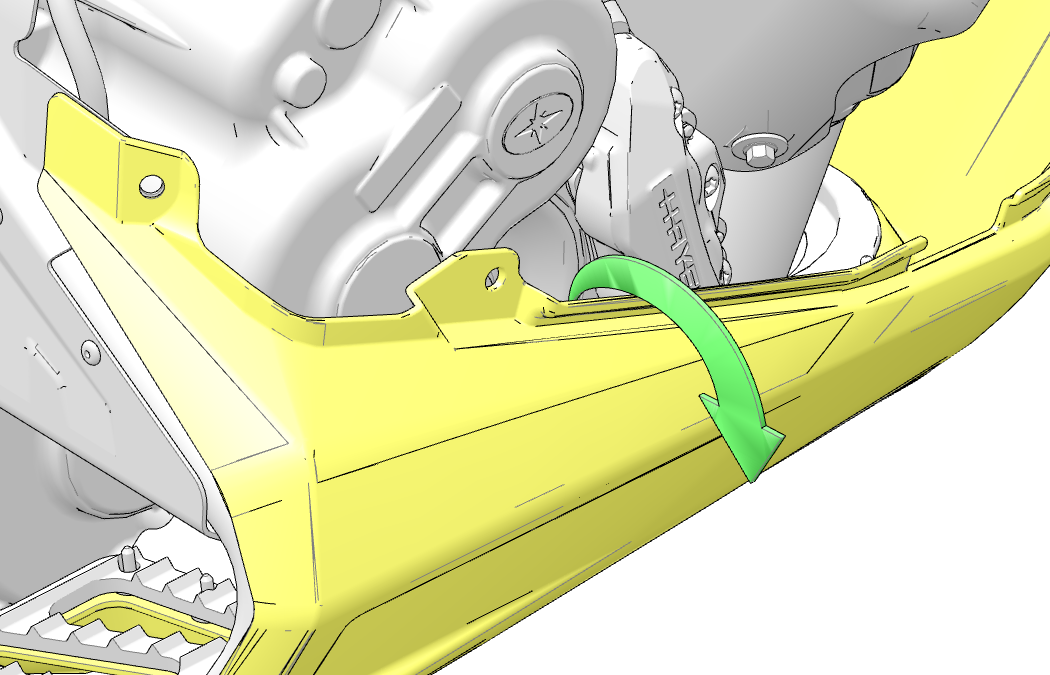
-
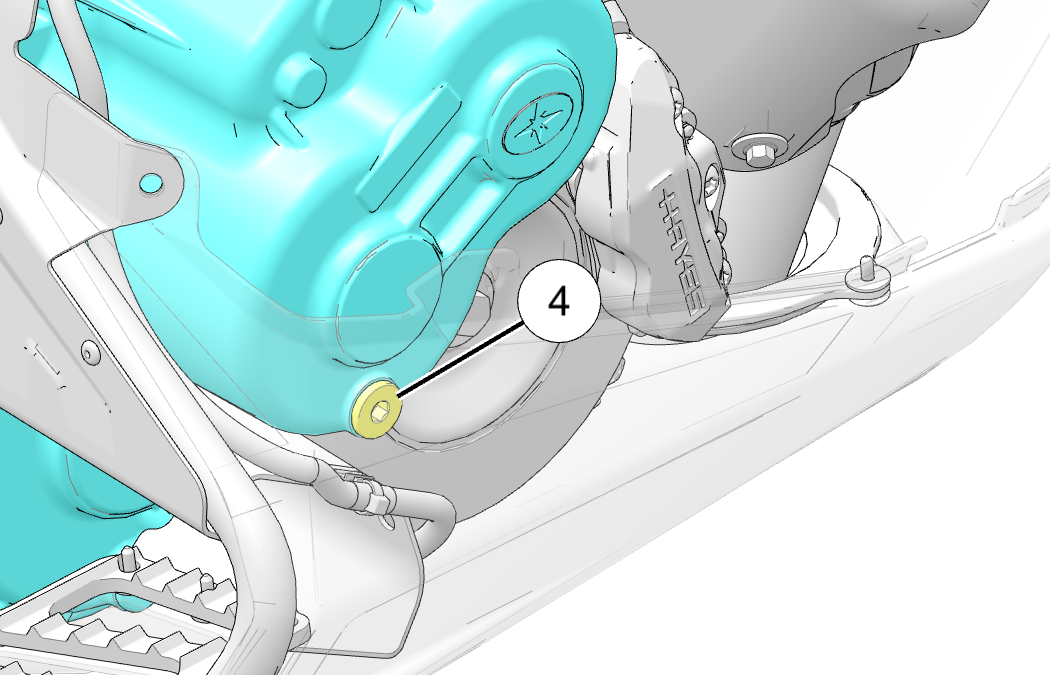
Remove the transmission fill plug 4, and then check the fluid level.
-
If the fluid level is not even with the bottom threads, add the recommended fluid as needed. Do not overfill.
Transmission Lubricant:
AGL Synthetic Gearcase Lubricant
-
Install the transmission fill plug. Torque to specification.
TORQUETransmission Fill / Drain Plug:
12 ft-lbs (16 N·m) -
Put the left ski on the ground.
-
Install the push pin 3 that secures the right fender to the footrest support.
NOTEThe console has been removed from the graphic for illustration clarity.
-
Install the push pin 1 that secures the console to the right fender.
-
Install the screw 2 that fastens the console to the footrest support. Torque to specification.
TORQUEConsole Fastener:
71 in-lbs (8 N·m) -
Install the right side panel.