Spark Plug Maintenance
Inspect / replace the spark plugs as outlined in the periodic maintenance table.
The spark plugs can be serviced by using the following procedure.
-
Position the snowmobile on a level surface.
-
Remove both side panels by turning the three quarter-turn latches.
-
Disconnect the two hood latches.
-
Lift the hood up slightly, disconnect the hood wire harness connector, and remove the hood.
-
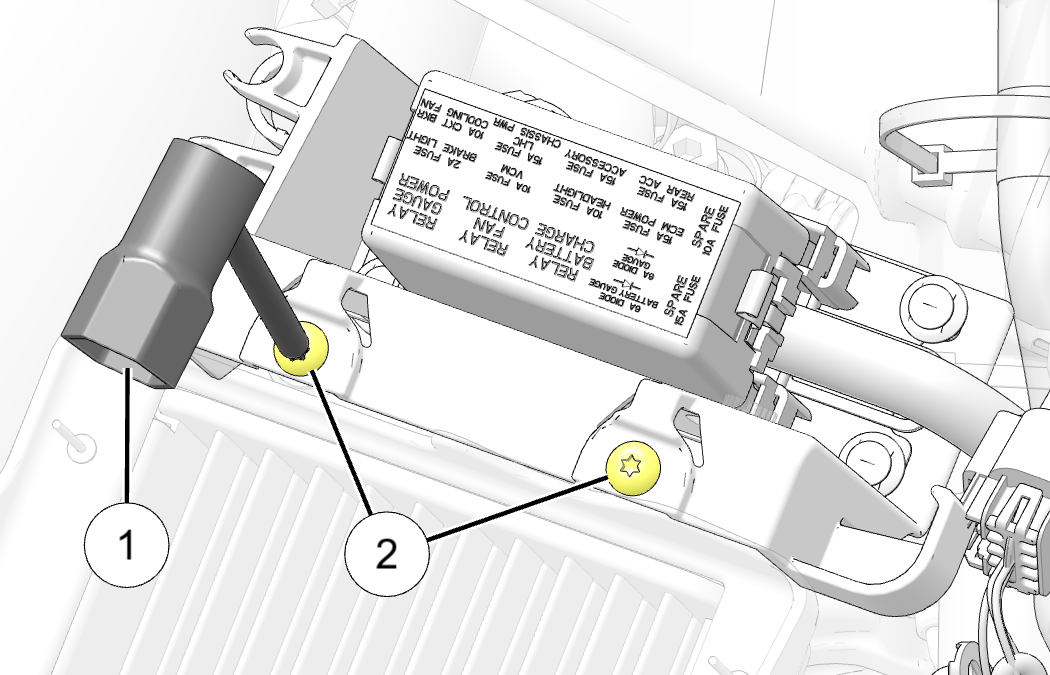
Using the Torx® end of the spark plug wrench 1, remove the two fasteners 2 from the load center.
-
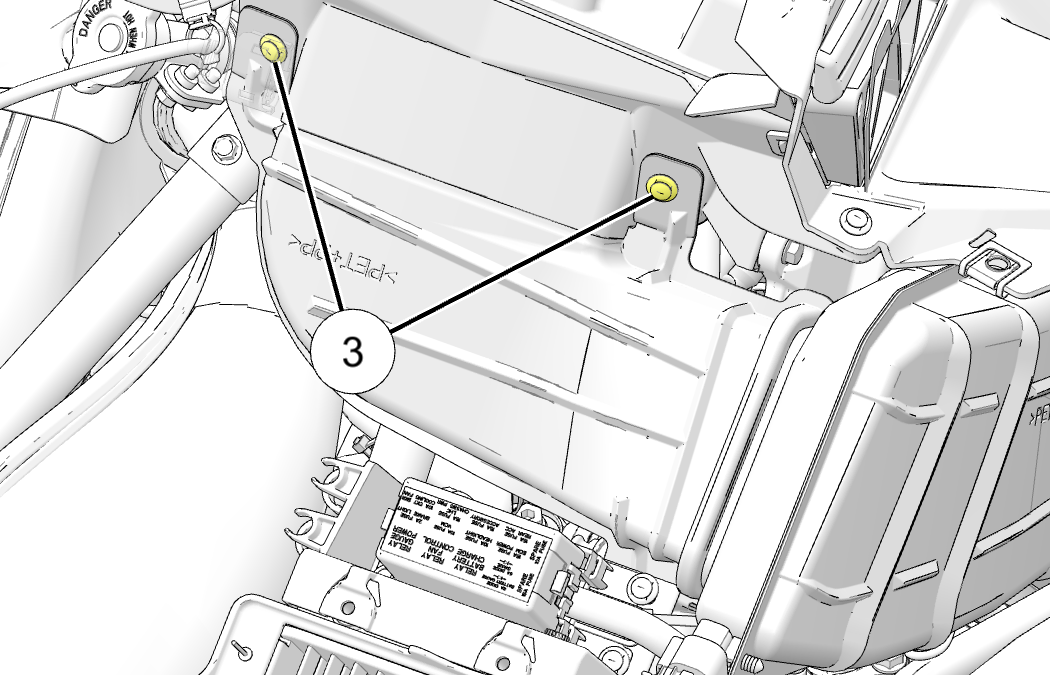
Remove the two push pin rivets 3 from the front intake tube. Remove the front intake tube and set aside.
-
Carefully unclip the retention clamp 4 from the radiator hoses and rotate the load center away from the radiator.
NOTICEExhaust assembly hidden for image clarity.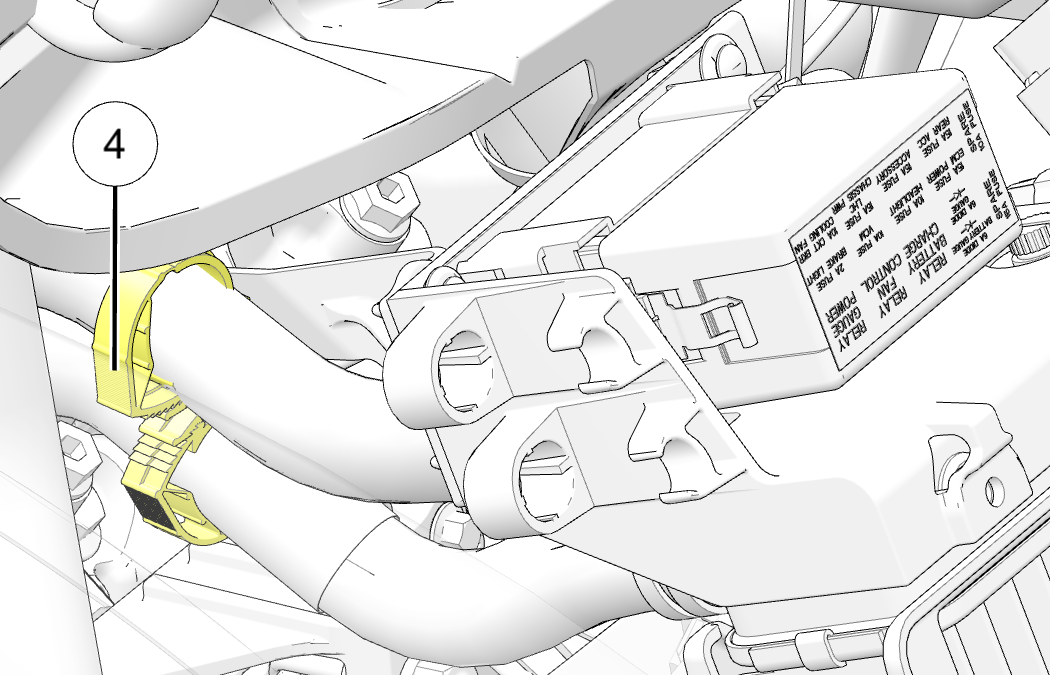
-
Remove the spark plug leads.
-
Clean the area around the spark plugs so no debris falls into the engine when the plugs are removed.
-
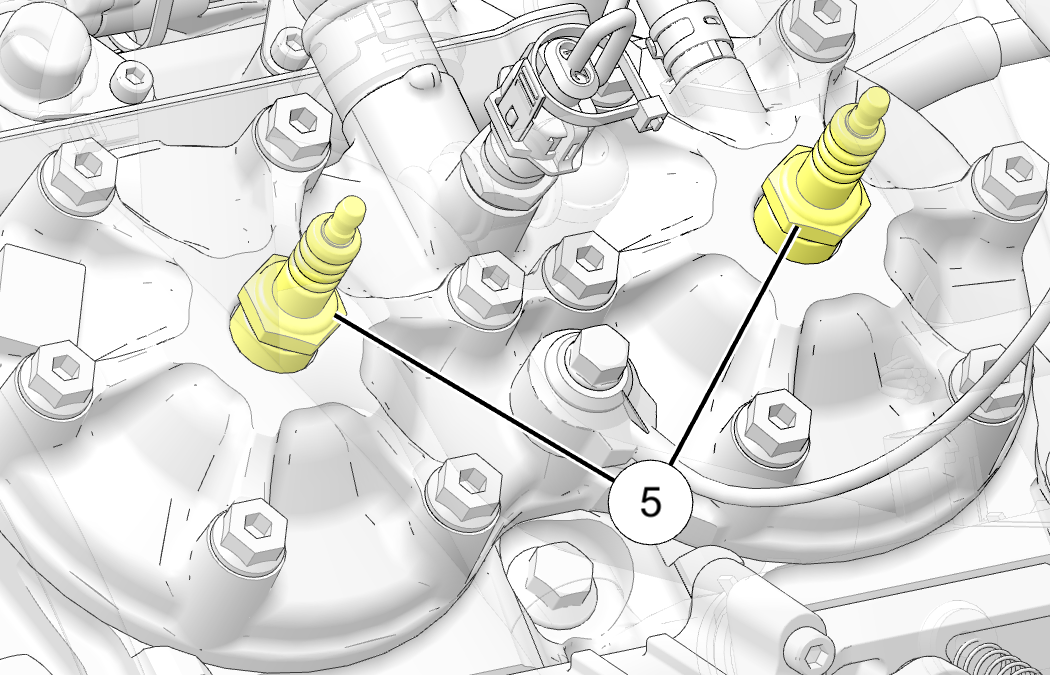
Using the spark plug wrench, remove the spark plugs 5 by rotating each plug counterclockwise.
-
Inspect the electrodes for wear and carbon buildup and verify there are no cracks around the insulator. The plugs should have a sharp outer edge with no rounding or erosion.
-
Inspect the color of each plug as follows:
-
A light brown/dark tan color indicates the engine is running properly.
-
If the spark plug electrode/insulator tip is white, the engine may be running lean. Inspect the engine, throttle body boots, etc. for air leaks.
-
If the spark plug electrode/insulator is black, oily, or shows heavy soot, the engine may be running rich. Inspect the engine, fuel system and lubrication system for problems.
-
-
Inspect and adjust the spark plug gaps. Replace with the recommended plug as needed.
MEASUREMENTNGK® BPR8ES Gap:
0.027 in (0.70 mm)
-
Carefully install the spark plugs into the engine and torque to specification.
TORQUESpark Plug:
18-22 ft-lbs (24-30 N·m)
-
Apply a small amount of dielectric grease to the spark plug caps.
-
Reconnect the spark plug caps onto the plugs and make sure they are secure.
-
Reinstall the load center back onto the radiator and reconnect the clamp to the radiator hoses.
-
Reinstall the front intake tube. Make sure the tube is fully inserted and aligned to the intake tube assembly.
-
Reinstall the two push pin rivets.
-
Place the spark plug wrench back into the holder.
-
Reinstall the hood panel, ensuring the front tabs are properly engaged.
-
Reconnect the hood wire harness connector underneath and verify it is secure.
-
Secure the two hood panel latches.
-
Reinstall both side panels by inserting the upper tab and pivoting in to engage the lower tab.
-
Turn the three quarter-turn latches to secure each panel.
-
In a well-ventilated area, start the vehicle to ensure proper operation.